The Bright Angel Trail Grand Canyon is the park’s most iconic hike, starting on the South Rim near Bright Angel Lodge and descending through millions of years of rock layers. In this guide, I’ll show you how to hike the Bright Angel Trail to the 1.5 Mile Resthouse, 3 Mile Resthouse, Havasupai Gardens, and Plateau Point. Not sure which one to aim for? Keep reading, and I’ll help you choose the right turnaround point and show you exactly how to hike the Bright Angel Trail based on your abilities.
Bright Angel Trail Options
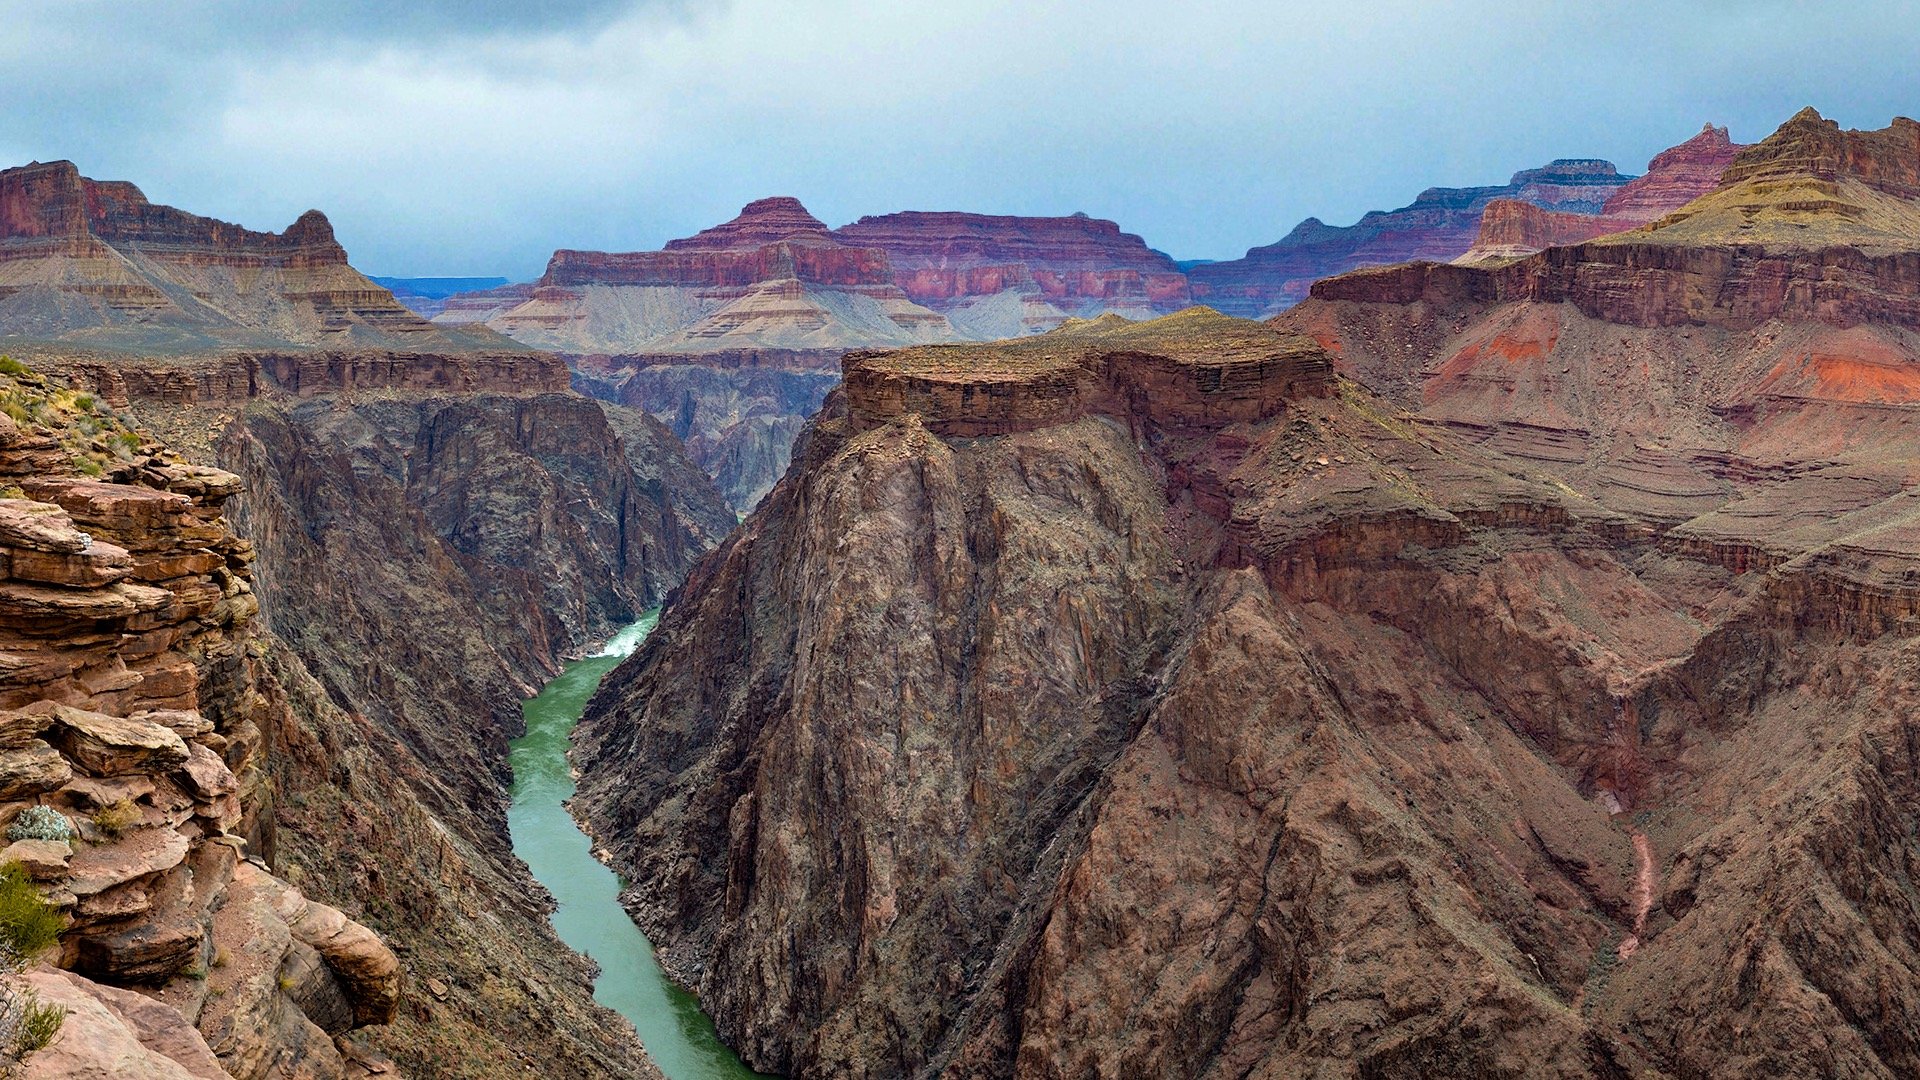
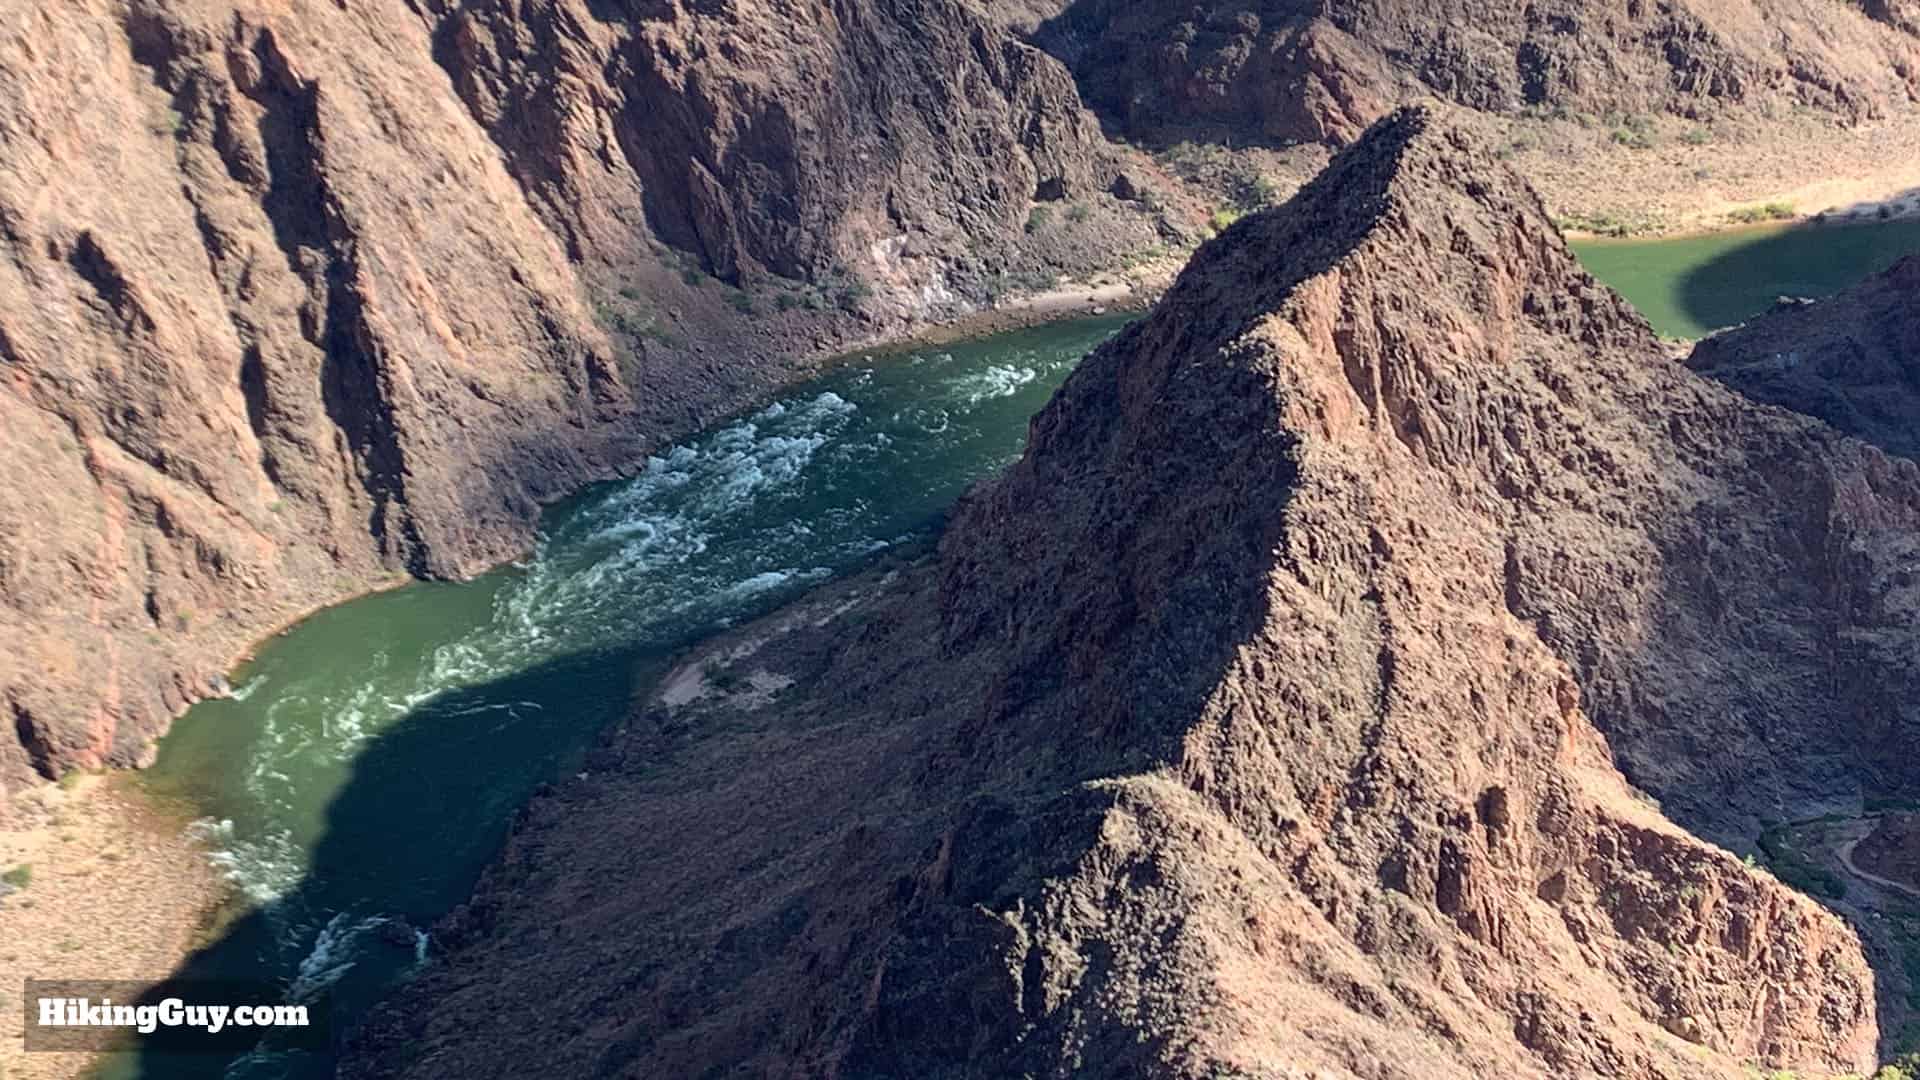
If you hike all the way to Plateau Point, you'll be rewarded with incredible views of the Colorado River. But you have to pay a price, it's 12.5 miles total with 3200 feet of climbing.
You can choose how far you want to hike down the Bright Angel Trail. Simply turn around and hike back up from the destination that you're hiking to.
The National Park Service doesn't recommend continuing below Havasupai Gardens as a day hike for most hikers.
Destination
Total Distance
Total Climbing
Time
Difficulty
Notes
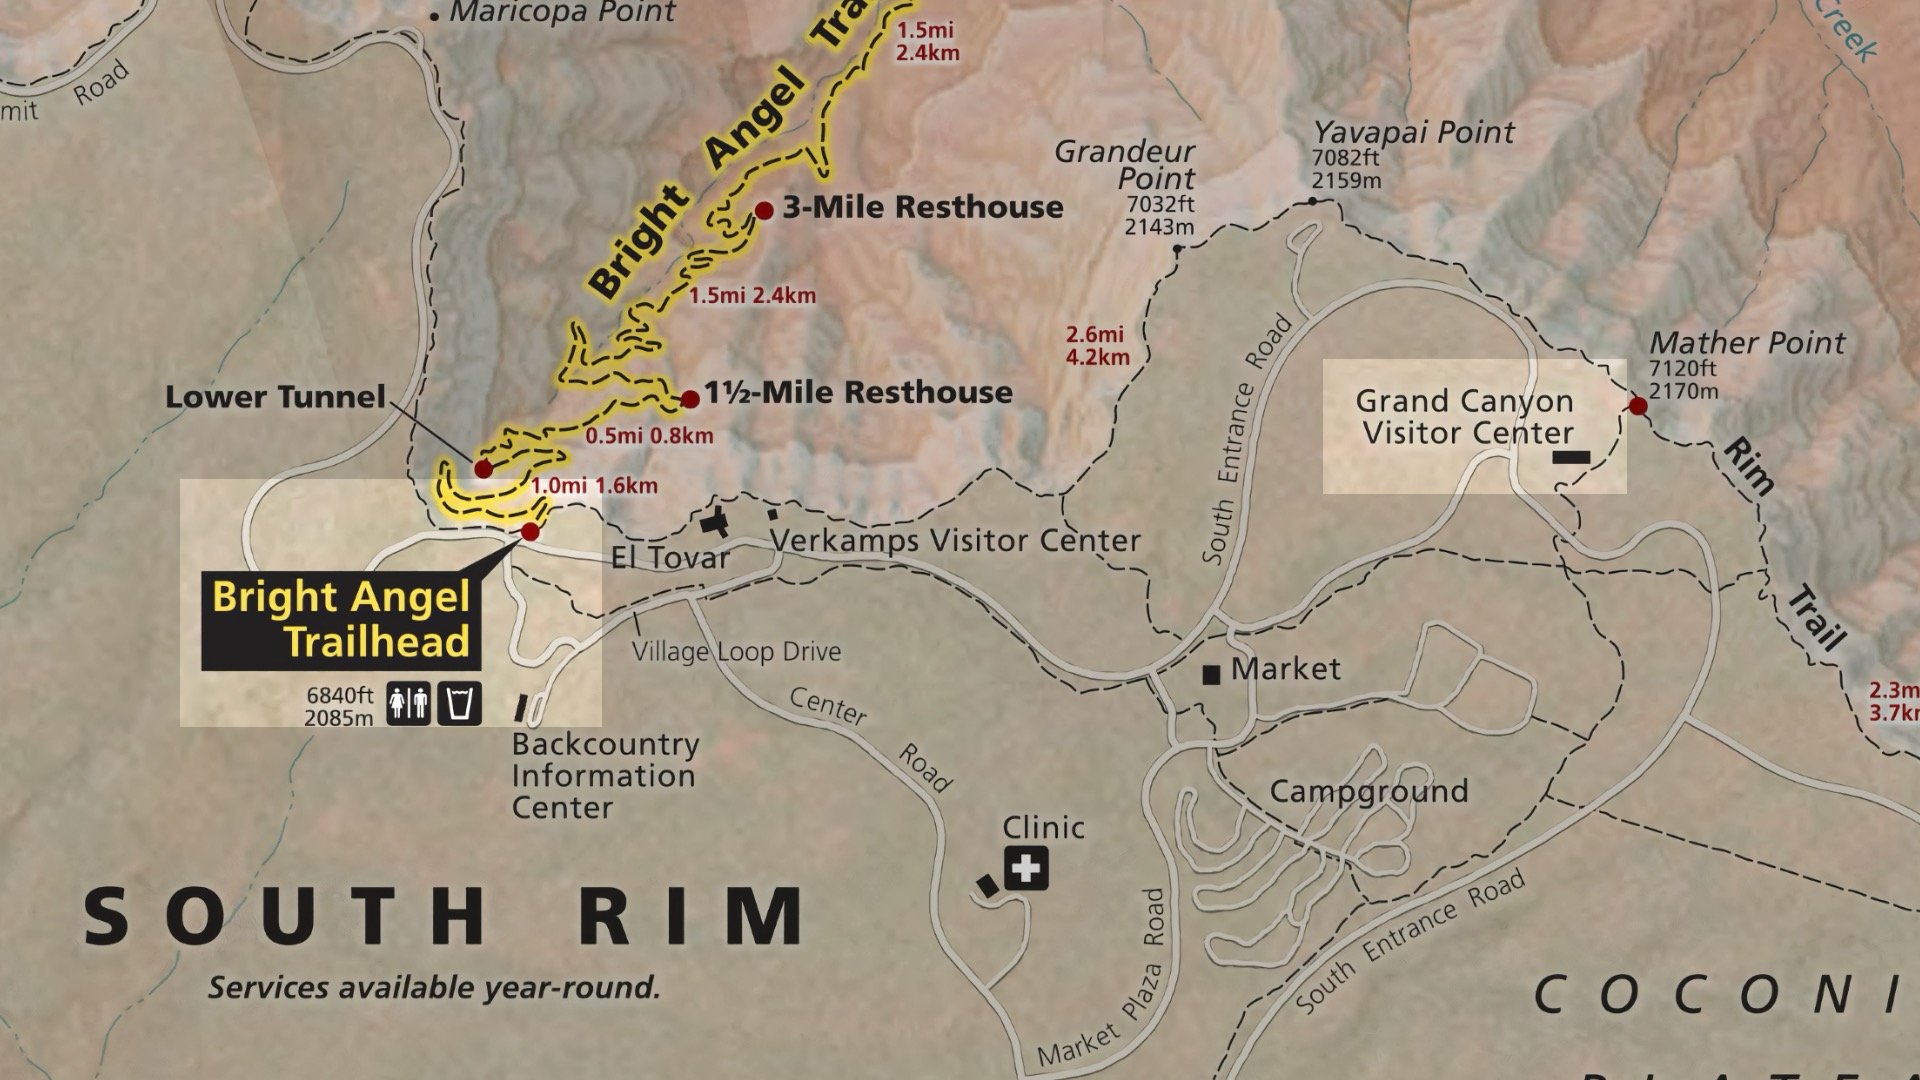
1.5 Mile Resthouse
3 miles
1100 feet
2-3 hours
moderate
Pictograph - Tunnels - Views
3 Mile Resthouse
6 miles
2100 feet
3-4 hours
hard
Iconic Canyon Views
Havasupai Gardens
9 miles
3050 feet
4-5 hours
hard
Grand Canyon Oasis
Plateau Point
12.5 miles
3200 feet
6-7 hours
hard
Solitary Viewpoint
When you're figuring out which option is right for you, know that 2,640 feet of climbing is 0.5 miles straight uphill and fairly tough for most folks. It's not just the distance.
Bright Angel Trail Difficulty
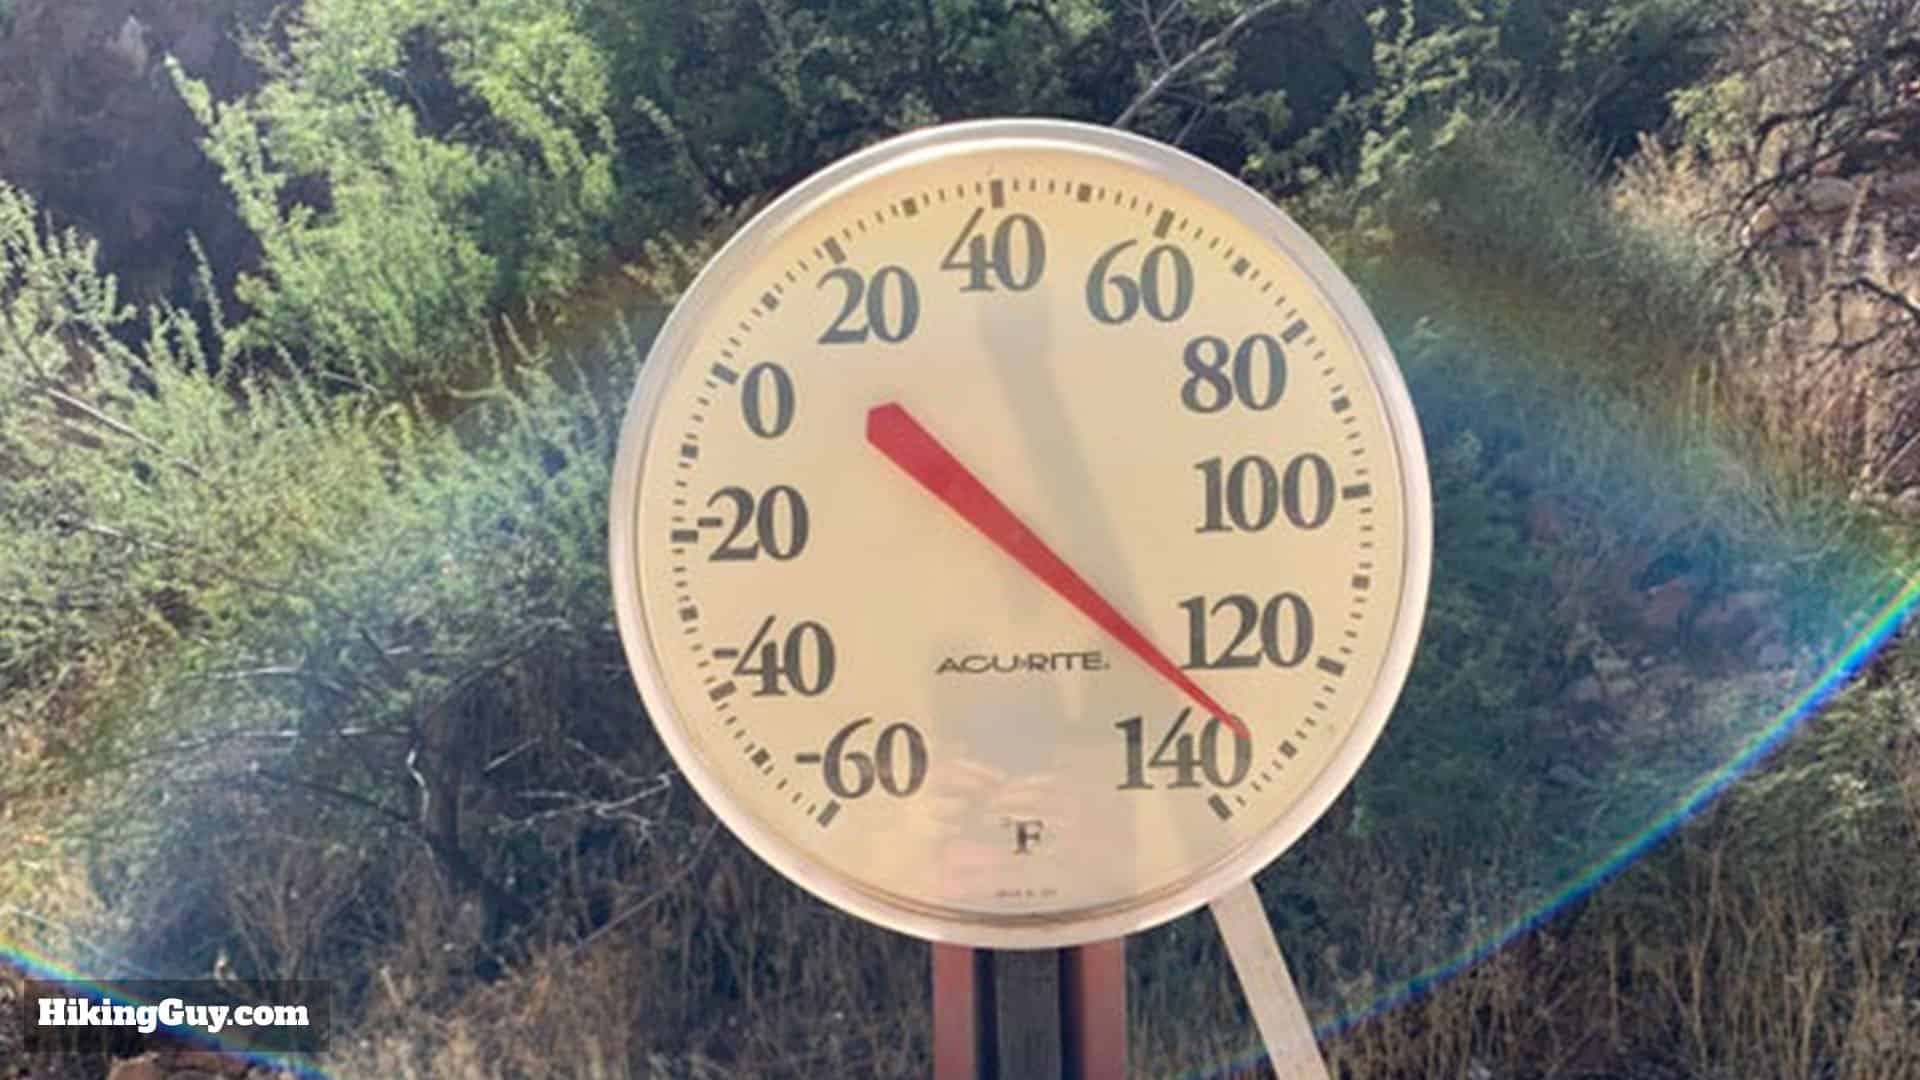
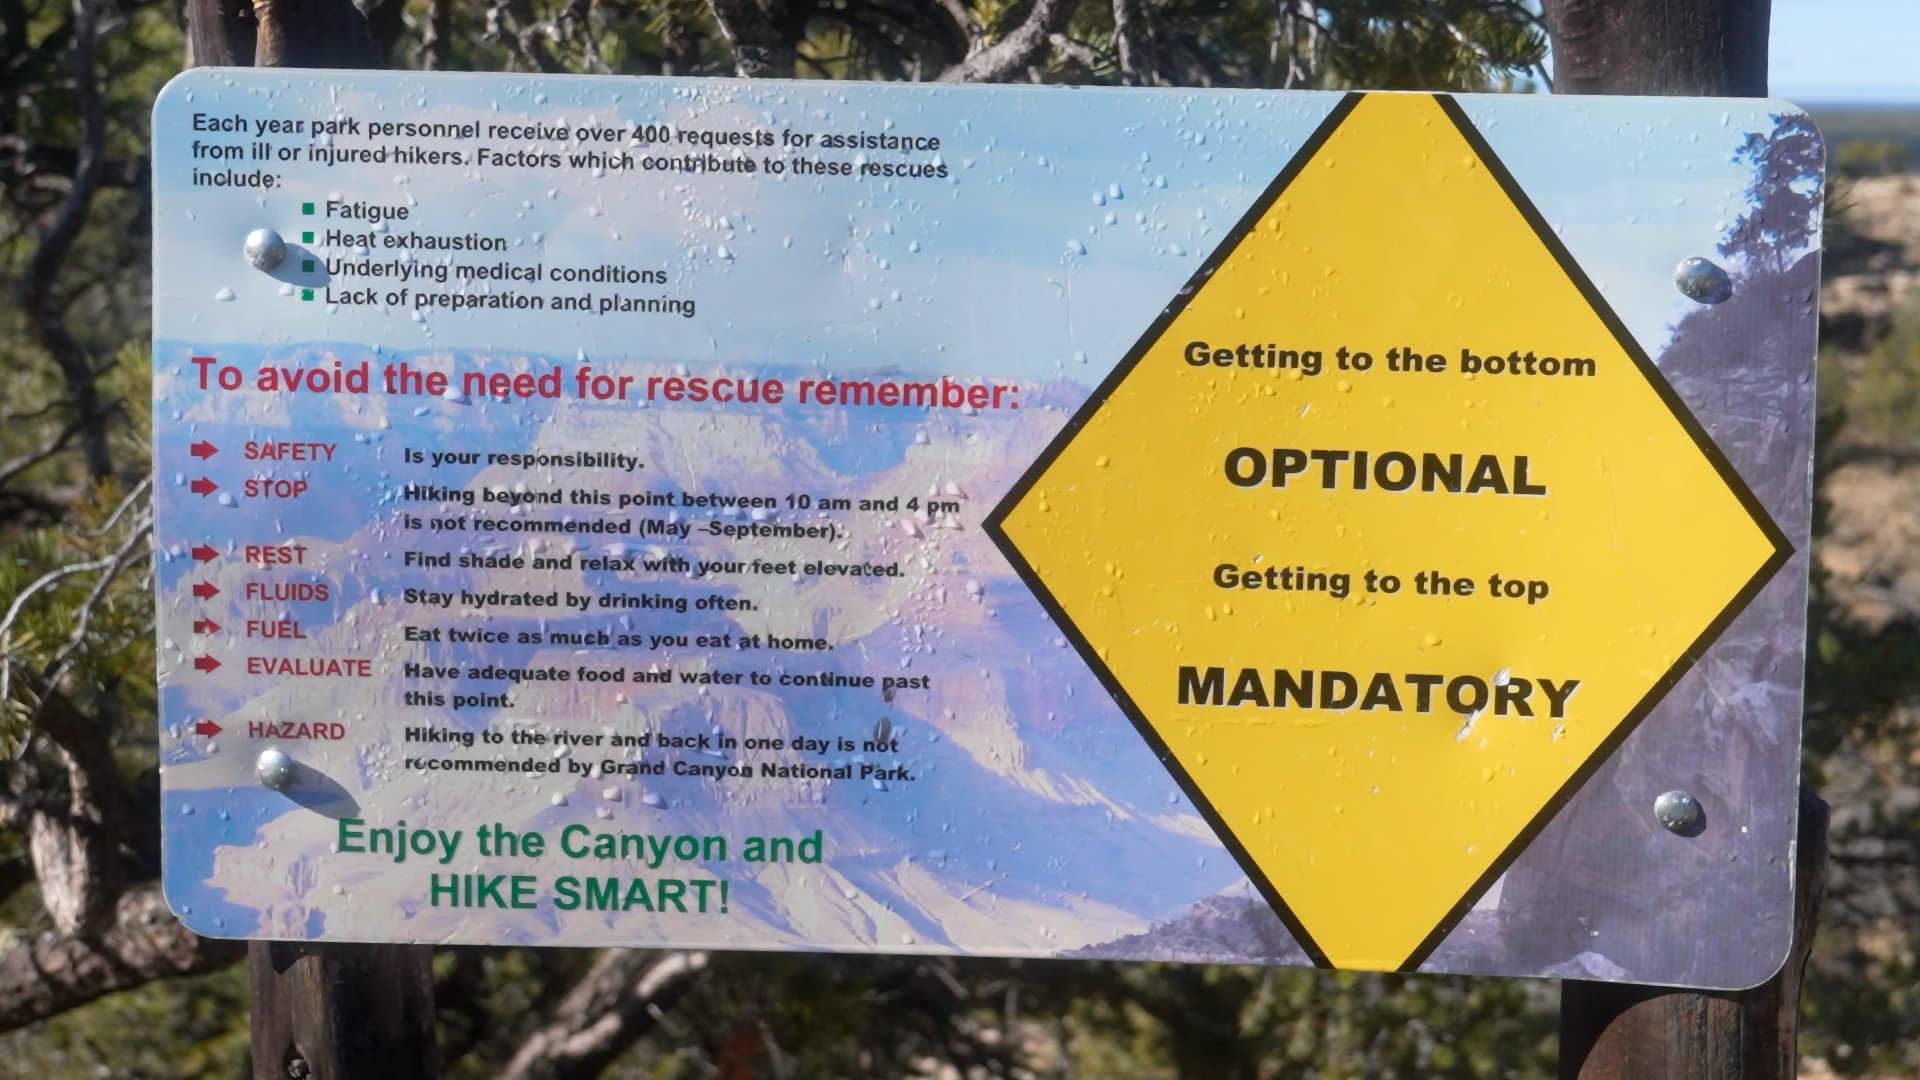
Here's the thermometer at Havasupai Gardens. Notice that it goes to 140°F. When people get into trouble on the Bright Angel Trail, heat, often paired with exhaustion, seems to be the main culprit.
Overall the Bright Angel Trail is safe. I've seen people of all shapes, sizes, ages, and fitness levels do these hikes. The trail is well-maintained, easy to follow, consistently about 4 feet wide, and has wider sections for passing. But you still need to be mindful of a few things.
As you descend 1000 feet, the temperature will rise around 3.5°F to 5.5°F. So if you descend to Havasupai Gardens, the temperature could be somewhere around 18.5°F hotter than where you started. And the temperature will continue to rise until mid-afternoon. There are some shaded parts of the trail but not much, it can get very hot. You need to check park alerts and weather for the heat and plan accordingly. Leaving at sunrise is a great way to beat the heat and the crowds at the same time.
The hike back up is much harder than going down. Many first-time Grand Canyon hikers overcommit on the easy downhill and pay for it on the climb out. A good rule of thumb: expect the hike up to take about twice as long as the hike down.
Snow and ice can linger on the upper sections in winter, especially in the morning. Be prepared for slippery, frozen sections near the rim, so bring microspikes.
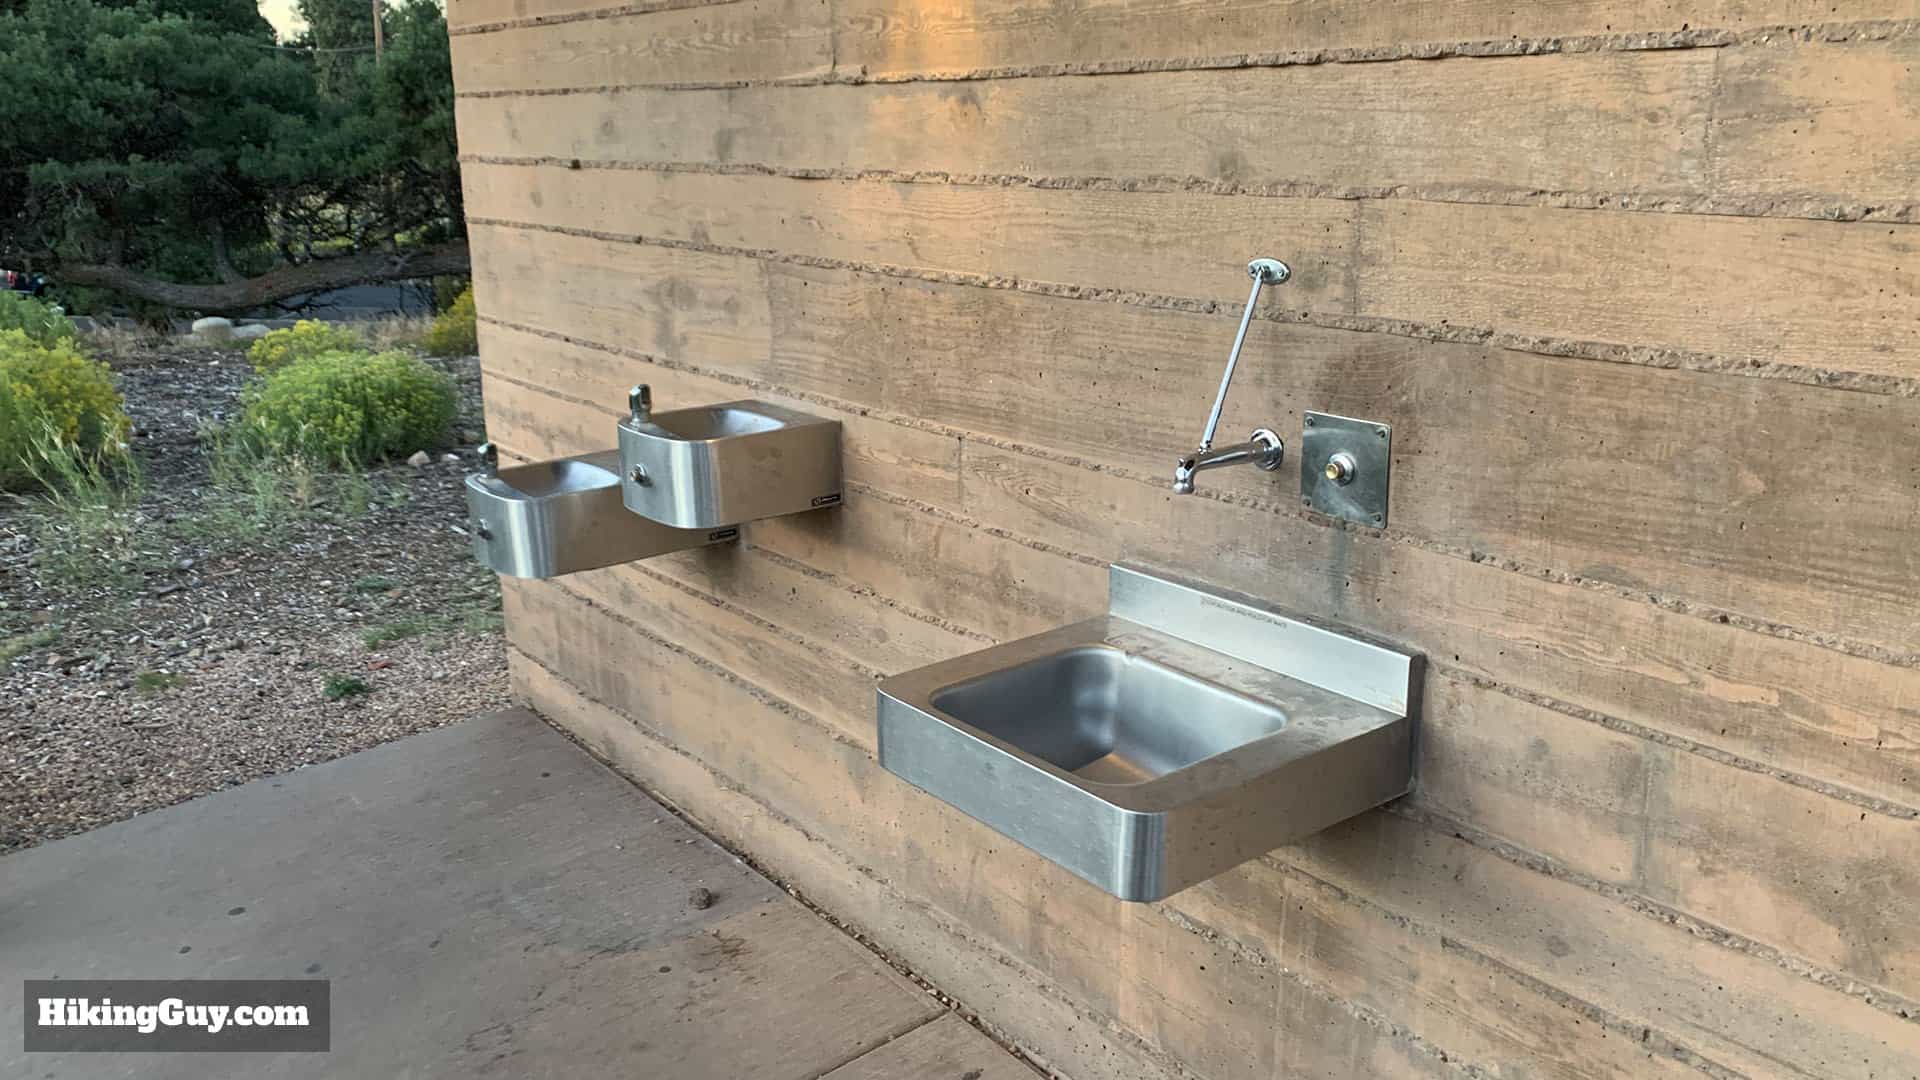
An advantage of the Bright Angel Trail is that it follows the water pipeline. You should still carry water with you, and you can refill along the way. Check the park page before you go, the water is sometimes turned off in places.
The trail is generally wide enough to hike comfortably and pass other hikers.
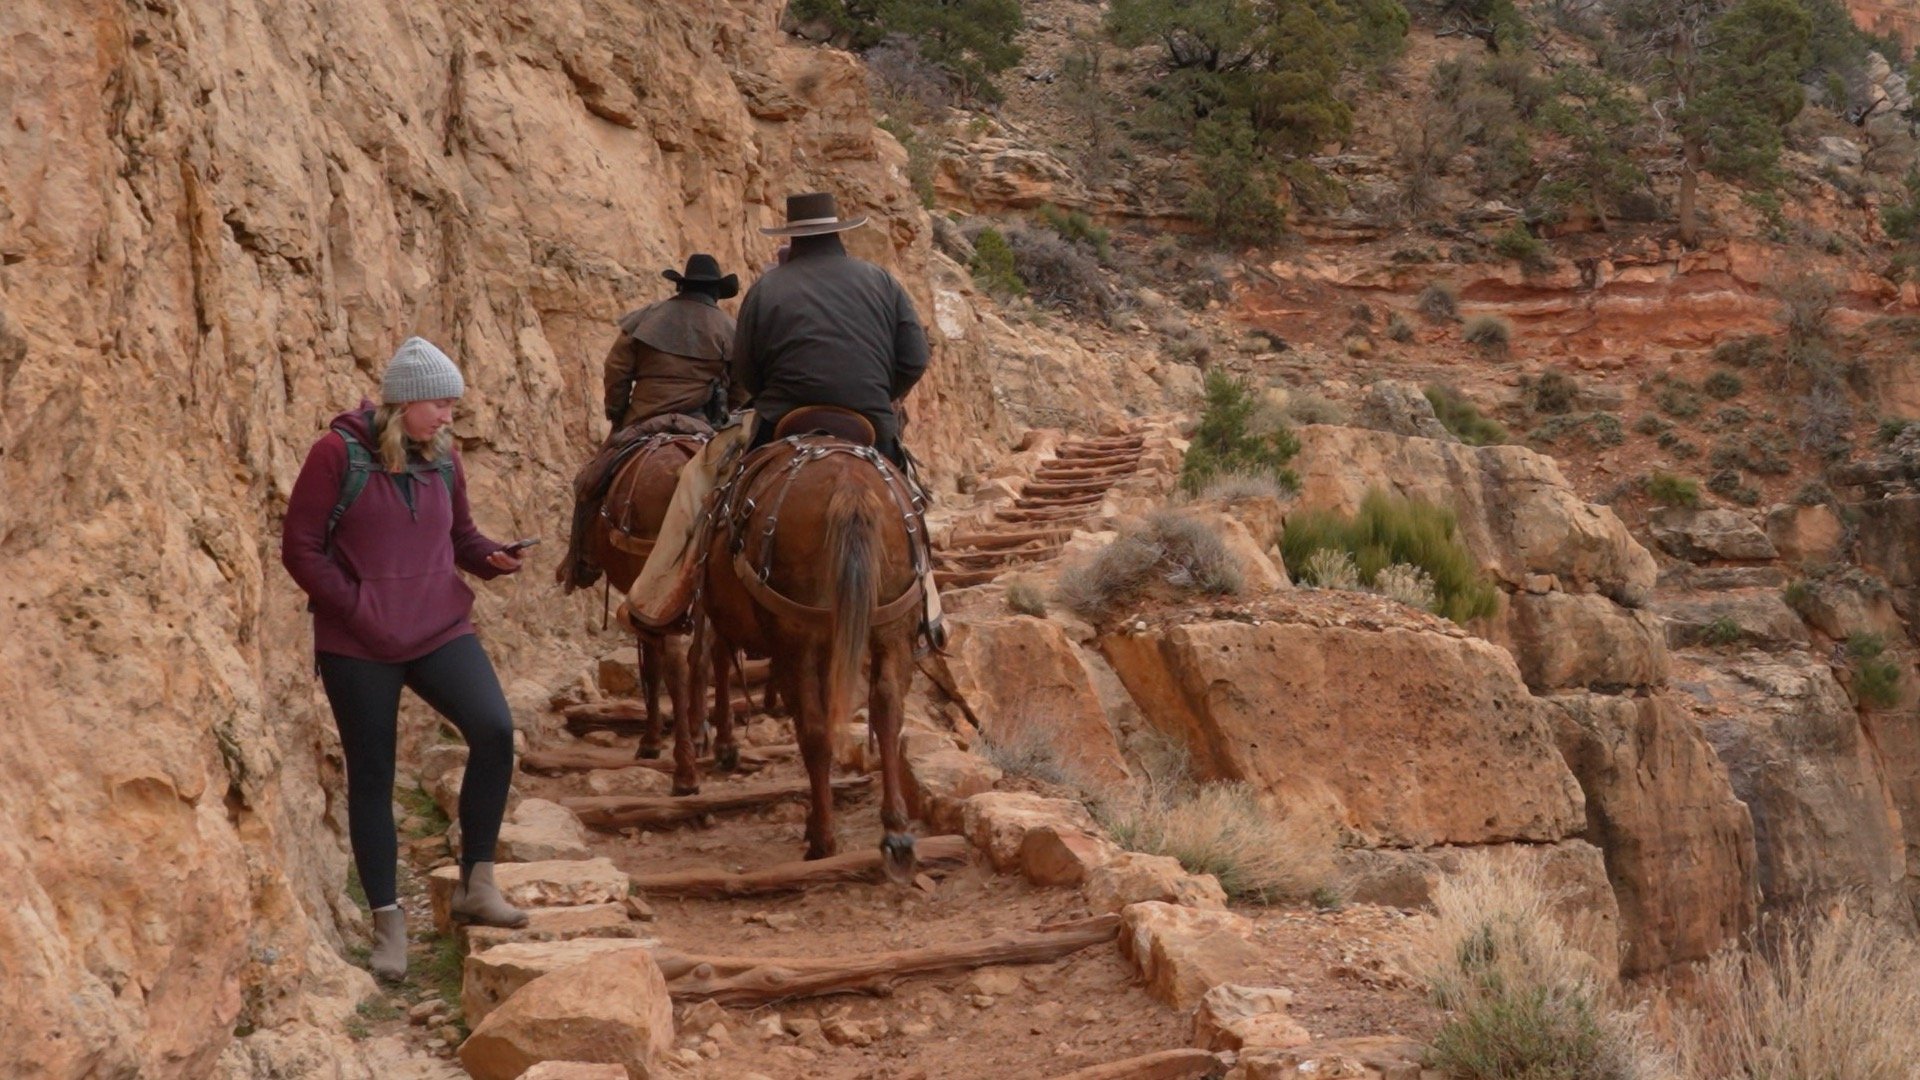
If you encounter mules on the trail, they always have the right-of-way. Stand against the cliffside of the trail and follow instructions from the mule handler. If you are stuck behind them, keep your distance until (and if) the mule handler lets you pass.
Want to camp on the Bright Angel Trail? You can book a tent site at Havasupai Garden on Recreation.gov (Backcountry Permit > Classic GC Hike South Rim > Havasupai Gardens Campground).
Bright Angel Trailhead
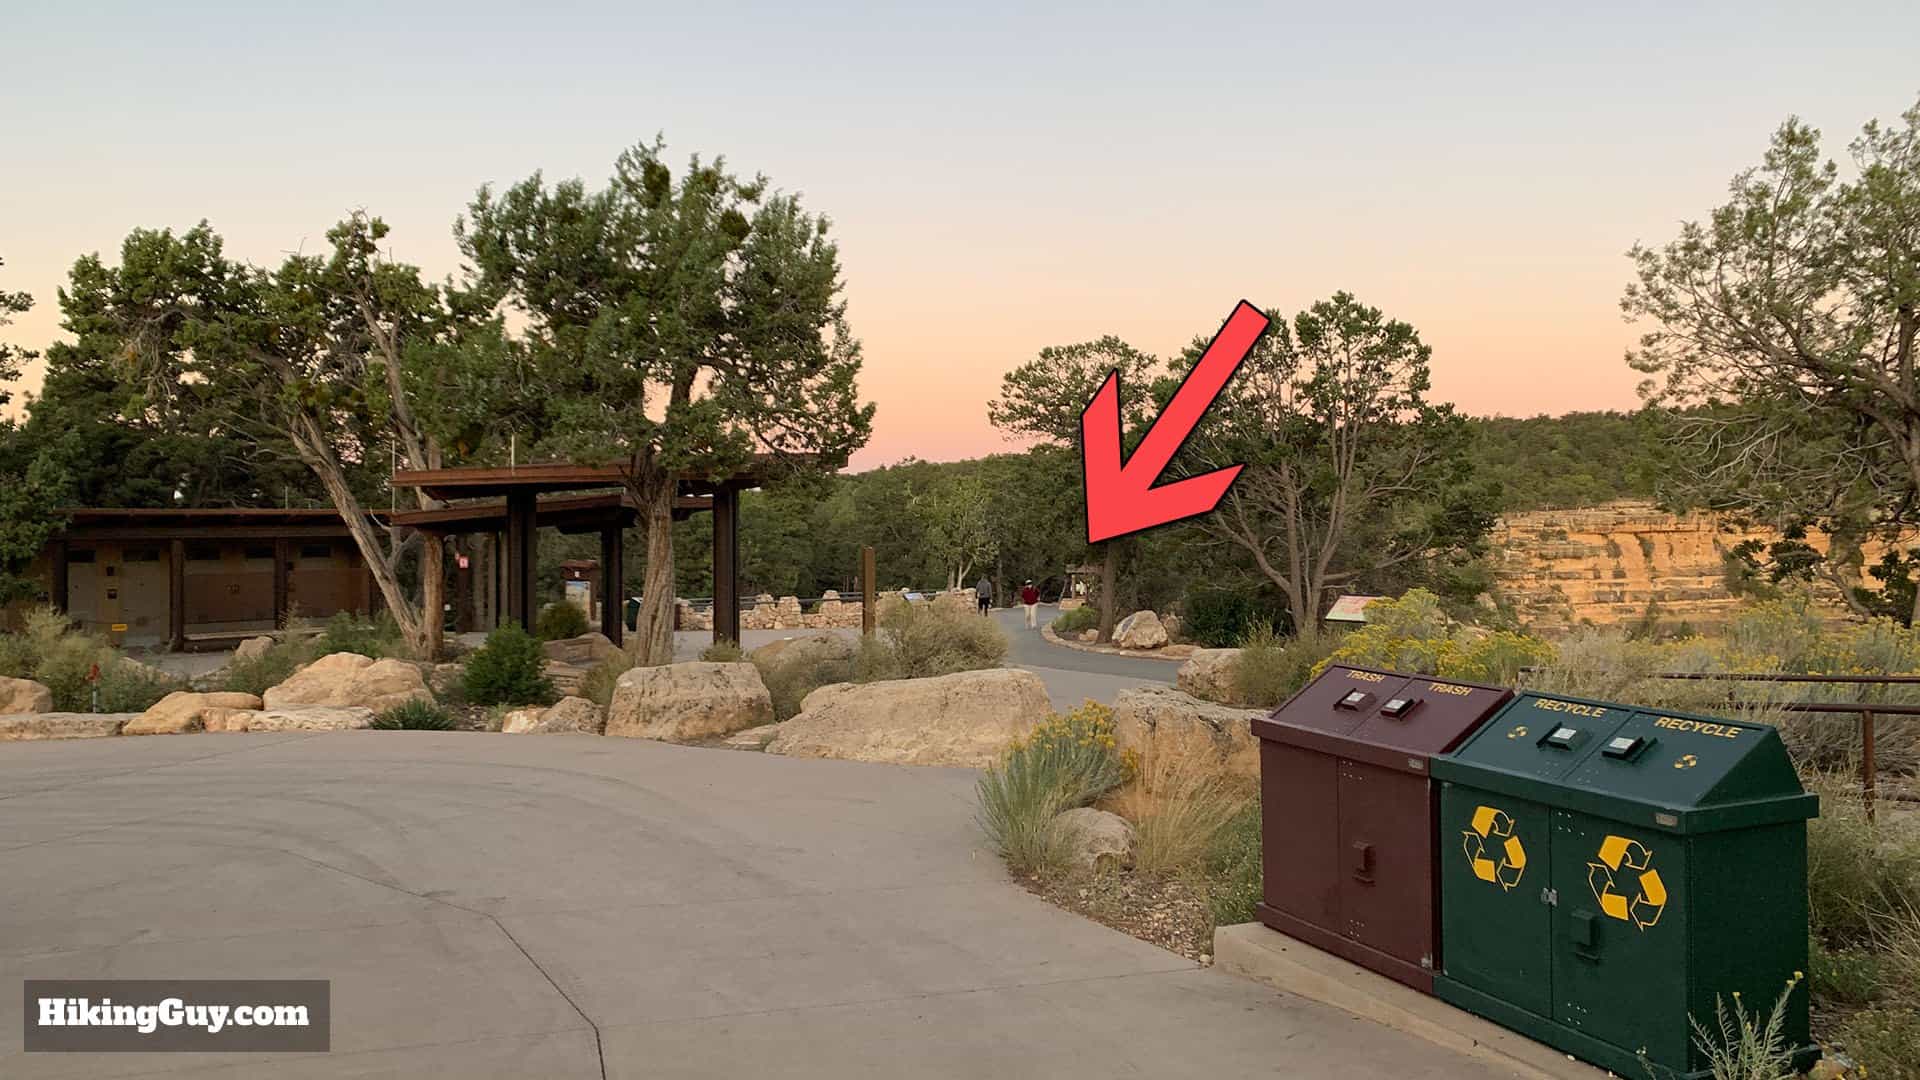
The Bright Angel Trailhead is located west of the Visitor Center, close to the Bright Angel Lodge.
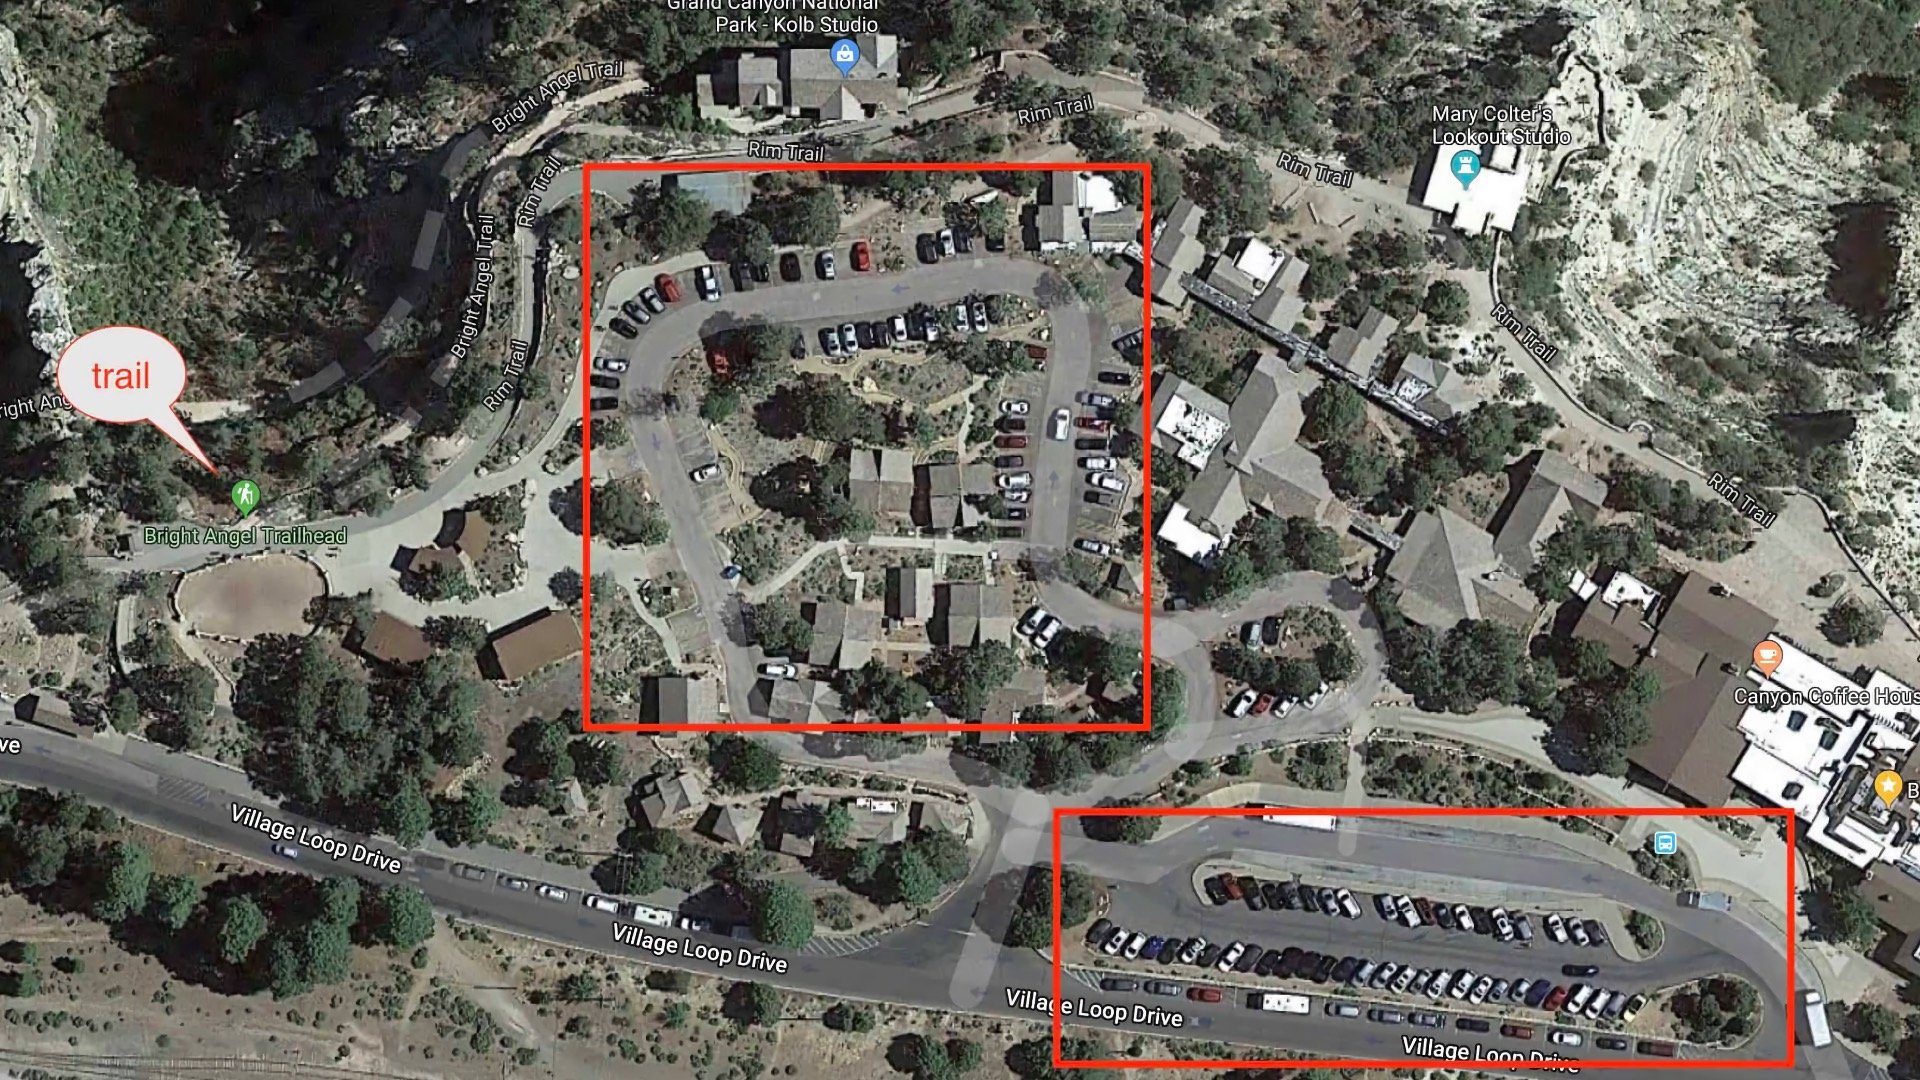
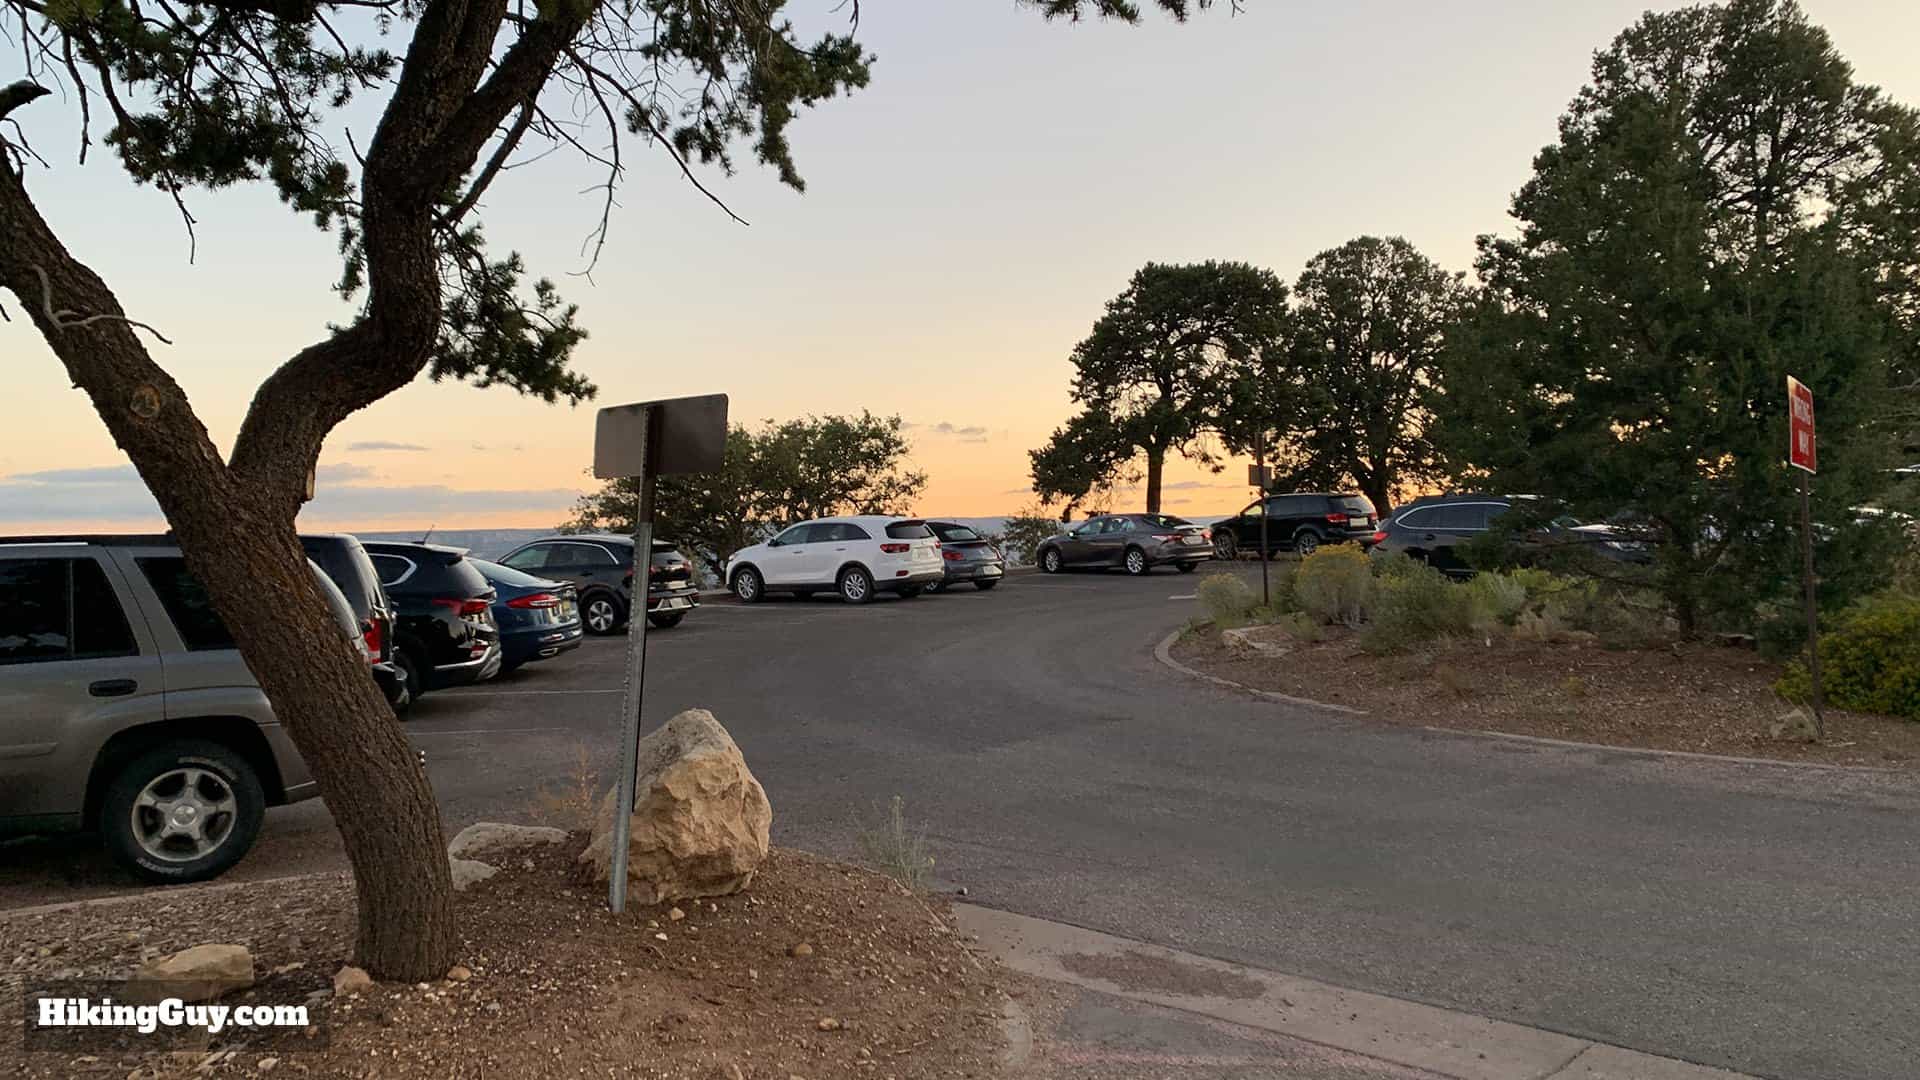
The closest parking is in the lot right next to the trailhead, which is next to the Bright Angel Lodge. I've had success here or on the street nearby when arriving early.
Here's where you can park nearby the trailhead, around the Bright Angel Lodge.The lot by trailhead is small but also bit hidden from casual drivers, and I usually have good luck here.
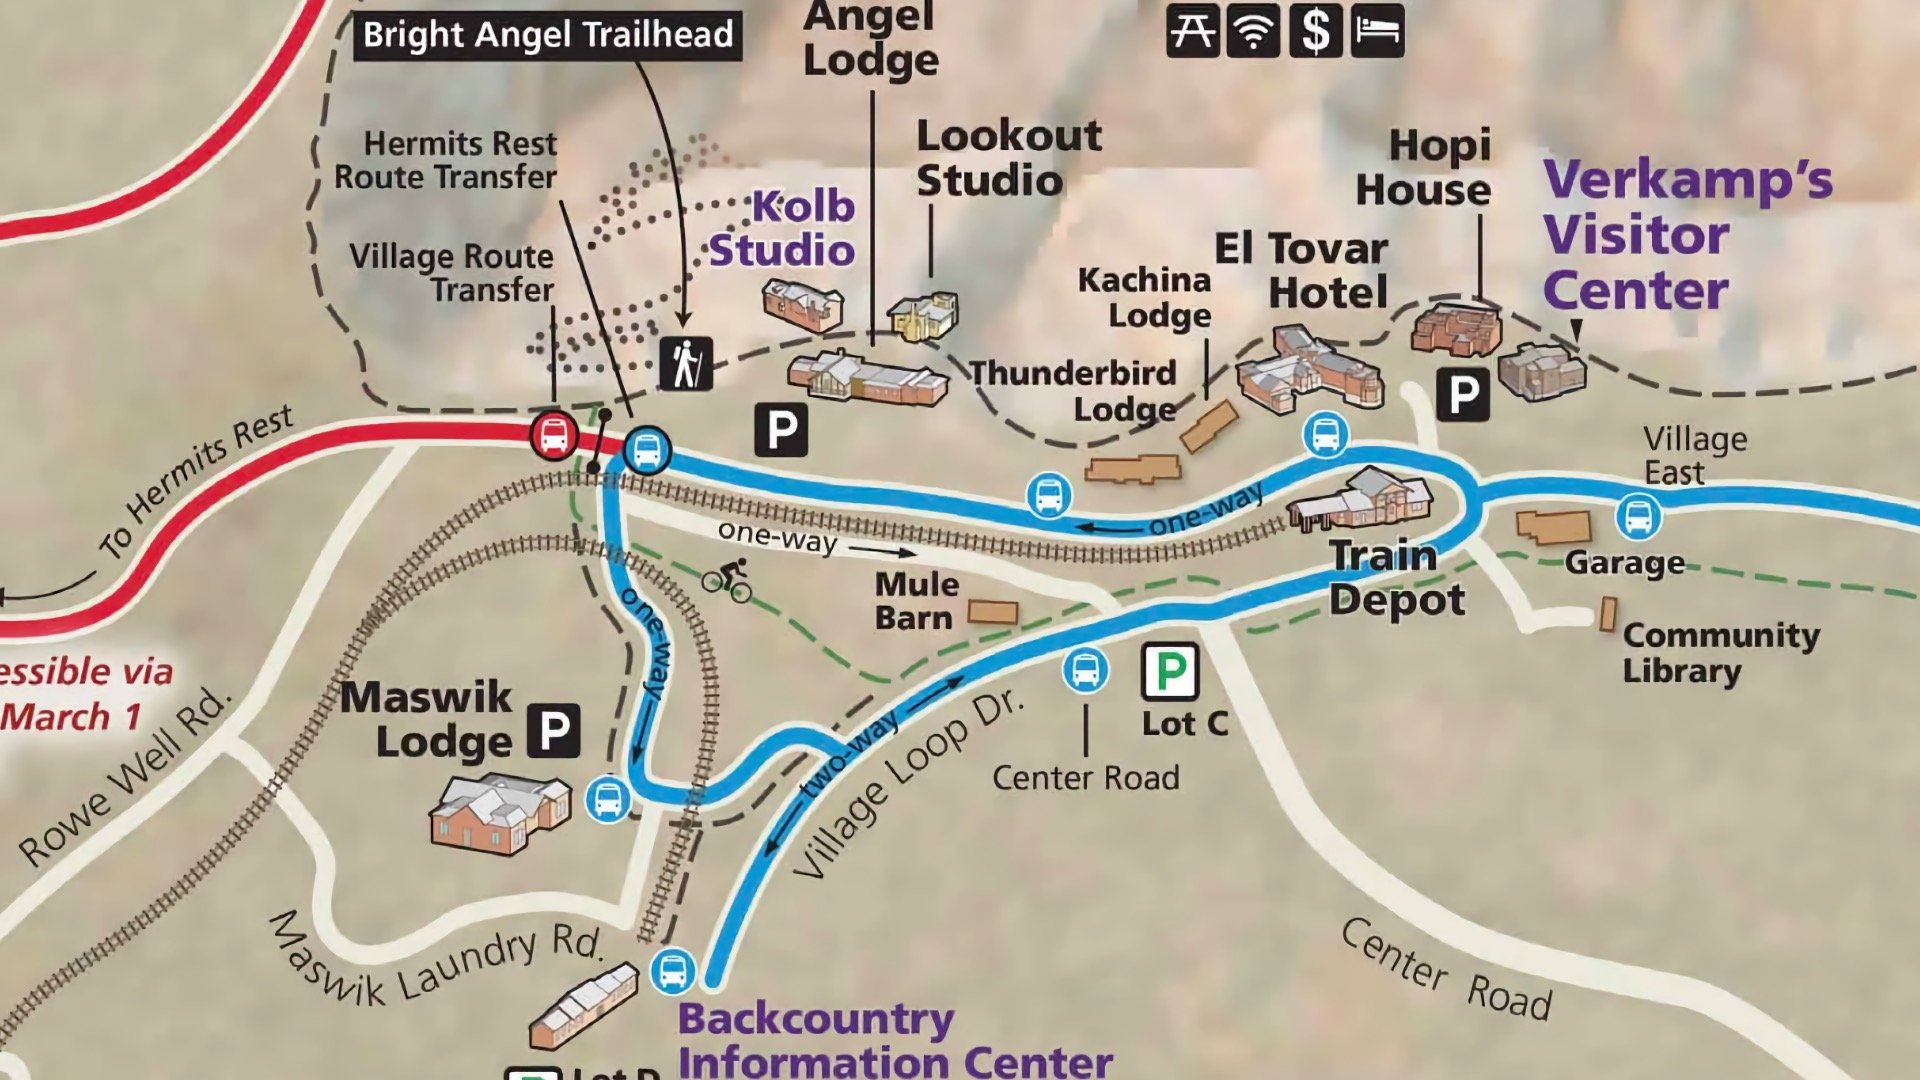
The biggest lot nearby is Parking Lot D by the Backcountry Information Center. It's a 5-10 minute walk to the trailhead from here and there are usually spots open.
Alternatively you can take free shuttles from a bigger parking area like the Visitor Center to the stop for Bright Angel Lodge.
The bigger lots around the area like Lot D are a short walk away. Or take the Blue Shuttle.
Gear for the Hike
Be prepared with water and snacks. You won't get a "rescue" if you're too tired to hike out, so bring energy gels, sweet drinks, whatever you need to power yourself back up to the rim.
Even though there's water on the trail, bring some with you, you'll need it. Bring a backpack to carry it along with sun protection.
The hiking community has generally moved from hiking boots to trail runners. Overall you want your feet to be comfortable, especially if you're not used to hiking this far. If you don't have trail runners, wear sneakers.
Some hikers like trekking poles, and they can be helpful for stability, knee protection (on the downhill), and climbing on the way back out.
Don't count on cellular service. If you need to call for help, having a satellite-enabled phone or satellite communicator can help. The trail is busy, so even if you don't have satellite communications, you're likely to see someone who might.
Bring a snack and/or electrolyte drink for the way back up.
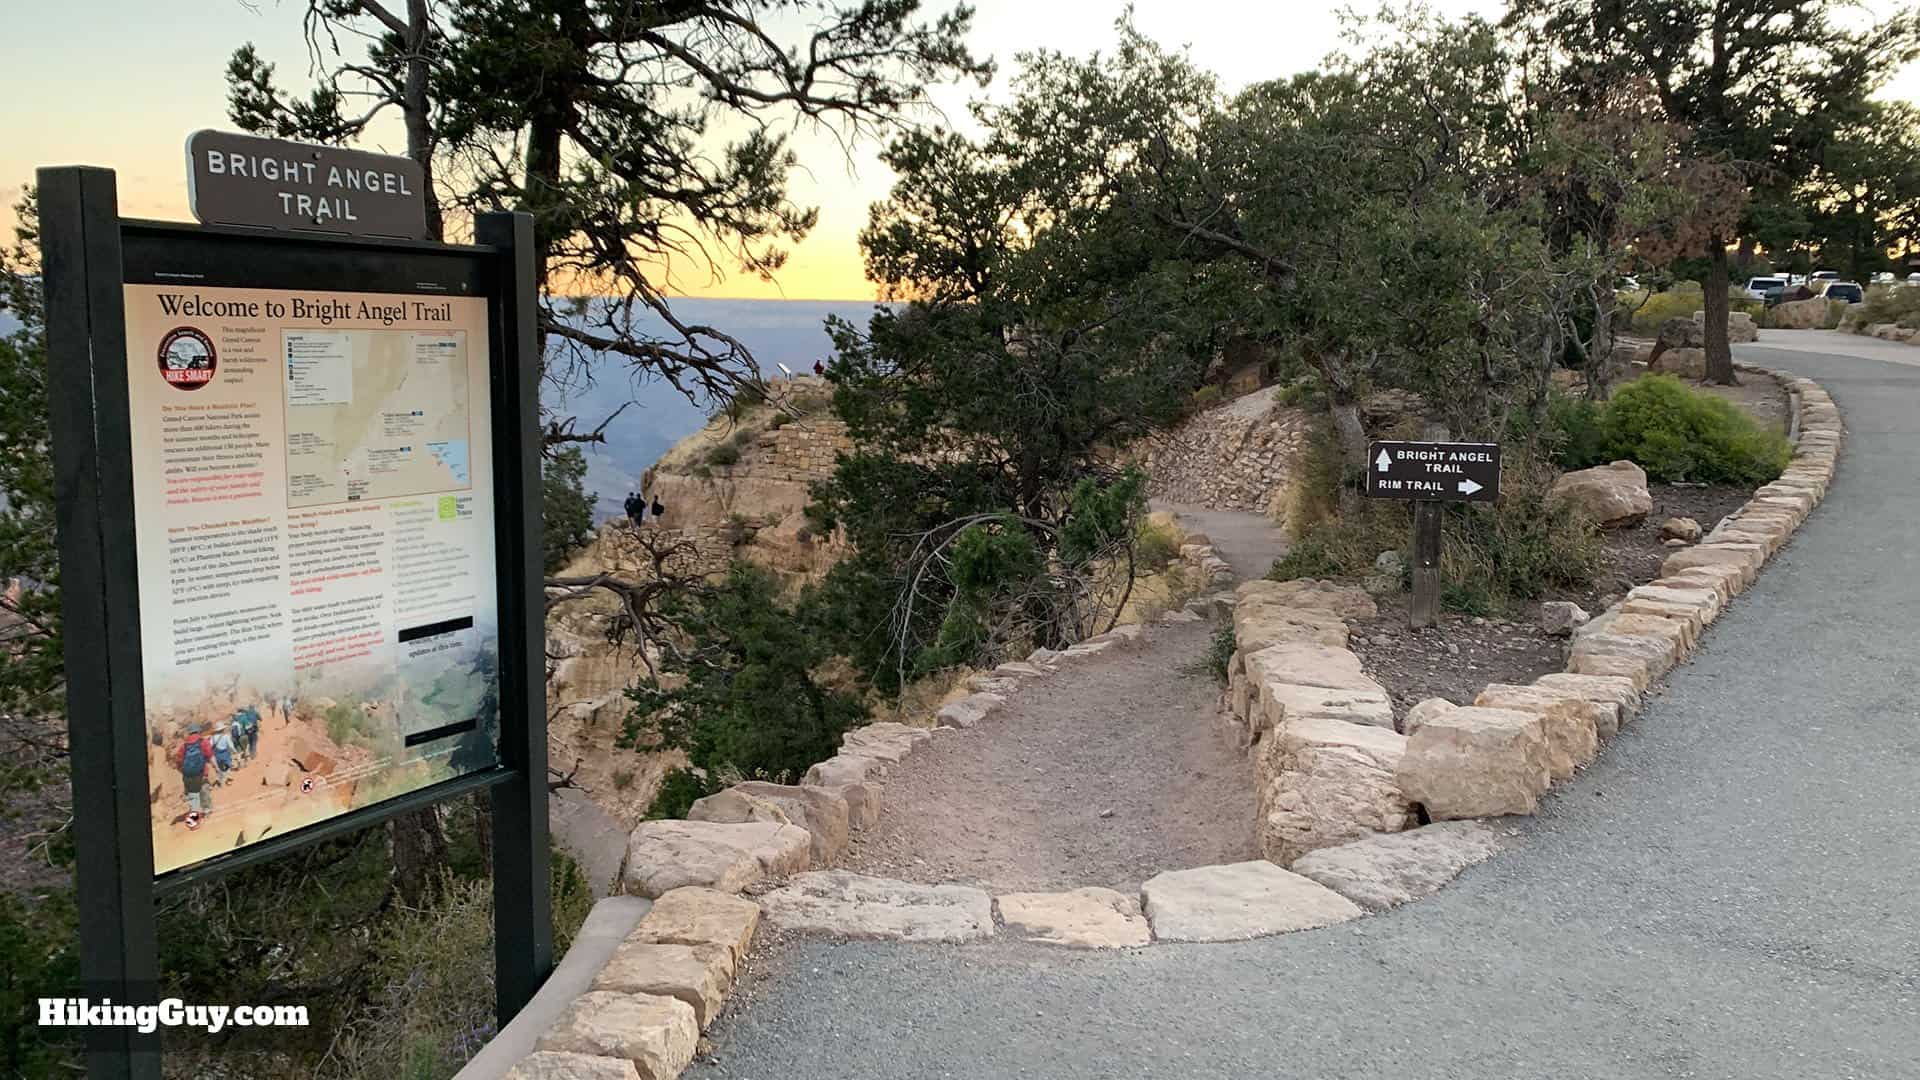
There are plenty of signs along the way. You'd really have to try and get lost on the Bright Angel. Just remember, always stay on the trail (don't cut them off or use shortcuts).
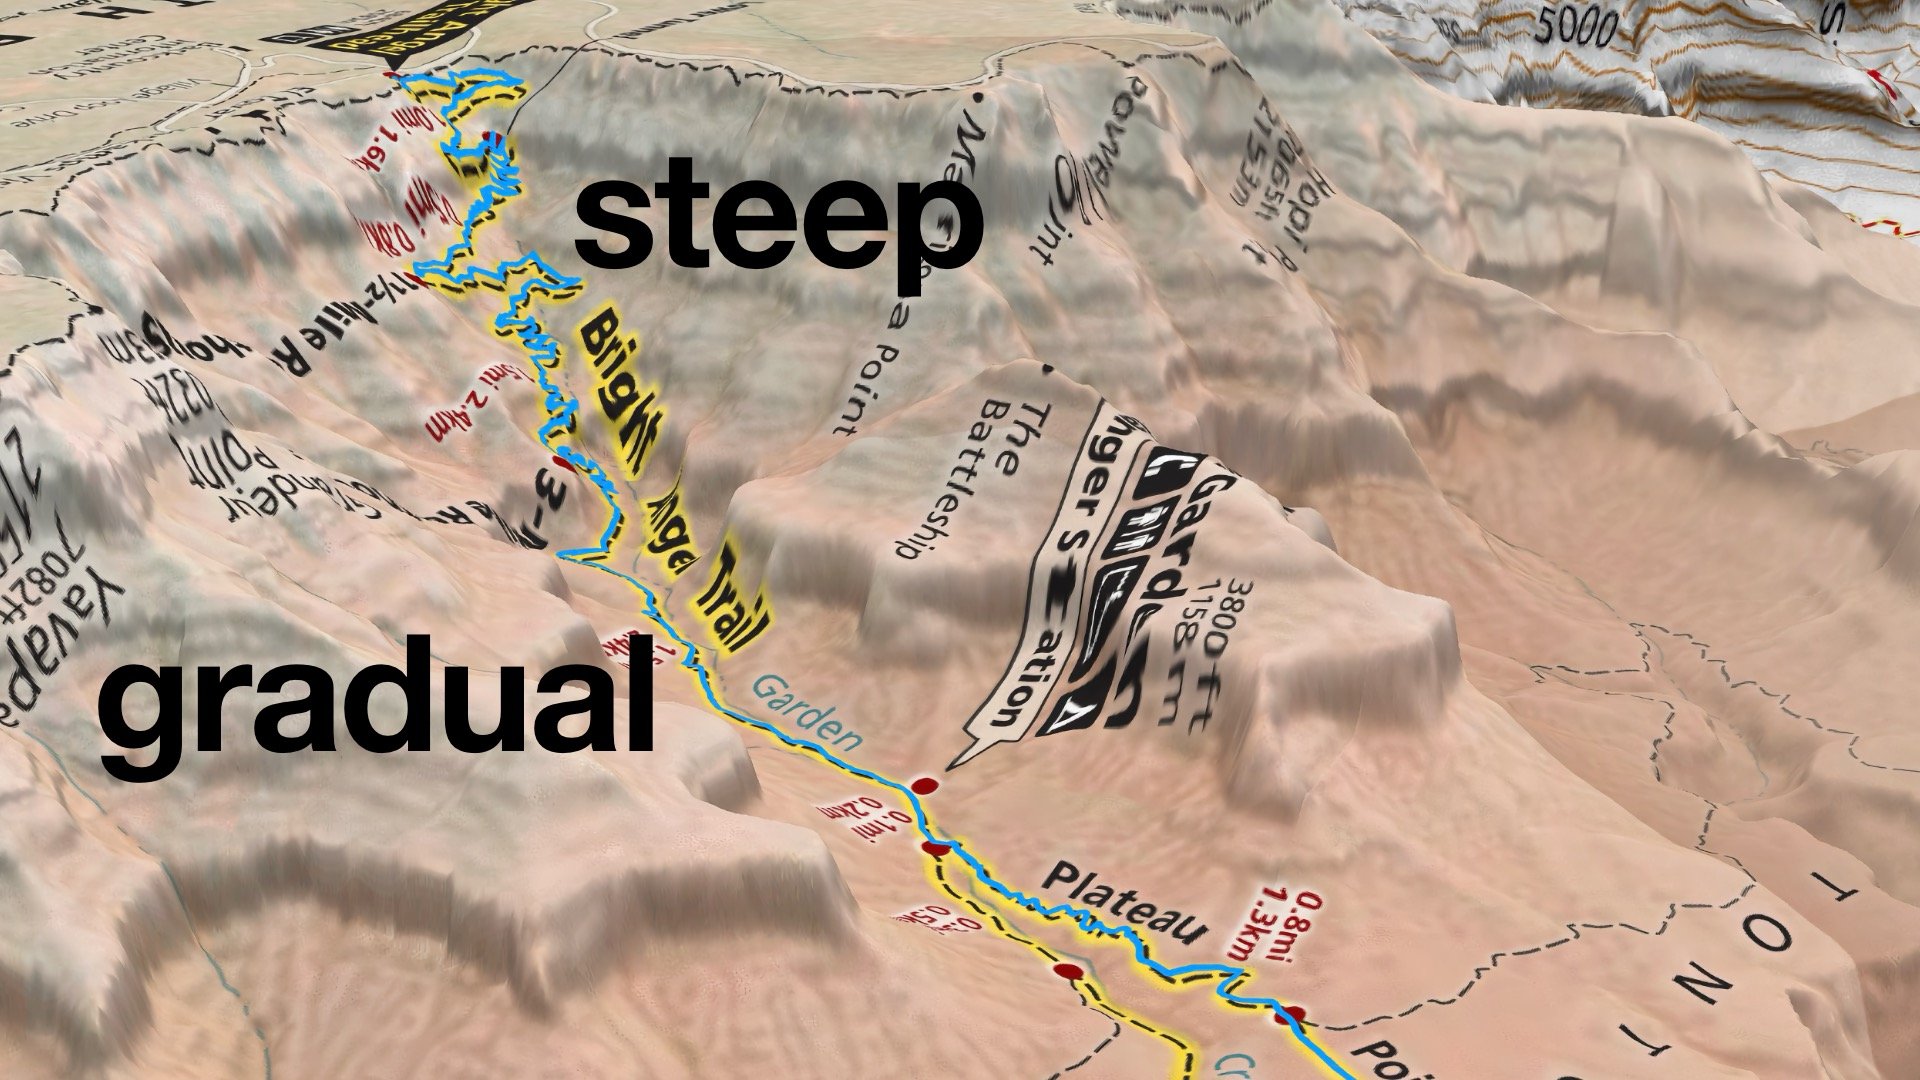
The steepest part of the hike is from the rim to about 4 miles down (or up). After that it's more gradual.
Bright Angel Trail Directions
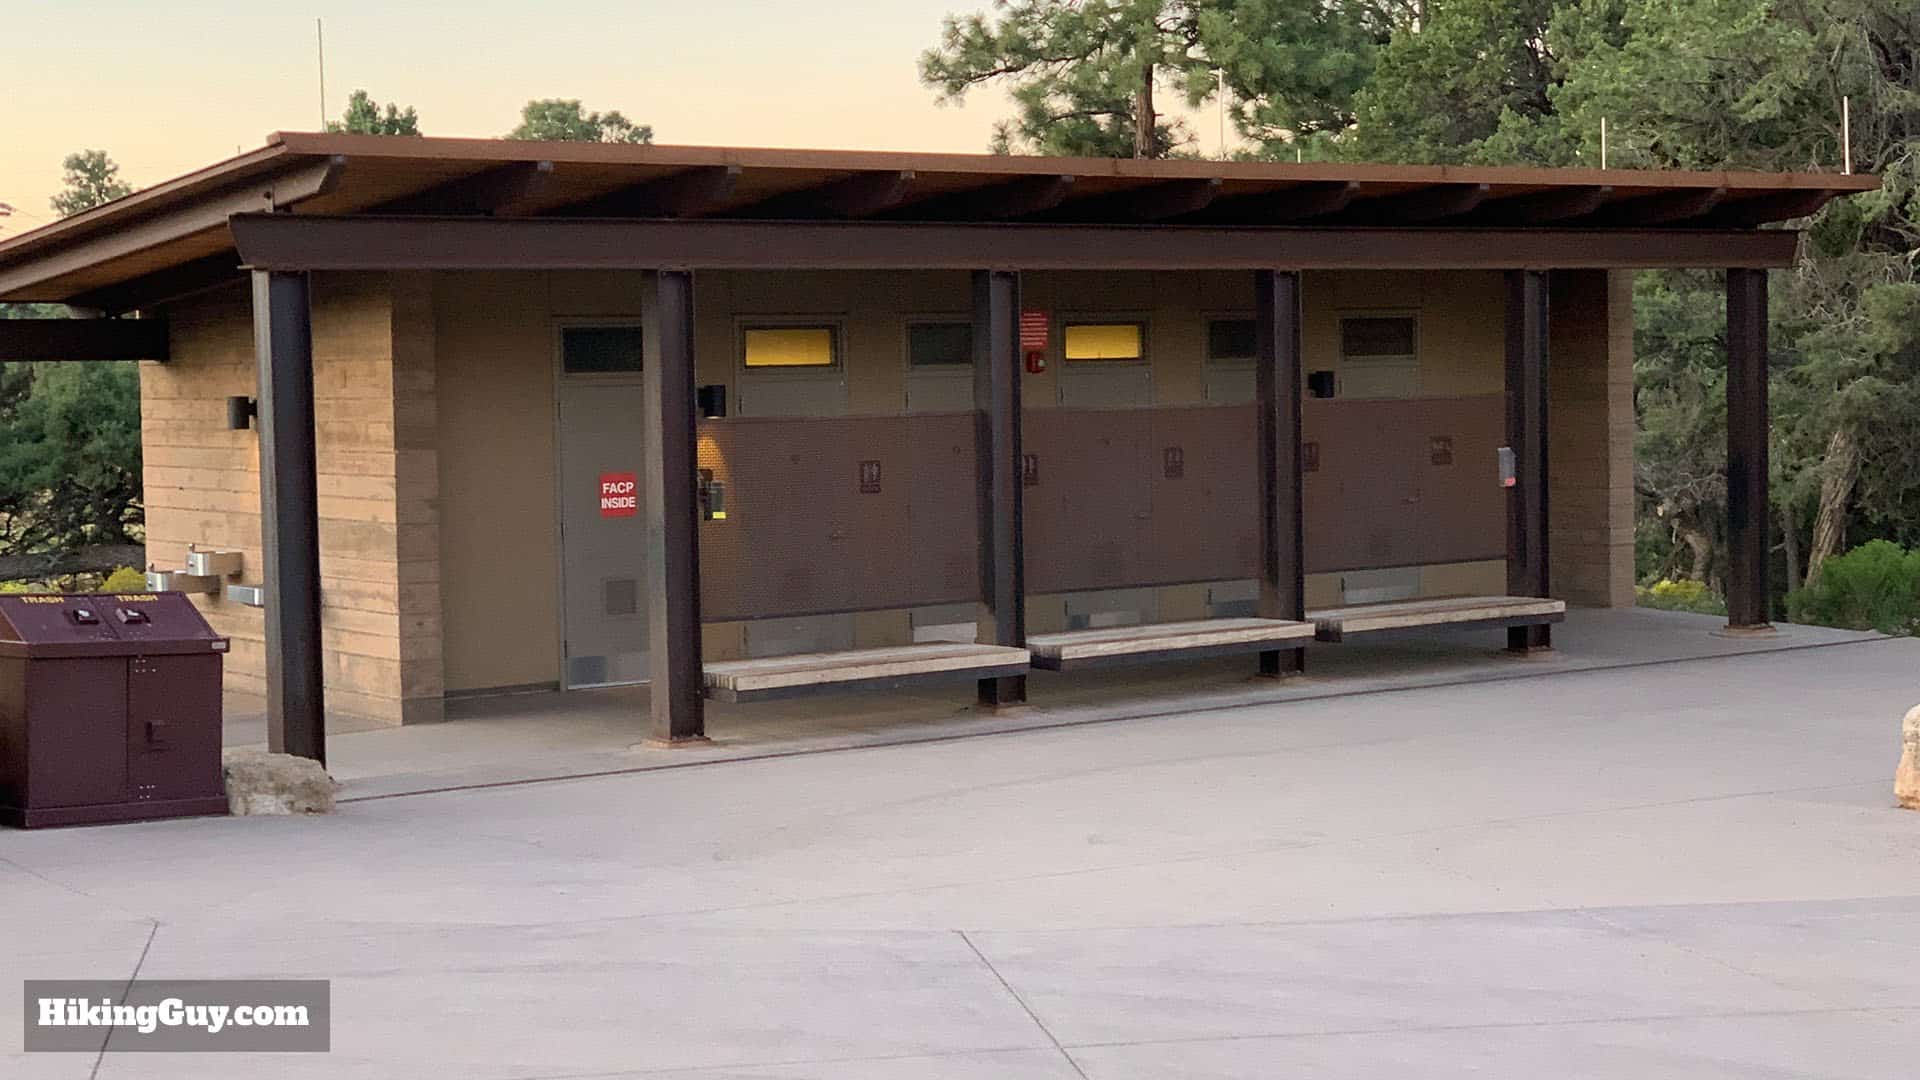
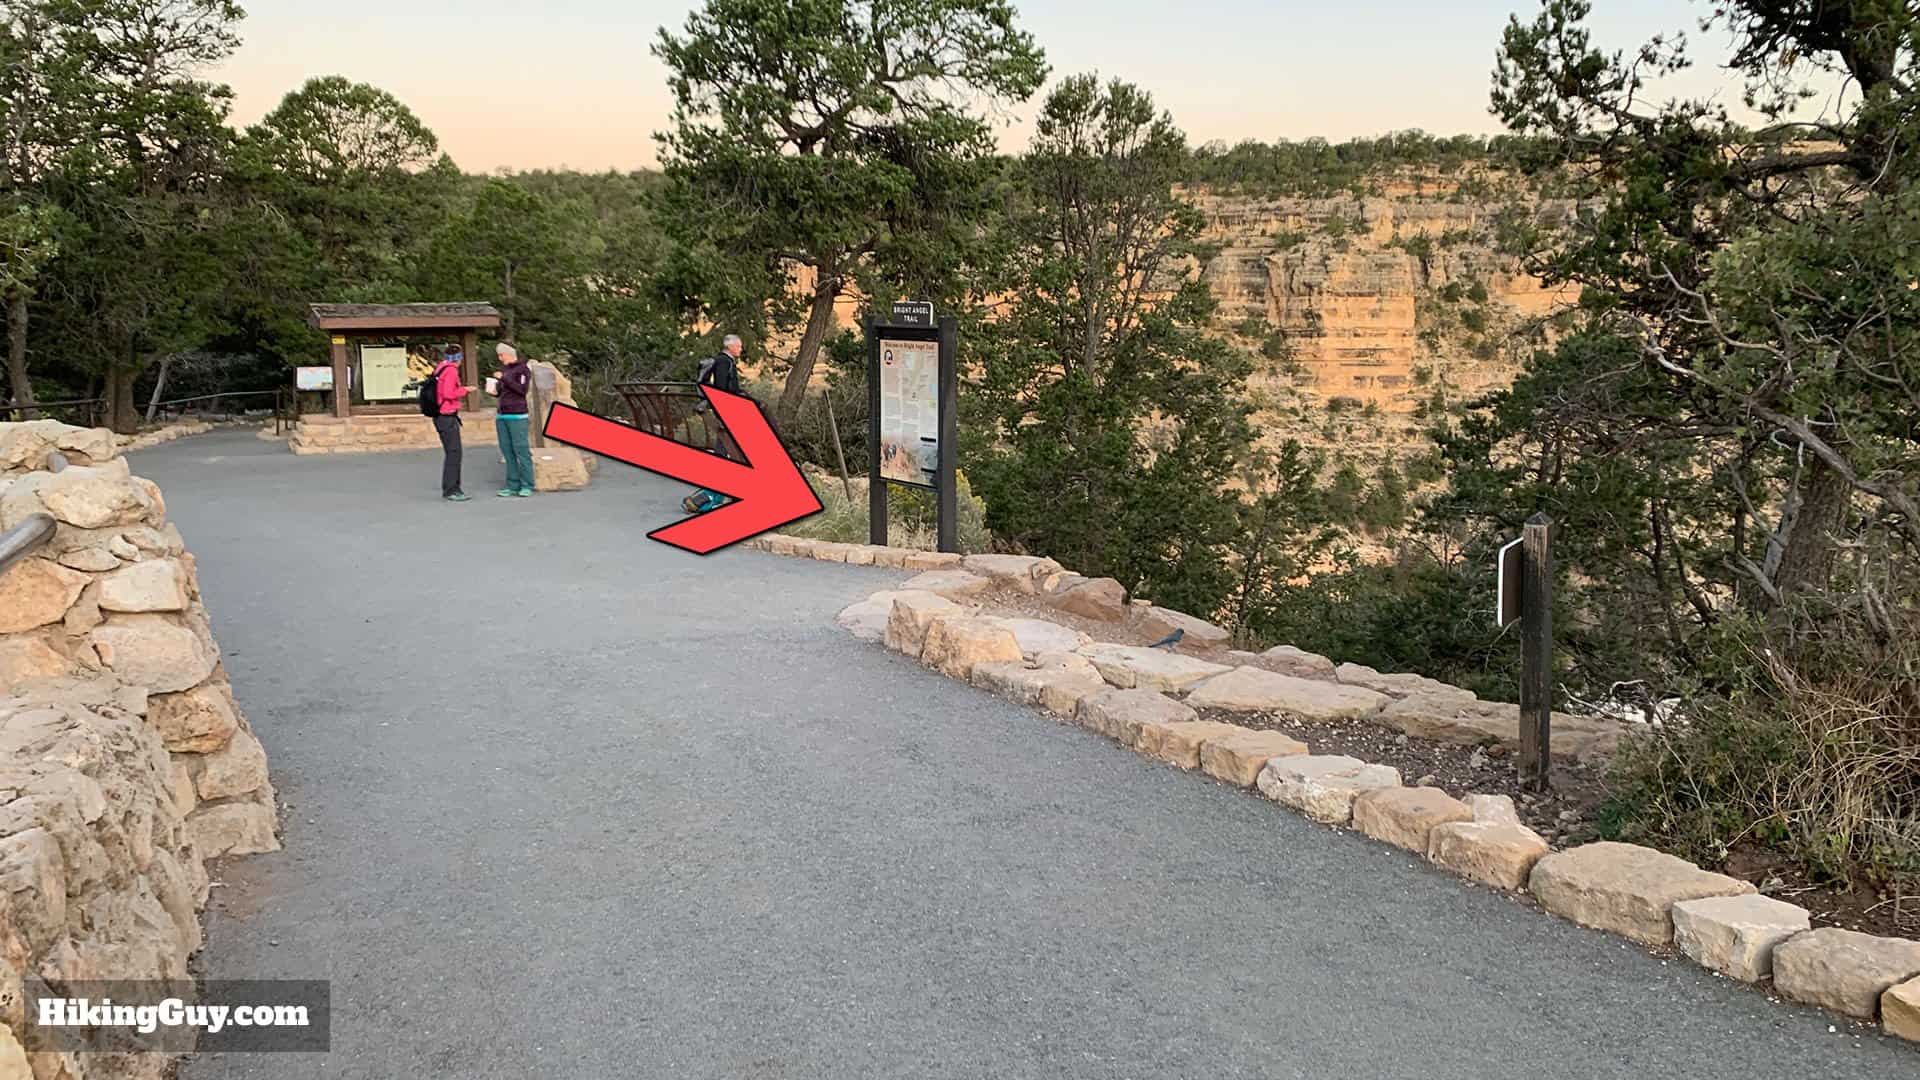
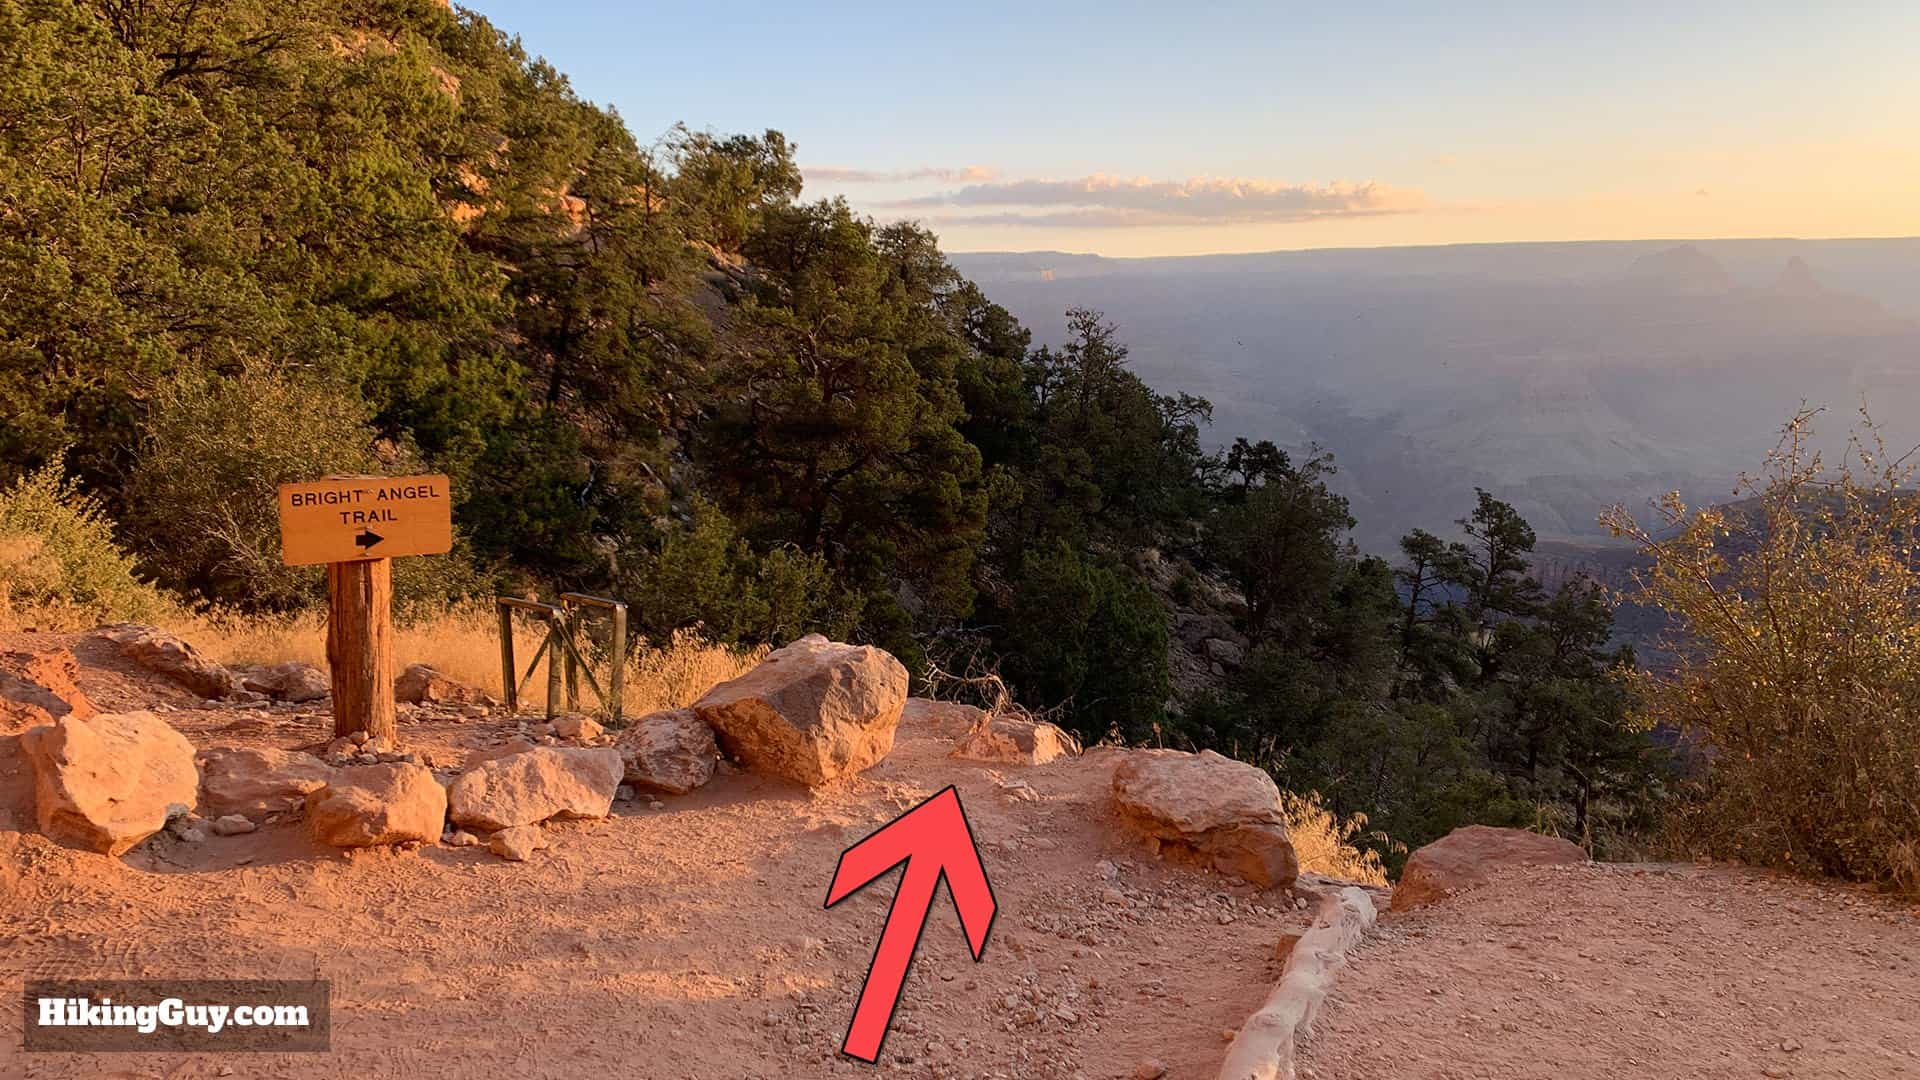
Bright Angel Trailhead
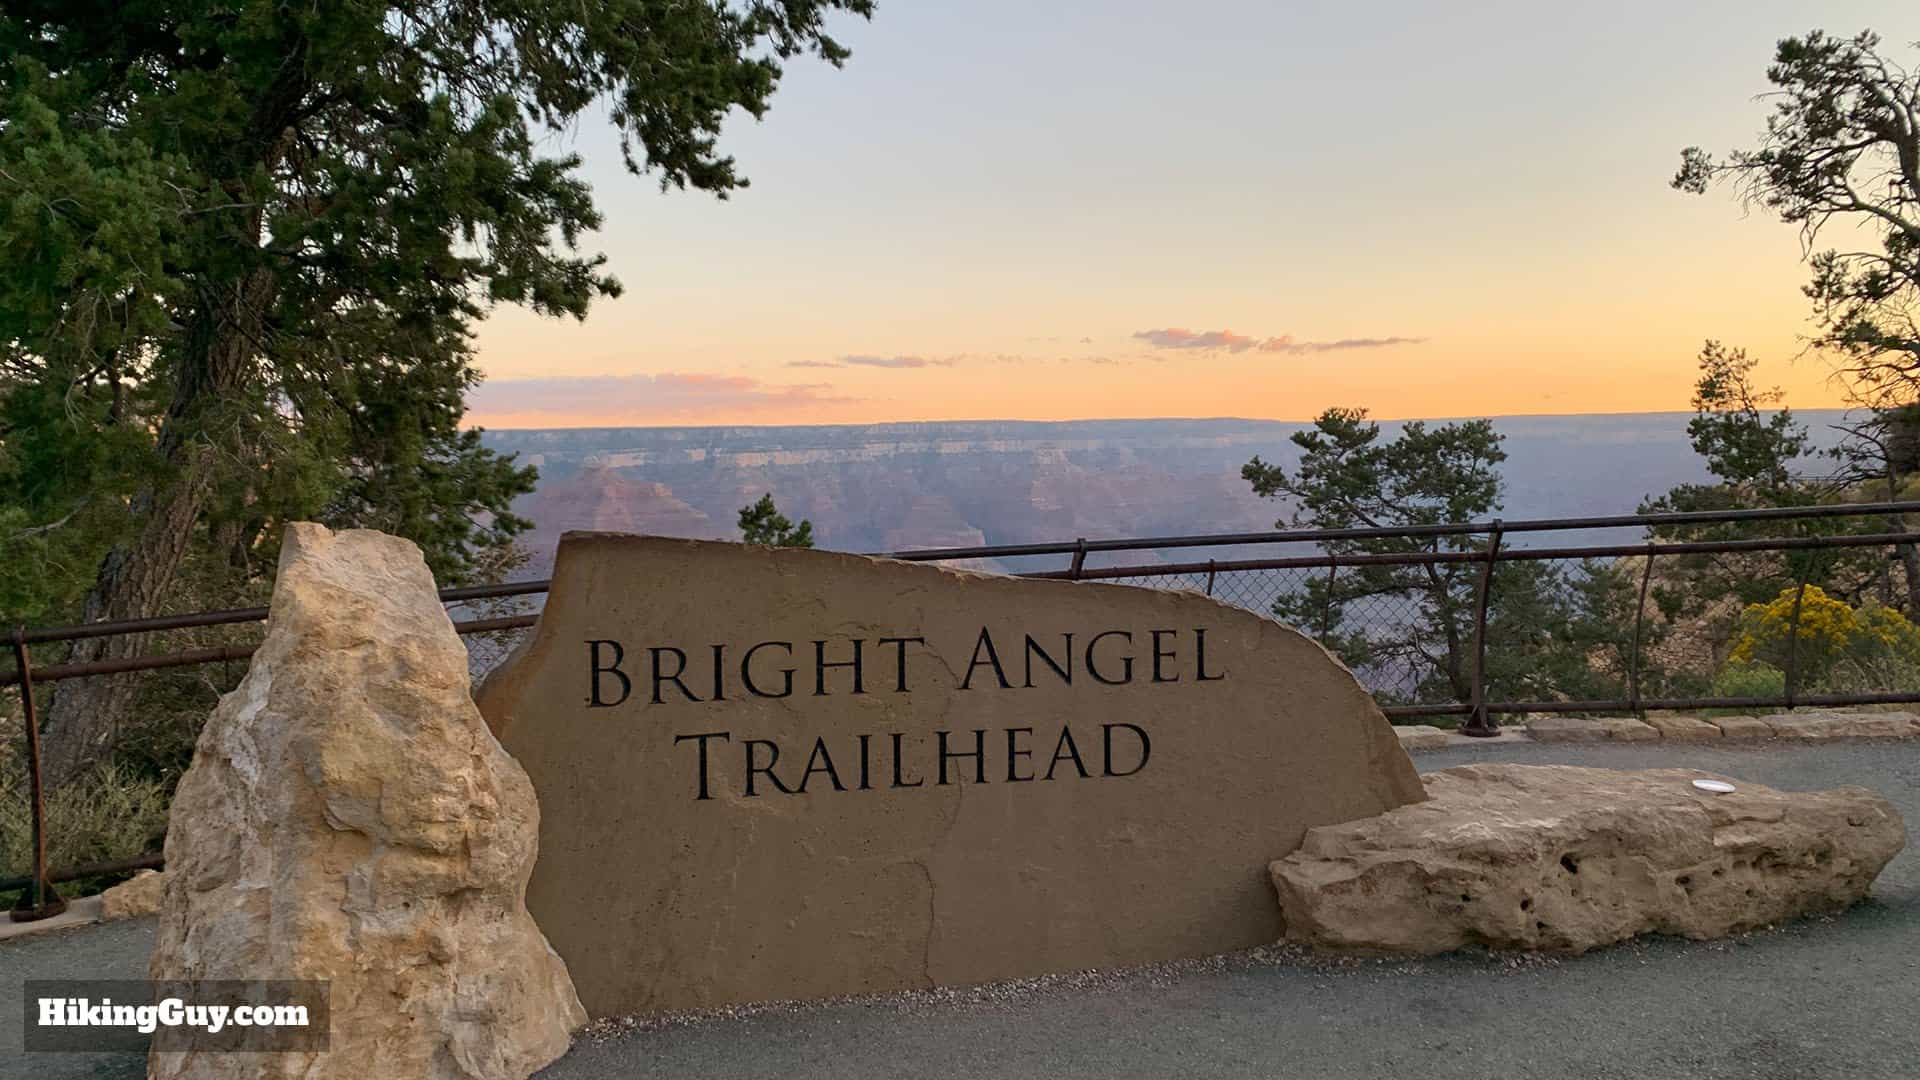
The actual trailhead is just past the bathrooms and across from the mule stables.There are lots of bathrooms at the trailhead.There's a water fill station at the trailhead on the side of the bathrooms.Here's the Bright Angel trailhead.Just past the trailhead is this beautiful sign that people take pictures with. If you are leaving early, take your photo before you start with the colors of sunrise. Later in the day there will be crowds here.
Did you know that the Bright Angel Trail used to be private and cost $1 (about $40 today) to hike? The path was used by Havasupai for hundreds of years but in the 1890s a settler claimed this land and started charging visitors to hike. Even after the Grand Canyon became a park in 1919 it was still private. The National Park Service was able to end private control by 1927.
Hiking to 1.5 Mile Resthouse
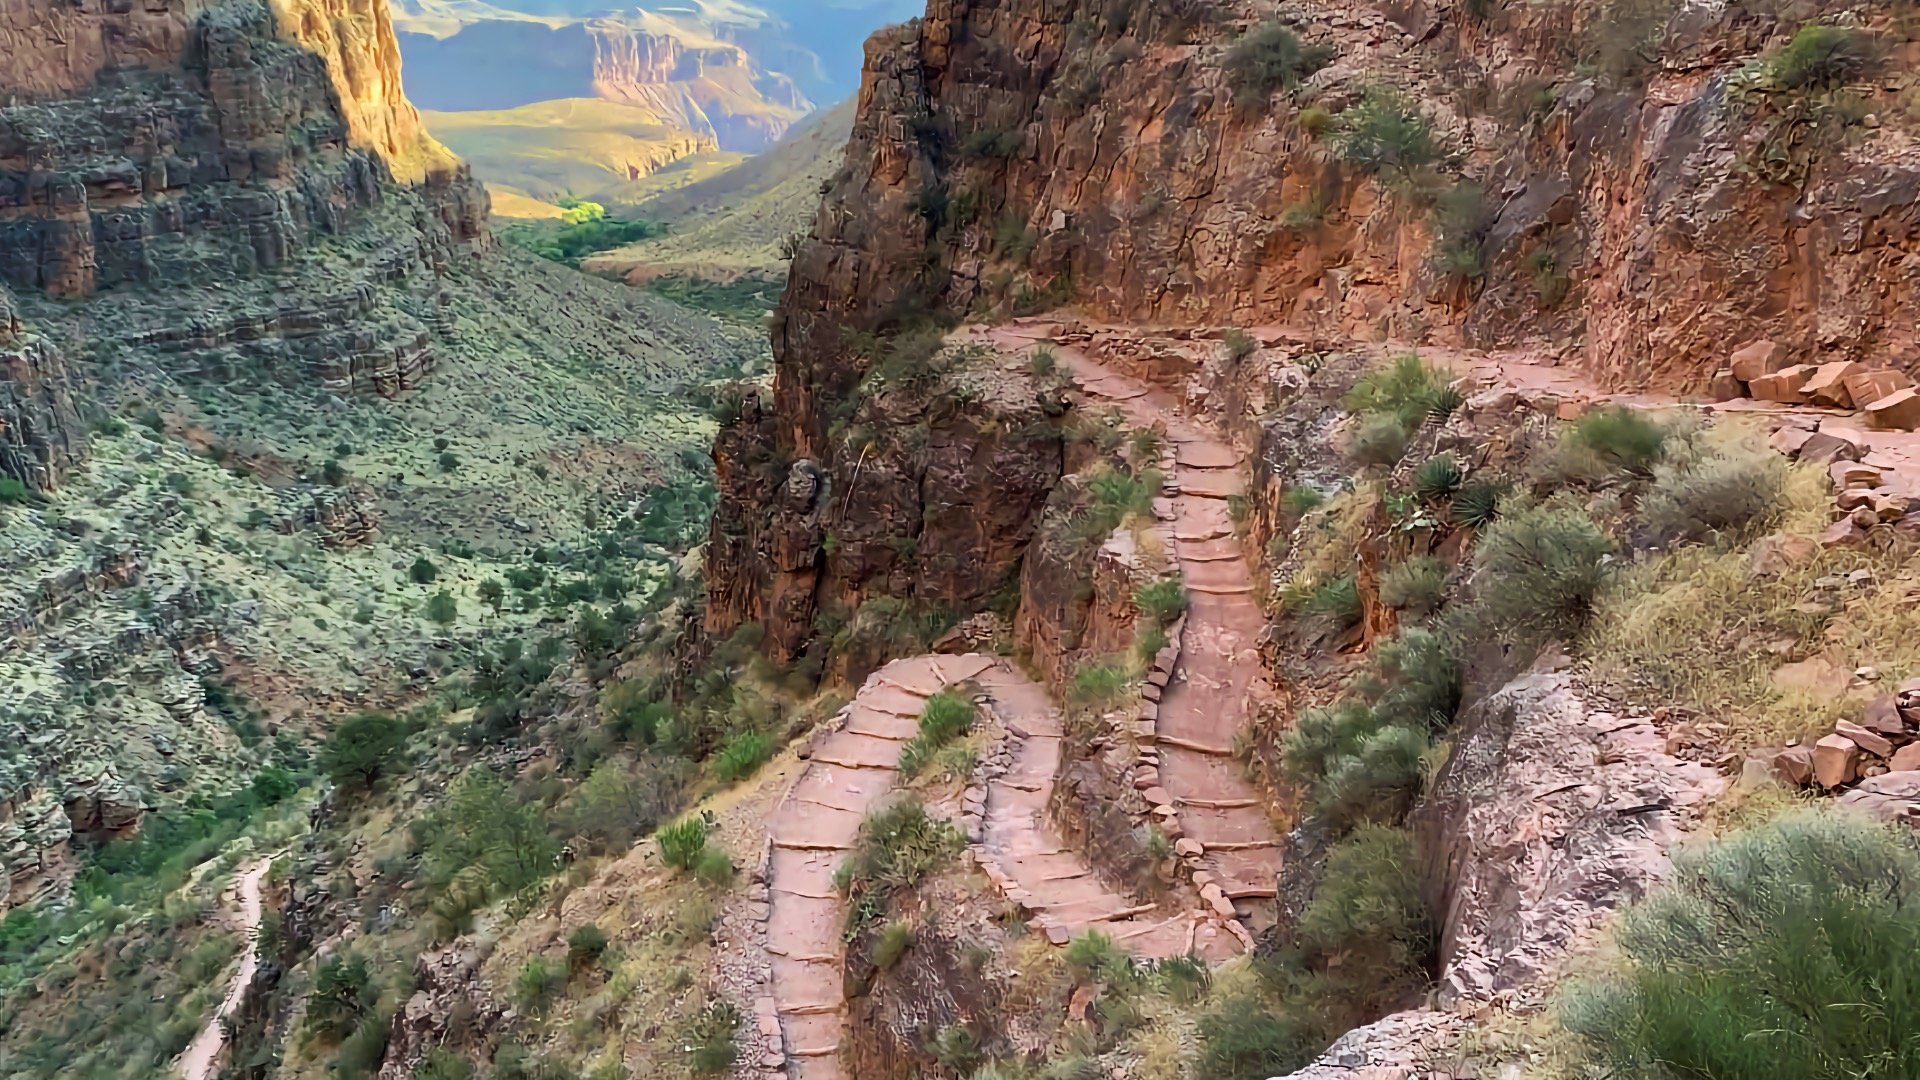
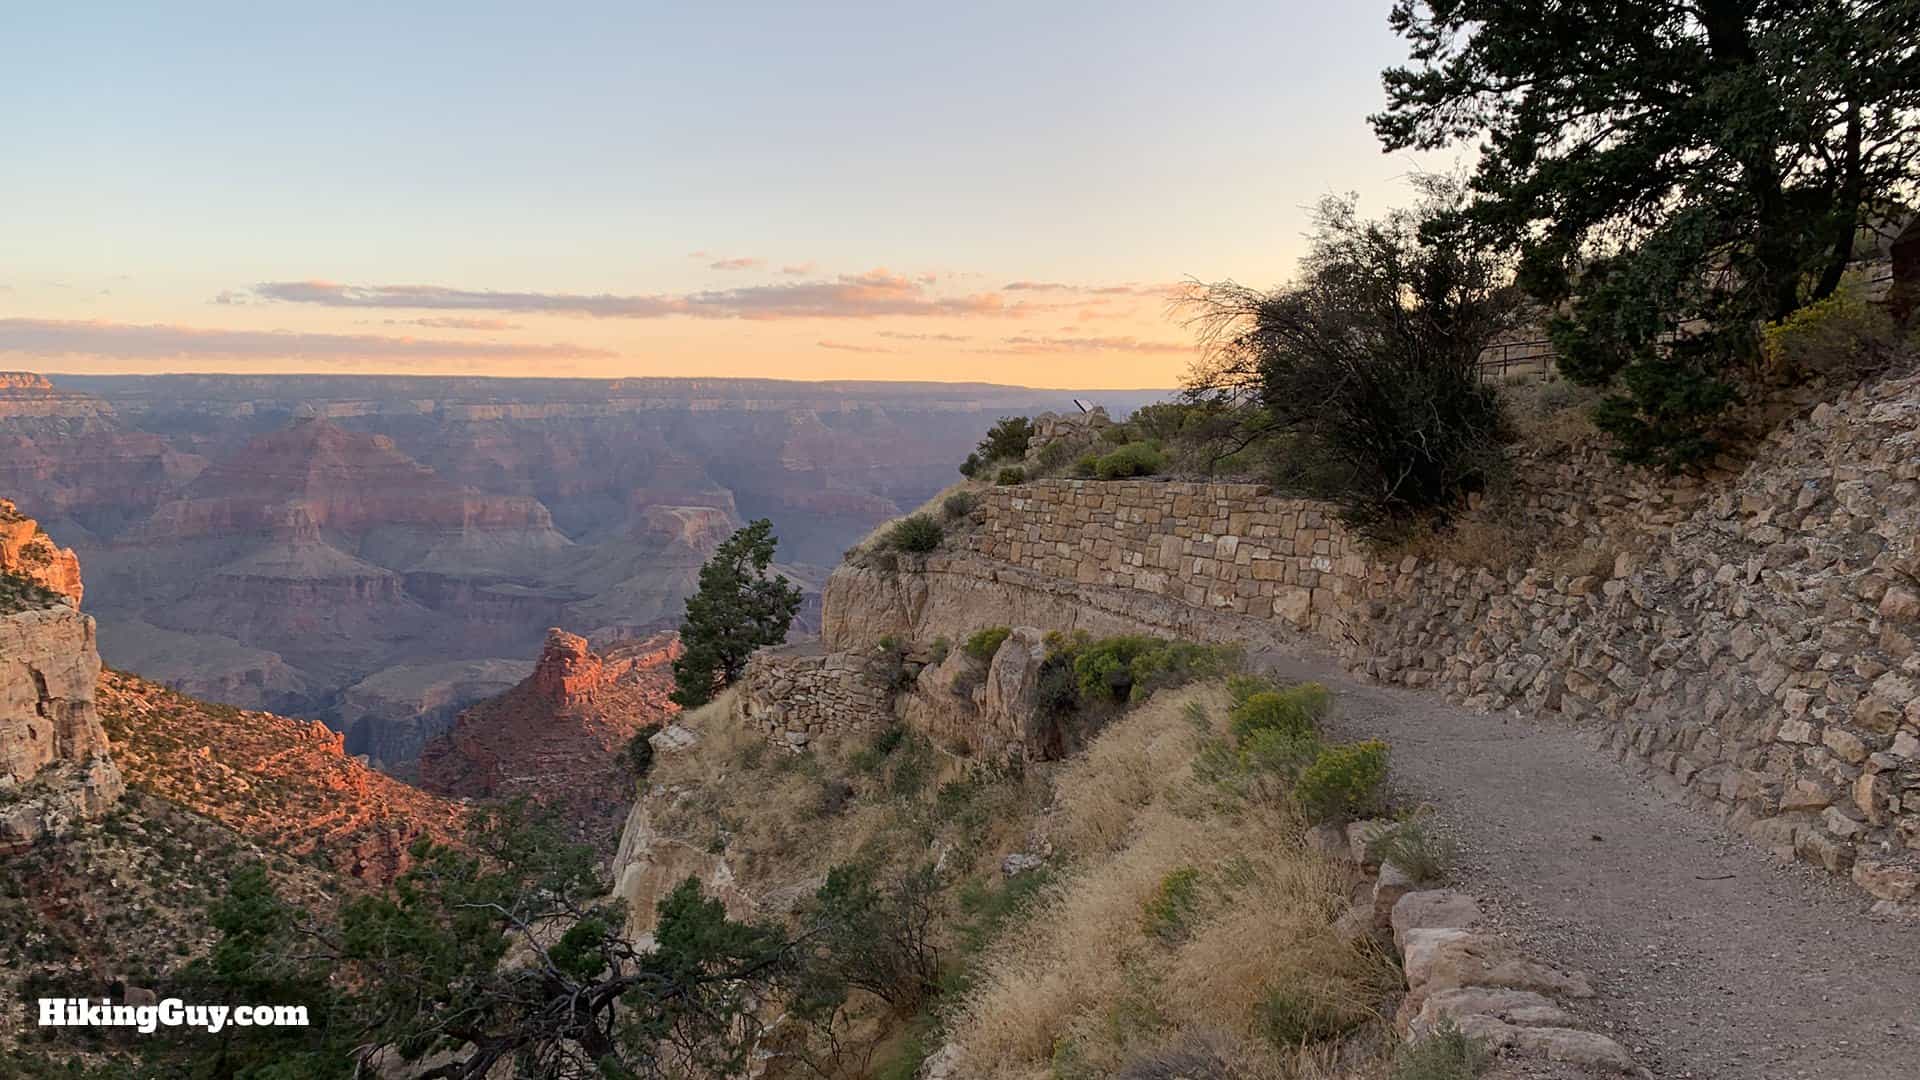
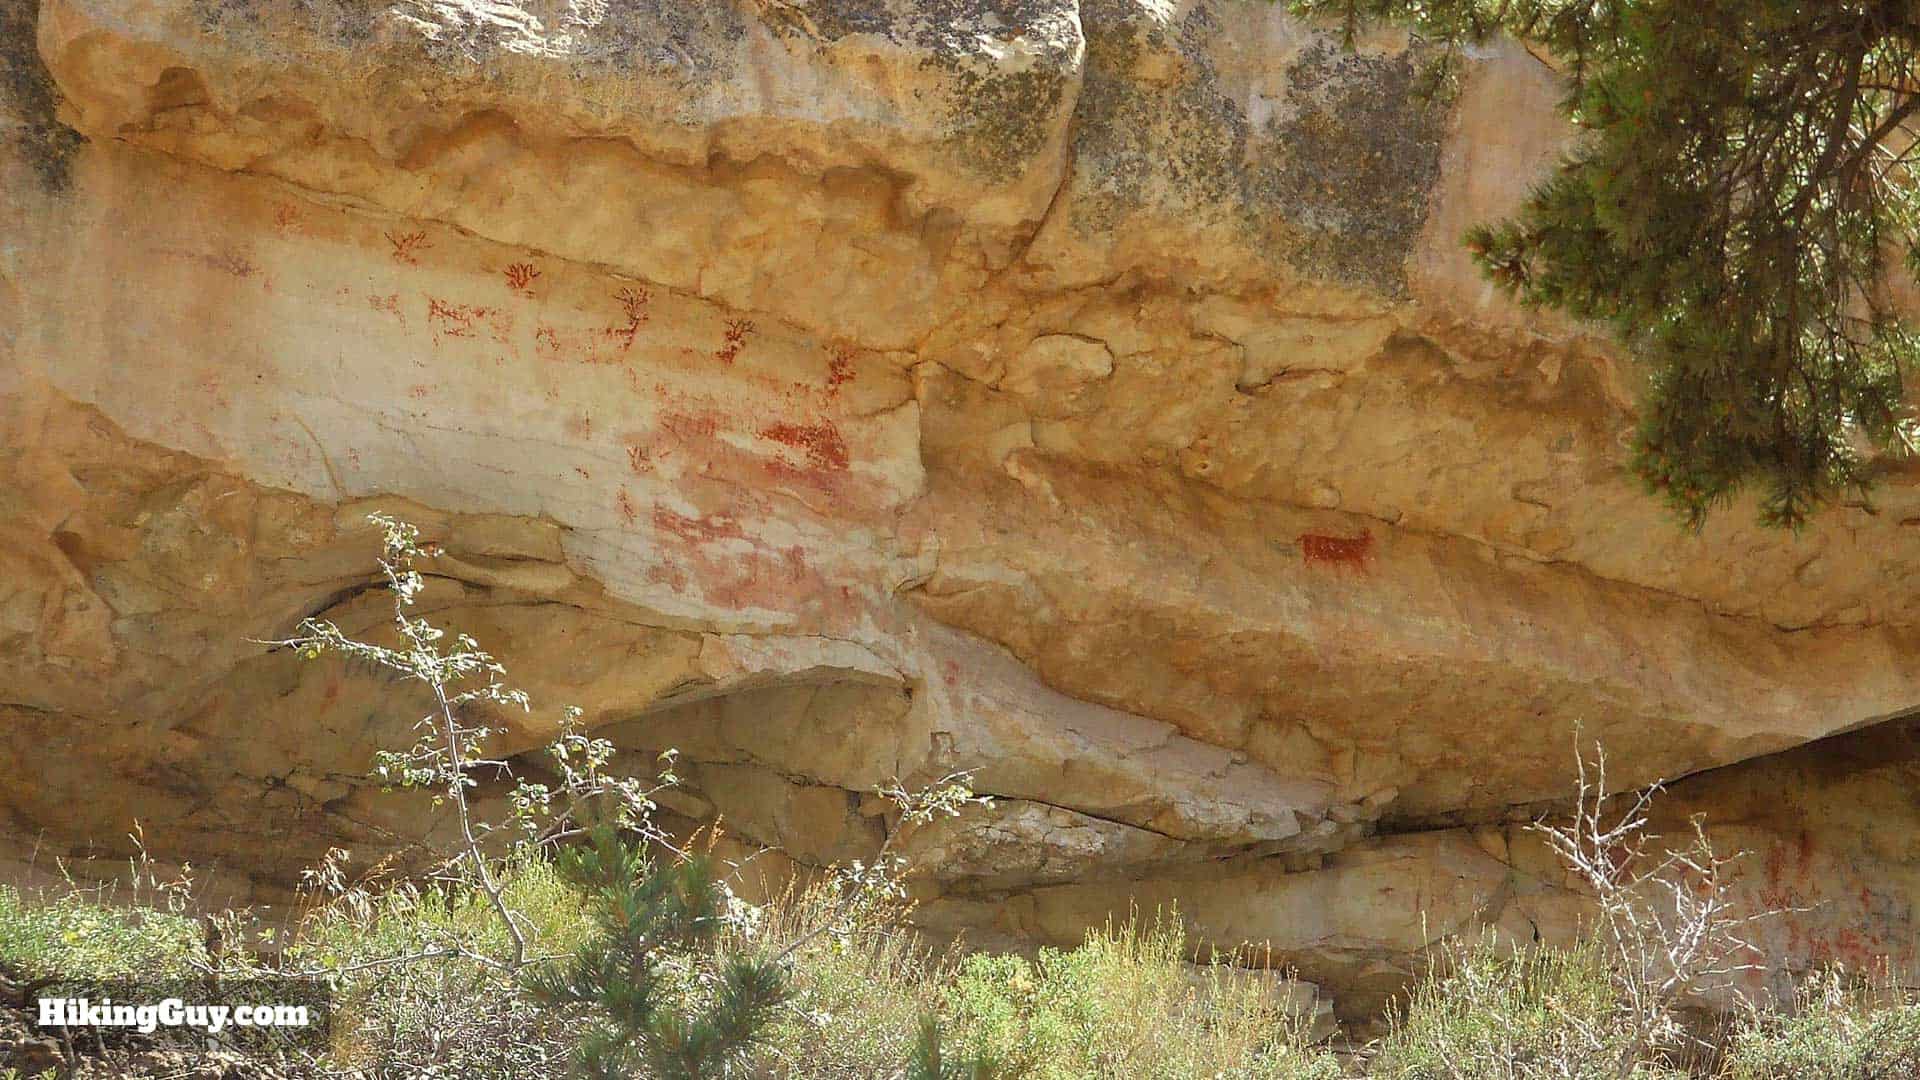
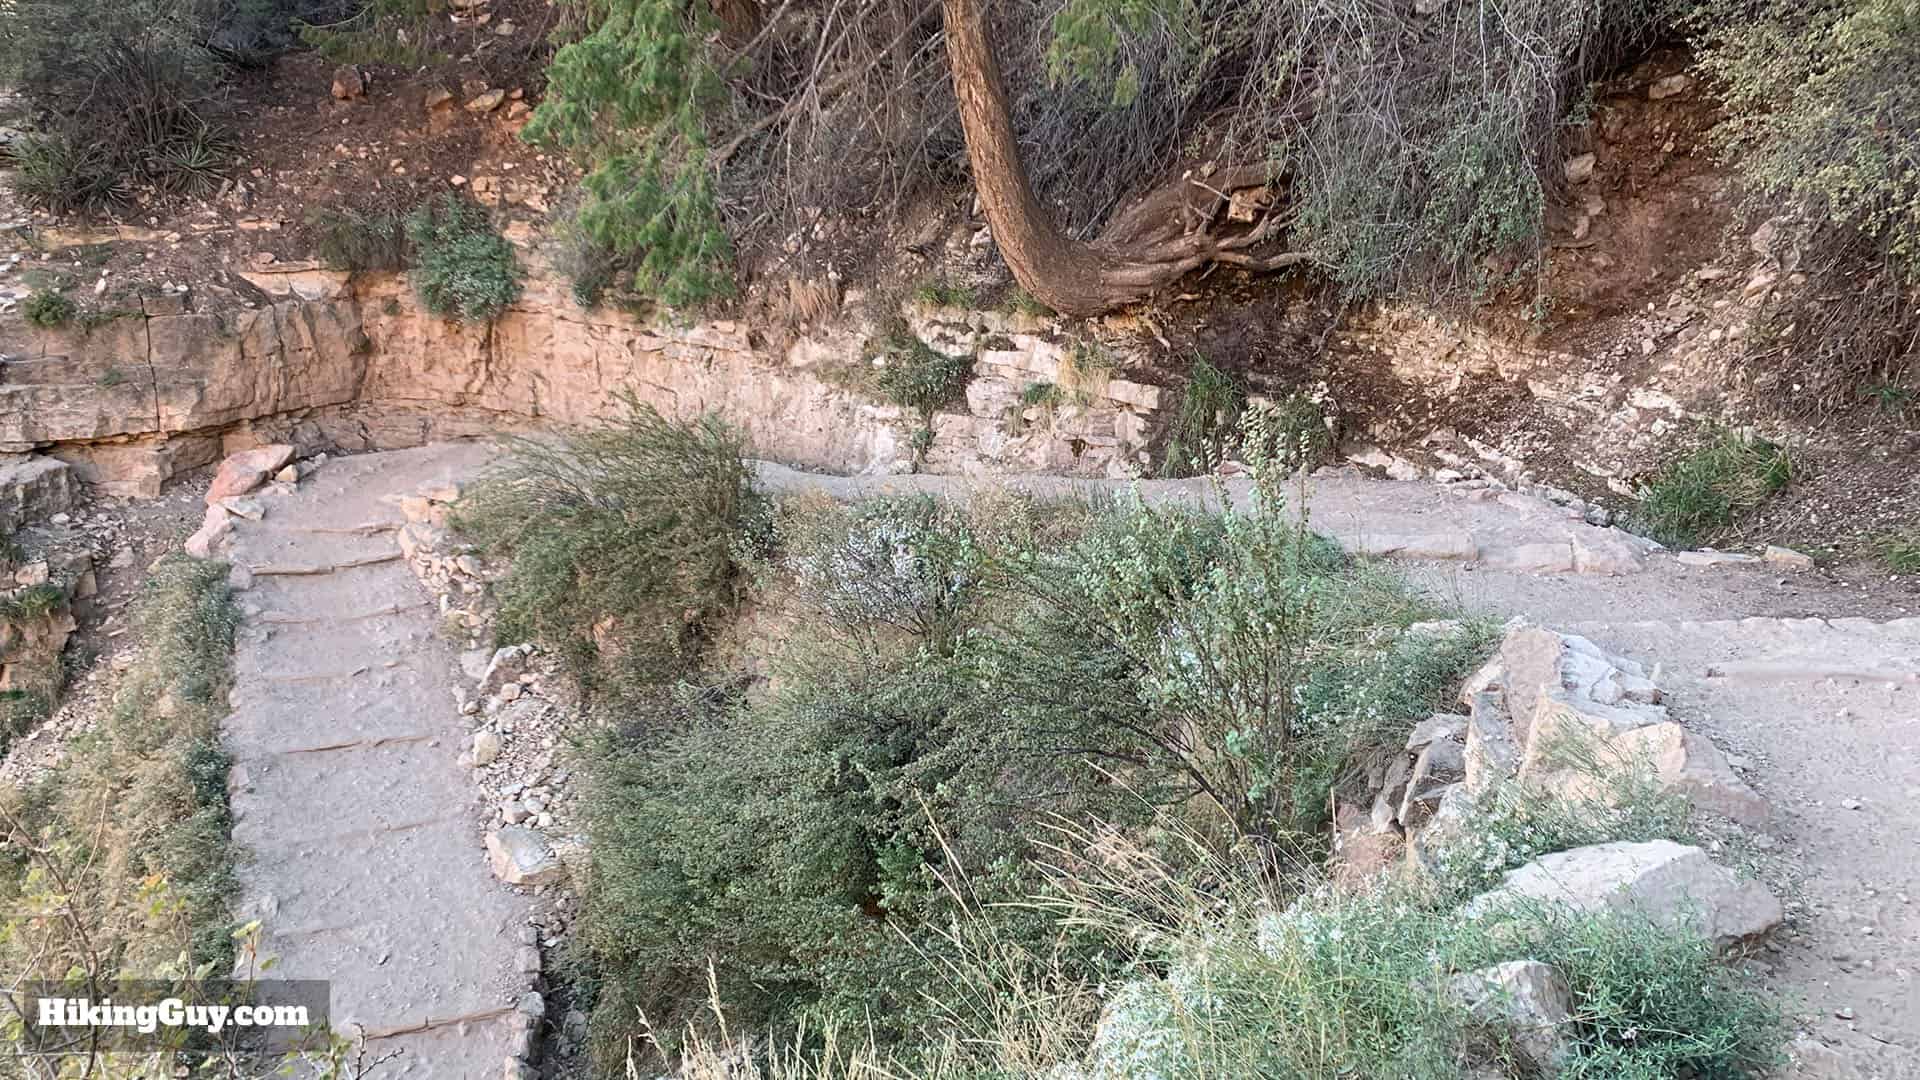
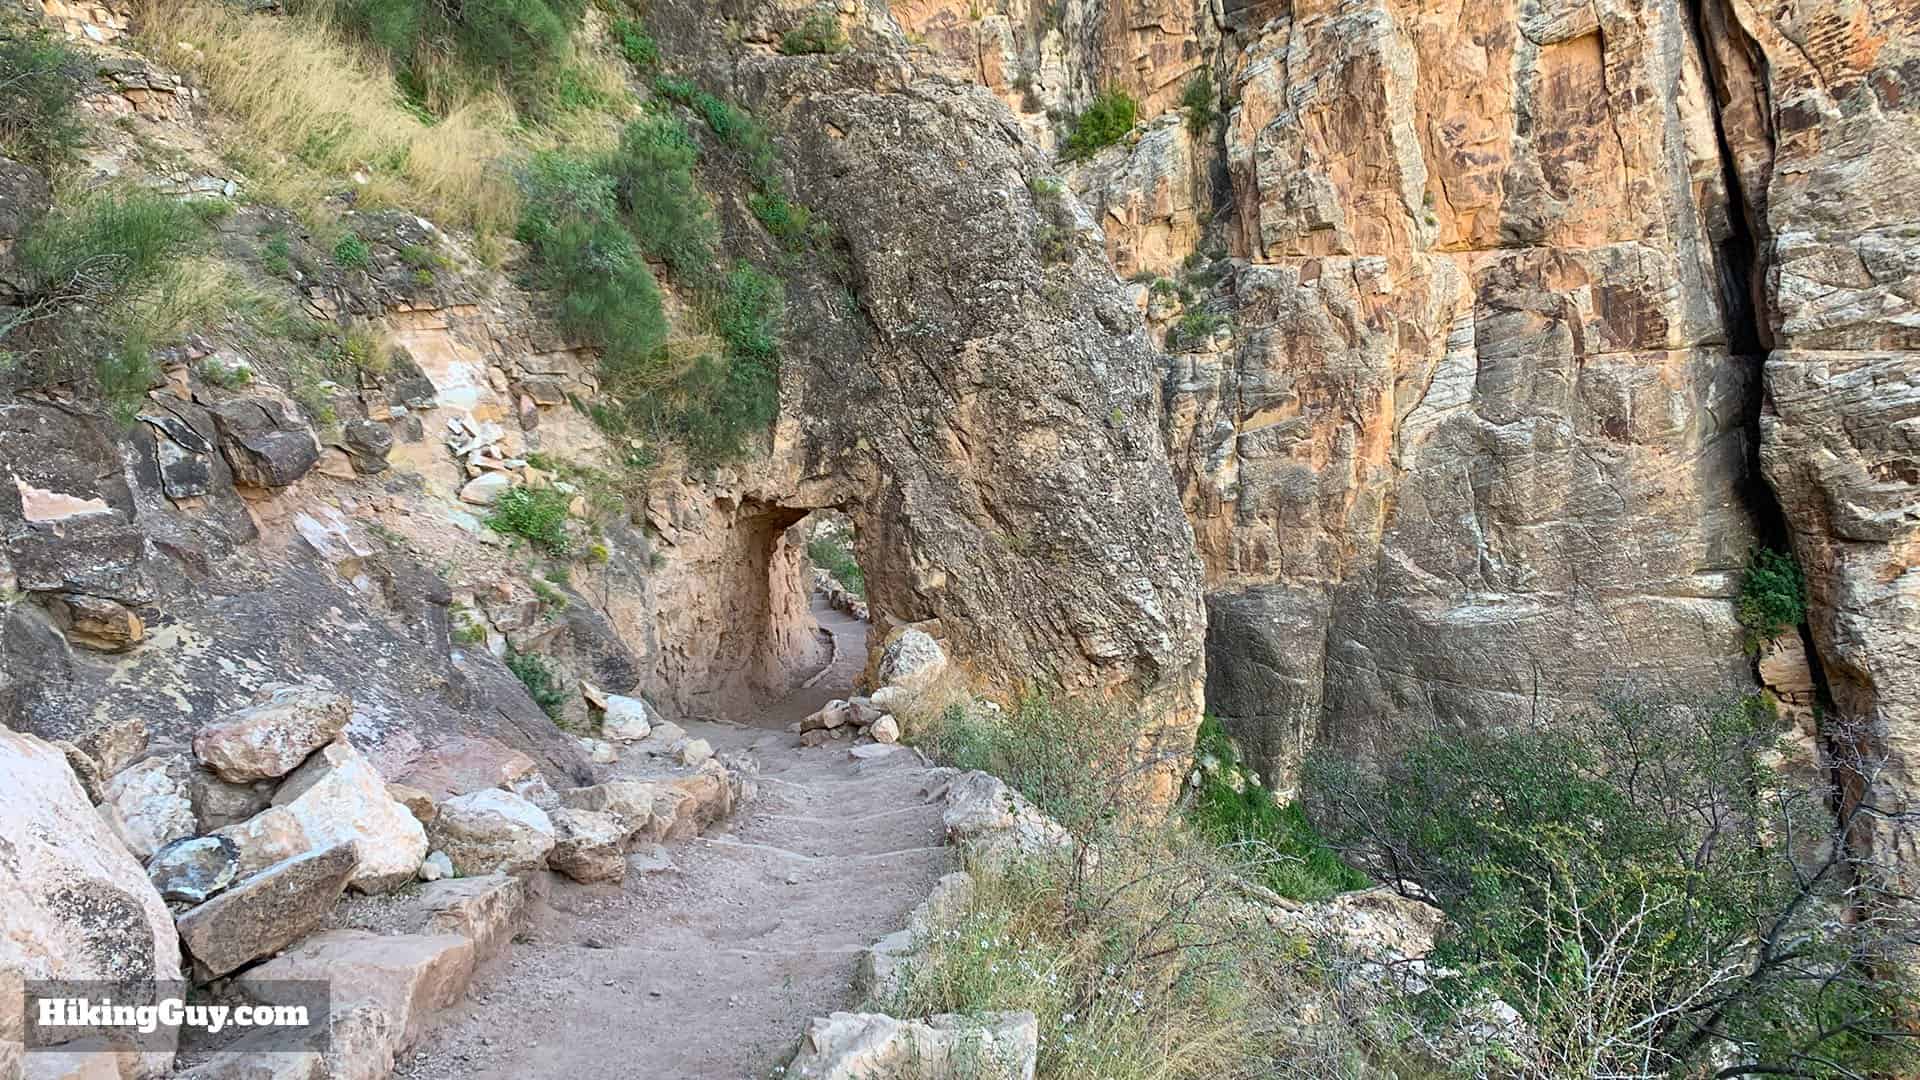
After you've gotten your photos at the rim, head down the Bright Angel Trail to begin the hike.The pavement quickly ends and you start the long windy descent down the Bright Angel Fault, which the trail was named after.Look at the canyon walls as you start to descend. The holes you see were used for blasting out the trail along the cliffside.Shortly after starting you'll pass through the first tunnel, blasted through the cliff in the 1930s.Just past the first tunnel, up on your left, look for these ancient pictographs under the overhang. Be respectful and stay on the trail.
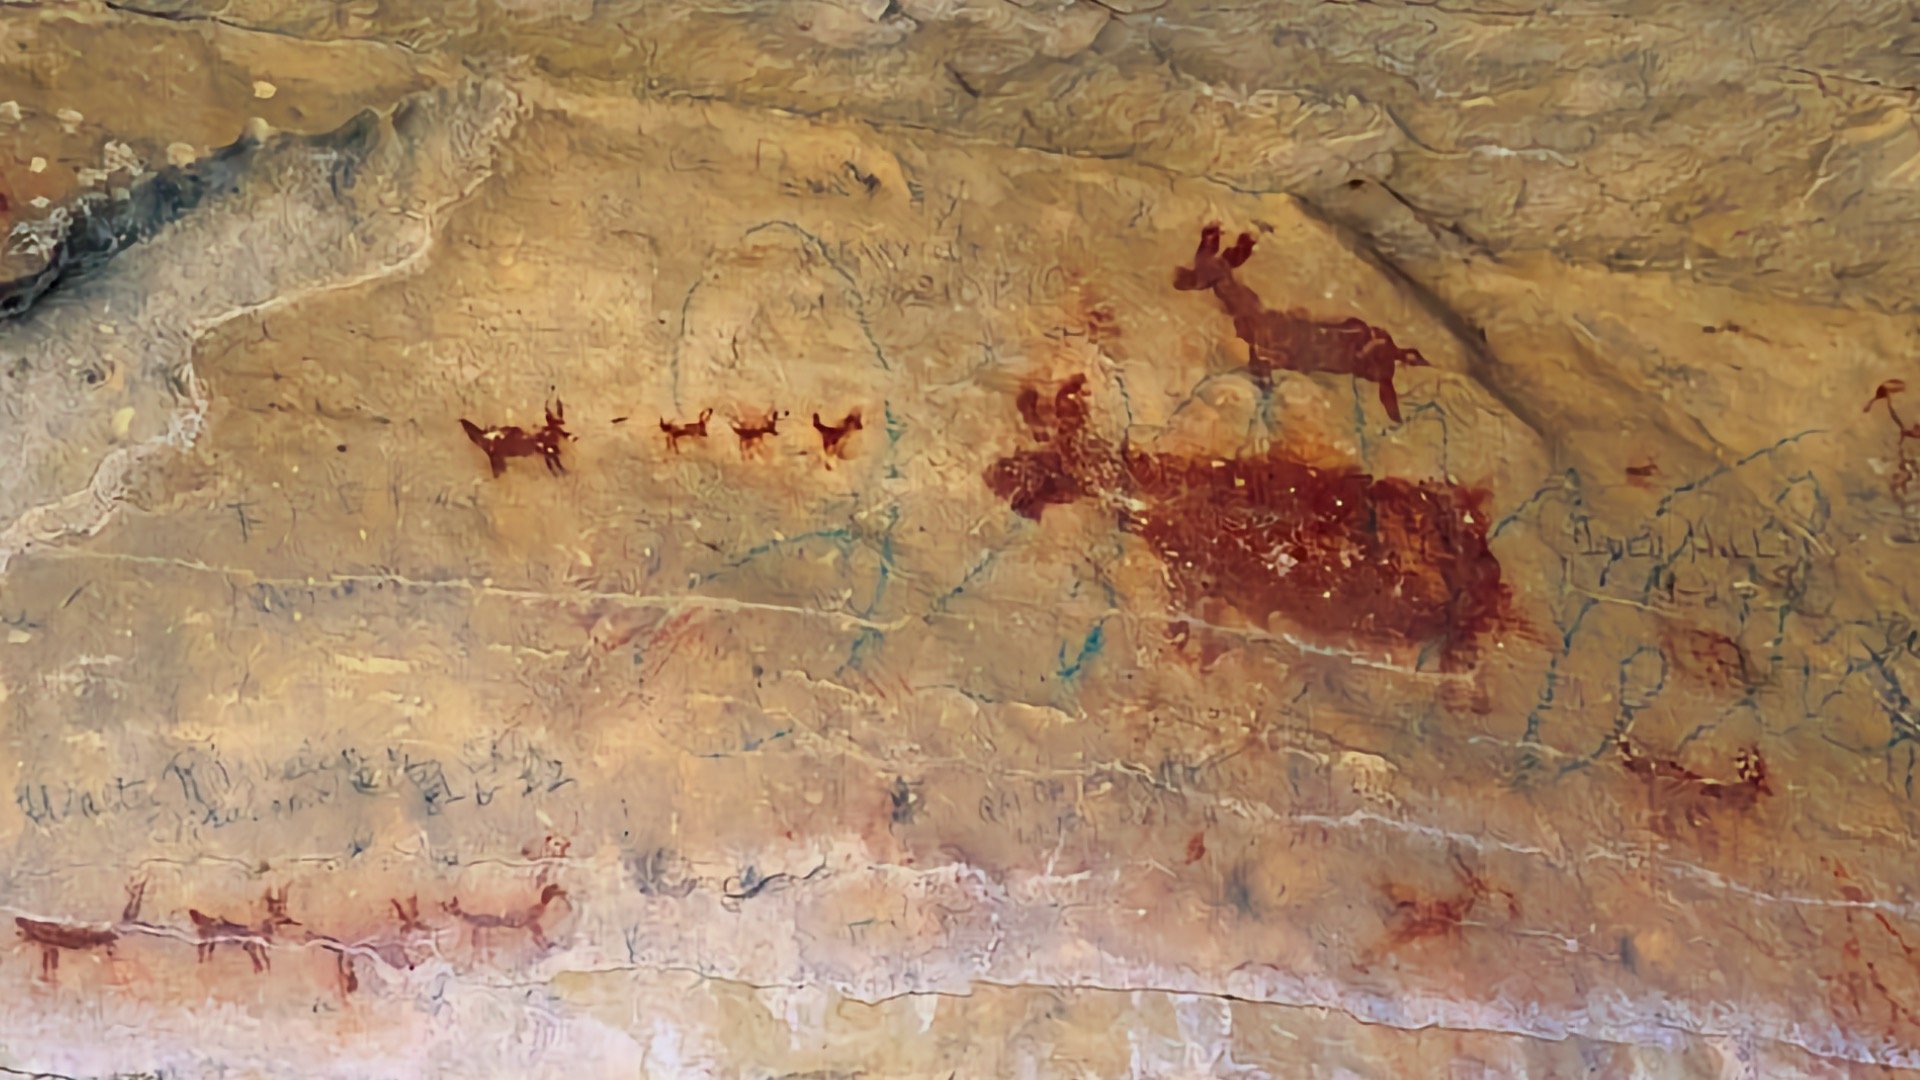
Pictographs = painted, Petroglyphs = carved
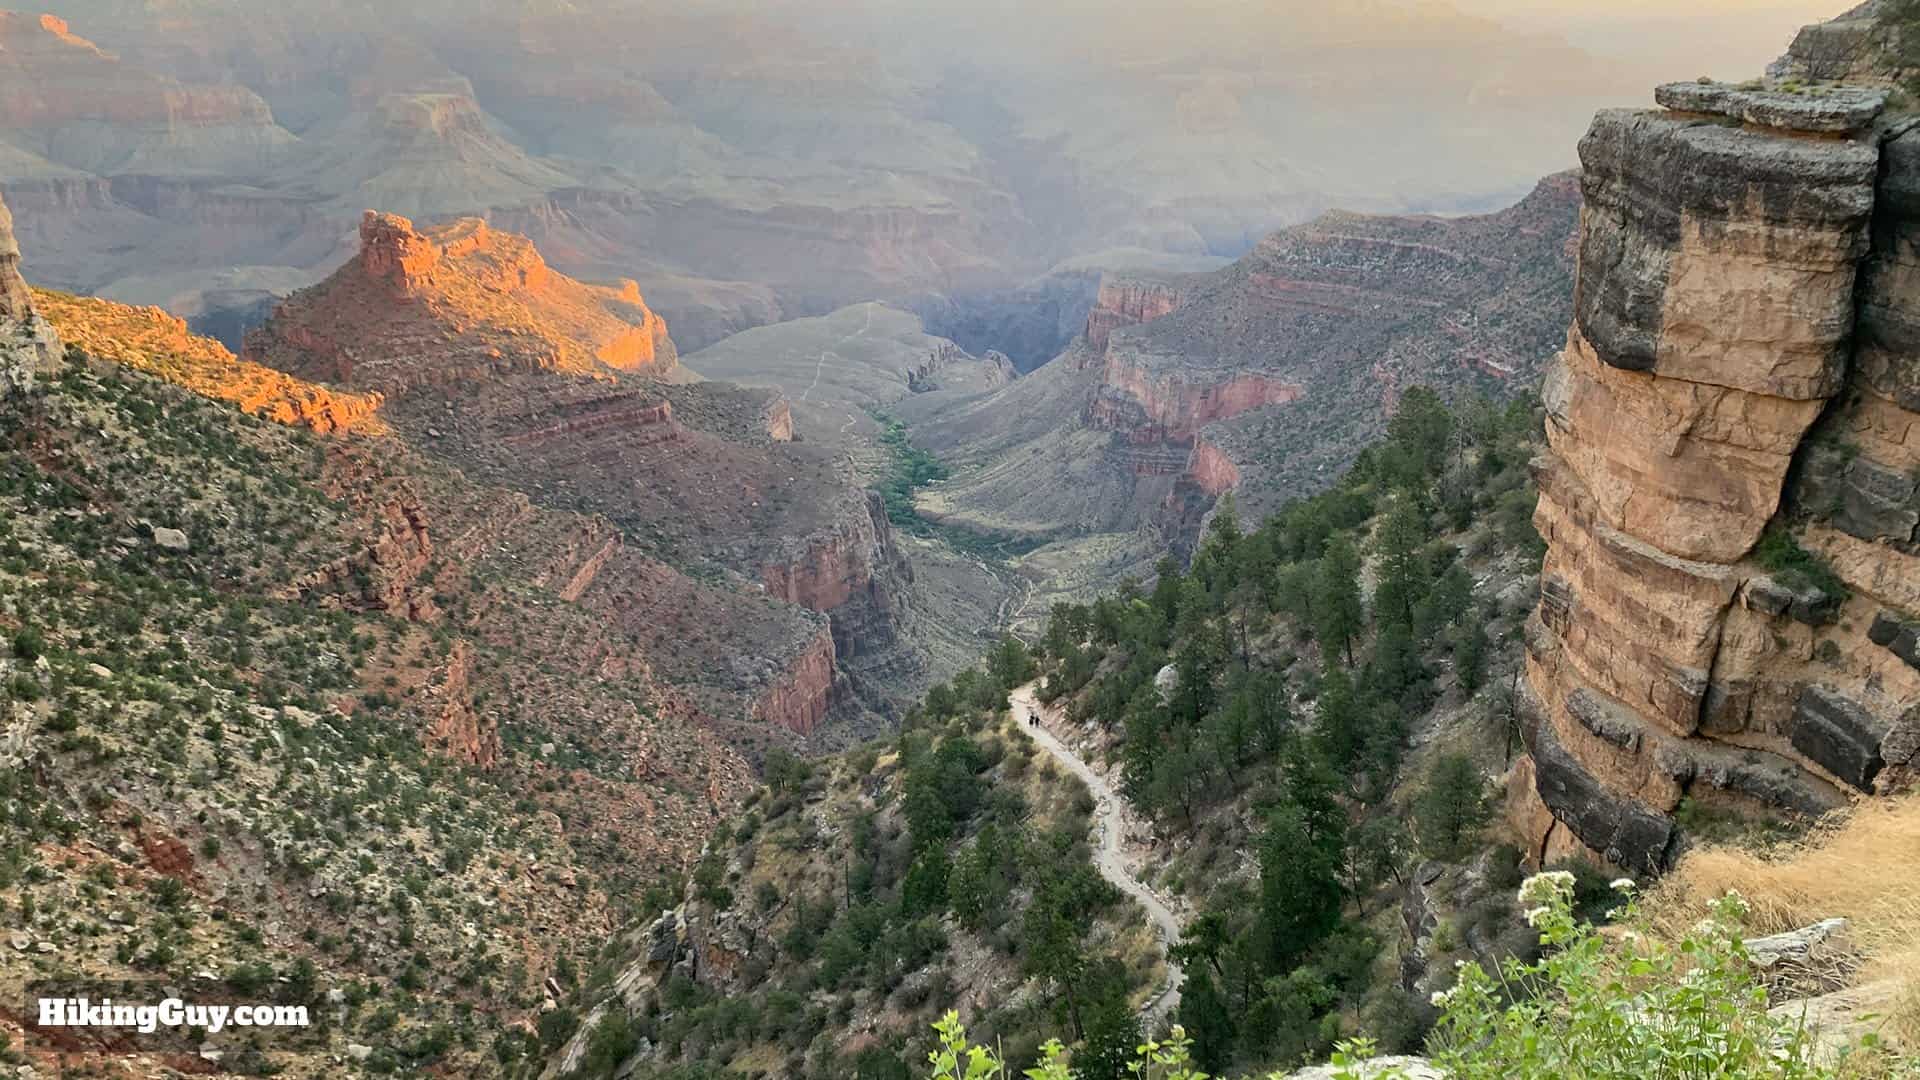
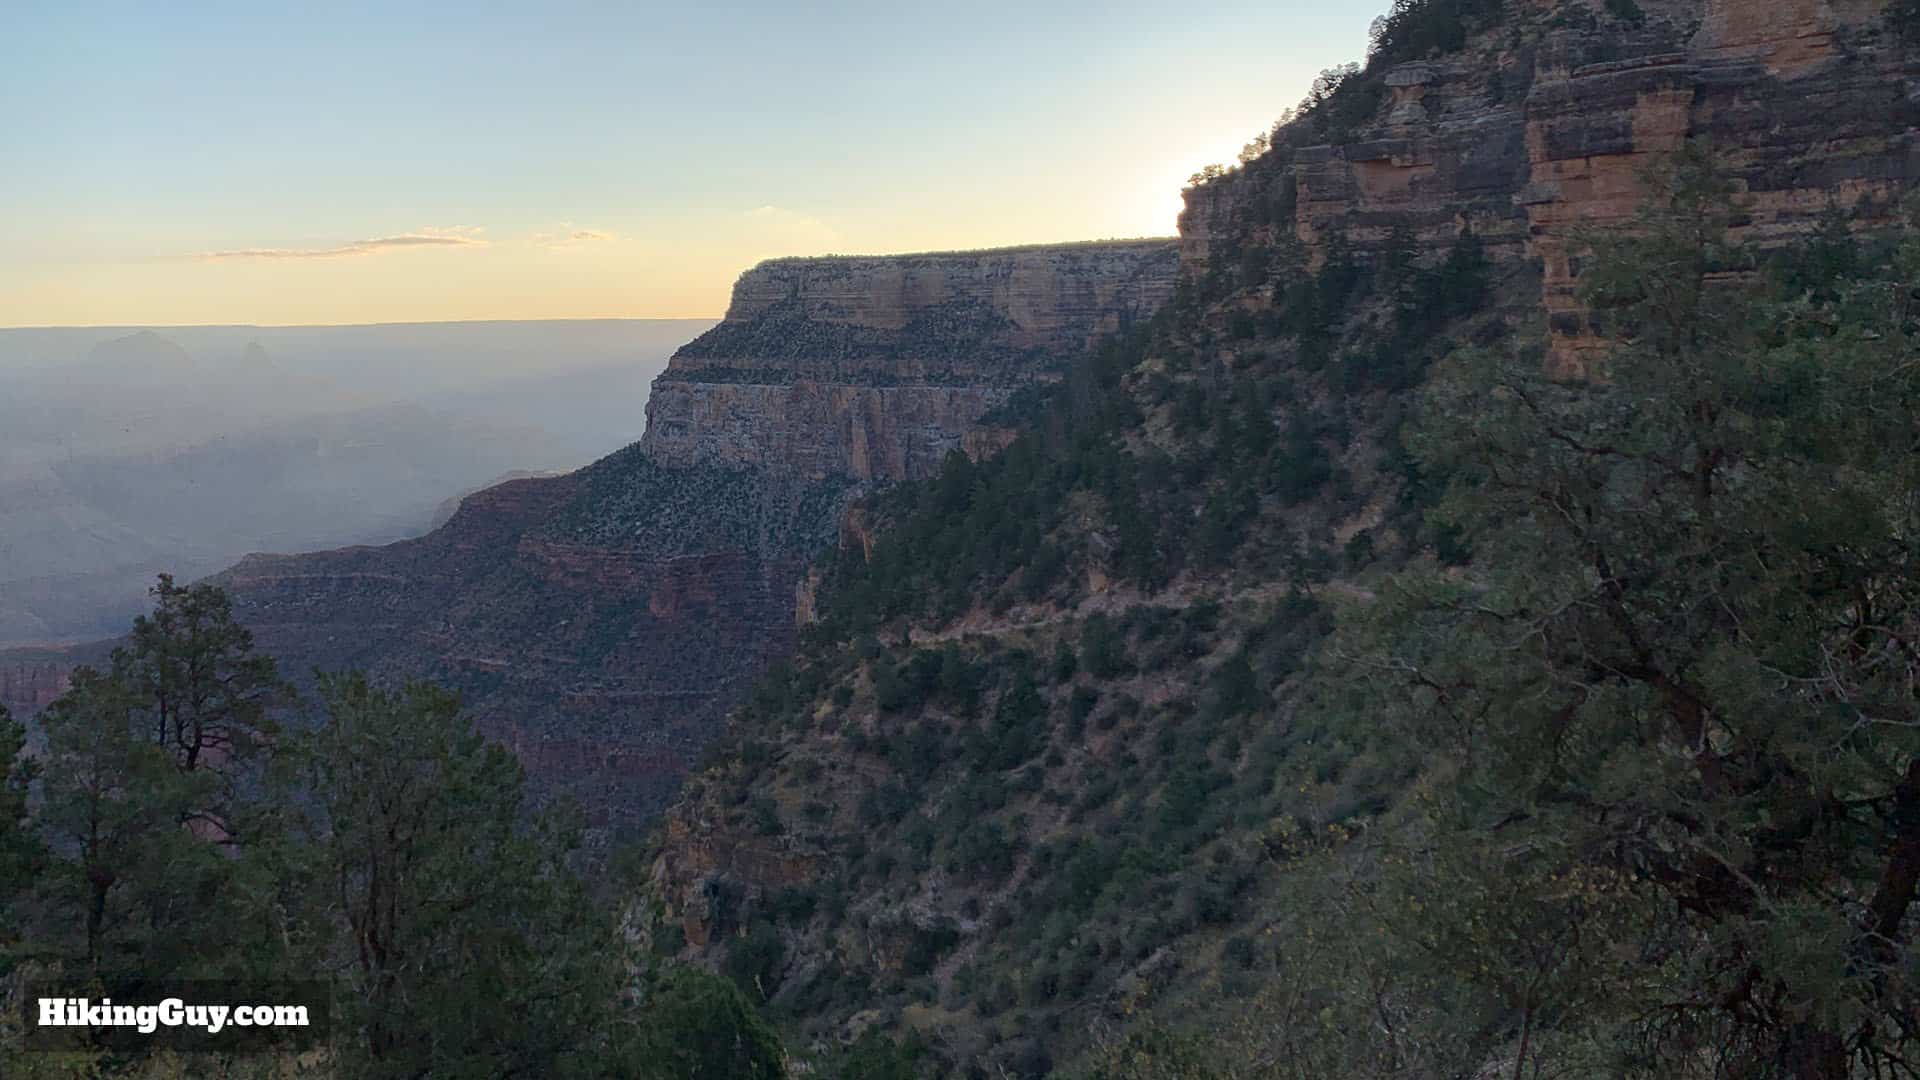
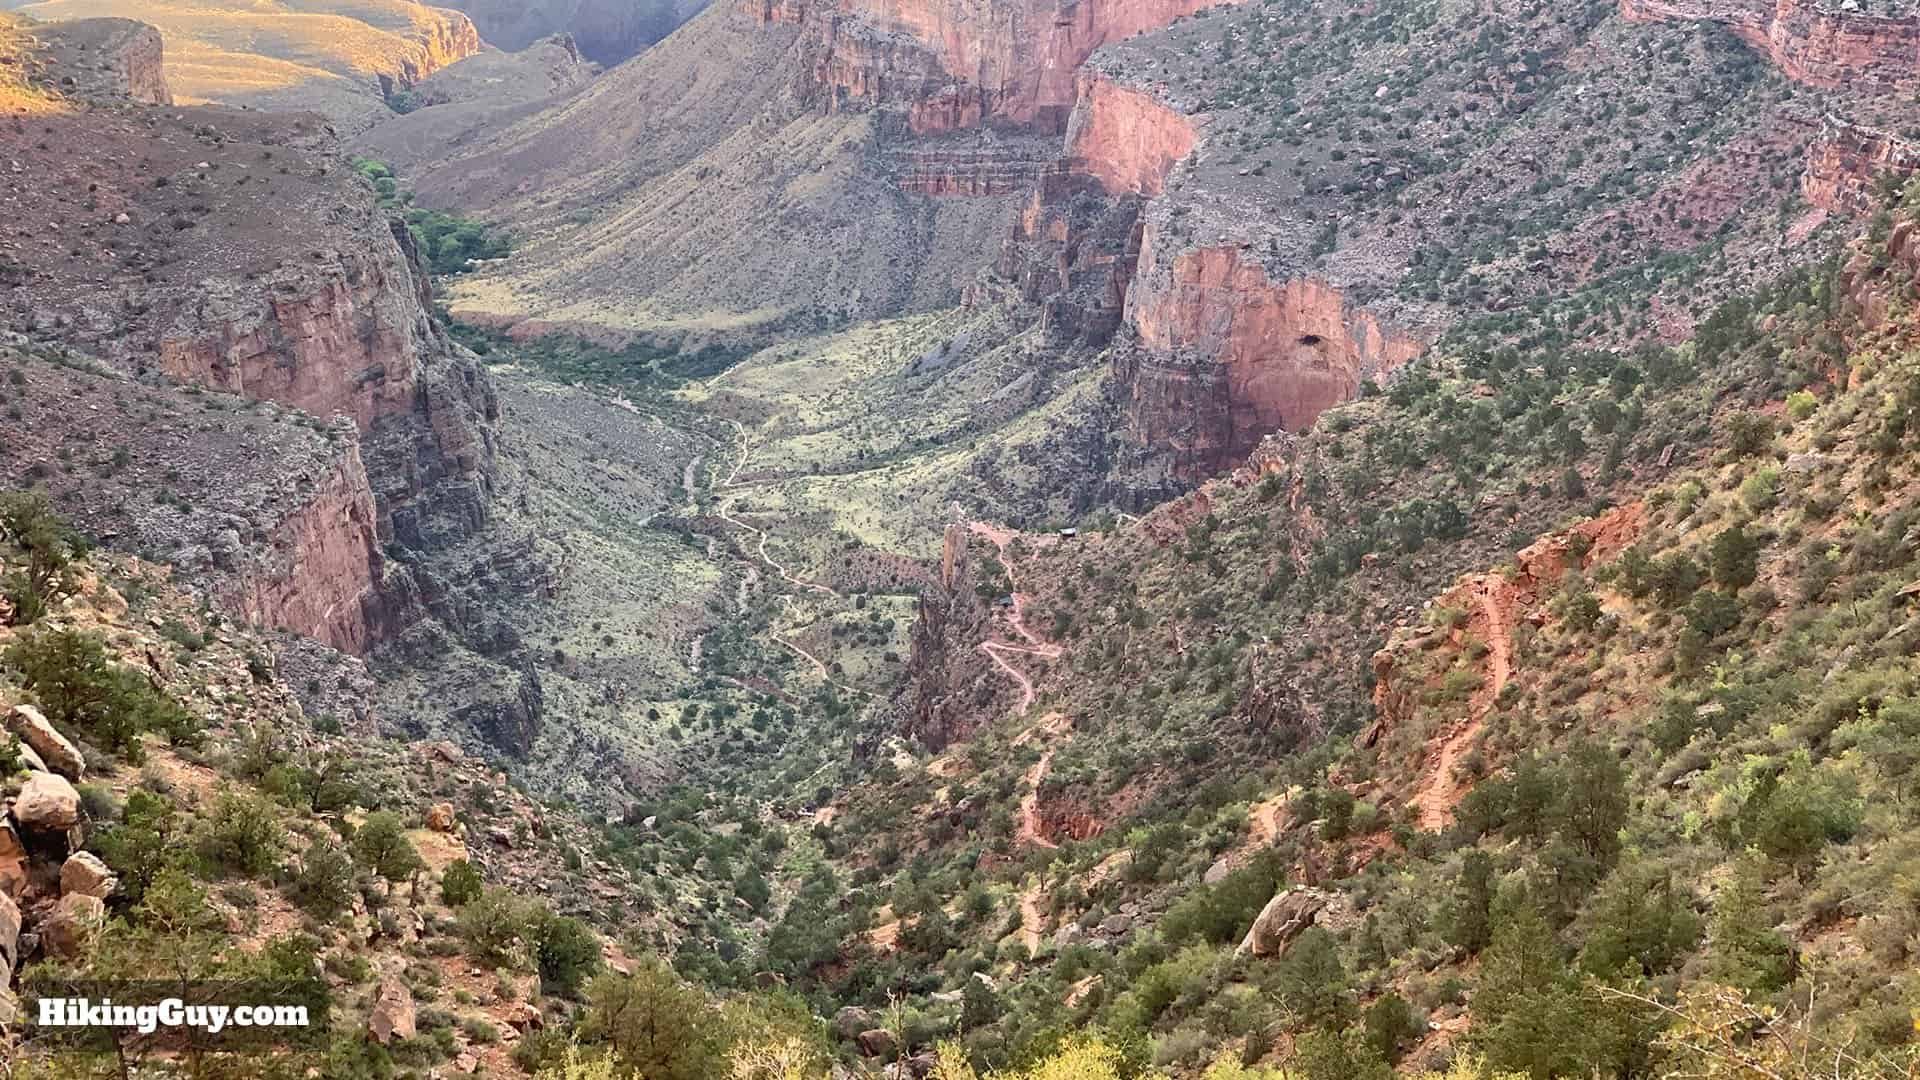
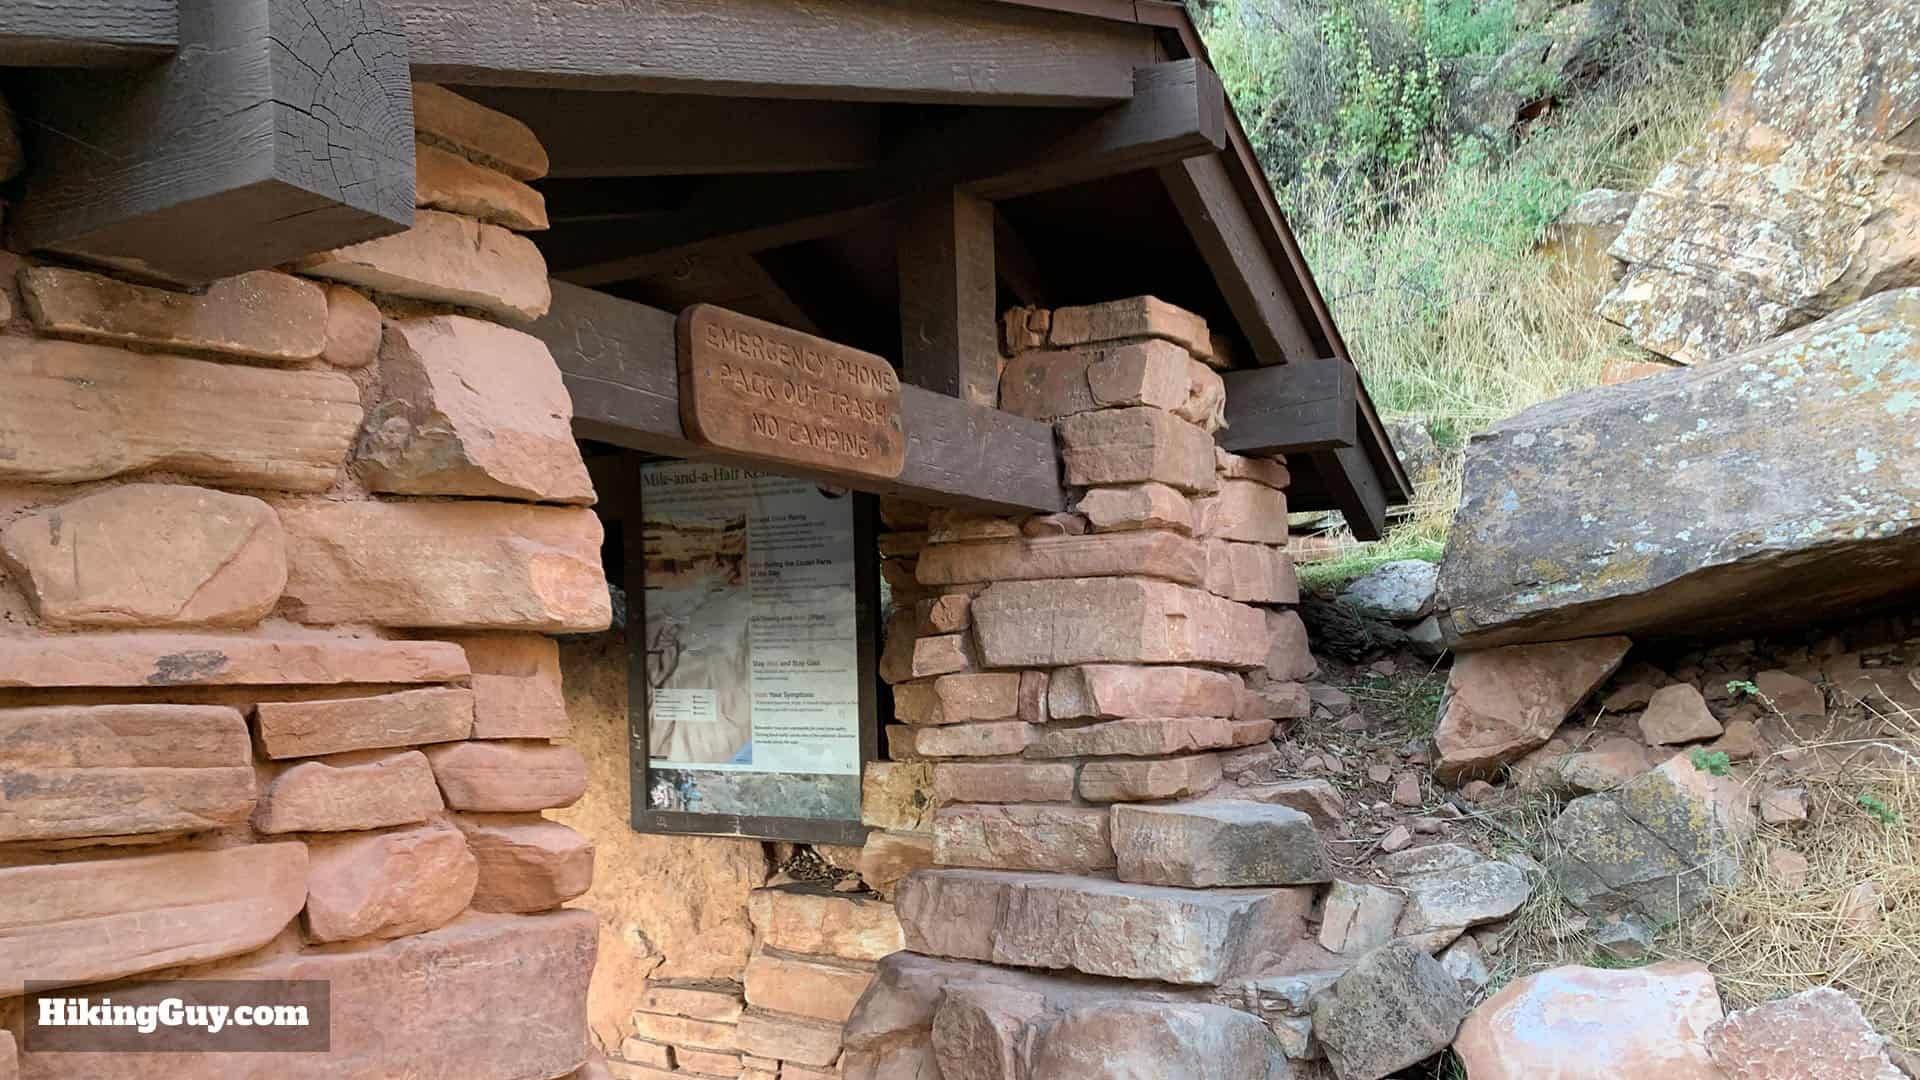
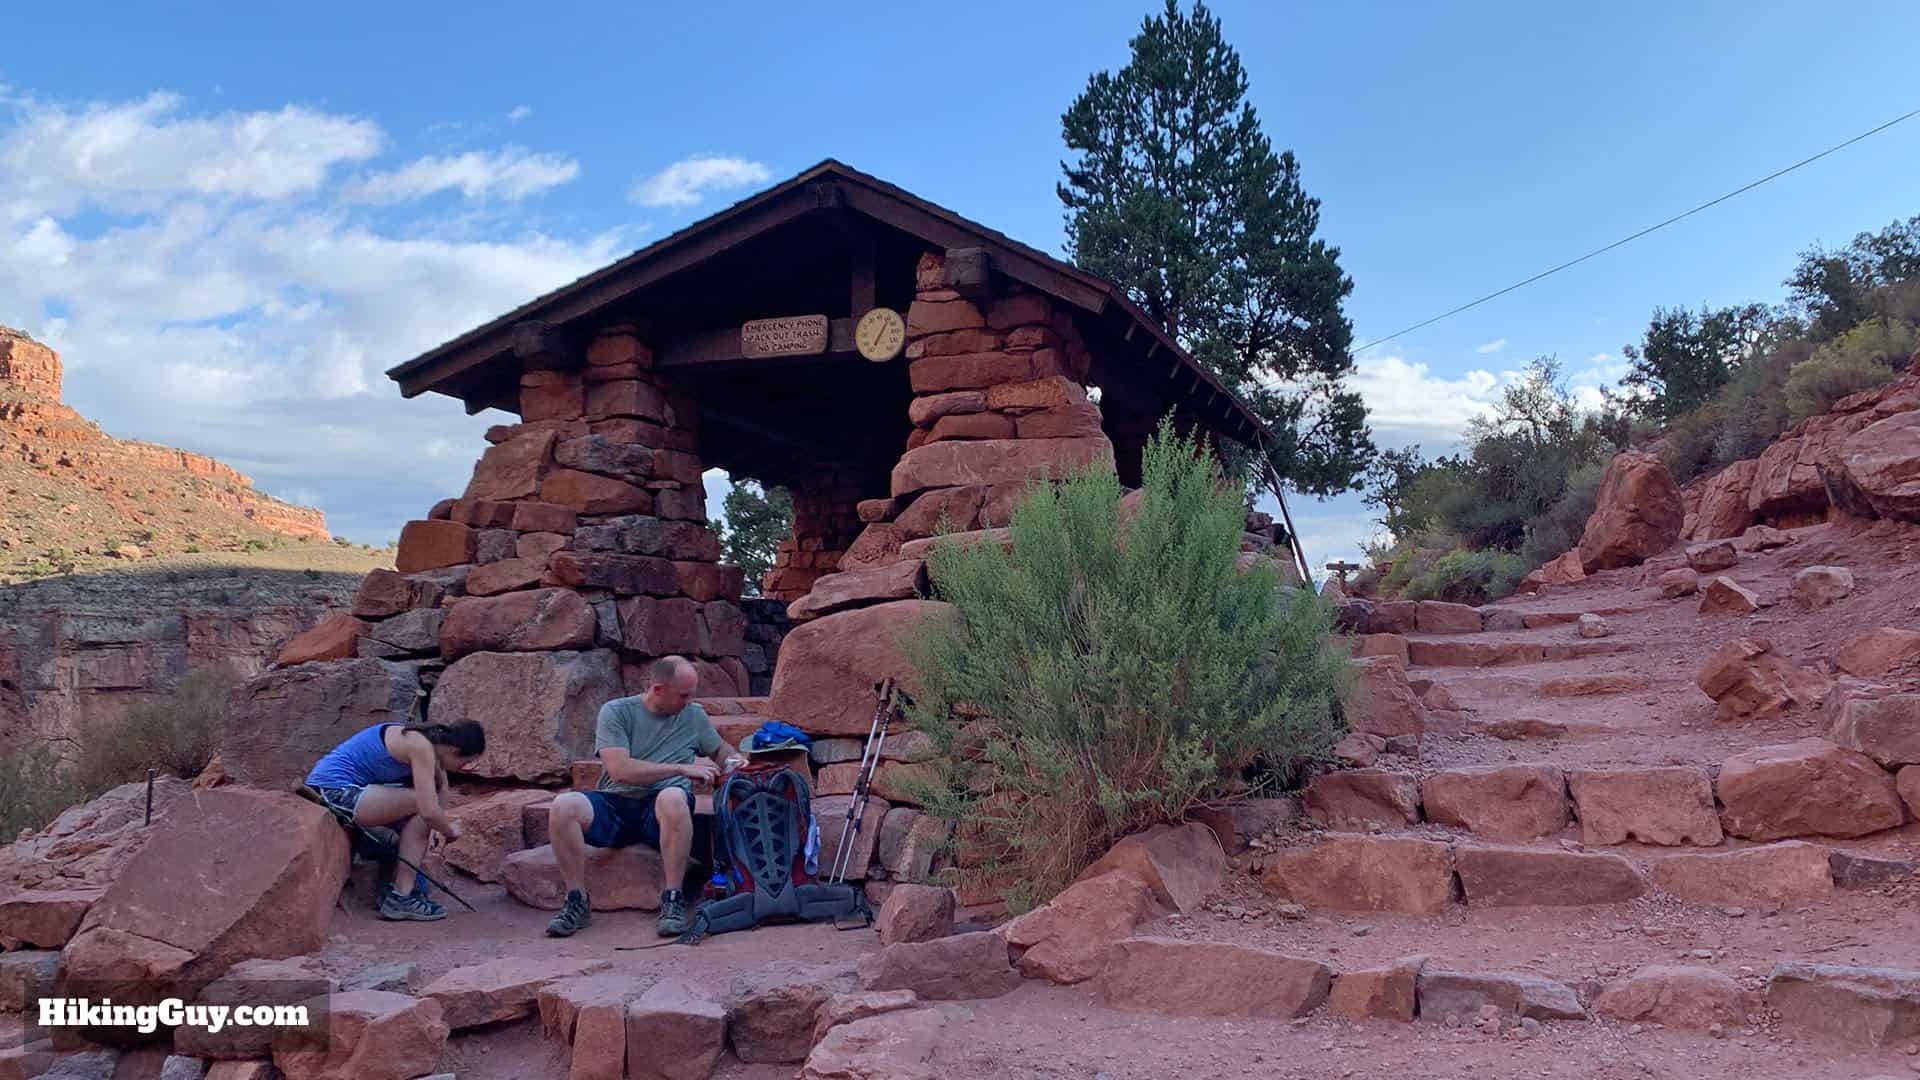
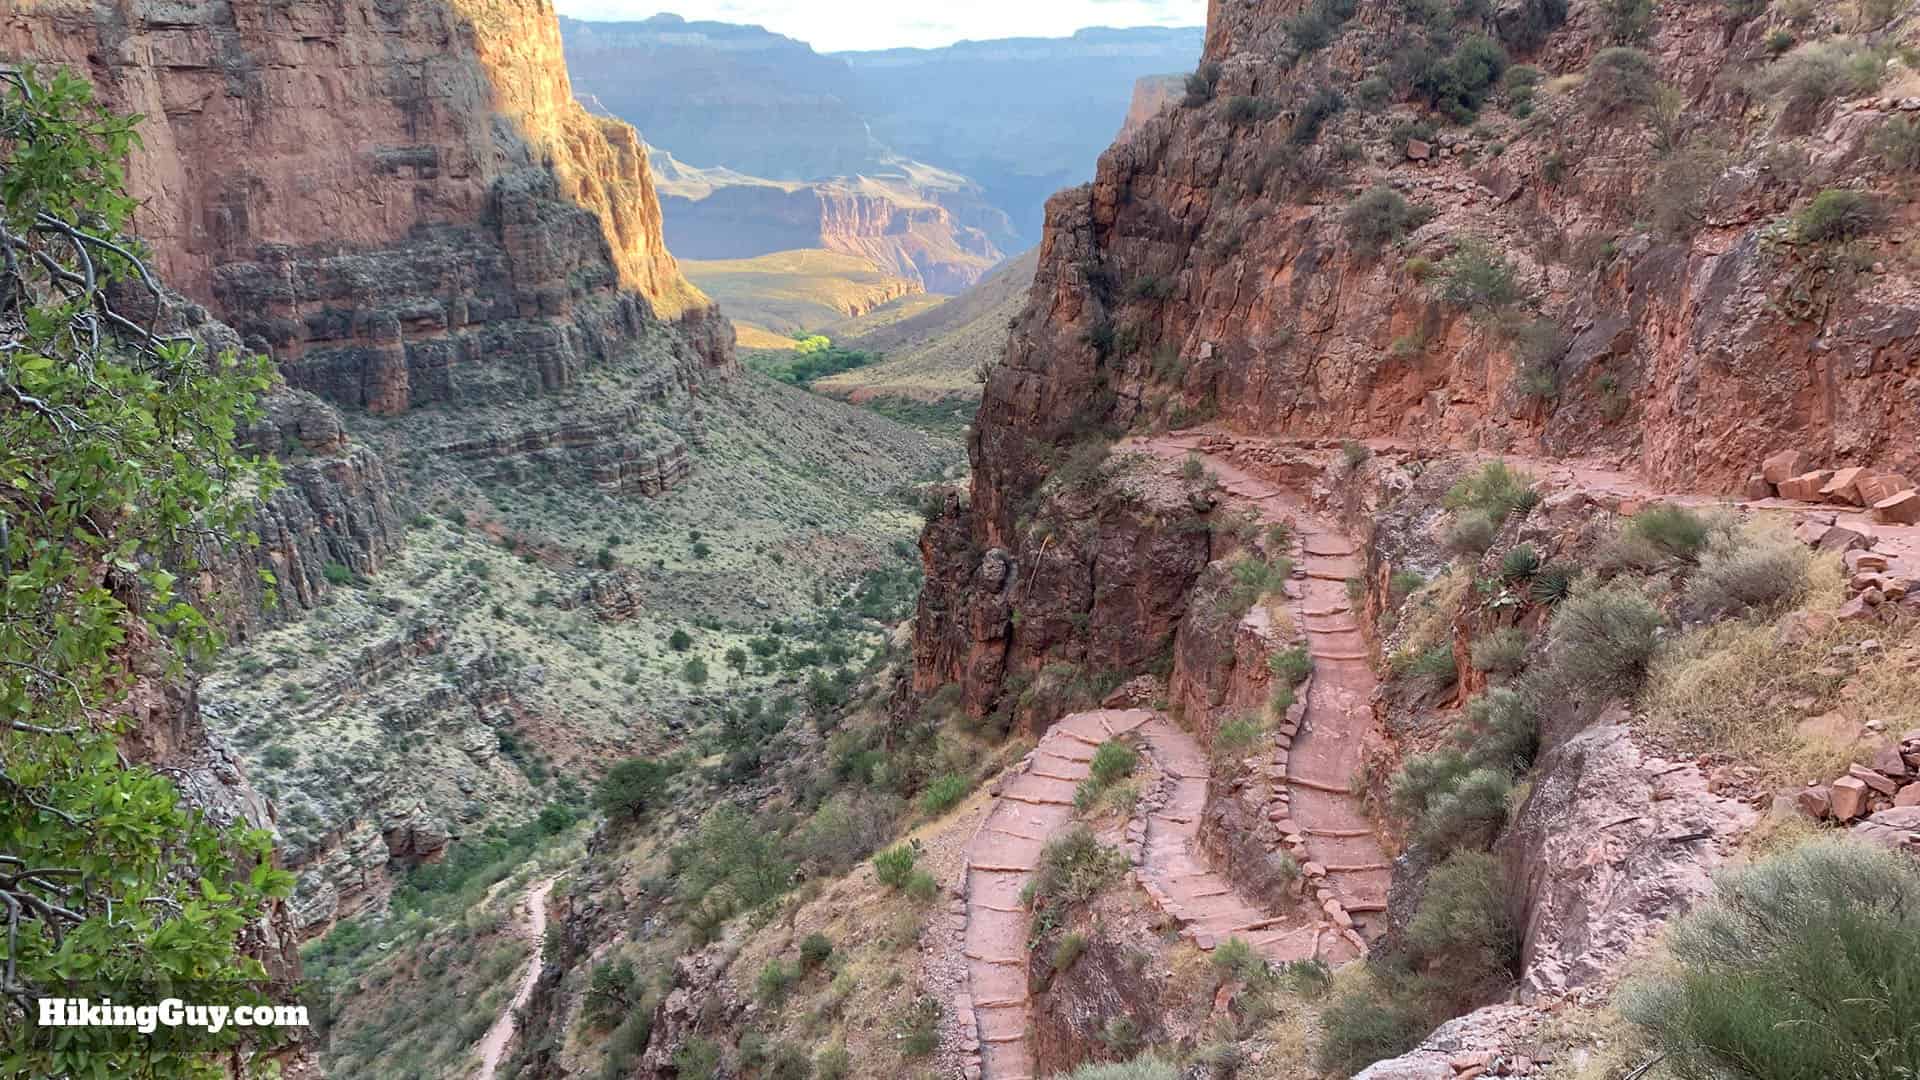
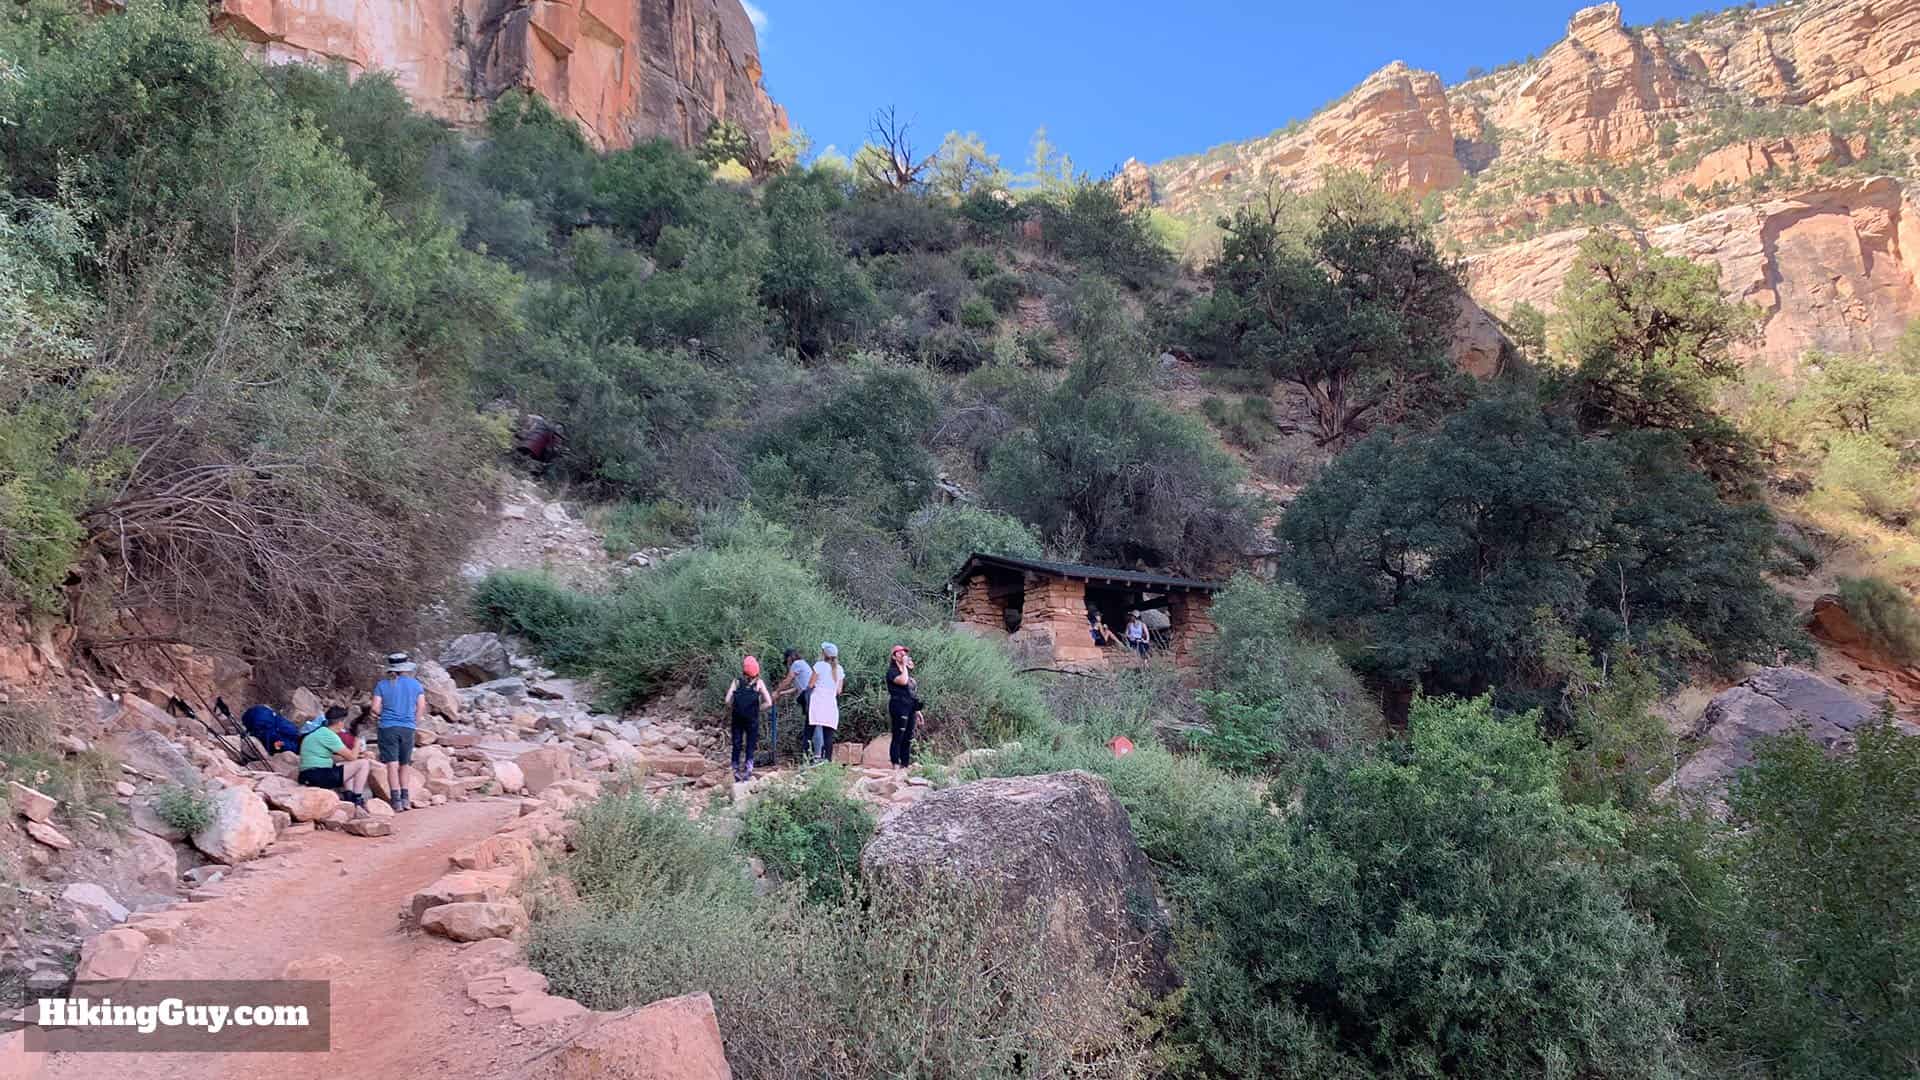
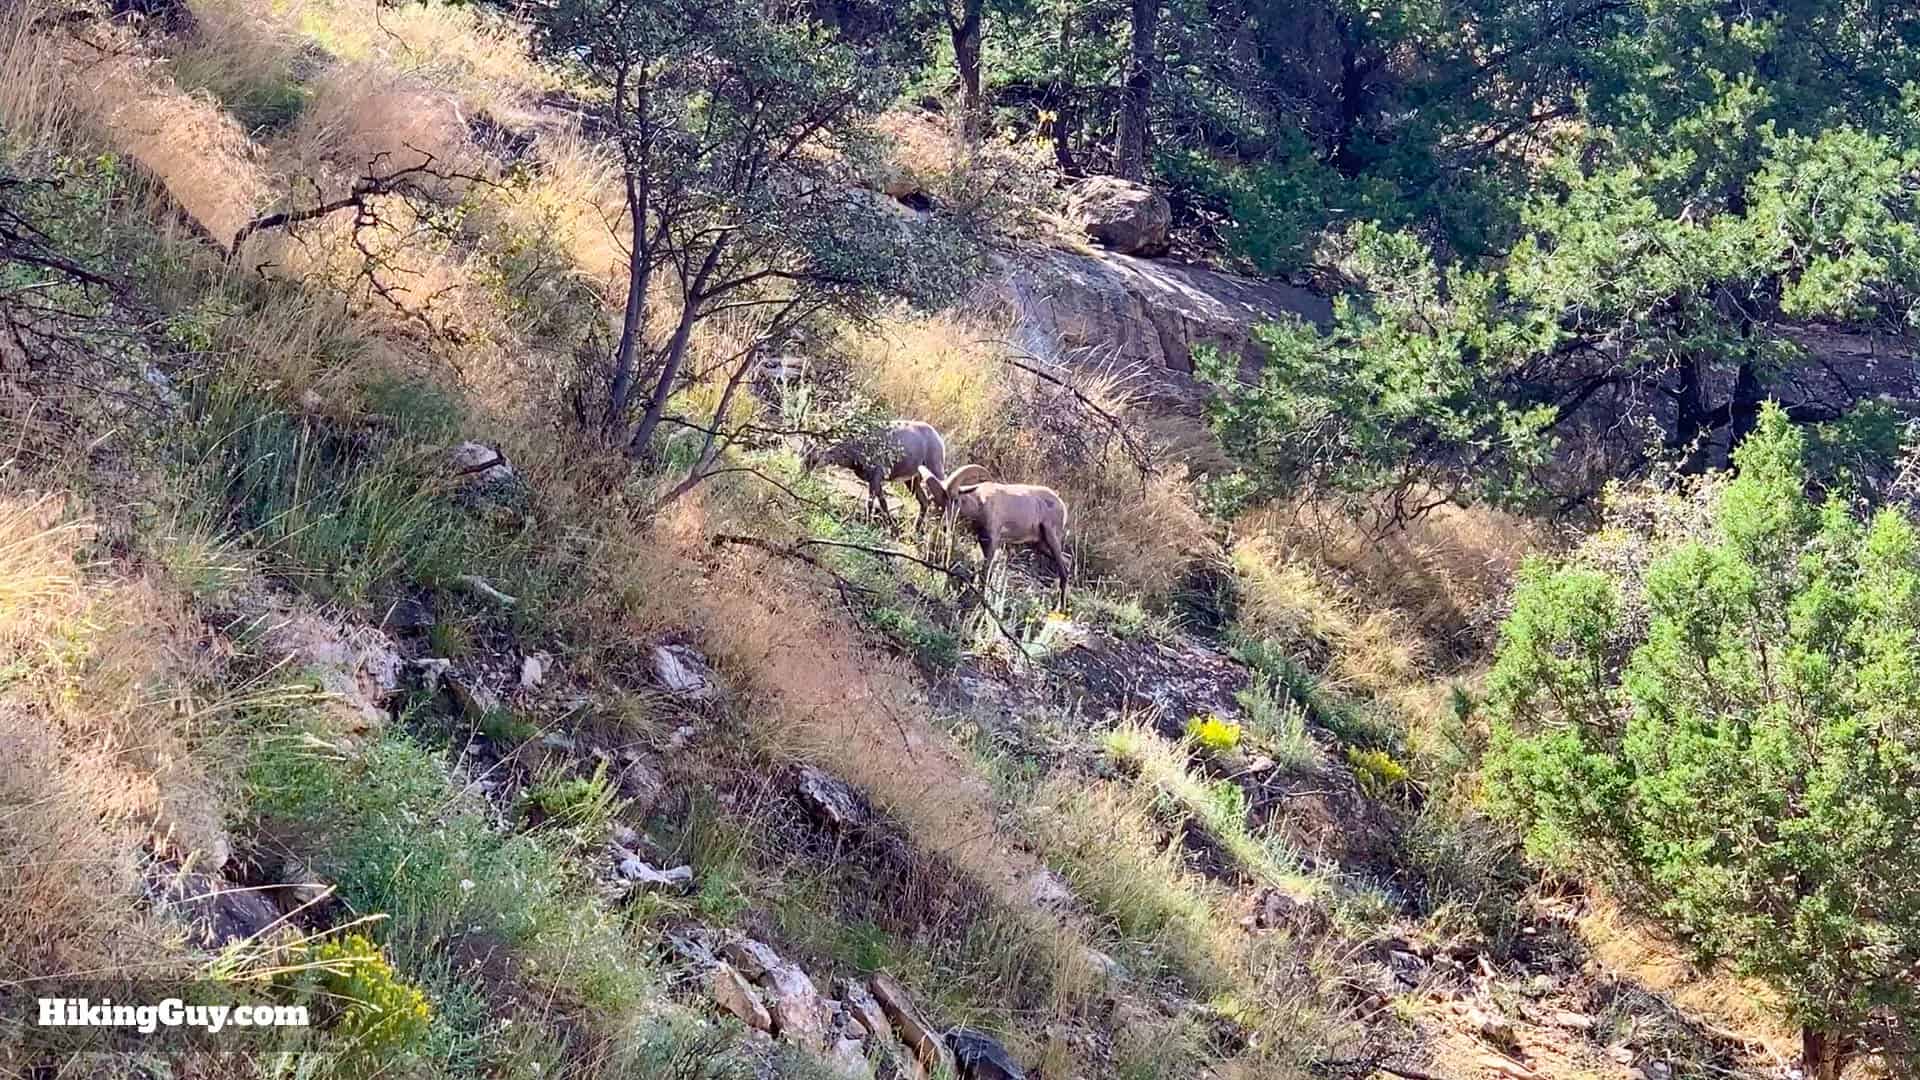
Here's a closeup of the pictrographs. And BTW, it's not uncommon to see the actual mule deer and bighorn off the trail, so keep your eyes open.As you descend you can look down and see the trail unfold beneath you. You can even see the line of the Plateau Point Trail in the distance leading to Plateau Point. Just remember, you have to climb back up this to get out.Follow the main trail and trail signs to continue on the Bright Angel Trail. There are some small (old) trails spurring off Bright Angel at various points. The Bright Angel Trail is always very easy to follow. Just look for the thousands of footprints.There are around dozens of switchbacks between the trailhead and Havasupai Gardens. Sometimes they have stairs built in to make them easier to climb.After about a mile in you'll start to notice that the rock on either side of the trail doesn't align. That's because you're going down the Bright Angel fault line. One side is getting pushed up and the other side down.At about 0.75 miles you reach the second tunnel.The trail is easy to follow and continues downhill.You'll be able to see down below to Havasupai Gardens, the green patch where the trail levels out.At 1.5 miles you'll (appropriately) start to see the 1.5 Mile Resthouse in the distance.The actual rest-house is a small stone hut to your right up the stairs.Once up the stairs you'll be at the resthouse.
These rest houses were built in 1935-1936 by the Civilian Conservation Corps (CCC).
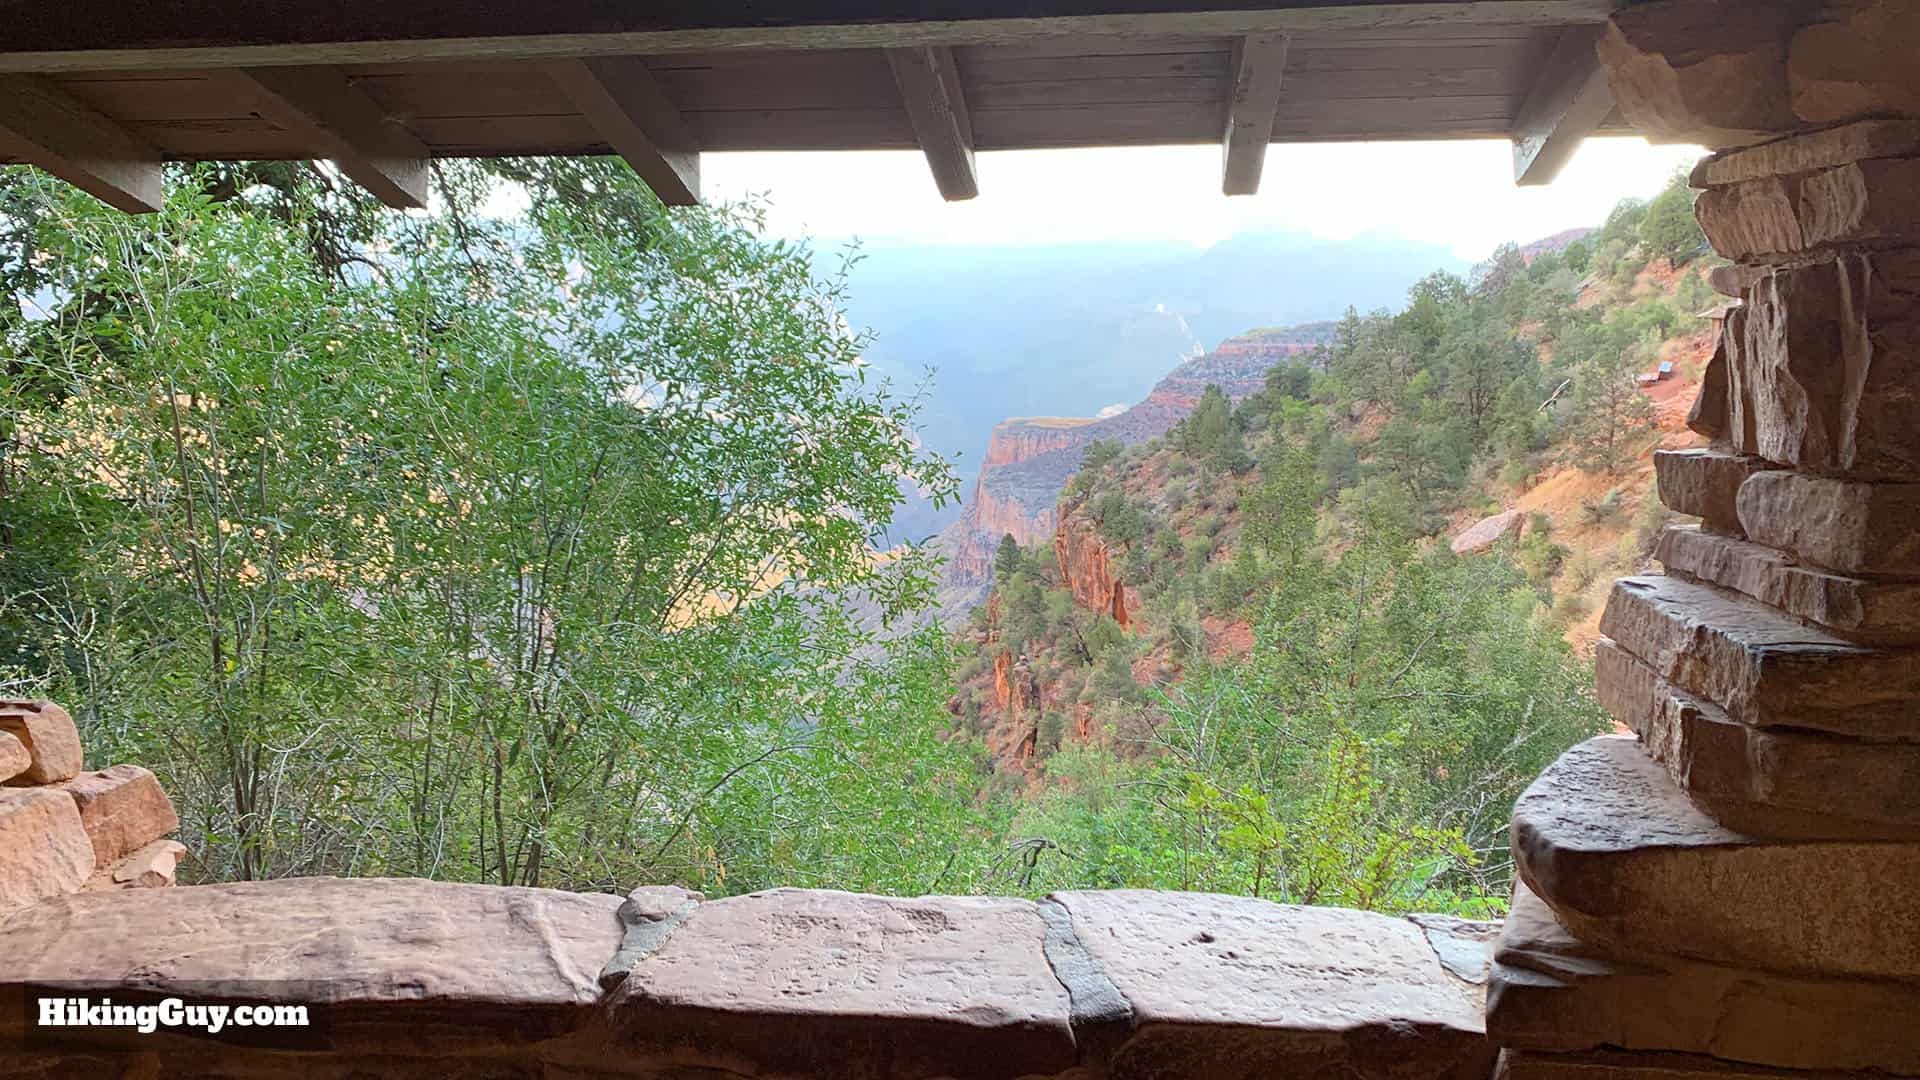
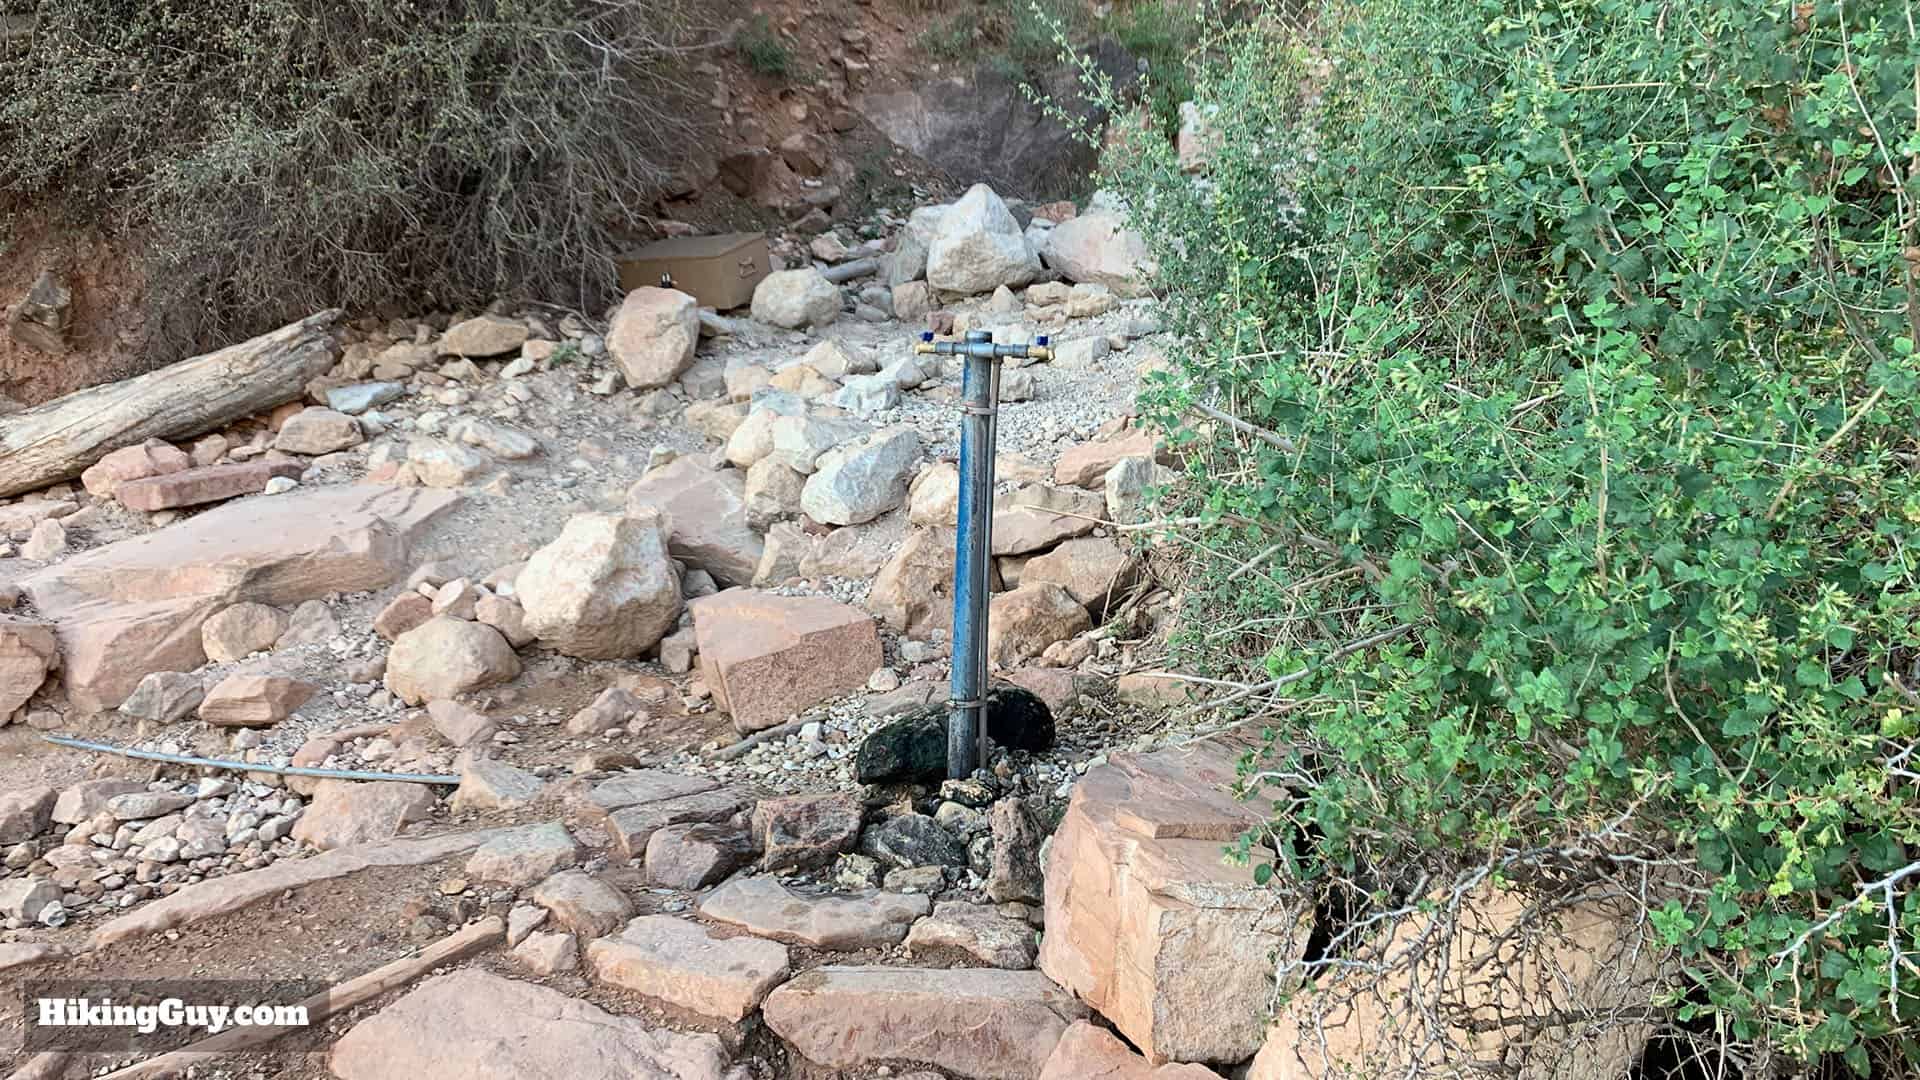
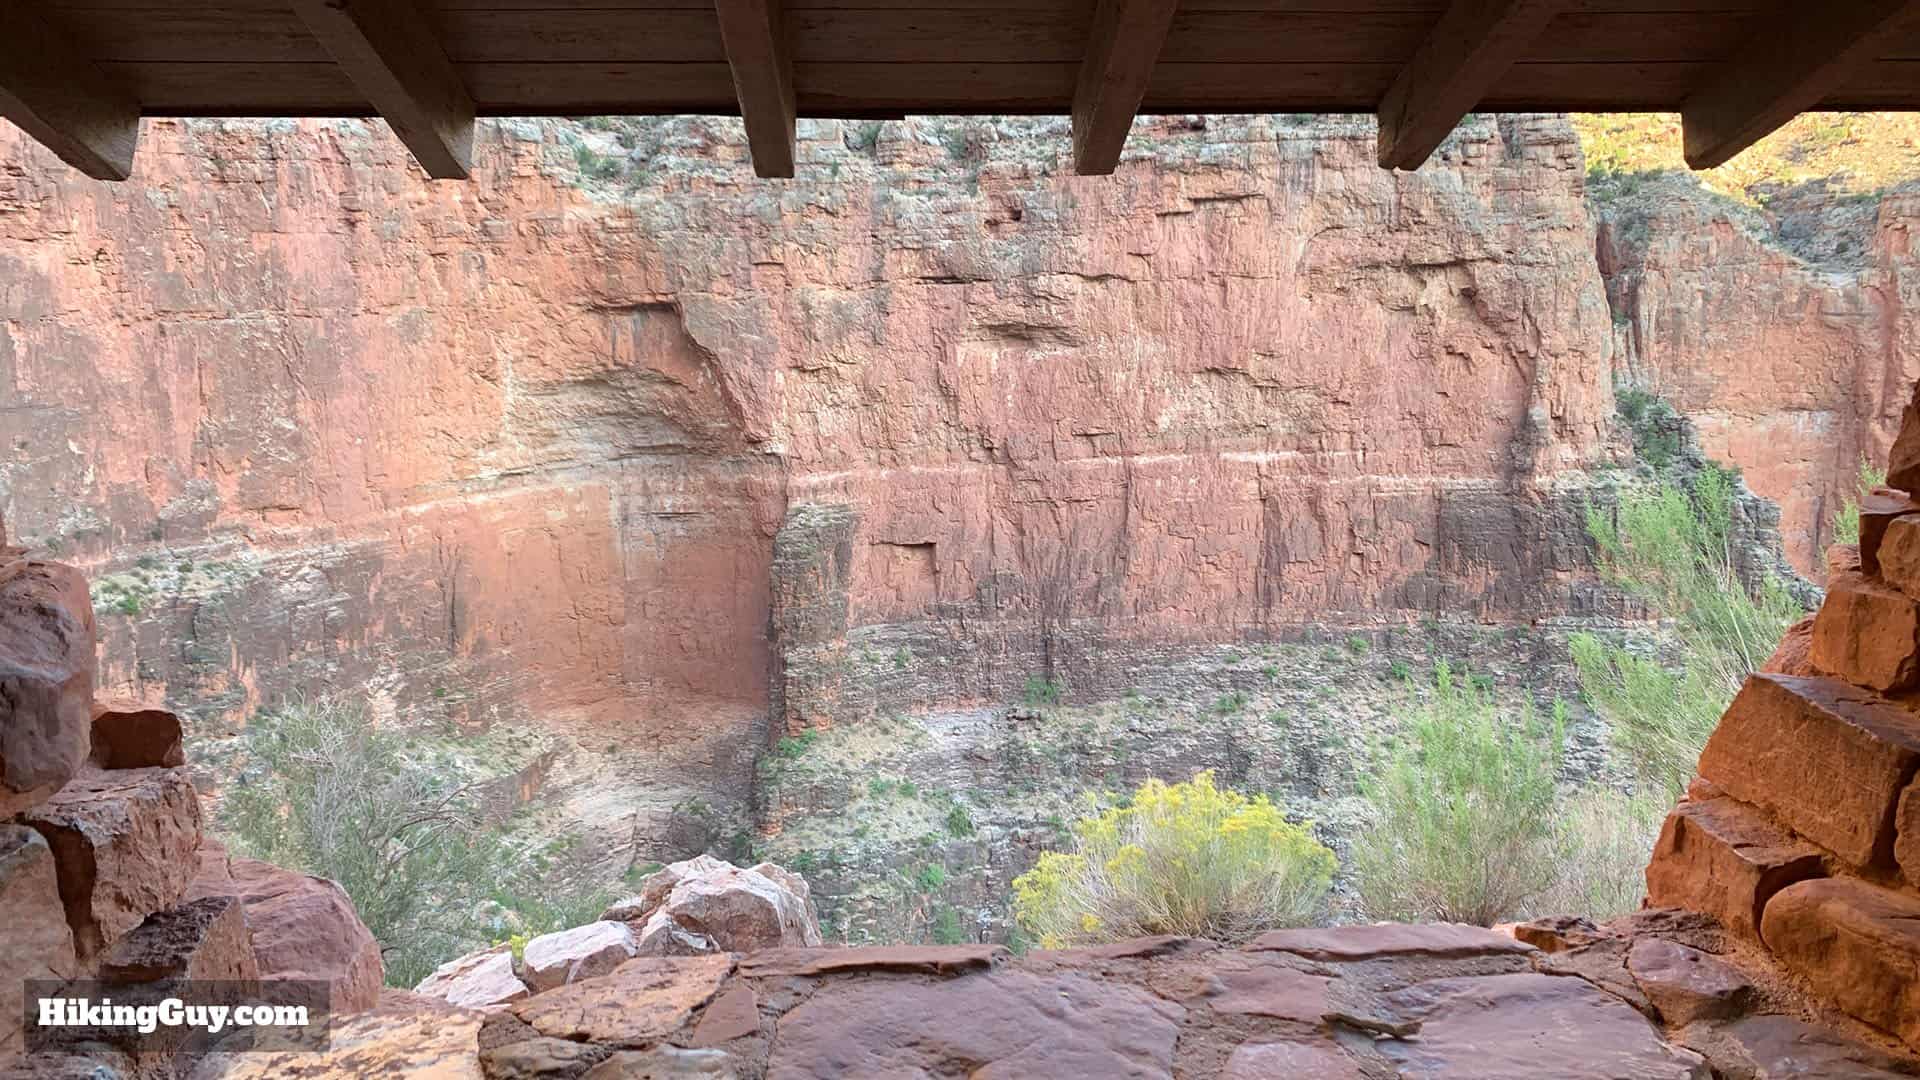
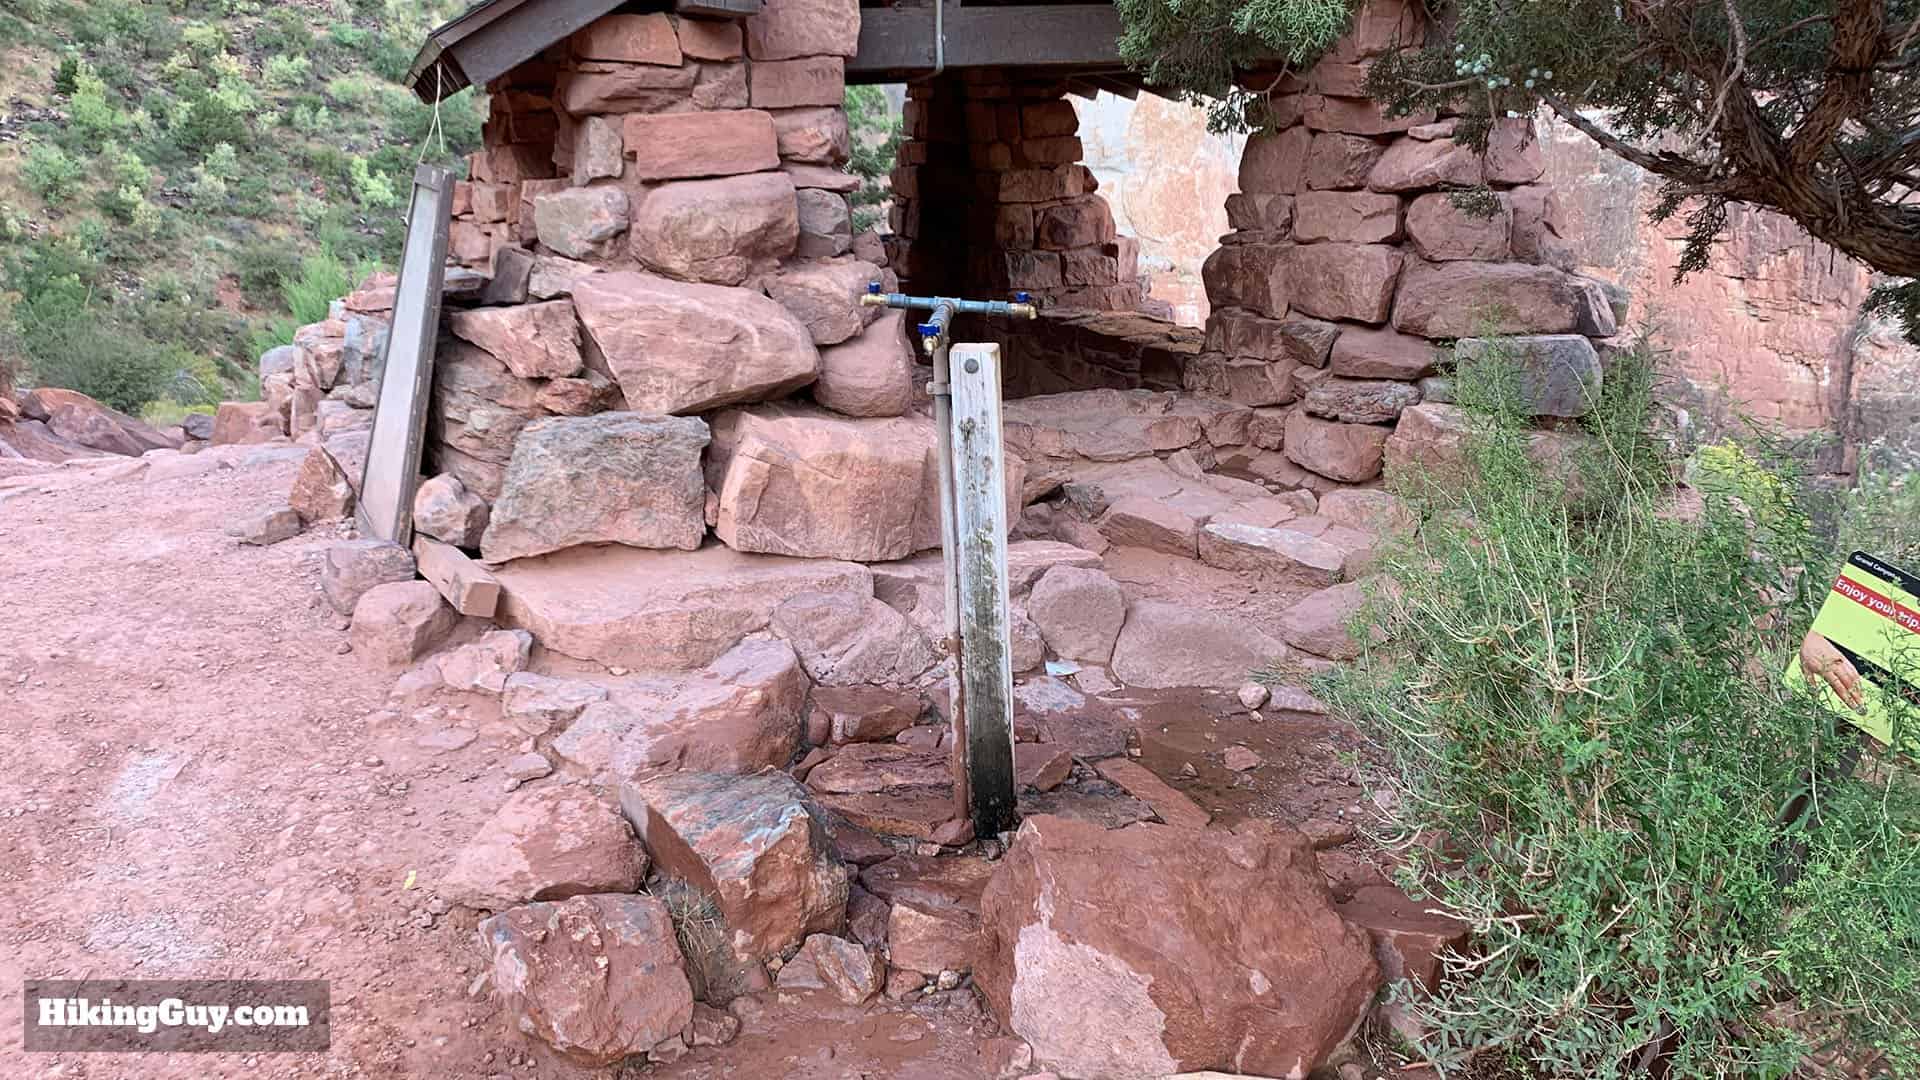
The resthouse is small but offers views and refuge from weather.Just past the resthouse is a water spigot where you can refill.
Hiking to 3 Mile Resthouse
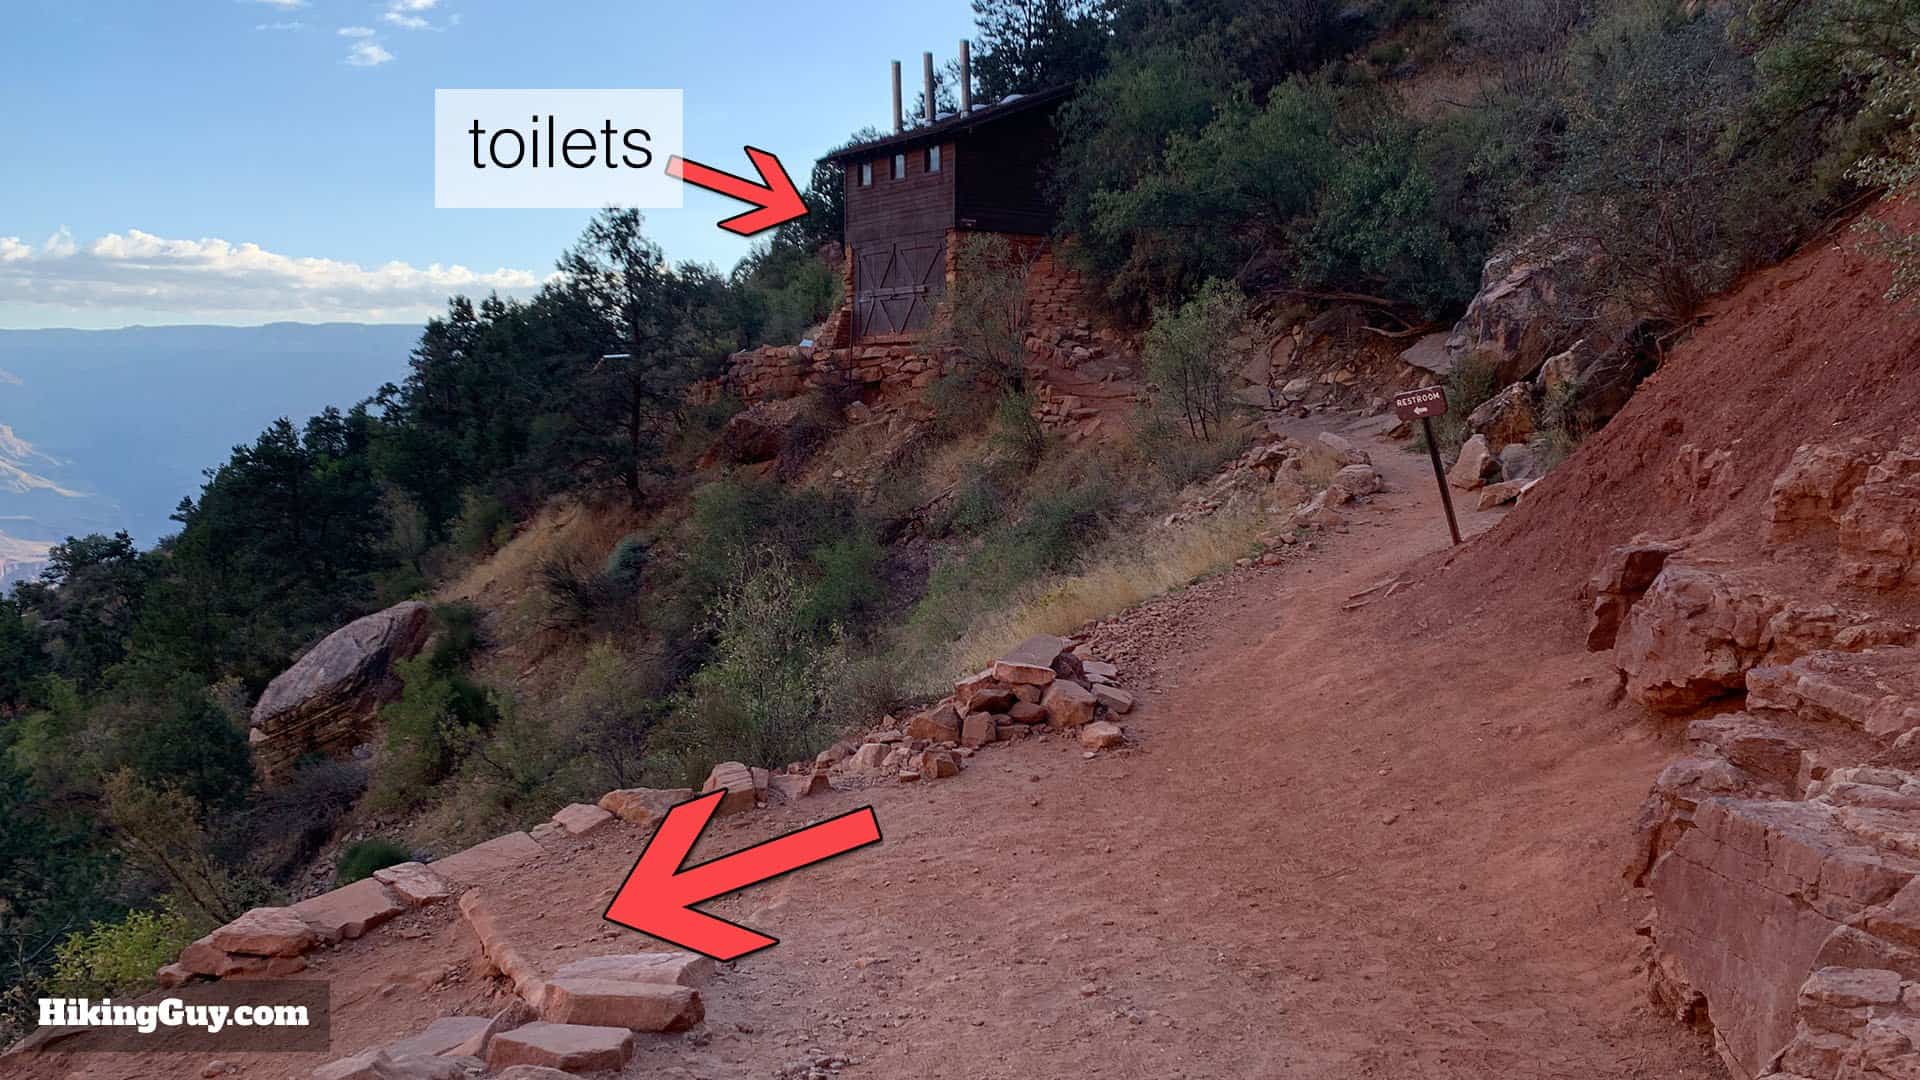
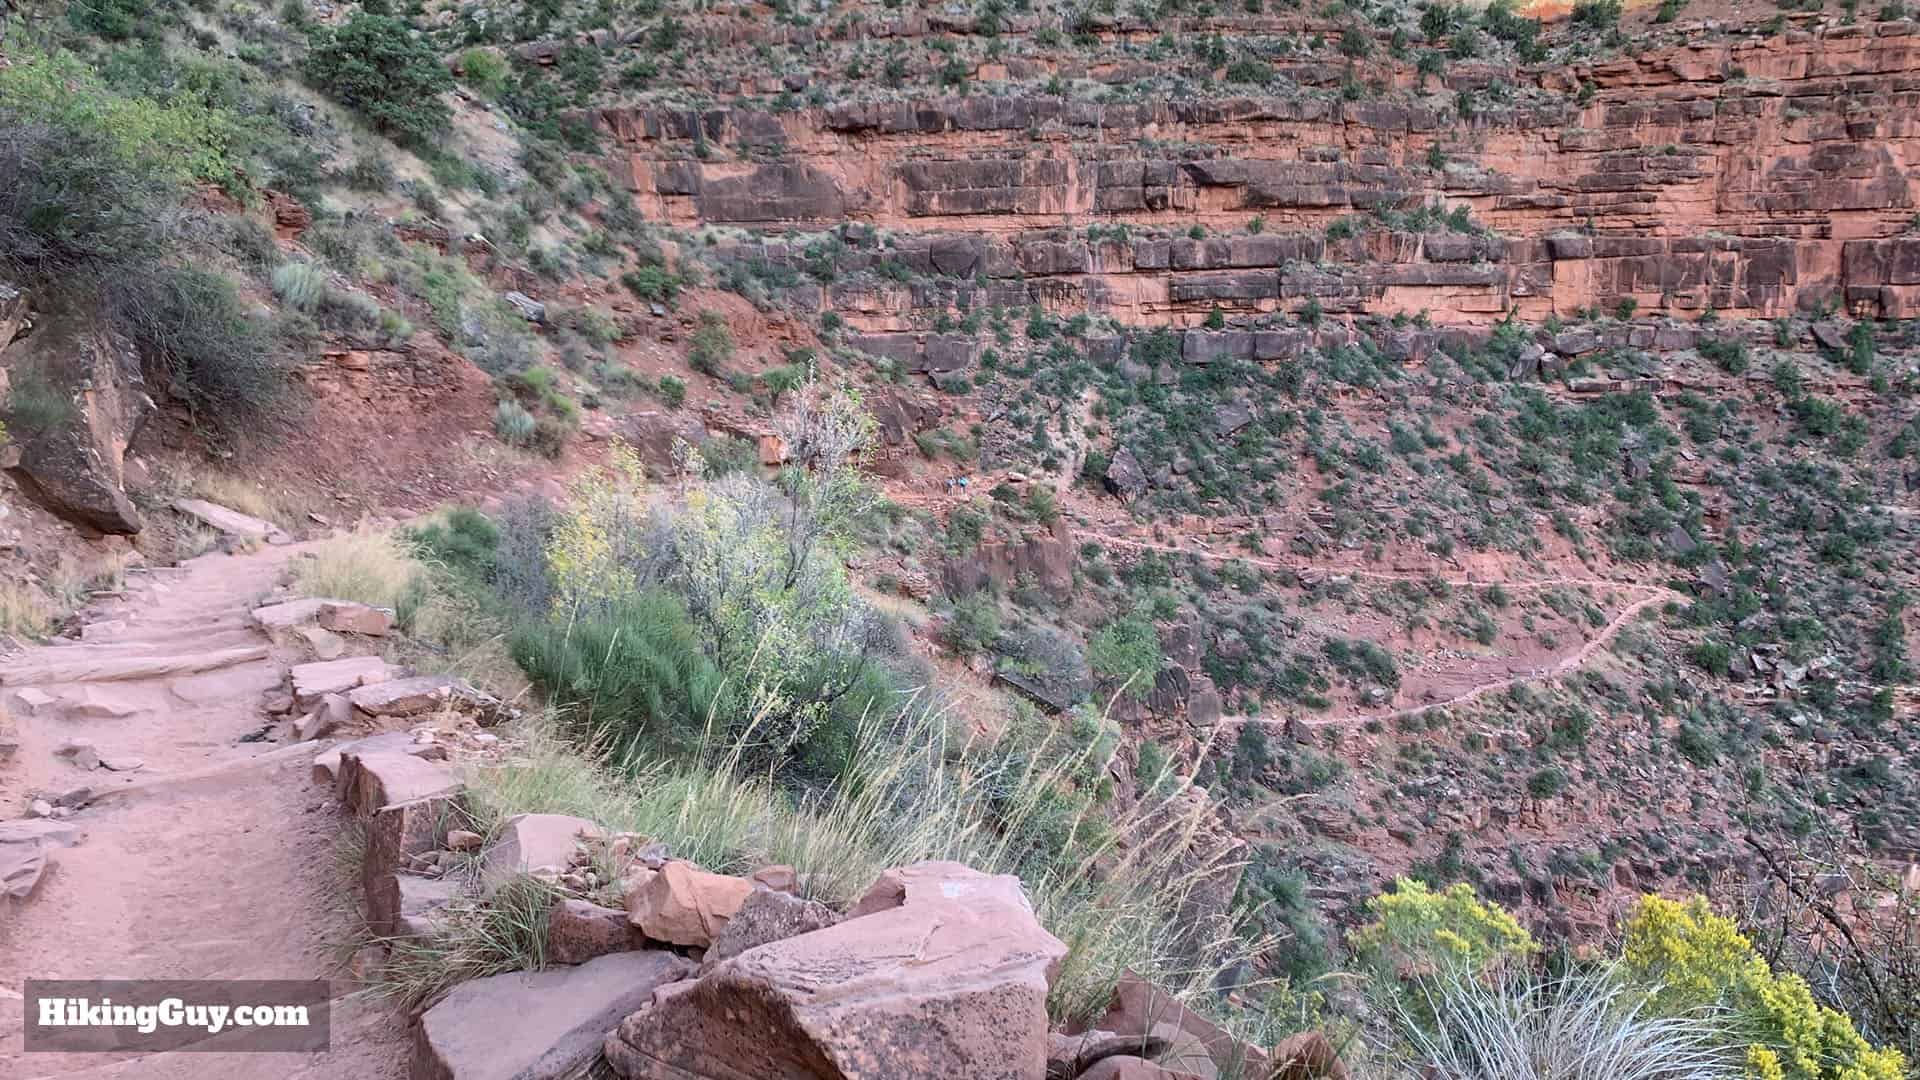
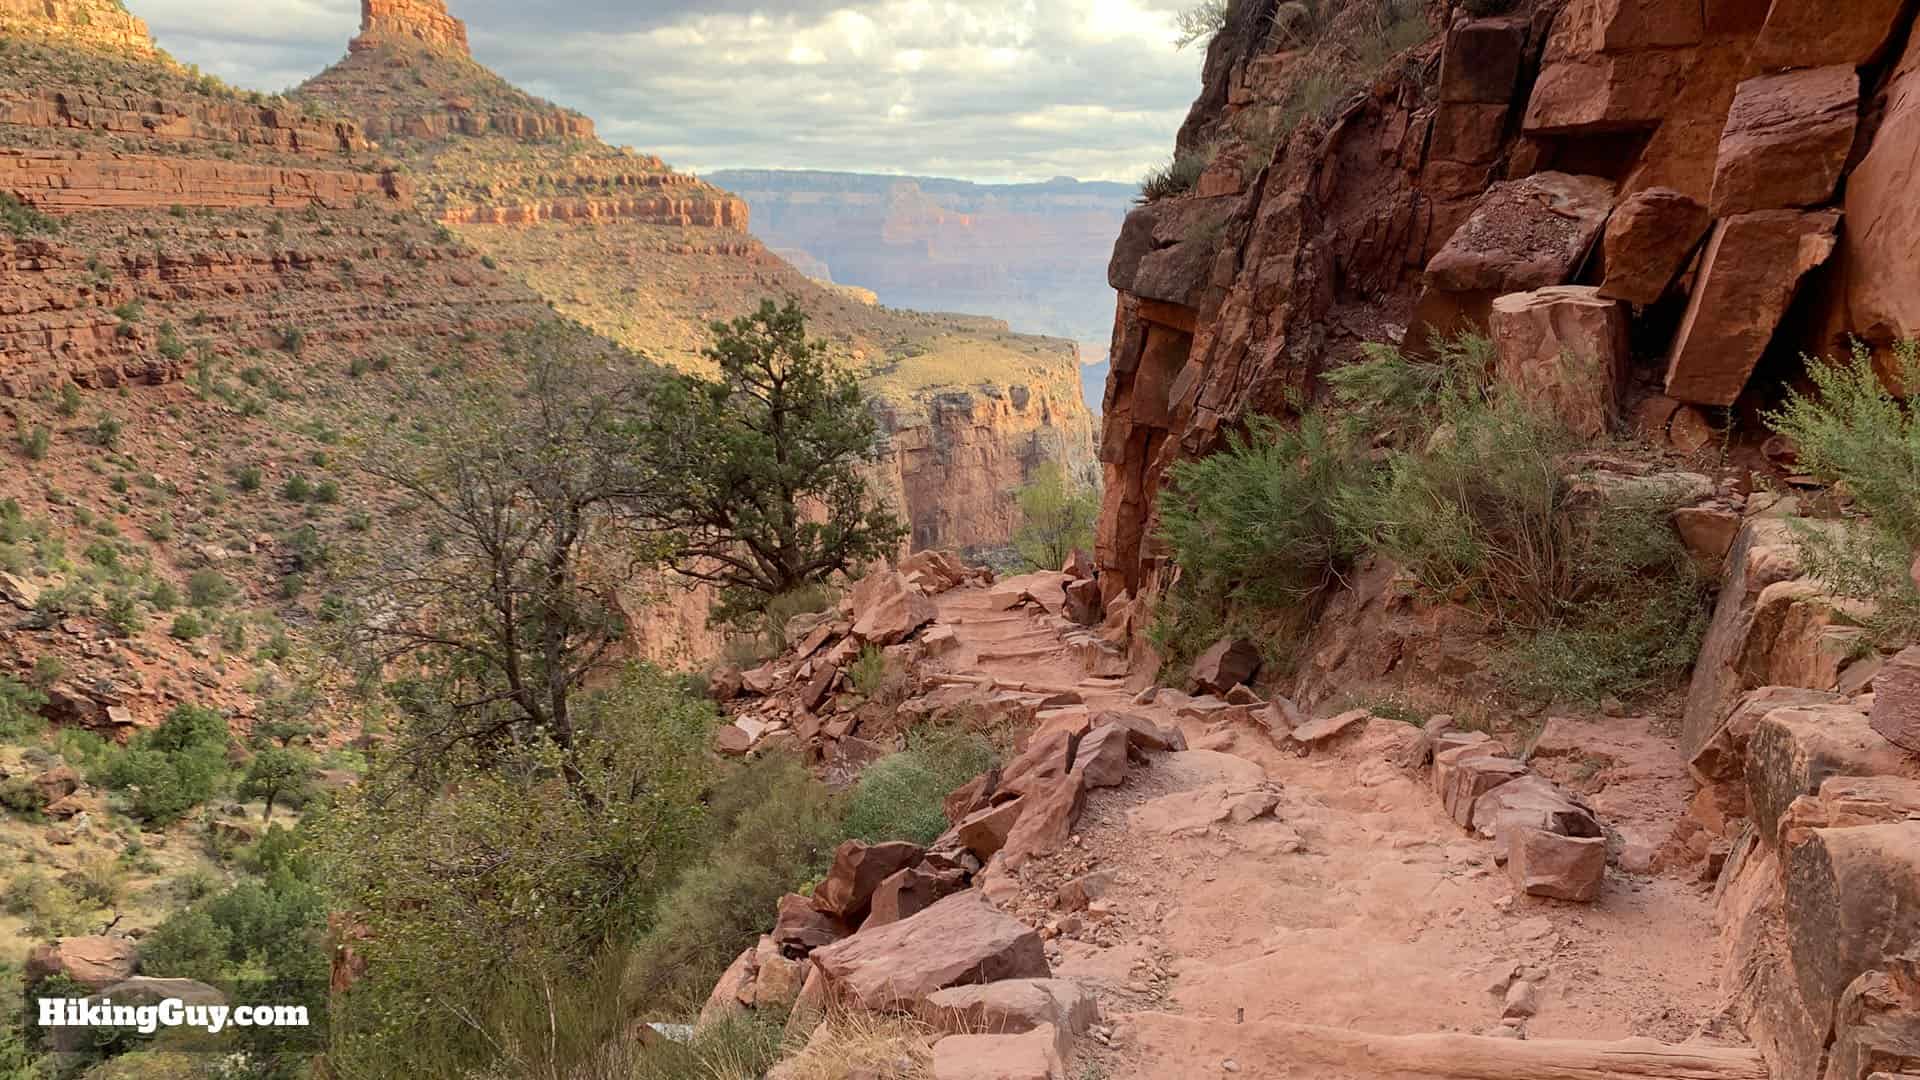
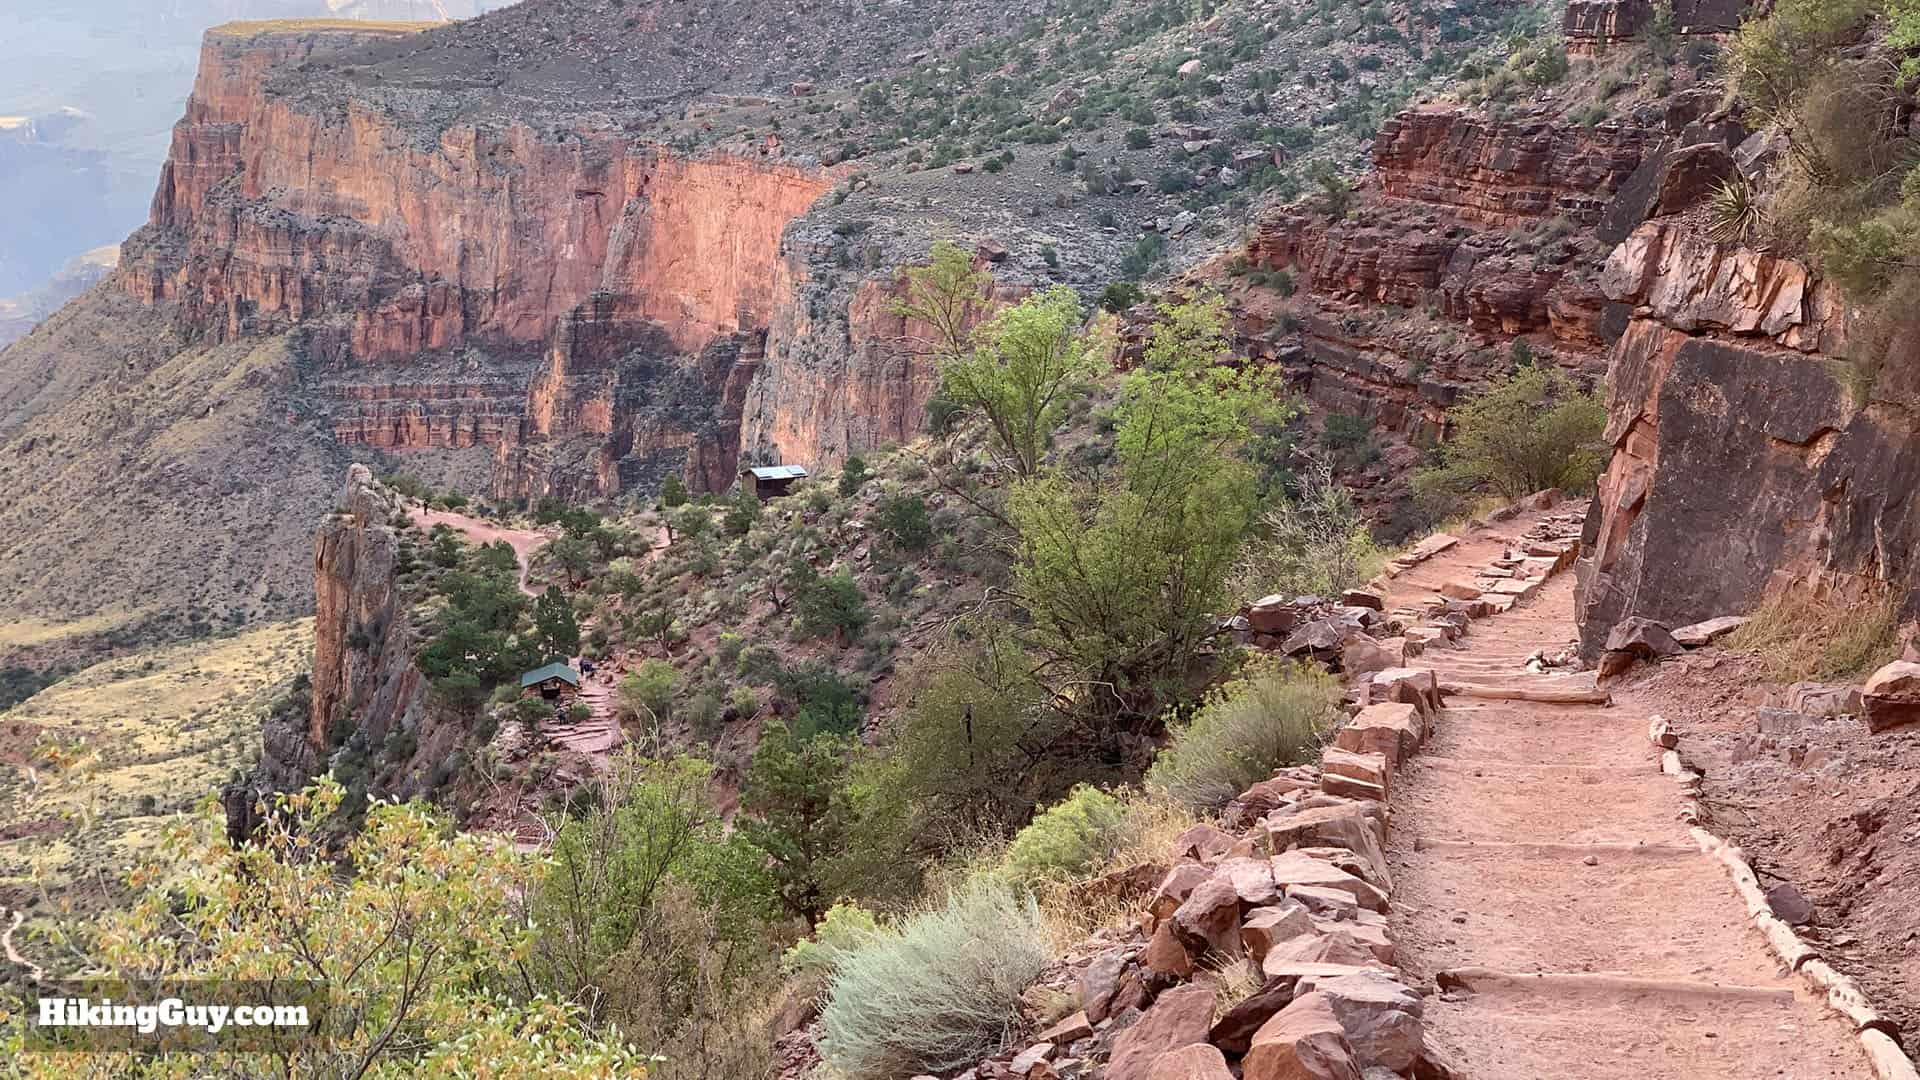
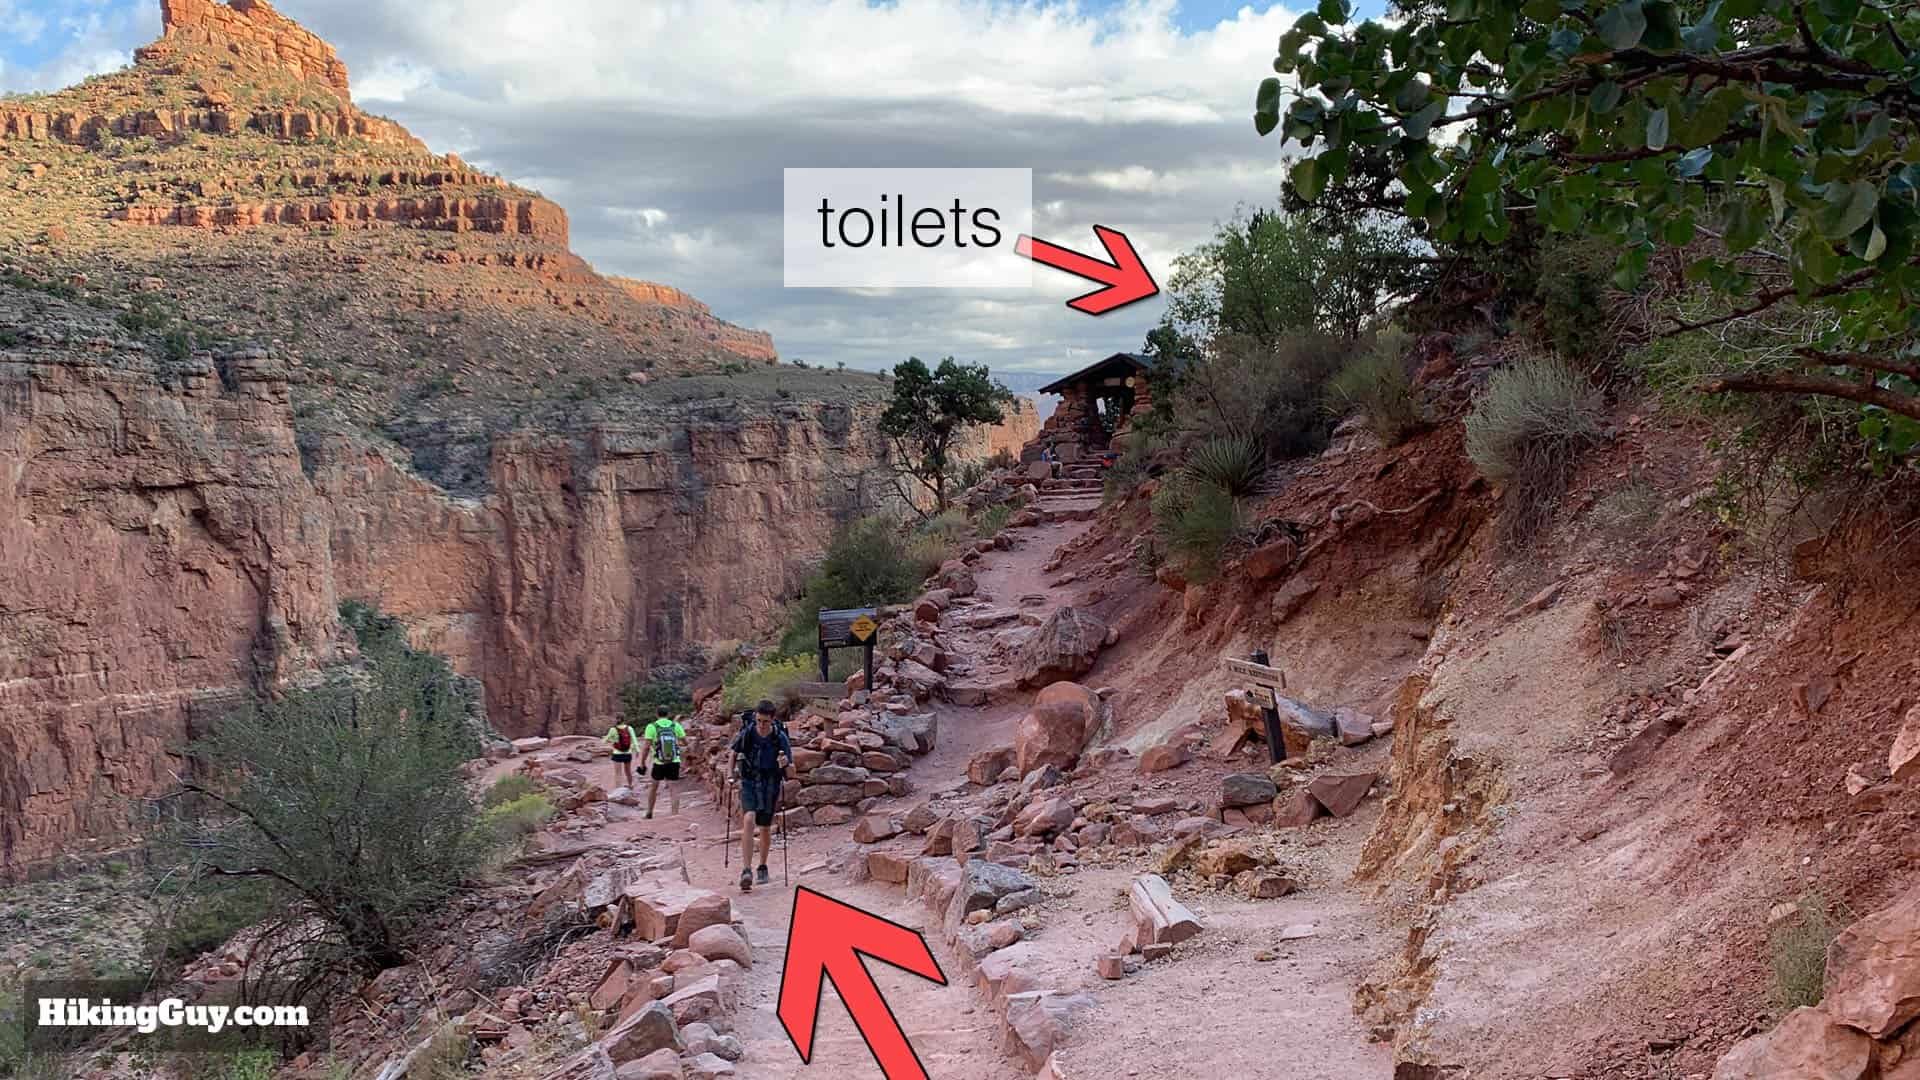
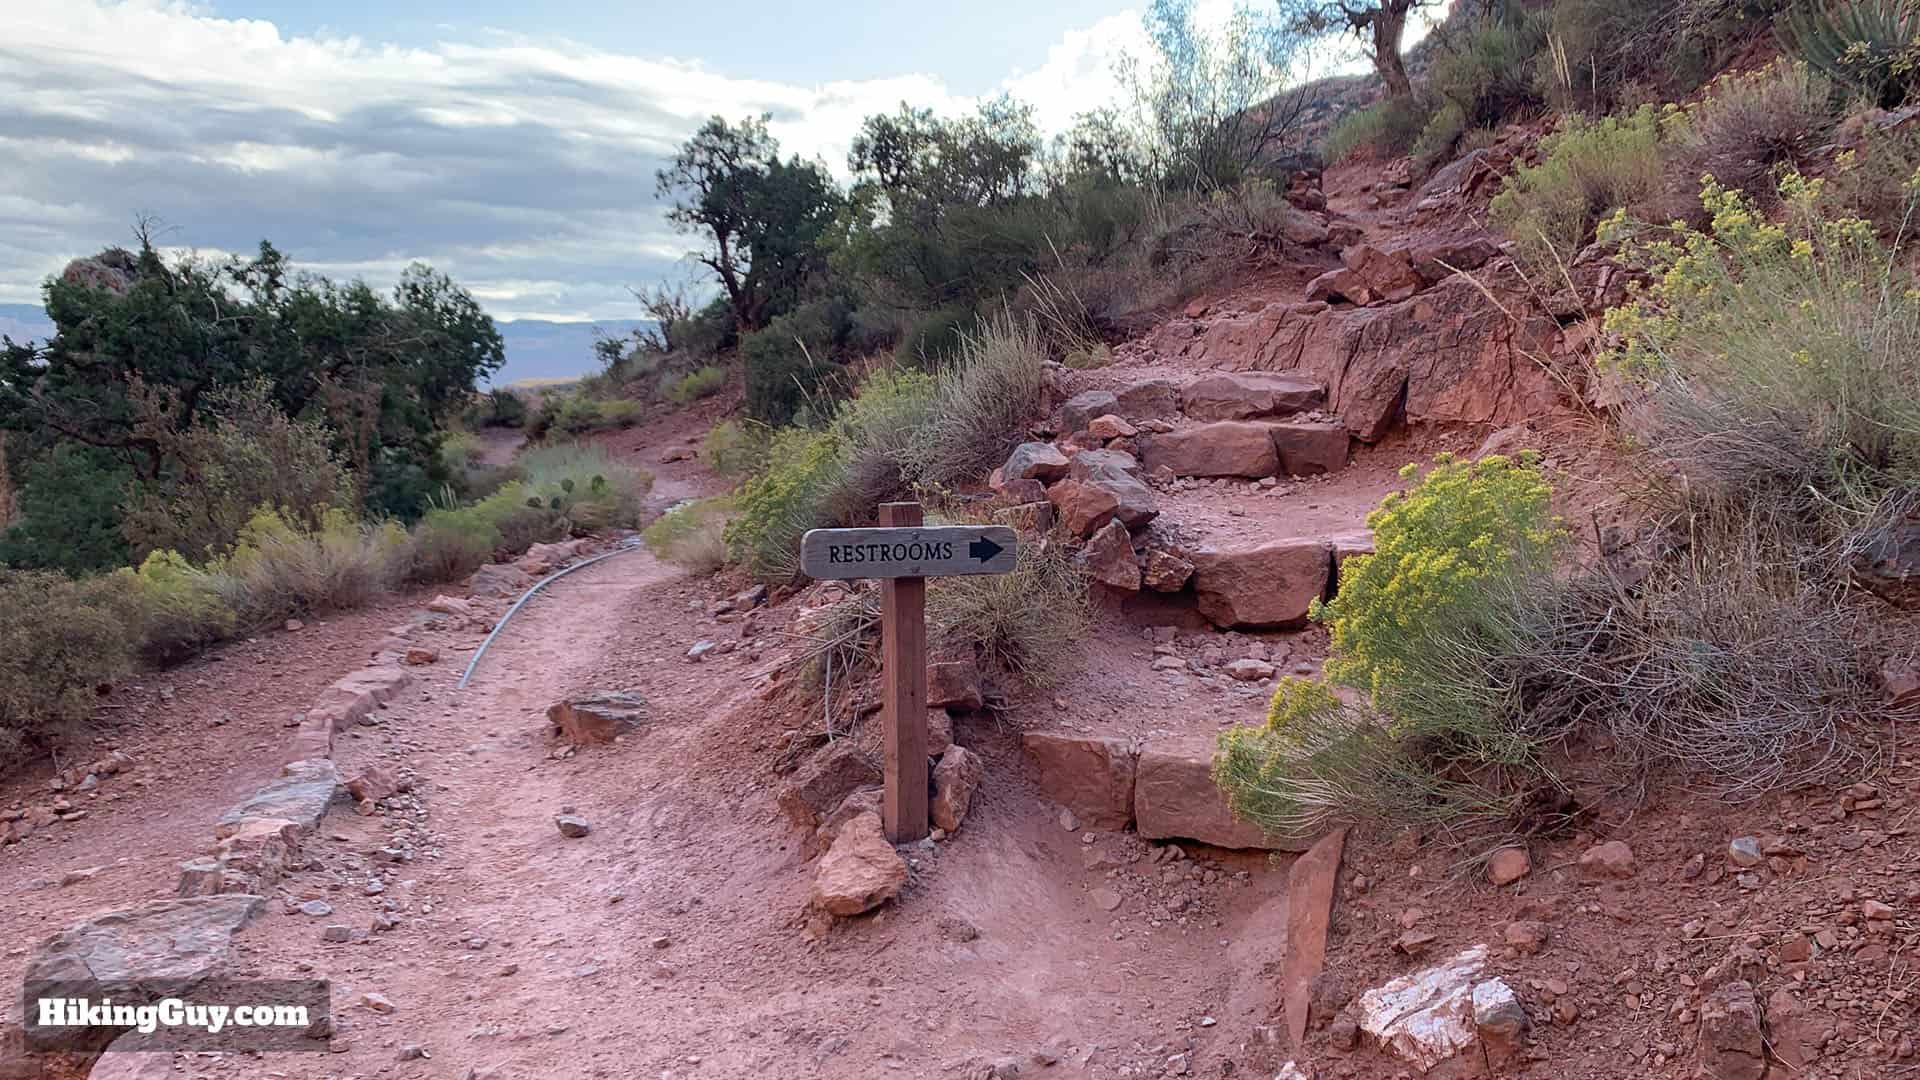
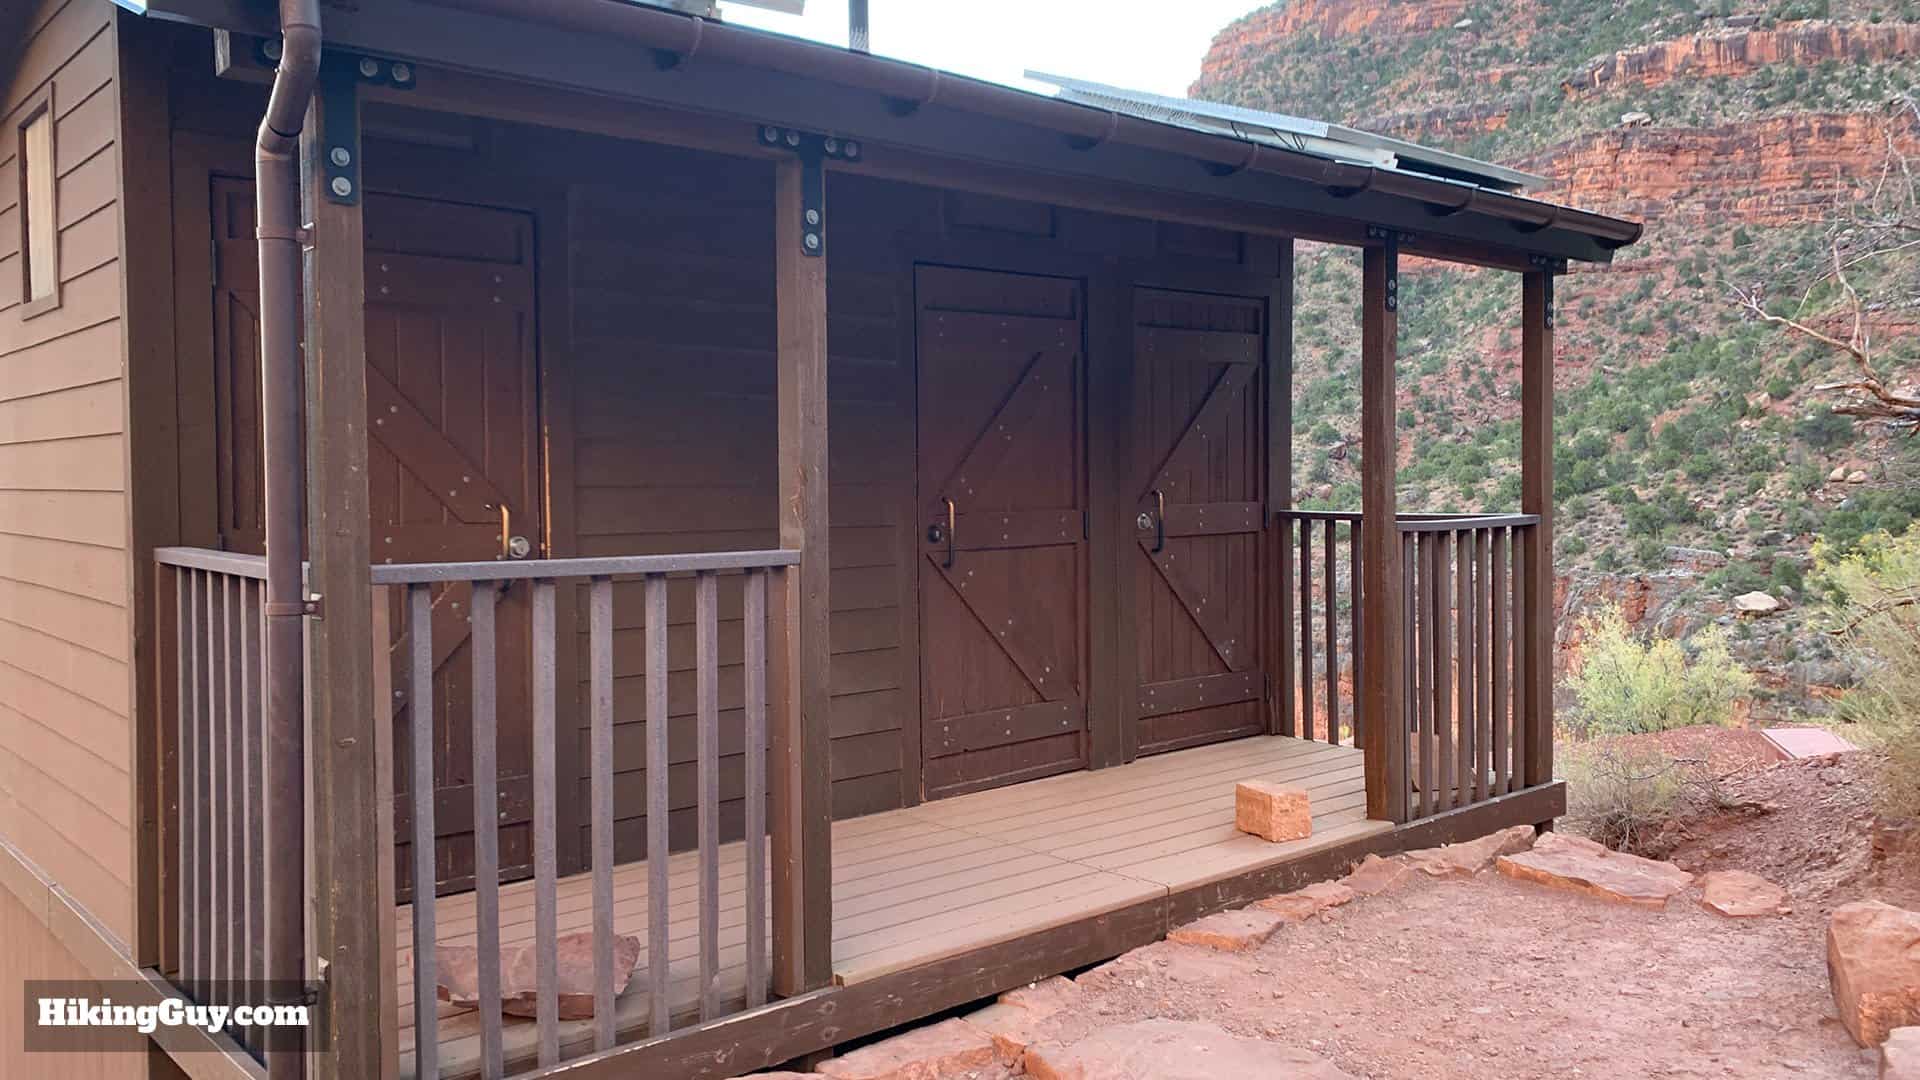
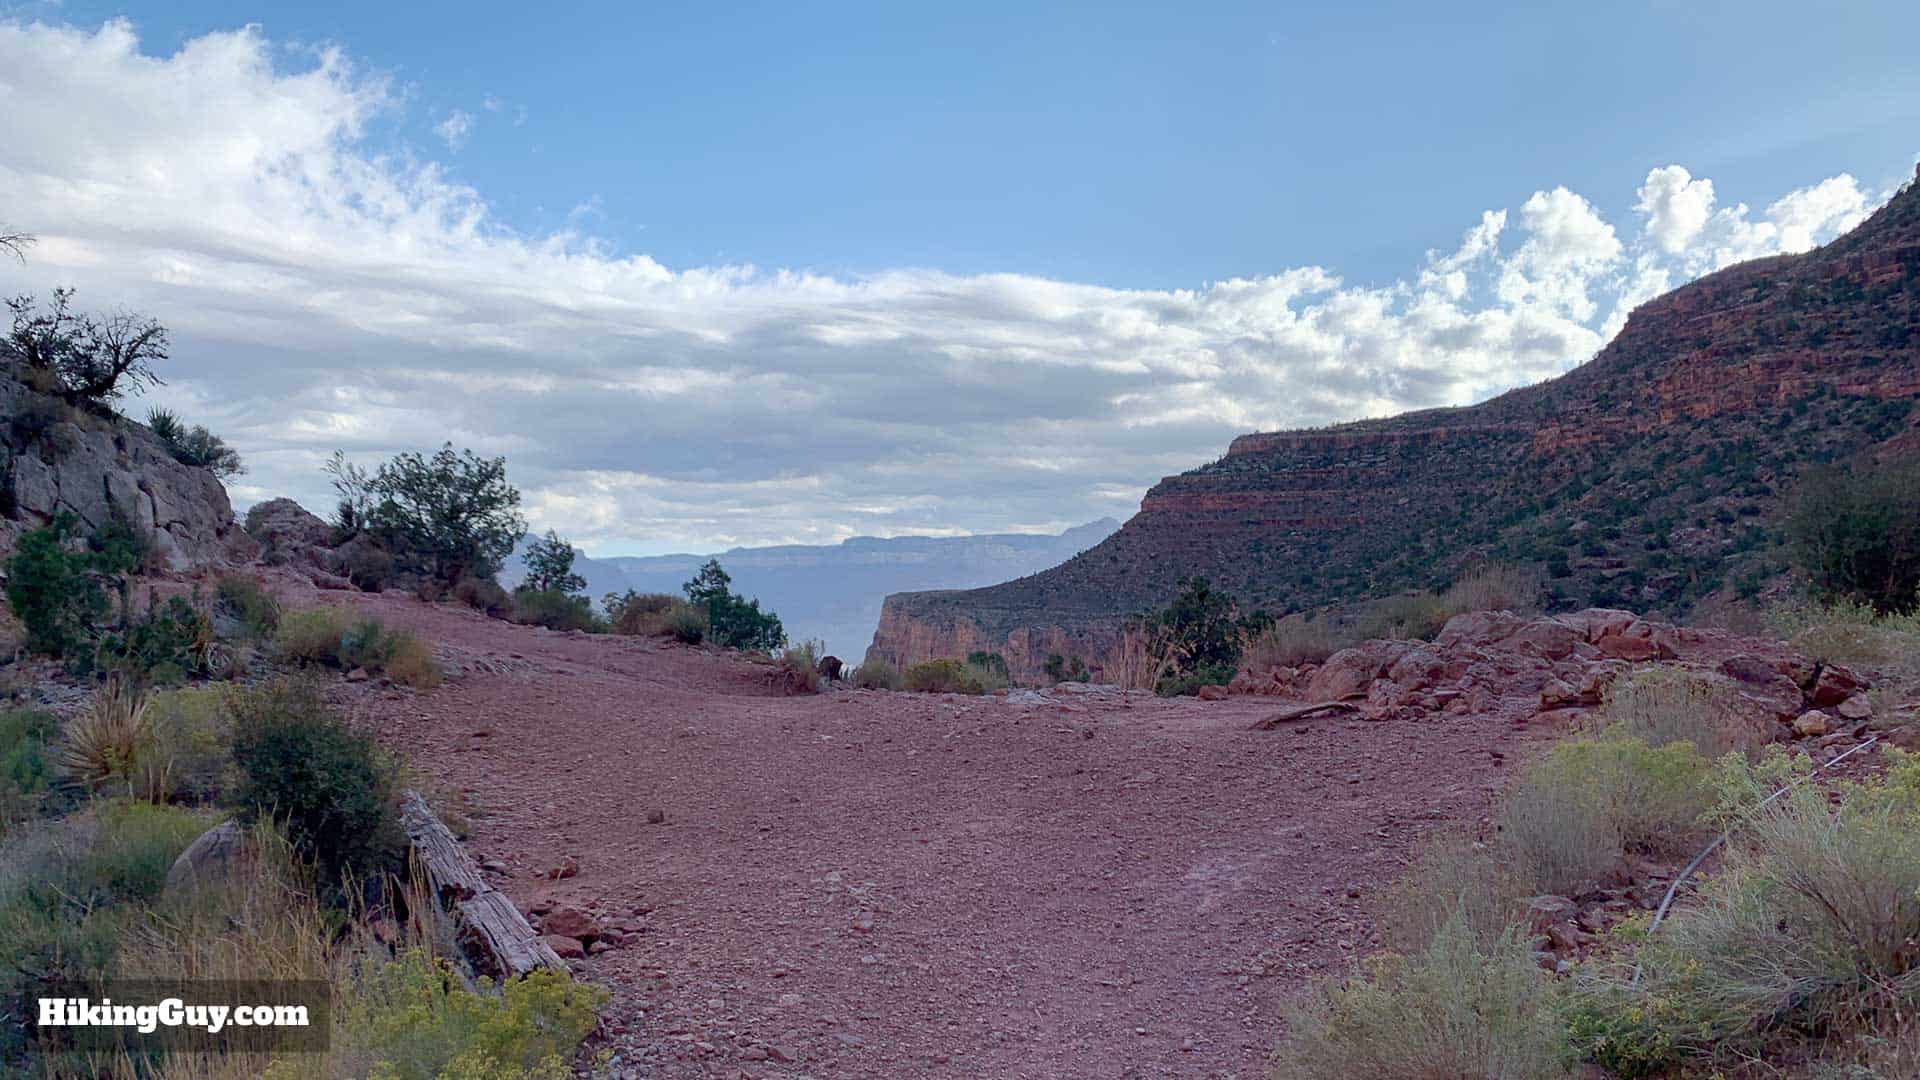
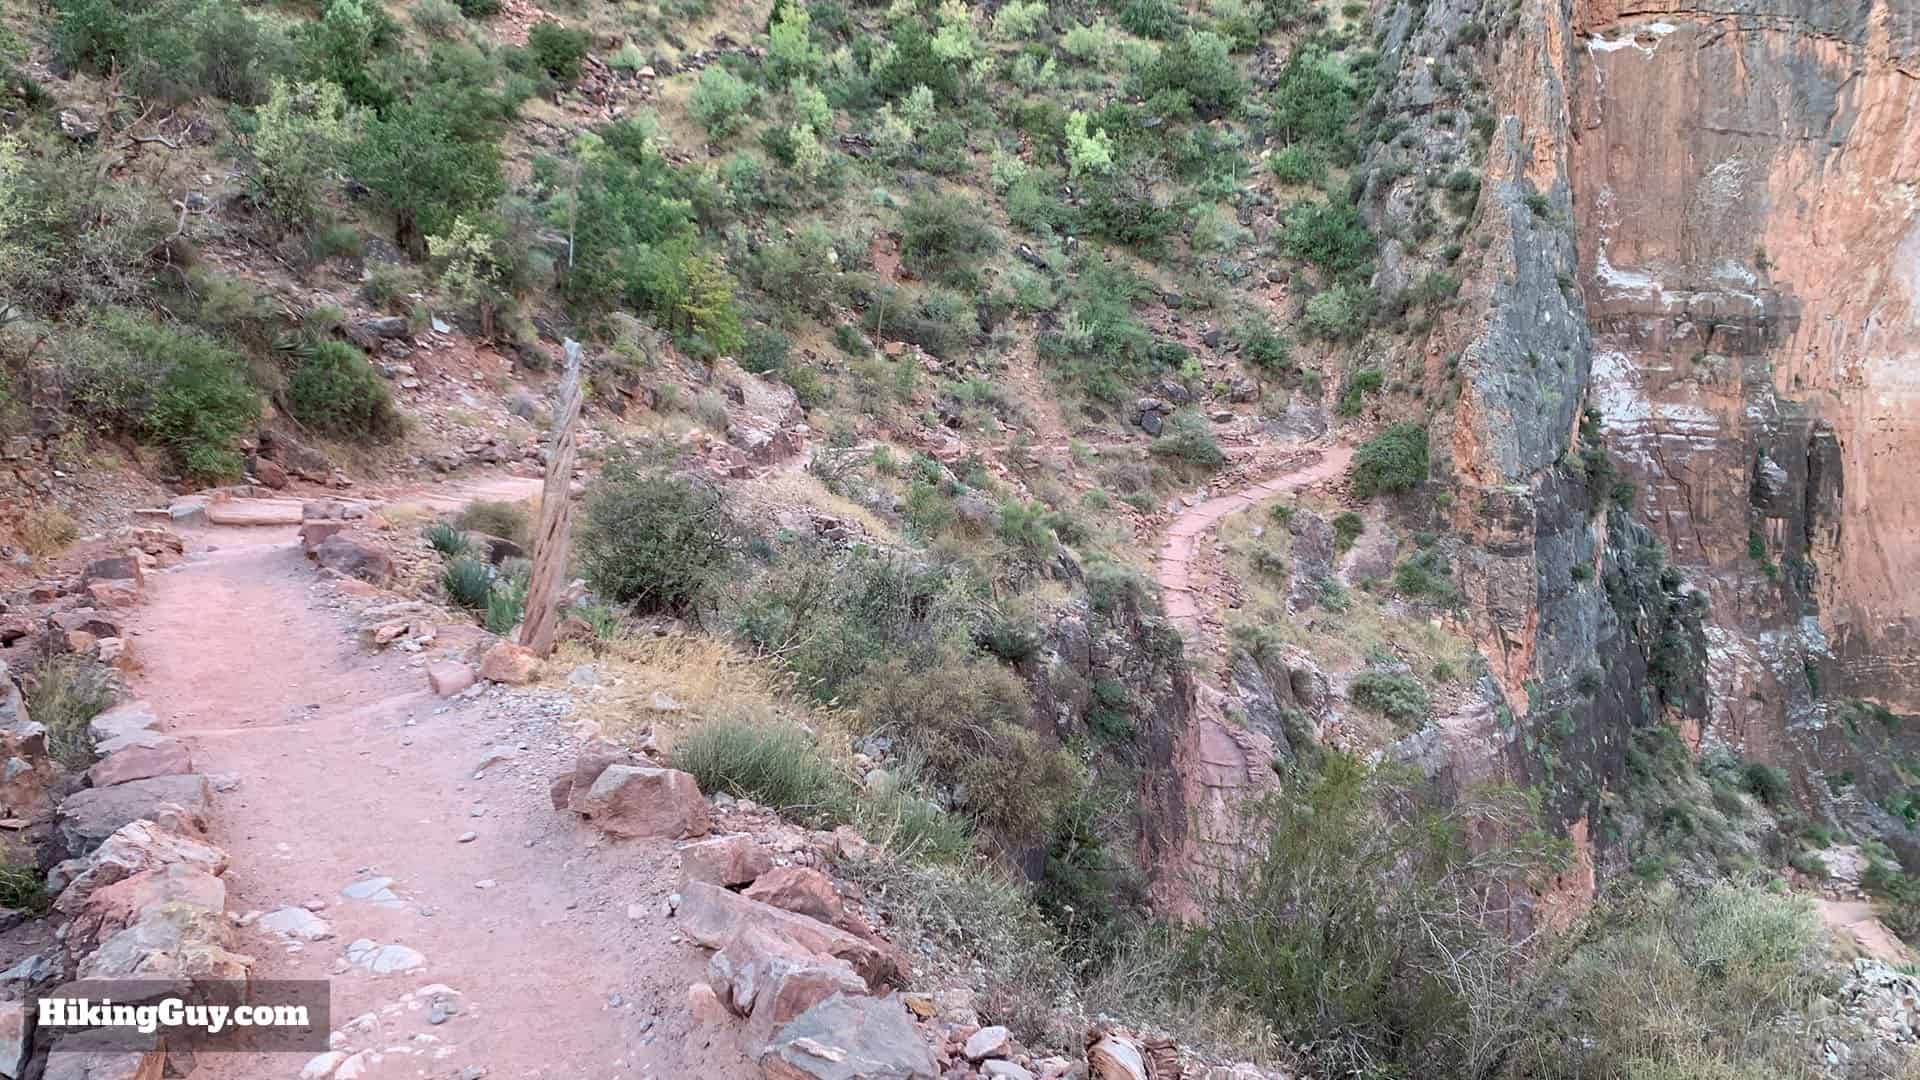
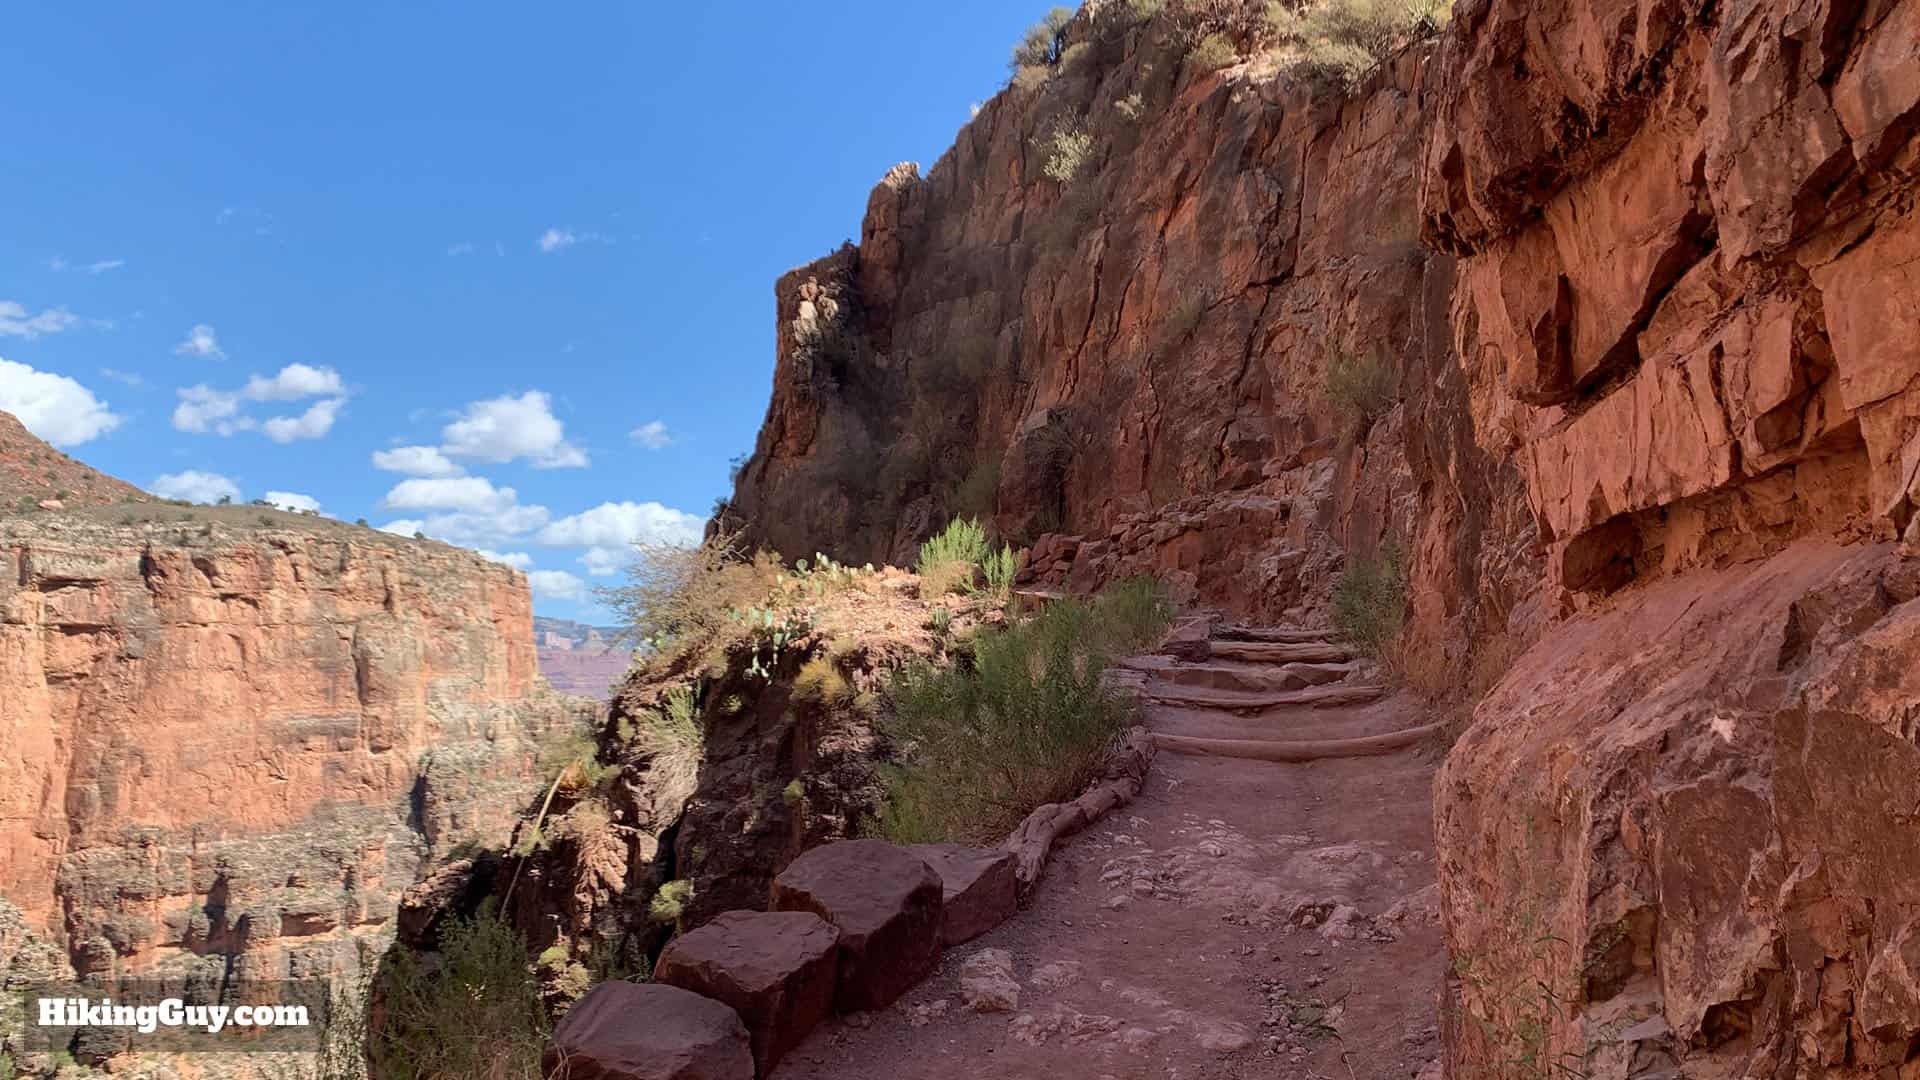
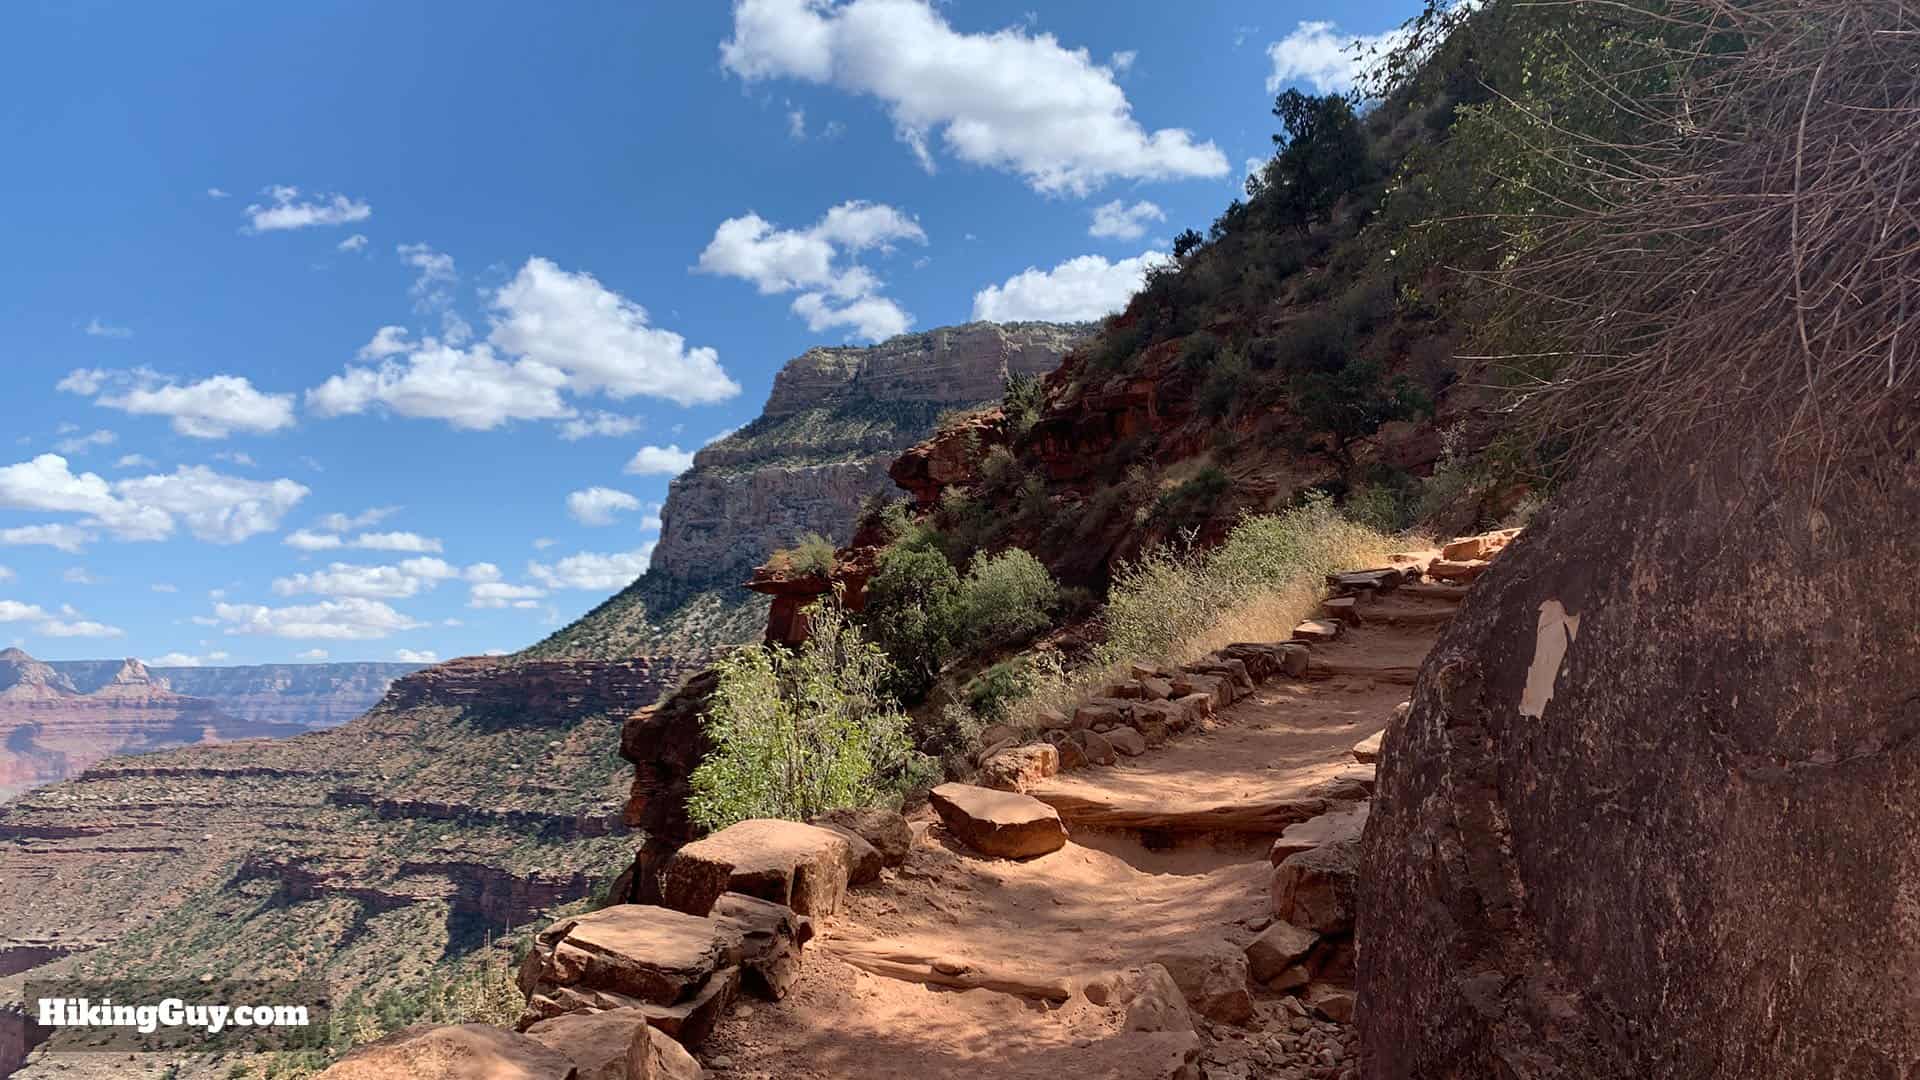
Once you pass the 1.5 Resthouse there are toilets up to the right. Otherwise continue down the Bright Angel Trail to the left.The trail continues to wind down the cliff.Keep left on the big trail avoiding any small spur trails leading off.The trail hugs the cliffside. This shot also gives you a good idea of how narrow the cliffside sections are. There are no narrow sections where you have to squeeze by on the side of the cliff. The trail is at least 4 feet wide in all places and there are no crazy drops.Soon you'll see the 3 Mile Resthouse in the distance.If you want to visit the shelter, water, or toilets, go up to the right. Otherwise the Bright Angel Trail continues down to the left.The 3 Mile Resthouse is similar to the last one.The view from the shelter is great for framing shots of the canyon wall.There's another water spigot just behind the shelter.Just past the shelter are the steps up to the toilets. The path to the left is an open area which used to be the terminus of a cable car system used by miners.The toilets are up the steps.If you go straight past the toilet turn-off you'll reach a wide open area. This used to be a cable car station that miners used to haul ore and gear up and down the canyon.
Hiking to Havasupai Garden
Havasupai Gardens was formerly known as "Indian Garden" and you may see some references to that on maps or signs.
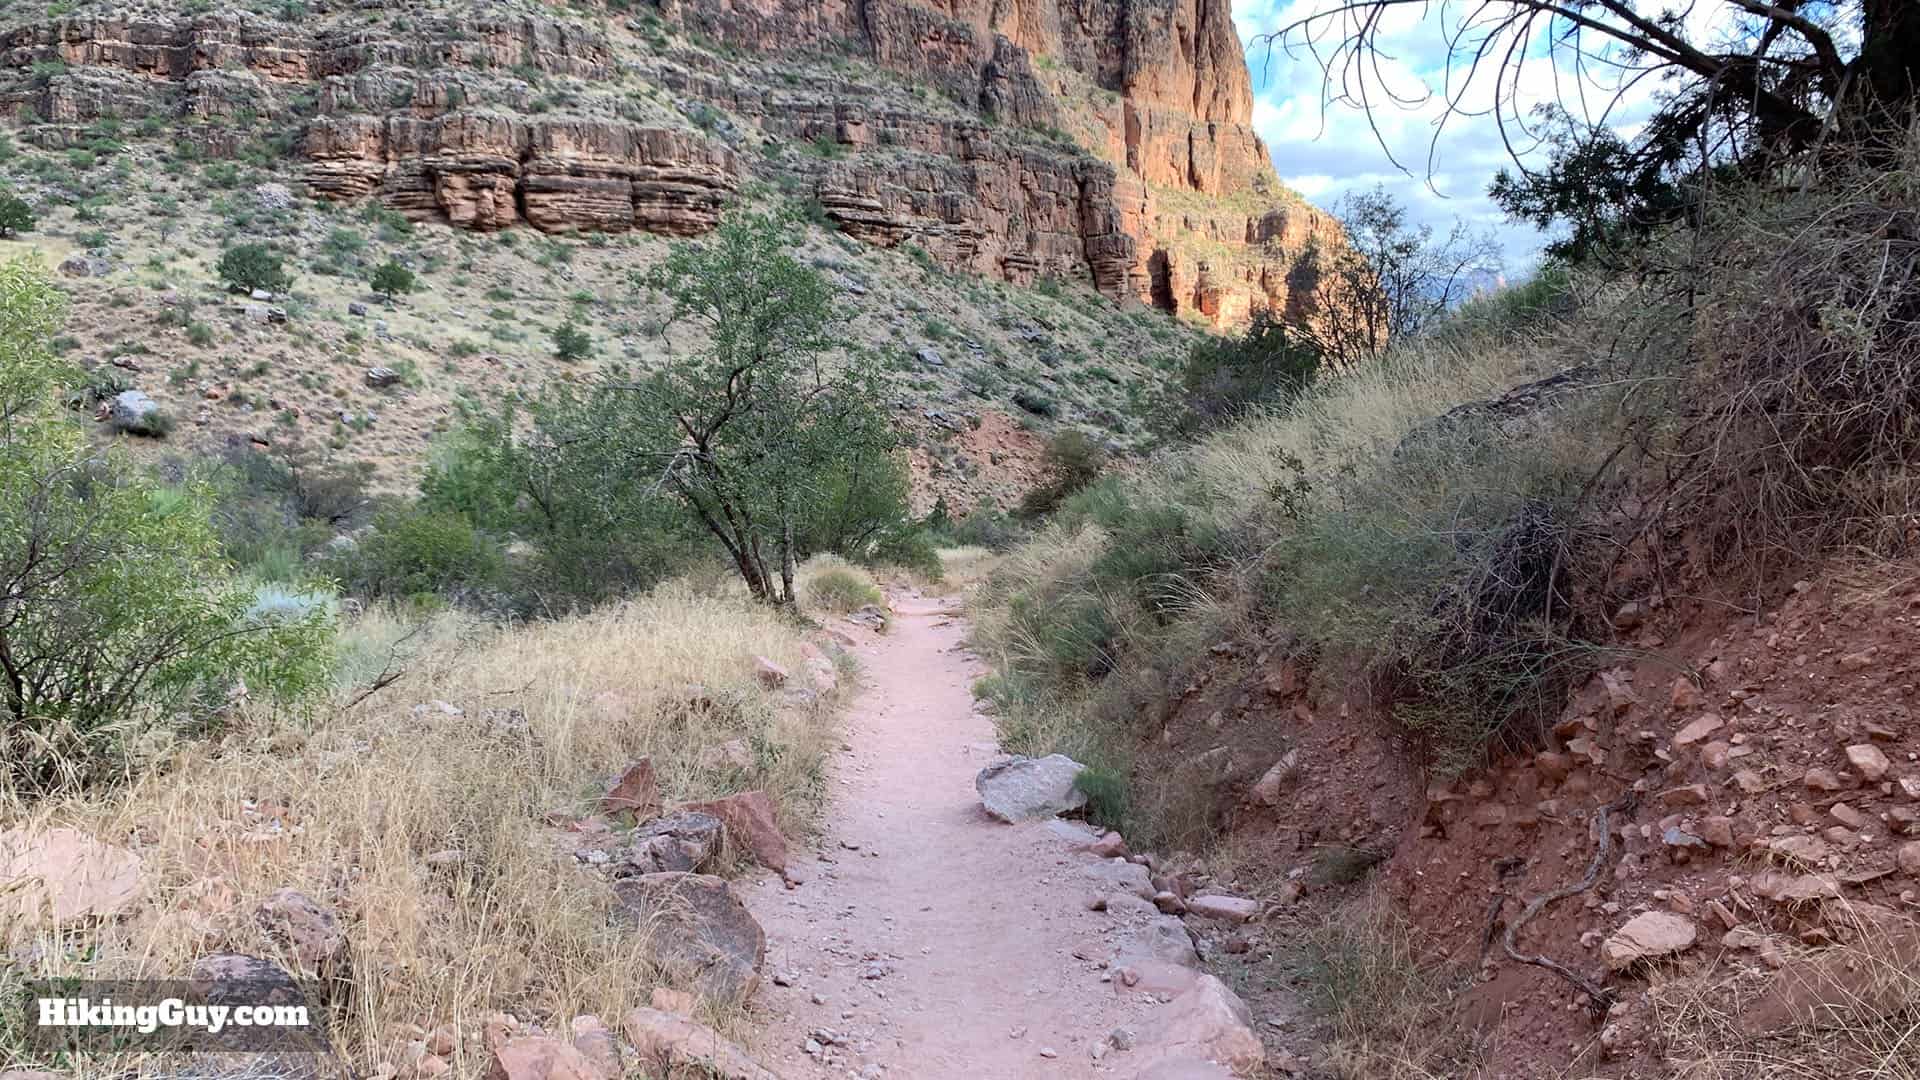
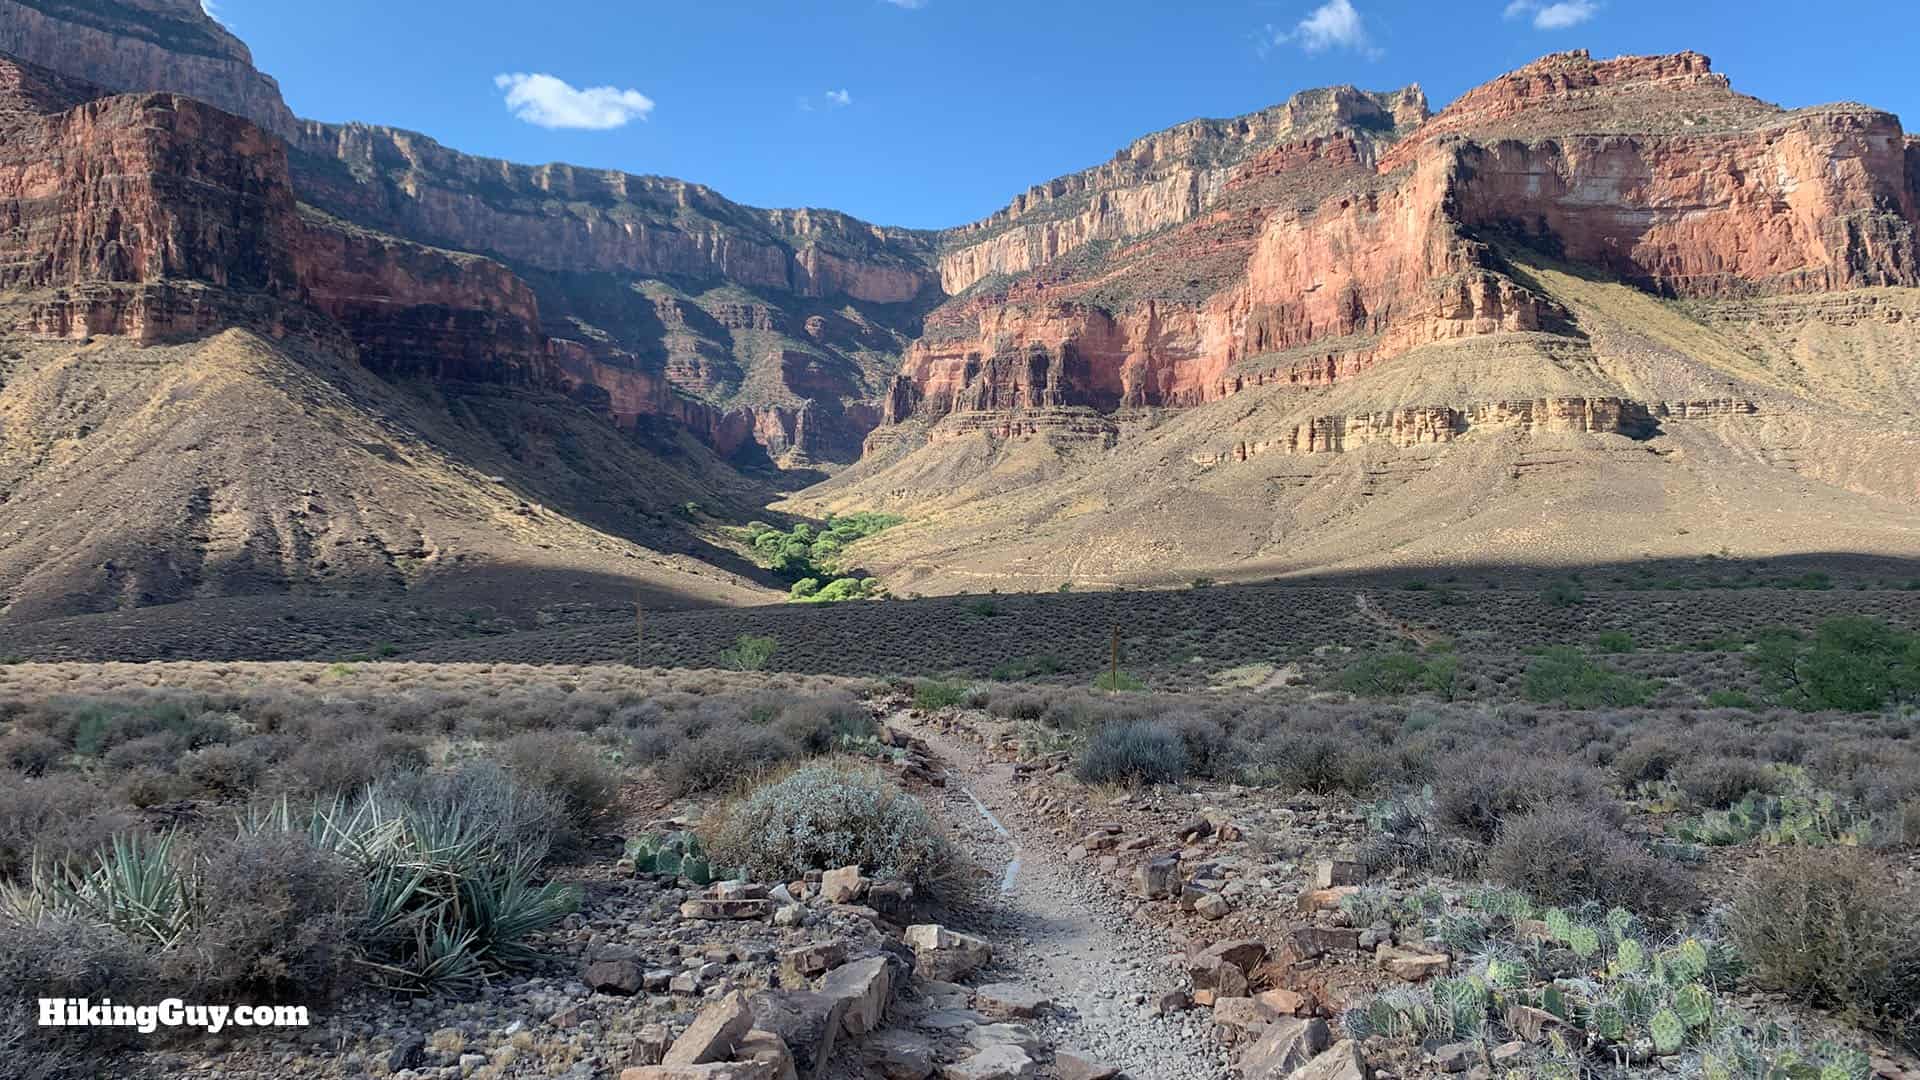
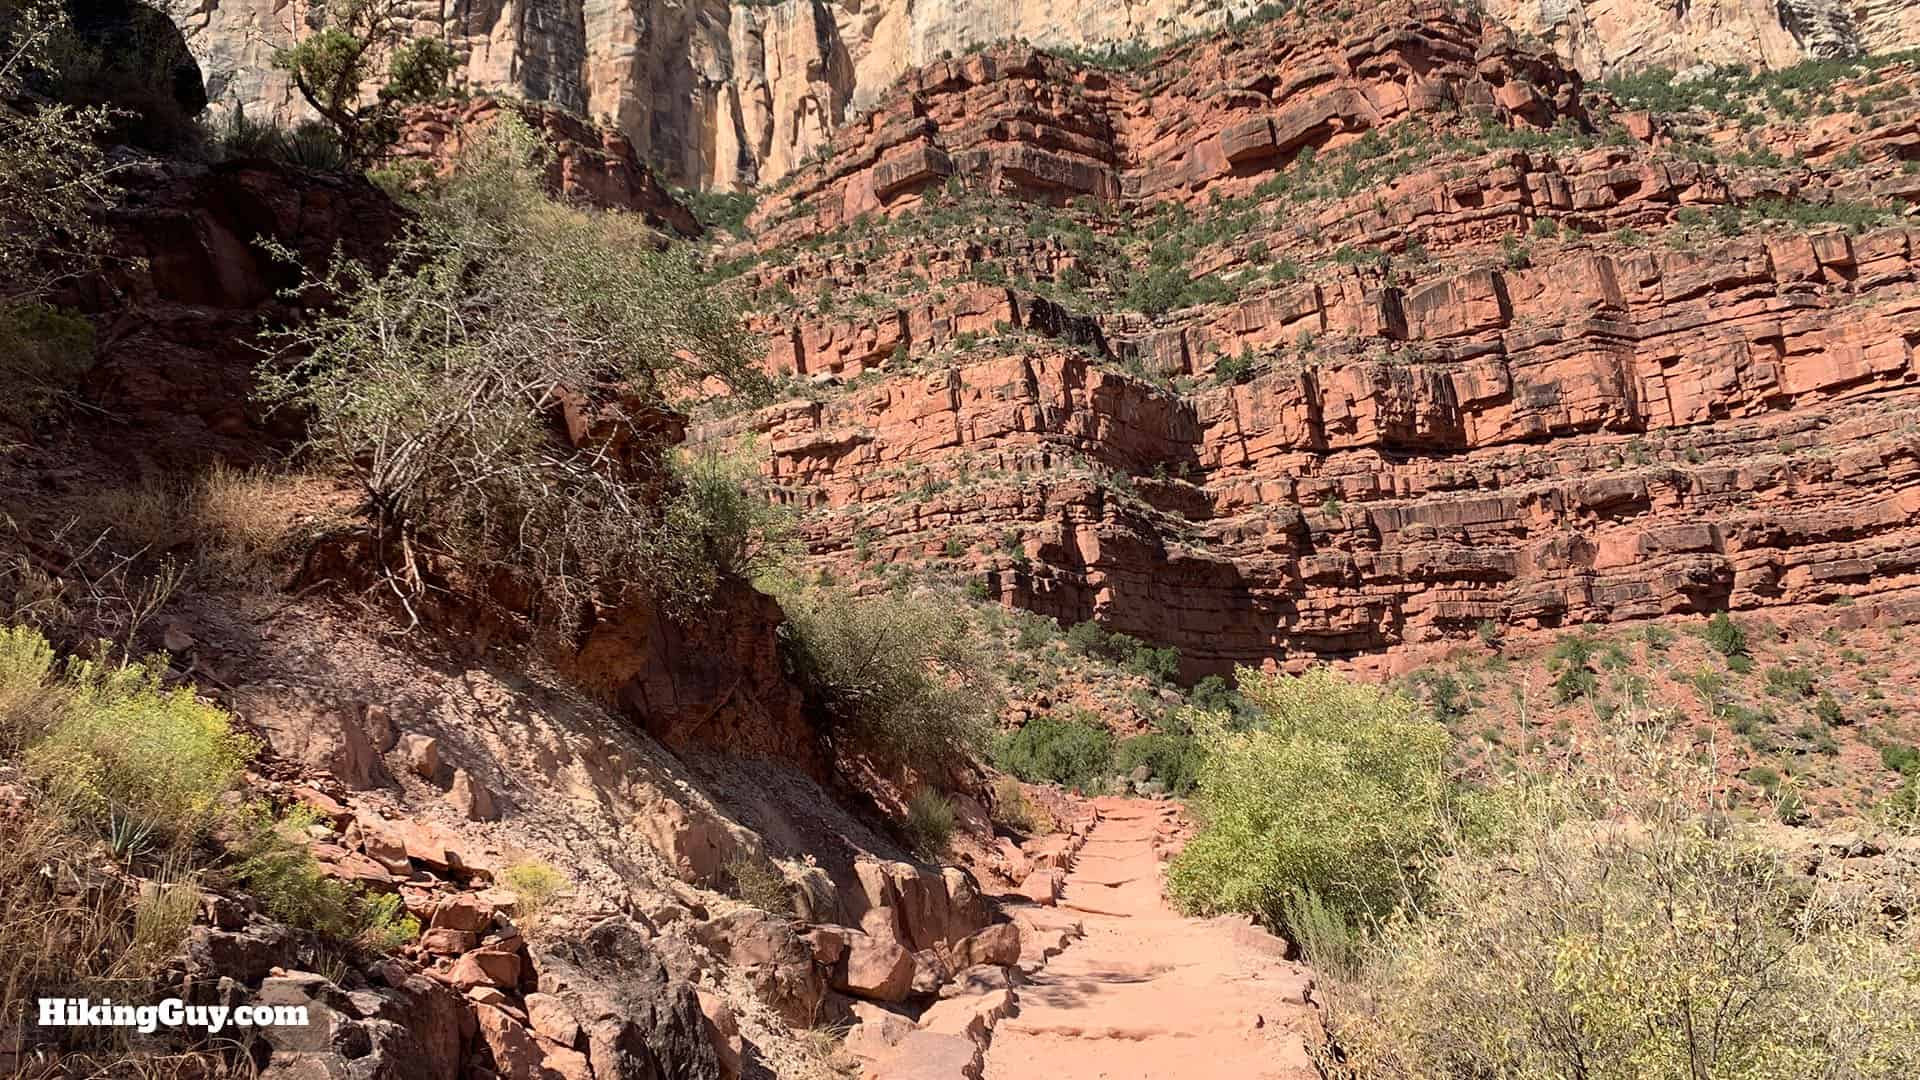
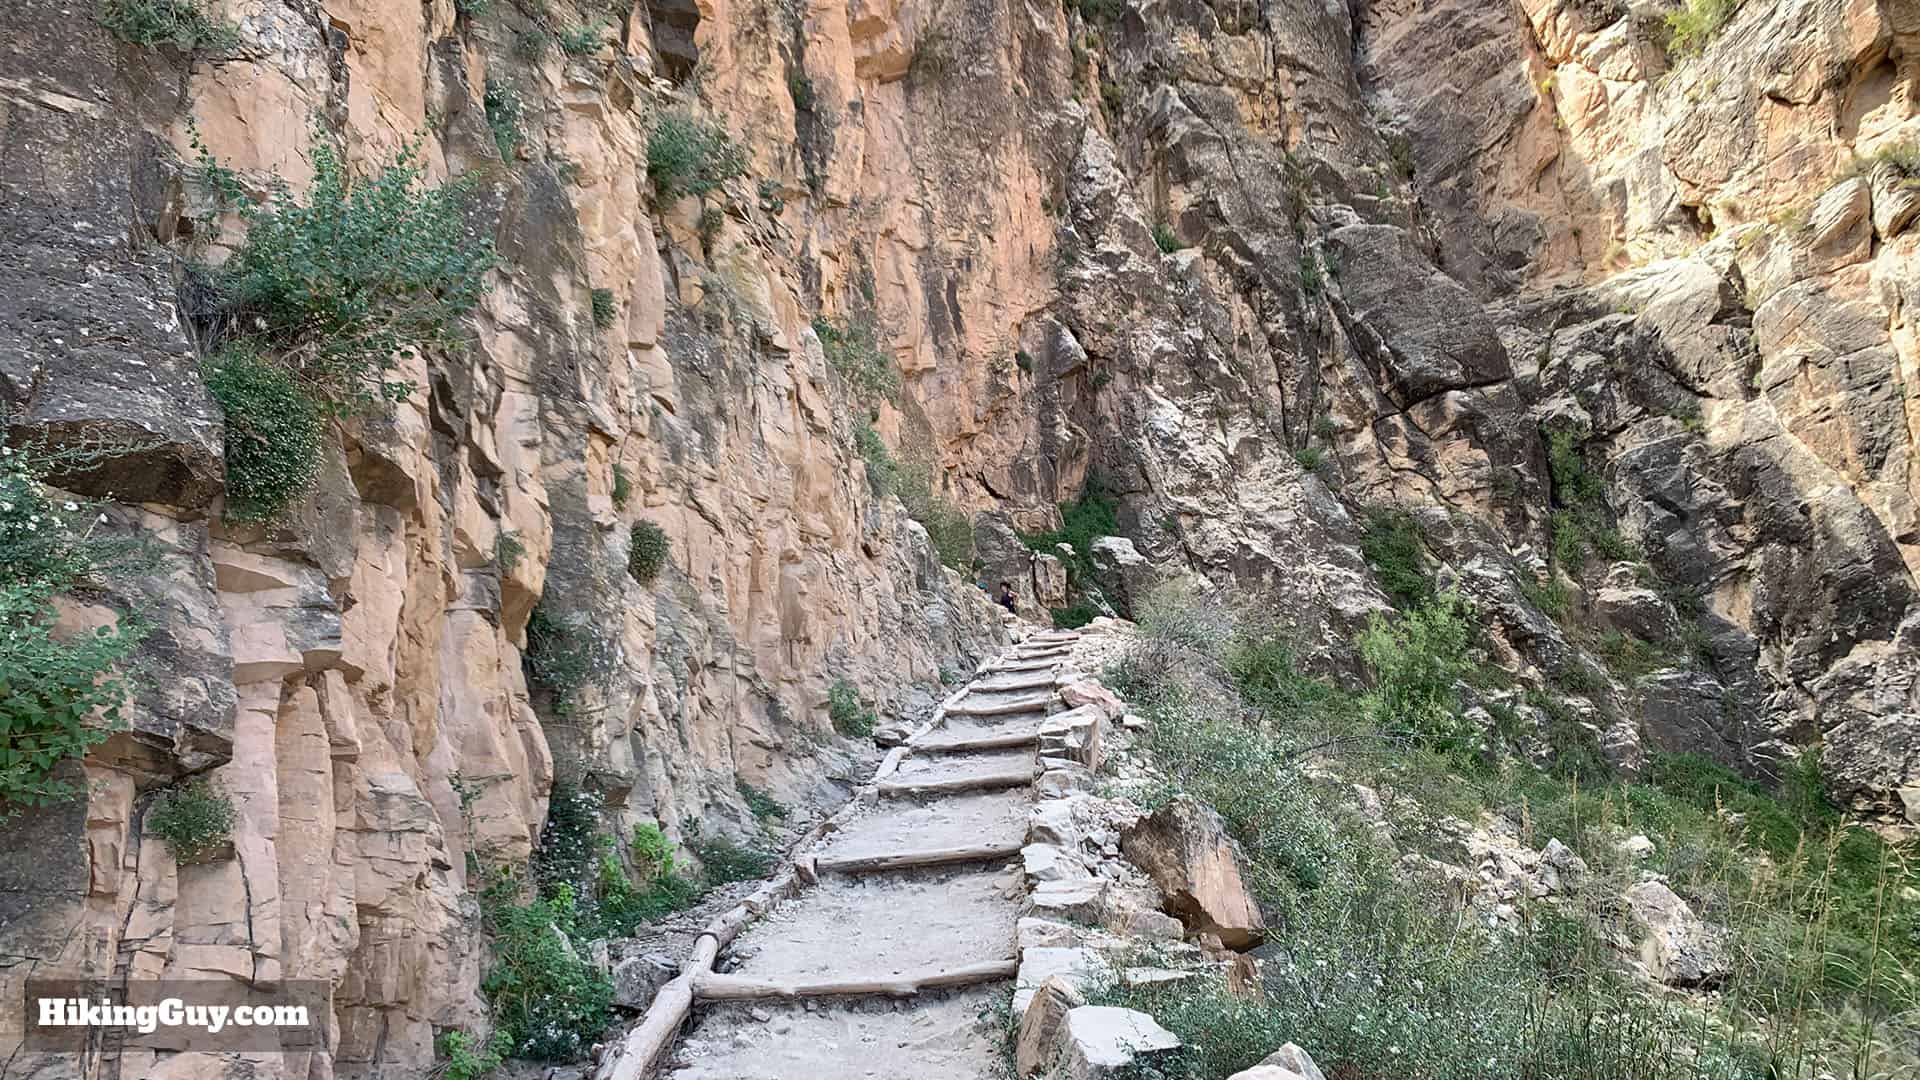
Continue down the Bright Angel Trail through the switchbacks.The next section of switchbacks is called Jacob's Ladder.After Jacob's Ladder the trail levels out as you approach Havasupai Gardens.Stay to the right on the trail as you reach the beginning of Havasupai Gardens.
Theodore Roosevelt (who rode down the Bright Angel Trail on a horse) ordered the Havasupai who lived here to leave in 1901 in order to make way for the park. Some left and some stayed, but in 1928 the Parks Service forced the last Havasupai out of the Bright Angel area and onto a 518-acre reservation in Havasu Canyon.
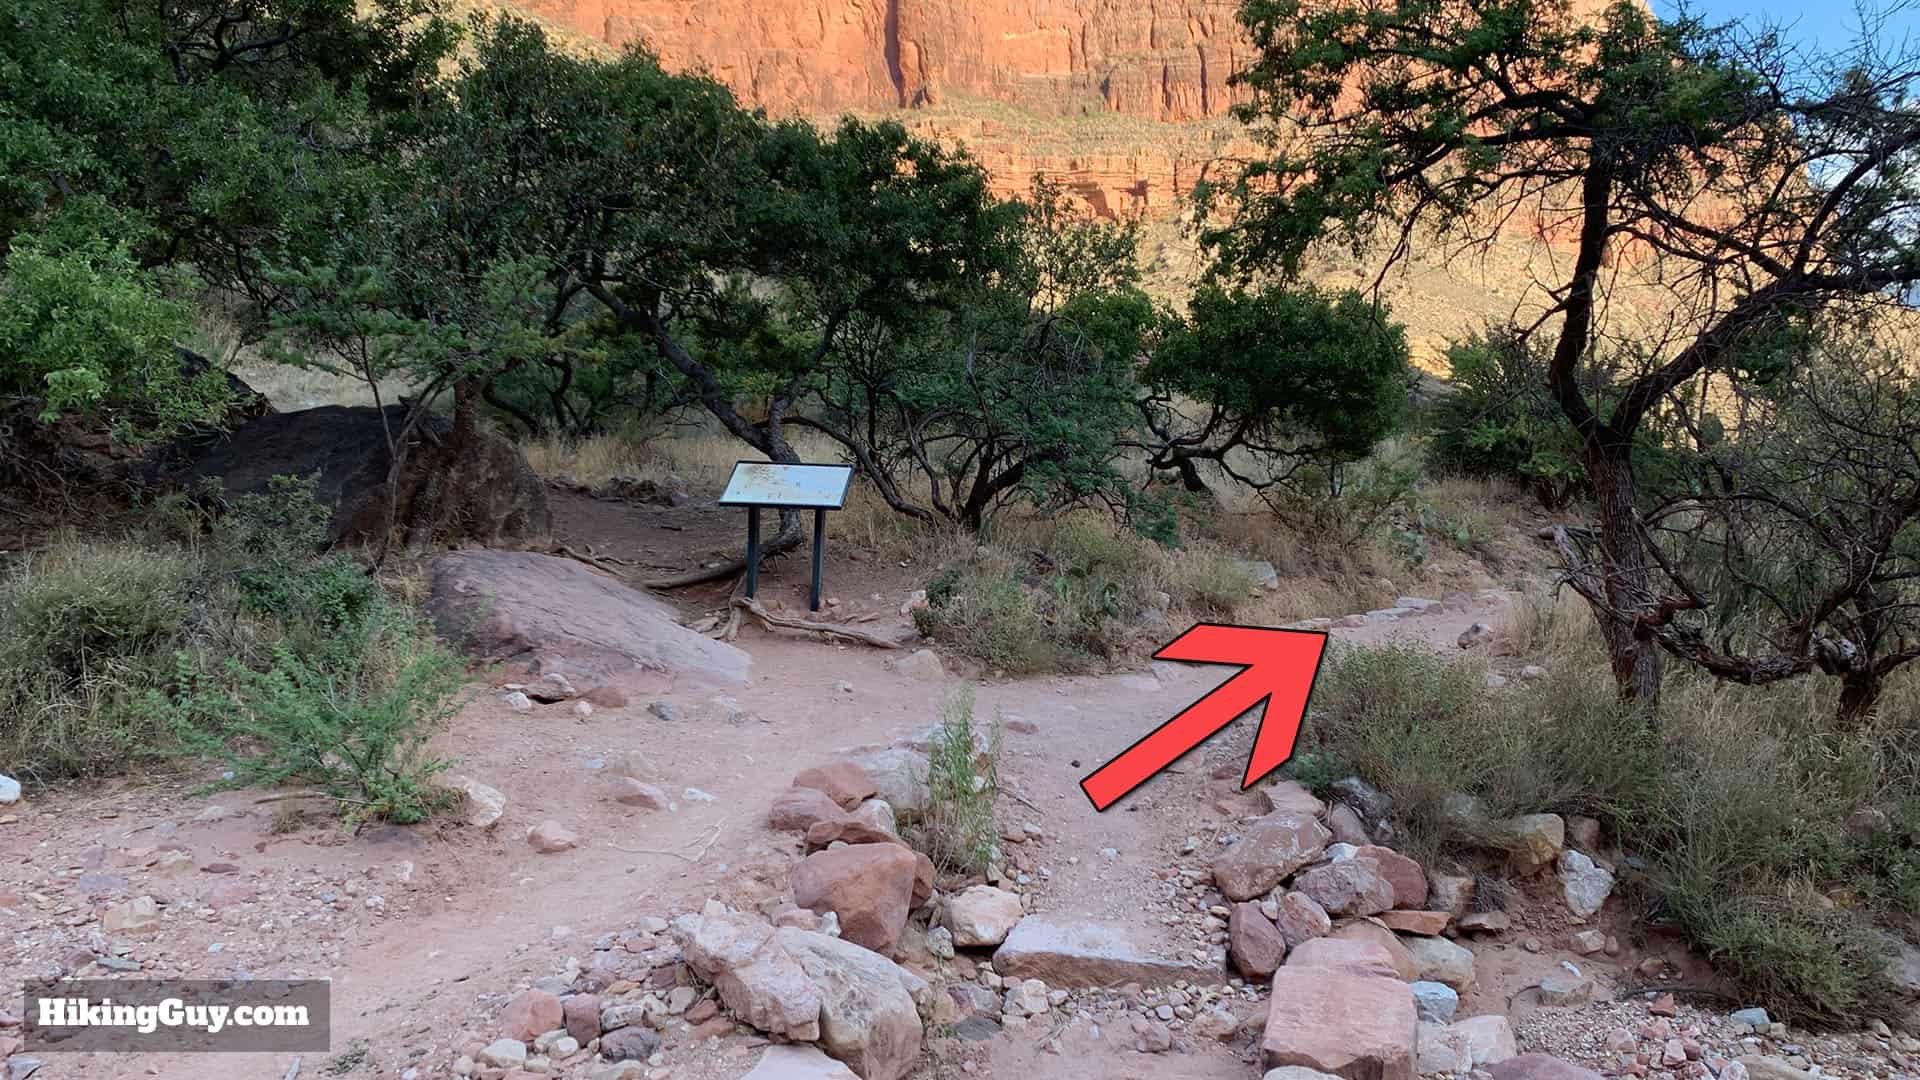
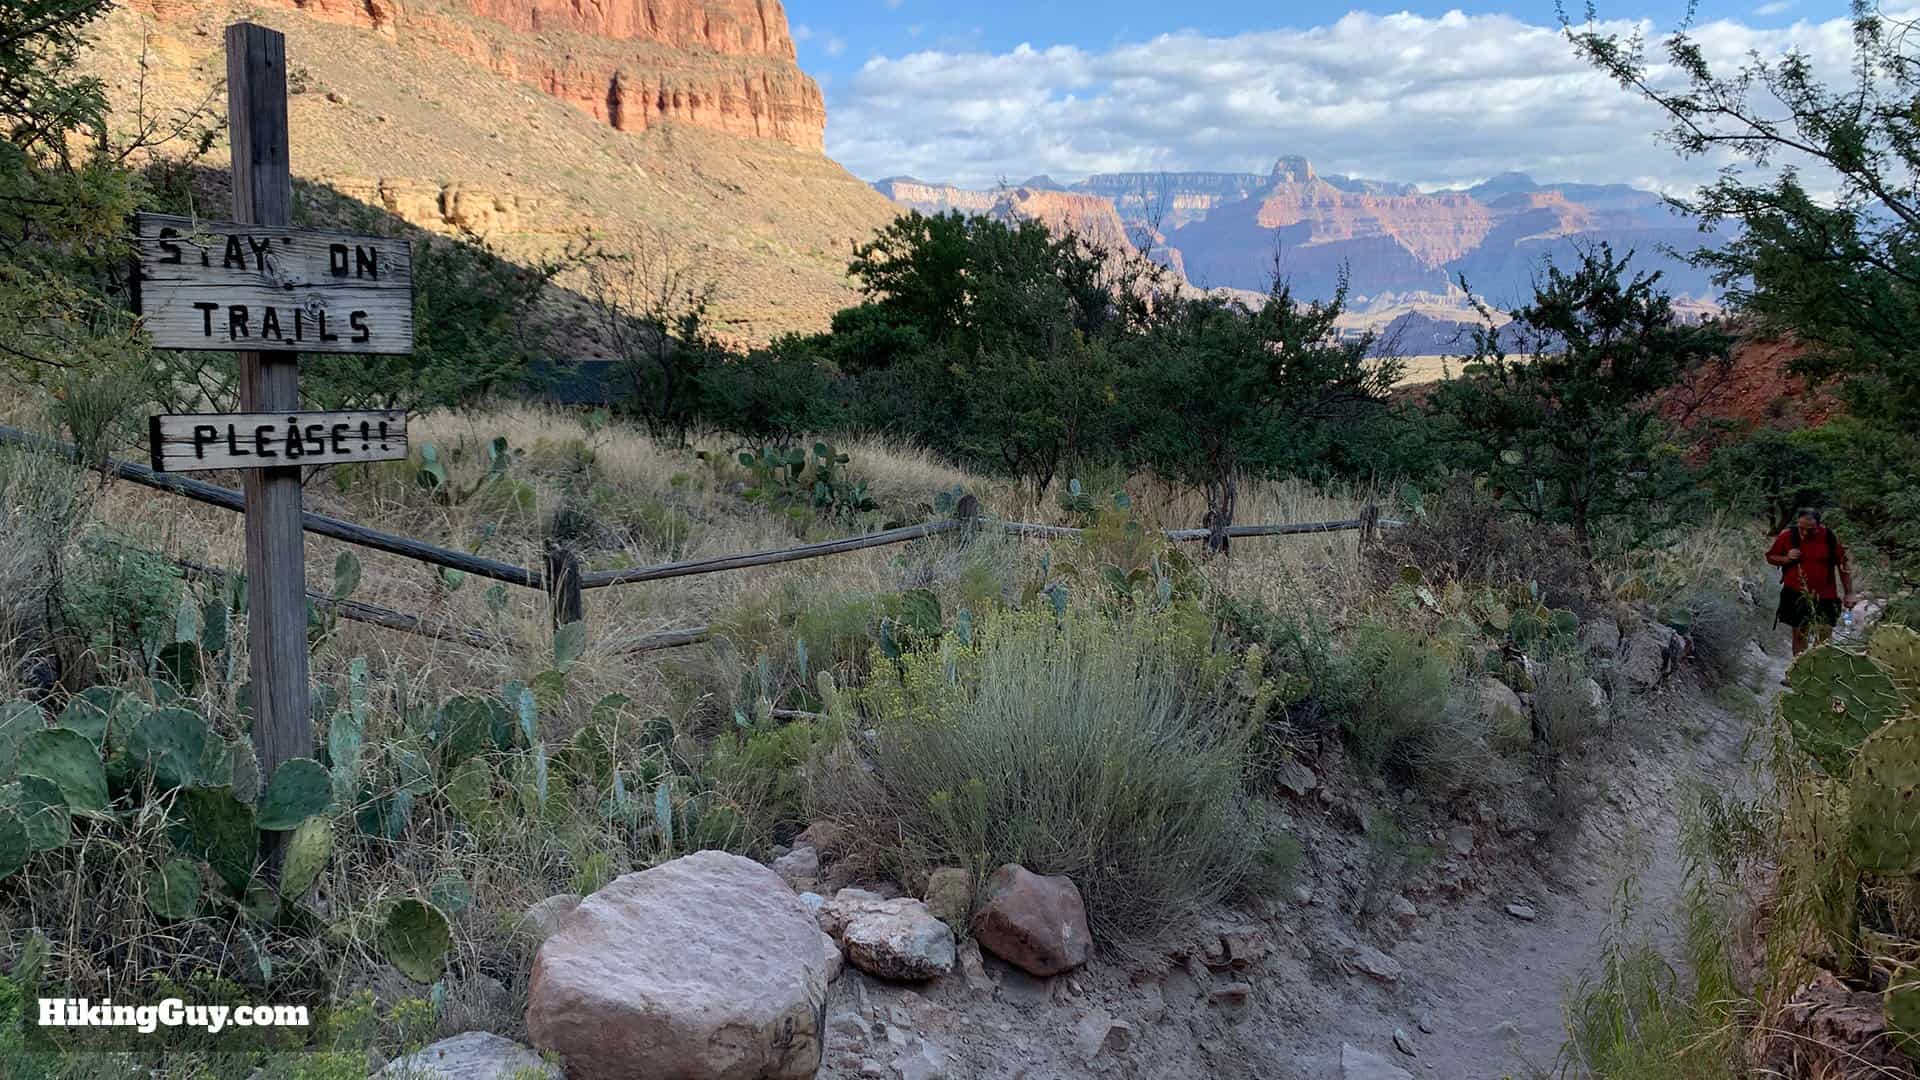
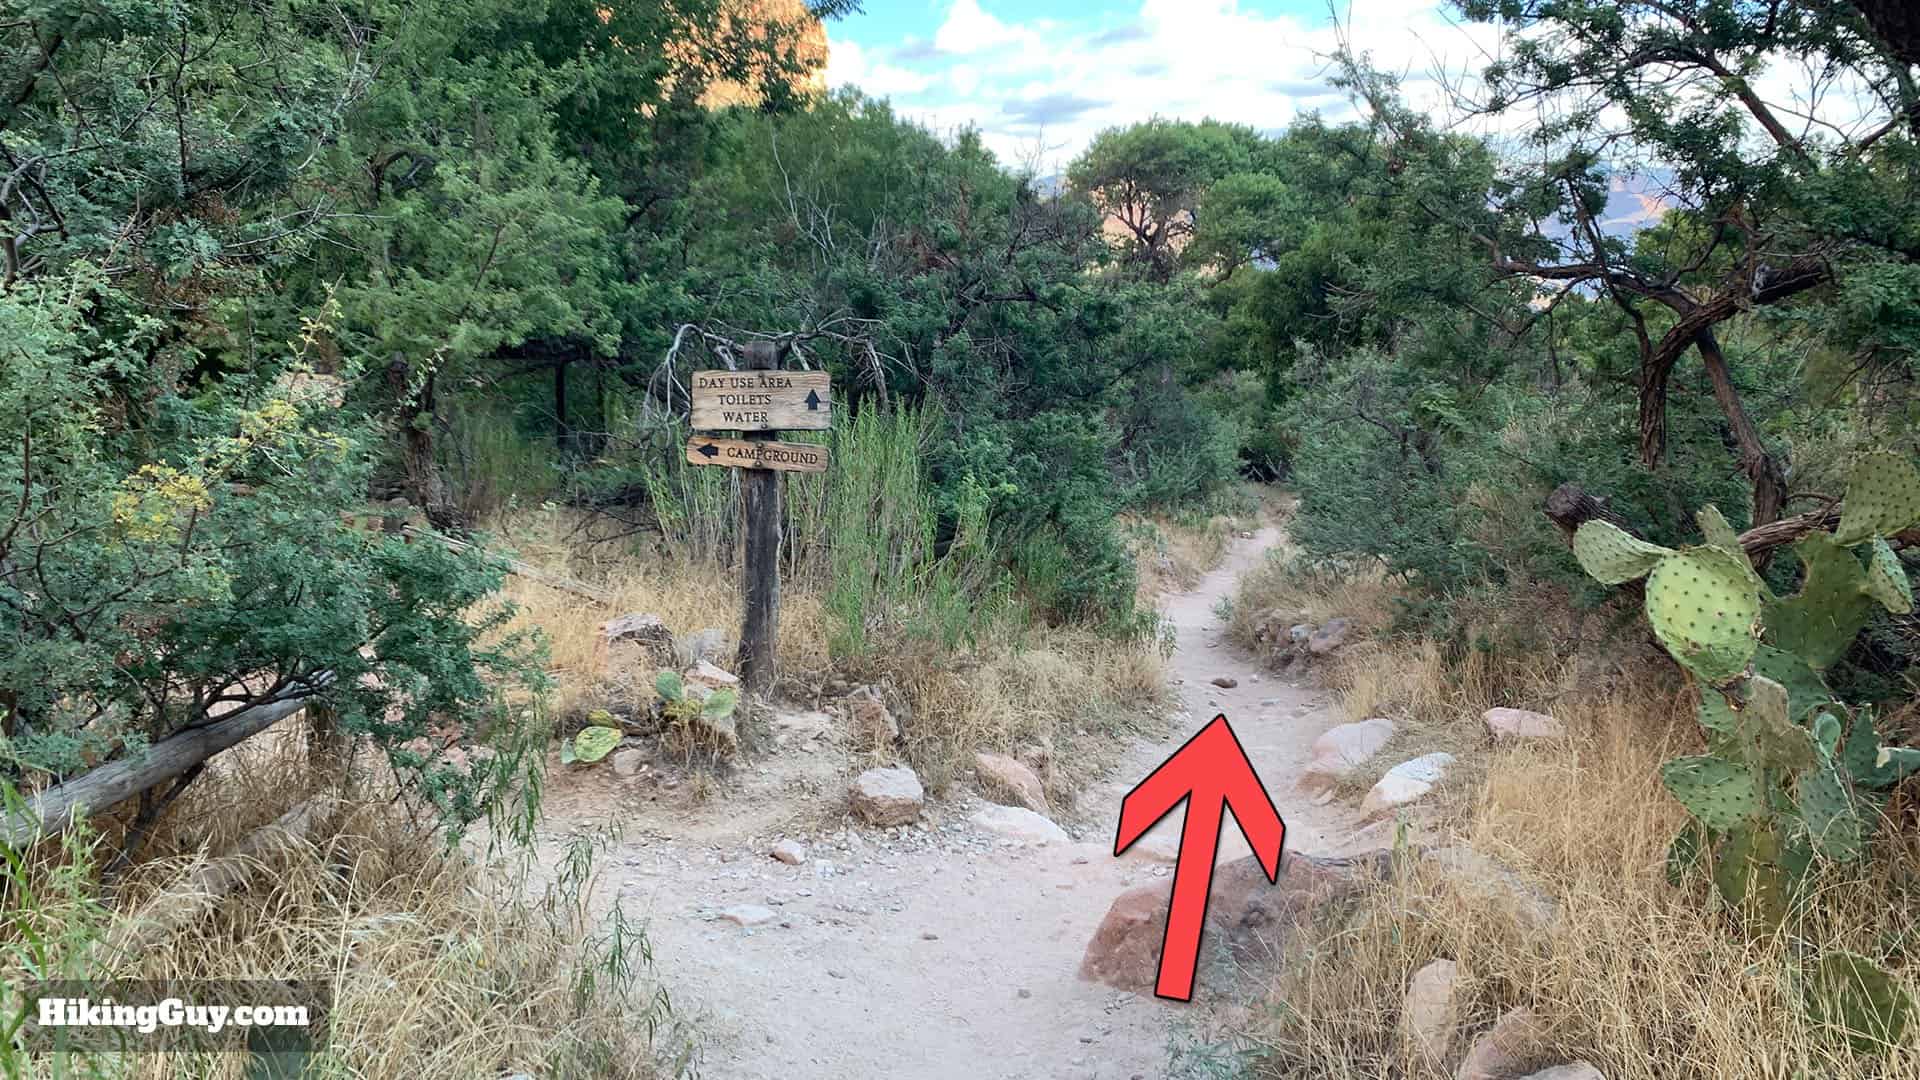
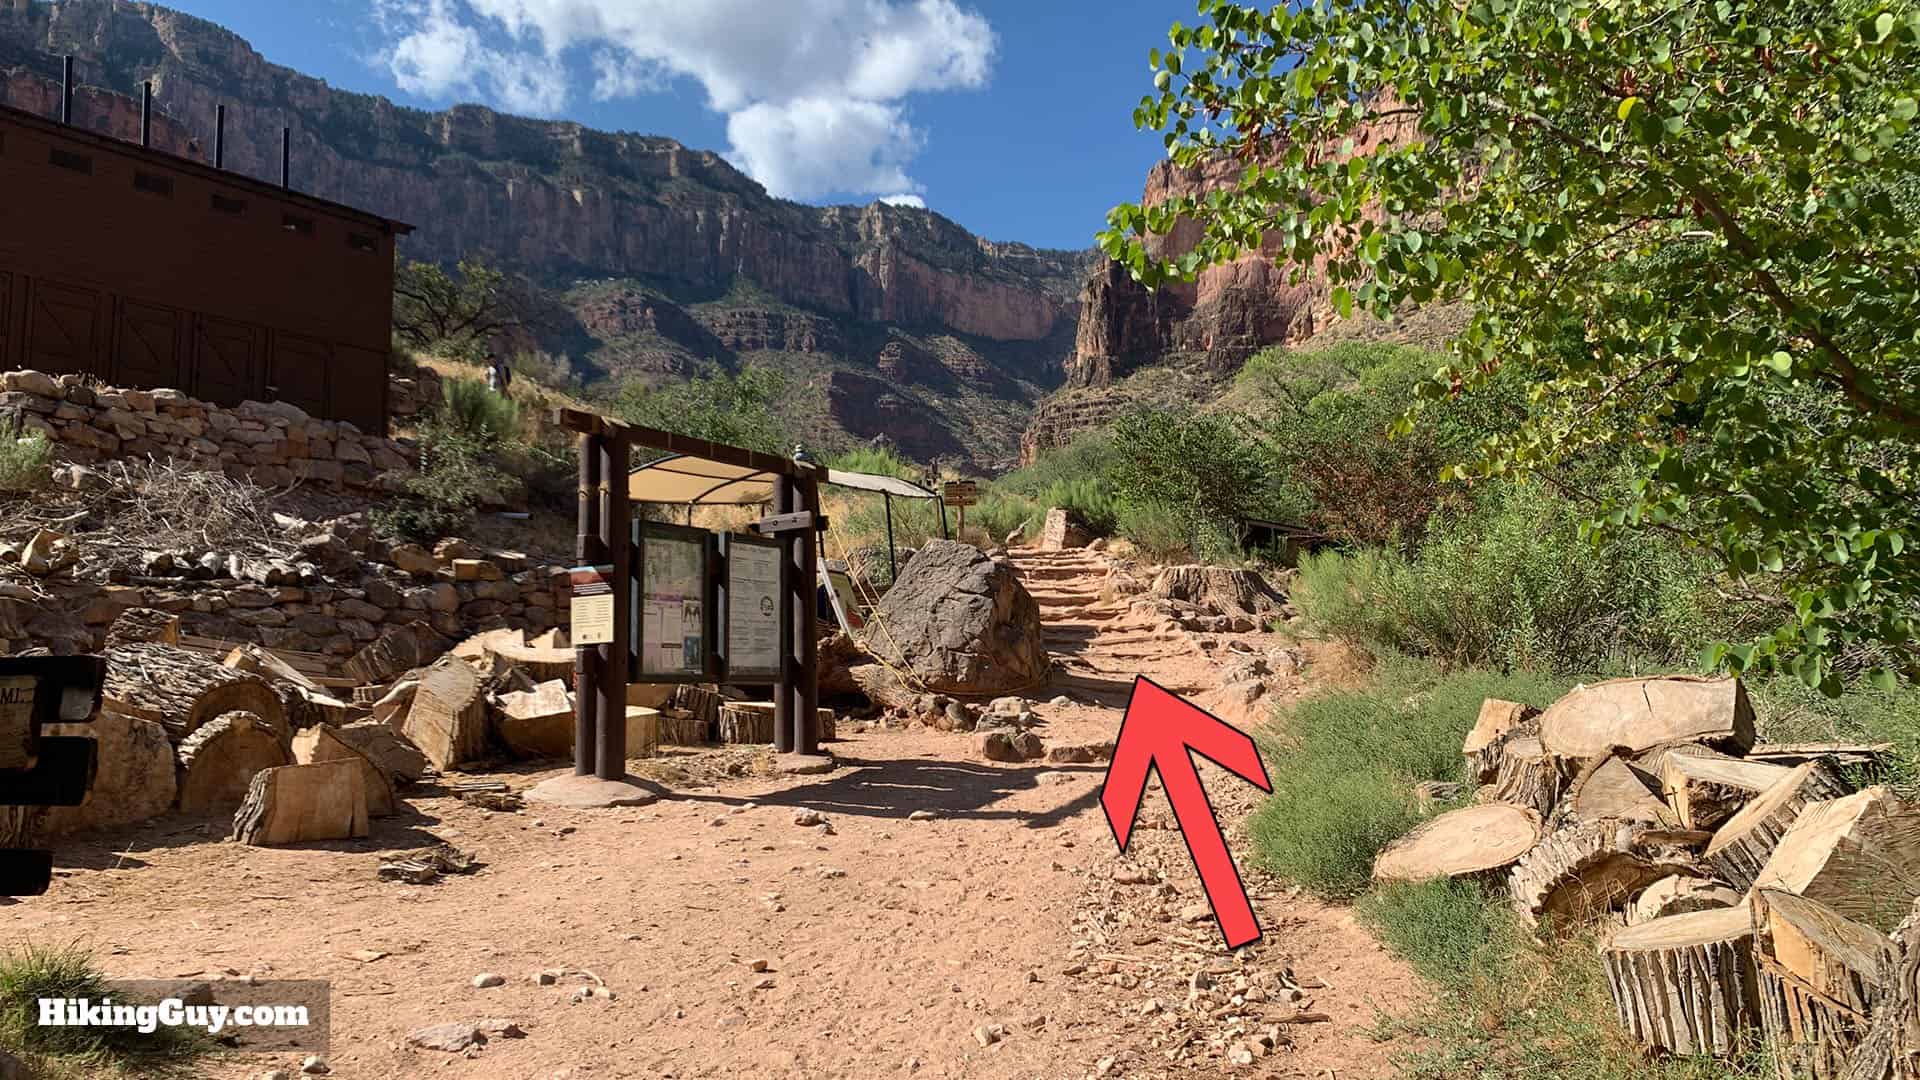
Soon you'll see the fence protecting native plants. Continue on the trail.At the turnoff for Havasupai Gardens, keep right on the trail to hike towards Plateau Point. If you want to explore the Havasupai Gardens area or use the toilets, make the left here.
The fertile land at Havasupai Garden (around Garden Creek) has been cultivated since 300AD. Western tourists starting arriving in the 1890s and as you know, the last natives were moved out of here in 1928. Today there is a ranger station, toilets, picnic areas, a campground, and water.
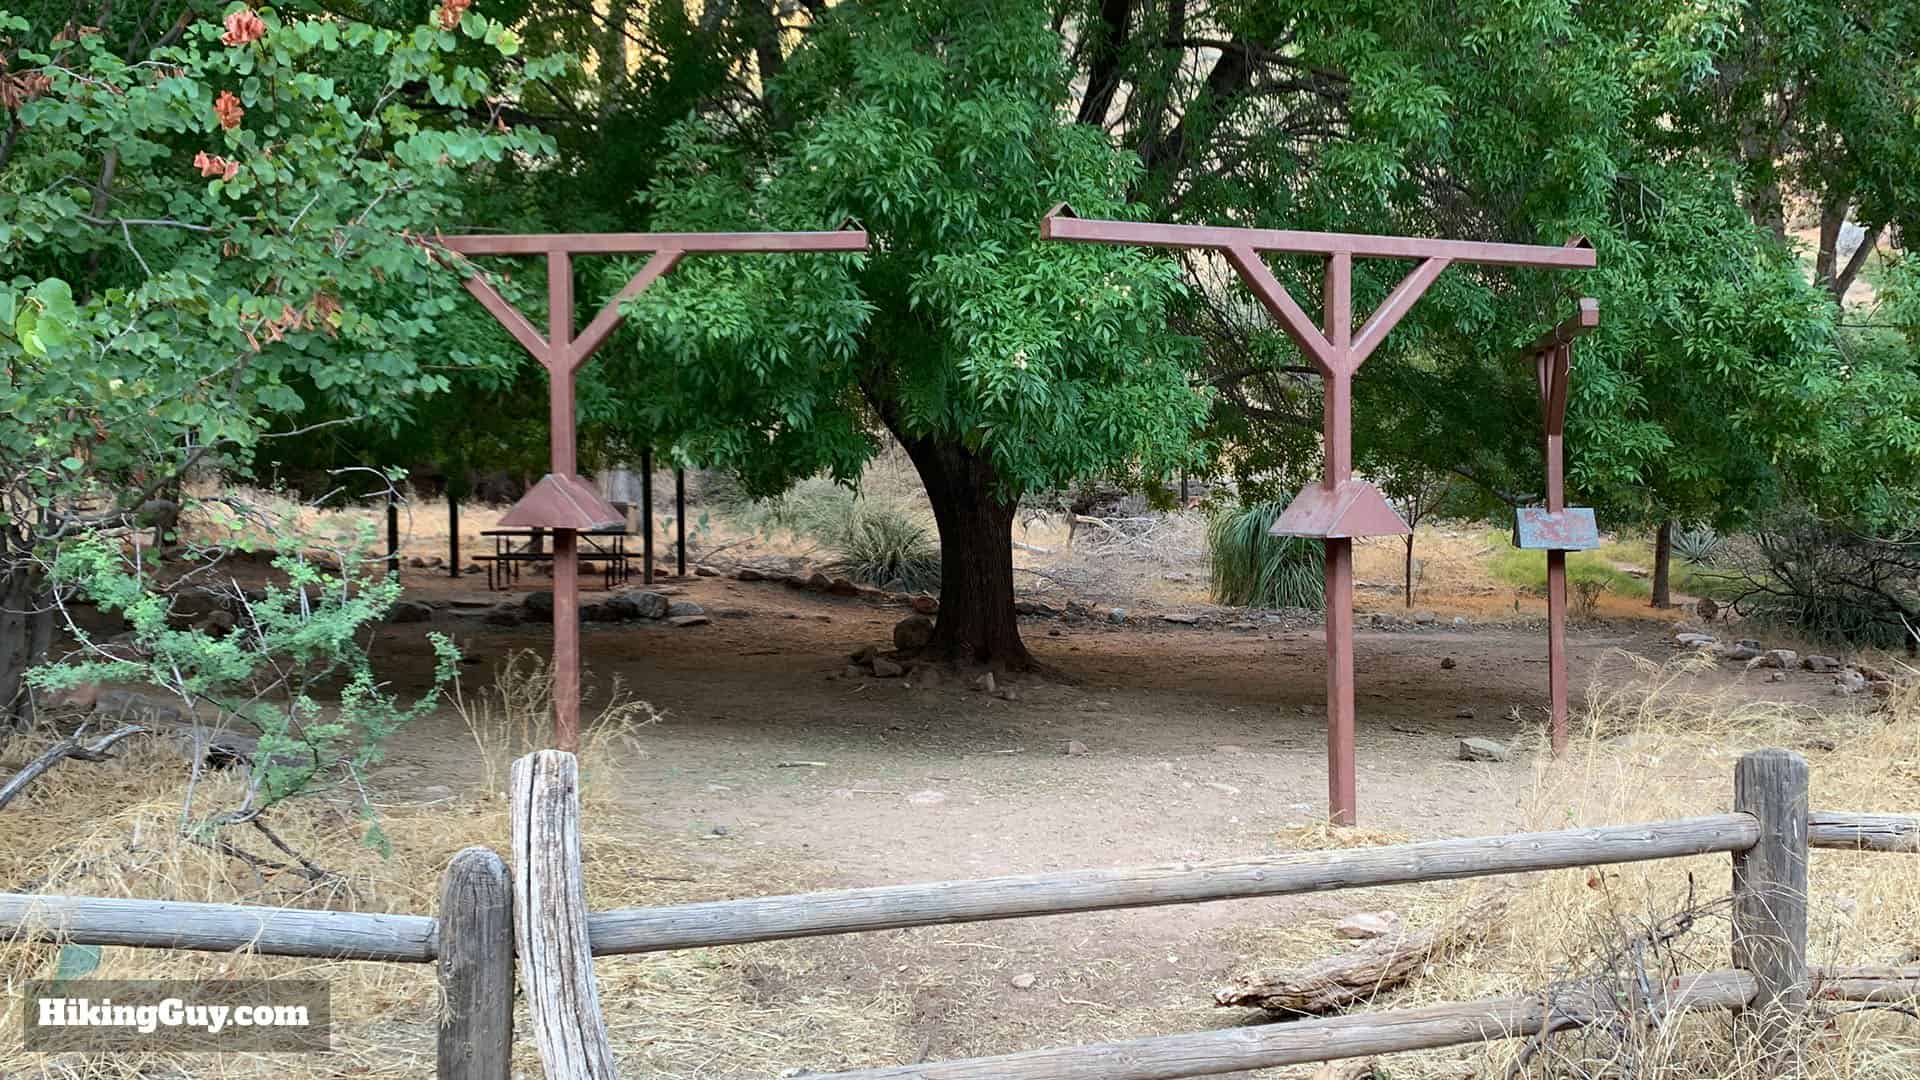
You'll pass by the campground as you continue on the trail. These poles are for hanging your food away from rodents.Continue past some benches and picnic areas. The post on the right is used to tie up mules.Depending on the time of year, Garden Creek might be flowing next to the trail as you continue down the trail. Stay to the right.
Havasupai means "people of the blue-green waters," referring to the color of the Colorado River, which runs through the Grand Canyon. In the early 1900s they worked as laborers here and created much of what you see at Grand Canyon National Park.
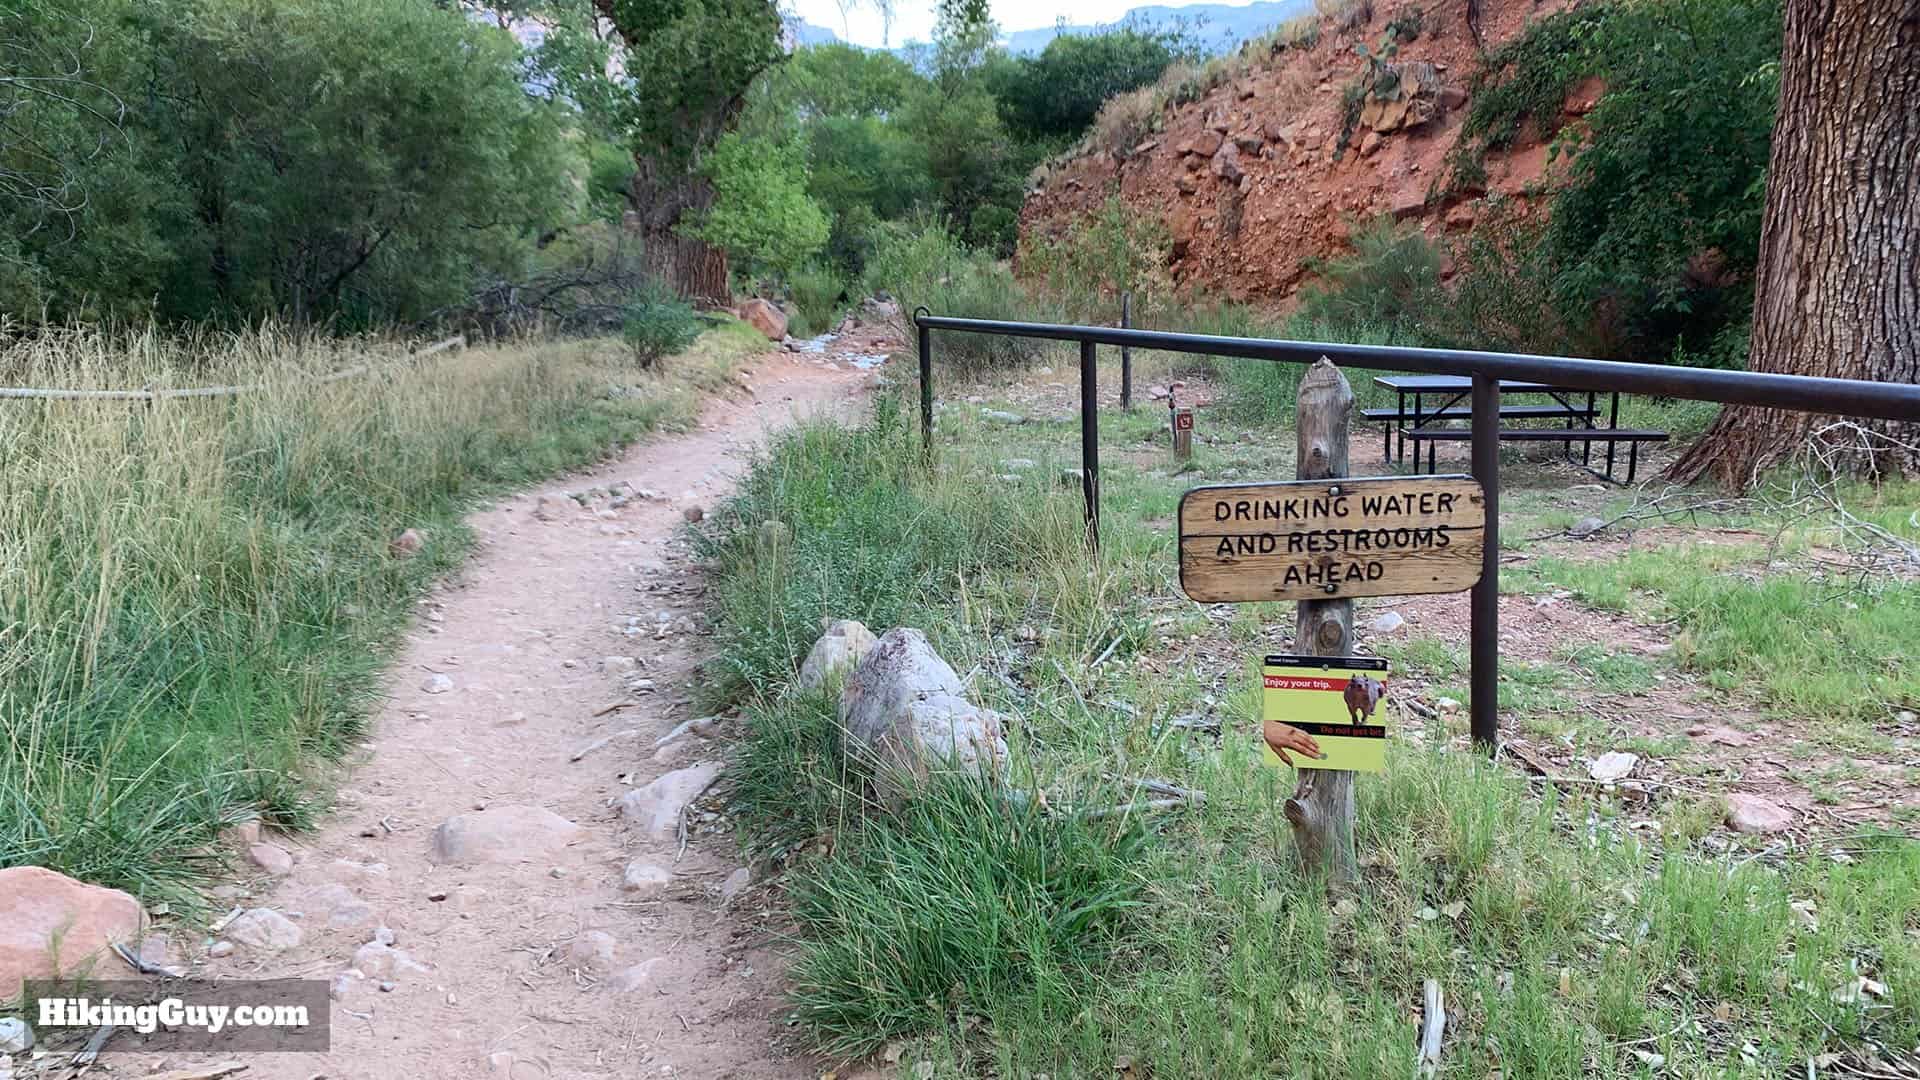
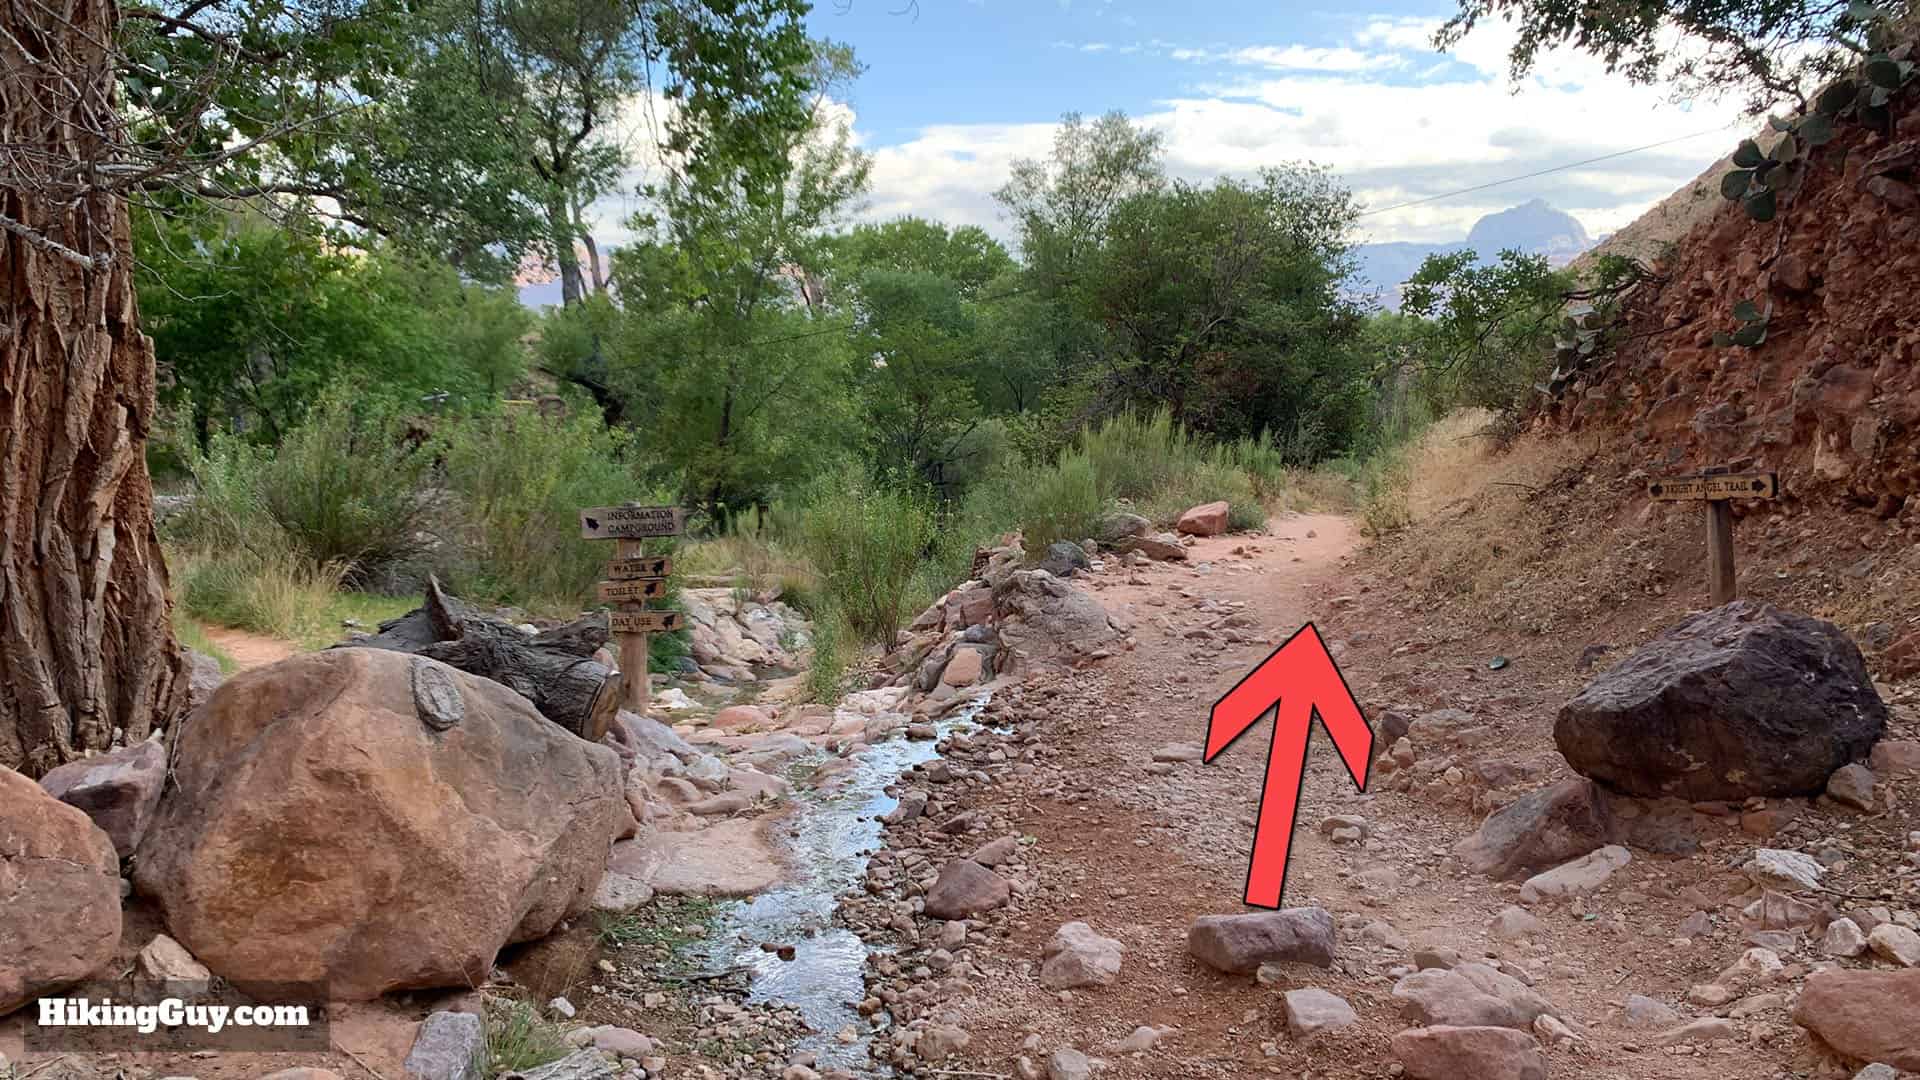
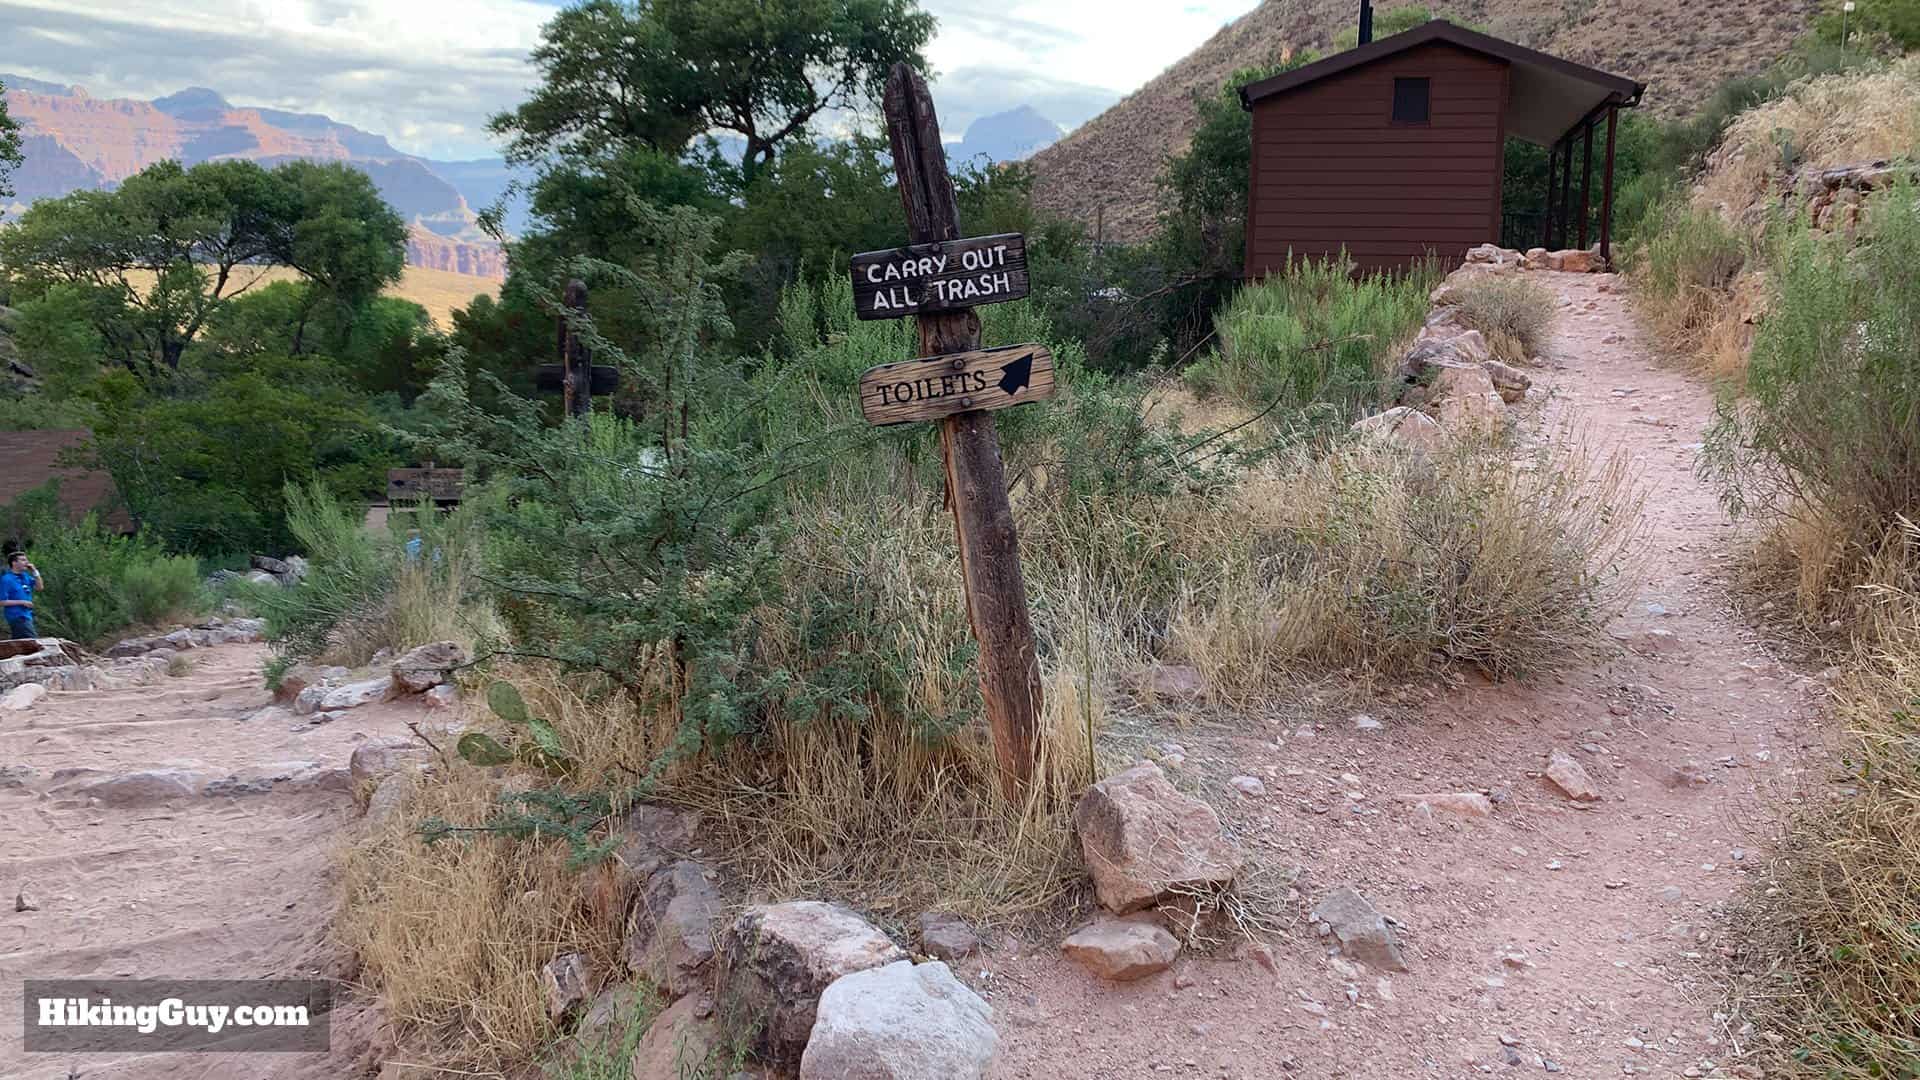
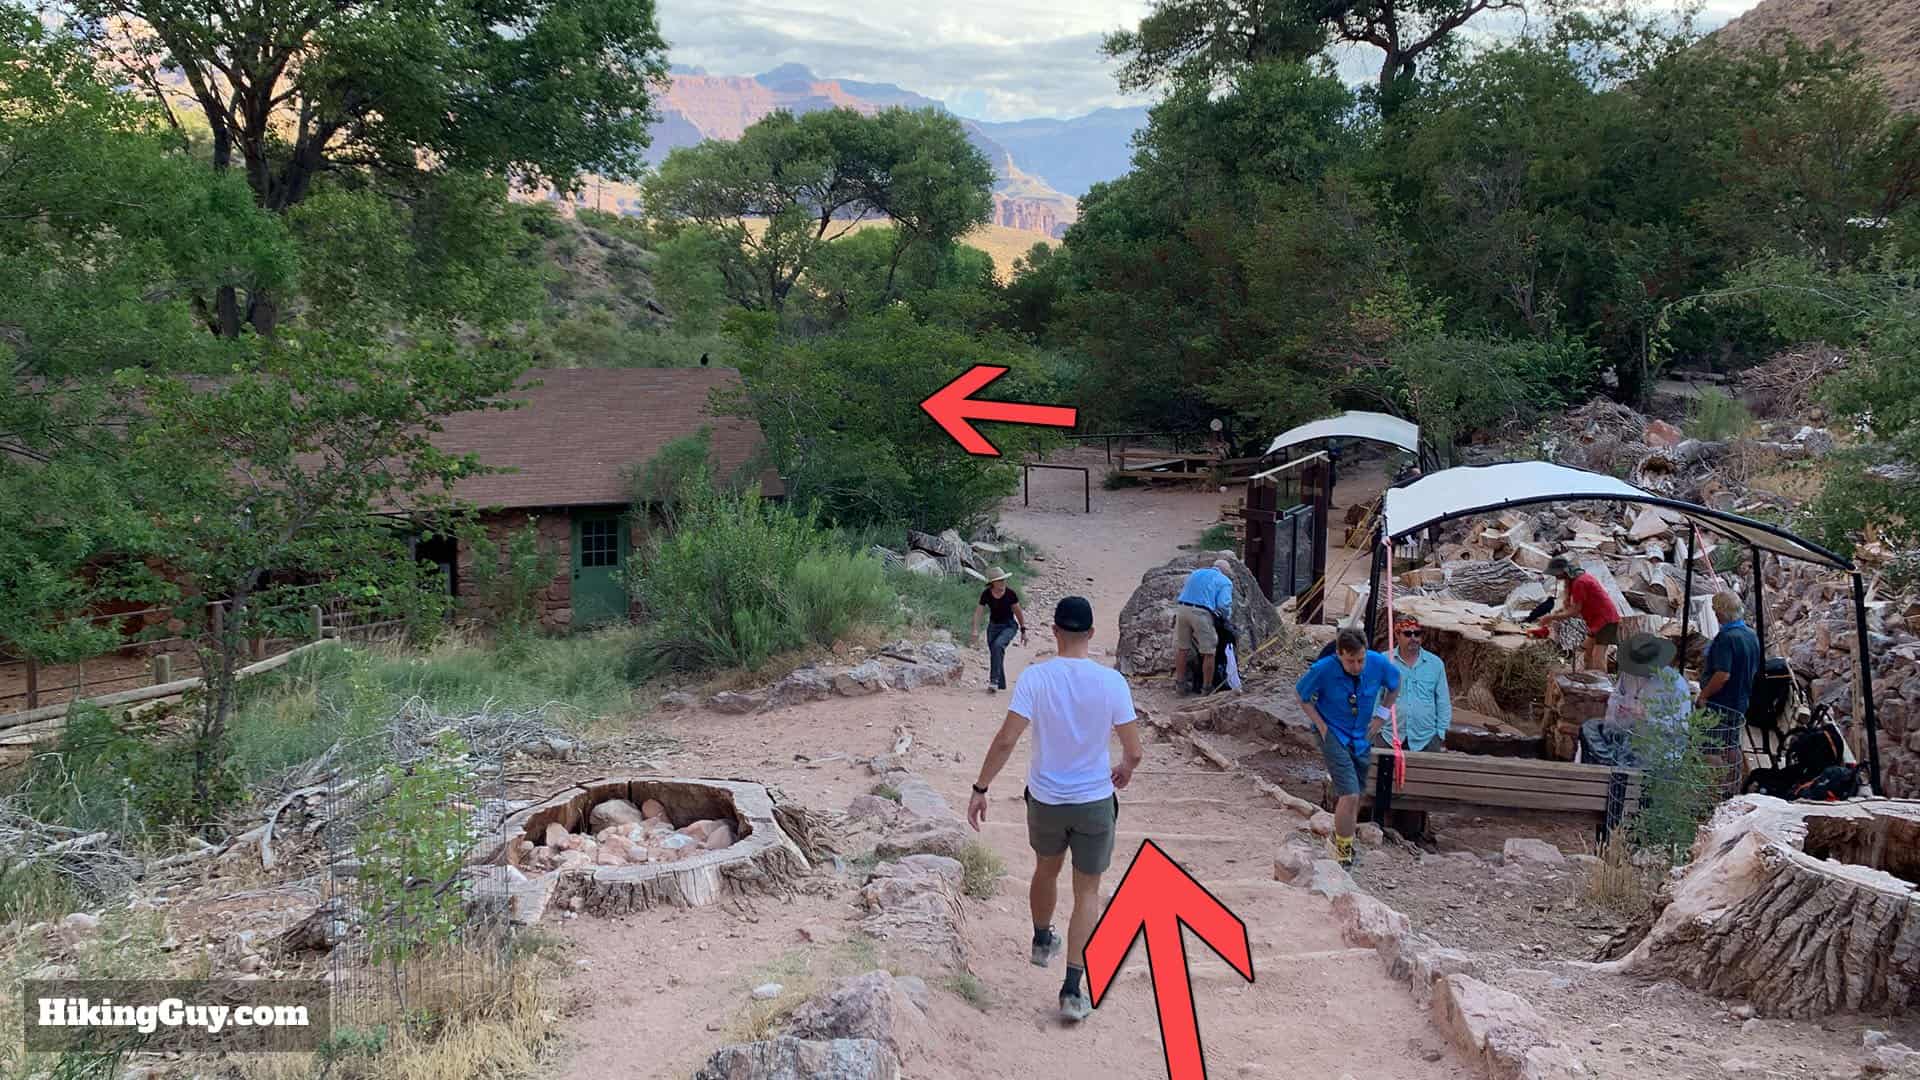
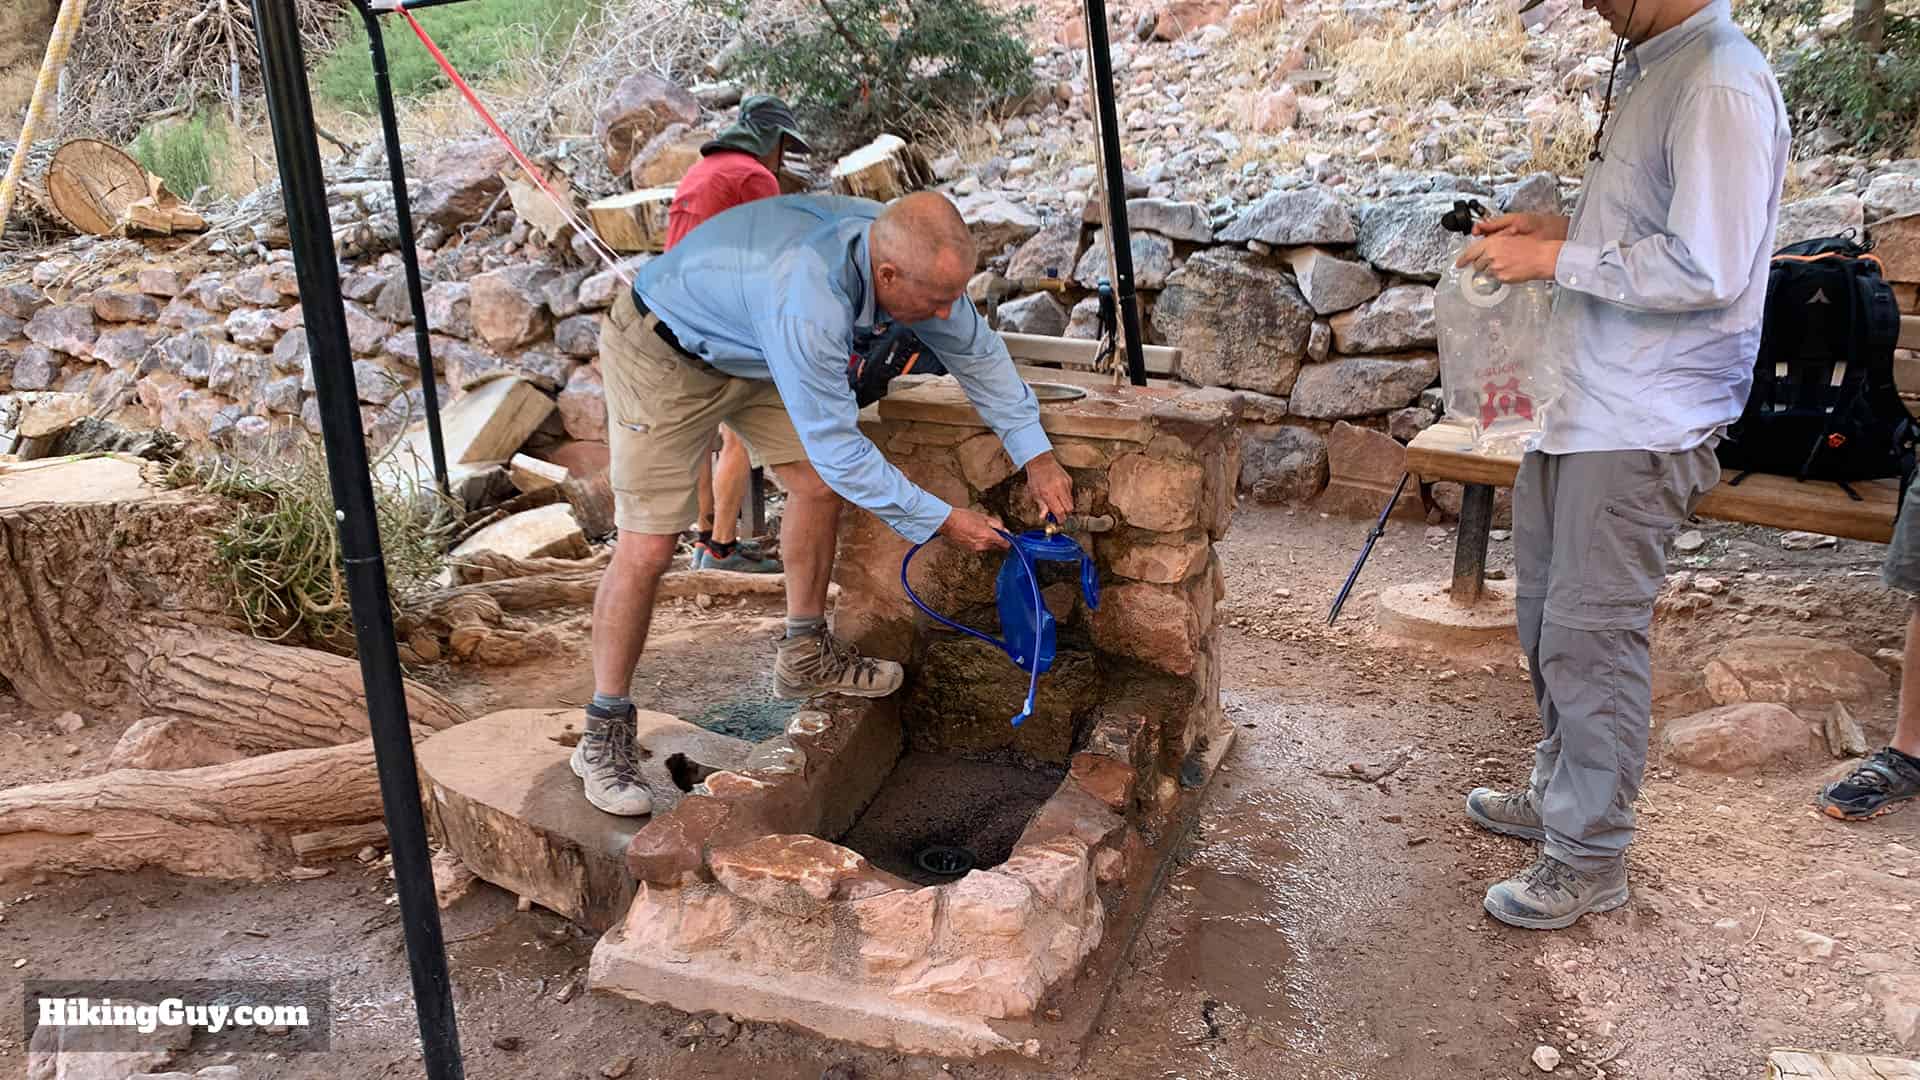
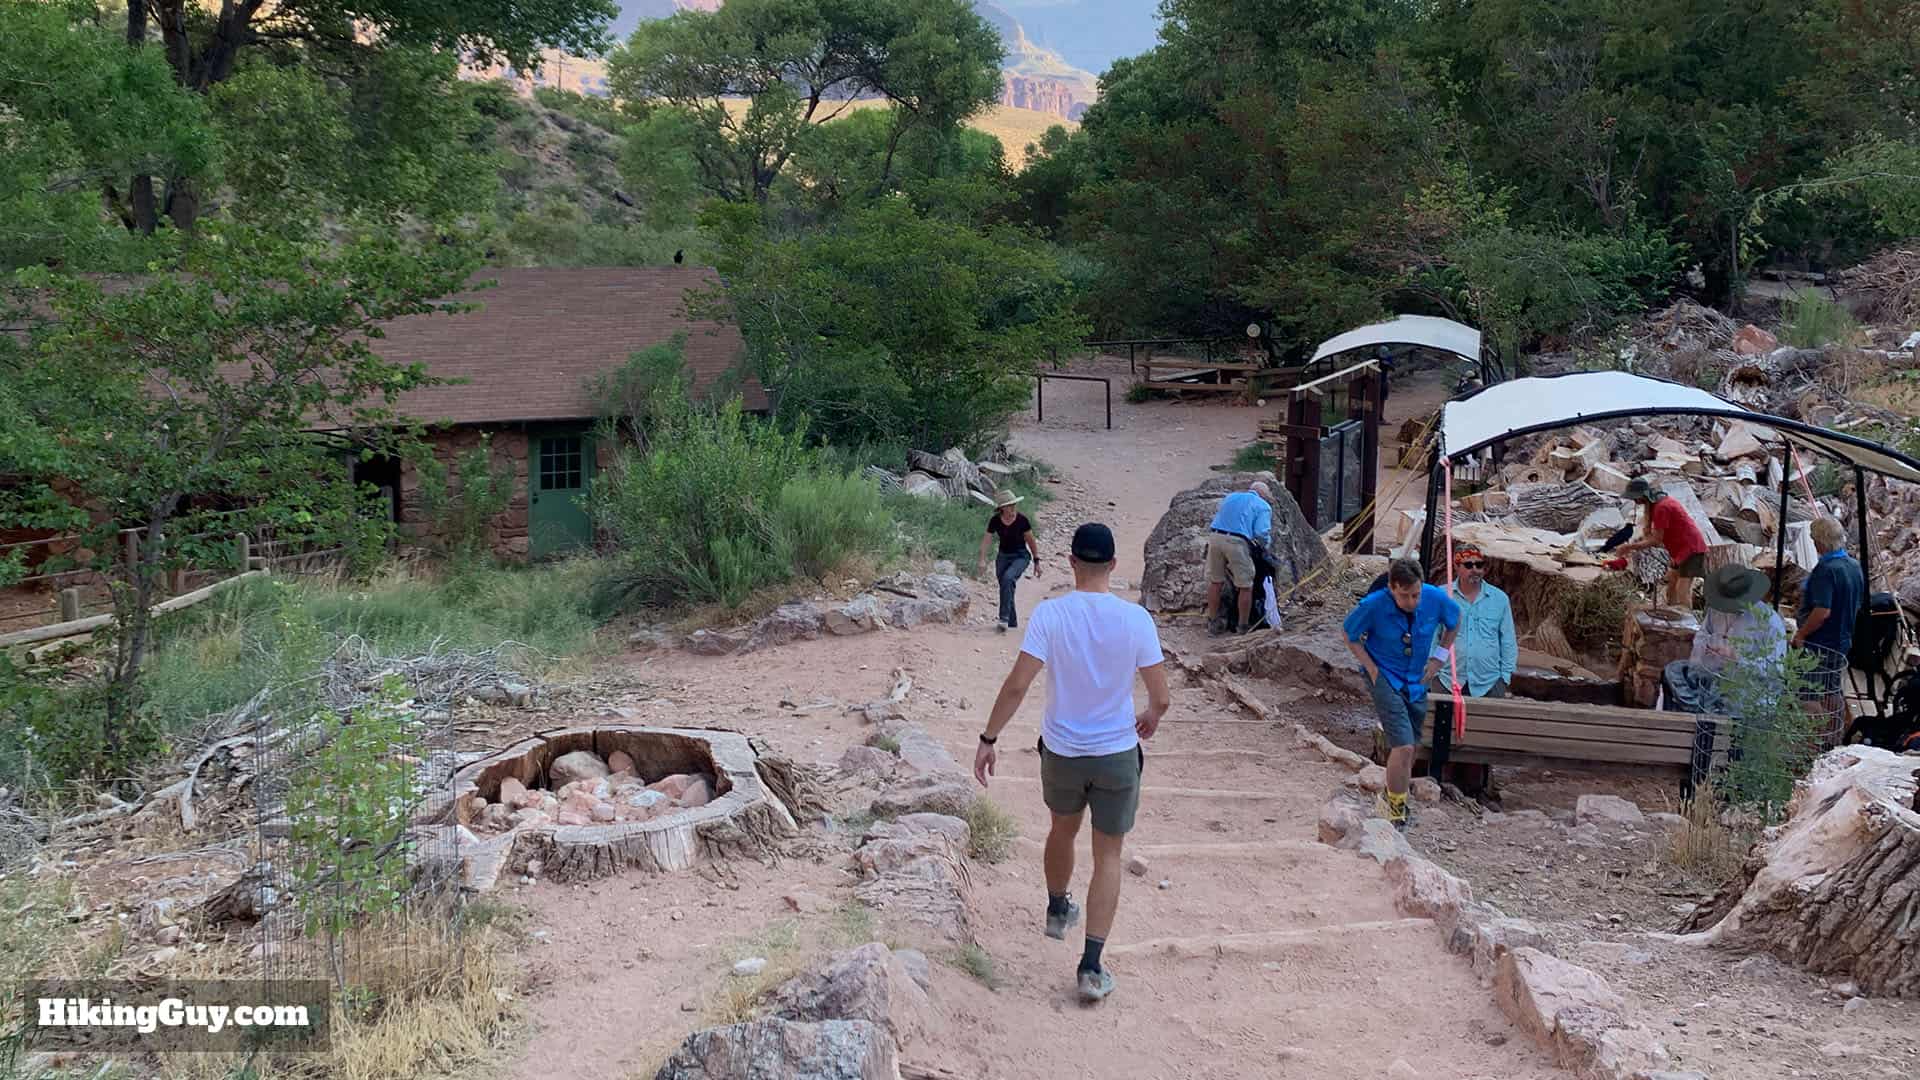
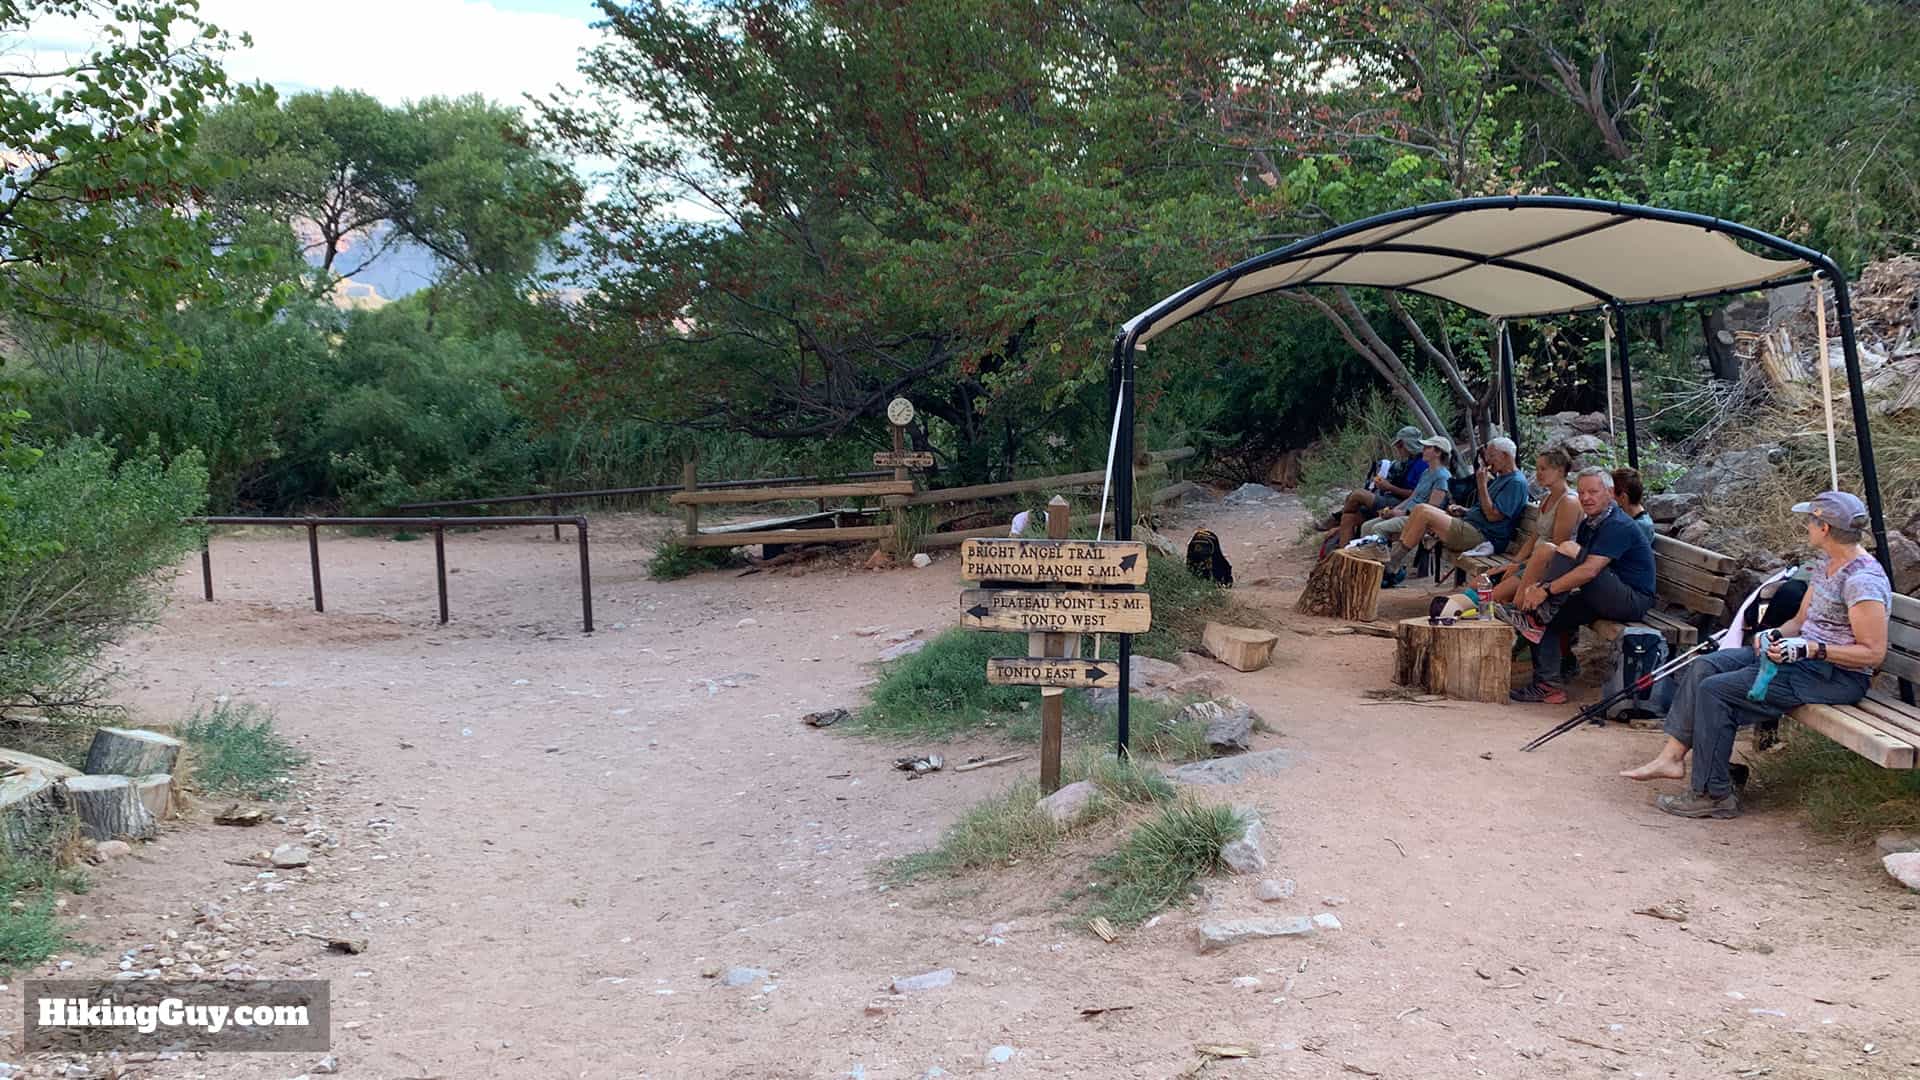
Eventually you'll reach the end of the Havasupai Gardens area. To the right are toilets, to the left is the Bright Angel Trail.When you get down to the last stretch of Havasupai Gardens, you'll be heading to the left to join the Plateau Point Trail.There's a water station on the right where you can refill.When you come to the stairs down, the toilets are up on the right, and a shaded water area down and ahead.You'll also see a lot of the stables and structures used to feed and keep the mules.When you get down to these final mule pens you've reached the end of Havasupai Garden.
Hiking to Plateau Point
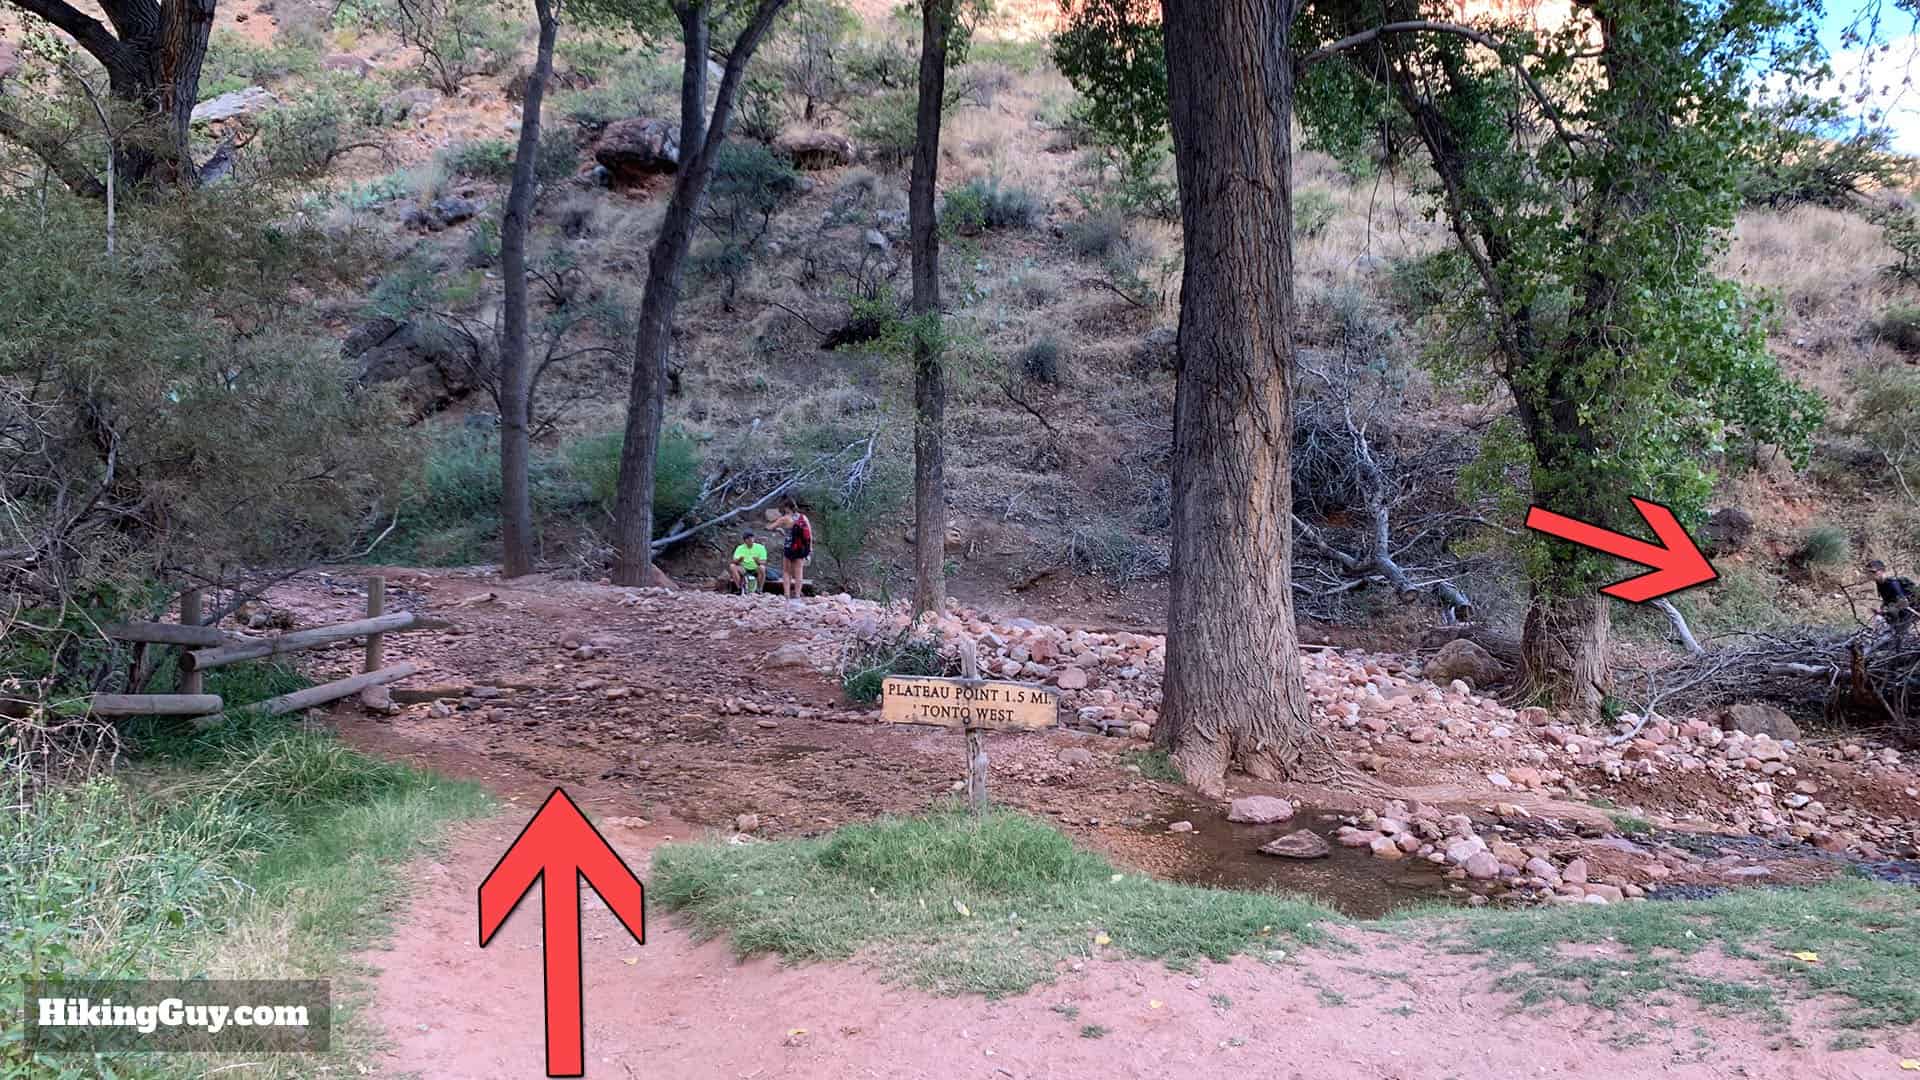
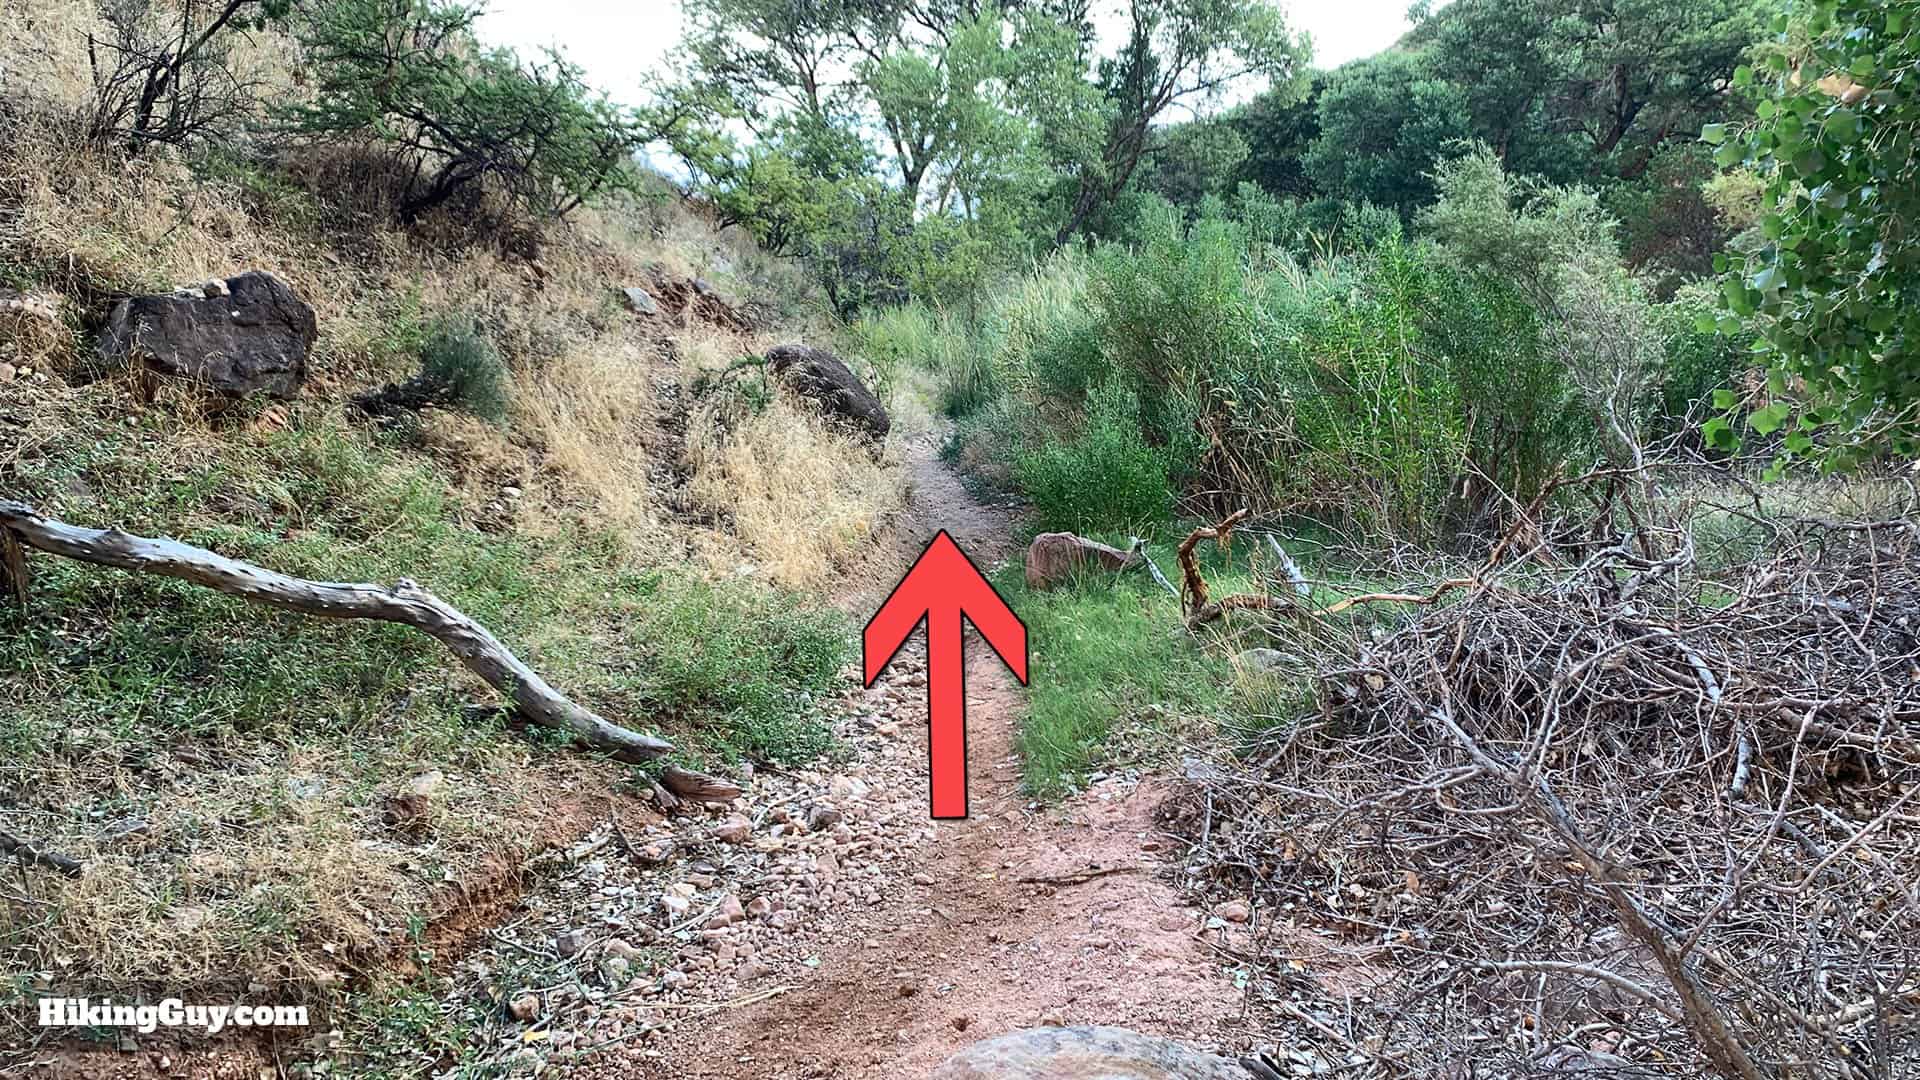
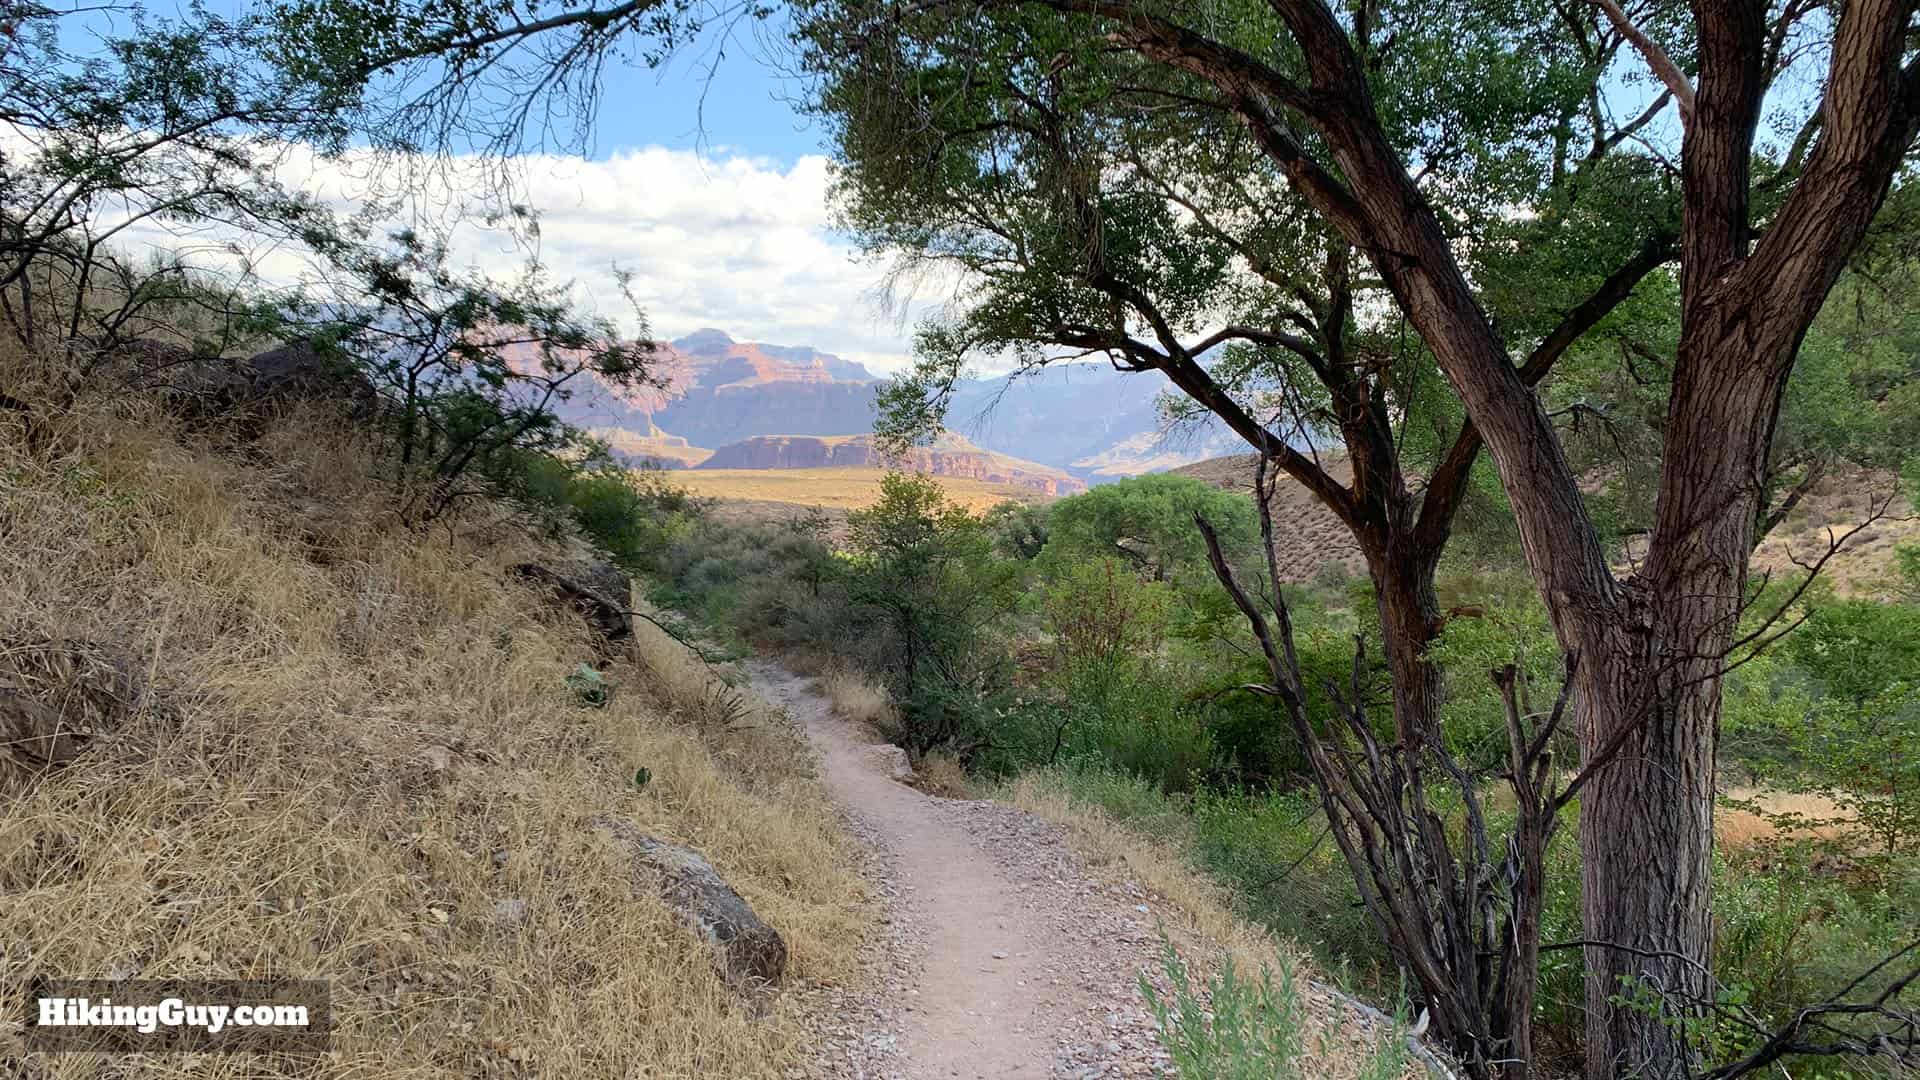
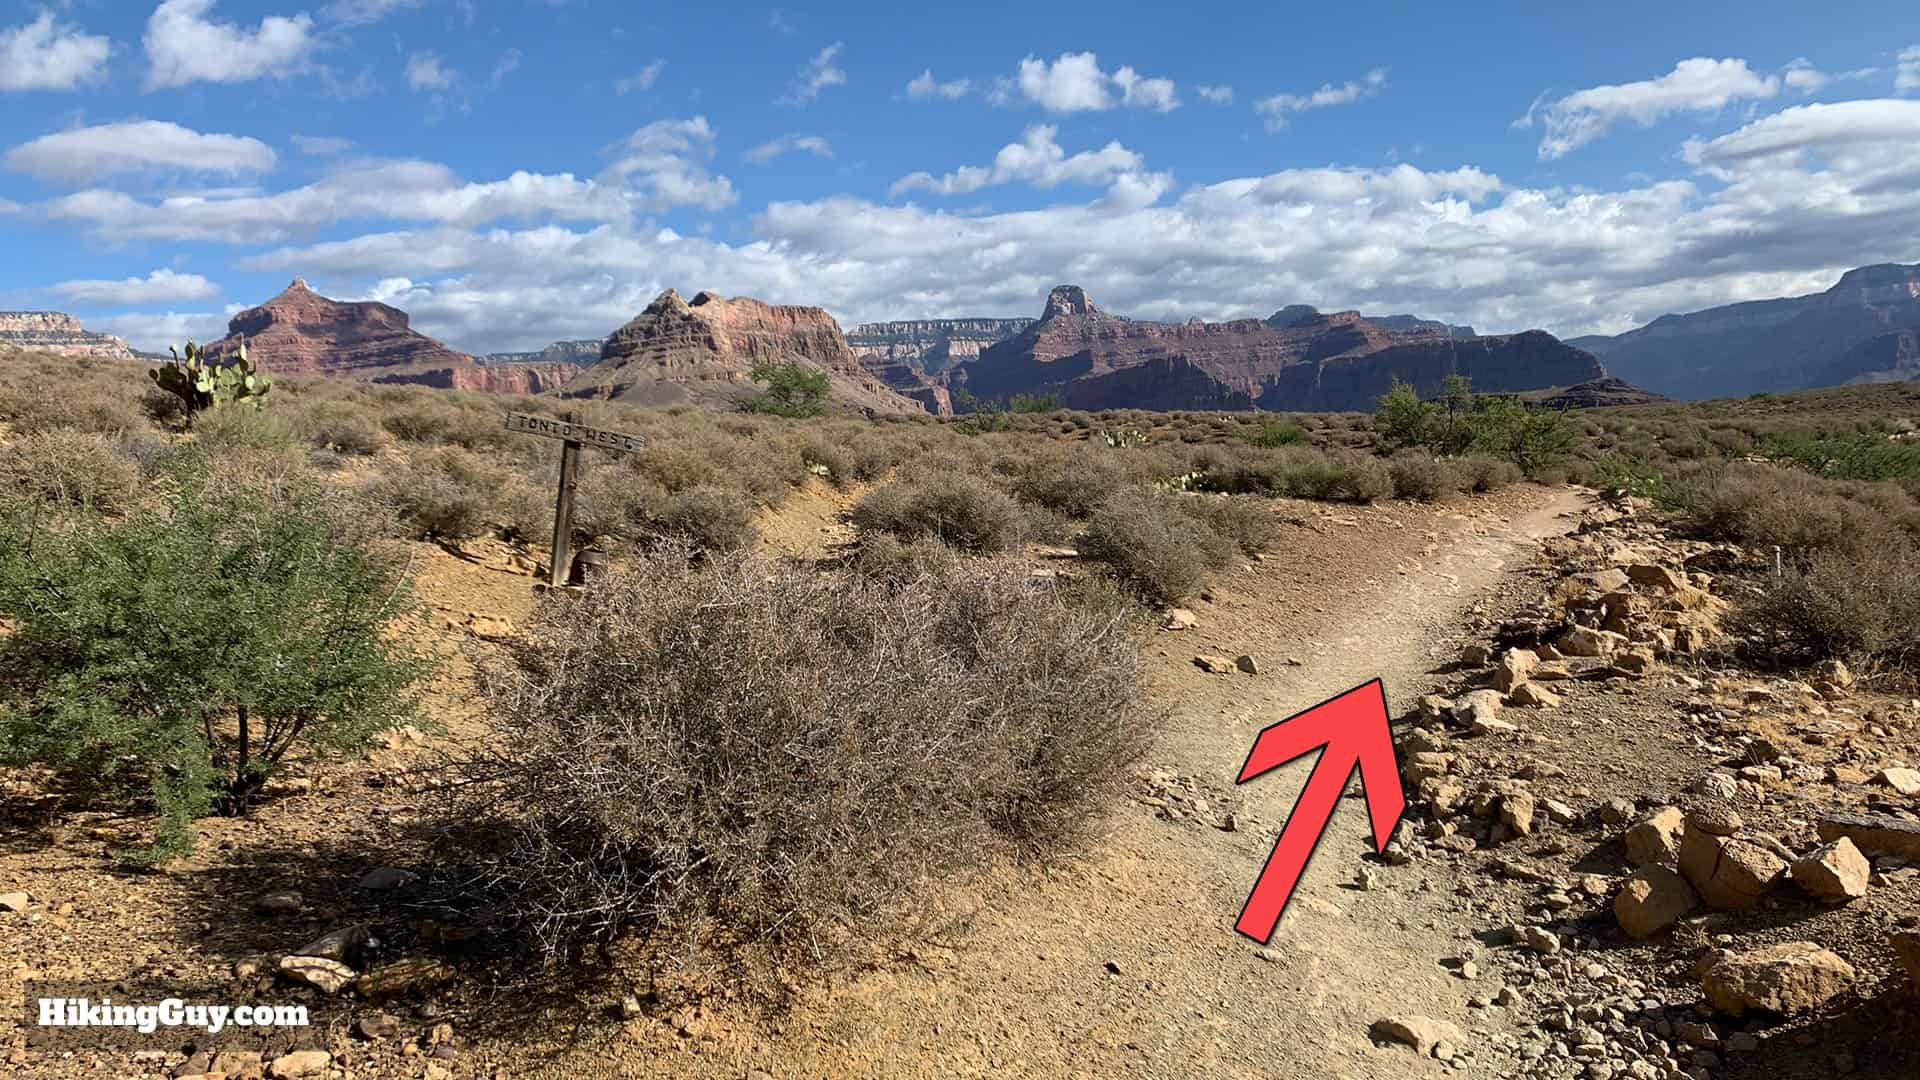
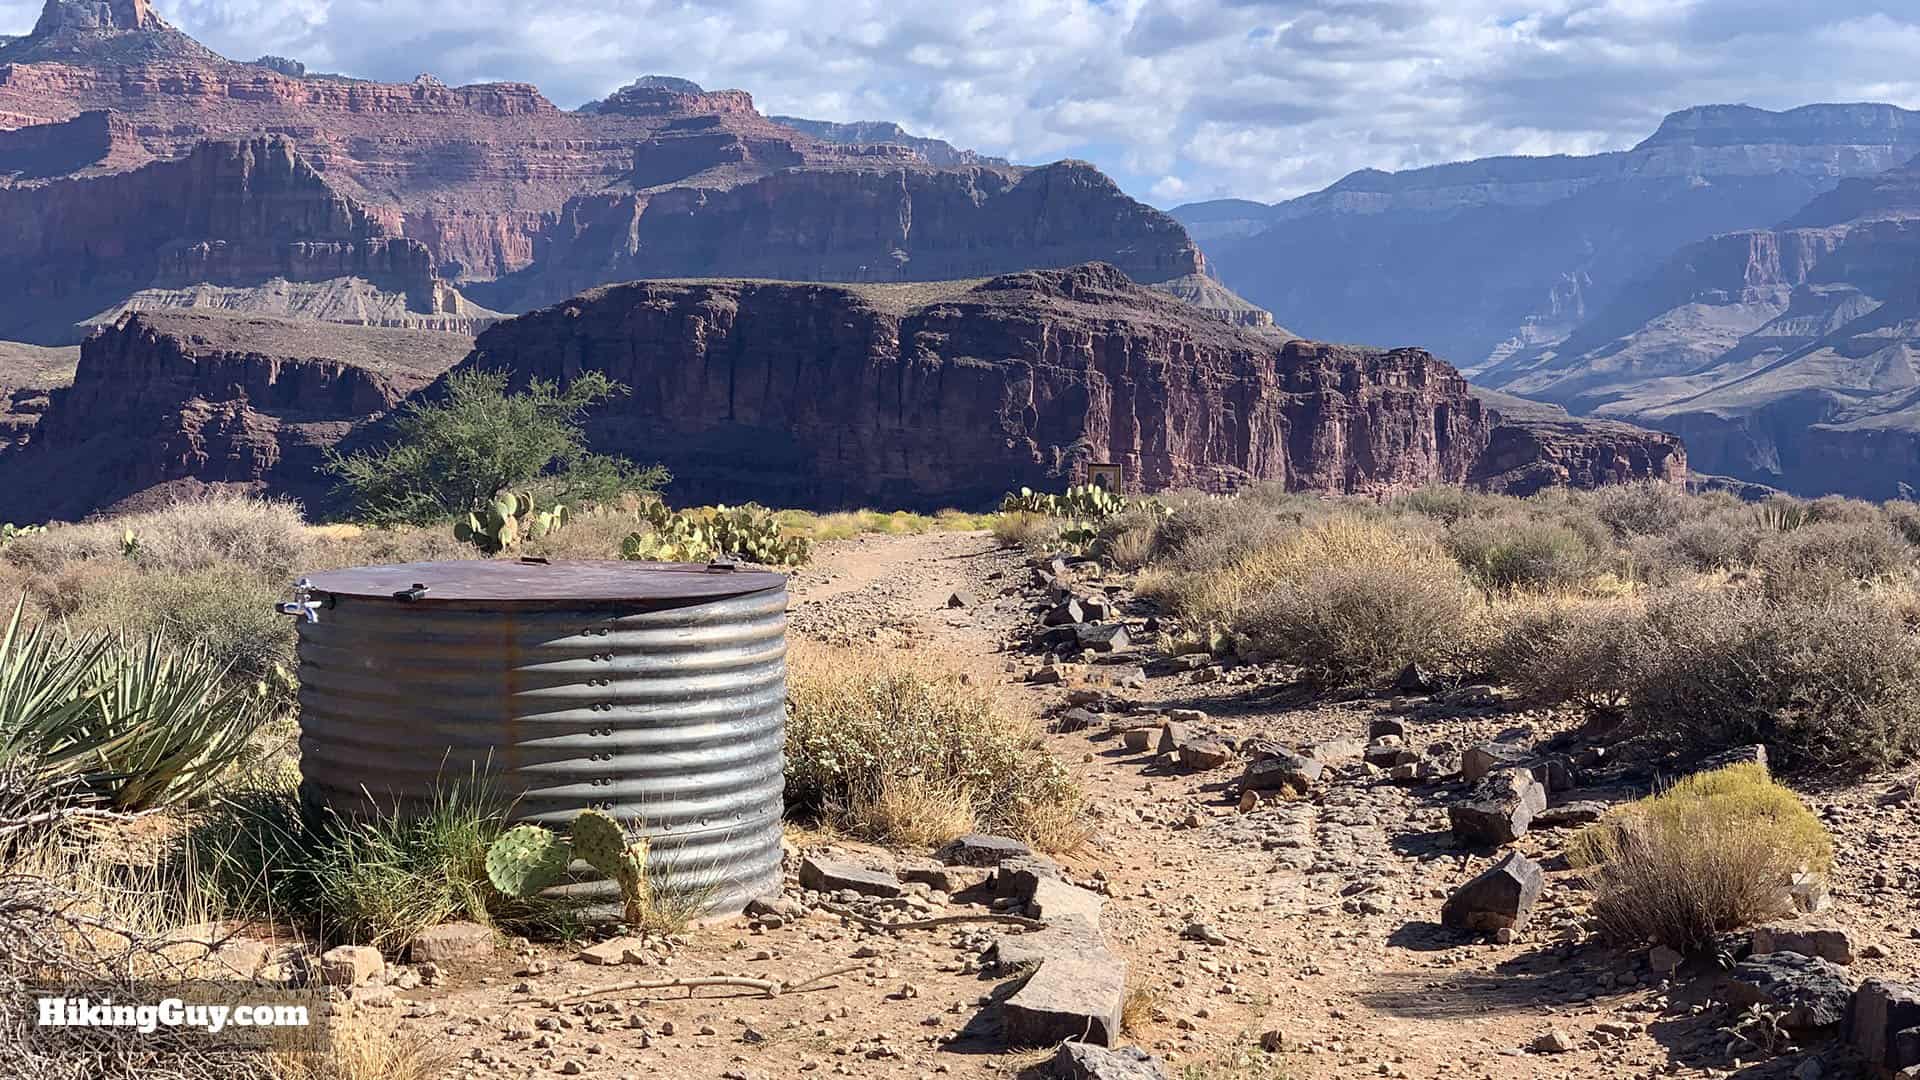
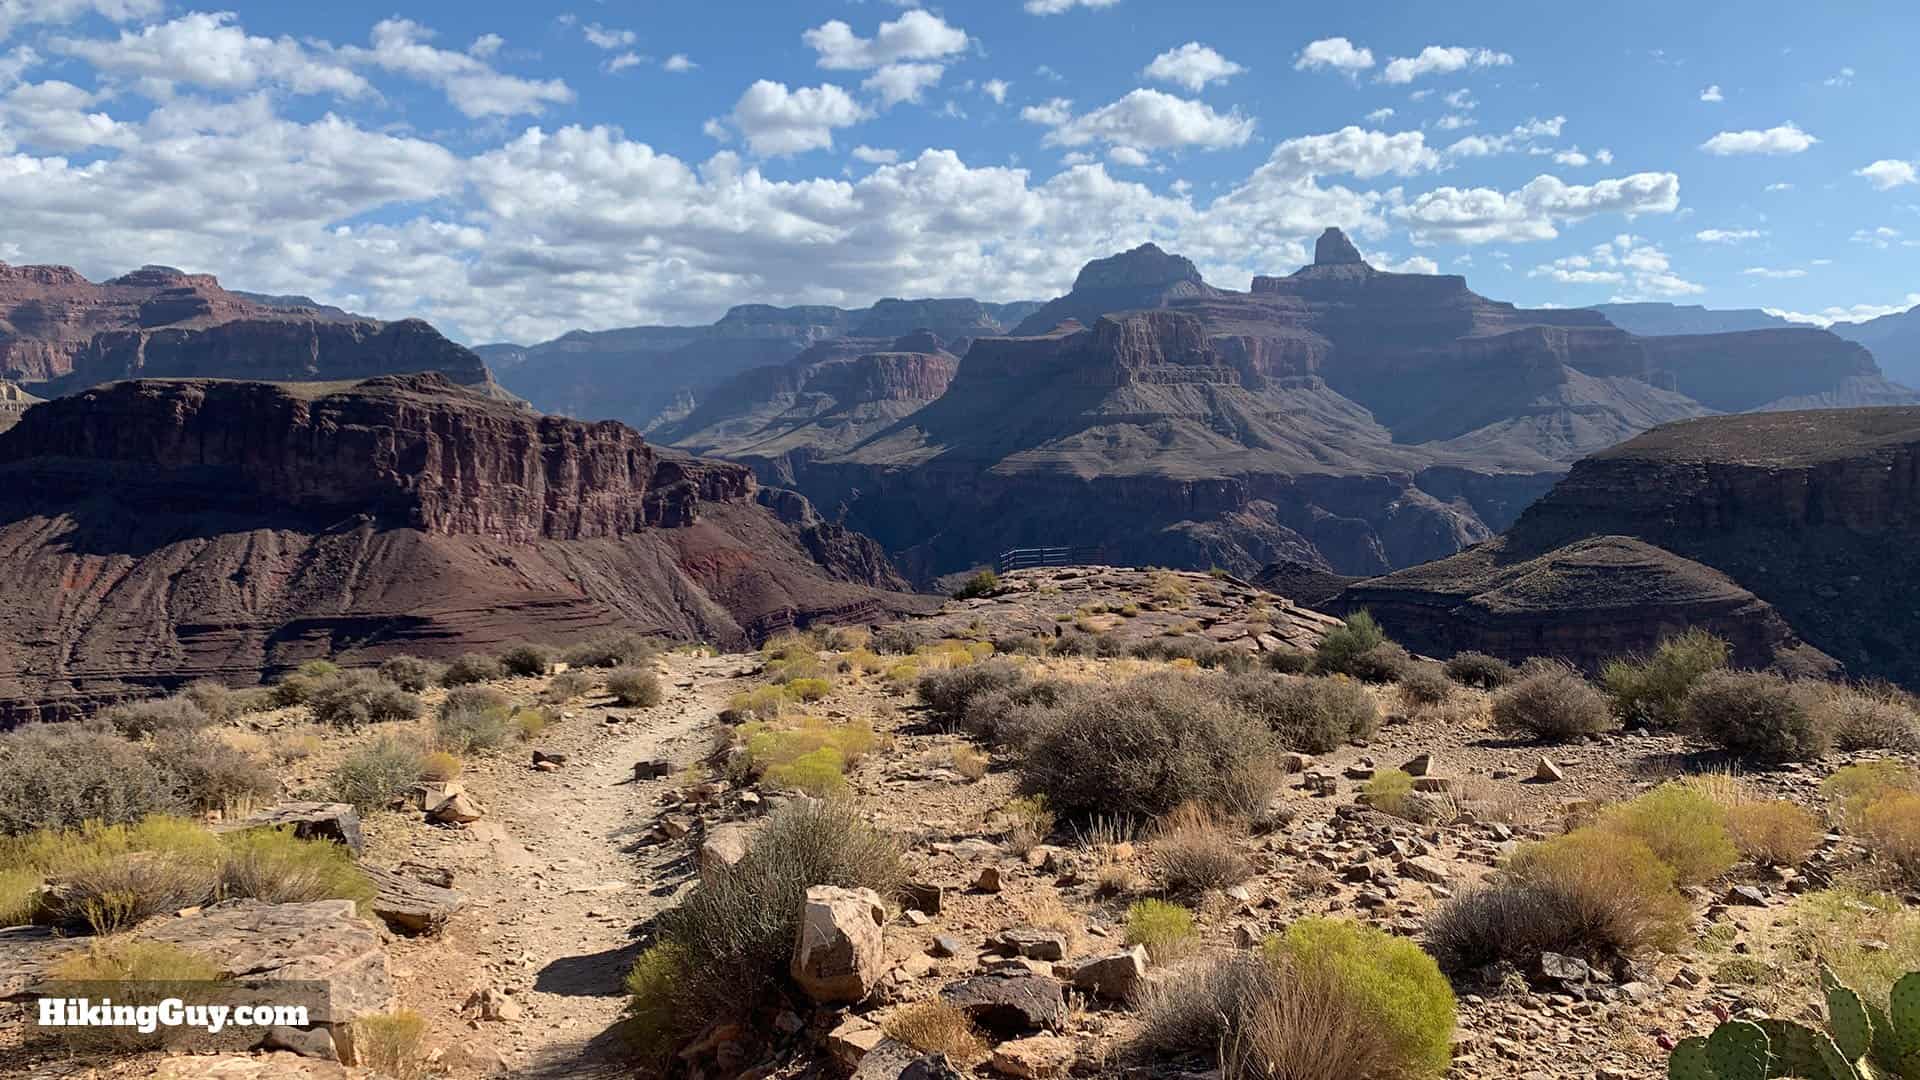
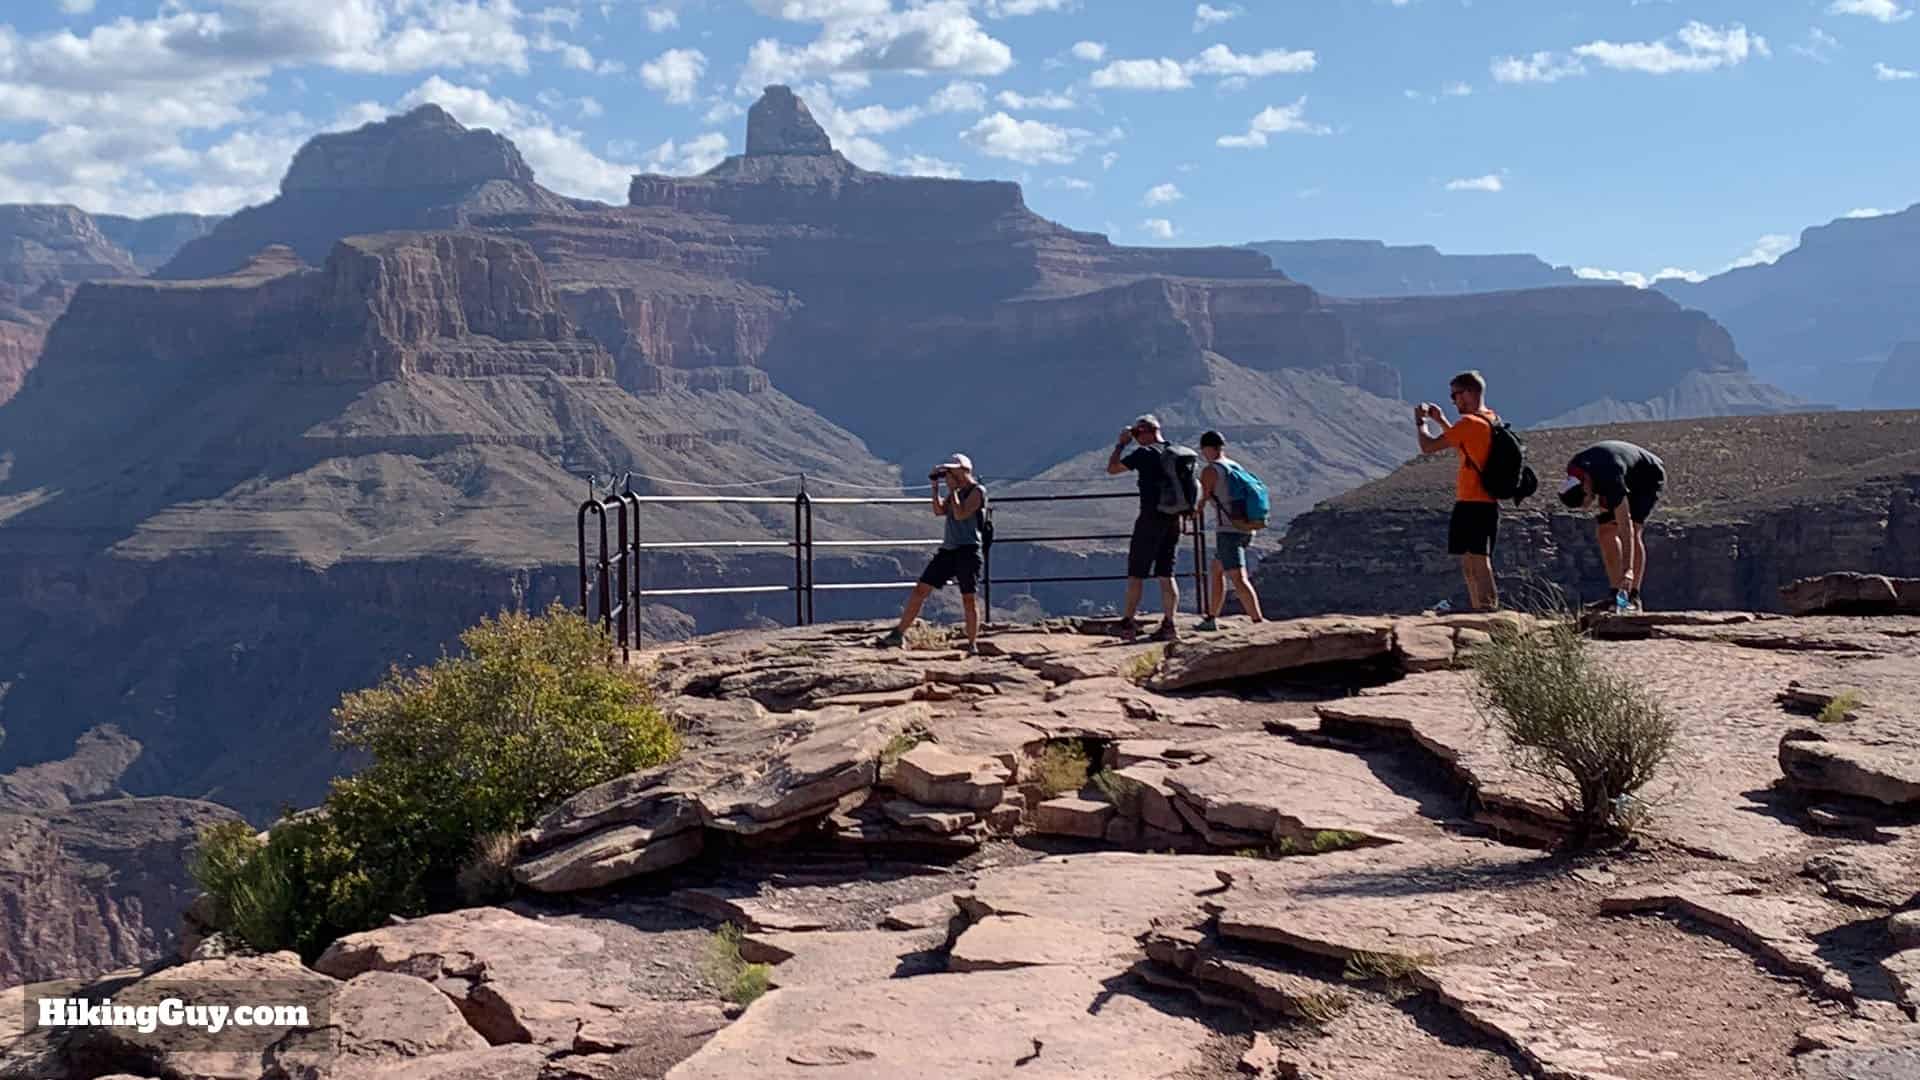
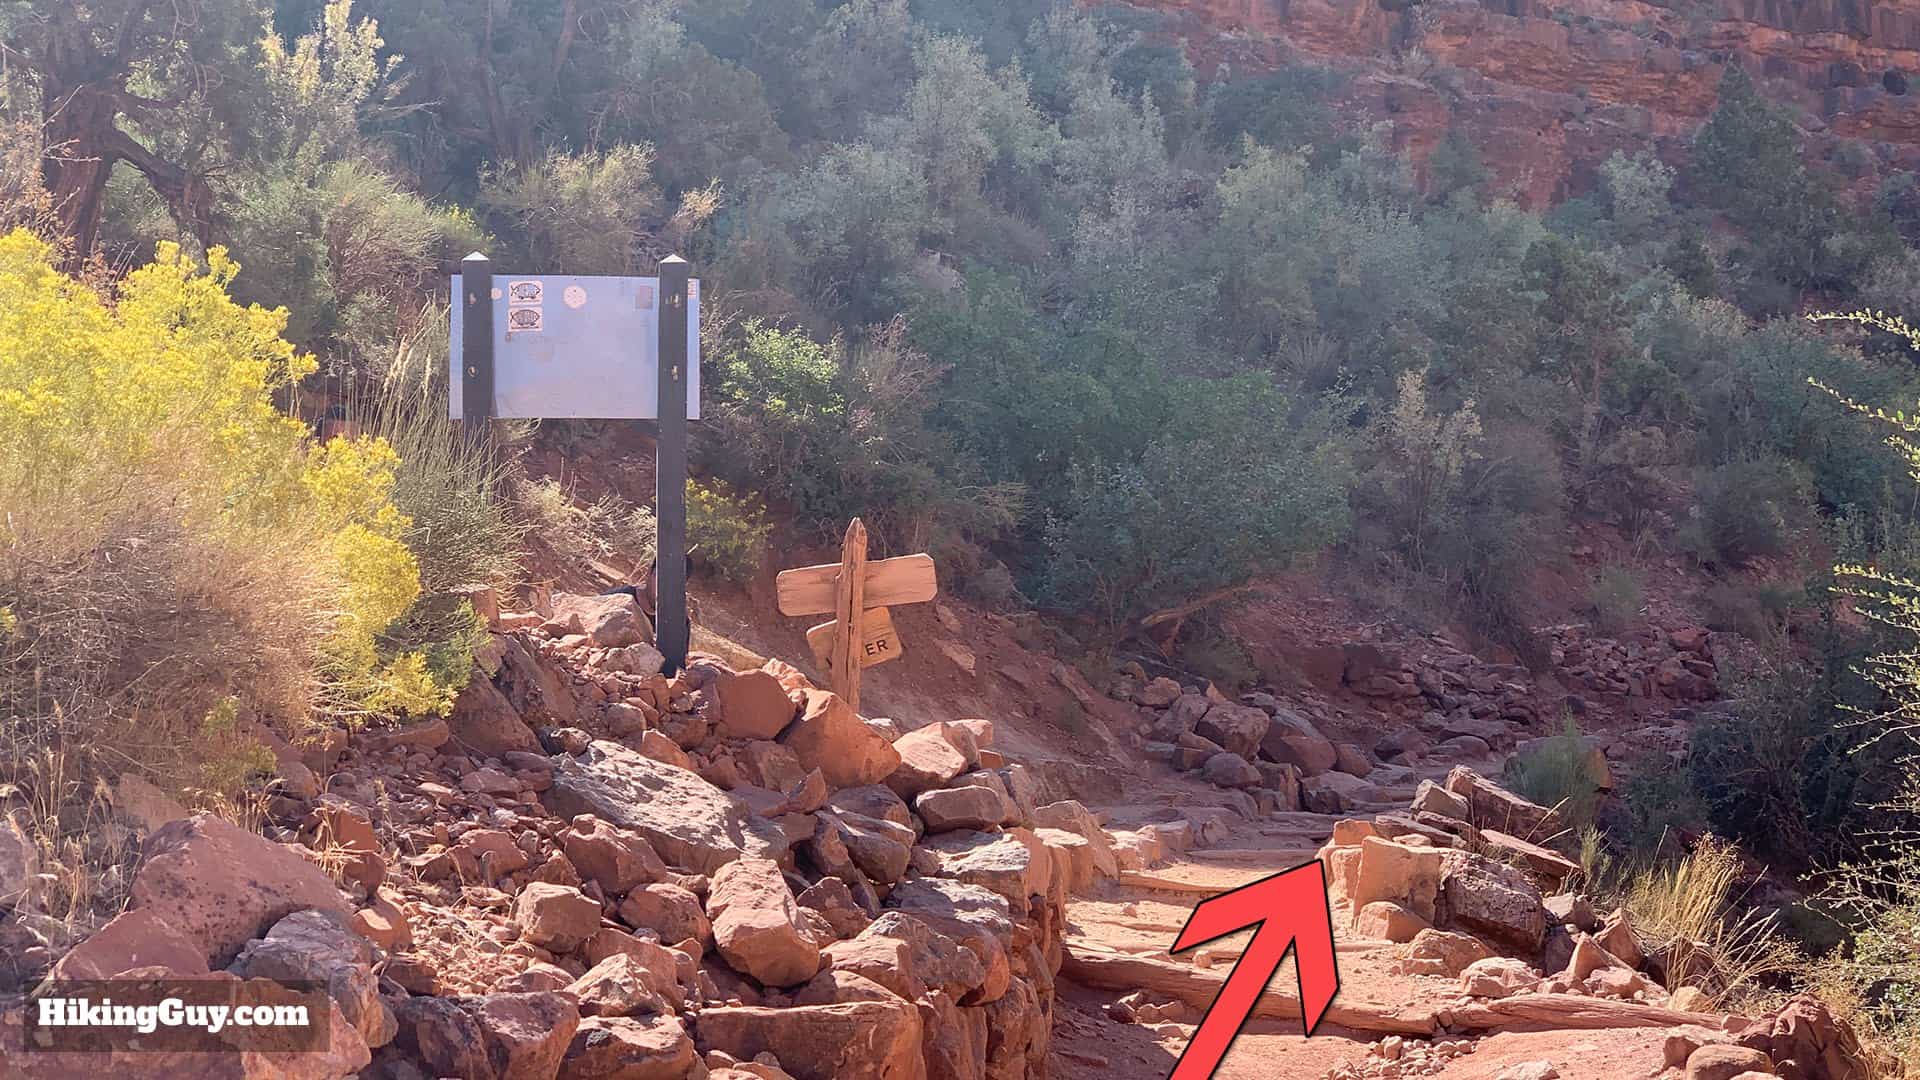
When you get down to the last stretch of Havasupai Gardens, you'll be heading to the left to join the Plateau Point Trail.Once you make the left cross Garden Creek and make the right to head down along its bank.Follow the trail which can get a little overgrown in this section along the creek.The trail starts to wind down toward the Tonto Platform, the plateau that separates the inner gorge and river from the upper canyon. Garden Creek disappears down to your right, and across the creek the Bright Angel Trail continues down toward the Colorado River and Phantom Ranch.The trail quickly turns to desert again as it moves away from the creek.Keep right at the junction with the Tonto Trail.Pass the water tank and continue on the trail.Shortly after the water, the metal fence at Plateau Point comes into view.And here you are, Plateau Point!Plateau Point offers some of the best views down to the Colorado River, 1300 feet below.And that's it. After your photos you just hike out the way you came in.
Hiking Back To the South Rim
The downhill is over, the hard part is yet to come. Unless you're going to float down the river, you'll have to walk back up to leave the inside of the Canyon.
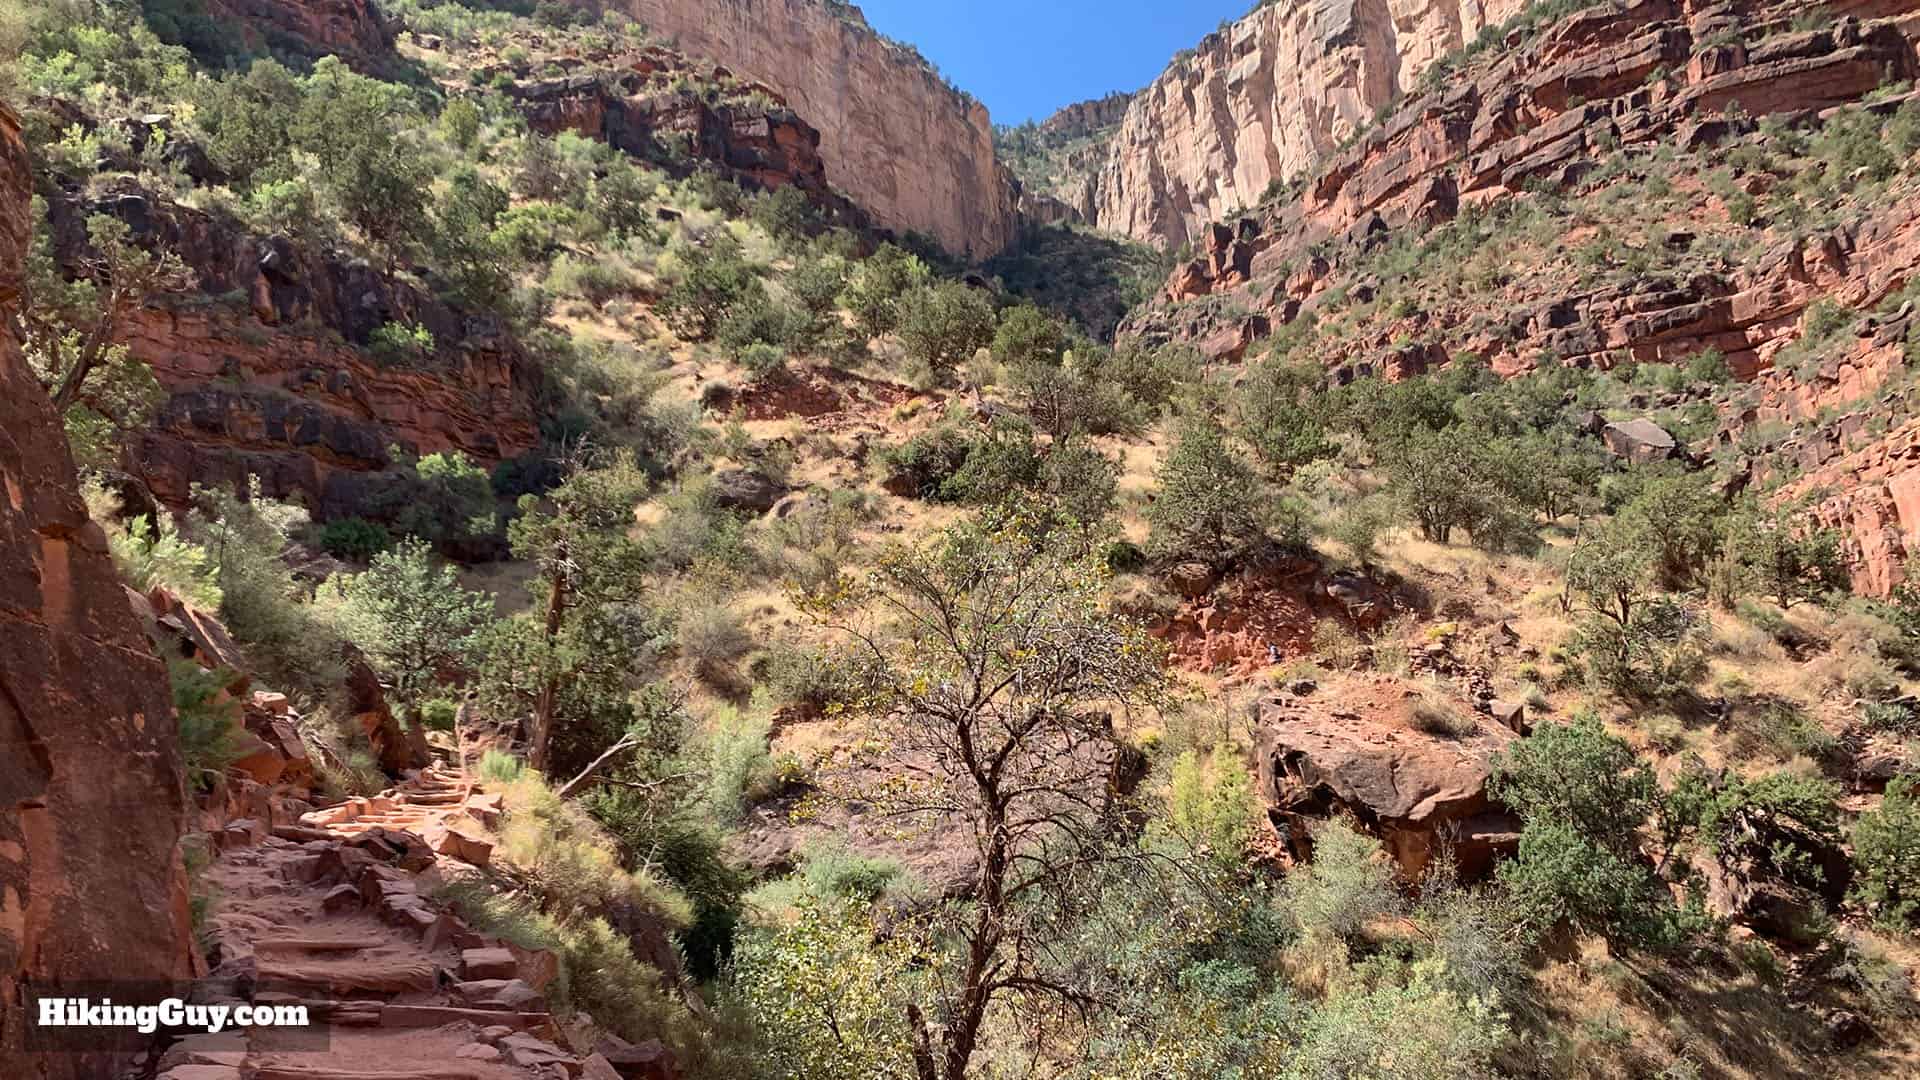
Luckily the first part of the return is relatively flat. You'll be climbing up through the gorge ahead.Go straight through Havasupai Gardens the way you came through. This is a good place to make sure you have enough water.After Havasupai Gardens the trail starts to slope upward.And pretty soon you're starting your 4 miles of uphill switchbacks.At the 3 Mile Resthouse keep right to continue up the trail.Although the climb is tough, you'll be amazed at how quickly you reach the landmarks that you saw on your way down.Almost there! The V in the cliff up top is where the trailhead is.More switchbacks as you climb the last 2 miles.At the 1.5 Mile Resthouse toilets, continue right and up the Bright Angel Trail.Continue pass the actual 1.5 Mile Resthouse. This is your last chance to refill your water.The last 1.5 miles can be steep and tough, but you're oh-so close! The tunnels are good landmarks to shoot for.Keep your eyes peeled on the heights around the trail as you climb; there are bighorn sheep in the park.You did it! Pat yourself on the back and go treat yourself to some calories at the Bright Angel Lodge, you earned it.