
How To Read a Topographic Map
I know that topographic maps and non-digital navigation can be intimidating, especially for those who never used them. In this guide, I'm going to focus on the basics of the topographic map so that you can look at one and make sense of it if your electronic fails.
- Topo Map General Concepts
- Identifying Specific Landforms
- Picking the Right Map For Your Hike
Topographic maps are also known as "topo maps" or "contour maps."
What Are Topographic Maps?
Topographic maps translate three-dimensional land features into a two-dimensional (flat) map. You can look at a topographic map and quickly see where the hills, rivers, peaks, and valleys are. When you are navigating, a topographic map can show you where you are, what route to take, and which ways are dead ends.
People generally pronounce topographic as TA-PAH-graphic and topo as TOE-PO.
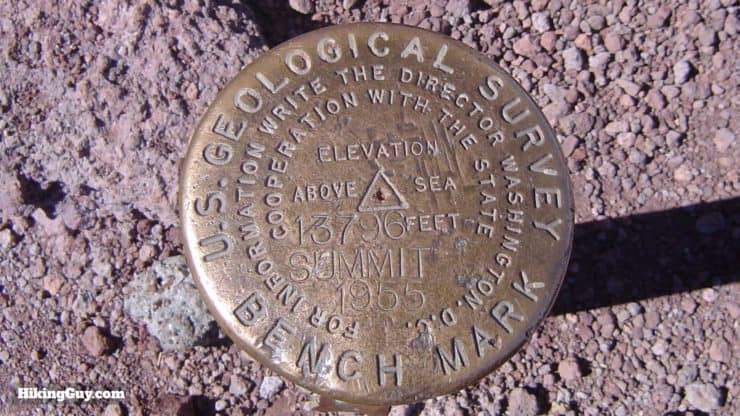
The first country to be mapped entirely with topographic maps was France in 1789, while in the USA, the U.S. Geological Survey (USGS) just started the process in 1879. The first maps were based on sketches that surveyors made using analog tools to measure distance, angles, and elevations.
It wasn't until the 1930s that aerial photography was incorporated to make the maps more accurate. Today, the USGS doesn't do human surveys anymore but instead uses satellites and drones to update the topographic maps every three years. And as you probably guessed, today's maps are all digital but can still be printed out.
Are We Talking About Printed or Digital Maps?
Although topographic maps were originally only printed, today they are available as digital maps or printed. When most people say "bring a topo map with you" they are referring to a paper map. But whether the map is digital or printed, the concepts and how to read the map are the same. I'll talk more about the actual maps that you should use later.
How To Read a Topographic Map
There are a few key concepts you need to know to understand a topographic map. It's easier than you think.
CalTopo now charges to download KMZ overlays, but you can get them for free from USGS. There's a how-to at the end of this article. I also have a sample you can download here.
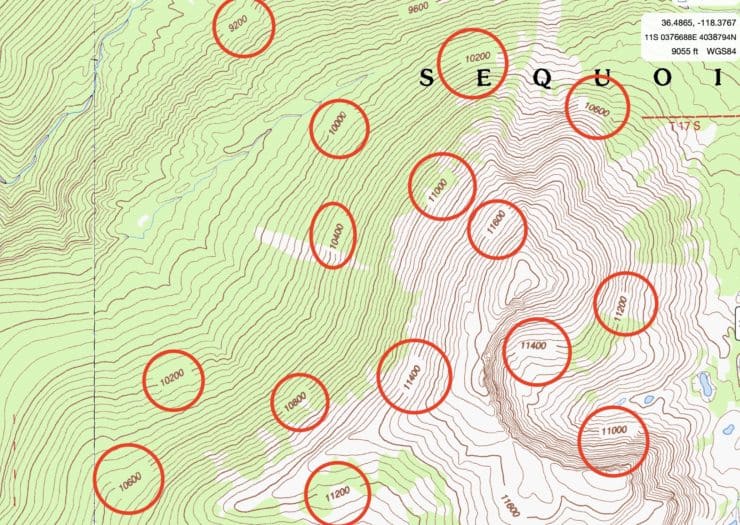
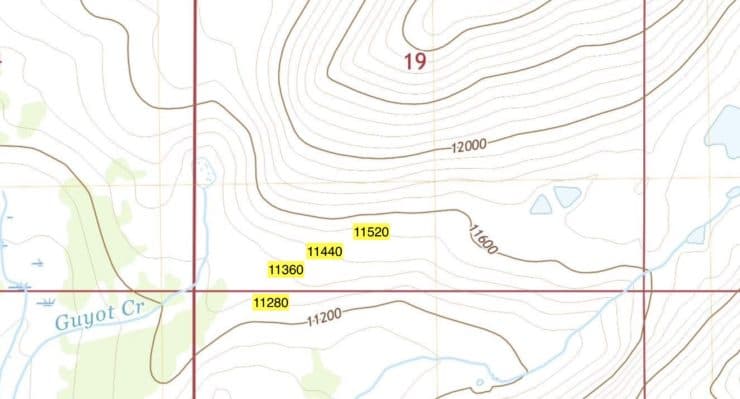
What Are Contour Lines?
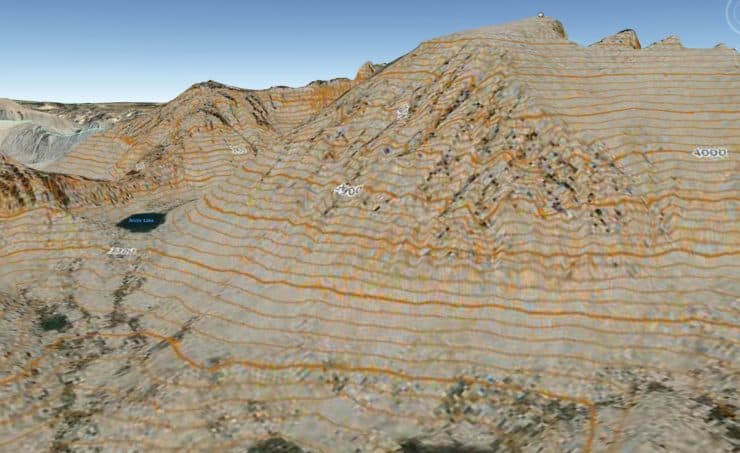
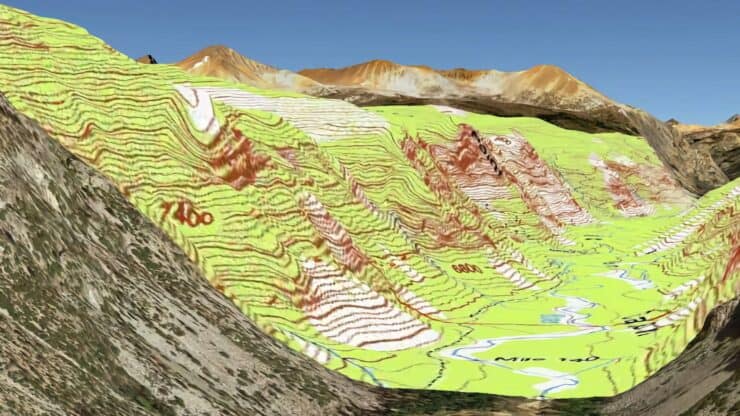
Want to overlay topographic maps onto a 3D Google Earth model so you can explore yourself? And even put your hike route on there? I'll show you how at the end of this article.
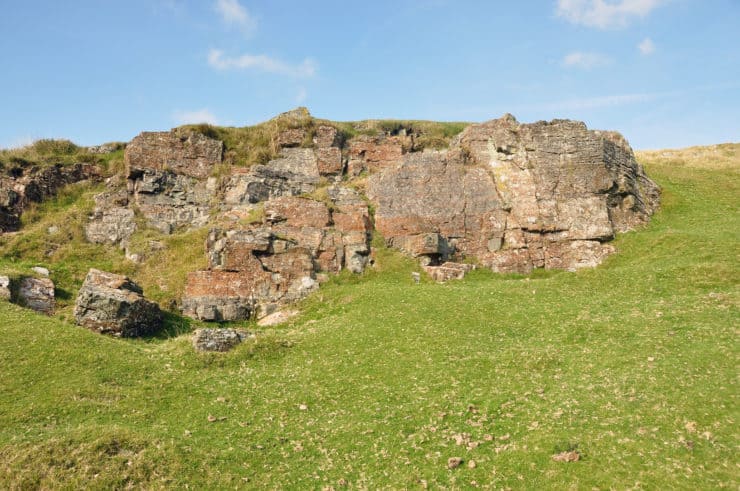
While contour lines may "stack up" on a steep cliff, they otherwise never cross on another.
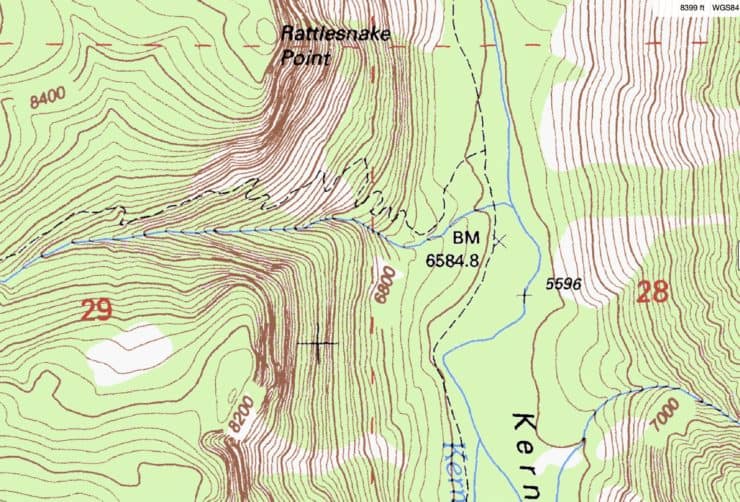
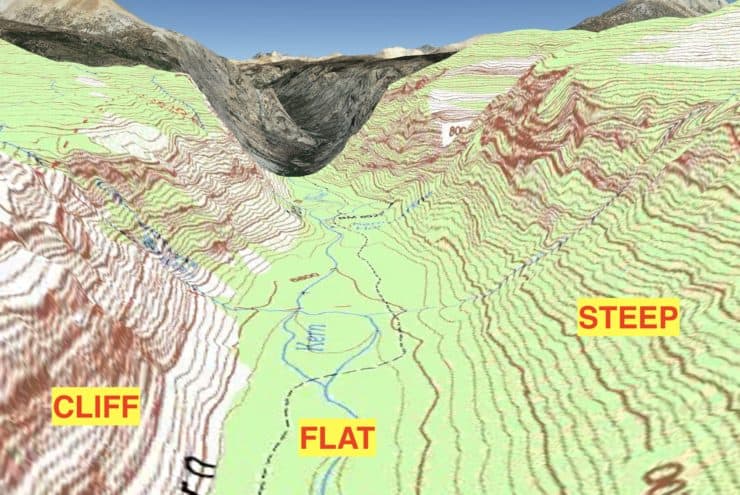
Reading Land Forms From Contour Lines
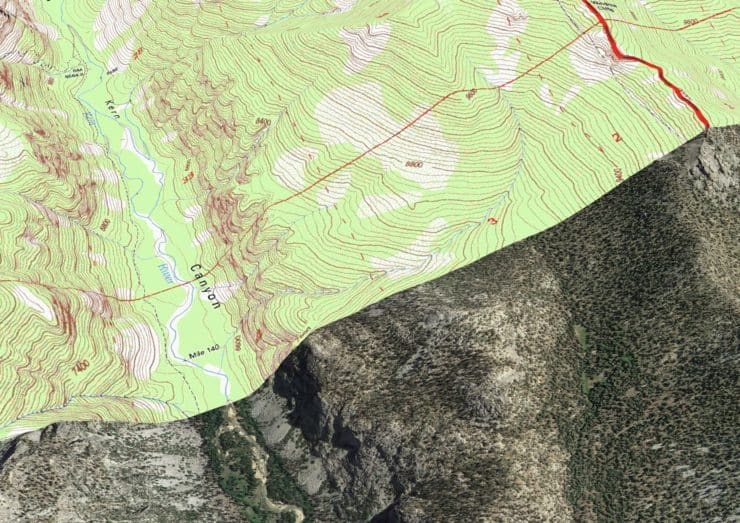
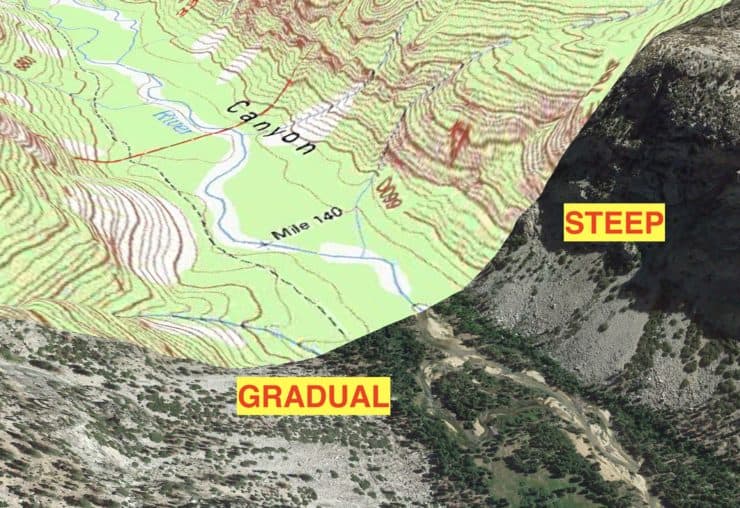
Let's start with the basics, a flat area, a steep slope, and a cliff.


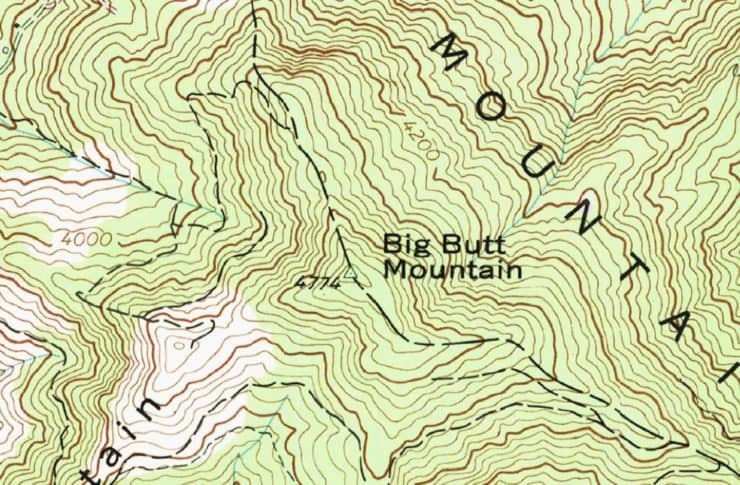
Mountain Peak
Double Summit
Gully / Ravine / Canyon
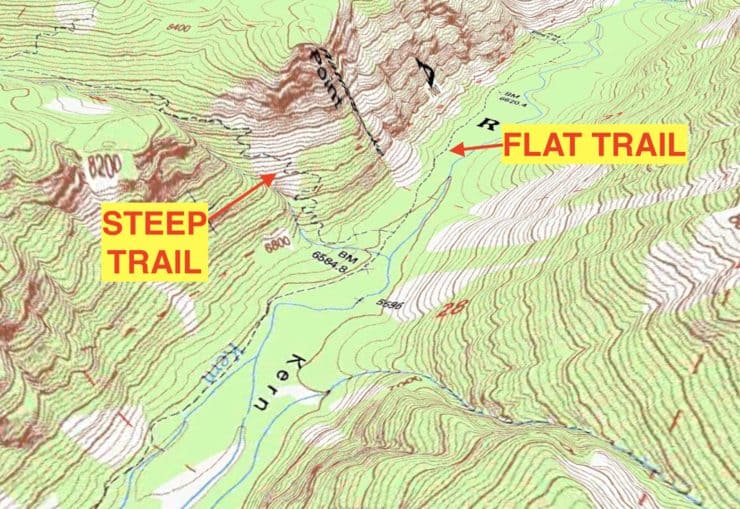
Ridge Trail
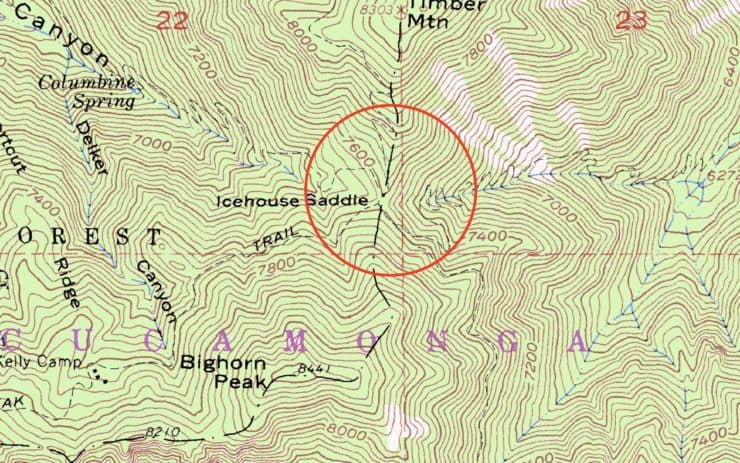
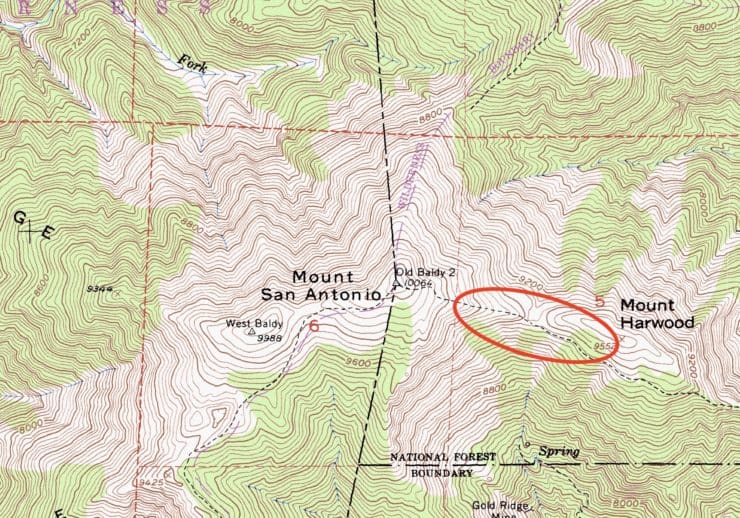
Saddle / Gap / Notch / Pass
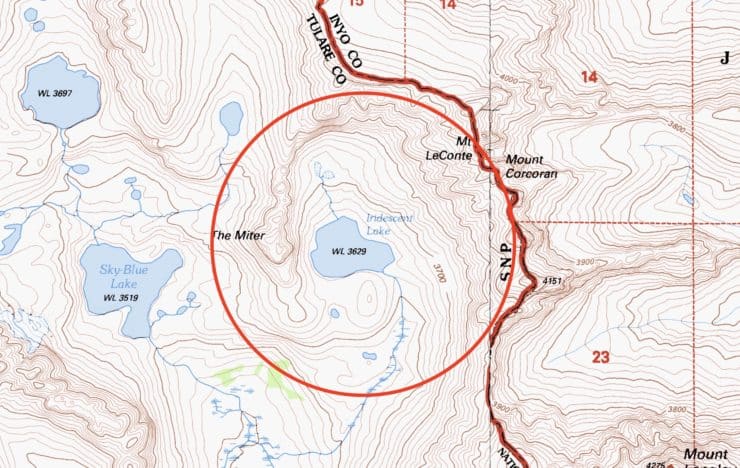
Cirque / Bowl
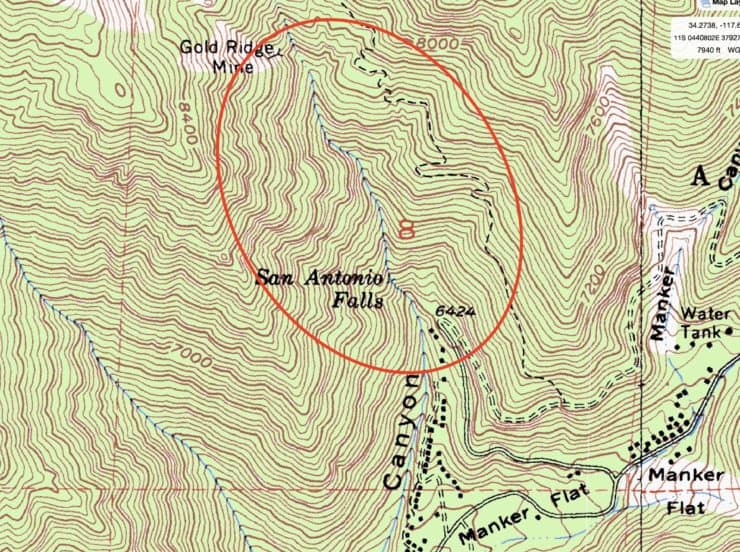
Features on Topographic Maps
I'm not going to give you an exhaustive list of every feature on a topographic map in this guide, but I will point out some of the more useful features to be aware of on your map. If you want to deep dive into all the features, the USGS has a comprehensive map key here.
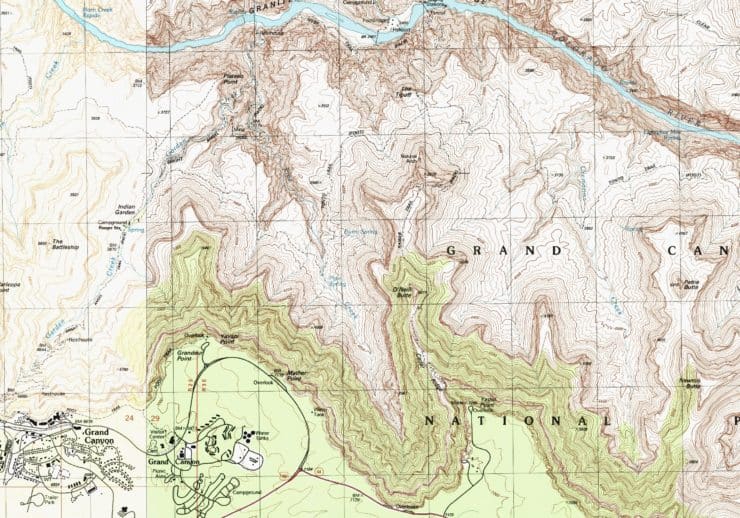
A topographic map will not show all the terrain features. Landscapes change and what a mapmaker can fit on a map is limited.

A white area also doesn't mean a complete lack of vegetation. There could be grass, meadows, or even overgrown vegetation in a gully.
Distance on Topographic Maps
I'll talk about scale shortly, but for most beginners, a key aspect in reading a topographic map is understanding how far apart things are.
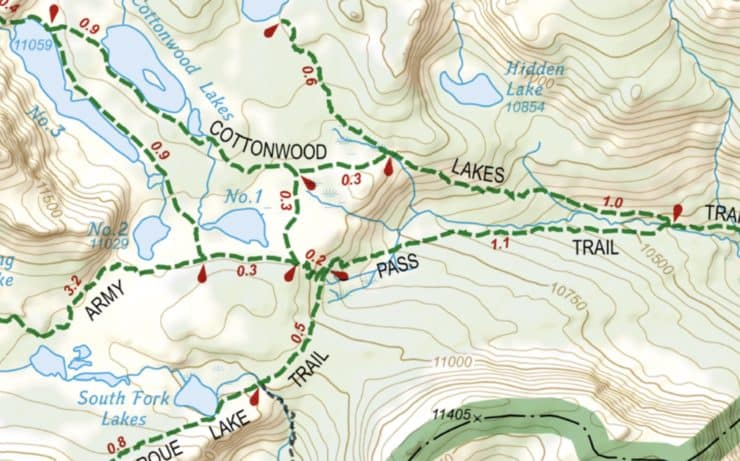
A mile, or 5280 feet, is derived from the distance that Roman soldiers would walk in 1000 (double) steps. The Latin word for thousand is mille, which the word mile is derived from.
Using Printed Topographic Maps
As I mentioned earlier, there's a solid amount of hikers who just use a GPS, whether on their phone or on a dedicated GPS unit. If you fall into that category of hiker, I strongly recommend bringing a printed topographic map with you in case your device fails in the backcountry. Even if you don't know the more advanced skills like orienteering, navigating, or route finding, the paper map is still helpful.
You'll likely know where you want to hike. And now you know how to read a topographic map. From there you can look at the map, your surroundings, and your expected position, and figure out a course of action if your GPS dies. For the cost of a $12 map, you have an invaluable resource if the electronics fail.
Here's what I recommend for those who are GPS-dependent or are beginners.
- Buy a printed map for the area that you are hiking.
- Look over the route on the printed map before you go.
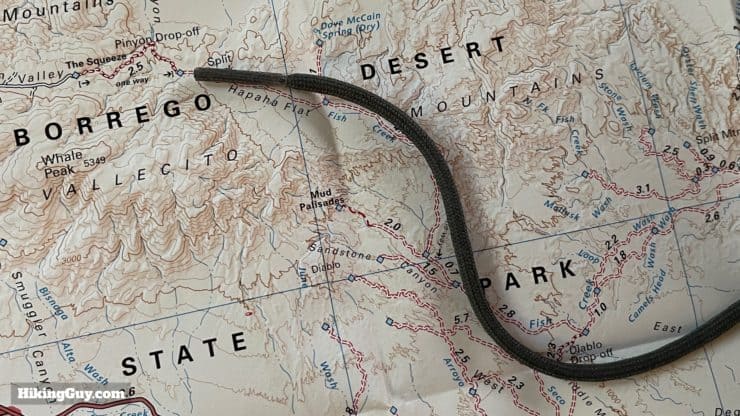
- Fold the printed map to show your route and carry it in your pocket as you hike. Periodically take the map out and see if you can orient yourself. Trail junctions and physical landmarks are a good place to do this.
- Use your GPS to confirm your position.
This is a good workflow to start using a paper topographic map. From there you can move onto more advanced skills.
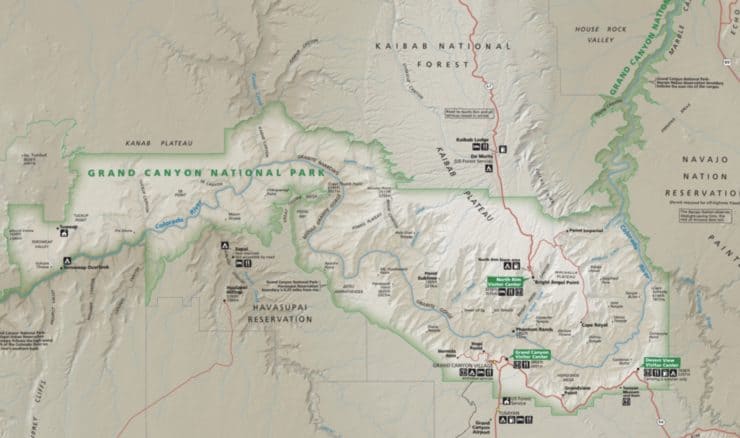
Picking A Map At the Right Scale
To make things simple, think of map scale as how much detail is covered on a map.
The common sizes for printed hiking topo maps are:
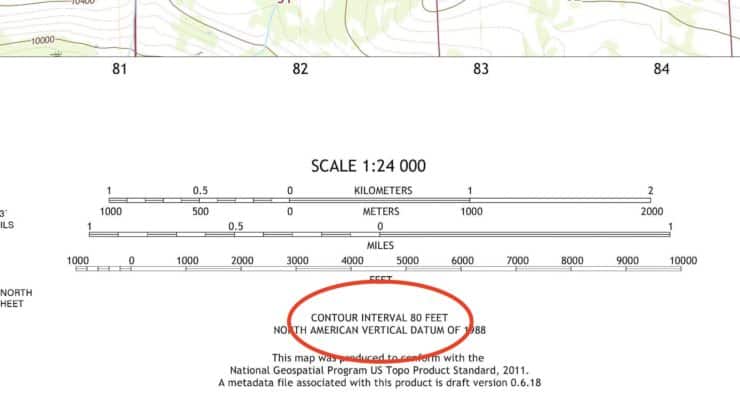
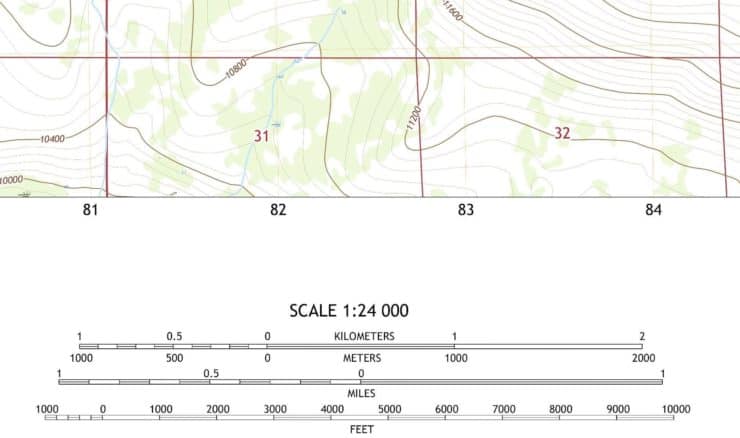
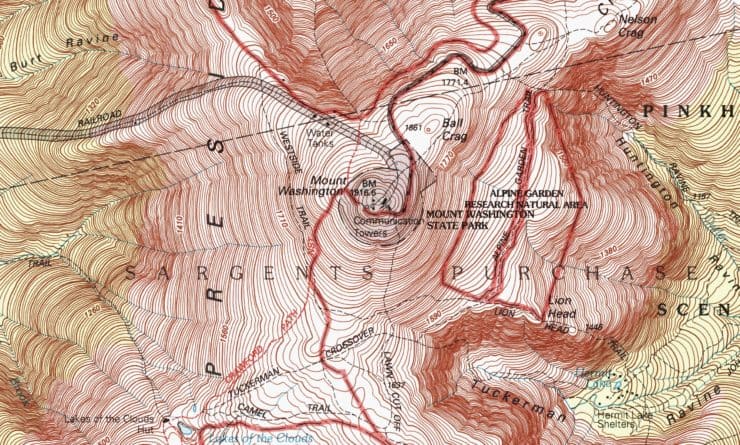
- 1:24,000 - The USGS has mapped most of the USA at this scale, and they're often referred to as "7.5-minute quadrangle" or "quad" maps. They cover an area of about 6 by 9 miles, and every inch is about a third of a mile. If you get them printed out (you can buy them online), they come on big 22 x 27 inch paper that you need to fold up. And for longer hikes, you will likely need multiples.
- 1:50,000 to 1:100,000 range - For most hikers, this is the sweet spot for a topo map, and the scale that most commercial maps (like Tom Harrison or National Geographic) come in. At 1:63,360 scale, 1 inch equals 1 mile. Generally these maps come folded for easy use.
Decoding scale is easy. The first number is an inch on a printed map, the second number is the number of inches it represents in real life. So a 1:24,000 map would show 24,000 inches (0.38 miles) for every inch of paper.
Map Recommendations
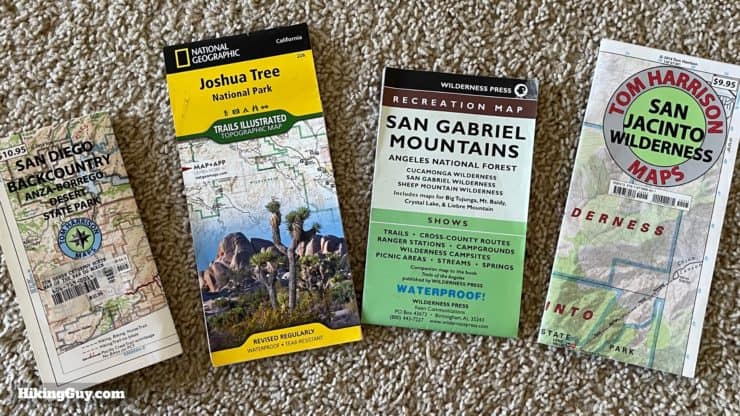
Here's what I would recommend if you're just getting into carrying a paper map.
- Buy a foldable map with hiking trails that has a scale in the 1:50,000 to 1:100,000 range. There are regional map brands like AMC, Tom Harrison, and Green Trails. And then there are maps with national coverage such as National Geographic.
- You can also order USGS quads directly for a reasonable price. Remember that you may need to buy multiples to cover your hike. And not all trails are these maps. They are, however, probably as detailed as you can get when it comes to topography. I'll use USGS quads when I'm going overland, but otherwise I'll use a third-party map for a region.
- The USGS maps are free, and you can download them and print them yourself. If you do, I'd recommend water-resistant paper, which you can buy yourself or send to a print shop like Fedex / Kinkos.
- You can use a website like CalTopo to create a custom area and print out scanned topo maps.
Digital Maps
I mentioned earlier that topographic maps were available digitally as well. Digital maps throw a little wrench into the idea of scale. If 1 inch equals 1 mile on a 1:63,360 map, what is 1 inch on a screen? What I can see on 1 inch of a screen on a phone from 2010 is much different then on a high-resolution screen from today. And you can zoom in and out on digital maps too. So how does that all work?
It's basically a matter of detail that's included. For example, Garmin sells 24k (roughly equivalent to a quad topographic map) and the 100k TopoActive maps. The 24k maps include more detail than the 100k maps. But for most free digital maps, the level of detail is as detailed as it can be. And most modern map browsers let you tweak the level of detail on a map or do it automatically for you.

Digital Map Options
You aren't limited to the maps that that USGS produces when it comes to digital topographic maps (which you can print). Tools like Gaia GPS (discount code here) and CalTopo allow you to view alternate topo maps and print them. You can even customize the maps to include other layers such as snow cover, weather, etc. It's very powerful. Let's look at some of the better digital topographic map options, which you can print out or send to your device.
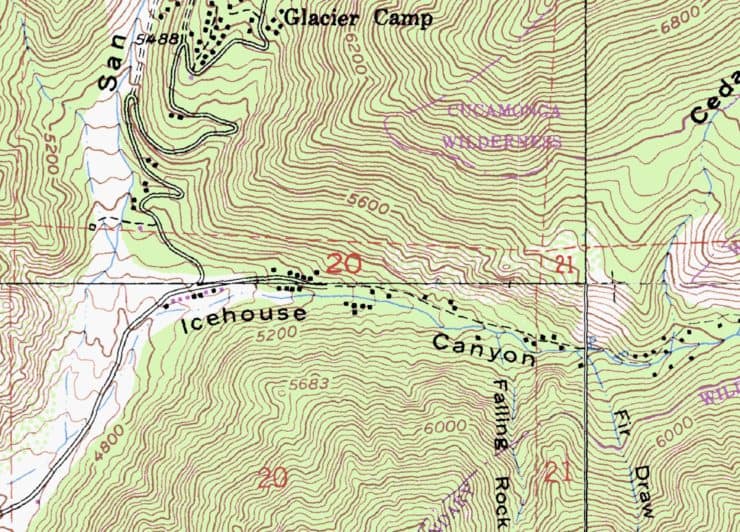
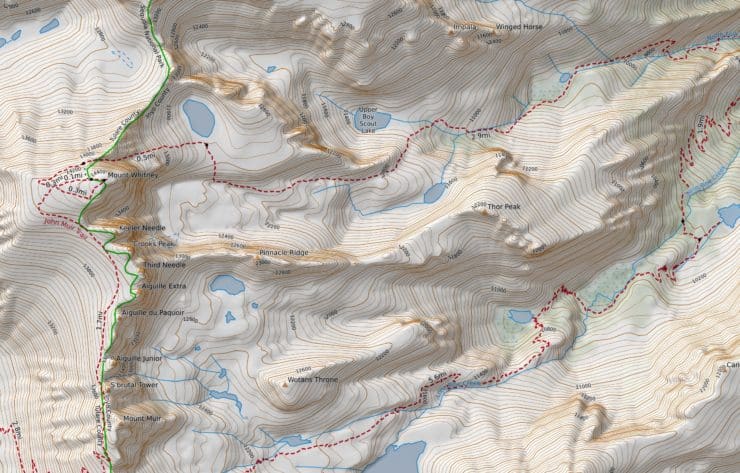
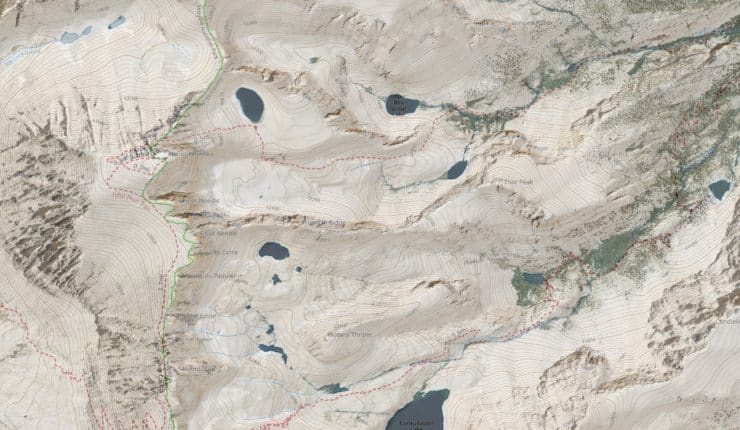
CalTopo - Mapbuilder Topo
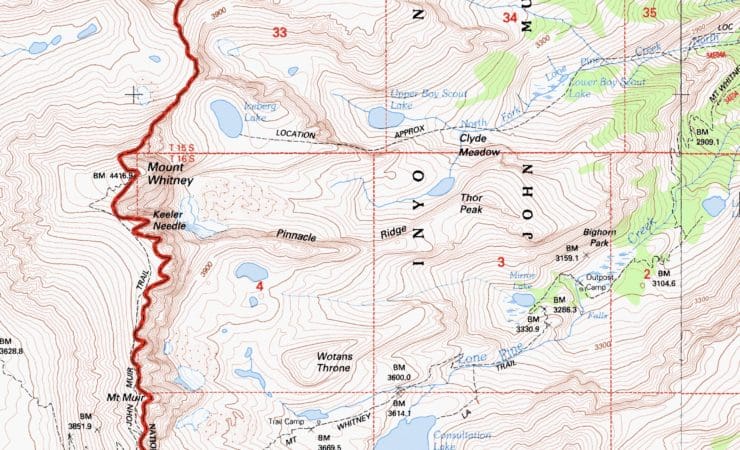
CalTopo - Scanned Topos
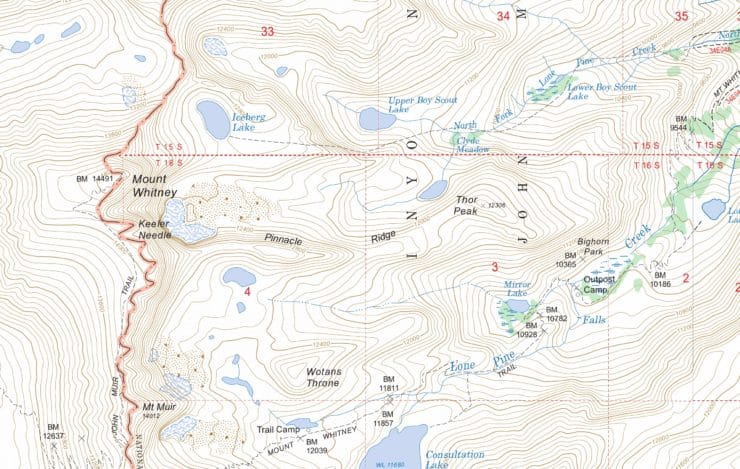
CalTopo - Forest Service
CalTopo - TF Outdoors
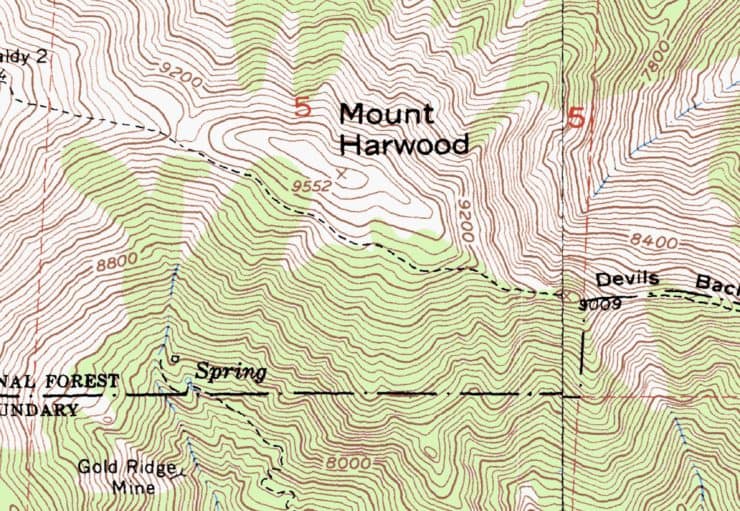
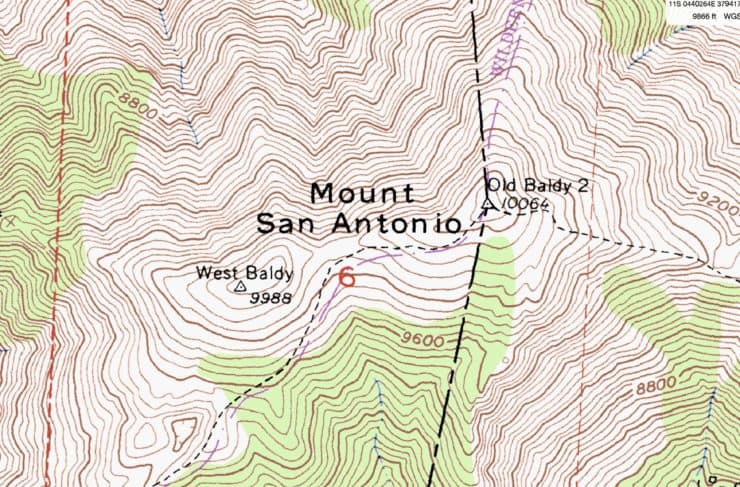
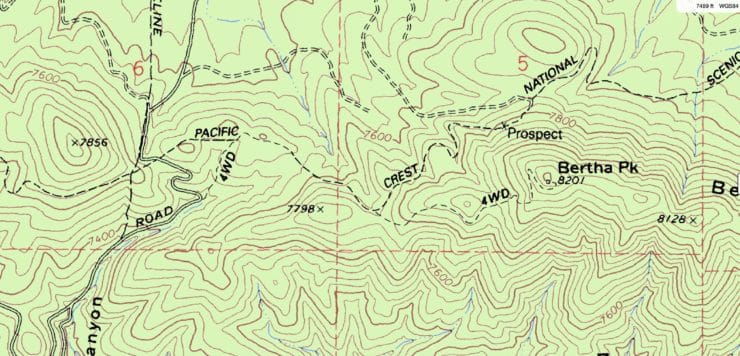
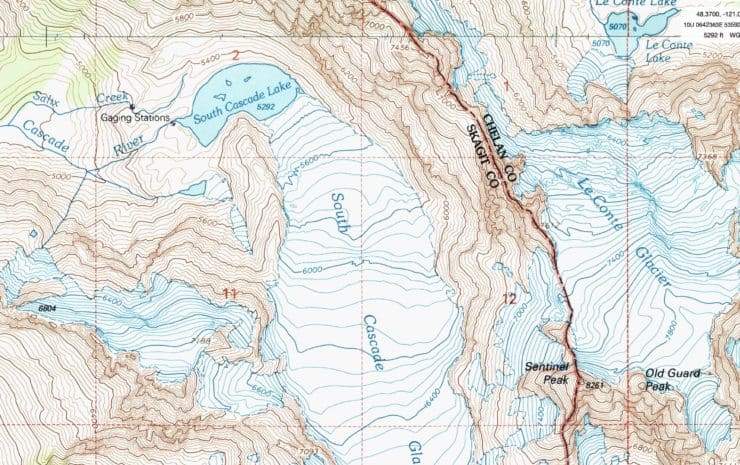
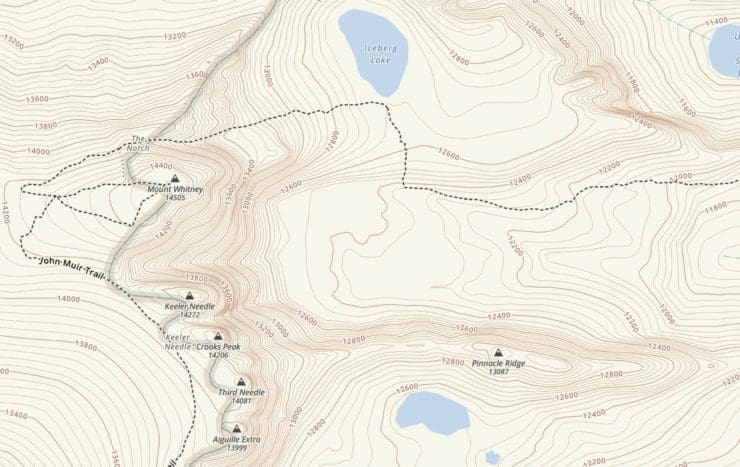
You'll also notice that this map has a combination of contour lines and shading, which is a computer generated way to illustrate slope, usually found on digital maps.
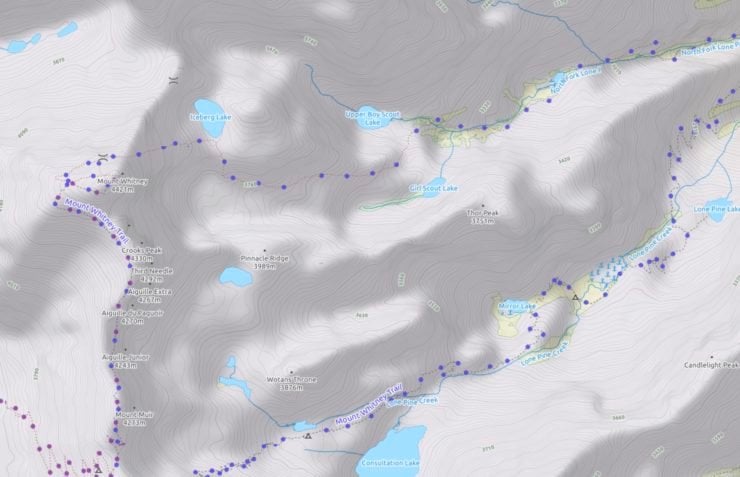
CalTopo - Global Imagery + Mapbuilder Topo
Gaia GPS (Native Maps)
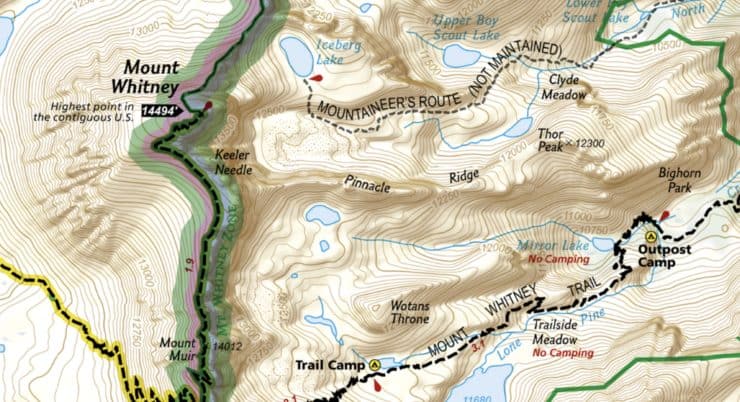
National Geographic Digital (Gaia GPS)
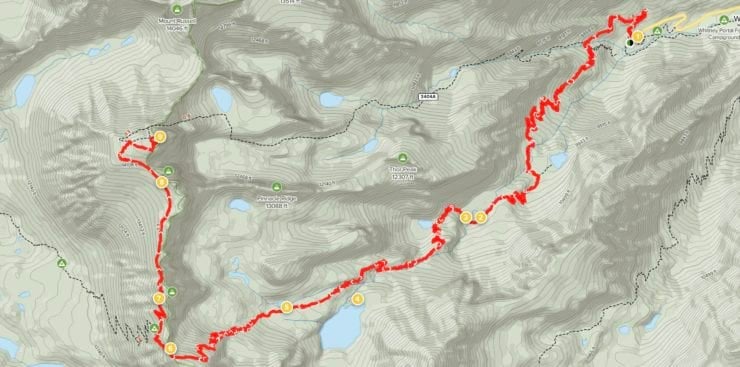
AllTrails Native
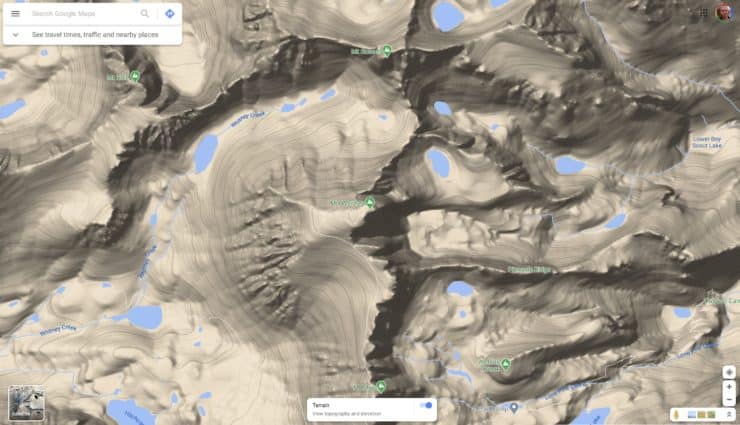
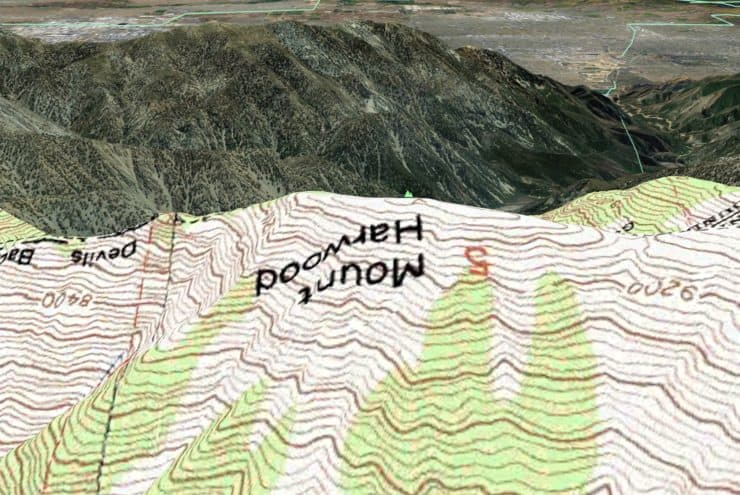
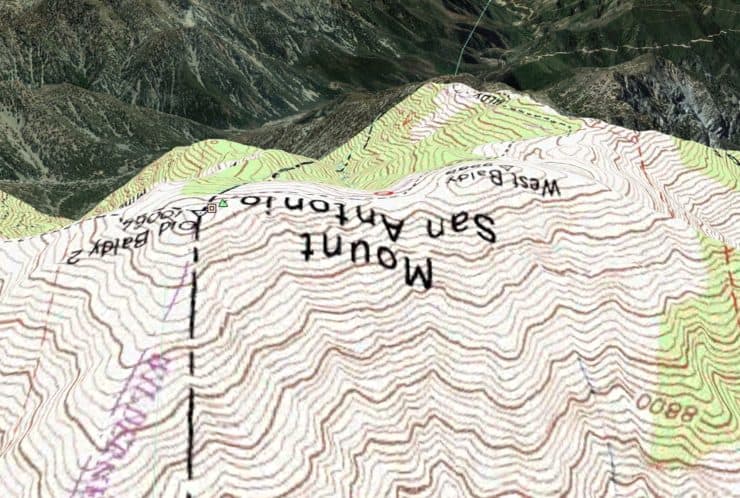
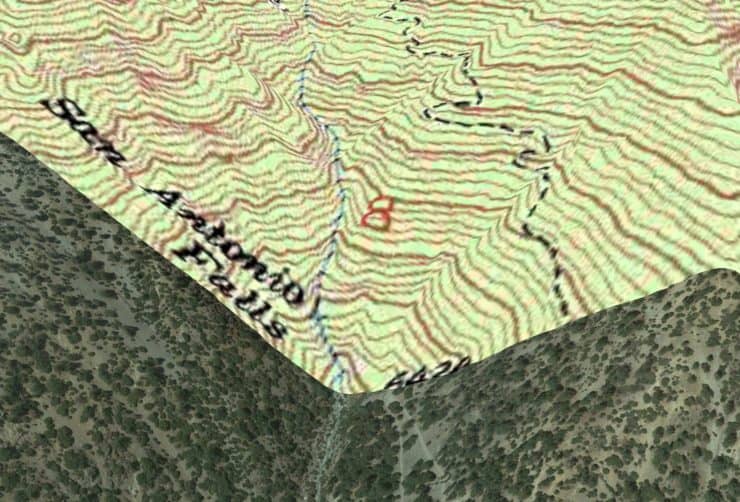
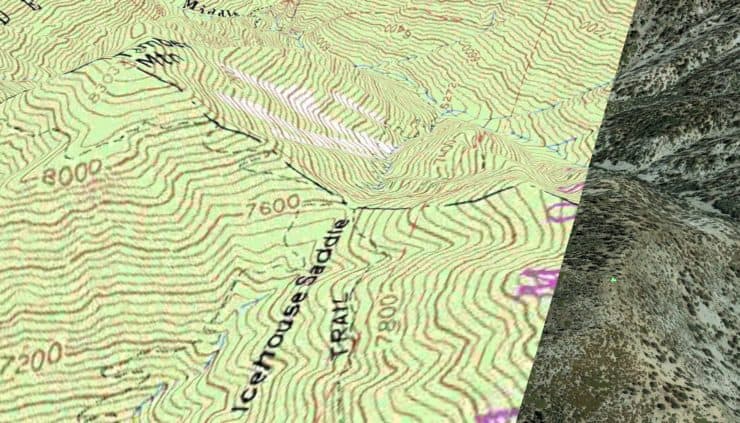
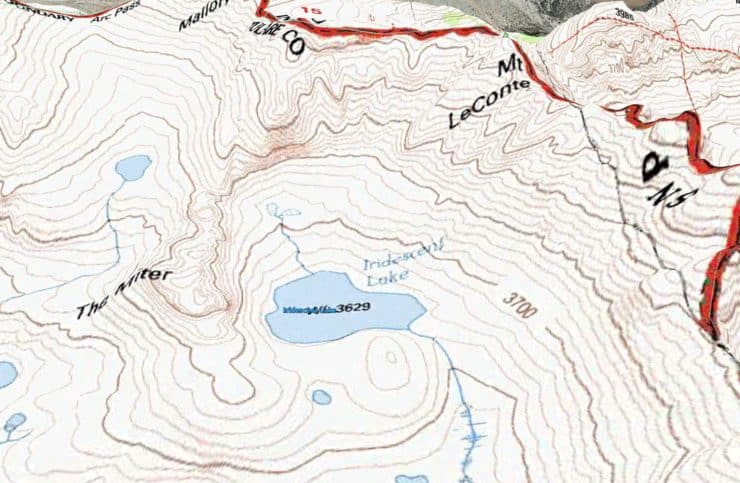
Exploring Topographic Maps With Google Earth
The best way to really understand a topographic map is to take it with you on a hike, find your position. look at map, look at the features around you, and translate the map features to real-life in real-time. But if you want to practice at home (or when avoiding work), there's a cool trick that you can do with Google Earth that overlays topo maps onto the Earth's contours. It's a great way to prep for a hike and learn topo map features at the same time.
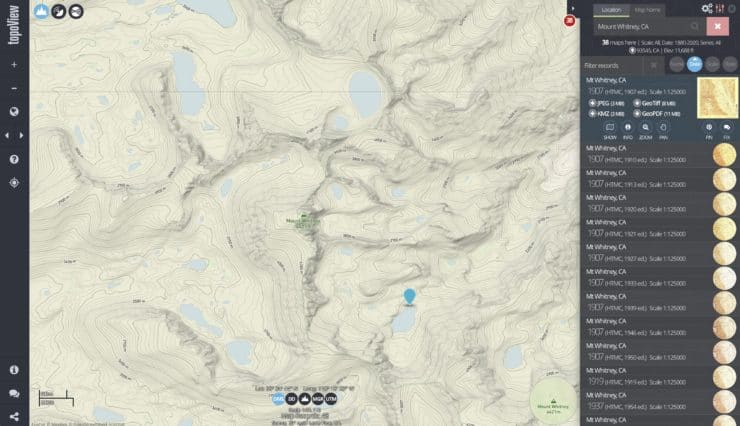
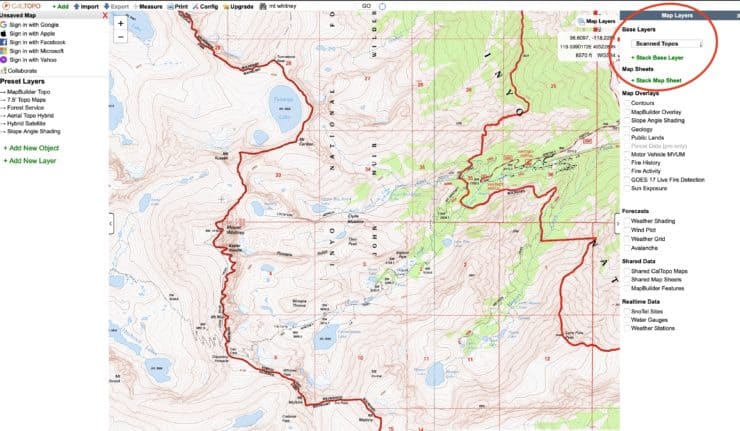
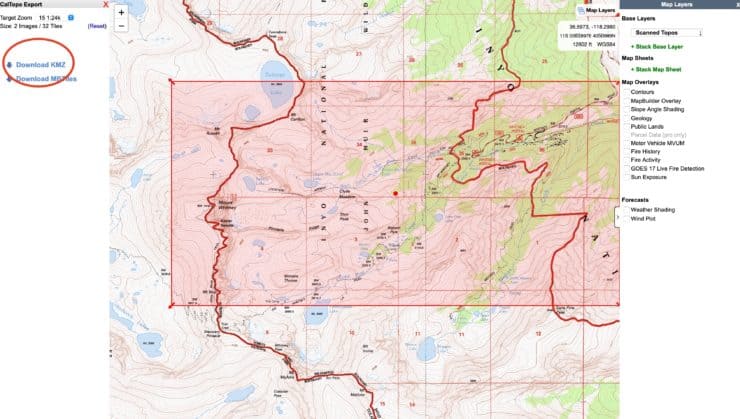
Step 1: Visit CalTopo and Get Your Topo Map
Note that CalTopo now requires a Pro account to download KMZ files. I think it's worth it, but if you're not intersted, you can also download them for free from USGS. I'll show that in the next step.

Step 1-Alt: Get Free KMZ Topo Maps from the USGS
If you want to download the topographic map files for free, just head over to the USGS Topoviewer site.
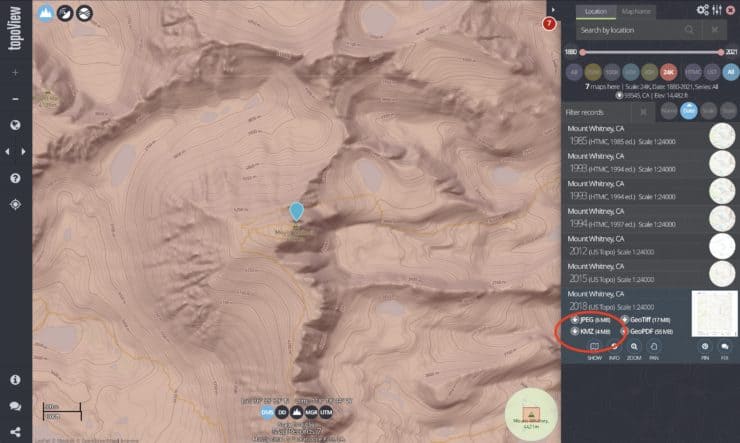
The download from here may give you two files. Open them both in Google Earth to find which one is the topo map.
Step 2: Open the Topo Map in Google Earth
For this step, you'll need to download and install the free Google Earth program.
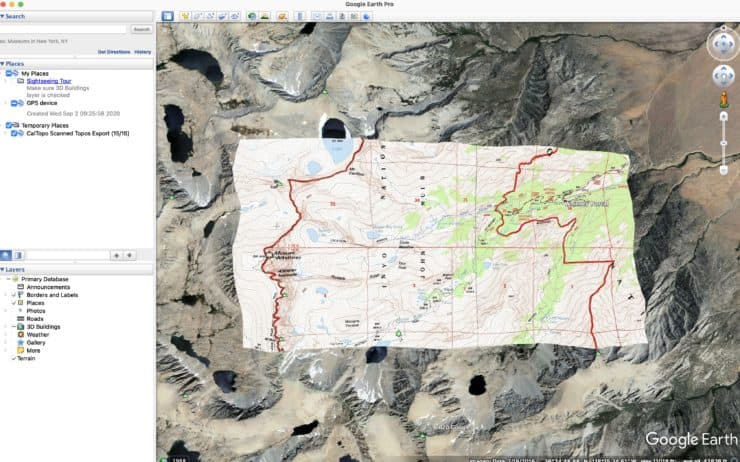

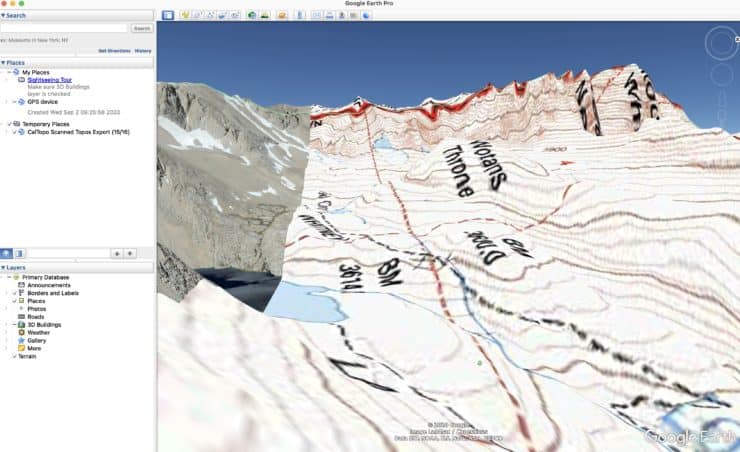
You can load multiple KMZ files into Google Earth. Just download multiple areas in CalTopo and open them with Google Earth.
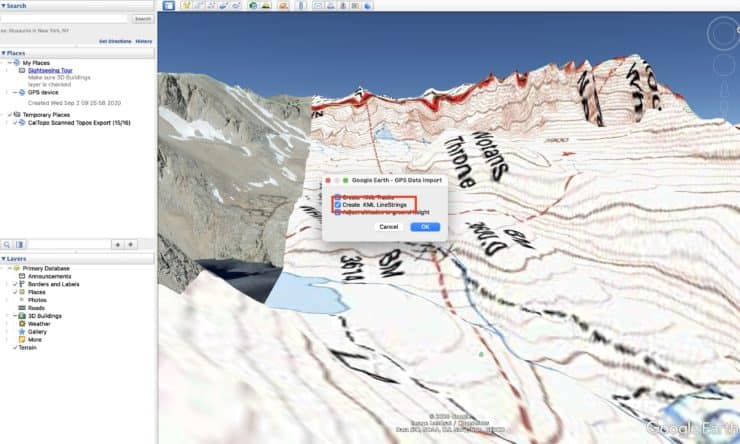
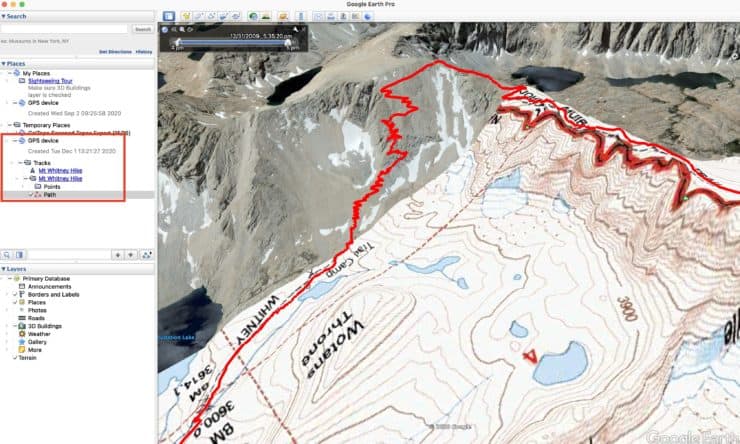
Step 3: Load Your Hike GPX File
If you are examining the area of a hike you're going to do, you can load your GPX file into Google Earth and it will be overlaid on your KMZ files.
Need More Info?
- Have a question about the guide? Join my Patreon and ask me a question.
Related Guides
 Hiking For Beginners: 11 Essential Tips
 Hiking Boots or Shoes: Do I Really Need Hiking Boots?
 Do I Need Trekking Poles?
 Understanding Mountain Lions When Hiking
 How to Create and Download Garmin Custom Maps
 How to Hike
Popular Guides
 Best Hiking Gear 2024
 When to Hit SOS on inReach
This Guide Was Written by Cris Hazzard

Hi, I'm Cris Hazzard, aka Hiking Guy, a professional outdoors guide, hiking expert, and author based in Southern California. I created this website to share all the great hikes I do with everyone else out there. This site is different because it gives detailed directions that even the beginning hiker can follow. I also share what hiking gear works and doesn't so you don't waste money. I don't do sponsored or promoted content; I share only the gear recommendations, hikes, and tips that I would with my family and friends. If you like the website and YouTube channel, please support these free guides (I couldn't do it without folks like you!). You can stay up to date with my new guides by following me on YouTube, Instagram, or by subscribing to my monthly newsletter.