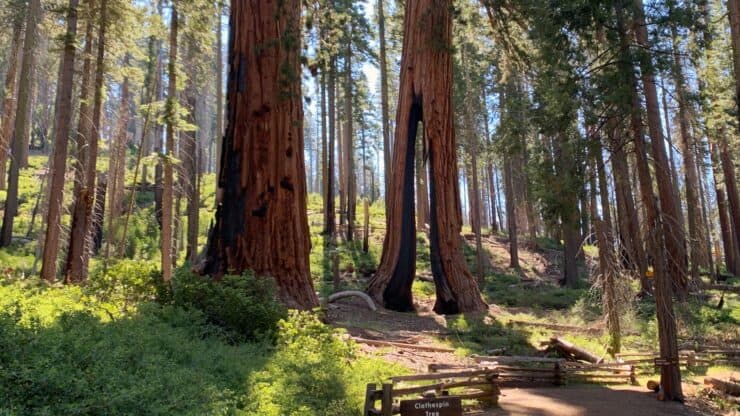
Nestled in the southern, less-visited part of Yosemite National Park, the Mariposa Grove of Giant Sequoias hike takes you on a tour through a grove of 500 mature Giant Sequoia trees, including some that are 2,000 years old. The Mariposa Grove was first protected by Abraham Lincoln in 1864, added as a National Park in 1906, and in 2019 reopened after an extensive restoration. The 7 mile Mariposa Grove of Giant Sequoias Trail hits all of the major attractions in the grove. It's got a little bit of uphill, but in general, is pretty easy and offers great scenery for the effort.
In this Guide:
Turn-by-Turn Mariposa Grove Hike Directions & Video
Parking, Maps, and Planing Information
Tips on What to Expect on the Mariposa Grove Trail
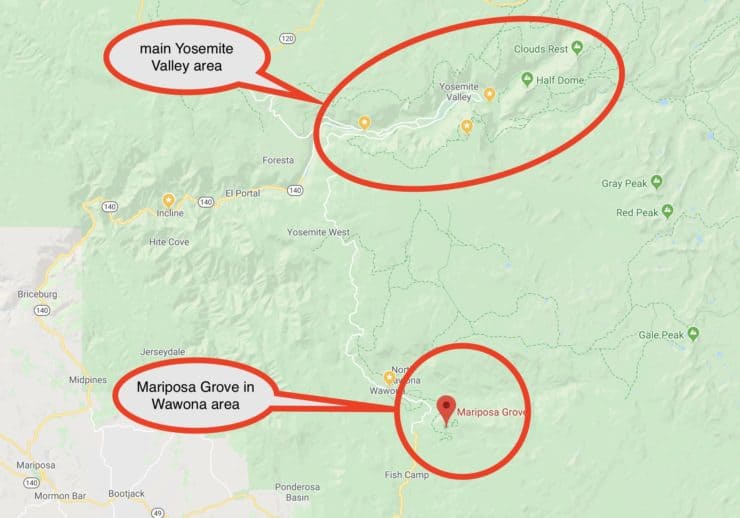
The Mariposa Grove is in the southern part of Yosemite National Park, along Rt-41, about an hour's drive from the Yosemite Valley.
Okay, so parking and getting to the trailhead can be tricky, so please read this section carefully.
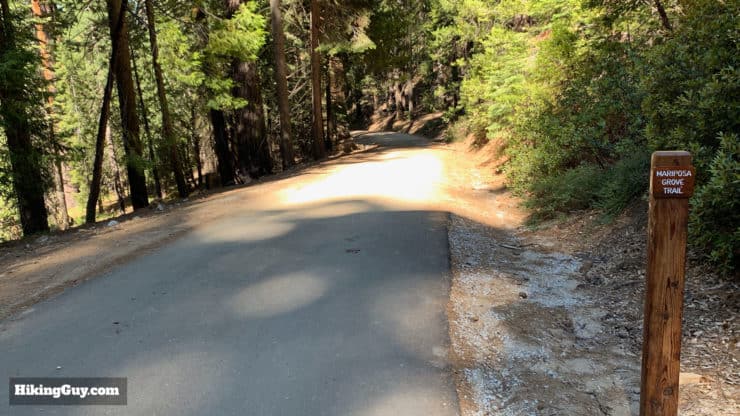
Your best move, which I highly recommend, is to get to the Mariposa Grove at sunrise and do the hike then. If you arrive before 730am, you can drive right up to the trailhead and park in the small lot there. Use the trailhead address for the Welcome Plaza below, and then go straight up Mariposa Grove Road until you reach the parking area and bathrooms. You'll beat the crowds and enjoy the grove and Giant Sequoias peacefully.
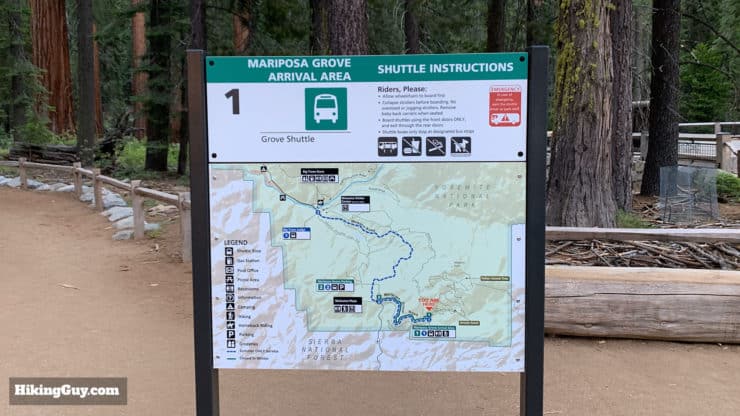
If you get here after 730am, the park closes the entrance gate to Mariposa Grove Road, and you have to park at the Mariposa Grove Welcome Center (address below). There is a huge parking lot with 300 spaces, but it can still fill up by mid-morning, which gives you an idea of the crowds that will be at the grove. If the lot is full, people come and go all the time, so just wait for a spot to open. From the Welcome Plaza you take a shuttle bus to the trailhead (and back). The buses run every 10-15 minutes.
In the winter Mariposa Grove Road is closed (check current conditions here). You can walk the 2 miles up the road to the grove after parking at the Welcome Plaza.
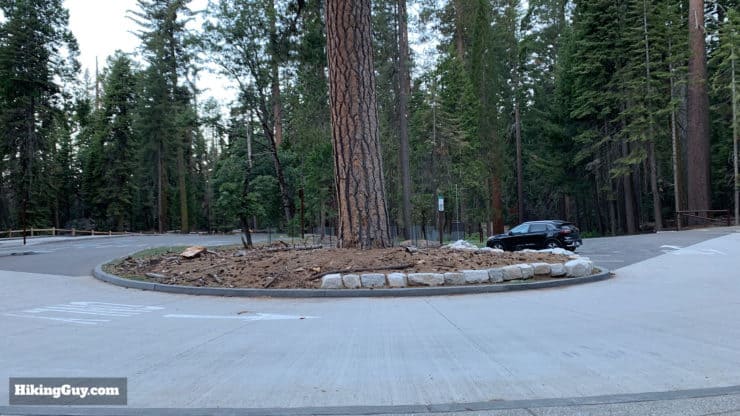
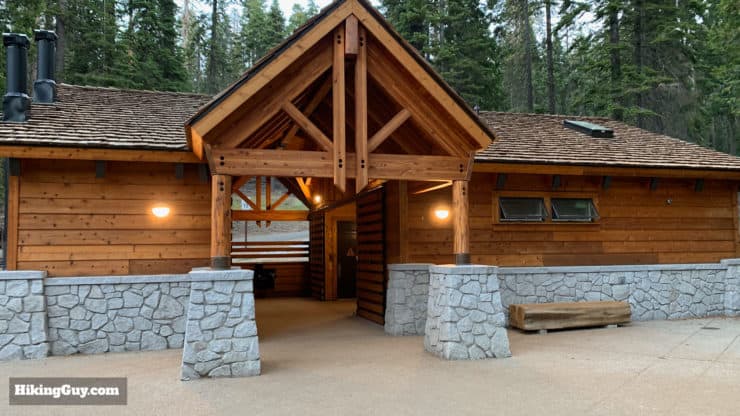
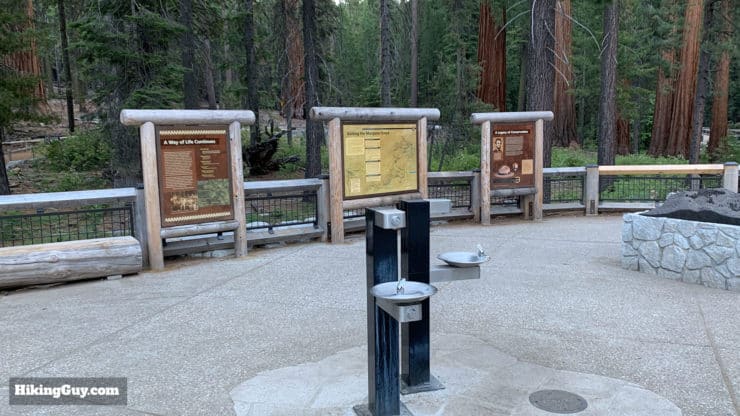
Here's the parking lot at the trailhead. I'm here at sunrise, the only car in the lot on a weekend in July. This is the best time to visit.If you take the shuttle from the Mariposa Grove Welcome Center, it will drop you off here at the trailhead.There are bathrooms at the trailhead.There are water refill stations at the trailhead and at the bathrooms.
Gear for the Hike
I recommend light hiking gear for this hike. Having a backpack and at least 1L of water will make the hike enjoyable. The trail surface is good but can get muddy, so trail runners or hiking shoes are a good move. You can also do this in fitness clothing if you don't have hiking gear. It's a longer hike, so take some snacks. The vita at Wawona Point is a great place for a picnic.
Nothing is sponsored or promoted, just the actual gear that I use.
Garmin InReach Mini 2Hit SOS or just tell loved ones that you're running late where your cell phone has no service. Review here.
Topo MTN RacerAggressive and fun with a wide toe box (=no blisters). Get them wet, they dry quickly. Lots of cushion and comfort.
Osprey Hikelite 26Lightweight, carries all your gear, and your back doesn't get sweaty. Oh yea, it's also one of the most inexpensive packs you can get.
This hiking guide follows the route of the Mariposa Grove Trail, the longest hike in the grove. The trail has a fair amount of twists and turns, so saving this guide on your phone or printing it out will be helpful. If you have a GPS, I strongly recommend loading my GPX track (below) and bringing it along. It's good to cross-check your position on the GPS if any part of the trail confuses you.
The route has ups in downs, but in general, you'll be climbing until you reach Wawona Point, and then heading back down. The section between the California Tunnel Tree and the Telescope Tree feels most like an uphill, but compared to the other hikes in Yosemite NP, the climbing here is much easier.
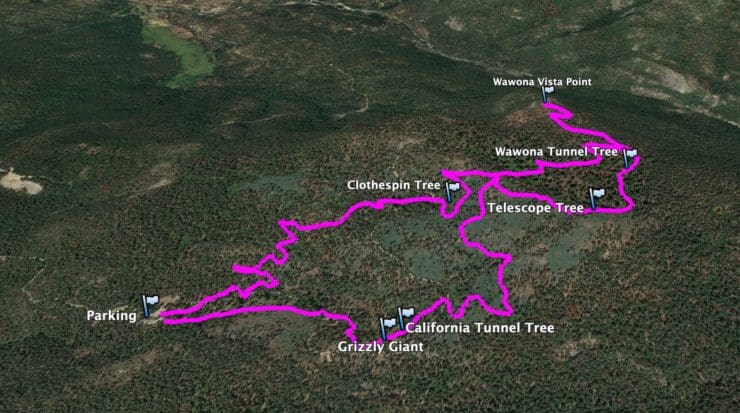
3d Map
Overall the Mariposa Grove Trail is a big loop hike that's pinched in the middle. From this view, you can also see that the climbing is gradual as yo head up to Wawona Point.
Quick Hike Brief
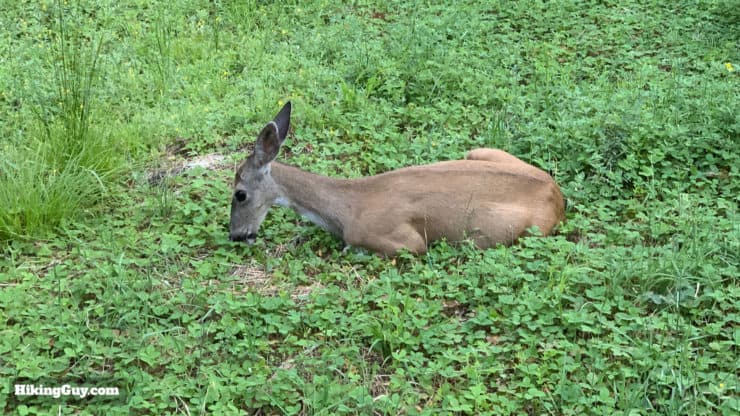
Wildlife abounds at the Mariposa Grove but tends to scatter as the crowds come in. Here's a female mule deer close to the Fallen Monarch tree.
"He is the best mountaineer I ever met, and one of the kindest and most amiable of all my mountain friends." - John Muir on Galen Clark, First Guardian of the Mariposa Grove
One of the first gringos to show up here in 1857 was Galen Clark. Galen Clark was instrumental in getting the Mariposa Grove protected, and then acted as guardian and tour guide here until his death.
The Mariposa Grove was first protected under the Yosemite Grant Act, signed by Abe Lincoln in 1864 during the Civil War. The first park commissioner was Frederick Law Olmsted who designed New York's Central Park.
Cars used to be able to drive through the grove and you can imagine the damage that was done. The grove was closed in 2015 for a massive restoration. The trails you see now were opened in 2018.
Don't leave the trail, take any cones, or pick any bark off the trees. Help protect this special place.
Mariposa Grove Trail Directions
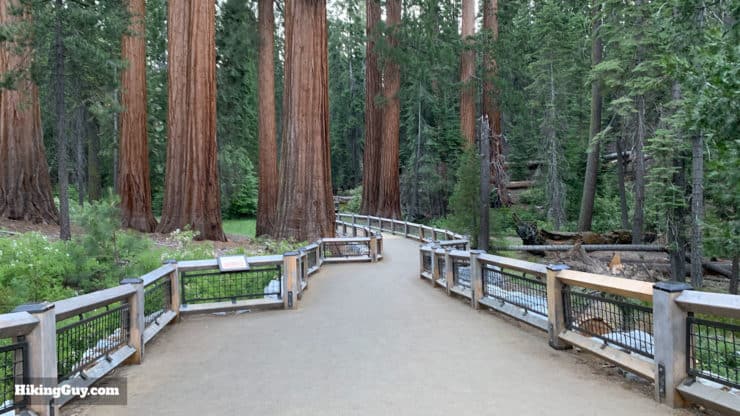
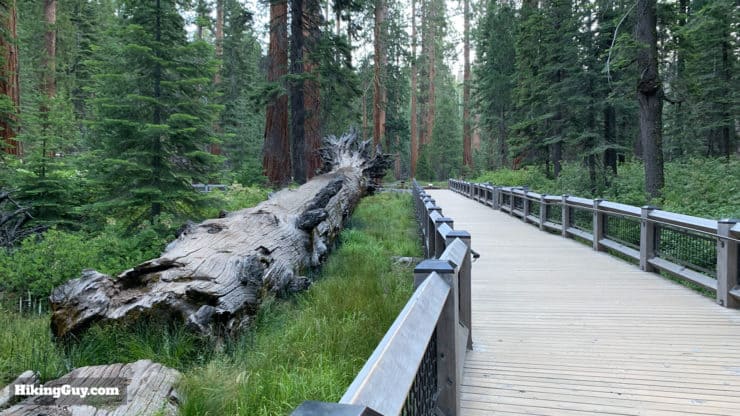
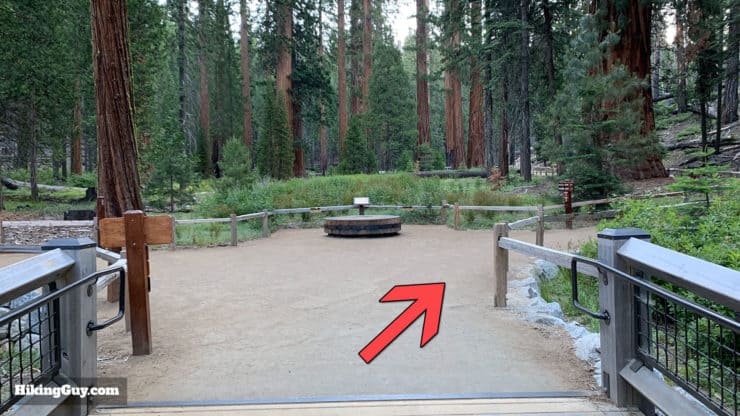
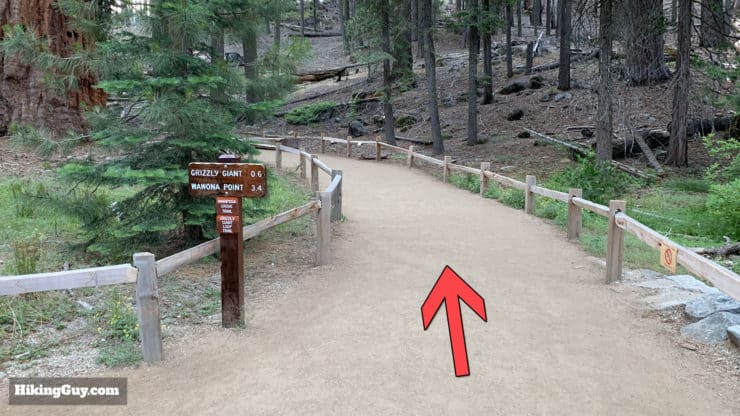
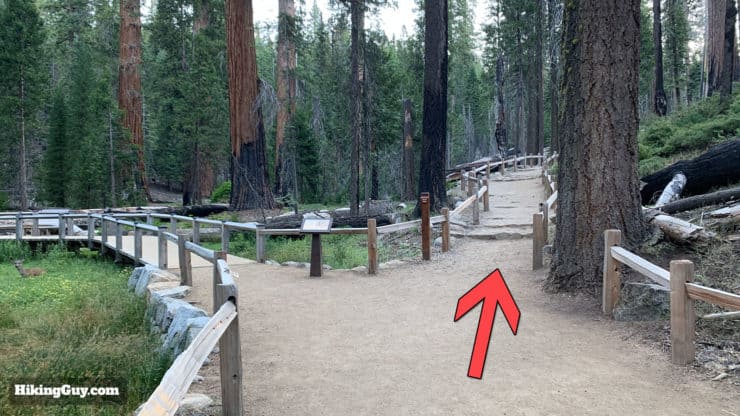
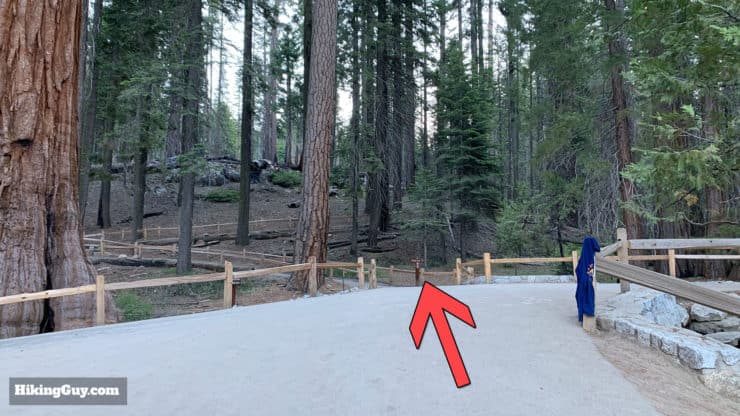
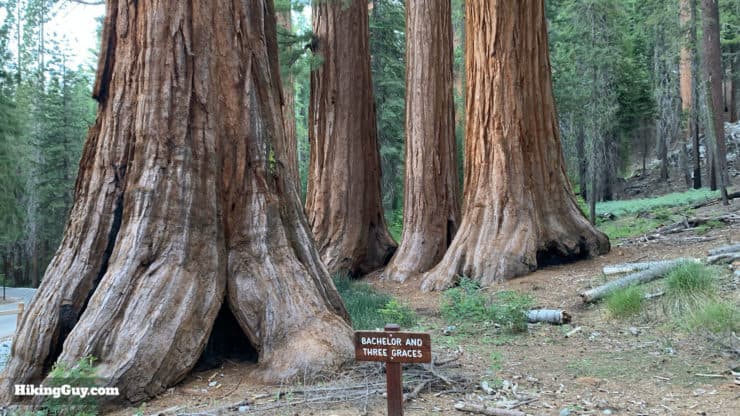
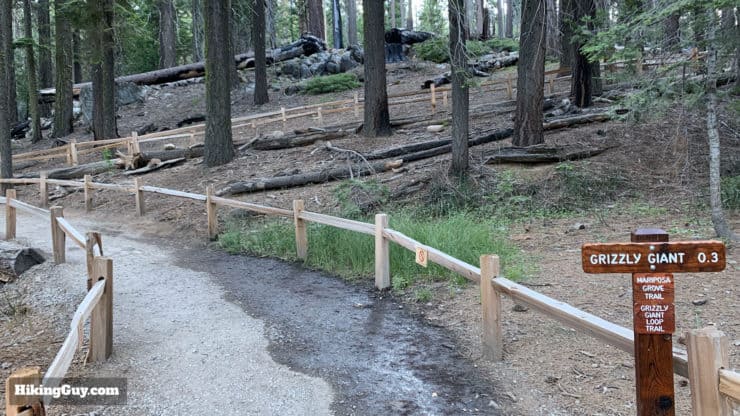
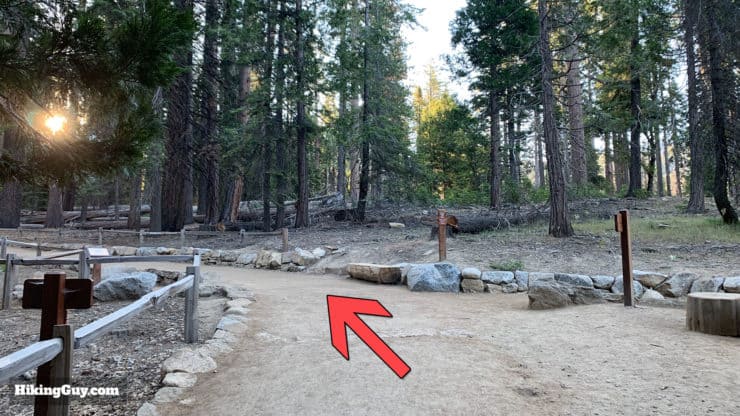
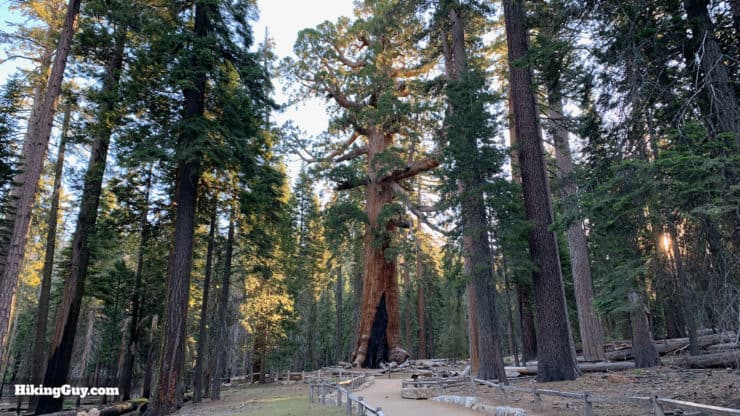
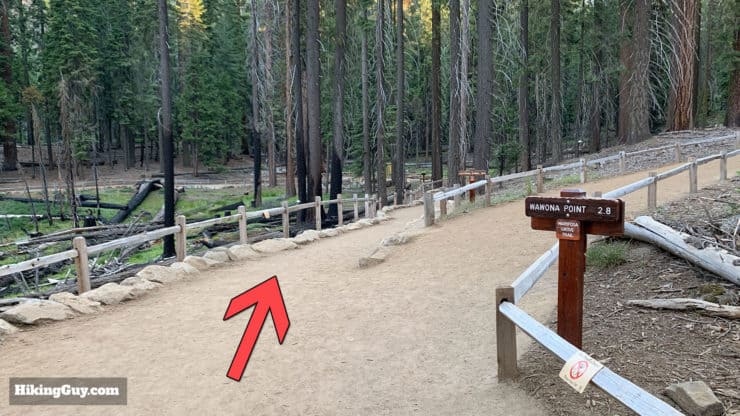
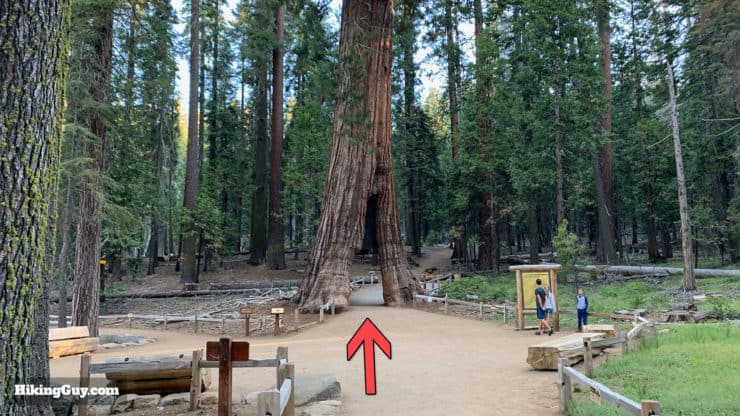
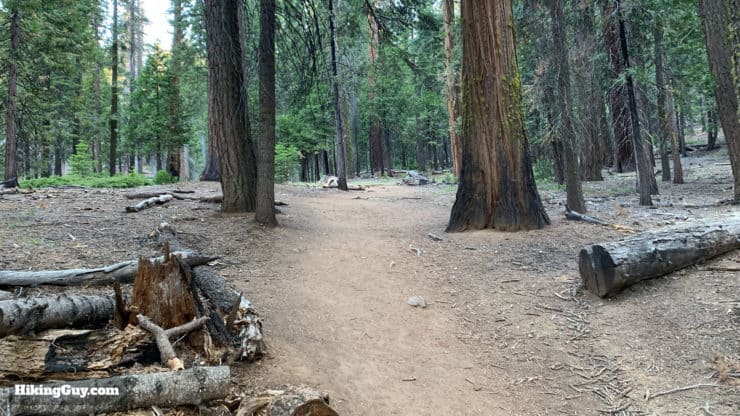
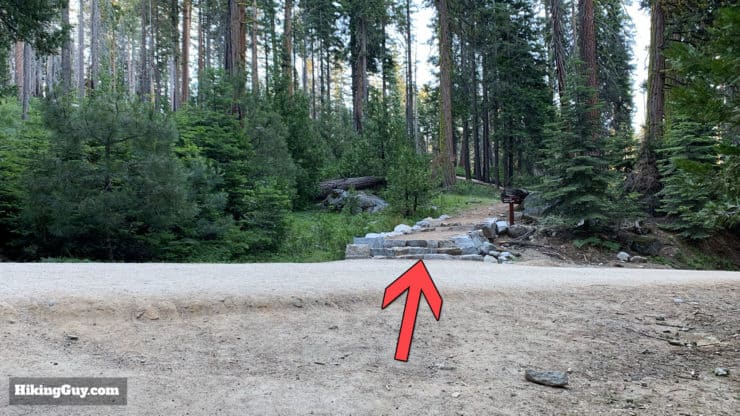
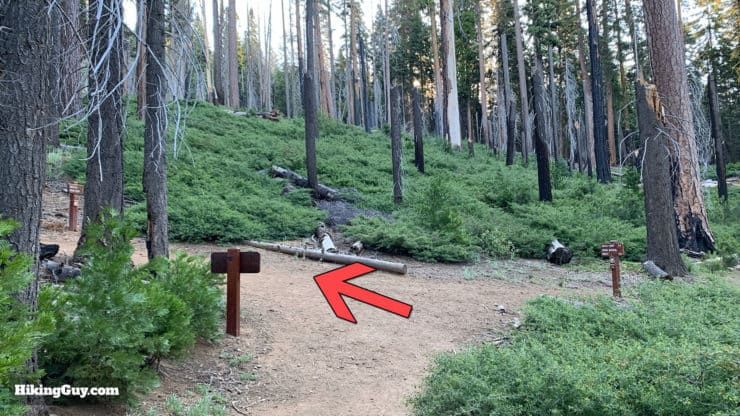
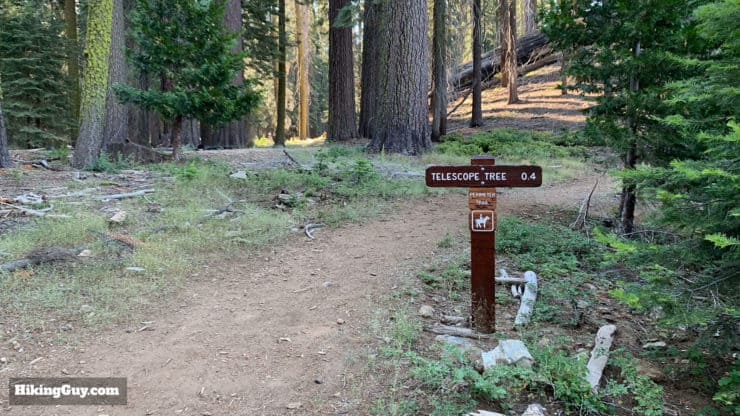
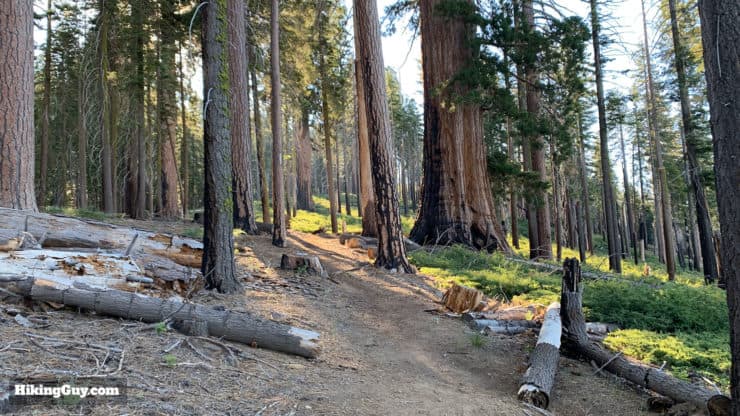
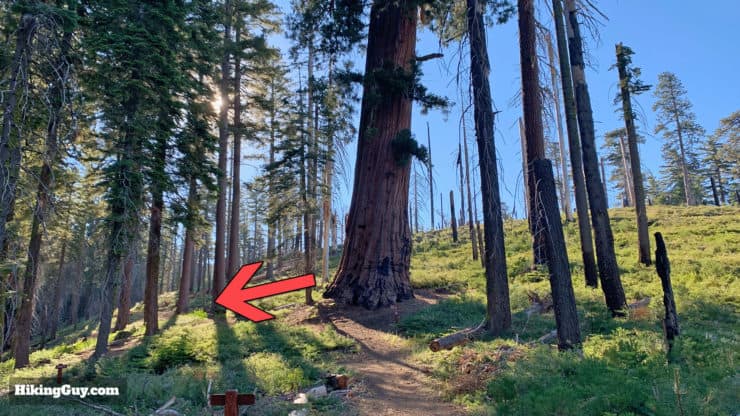
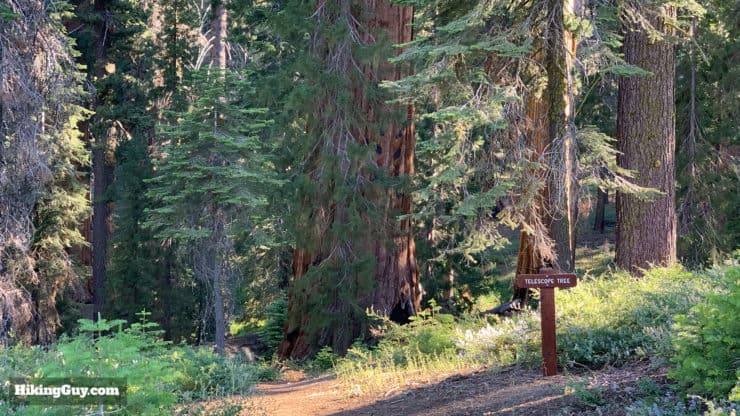
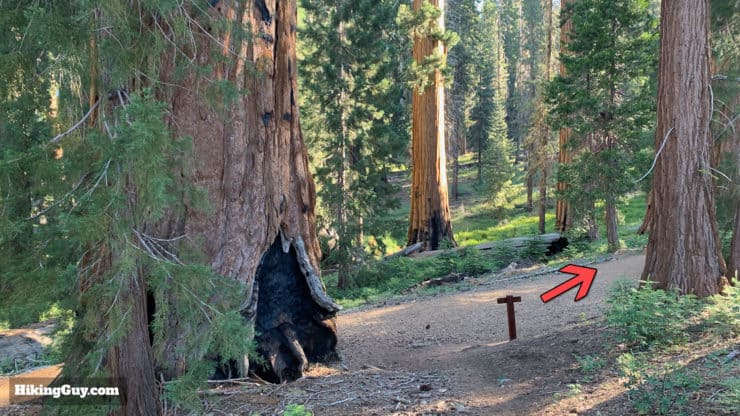
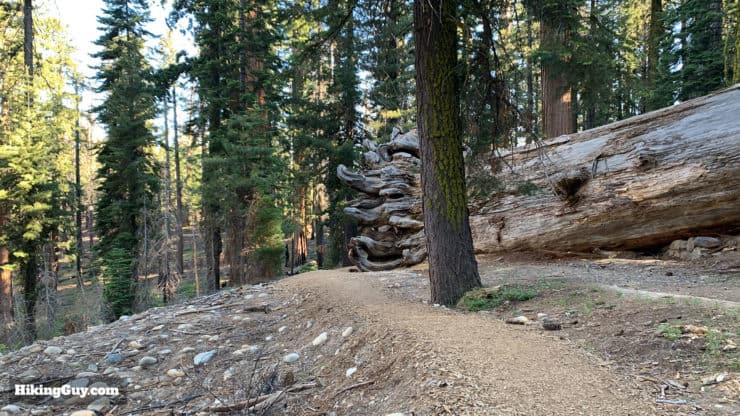
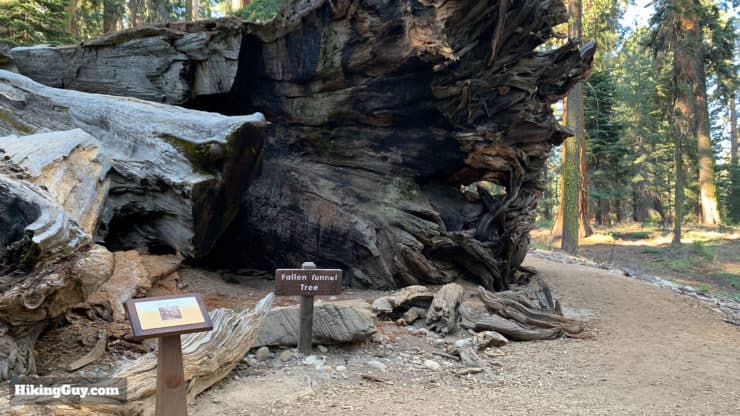
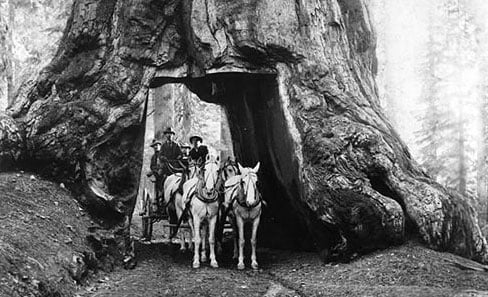
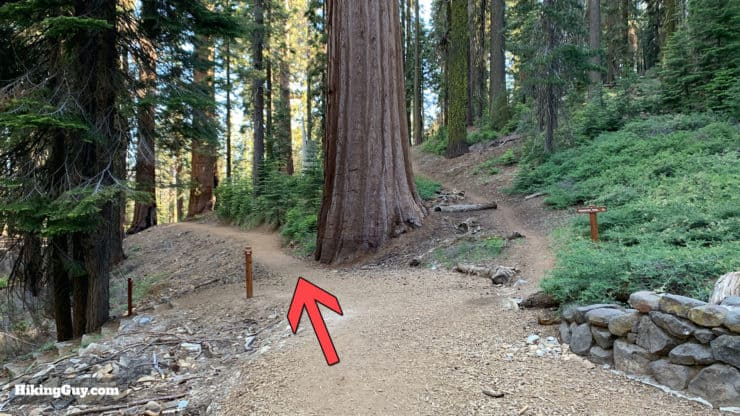
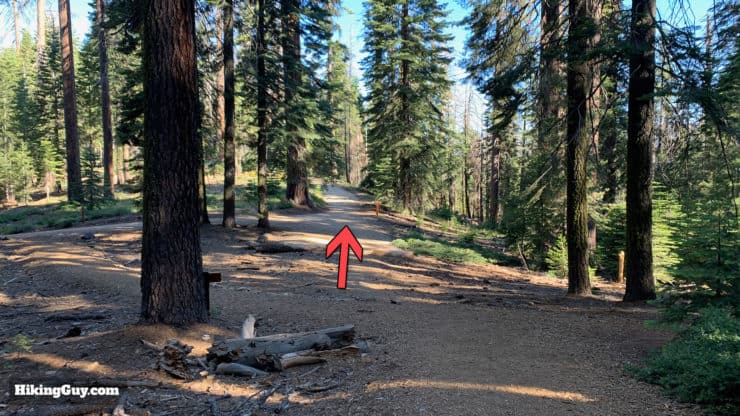
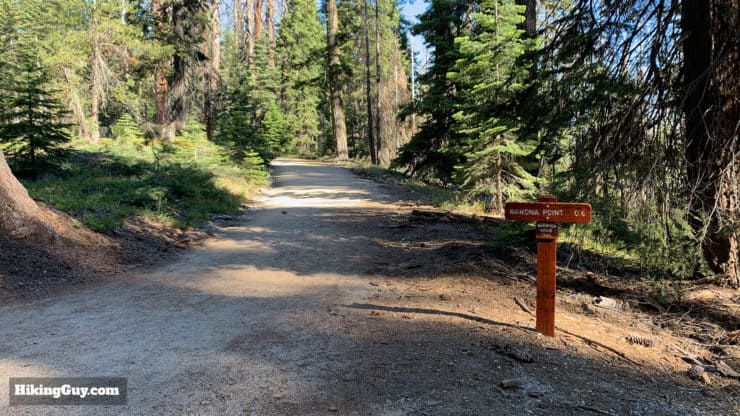
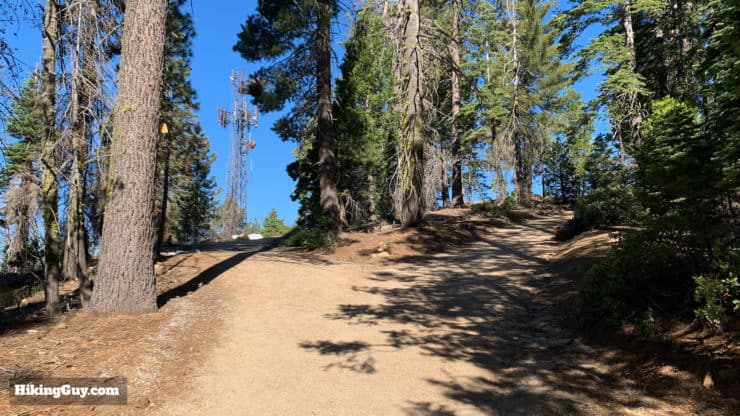
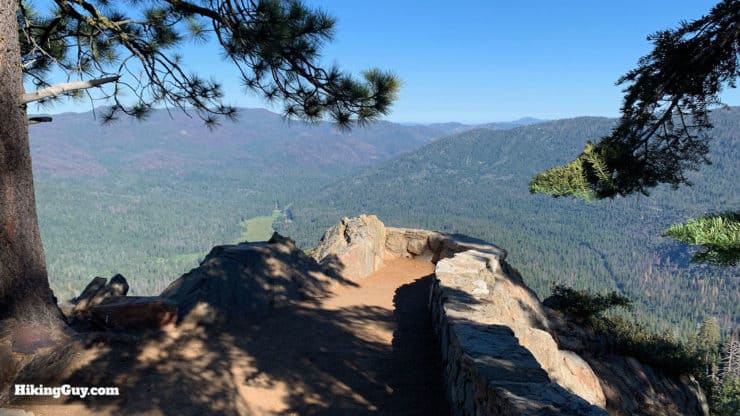
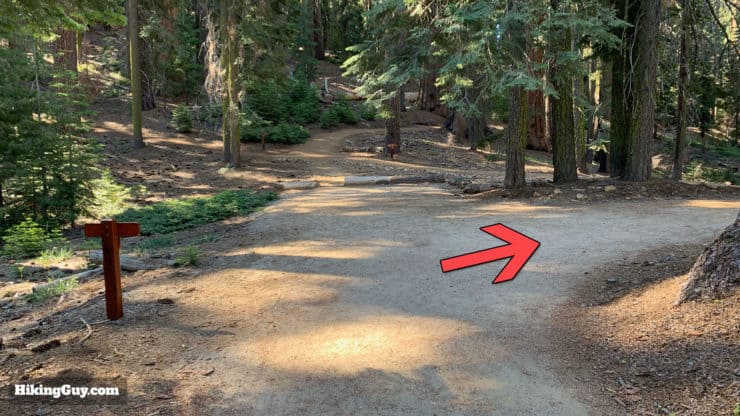
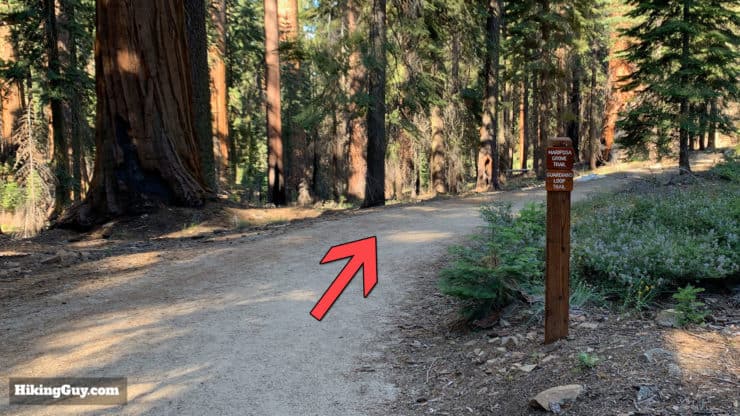
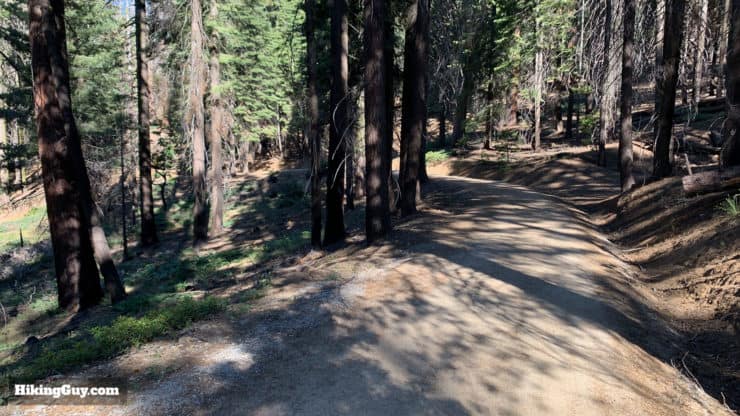
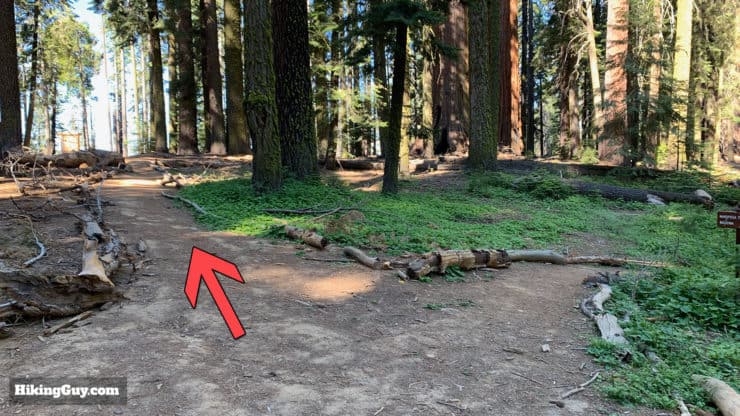
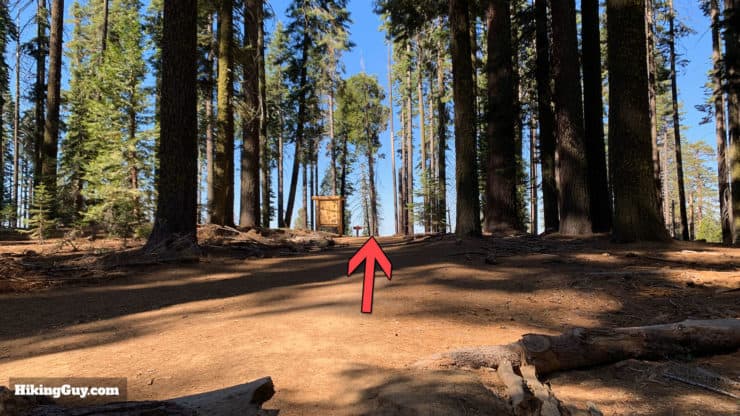
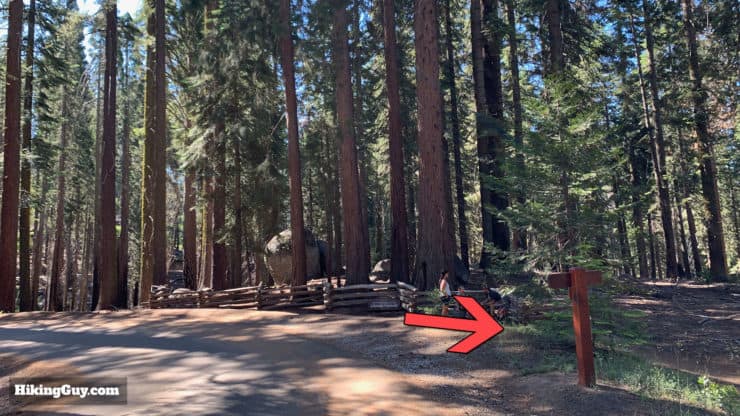
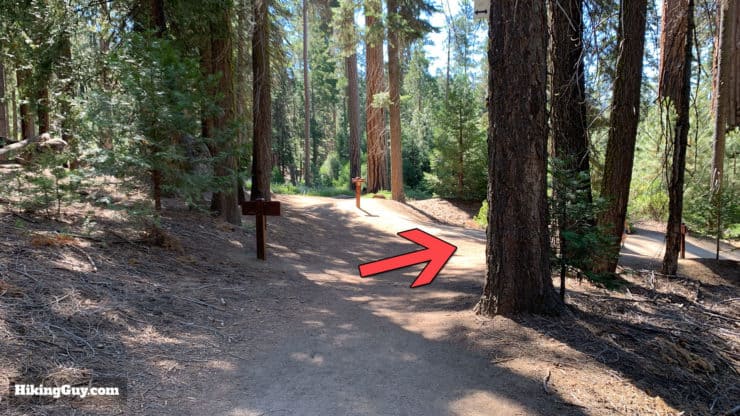
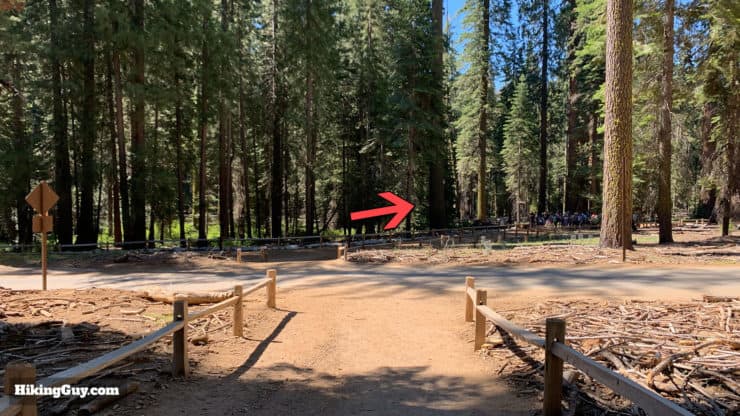
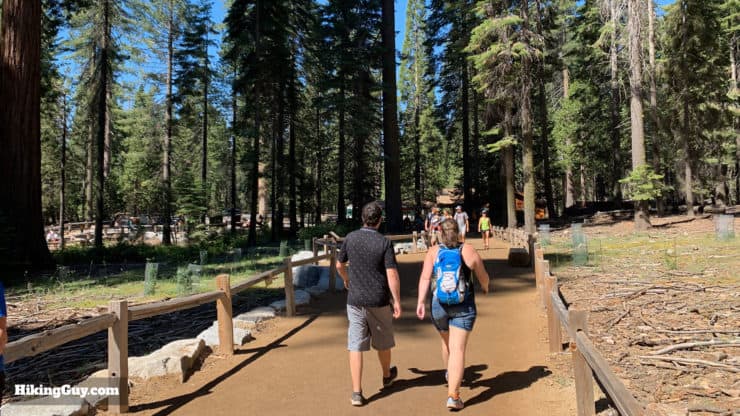
Start the hike by walking up the big boardwalk from the trailhead. Here's what it looks like at sunrise. At 9am it will be jammed with people.After a minute or two you'll reach the Fallen Monarch, which fell over 300 years ago. Giant Sequoias are very resistant to decay, which is why it still is intact.At the junction, bear right and continue hiking.Keep hiking up the wide path toward Grizzly Giant.Keep going straight up the stairs.When you get to the road, cross it to continue the trail.You'll pass by the Bachelor and Three Graces.Keep heading up the path toward Grizzly Giant.Bear to the left, past the trail on the right.And in front of you will see Grizzly Giant, the largest and oldest tree in the park. When the Grizzly Giant was a sapling 1800 years ago, the Roman Empire controlled much of Europe and the Mediterranean.Continue past Grizzly Giant and bare to the left.And right after that you'll arrive at the California Tunnel Tree. This is the only tree still standing that has a tunnel cut into it; this one was cut in 1895. The Giant Sequoia can still live with the tunnels cut into them, although they are weaker. Hike through the tree.Once you leave the California Tunnel Tree, the crowds start to drop away. Continue up the trail.The trail crosses the road.At the junction make the hard left and start the climb to the 5-point intersection.After about 0.8 miles of climbing you'll arrive at the 5-point junction. Make the first left.As soon as you make the left you'll see a sign for the Telescope Tree, that's where we're headed next.This stretch of trail is peaceful, passing through many unnamed Giant Sequoias and offering nice views into the valley on the right.When you reach this Giant Sequoia right in the middle of the trail, make the left.Right in front of you will be the Telescope Tree, Walk inside and look up; the tree is hollow and you can see the sky. Giant Sequoia trees don't need an entire trunk to live. This tree is alive but obviously weakened.Just past the Telescope Tree, make the right onto the trail.Soon you'll see the massive root of the Wawona Tunnel Tree.The Wawona Tunnel Tree, now renamed the Fallen Tunnel Tree, was the first tree in the park with a tunnel carved through it in 1881. At the time carving the tunnels was a novelty and good photo opportunity to attract visitors. In 1969, after 2300 years of life, the tree fell and died during a heavy snow. The event was an eye-opener for the parks system, and from then on their focus started shifting to conservation.Here's what the Wawona Tunnel Tree looked like in 1904. Photo Ted OrlandContinue straight down the trail from the fallen tree.The trail twists around to the right and you'll see the road. Continue up the road to Wawona Point.This paved road used to be open to cars. Hike up the small hill to the point.When you get towards the top, you can go either way and check out the viewpoints.Wawona Point is the highest point on the hike at 6,810 feet. From the viewpoints you can see into the Wawona Valley.
After you visit the point, walk back down the road to the last intersection.
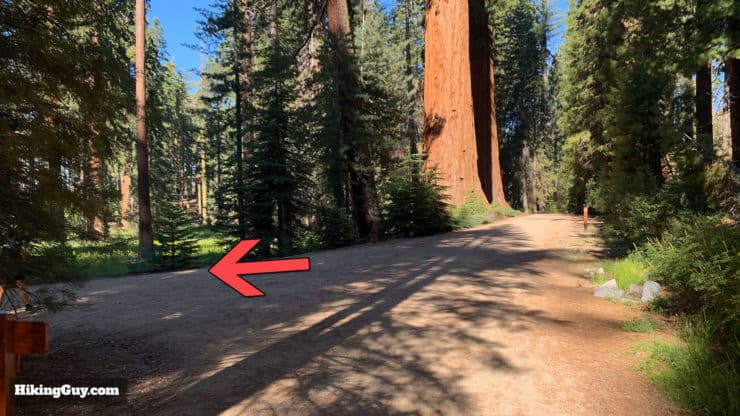
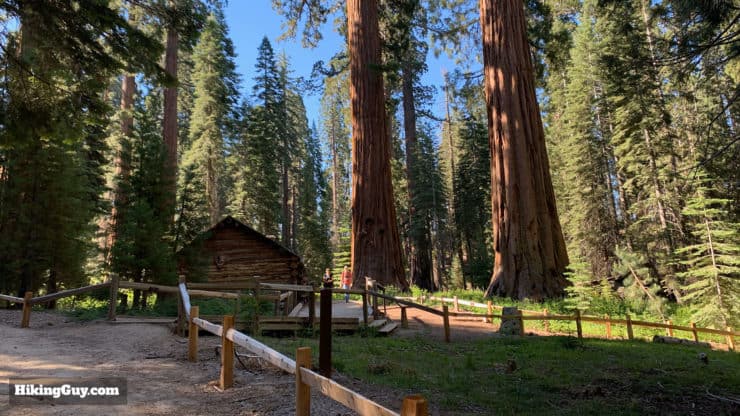
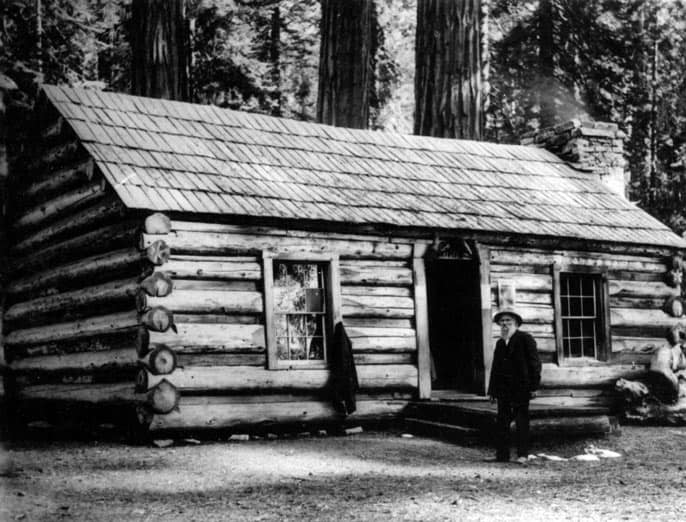
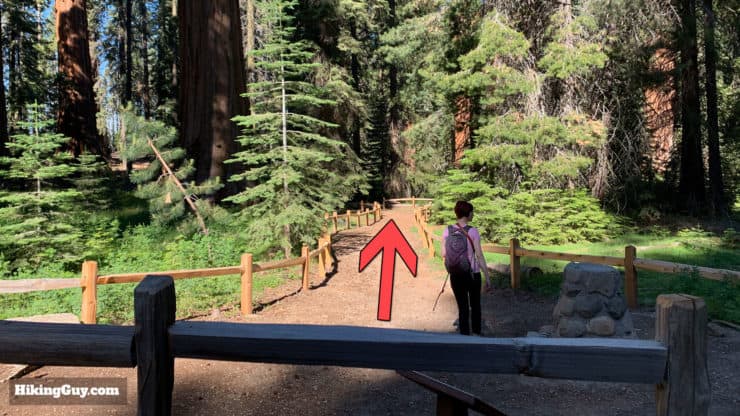
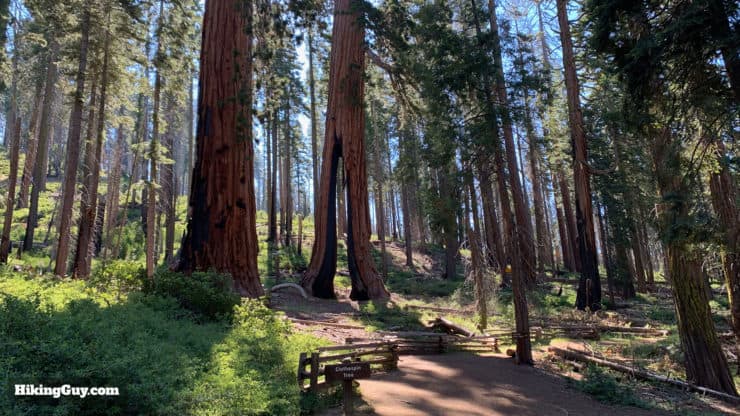
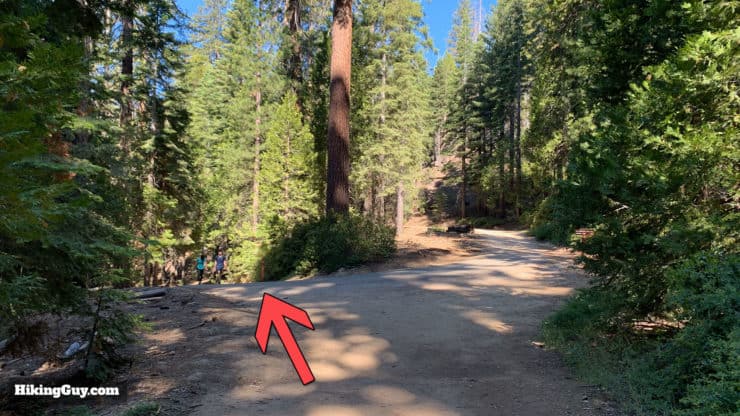
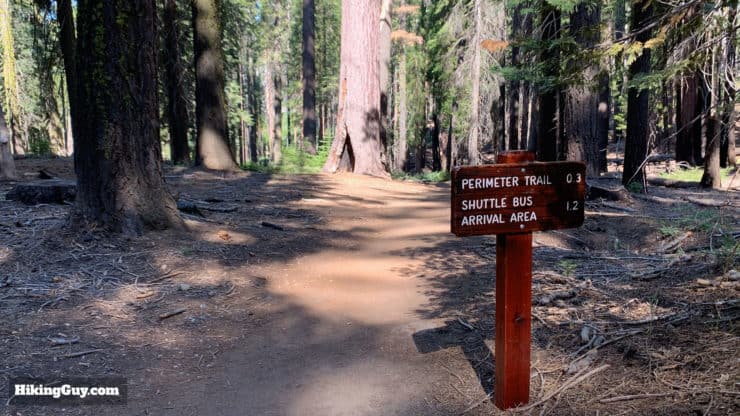
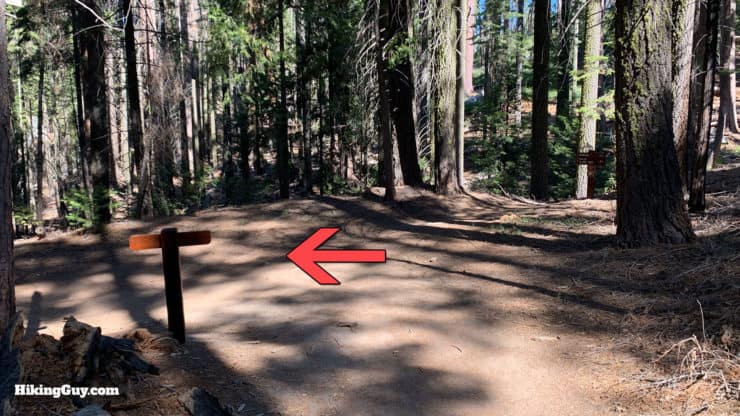
When you get back to the intersection where you joined the road, continue down the road to the right. Avoid any small side trails you see that say Wawona Valley.Keep heading down the road. You'll see a marker for the Mariposa Grove Trail.Now is your payback for all the climbing you did earlier. Cruise down the road.When you get to the intersection, make the hard left to head to Galen Clark's Cabin.After the turn you reach Galen's Cabin. Today it serves as a museum. The original structure was built in 1858. This structure replaced the old cabin in 1930.Here's a picture of Galen at the cabin in 1904. Photo NPSFrom the front of the cabin head straight.You'll pass bathrooms, go straight past.Stay left at the junction with the trail to Wawona. If you were staying at the Wawona Hotel, you could take the left to hike directly there.Head back up to the 5-point intersection.And go straight through towards the Clothespin Tree.After a descent you'll see the Clothespin Tree, where the tunnel is actually created by forest fires, not man. This view is looking back at it (behind you has you hike) which captures it better.You'll reach the road again, head left down the hill.You'll see a trail marker that confirms you are on the Mariposa Grove Trail.At the bottom of the hill when you see a wood fence, make the hard right off the road to continue on the trail. This turn is easy to miss.From here on out, you'll start seeing signs for the shuttle bus arrival area, which is the end of the hike.At the first junction, make the left.And soon after that, make the right at the next junction.Soon you'll reach the boardwalk area where you started the hike. After the peace of the last section of trail, I'm sure you'll know that you are arriving at the end because you'll hear the crowds. Continue hiking down around to the right.And here you are, back at the trailhead. That's the hike!


 Using the Apple Watch for Hiking
 Garmin Fenix 7 & Epix Review For Hikers
 How To Read a Topographic Map
 Garmin GPSMAP 67i Review
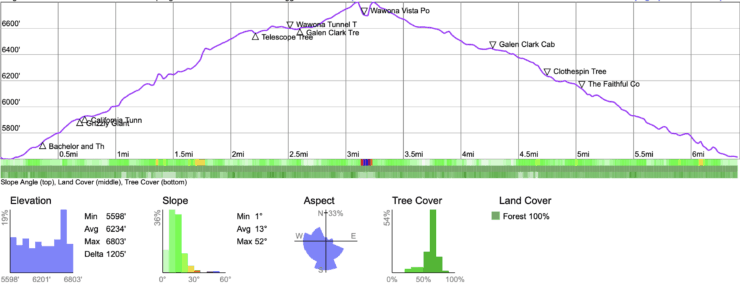


 Hike Mirror Lake Trail (Yosemite)
 Artist Point Yosemite Hike
 Hike Chilnualna Falls Trail
 Yosemite Hiking Tips
 Best Hikes in the US
 Yosemite Hikes
 Best Hiking Gear 2024
 Hiking Boots or Shoes: Do I Really Need Hiking Boots?
 When to Hit SOS on inReach
