Cactus to Clouds Hike
Hike Stats
- Total Distance
- 21 miles
- Time
- 12 - 16 Hours
- Total Climbing
- 10800 feet
- Difficulty
- Very Hard
- Crowds
- Moderate
- Dogs
- No Dogs
- Gear
- What I Use
- Weather
- Latest Report
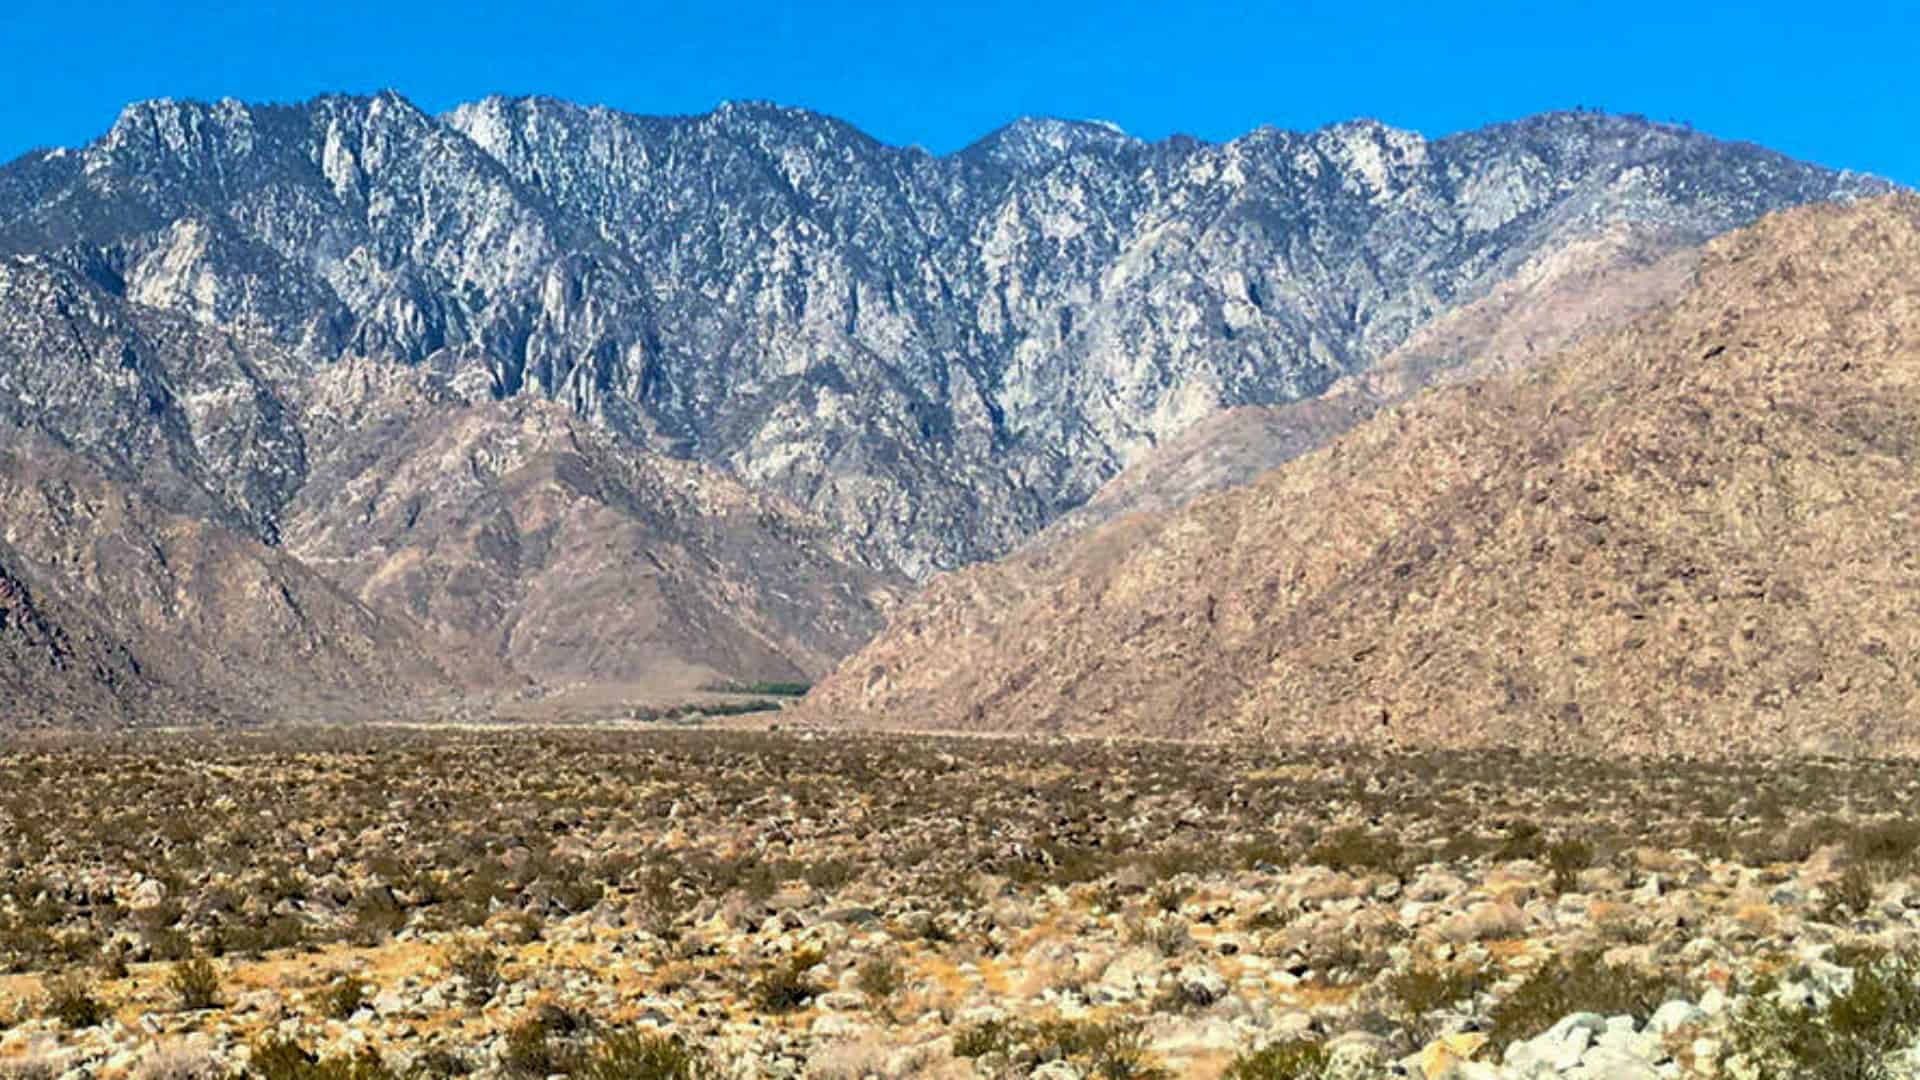
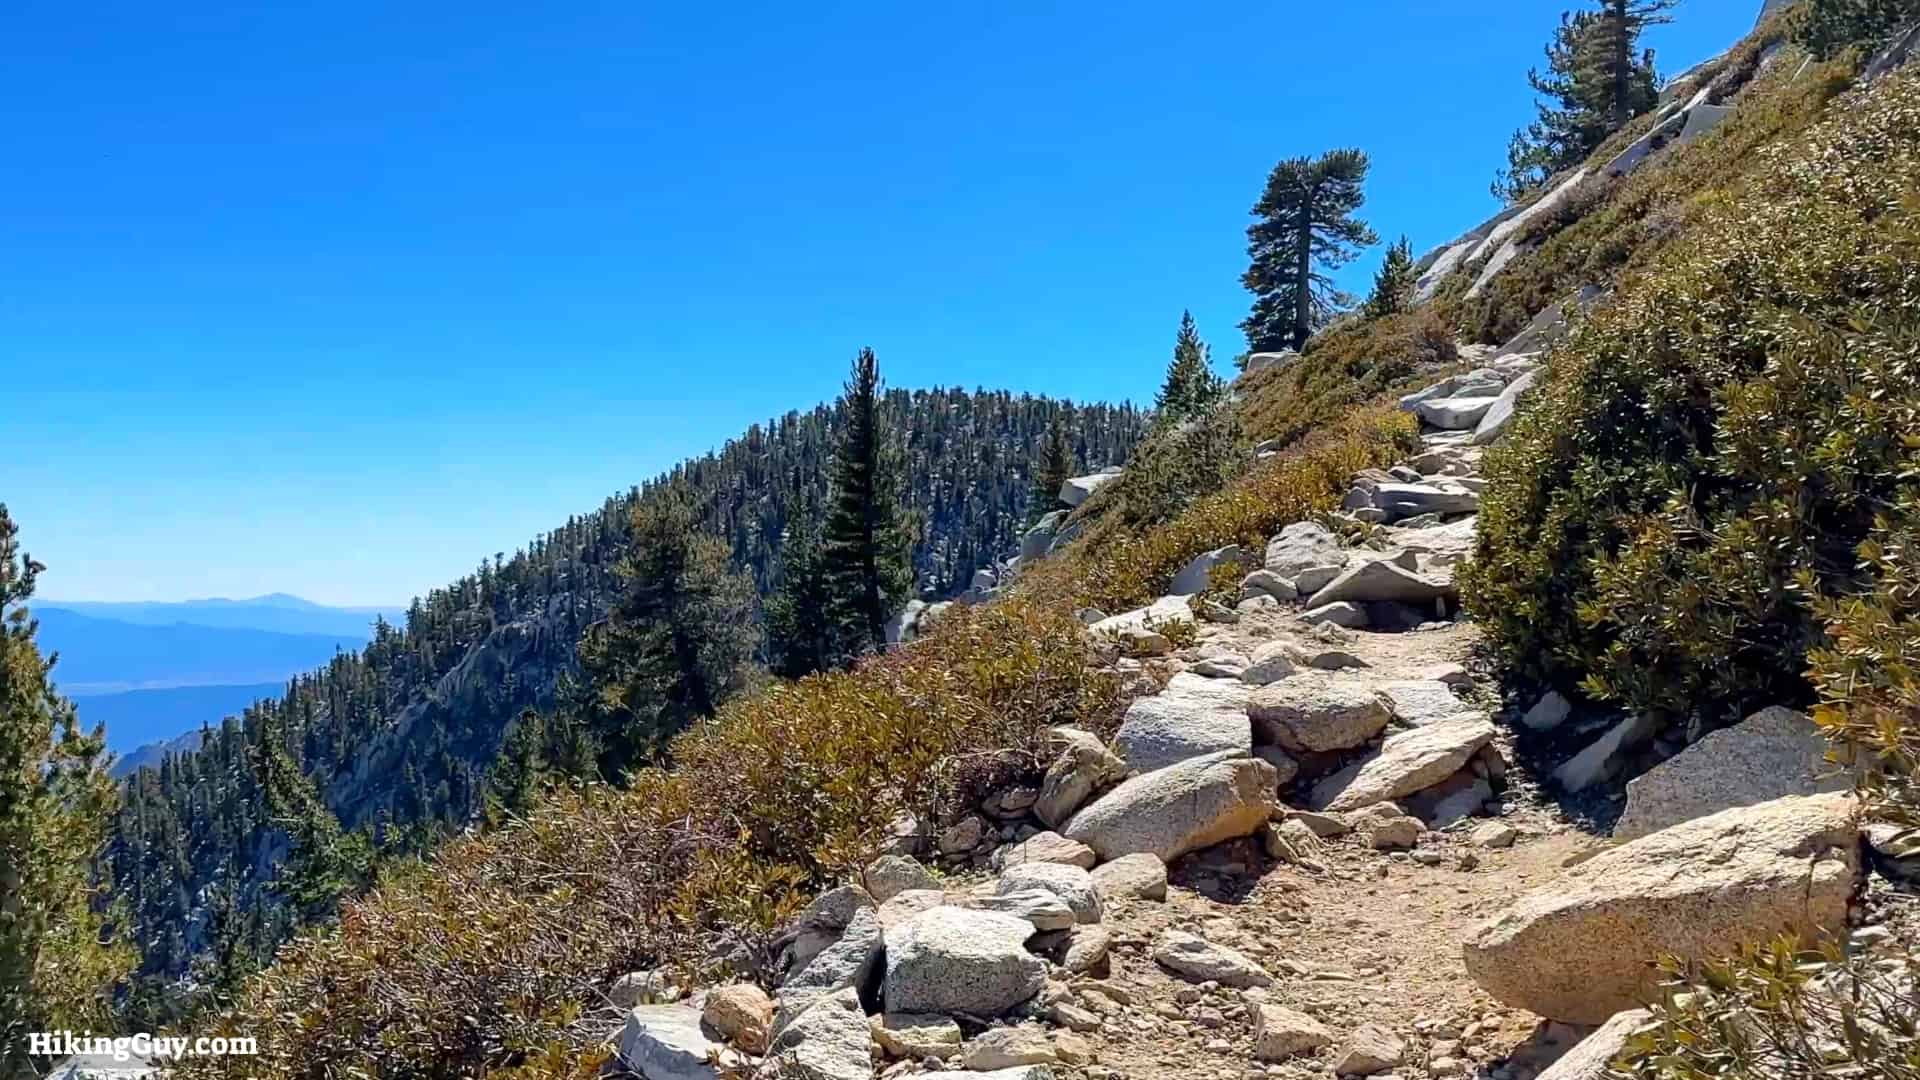
The Cactus to Clouds hike is epic. Backpacker Magazine rated it one of the hardest day hikes in the world. You start in downtown Palm Springs and climb over 10,000 feet to the summit of Mt San Jacinto, with a large stretch on the Skyline Trail. It's not only physically challenging, but you must also factor in the potentially deadly weather. However, with the proper training and preparation, you can do the hike safely, and in this guide, I'll show you how.
When to Hike Cactus to Clouds
Social media and many website trip reports have made Cactus to Clouds more popular. But it's not a hike you just show up and do. It's a hike that you need to prepare for, and then you do it only when the conditions are right. So the first thing to plan for is the weather.
Best Seasons for C2C
Cactus to Clouds features extremes of weather at both ends. Palm Springs lies in the Sonoran Desert, with high temperatures often above 110F. The summit of San Jacinto is known for alpine conditions, with snow, ice, and windchill. The trick is to find a window when it's cooler in Palm Springs and the upper elevations are clear of snow and ice.
| Time Period | Conditions |
|---|---|
| Late September - Early October | This is your best bet for the hike. Temperatures in Palm Springs can start to cool down and the upper elevations are generally free of snow. The trail is well-trodden and easiest to follow. |
| November - April | Winter conditions can make the upper portion of the hike more of a mountaineering experience. Even experienced winter hikers often have difficulty braving the steep "traverse" section where the gradient goes to 50%. Falling ice and debris in the traverse section add an element of risk that most people would rather avoid. |
| May | This is the second-best opportunity with cooler temps at lower altitudes and most snow gone on the upper slopes. The shady and cooler sections of the traverse can often have lingering ice and snow. |
| June - September | Most rescues and deaths happen in the summer when the highs can be around 110-120F. The park rangers strongly recommend NOT doing your hike during this time. |
People have died on this hike. So please make sure you've fully prepared for this hike and are doing it under the right conditions.
Deadly Summer Conditions
To cut to the chase here, heat stroke kicks in when your body goes above 104° F. Your brain functions start to shut down, then your bodily functions, then death. Temperatures in Palm Springs have gone into the 120Fs. So if it gets too hot, you can die, and people have. Most rescues on the Skyline Trail are from heat-related issues. People have died only a mile away from the trailhead in these parts. It's real.
In very hot but not deadly temperatures, the heat will sap up energy. You'll want every ounce of energy you can get on this hike. If you want to do this hike when it's hot out, do it a few times in good conditions to understand the risks and effort involved.
Deadly Winter Conditions
The traverse and the section from Coffman's Crag to Grubbs Notch are steep and loose. These sections can become treacherous in the winter and more of a mountaineering exercise. The area here is shaded and cool, with ice and snow lingering longer than in other spots. The steep slopes are prone to falling debris and ice.
Picking the Right Time
Given the temperatures and distance on this hike, it's usually wise to leave before dawn. First, you want to give yourself enough time to complete the hike. Generally, my pace on Cactus to Clouds is about half my average hiking pace. For instance, I normally hike at 3 mph (20 min/mile) pace. For C2C it's a safe bet to half the pace to 1.5mph (40 min/mile). It's a bit conservative, but it gives you some wiggle room and time to take breaks.
The other thing to consider is that the temperature goes down about 3-5°F for every 1000 feet you climb. It's a general rule, and there are many factors, so I ballpark it at 4°F per 1000 feet. I take the hourly forecast for Palm Springs and then calculate the temperatures along the way as I climb. For example, if it's supposed to be 80°F at 10 am in Palm Springs and I've calculated that I'll be at 8400 feet by then, It should be about 32°F cooler (48°F). It's a rough guide but one to factor into your planning.
I've created a spreadsheet to help you time out your hike and give you a rough guide on how the temperature will be along the way. Make a copy and customize it for yourself.
Important Planning Links
- Palm Springs Weather - I look at the hourly weather report for the high temperatures and see how they correspond to my departure time, knowing that the air gets cooler as I ascend. Know that forecasts are only sometimes correct; microclimates along the trail can be warmer. You want to leave yourself some wiggle room.
- San Jacinto Mountain Forecast- Check the wind and precipitation at the summit. Since we're talking over 10000 feet of difference from Palm Springs, it can be snowing above the tram and sunny in the Coachella Valley below. San J has a reputation for being windy. Bring layers (more later) no matter what the forecast is.
- San Jacinto Trail Report - This is an invaluable resource for SoCal hikers, with accurate, timely, and detailed trail reports for the San Jacinto area. If you use the website please consider donating to this user-supported website (just like mine is).
- Palm Springs Aerial Tramway - The tram closes for a few weeks every fall for maintenance. Make sure it's running when you do the hike.
Weather windows can occur at any time. I've done this hike in August when high temps in Palm Springs were in the 80Fs. If you are local, keep an eye on the weather.
Training for Cactus to Clouds
The Cactus to Clouds hike is steep and long; there's no getting around it. It would help if you got used to climbing for 10-13 hours straight. I recommend these hikes as preparation for hiking Cactus to Clouds.
Gear For the Hike
- Trekking poles are helpful on steep slopes. They're also good in preventing a snake bite since the pole will land ahead of your foot. Snakes can be active at night here when warmer. Just tread carefully, and you'll be fine.
- Make sure you have all your essentials and everything you usually take on a backcountry hike.
- You'll need layers for the upper slopes and summit area. Be prepared for alpine conditions, which can include precipitation.
- Make sure you've charged your headlamp fully or have extra batteries handy if you have to make a nighttime swap.
- I bring a combination of energy gels, solid bars, and electrolyte chews. Sometimes the effort can make it hard to stomach solid food, and the gels go down easily. And you'll sweat, so replenishing electrolytes should be a consideration. You can also bring a bottle of Gatorade. The combo of sugar, liquid, and electrolytes often works well.
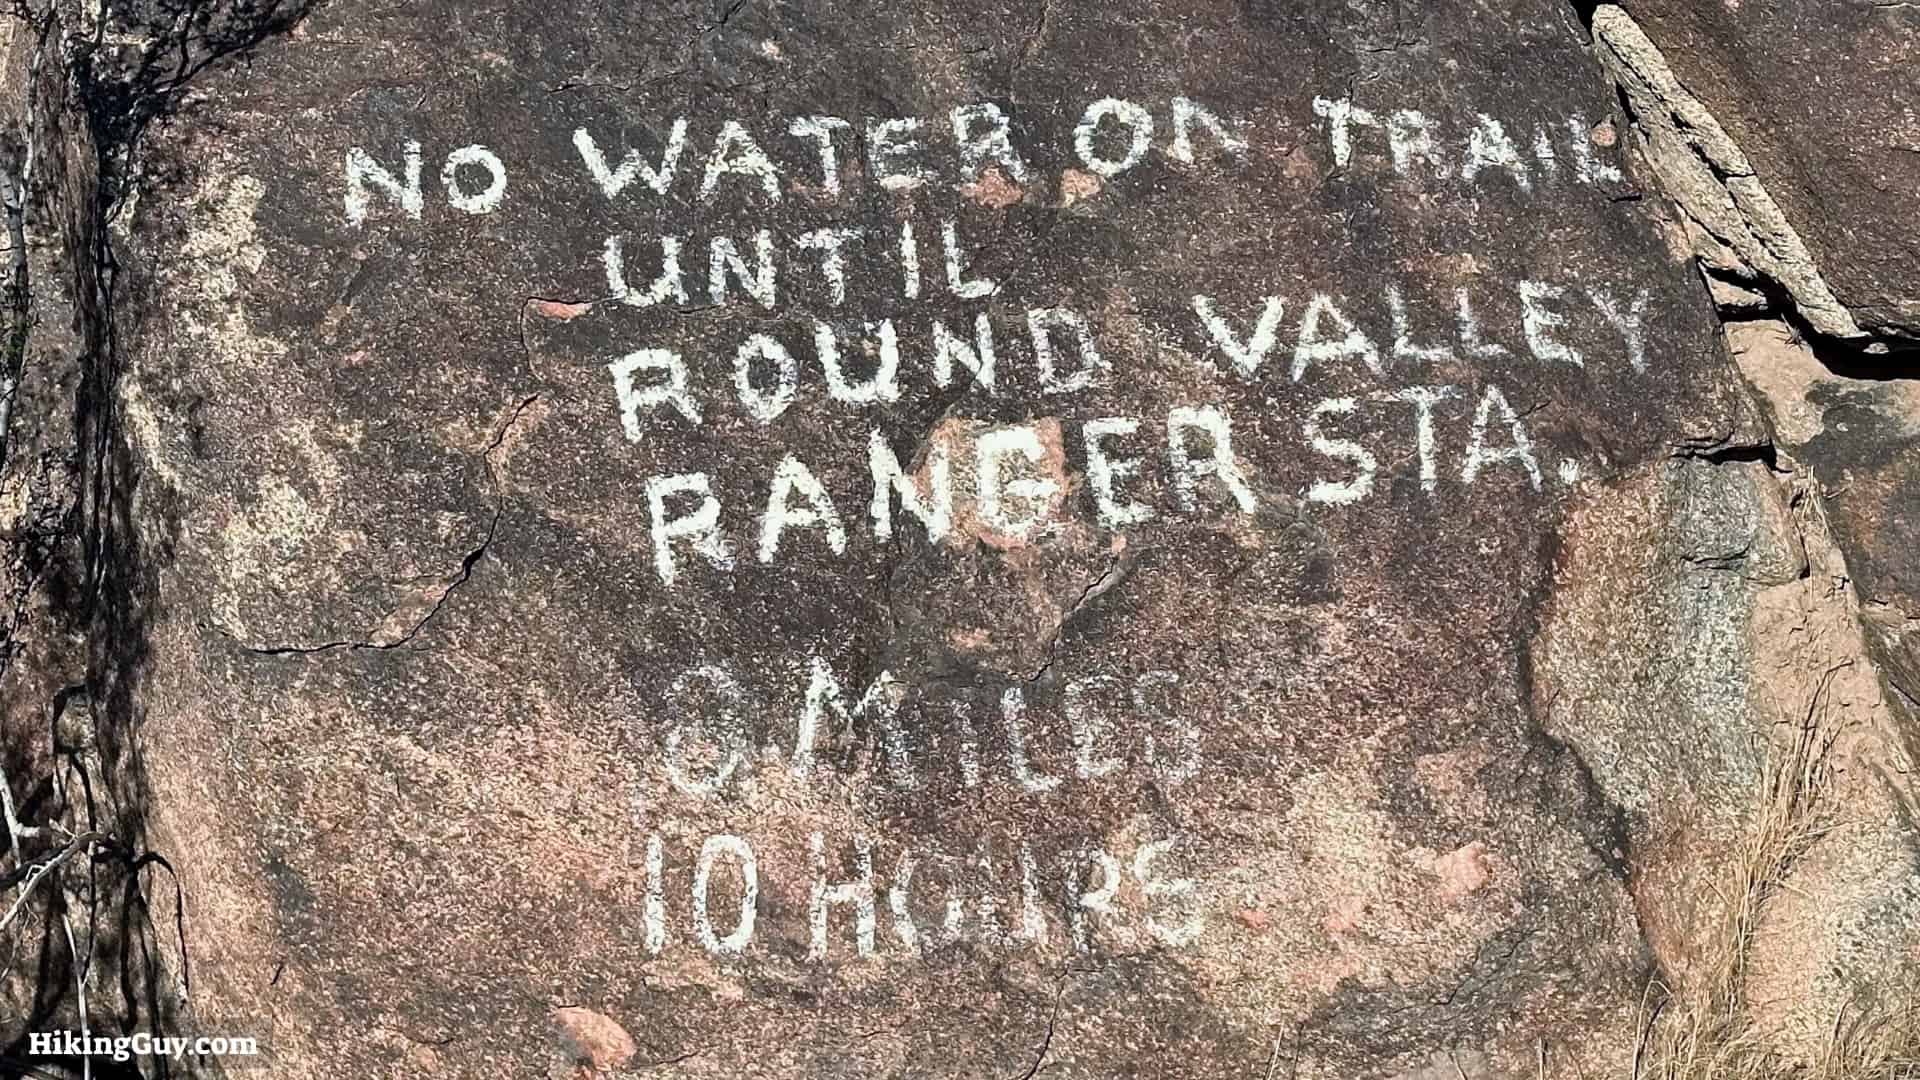
- I divide my water carry into two segments.
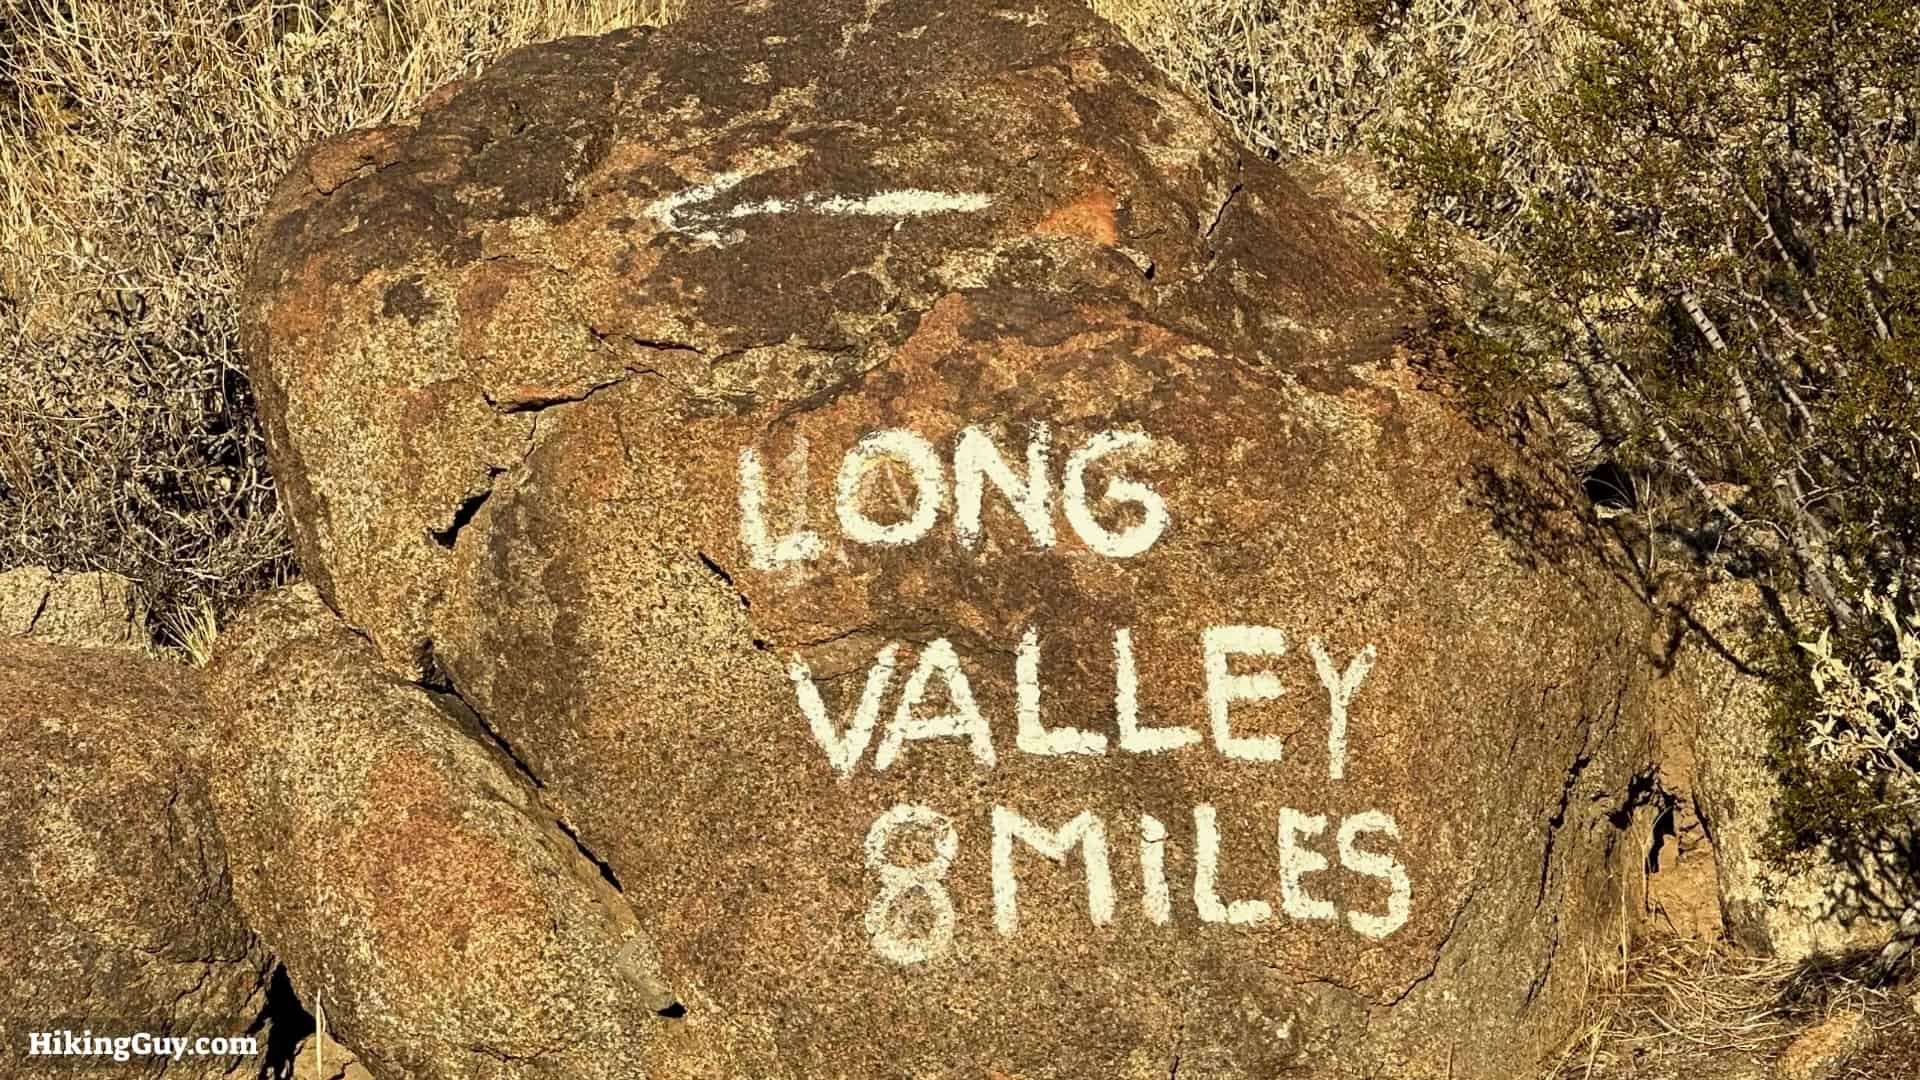
- First, I carry 3L of water from the start to Long Valley.
- Then I refill 3L at the Long Valley Ranger Station for the last half of the hike. You can also fill at the tram station and usually at Round Valley Campground.
Essentials I’m Using Now
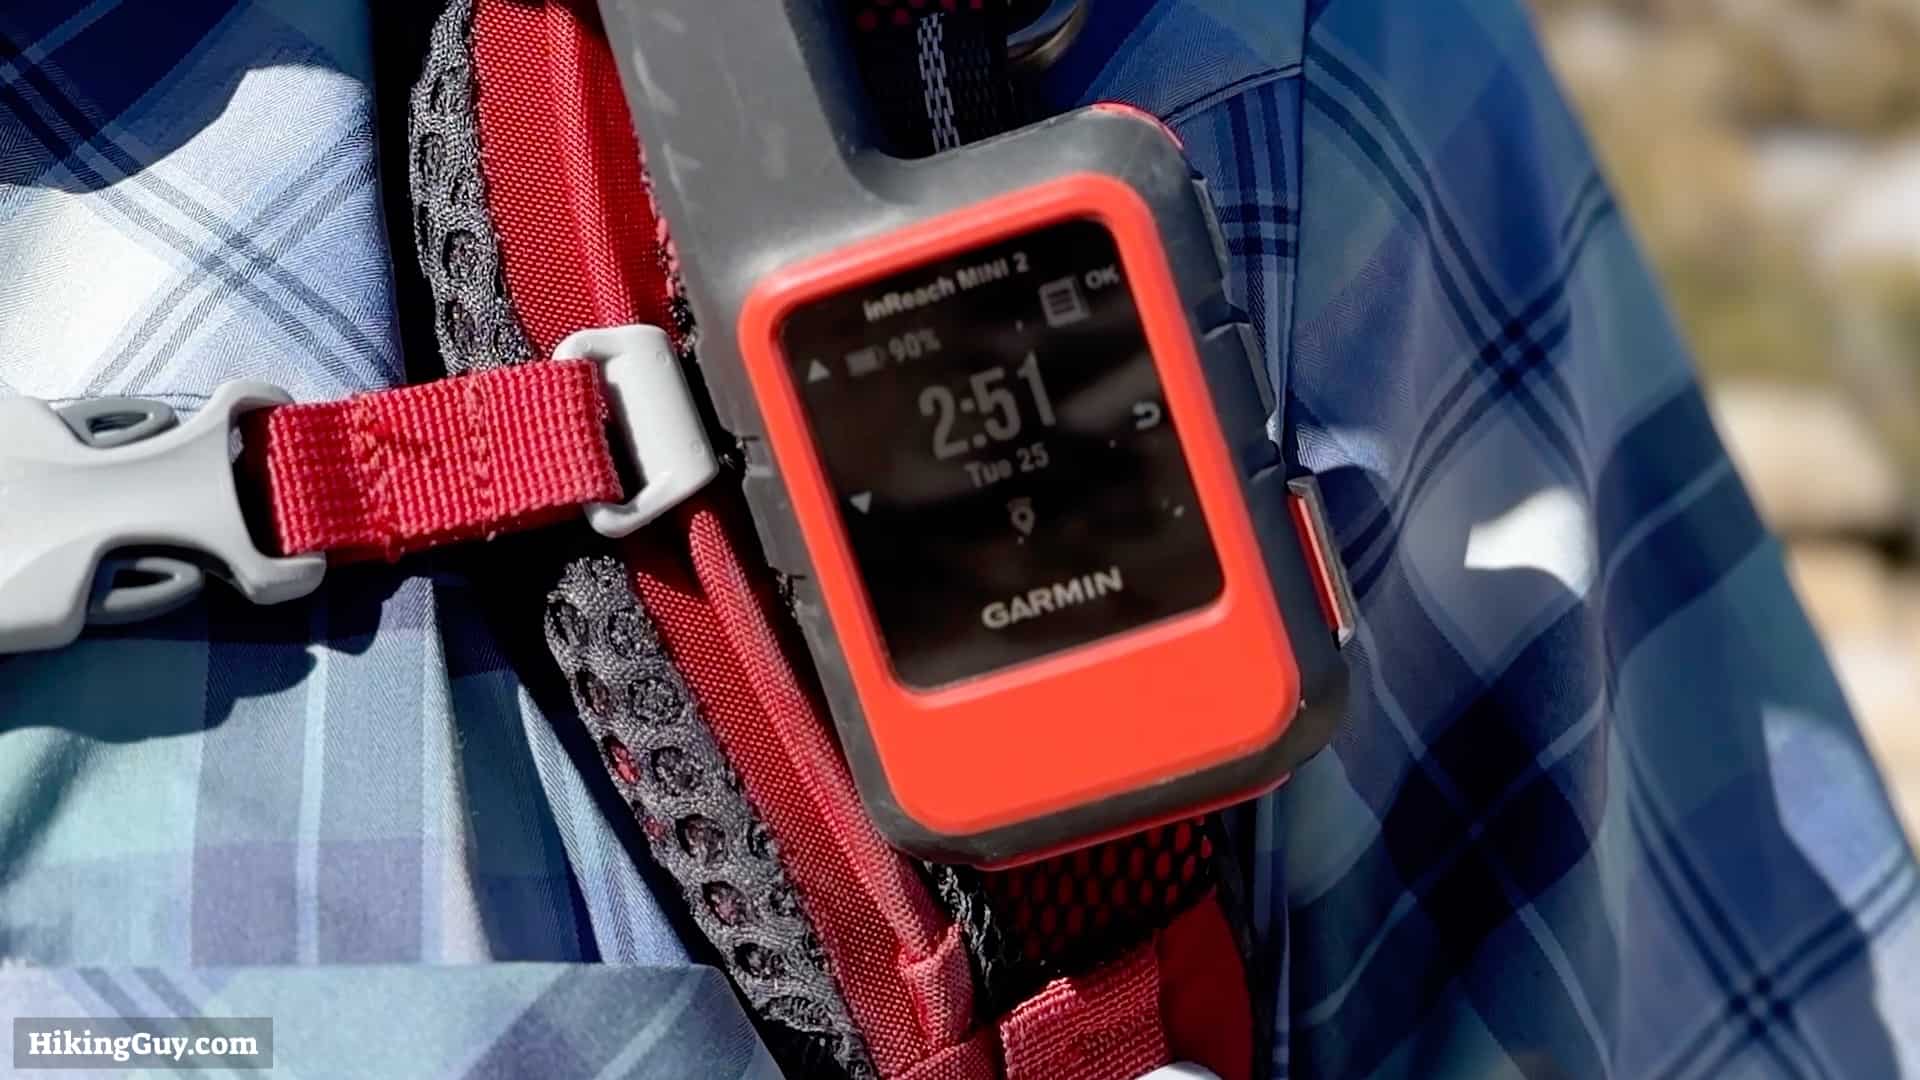
- Garmin inReach Mini 2: Reliable SOS Everywhere on Earth
- Sawyer + CNOC Water Filter: Easy & Reliable Safe Water
- Nitecore NU25 Headlamp: Running late? Get home safe
- Altra Olympus 275: Favorite trail shoes right now, no blisters and very comfy.
- AllTrails Plus (30% off): Offline maps on your phone with the Plus level
- Full November 2025 Gear List →
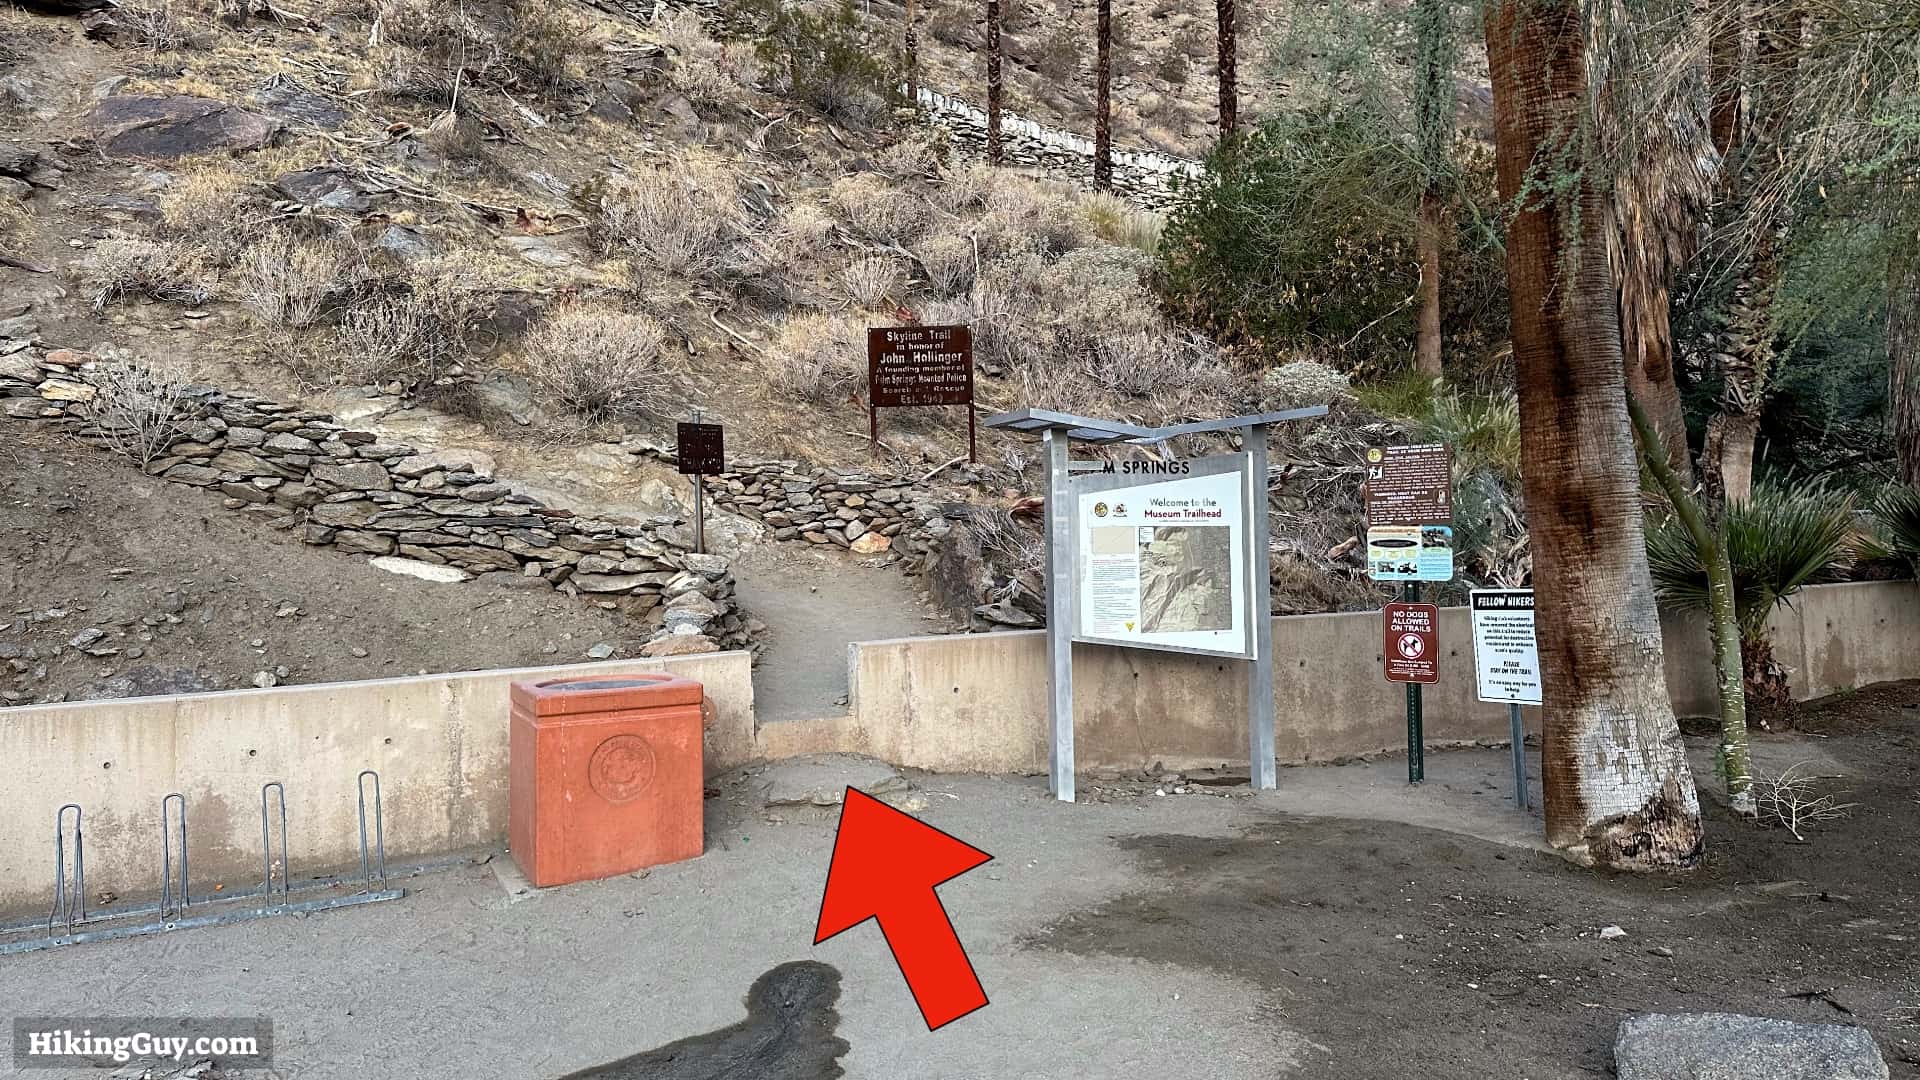
Getting to the Trailhead
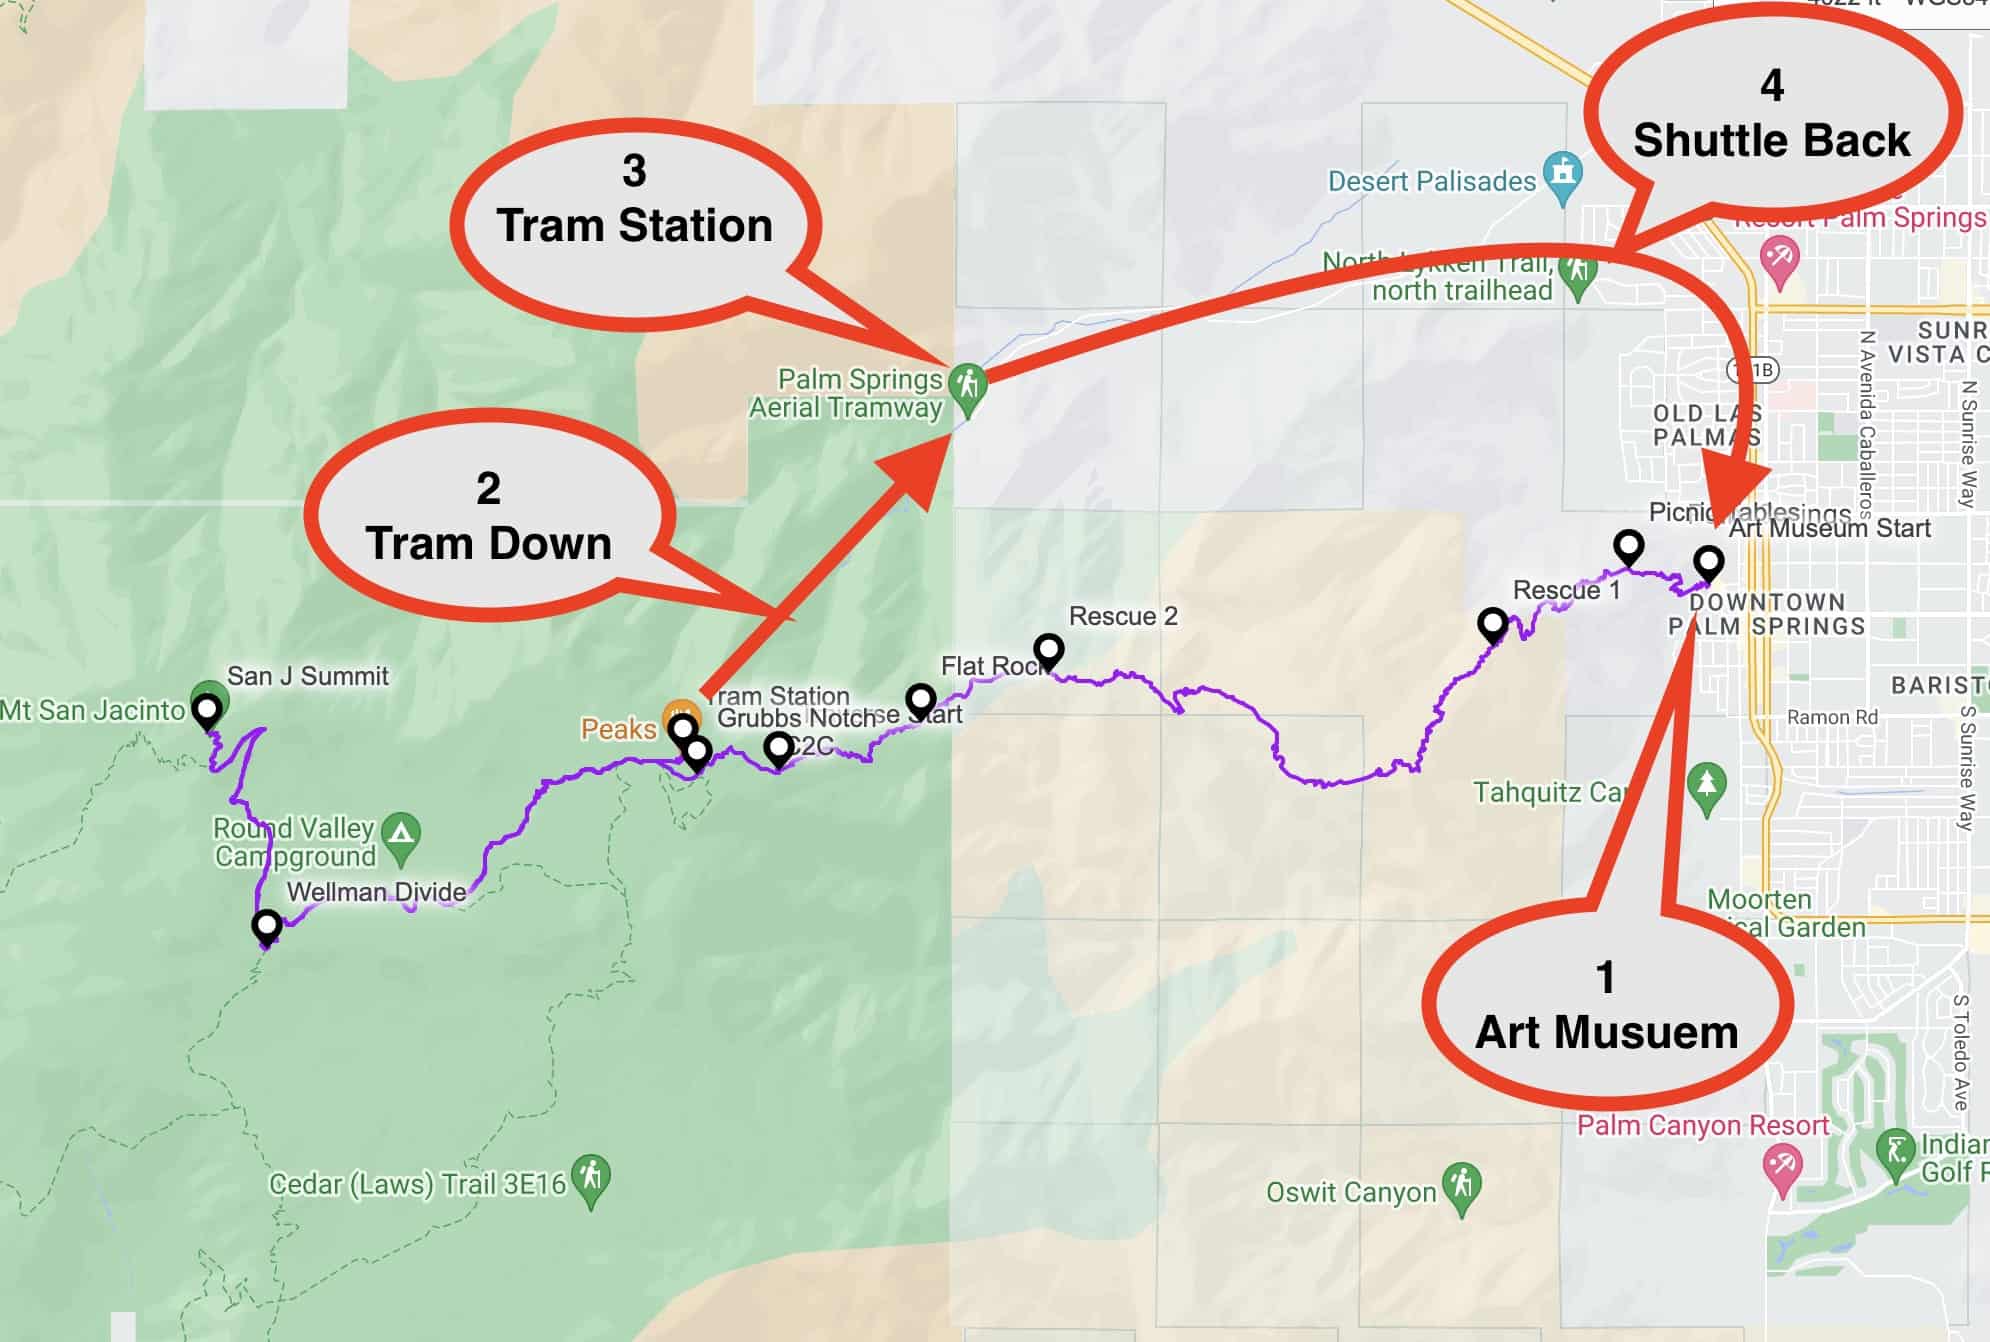
- Start the hike behind the Palm Springs Art Museum at 101 N Museum Dr, Palm Springs, CA, 92262, USA.
- There's free street parking around the museum. Check the signs carefully before parking. The museum parking lot and garage across the street are usually unavailable for hikers.
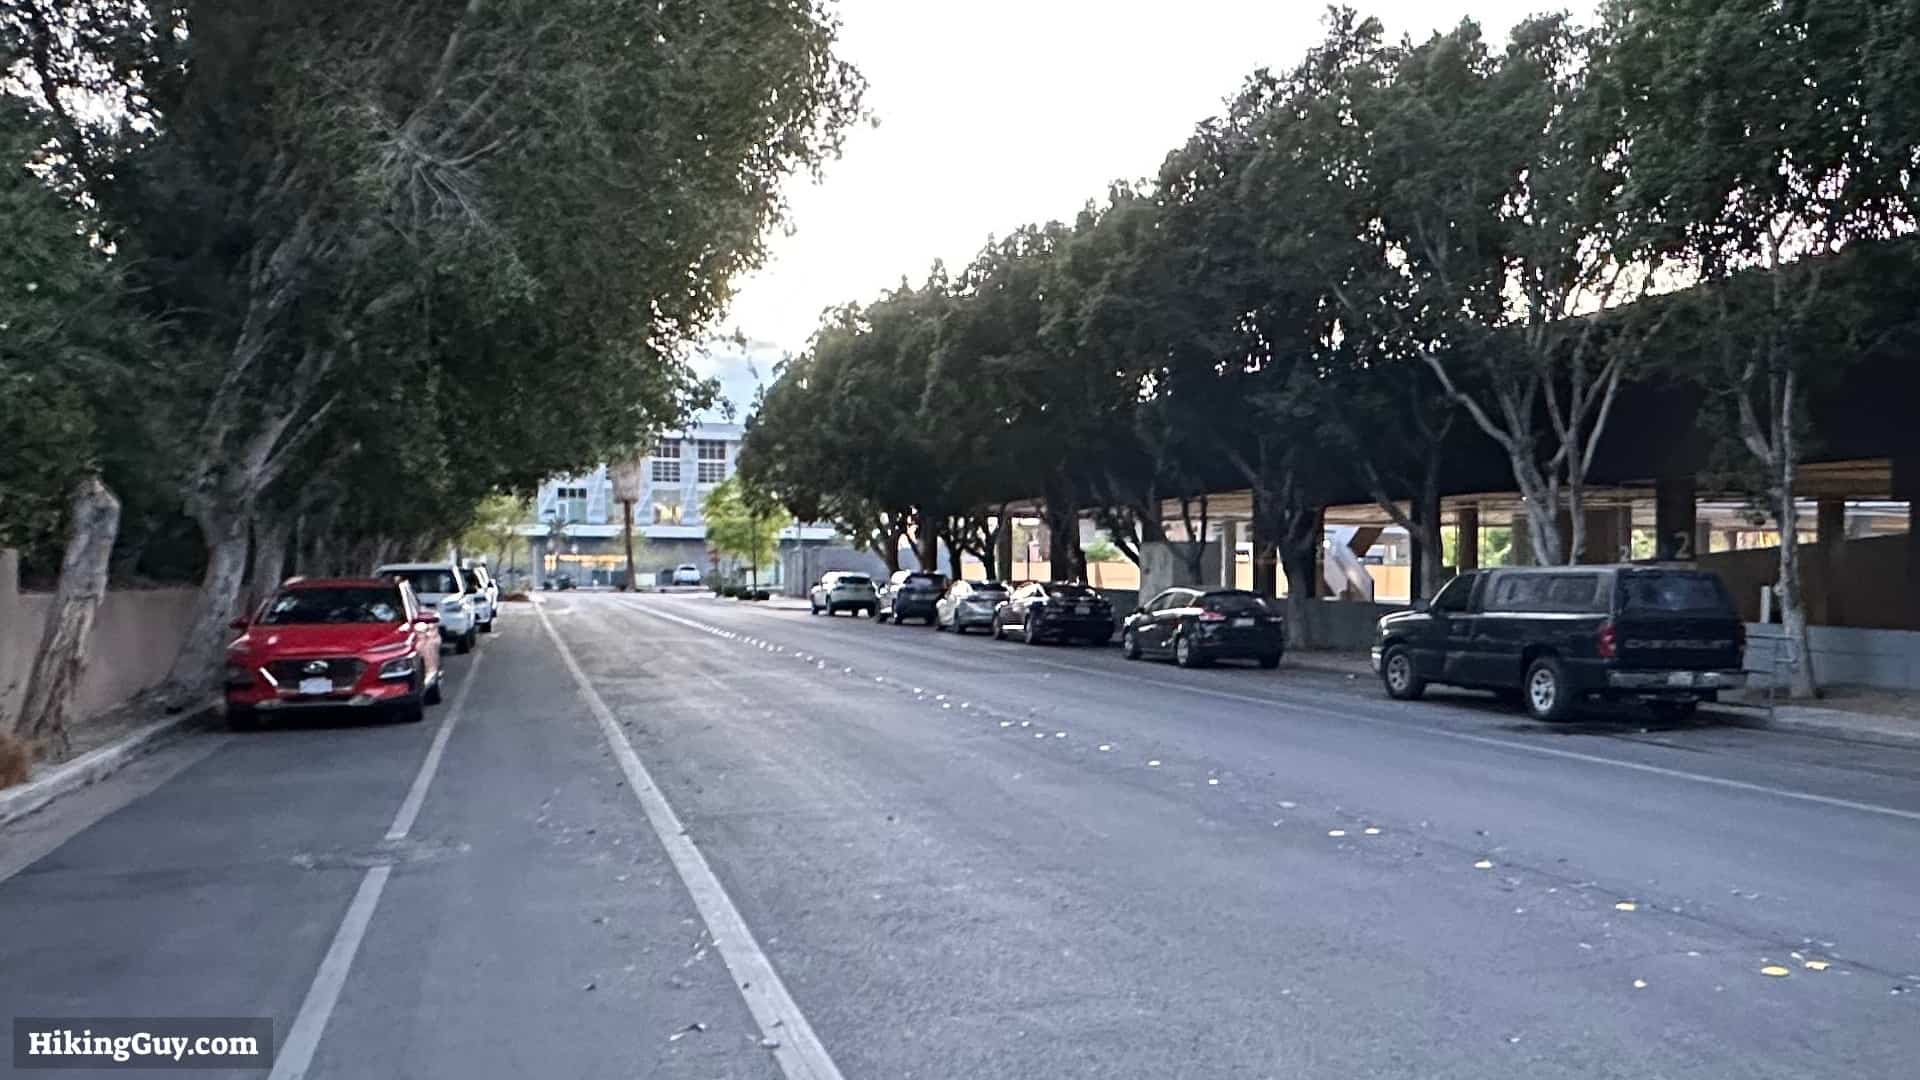
There's generally plenty of street parking around the museum and garage. - When you finish the hike, you'll be at the upper tram station, called Mountain Station. Mountain Station has food and drink. You can purchase a one-way ticket back down at the gift shop using cash or credit. The last trams usually depart in the evening.
- At the bottom of the tram, you can shuttle back to Palm Springs. The lower tram station has WiFi, and you can use ride-sharing apps to get back. You can also ask the ticket agents to call you a taxi. This is generally easier than the logistics and fees of overnight parking at the tram lot.
The trailhead is within walking distance of many downtown Palm Springs hotels. So if you want to stay for two days, you can walk from your hotel to the trail, do the hike, and then head back to your hotel for a warm (or cold) shower.
Cactus to Clouds Trails
This guide covers the most popular routing on Cactus to Clouds, using the Museum and Skyline trails. There are other routes, like the North Lykken Trail. Leave the tougher, more obscure trails for the next time.
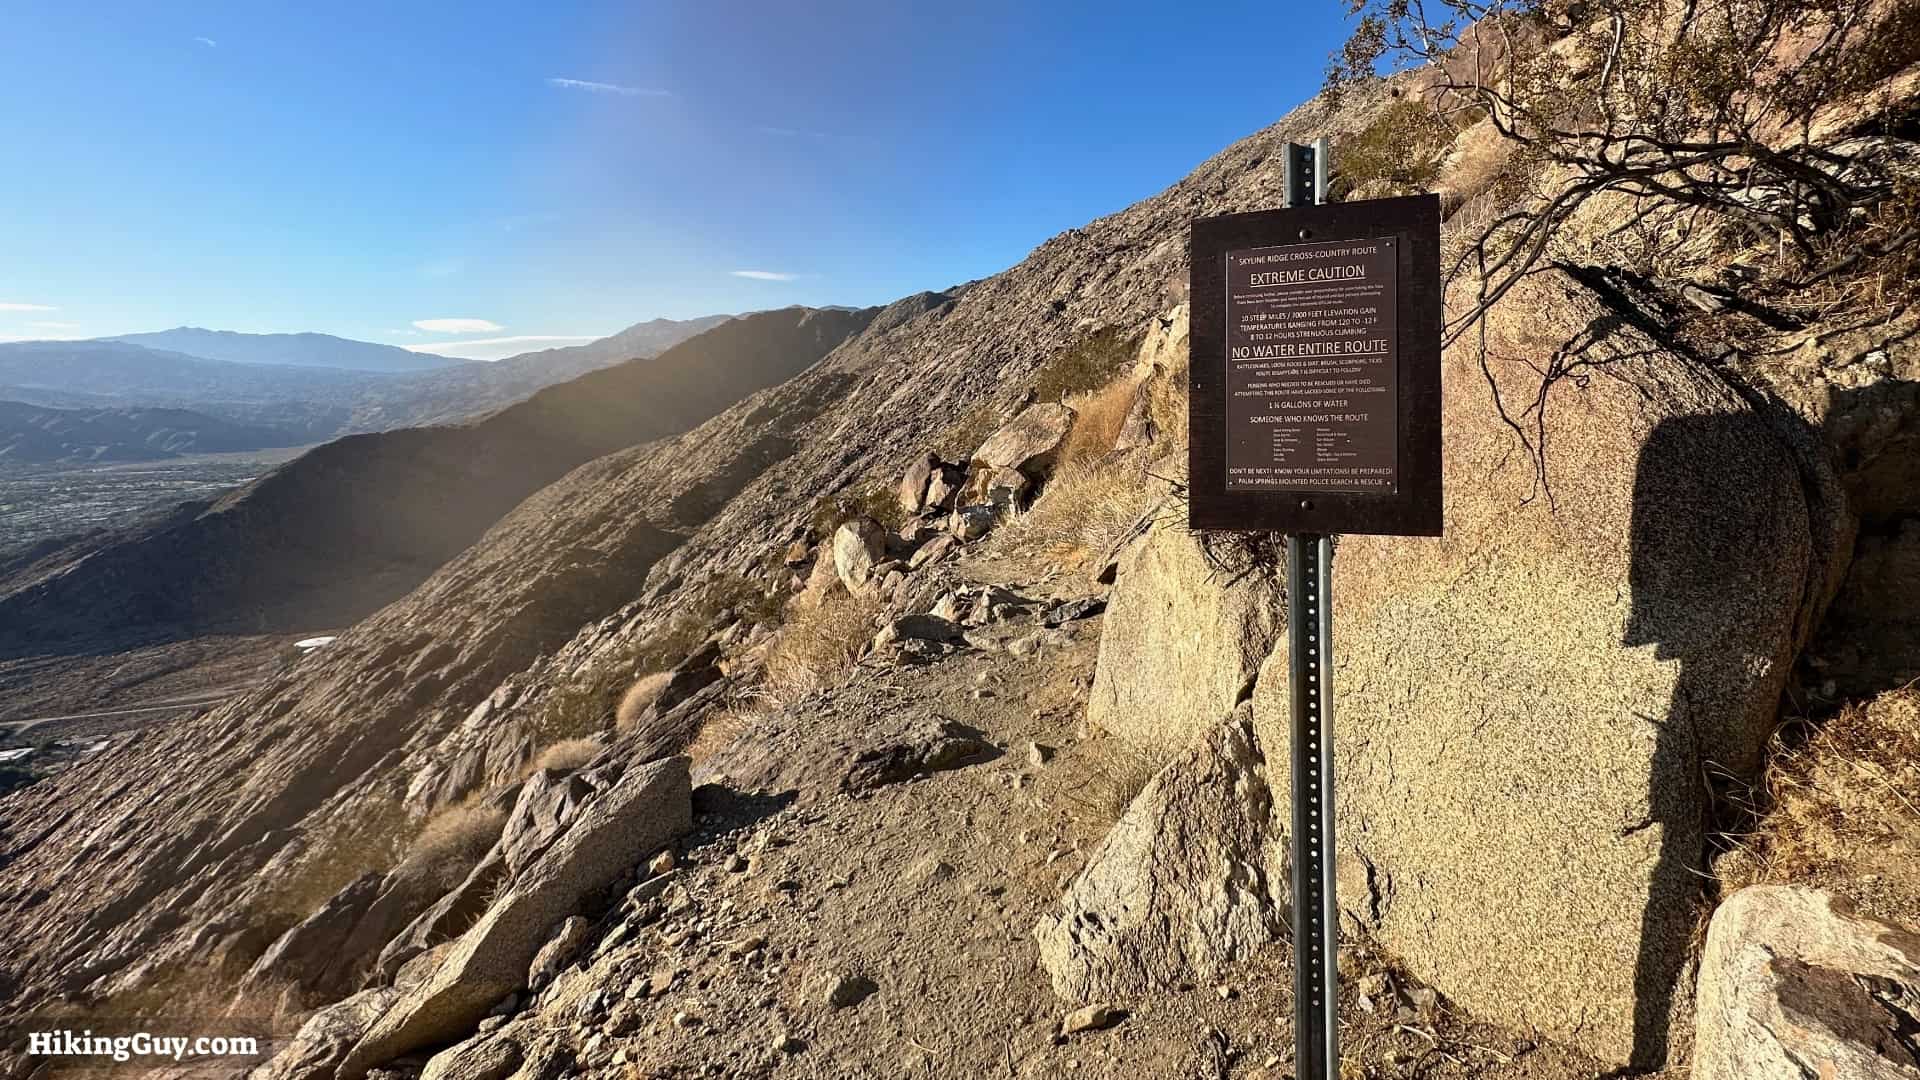
The Skyline Trail (the portion of the hike until you get to Long Valley) is not an officially sanctioned trail by any park service. However, authorities recognize it as a cross-country route, and public access is allowed. According to the official topographic map, the lower parts of the hike are on the Aqua Caliente Indian Reservation. The Skyline Trail is entirely maintained by local hikers.
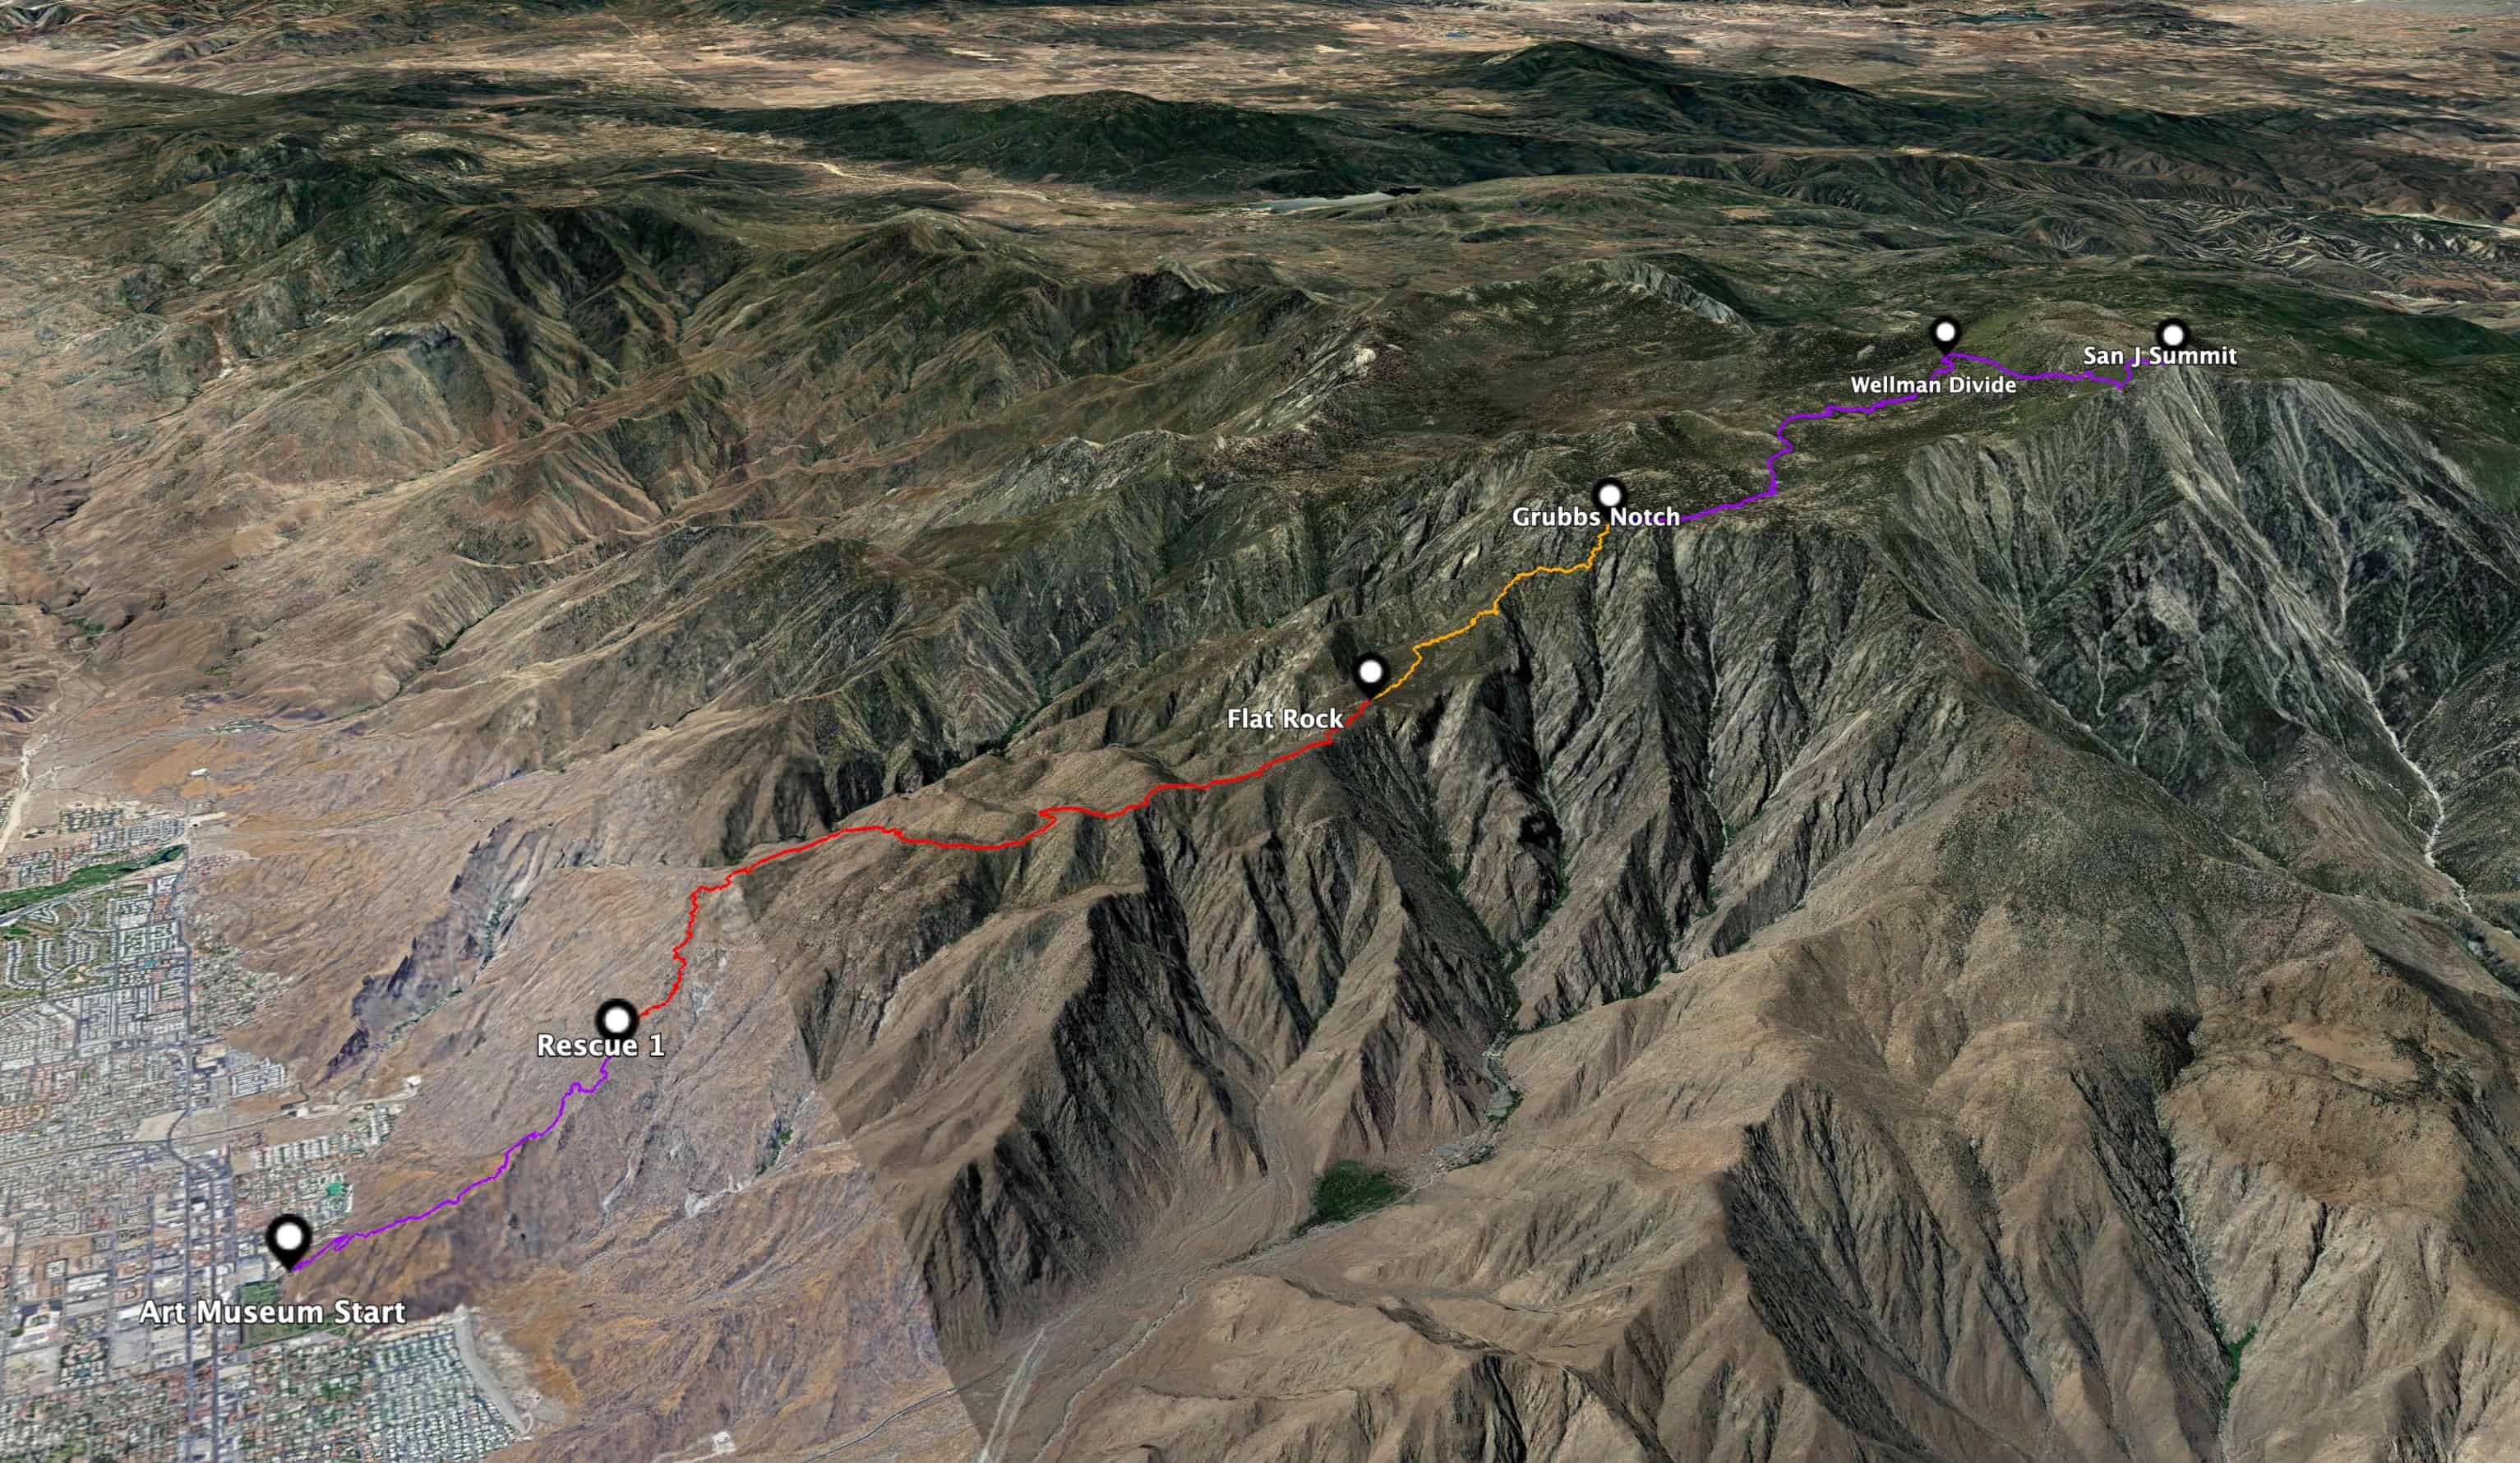
3d Map
Elevation Profile
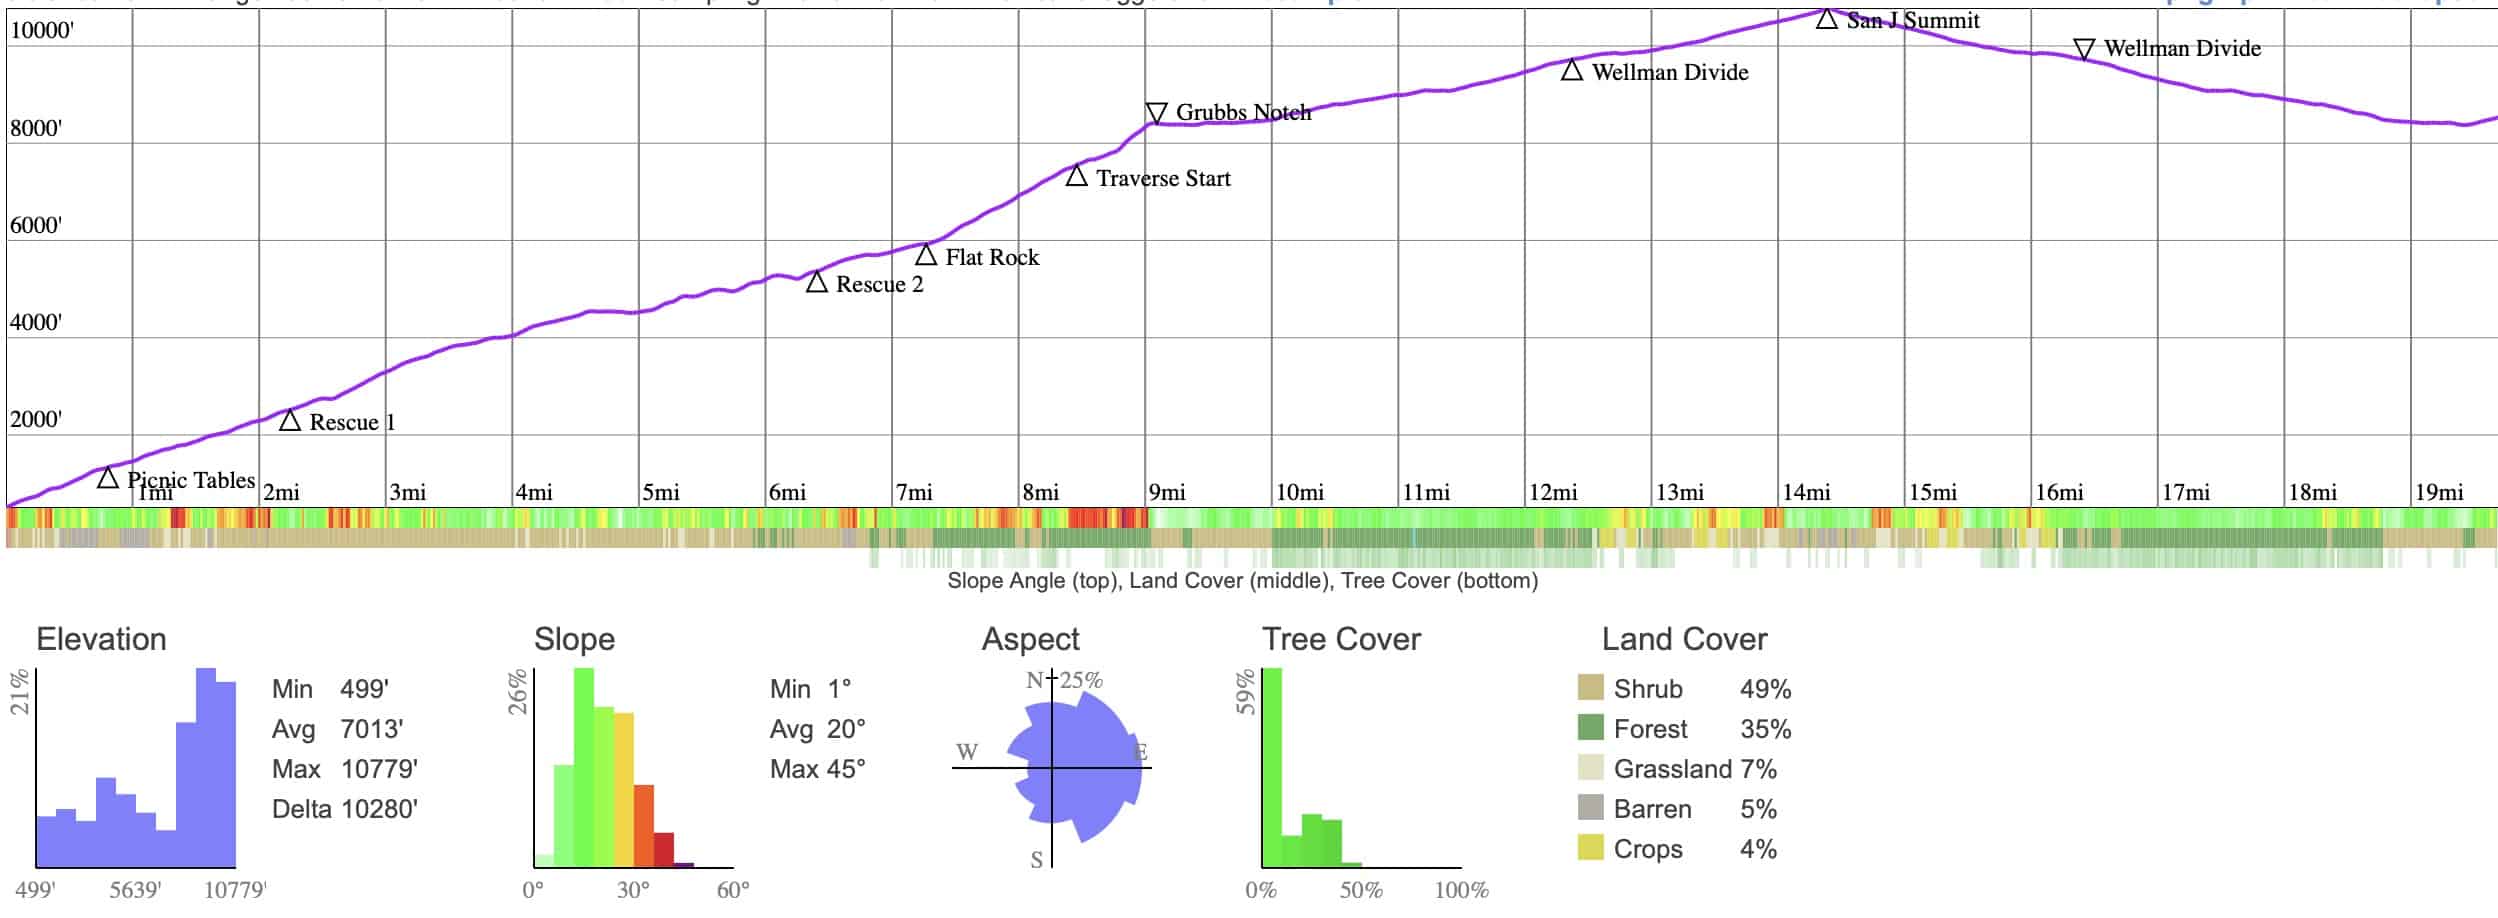
Breakdown of Cactus to Clouds Sections
It helps to mentally break the hike into sections and tackle it one at a time. Distances are approximate and will change depending on how many wrong turns you make (if any). I've seen some mileage charts online with different (and lower) values. Take them with a grain of salt and use it as a rough guide. These waypoints are also in the GPX file.
| Landmark | Approx. Distance | Approx. Elevation | Notes | Hours at 1.5mph Pace |
|---|---|---|---|---|
| Palm Springs Art Museum | 0 | 476 | 0:00 | |
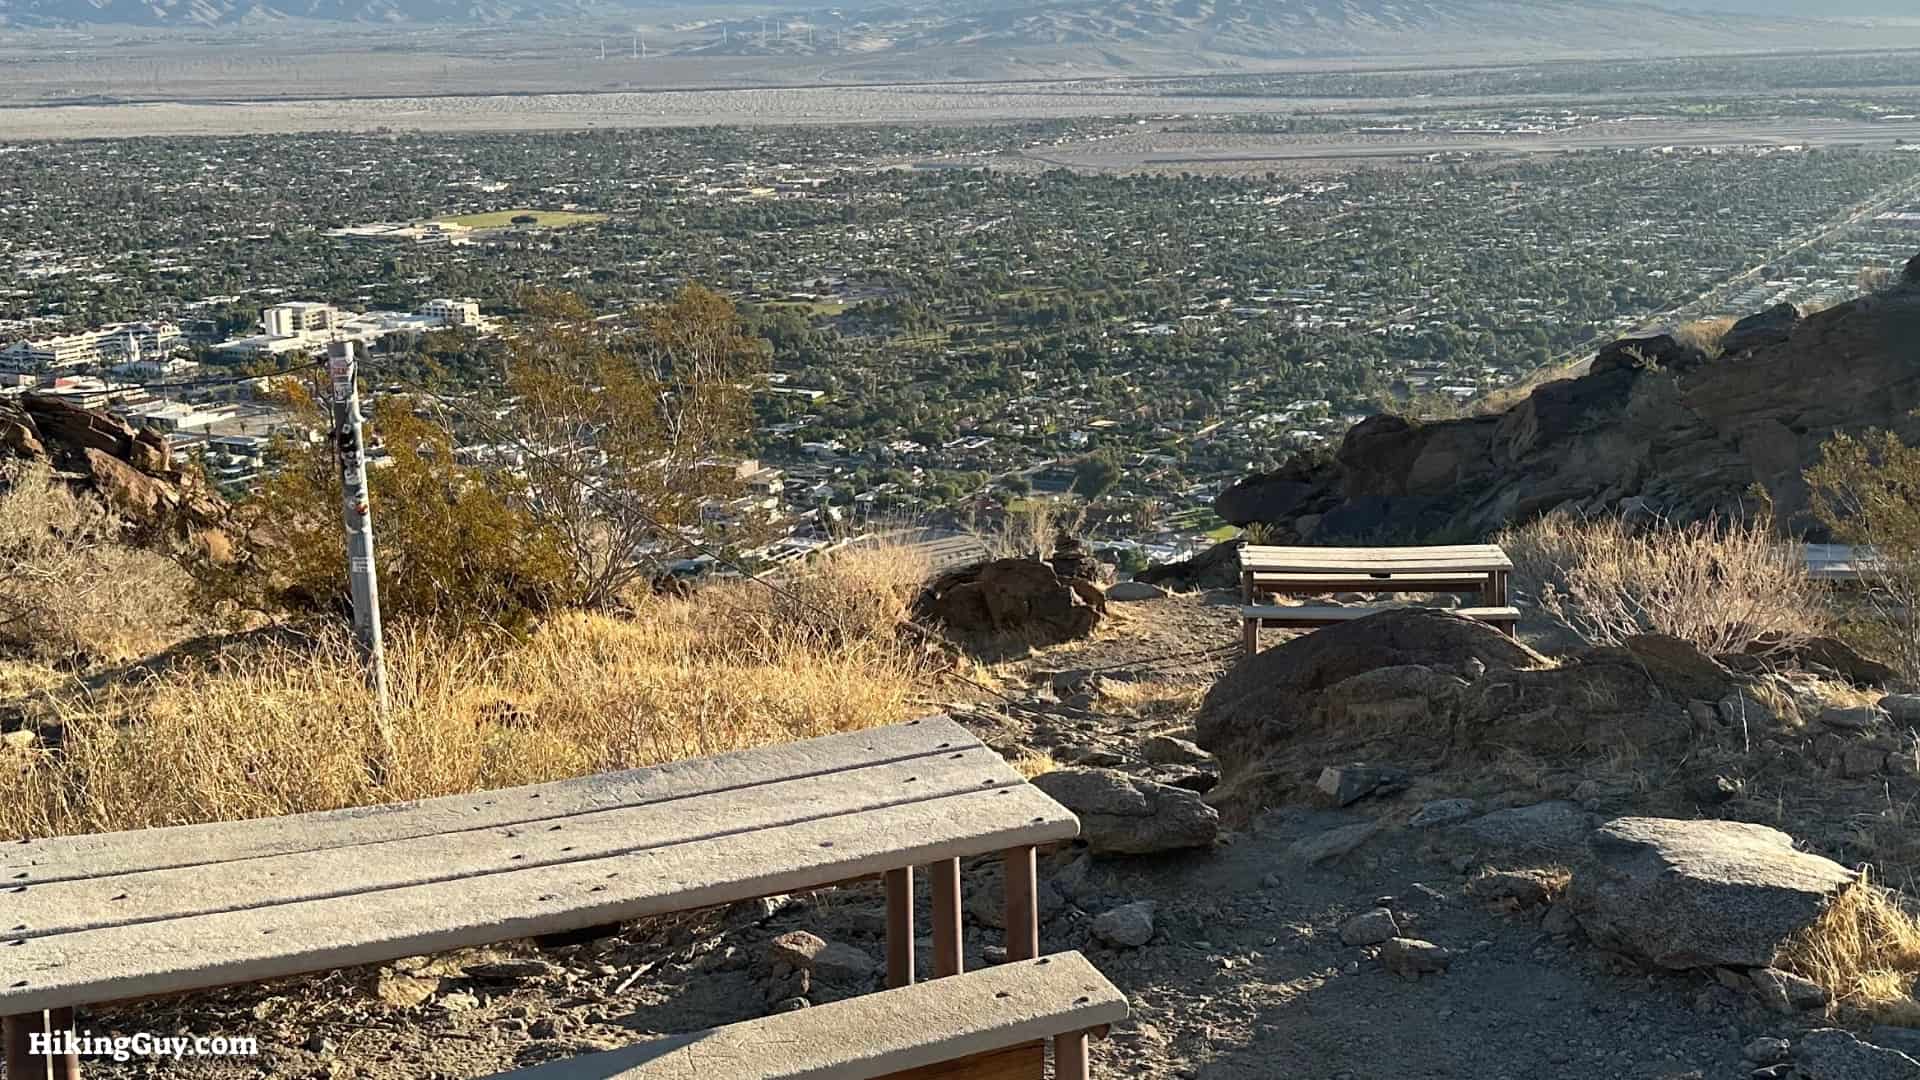
| Picnic Benches | 1 | 1350 | 0:40 | |
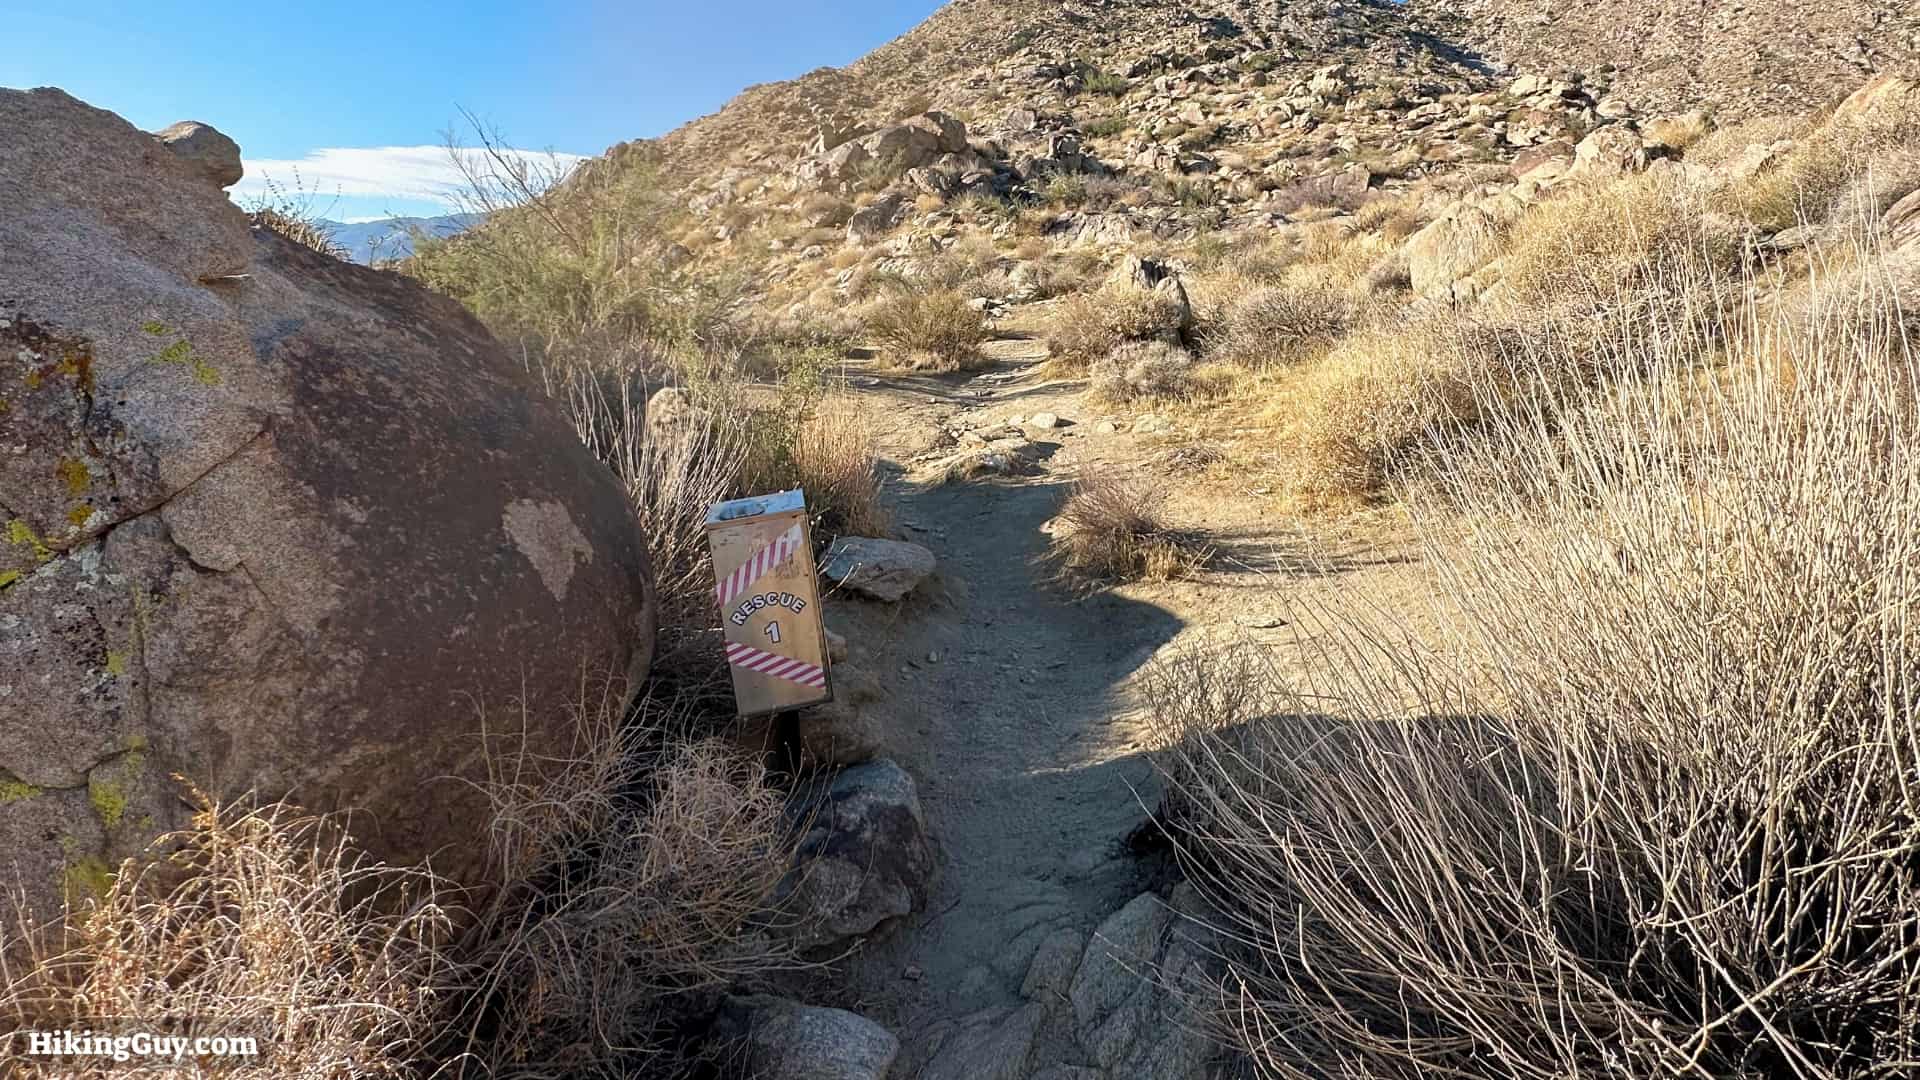
| Rescue 1 | 2.5 | 2500 | Turn Around Gut Check | 1:40 |
| Rescue 2 | 6.5 | 5400 | 4:20 | |
| Flat Rock | 7.5 | 5900 | 5:00 | |
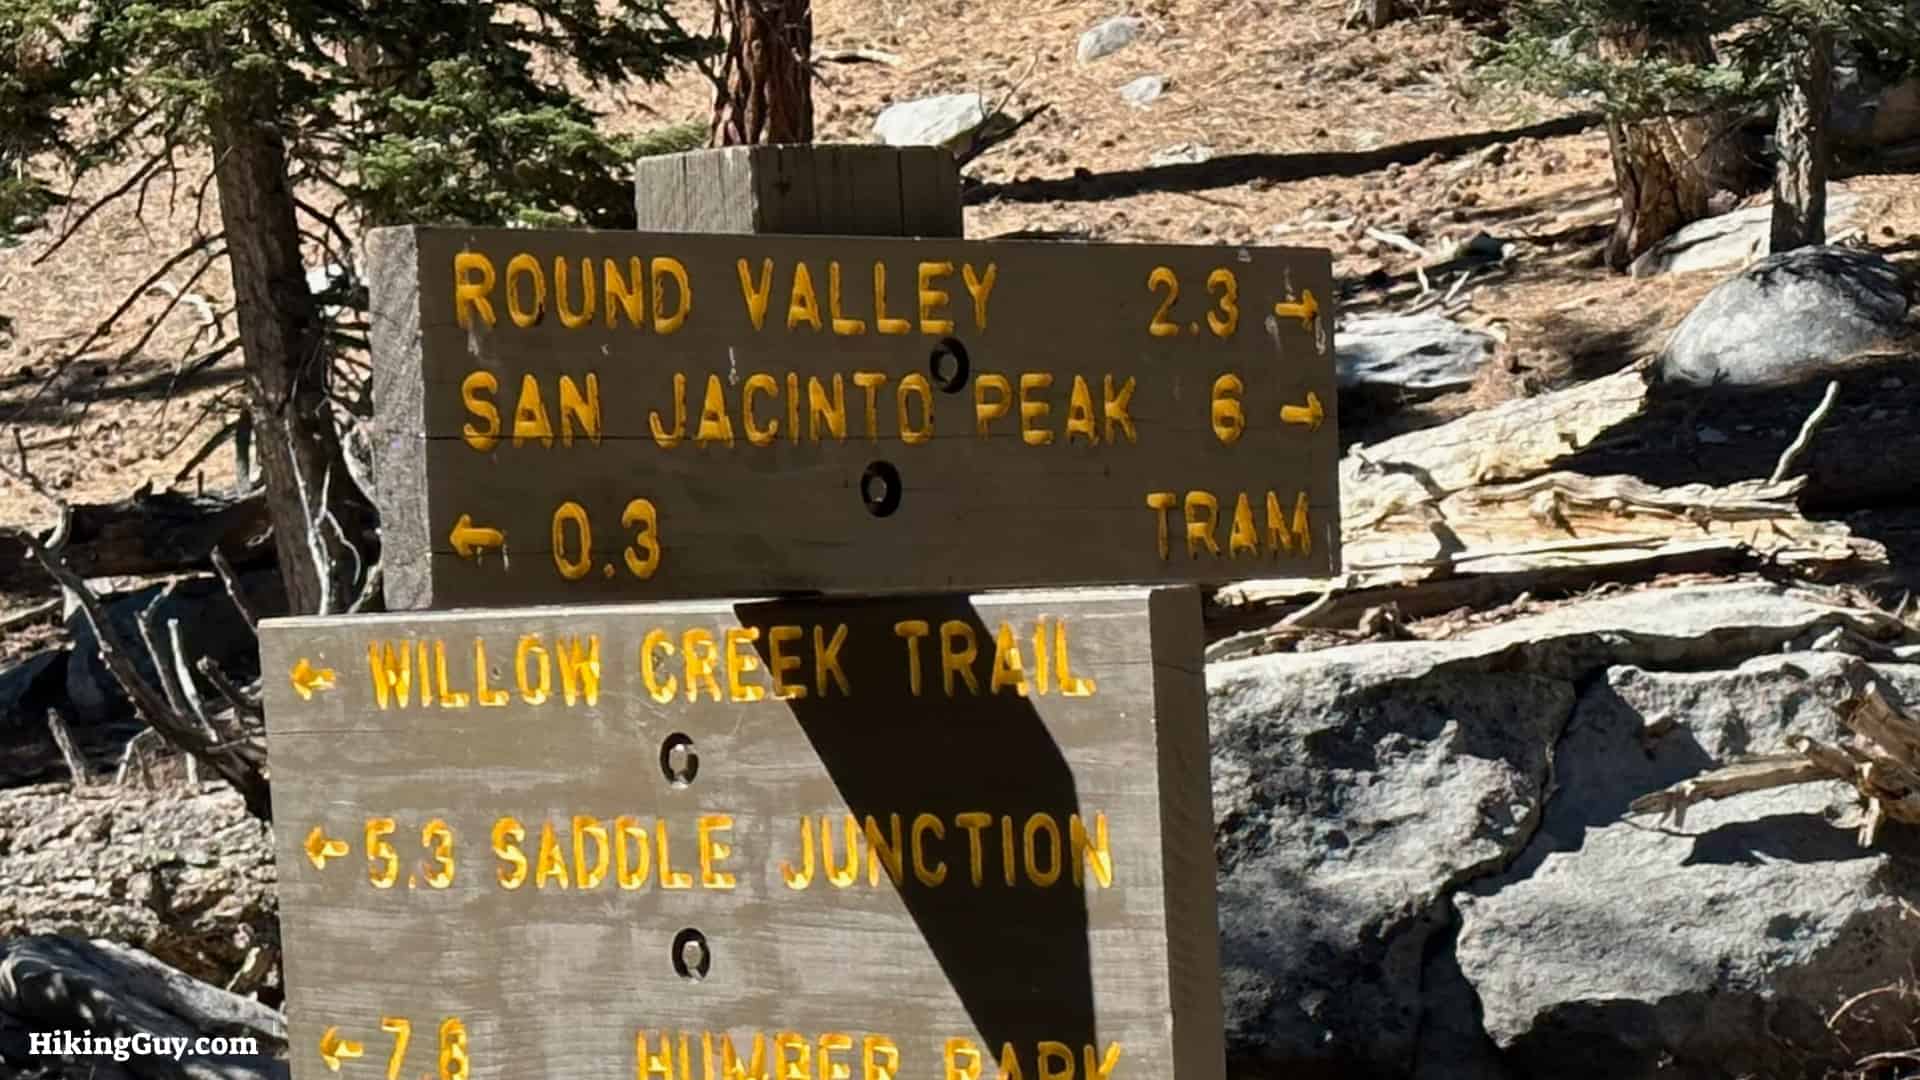
| Grubbs Notch | 9.5 | 8400 | Steepest Climbing is Done | 6:20 |
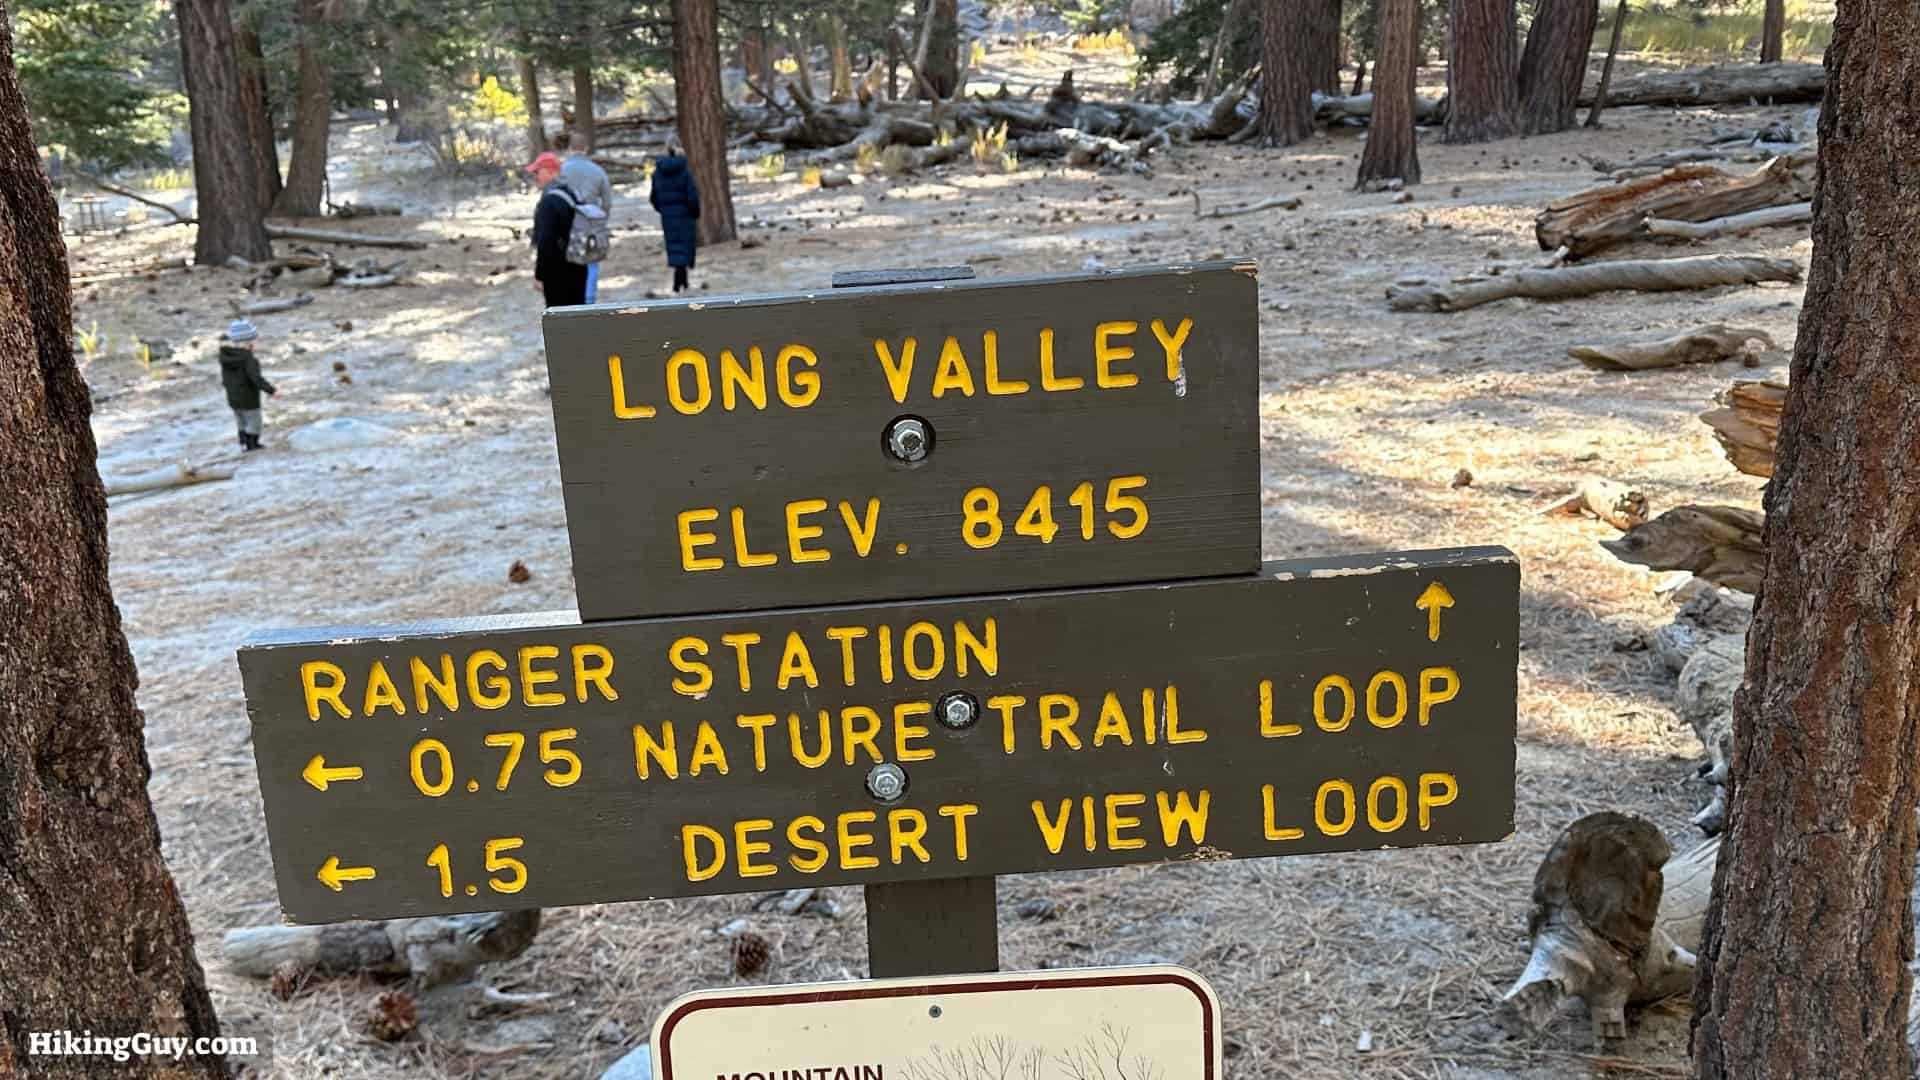
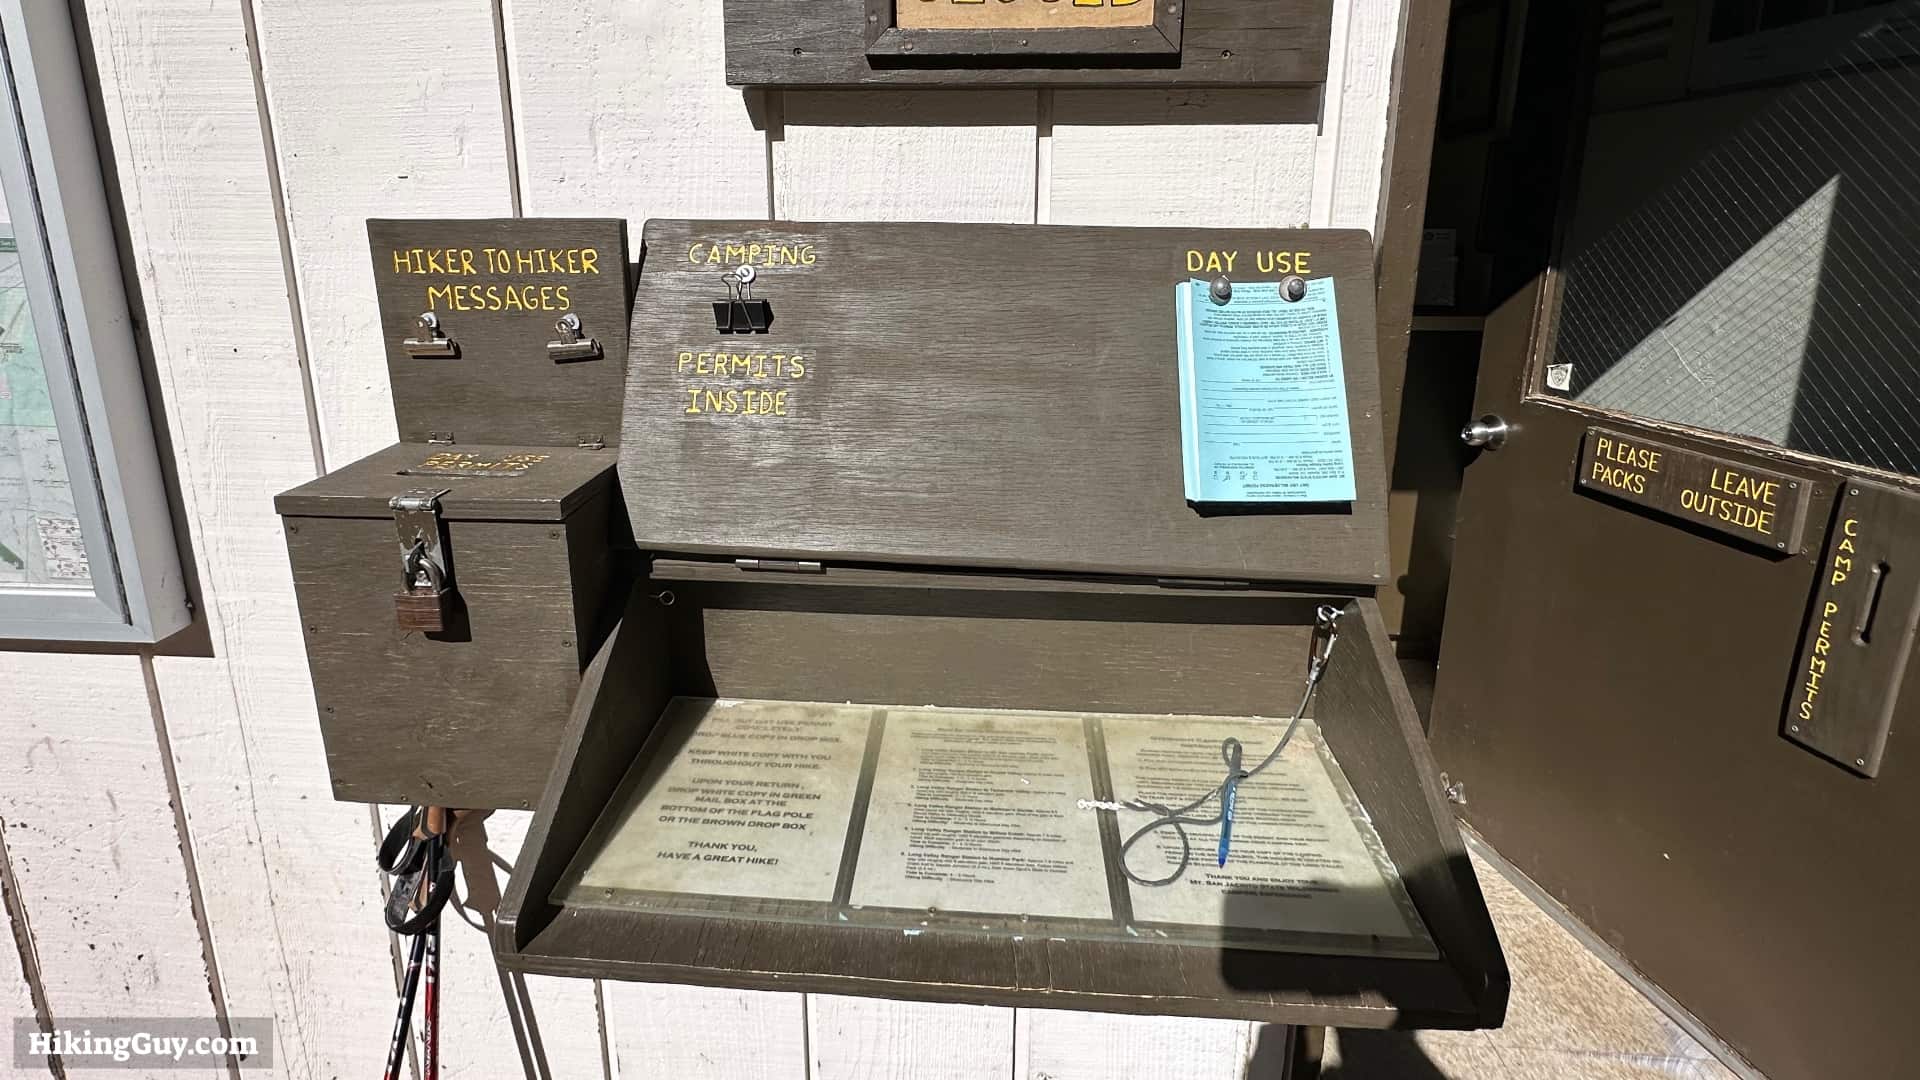
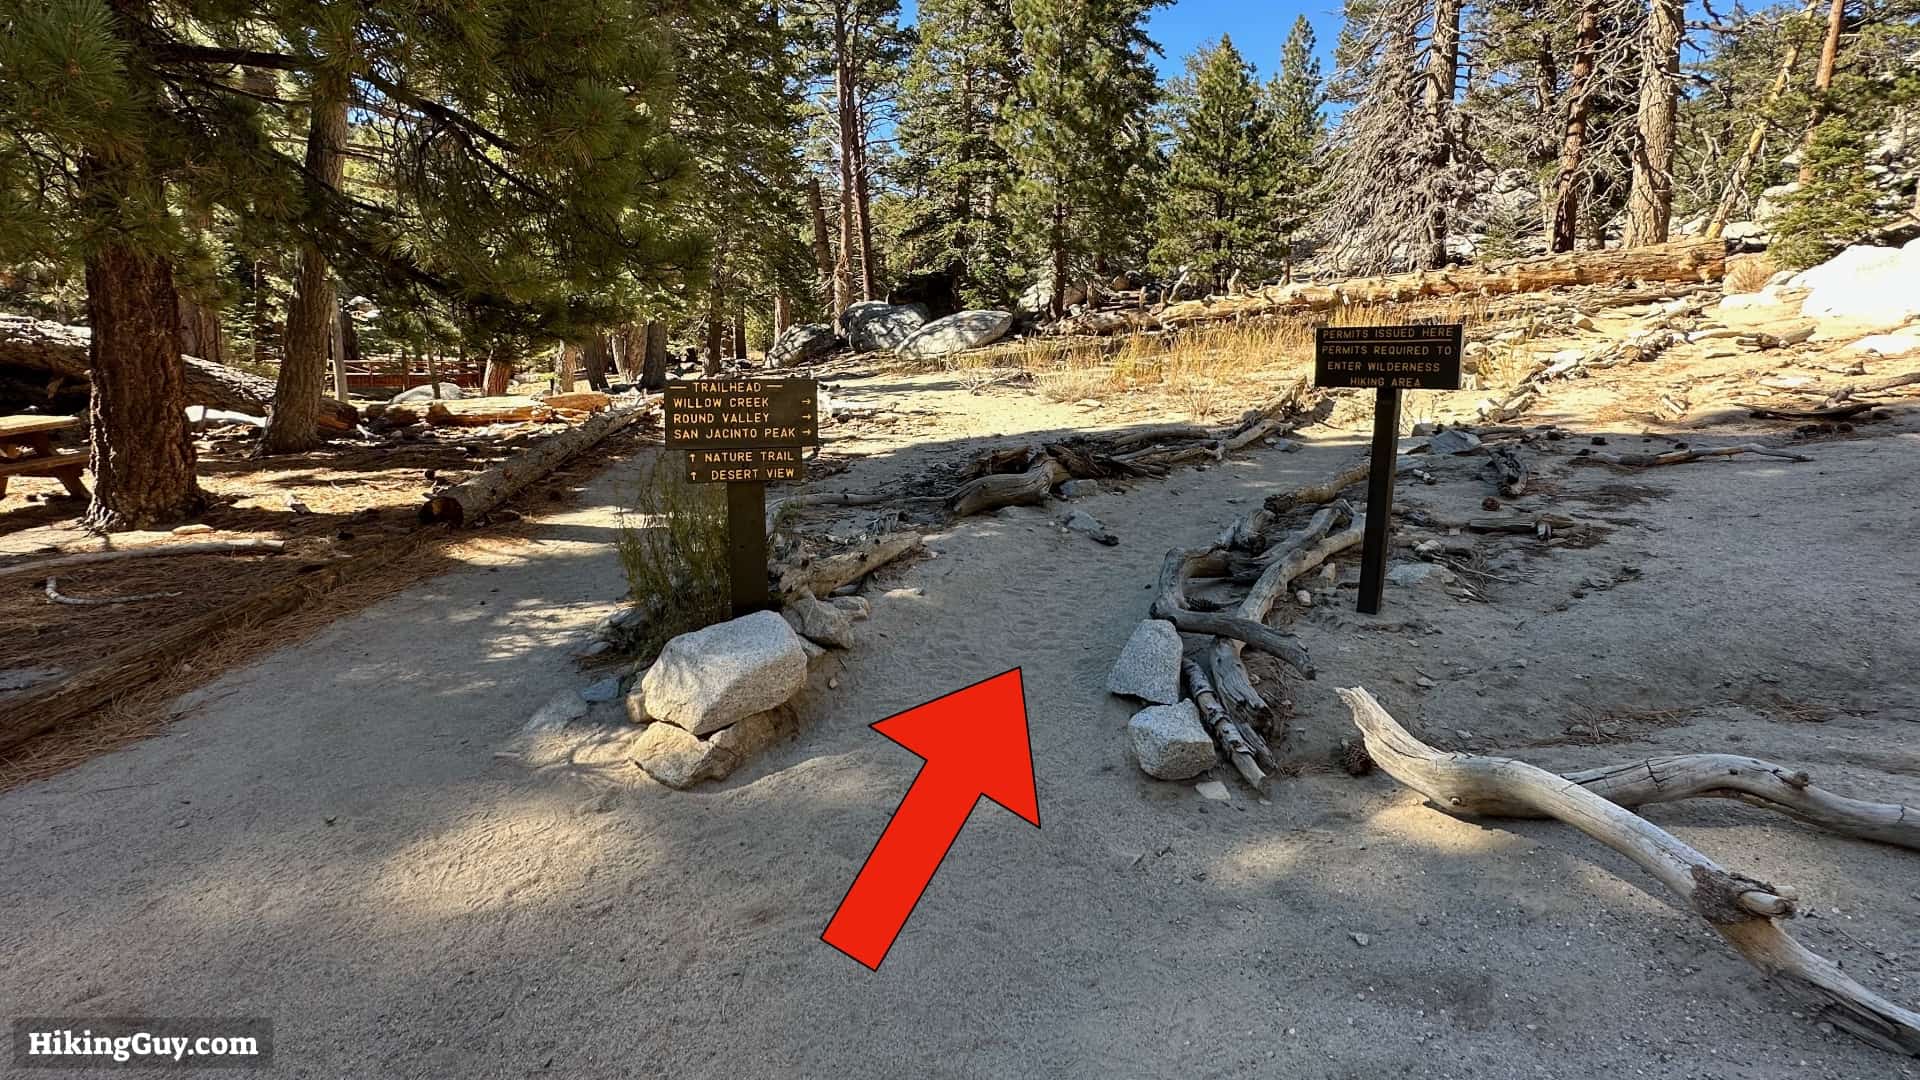
| Long Valley Ranger Station | 10 | 8400 | Water & Permit | 6:40 |
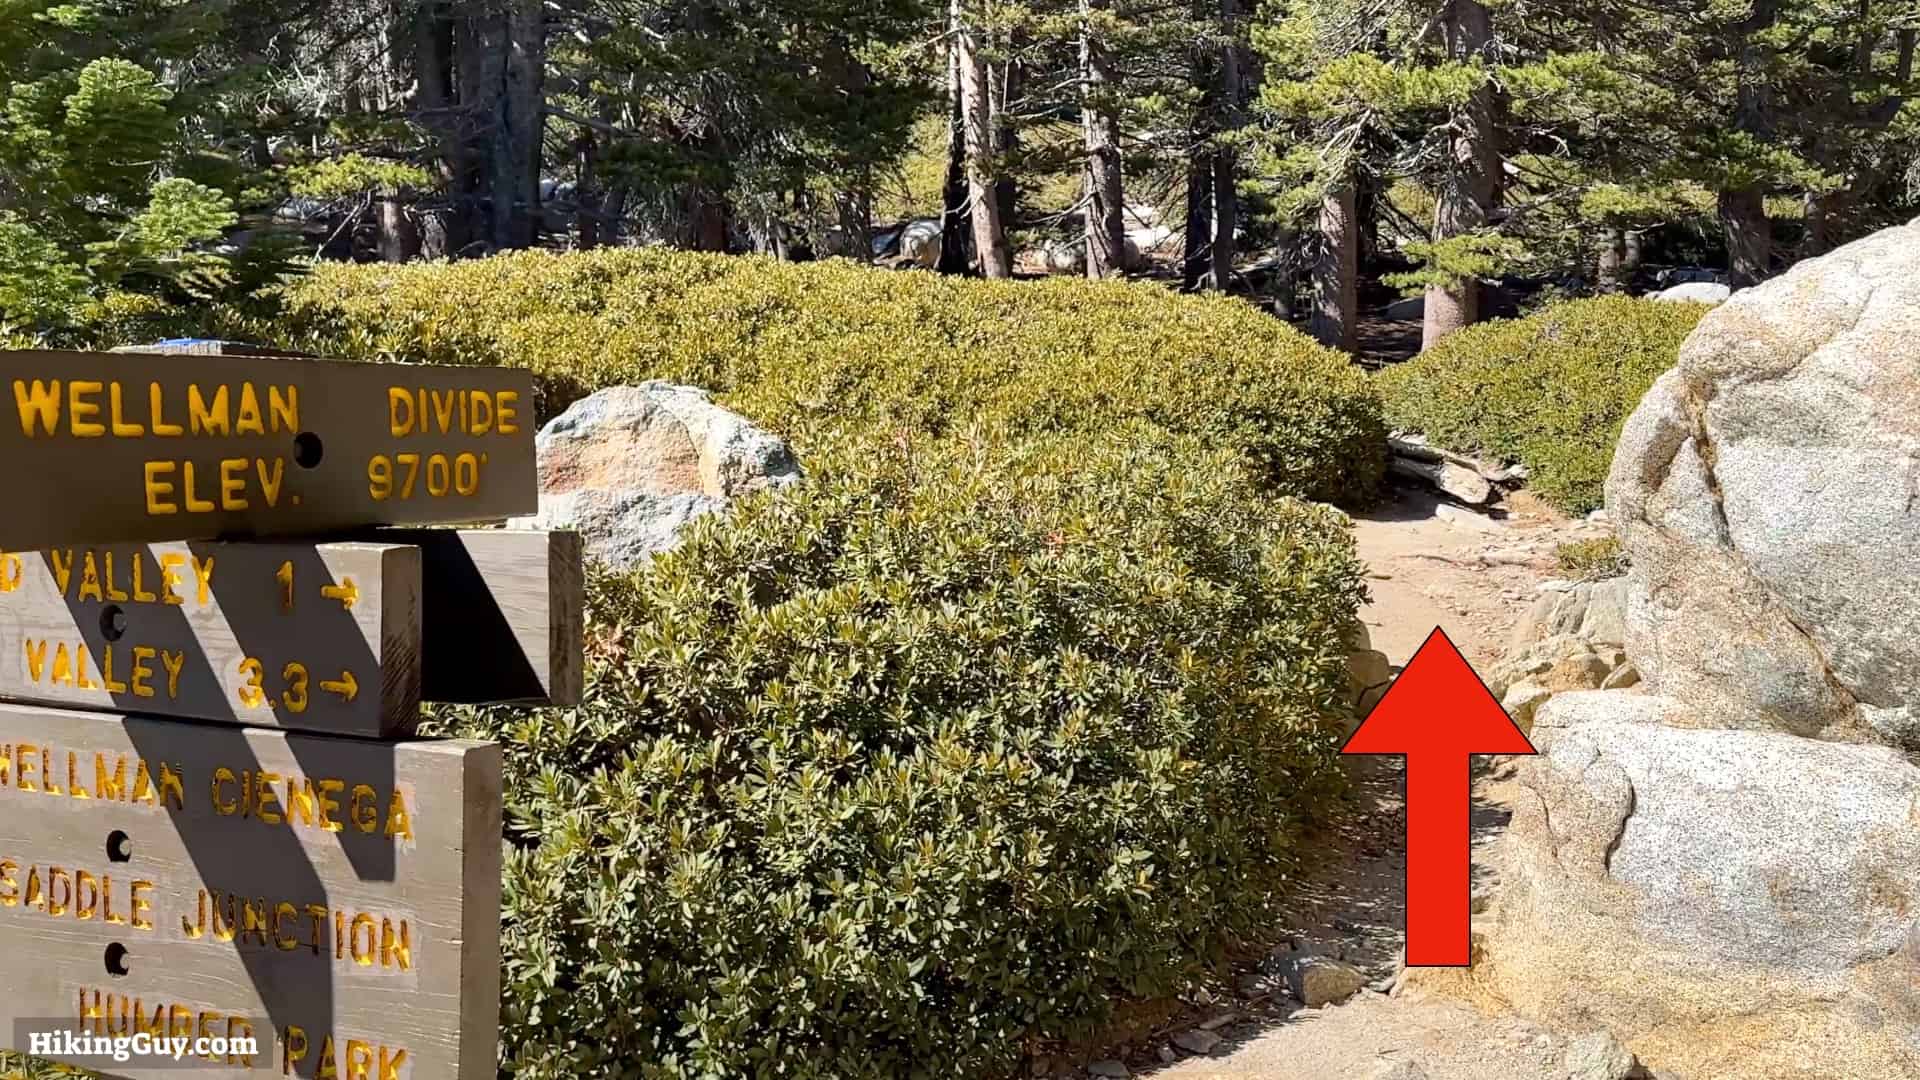
| Wellman Divide | 13.5 | 9700 | 9:00 | |
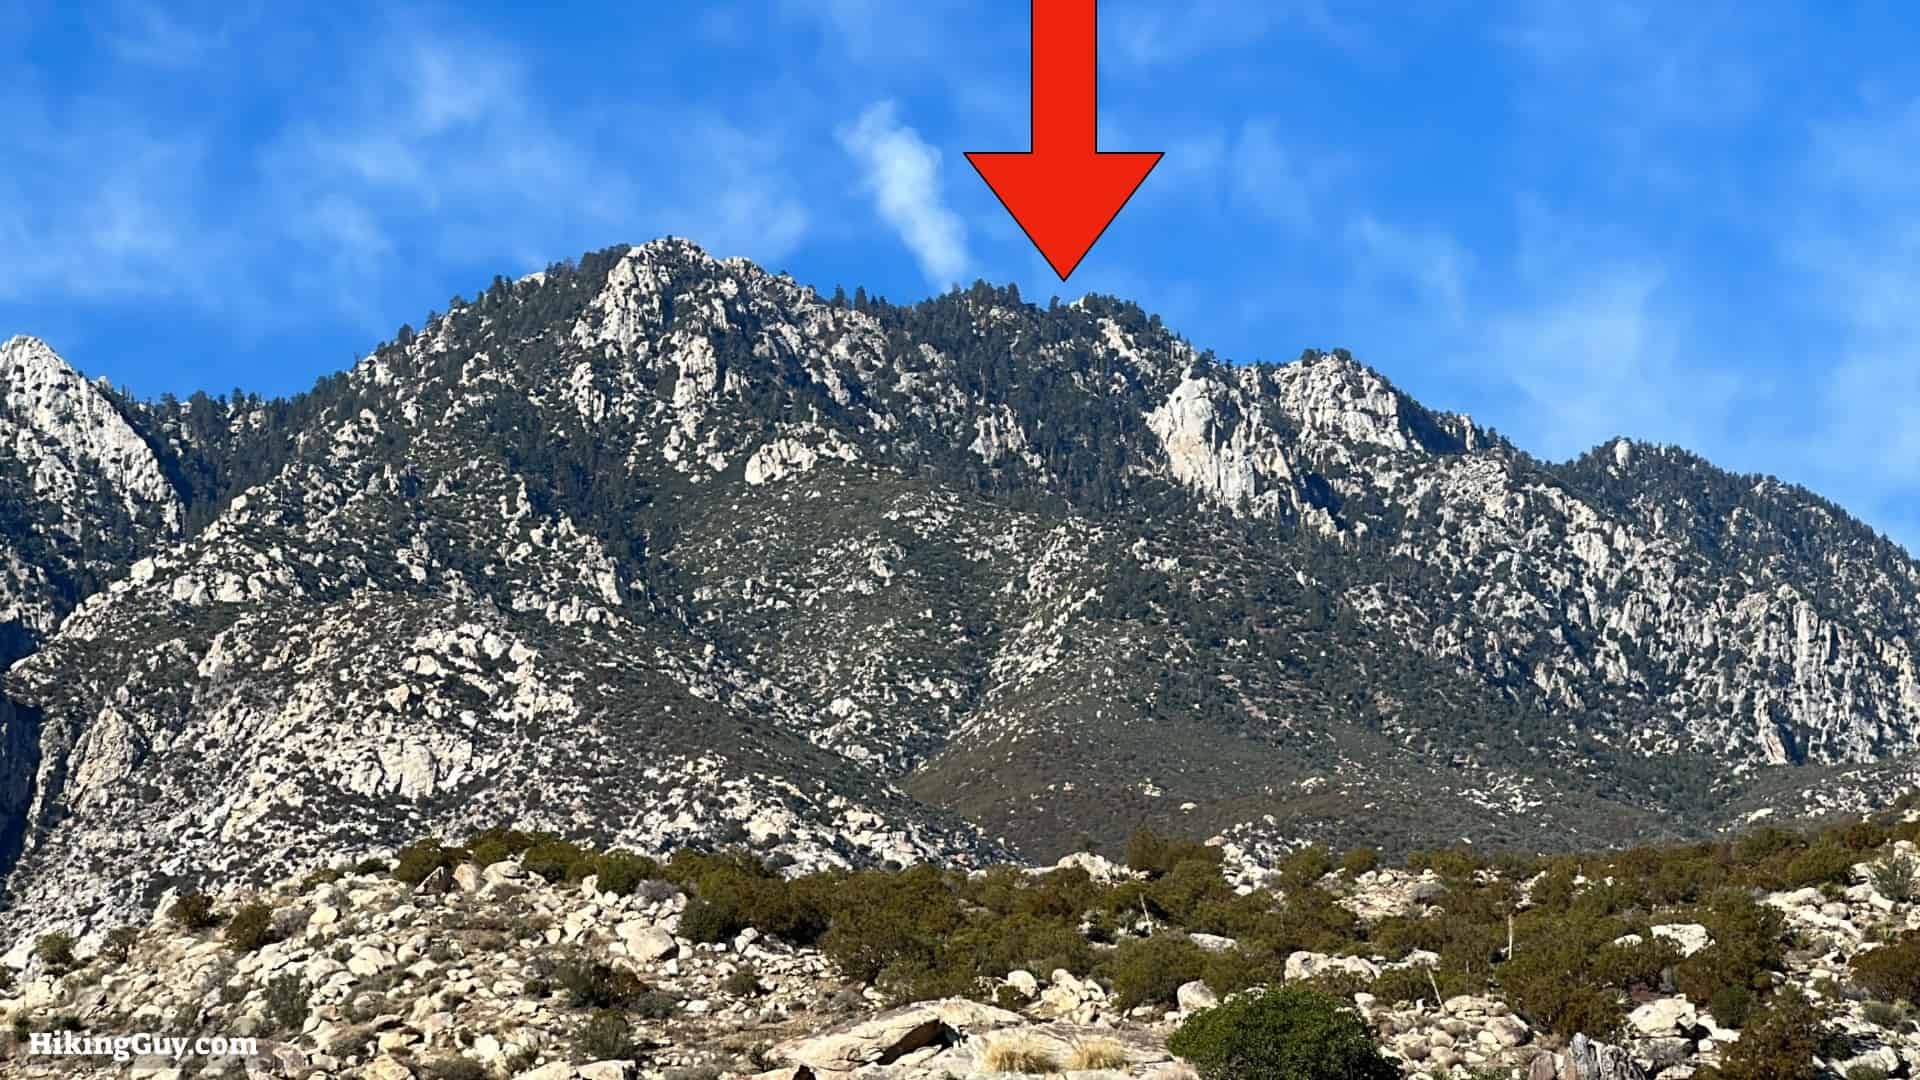
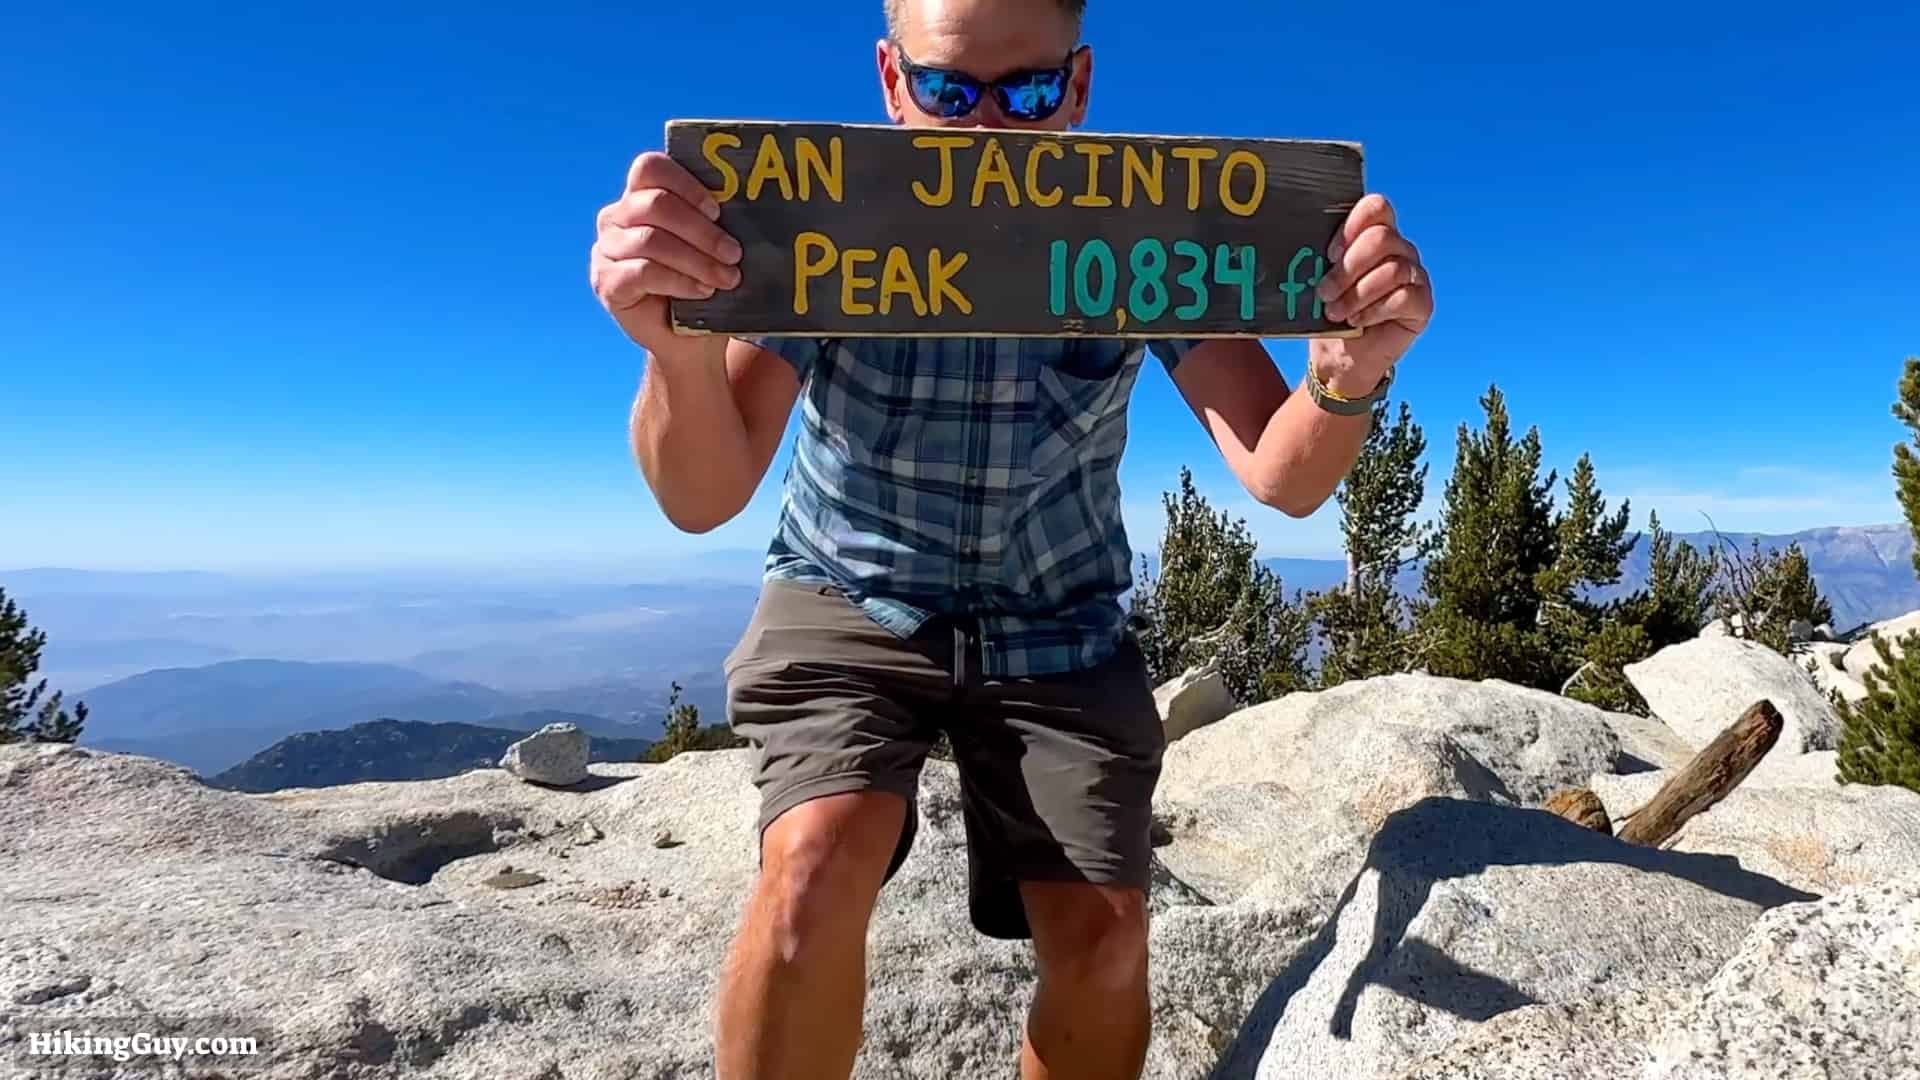
| San Jacinto Peak | 15.5 | 10834 | 10:20 | |
| Tram | 21 | 8500 | Party! | 14:00 |
The history of the Skyline Trail is murky. Some say it was a native Cahuilla trail; others say it was started by the CCC in the 1930s and abandoned. The modern-day Cactus to Clouds hike began in 1991 when Coachella Valley Hiking Club members revived the trail and started leading hikes there.
The Point of No Return
Hopefully, you read the article about deaths on Cactus to Clouds and fully understand that you can quickly die if you make poor choices or have bad luck. Even if you've planned and timed your Cactus to Clouds hike perfectly, sometimes we all have bad days.
You need to assess your condition in the first few miles. Check in with yourself at the picnic tables and then at Rescue 1. You need to turn around if you're tired or have doubts. In ideal conditions, after Rescue 1, you need to be 100% committed to hiking up to Long Valley. In hot conditions, I would make that call at the picnic tables. After Rescue 1 you should NOT turn around and hike down through the heat. Continue up to Long Valley no matter what. A common thread in deaths and rescues is turning around (and maybe getting lost on the way down).
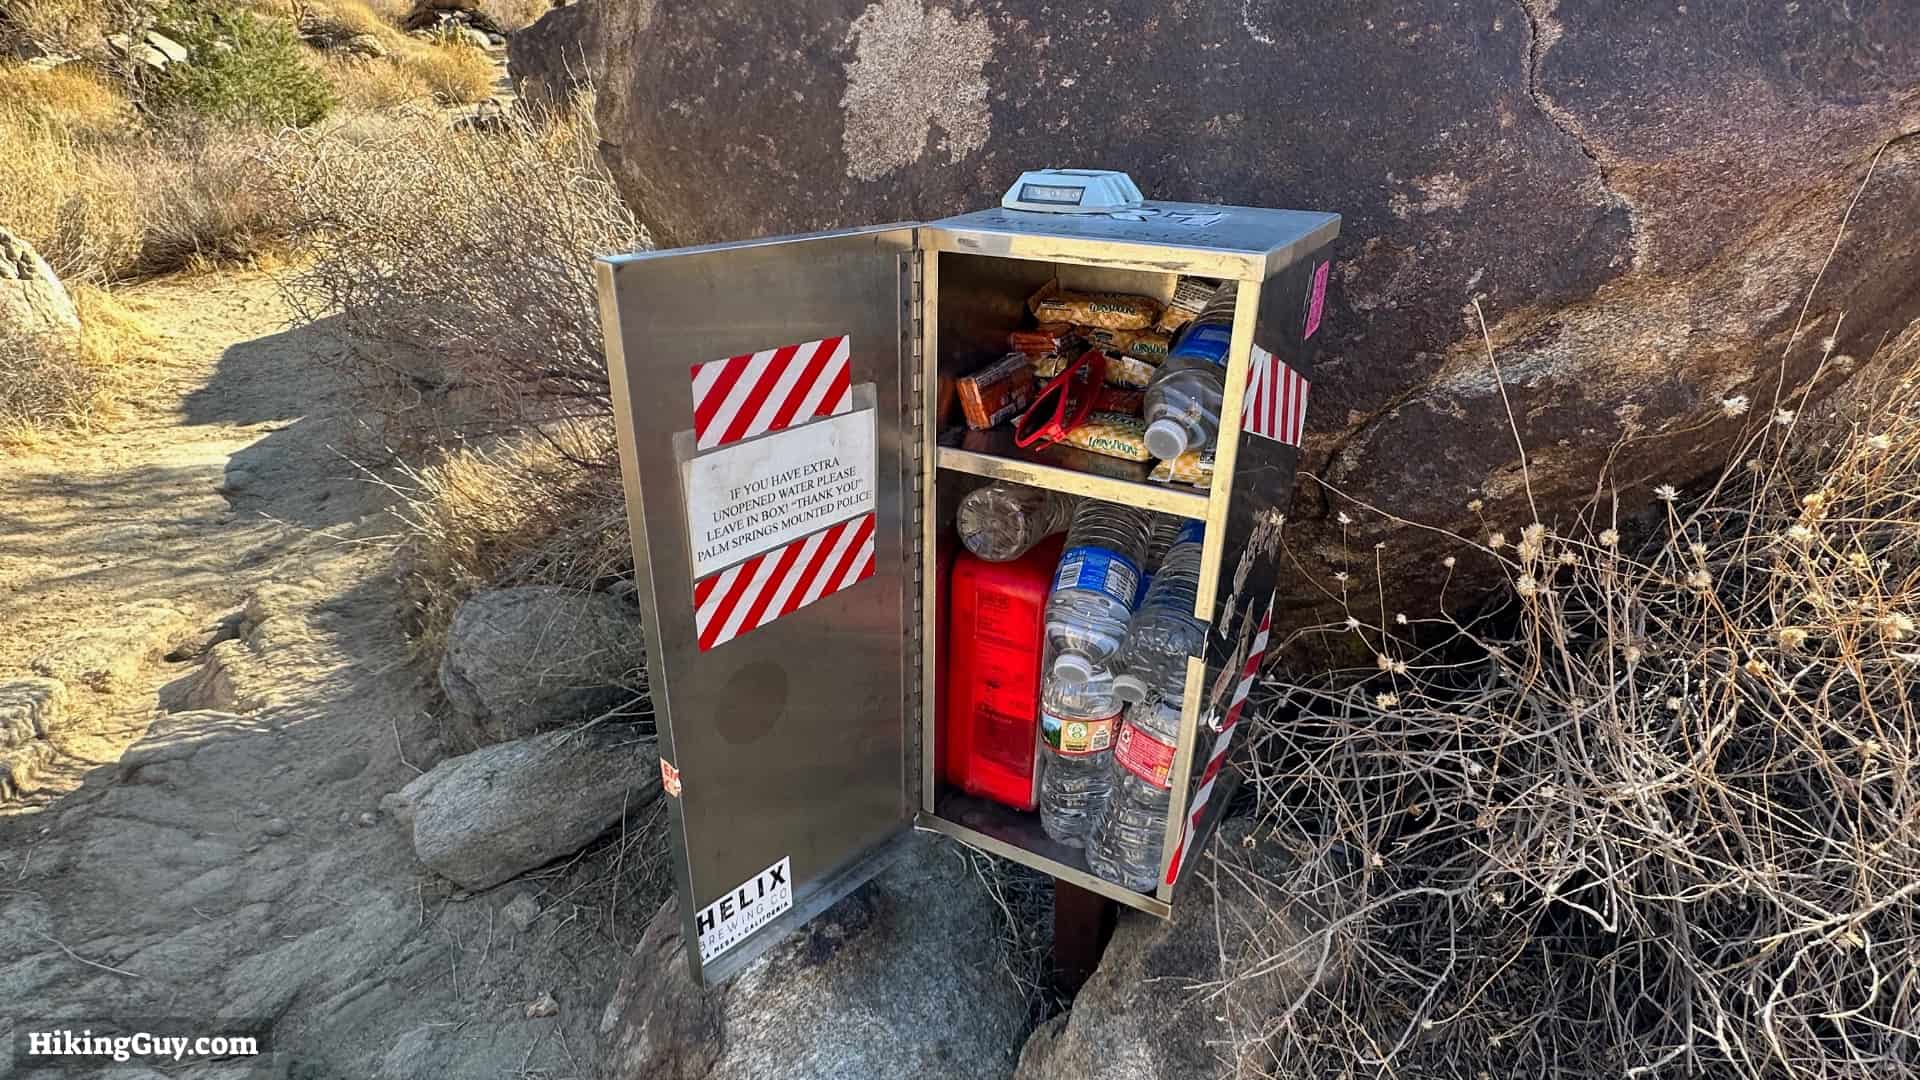
If you need to take water from a rescue box, do it and contact the Coachella Valley Hiking Club afterward to let them know. There is zero room for mistakes here. Be confident in your fitness and your route before you start.
Getting lost or too tired to continue can mean death. This is real.
Skyline Trail Navigation Tips
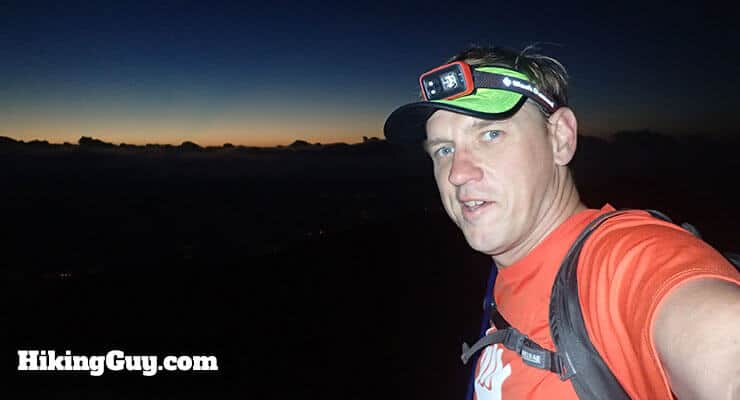
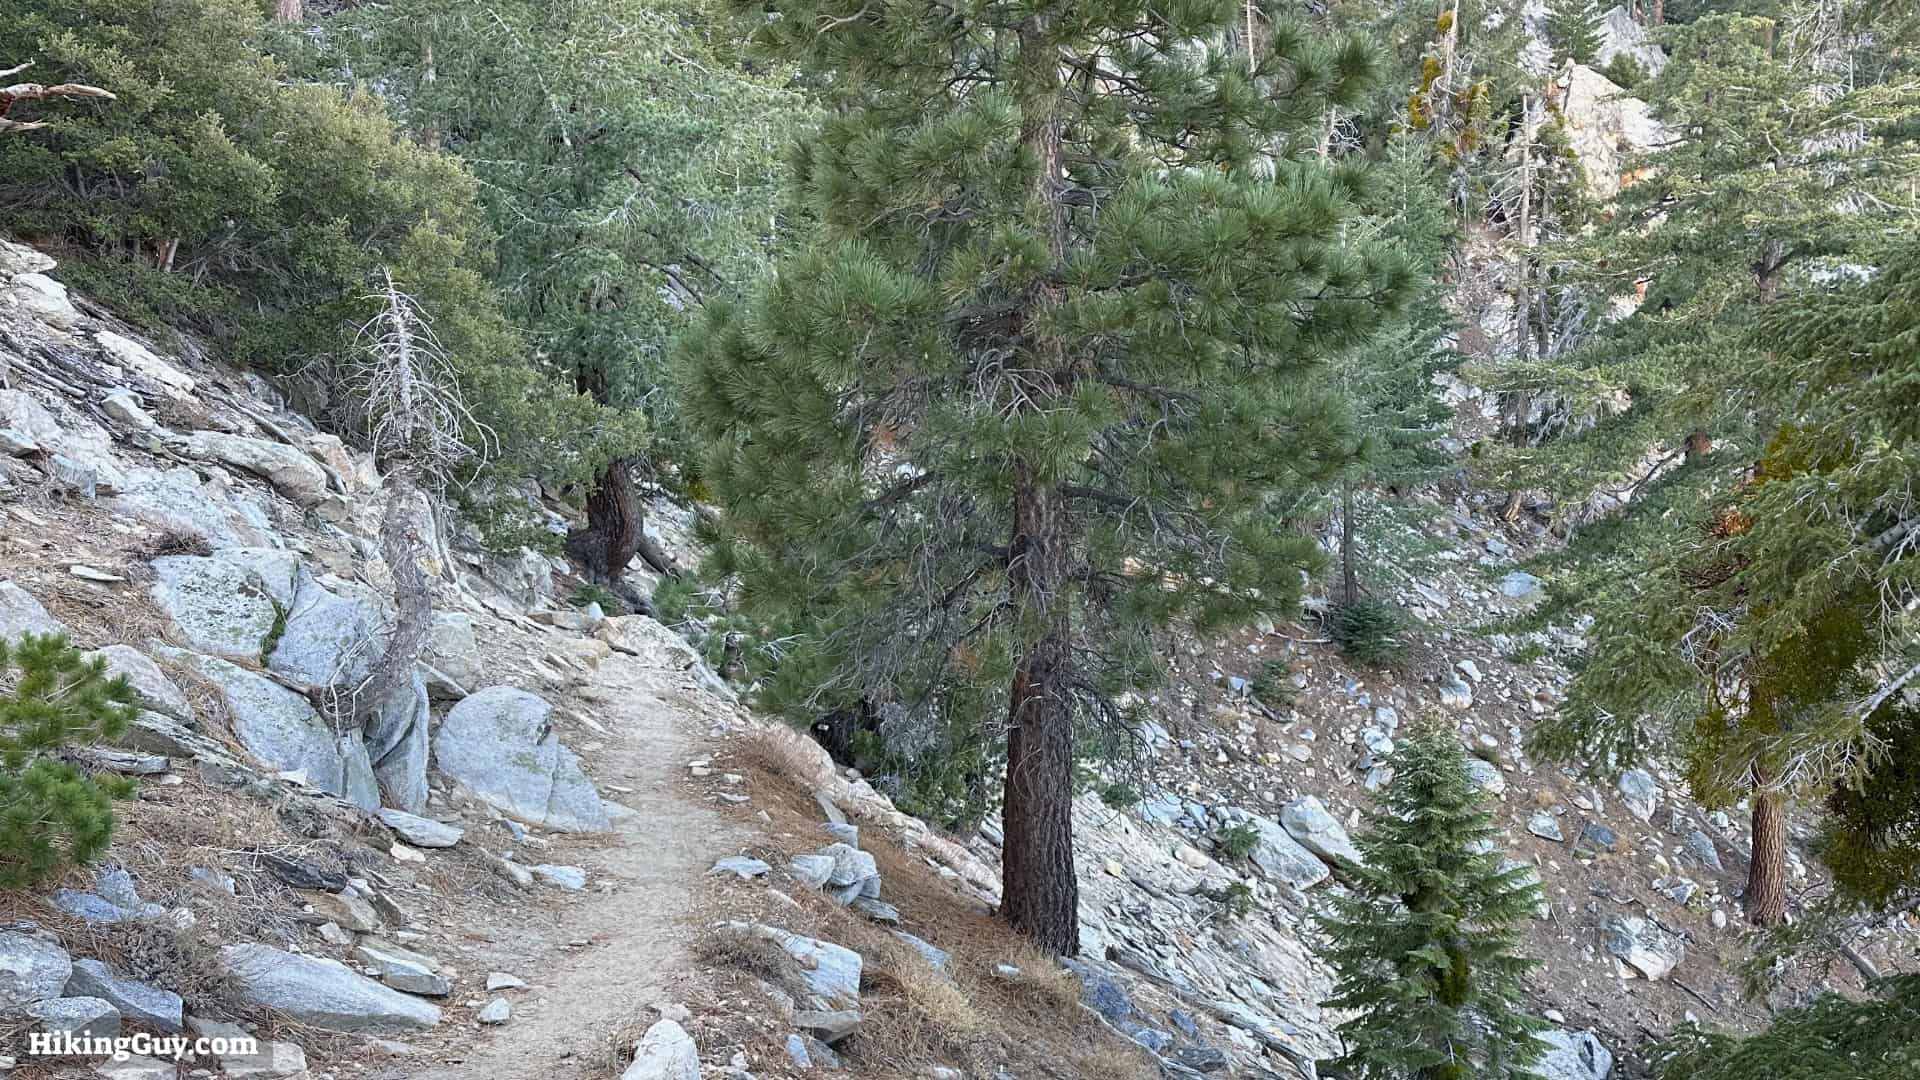
The first part of Cactus to Clouds is on the Skyline Trail, usually hiked in the dark, which can be challenging to follow. Hiking with a headlamp puts your focus right in front of you. The peripheral vision you use to recognize a twist or turn on the trail is not there. Here's how to make sure you're on the right course.
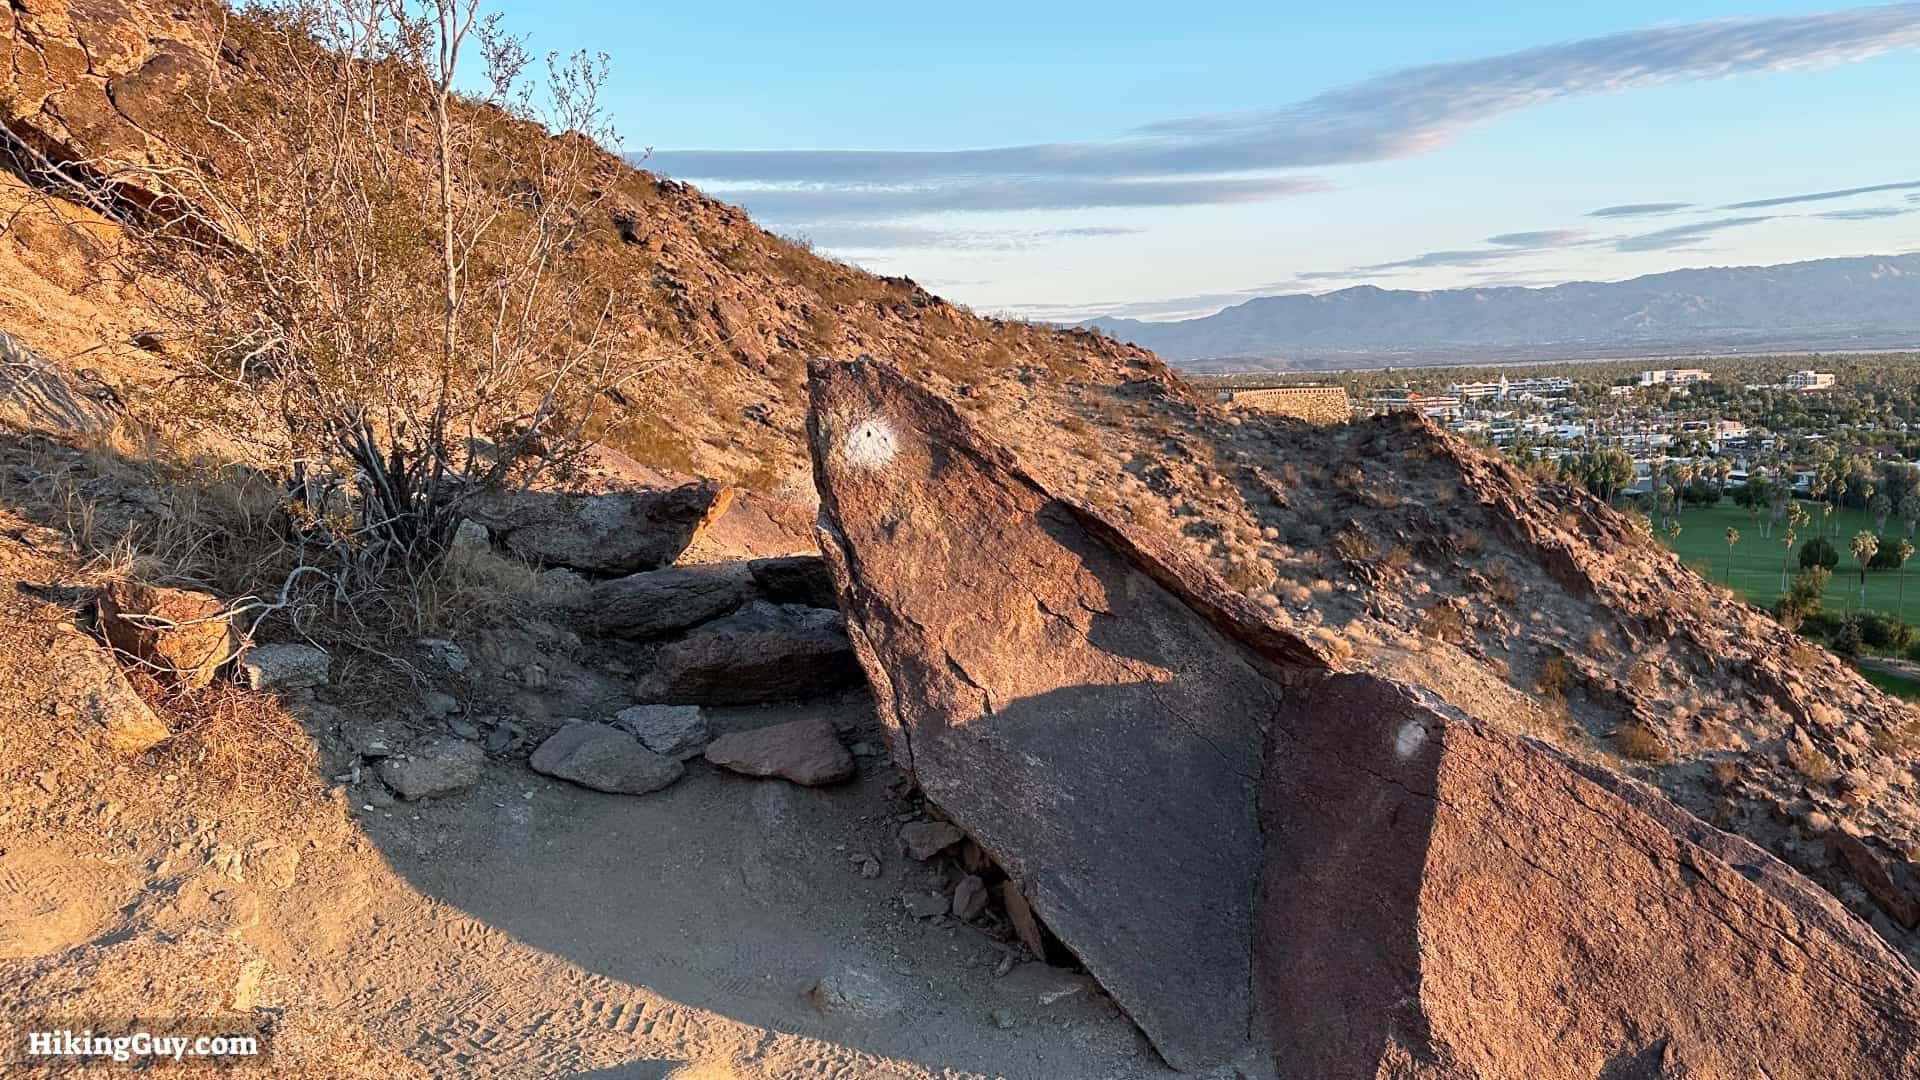
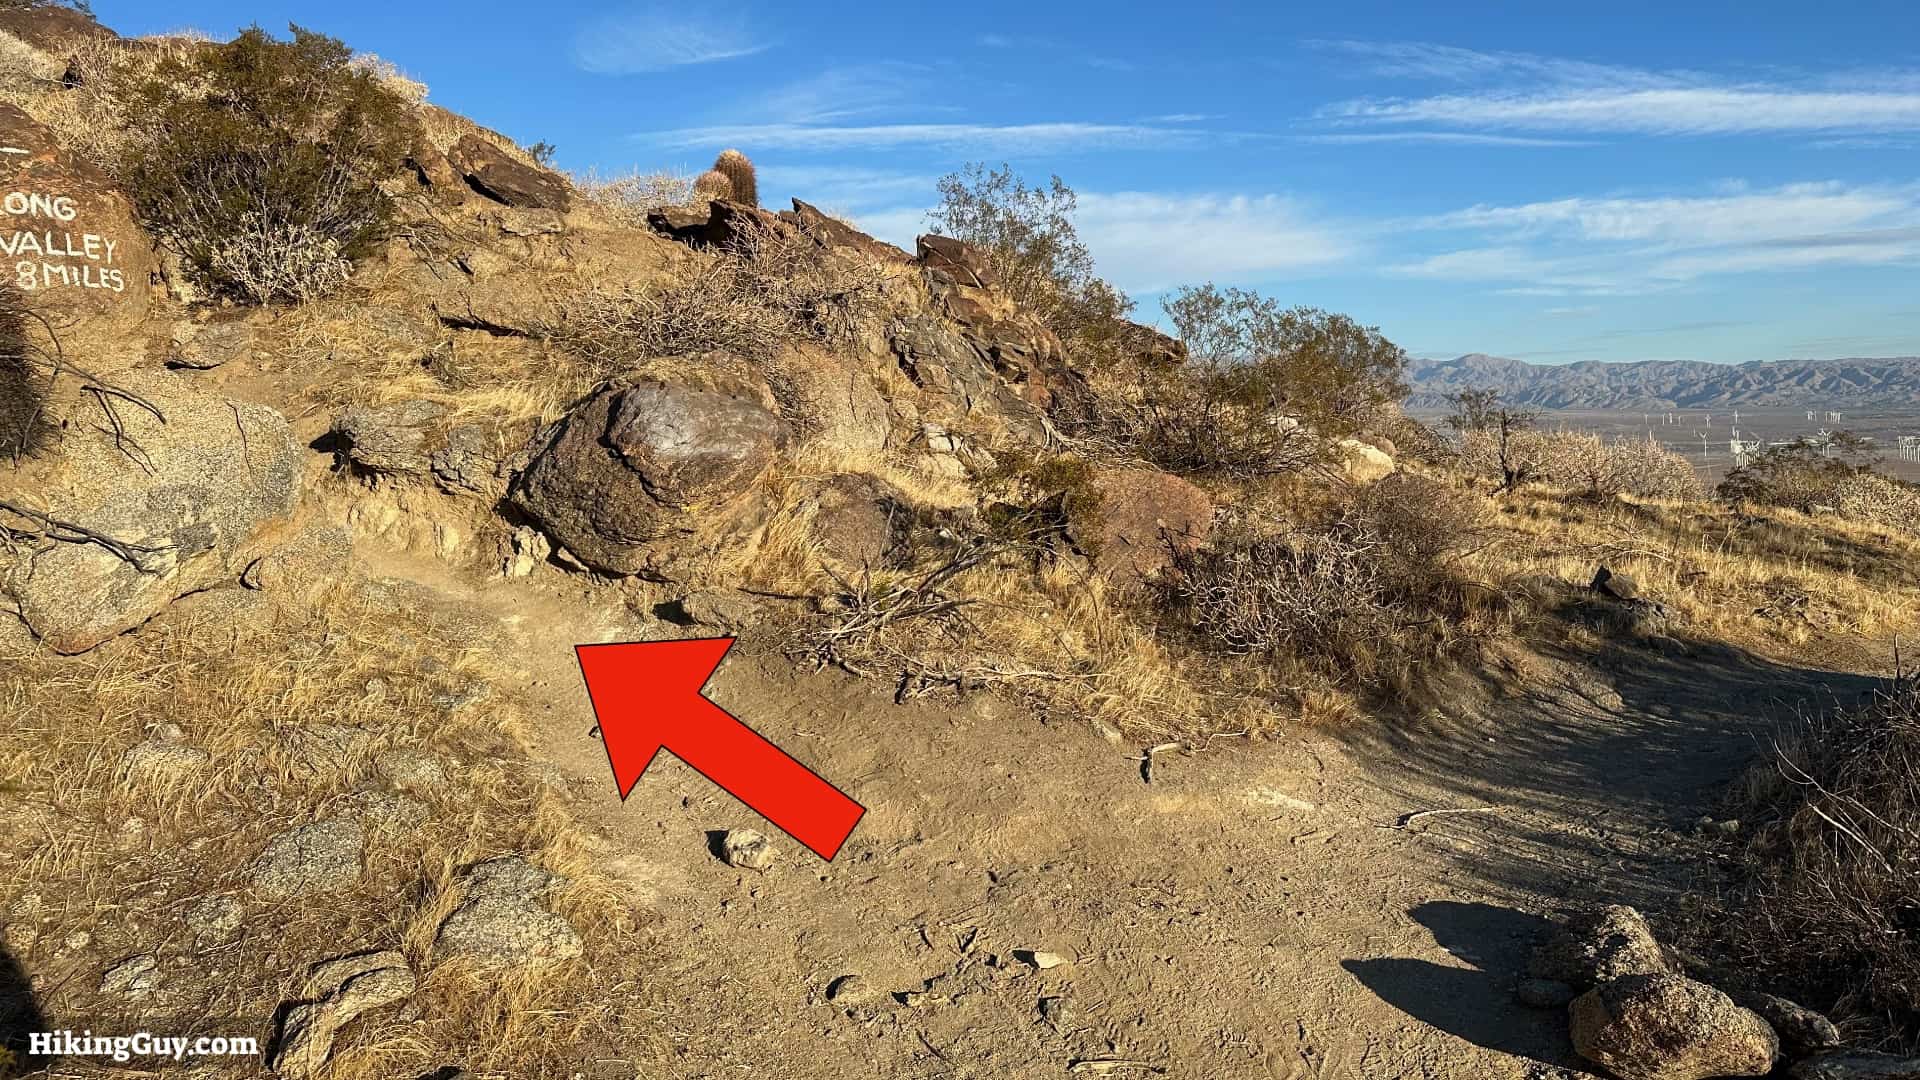
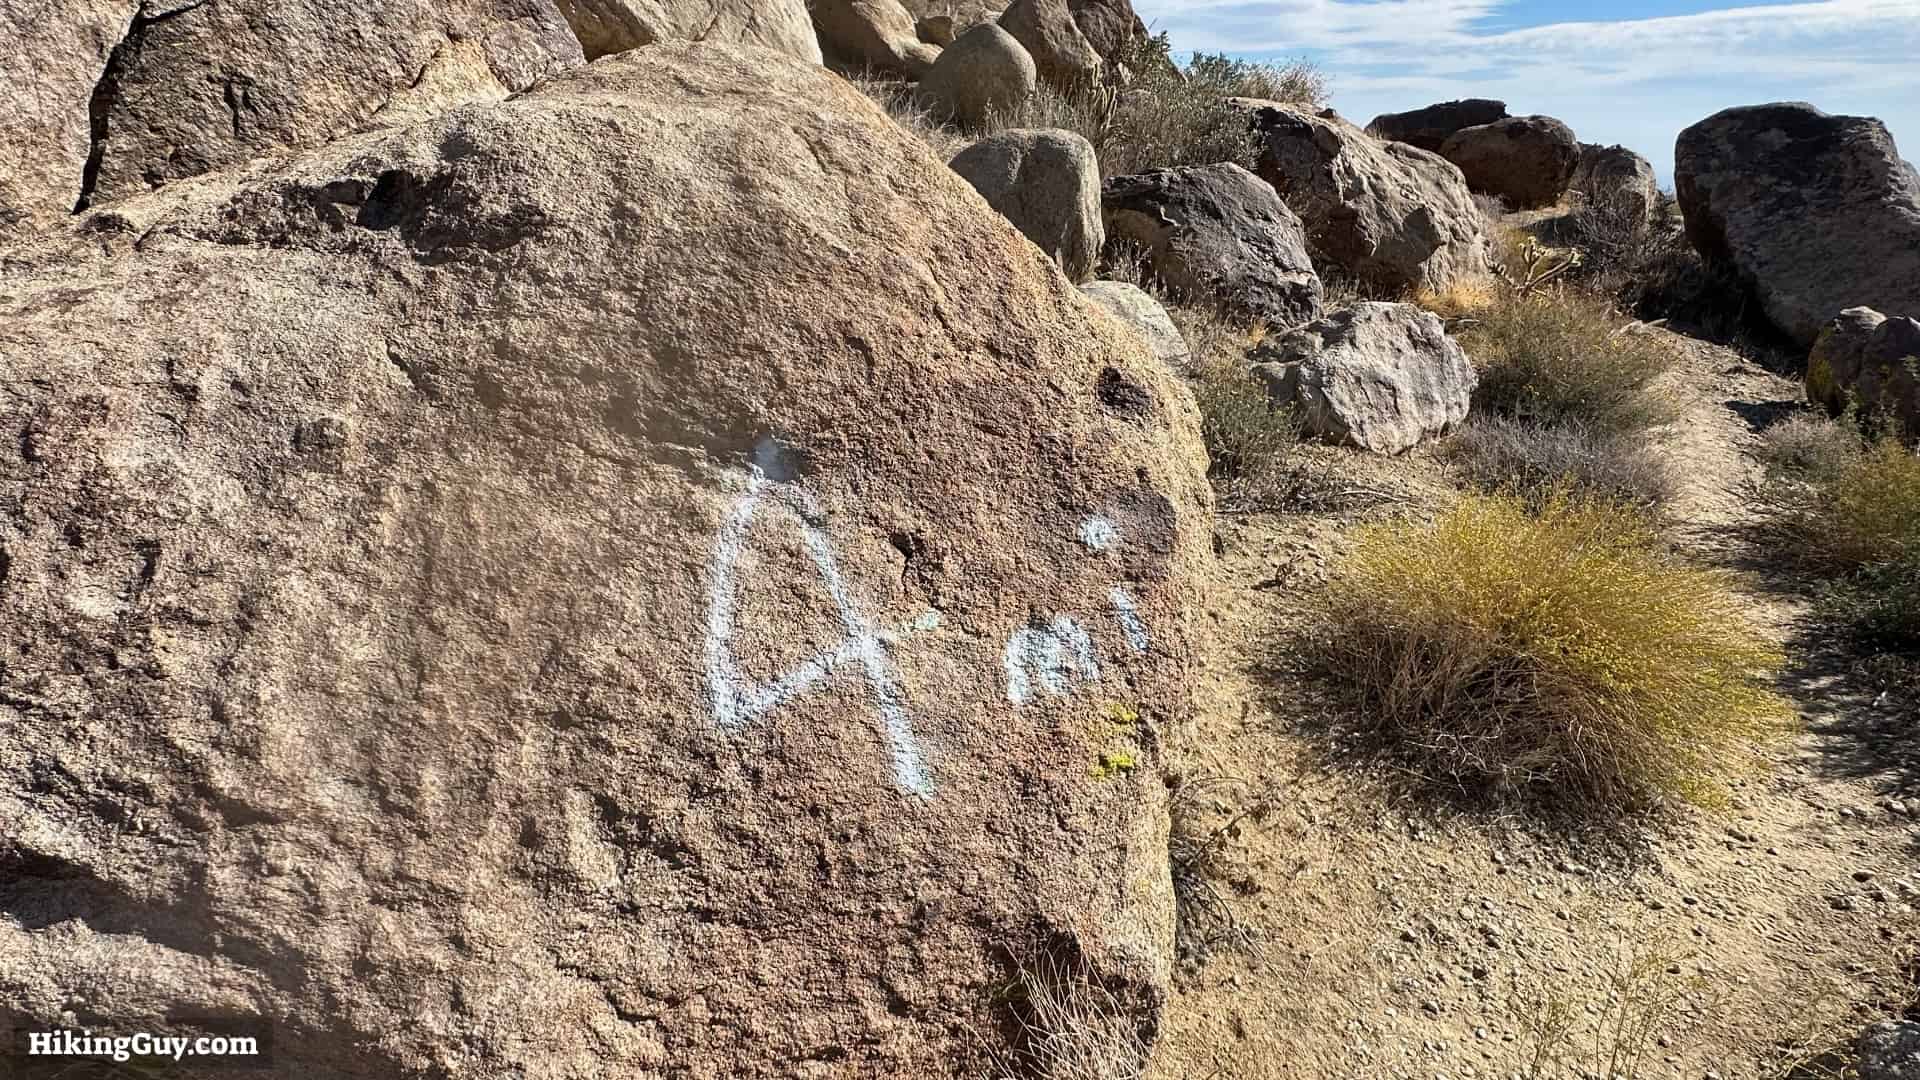
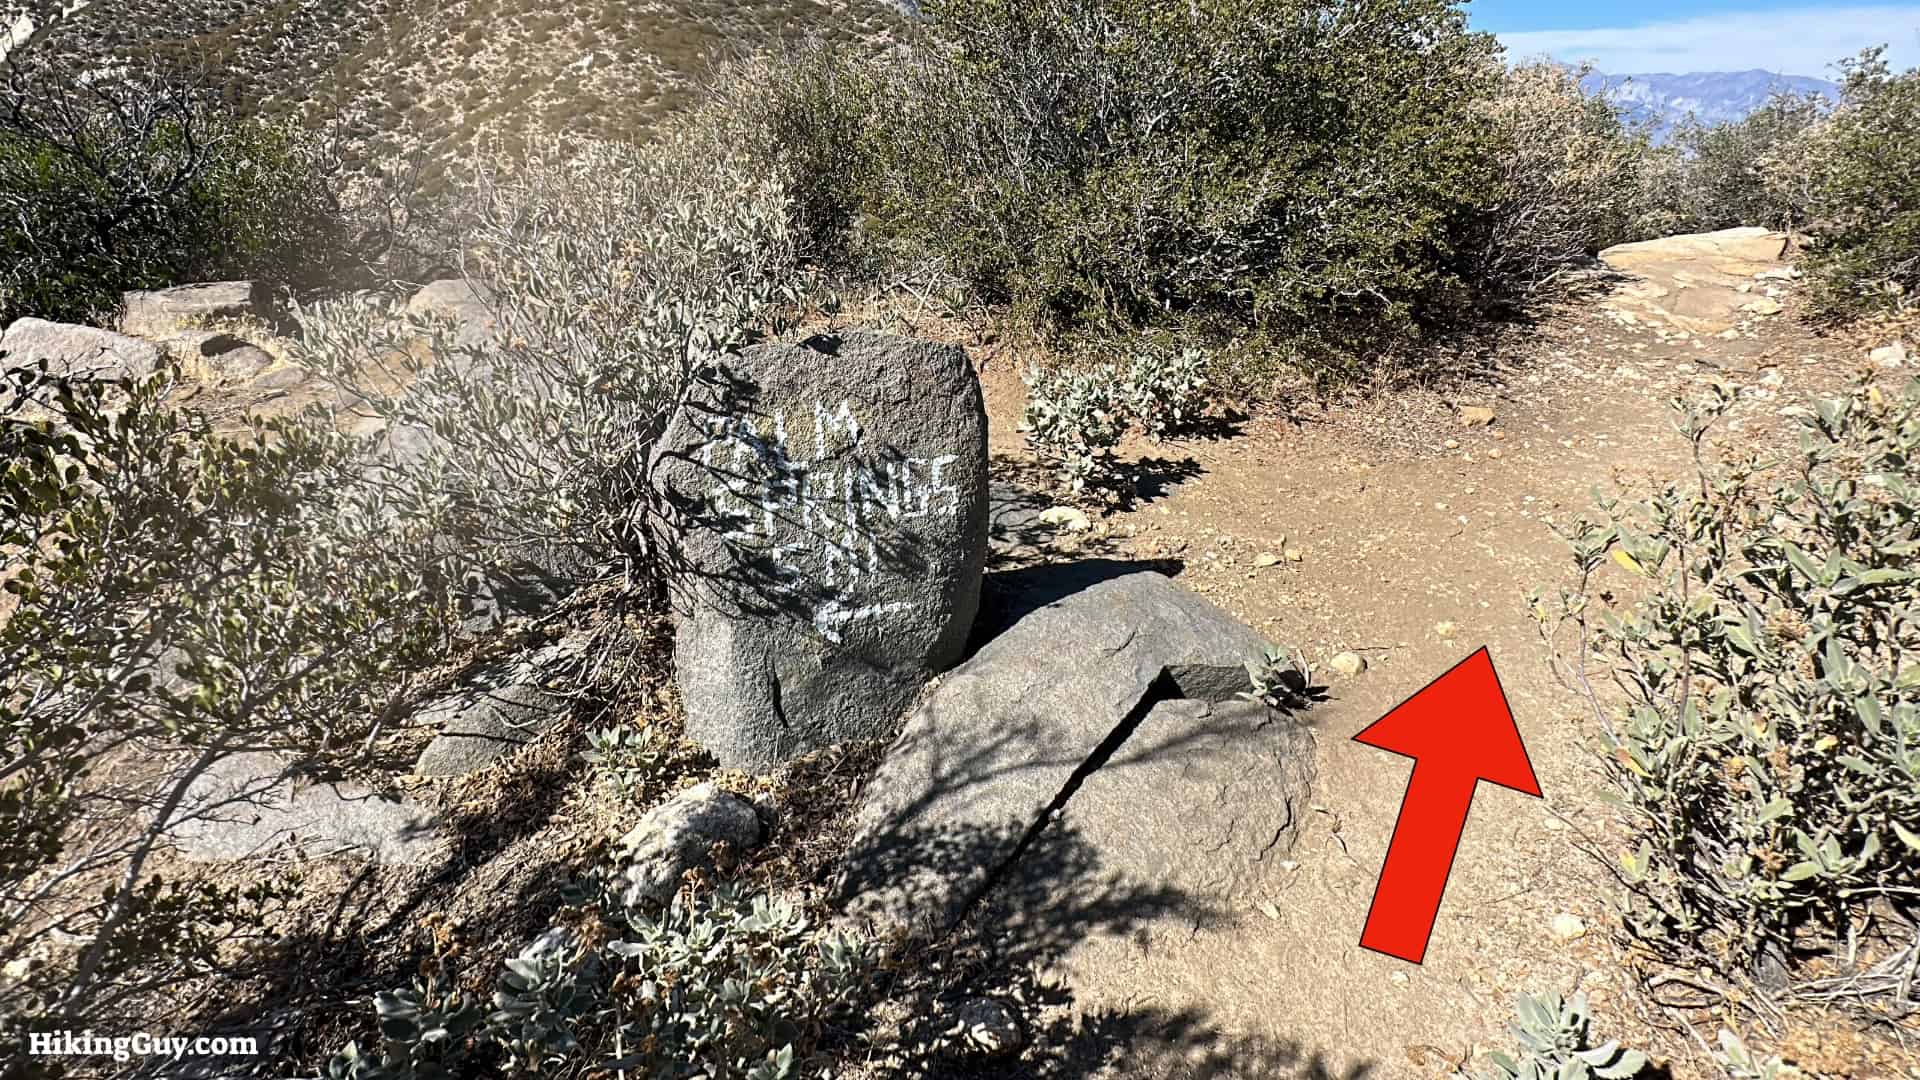
- Local hikers have done a great job blazing the trail with white dots. The white blazes fade over time and might be lighter or brighter than you see in these pictures. Have a few GPS options to cross-check your position.
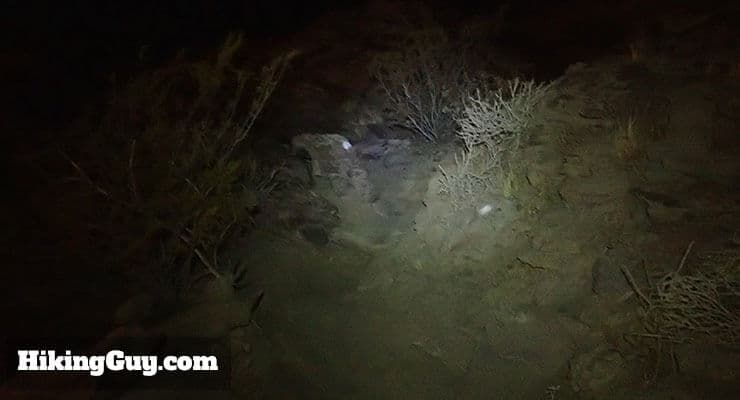
The white blazes on rocks along the trail are pretty easy to spot with a headlamp. - Looking for bootprints is a great way to determine which trail is correct. In general, if you stick with the path with the most bootprints, you should be in the right place.
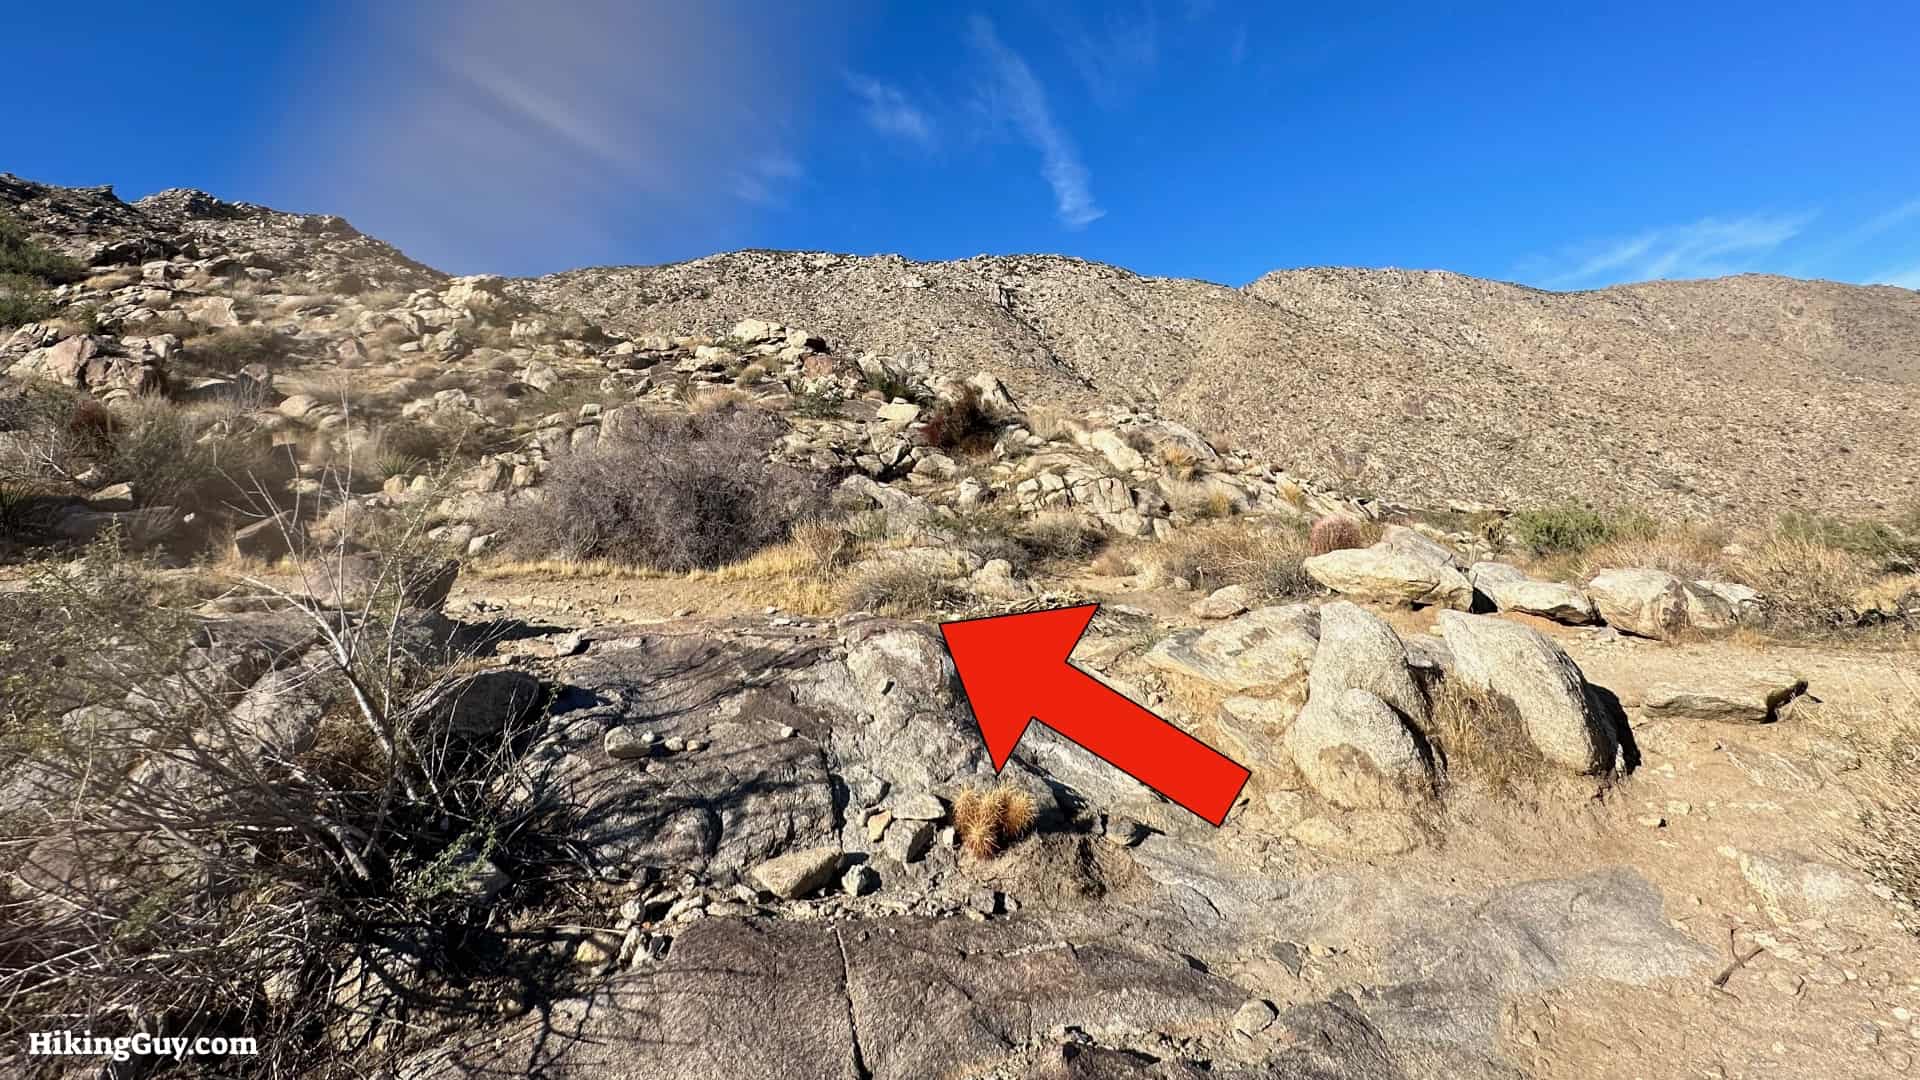
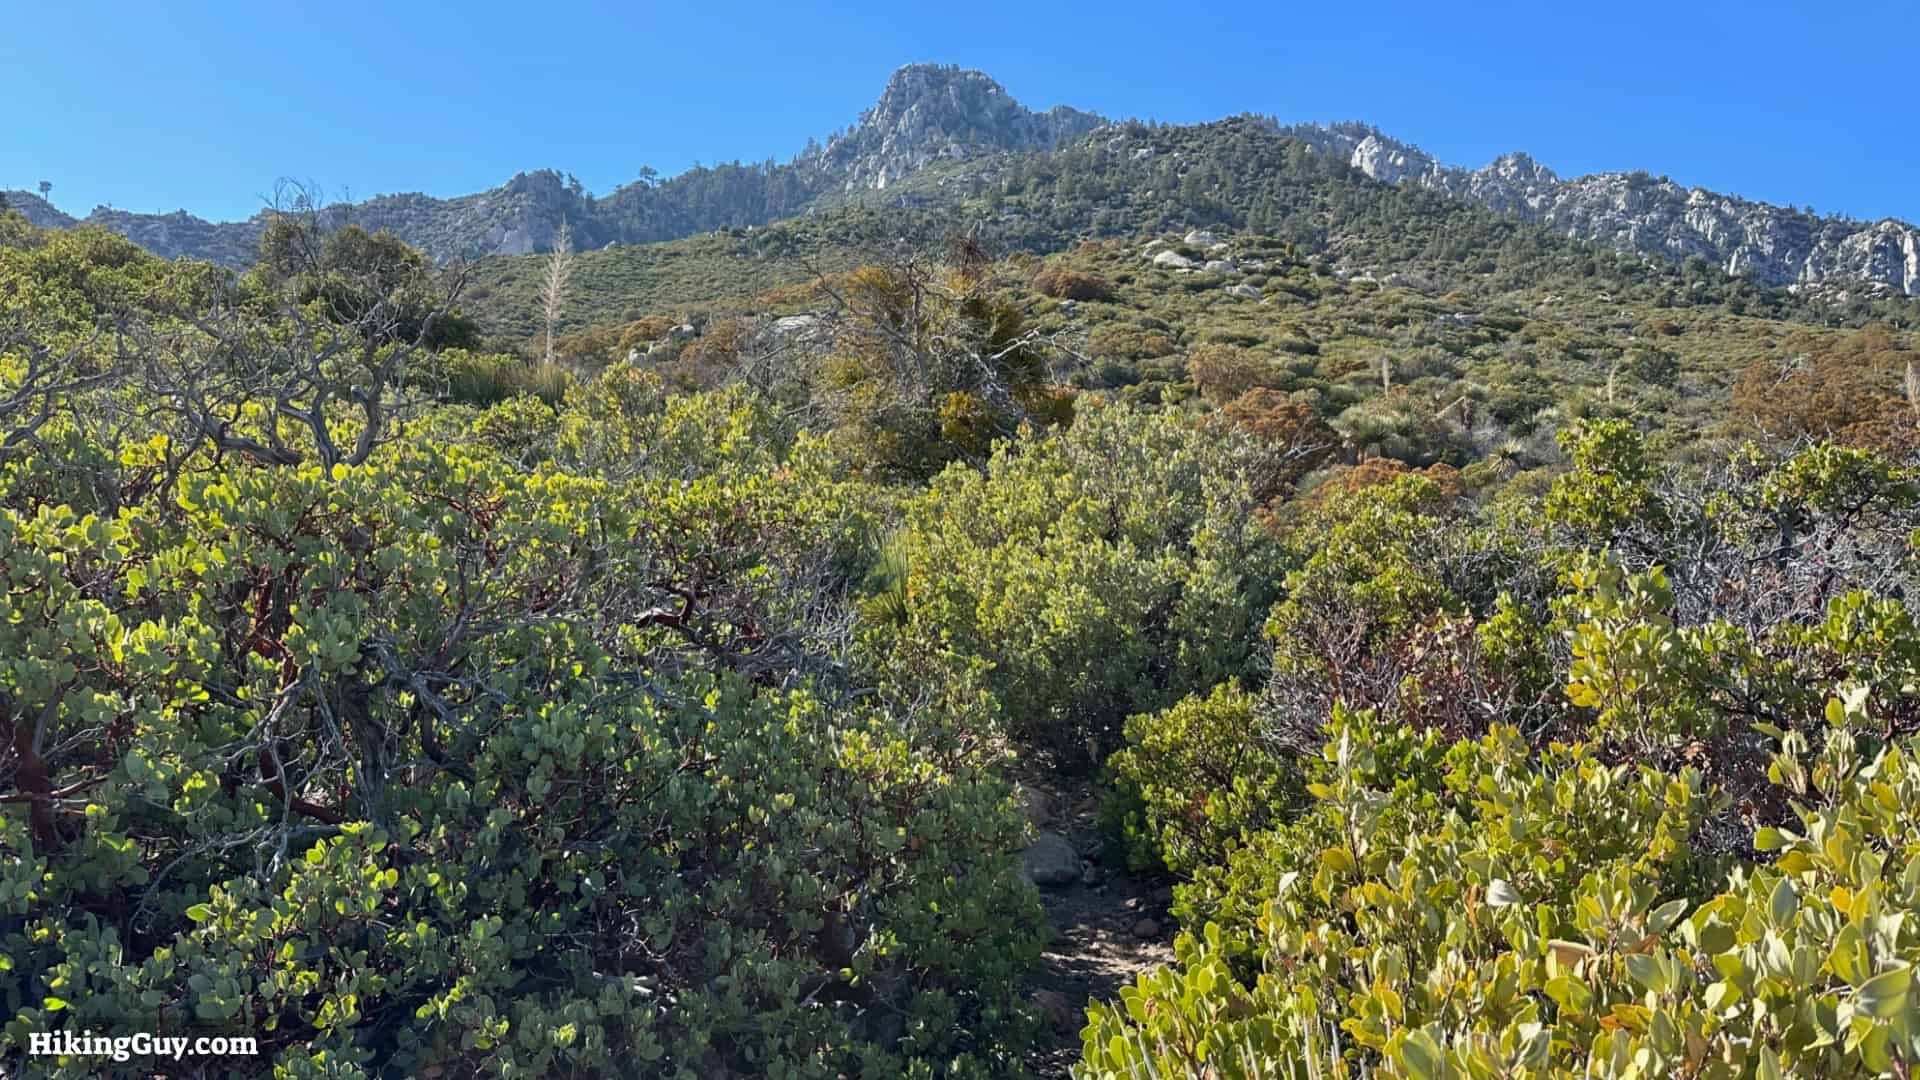
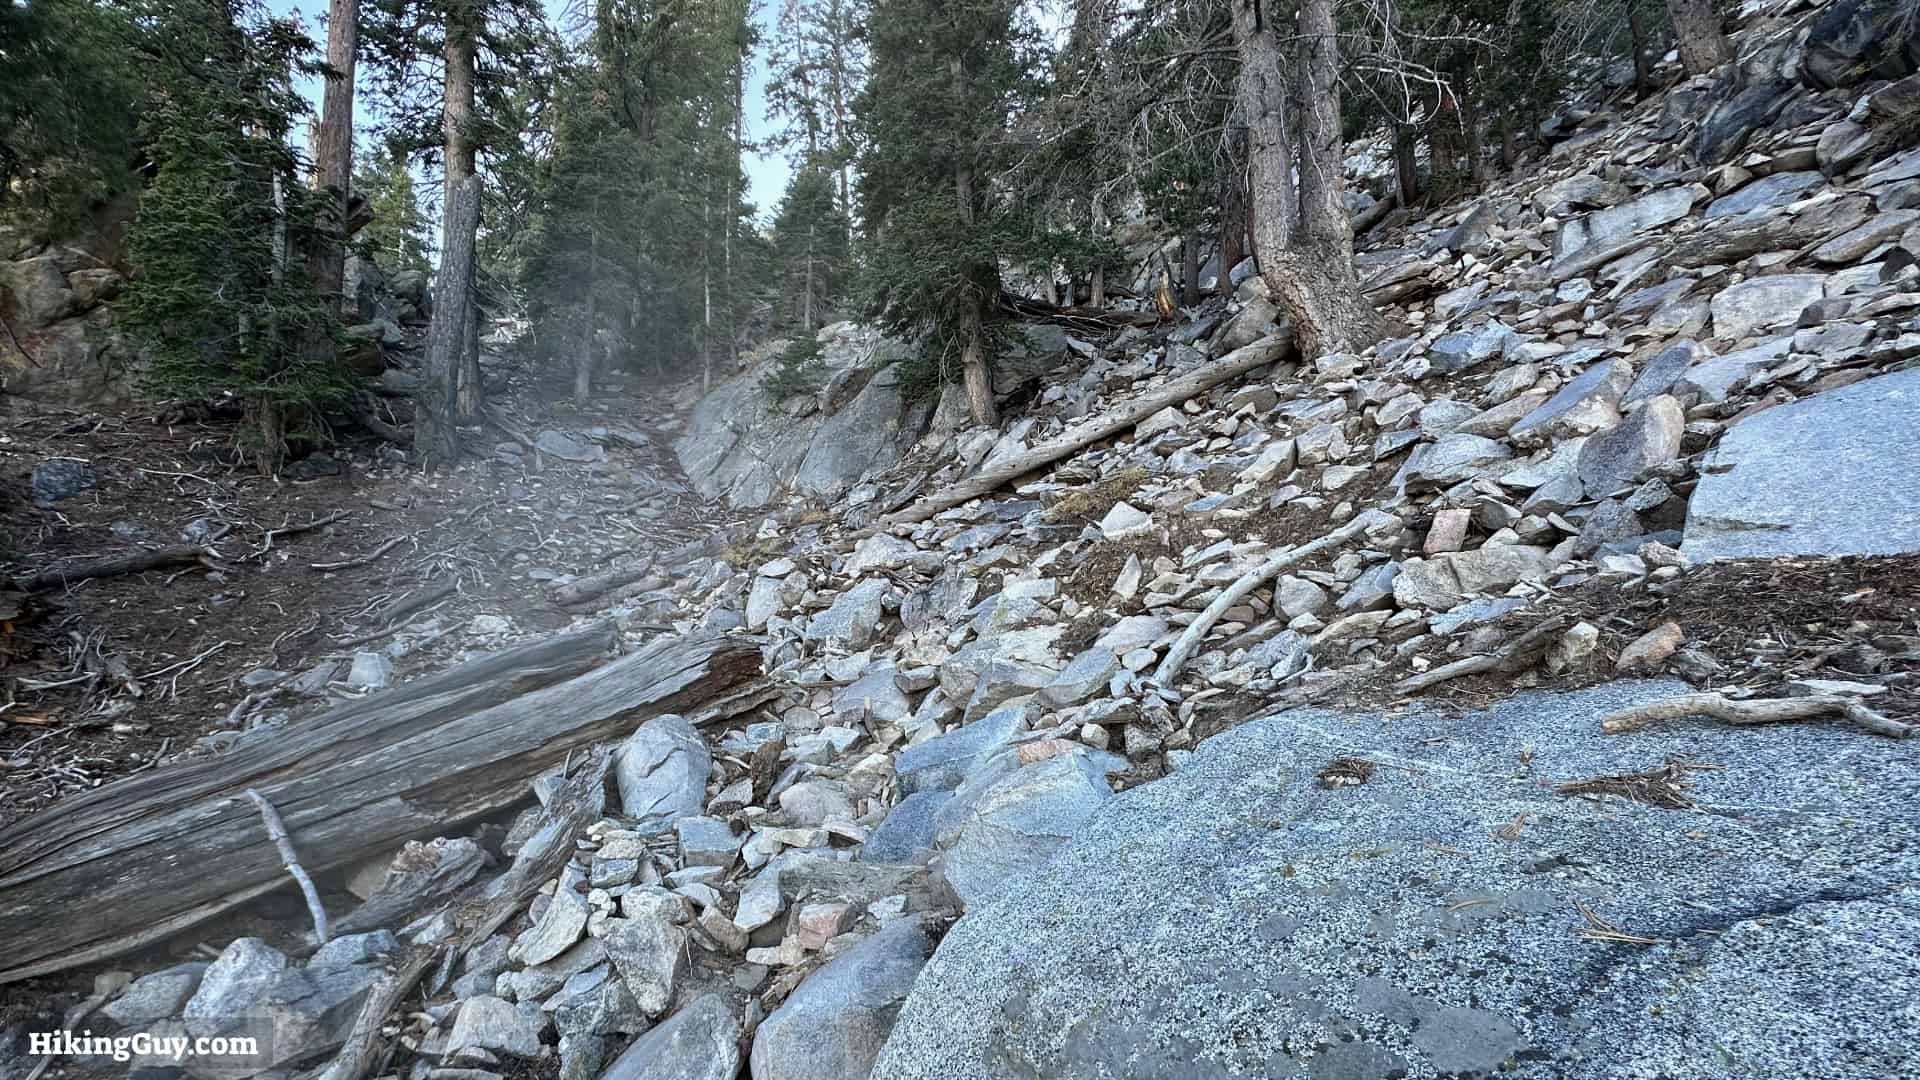
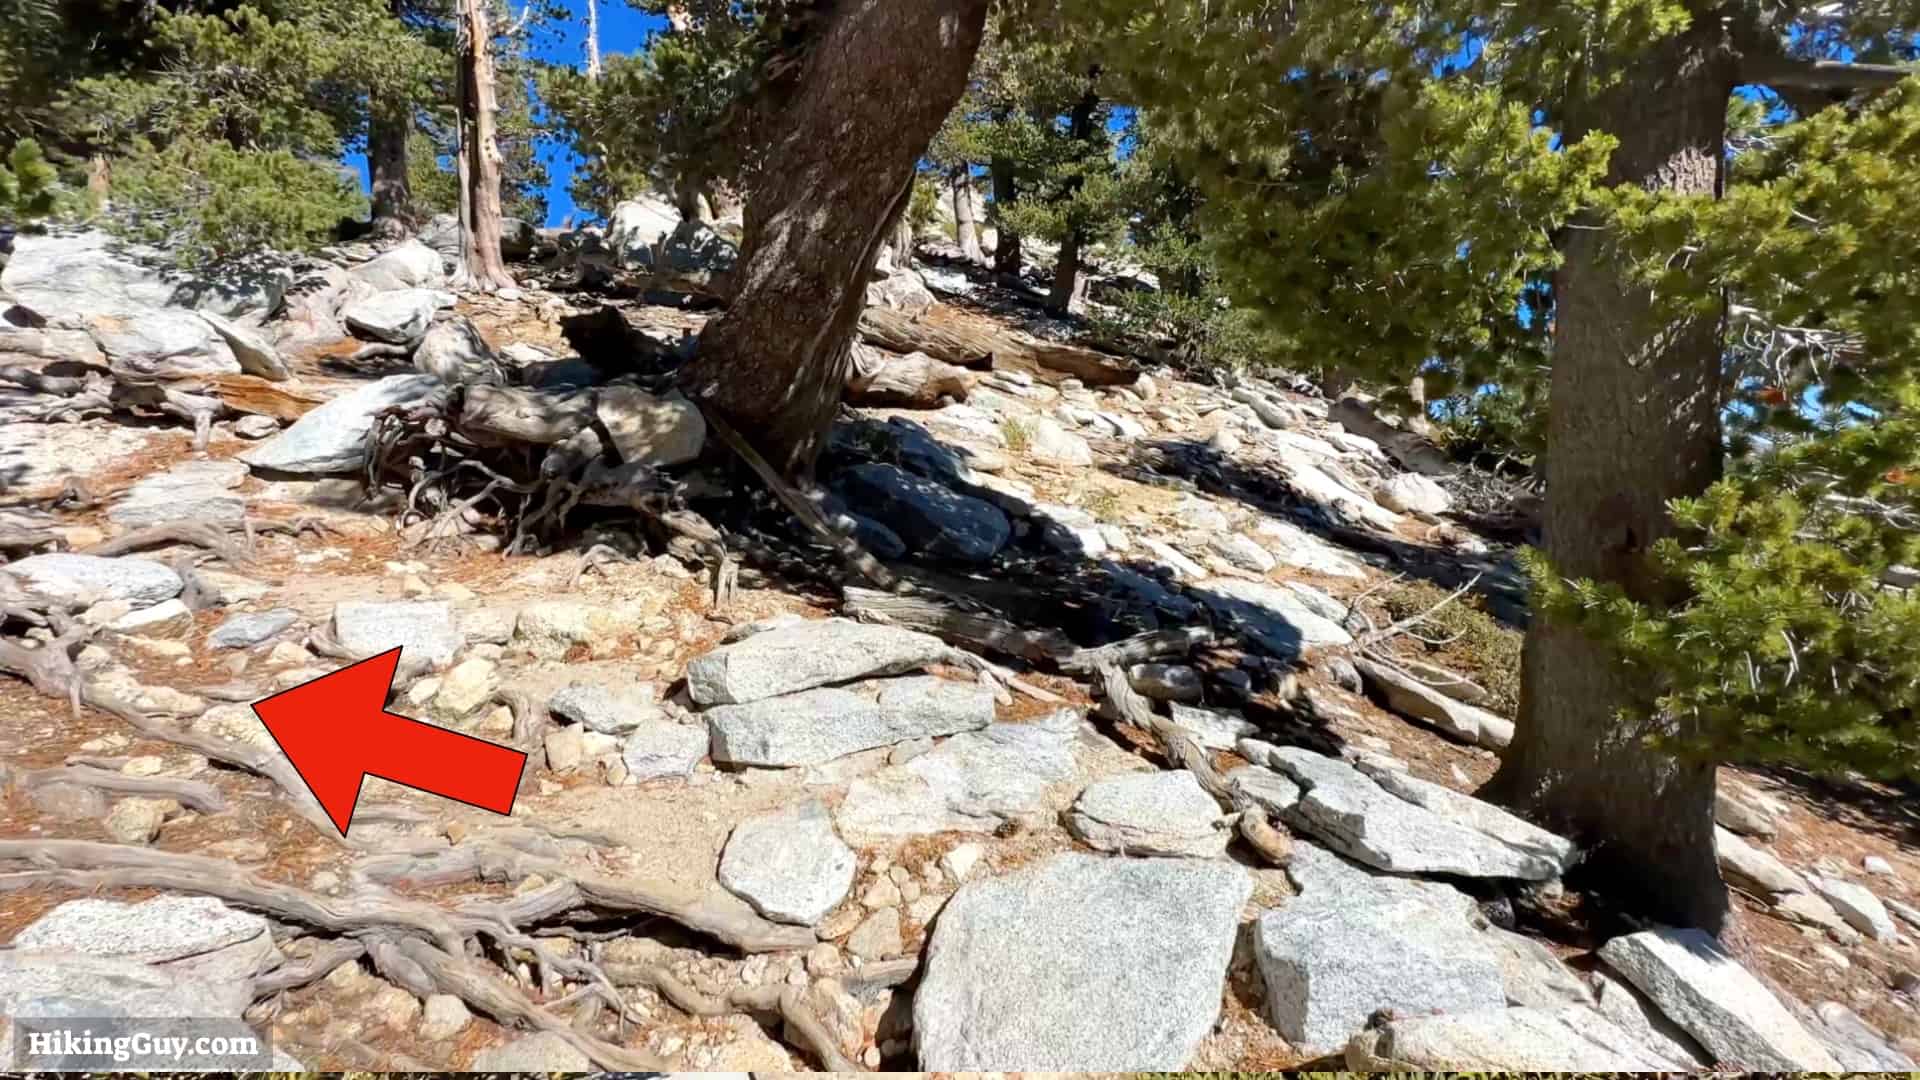
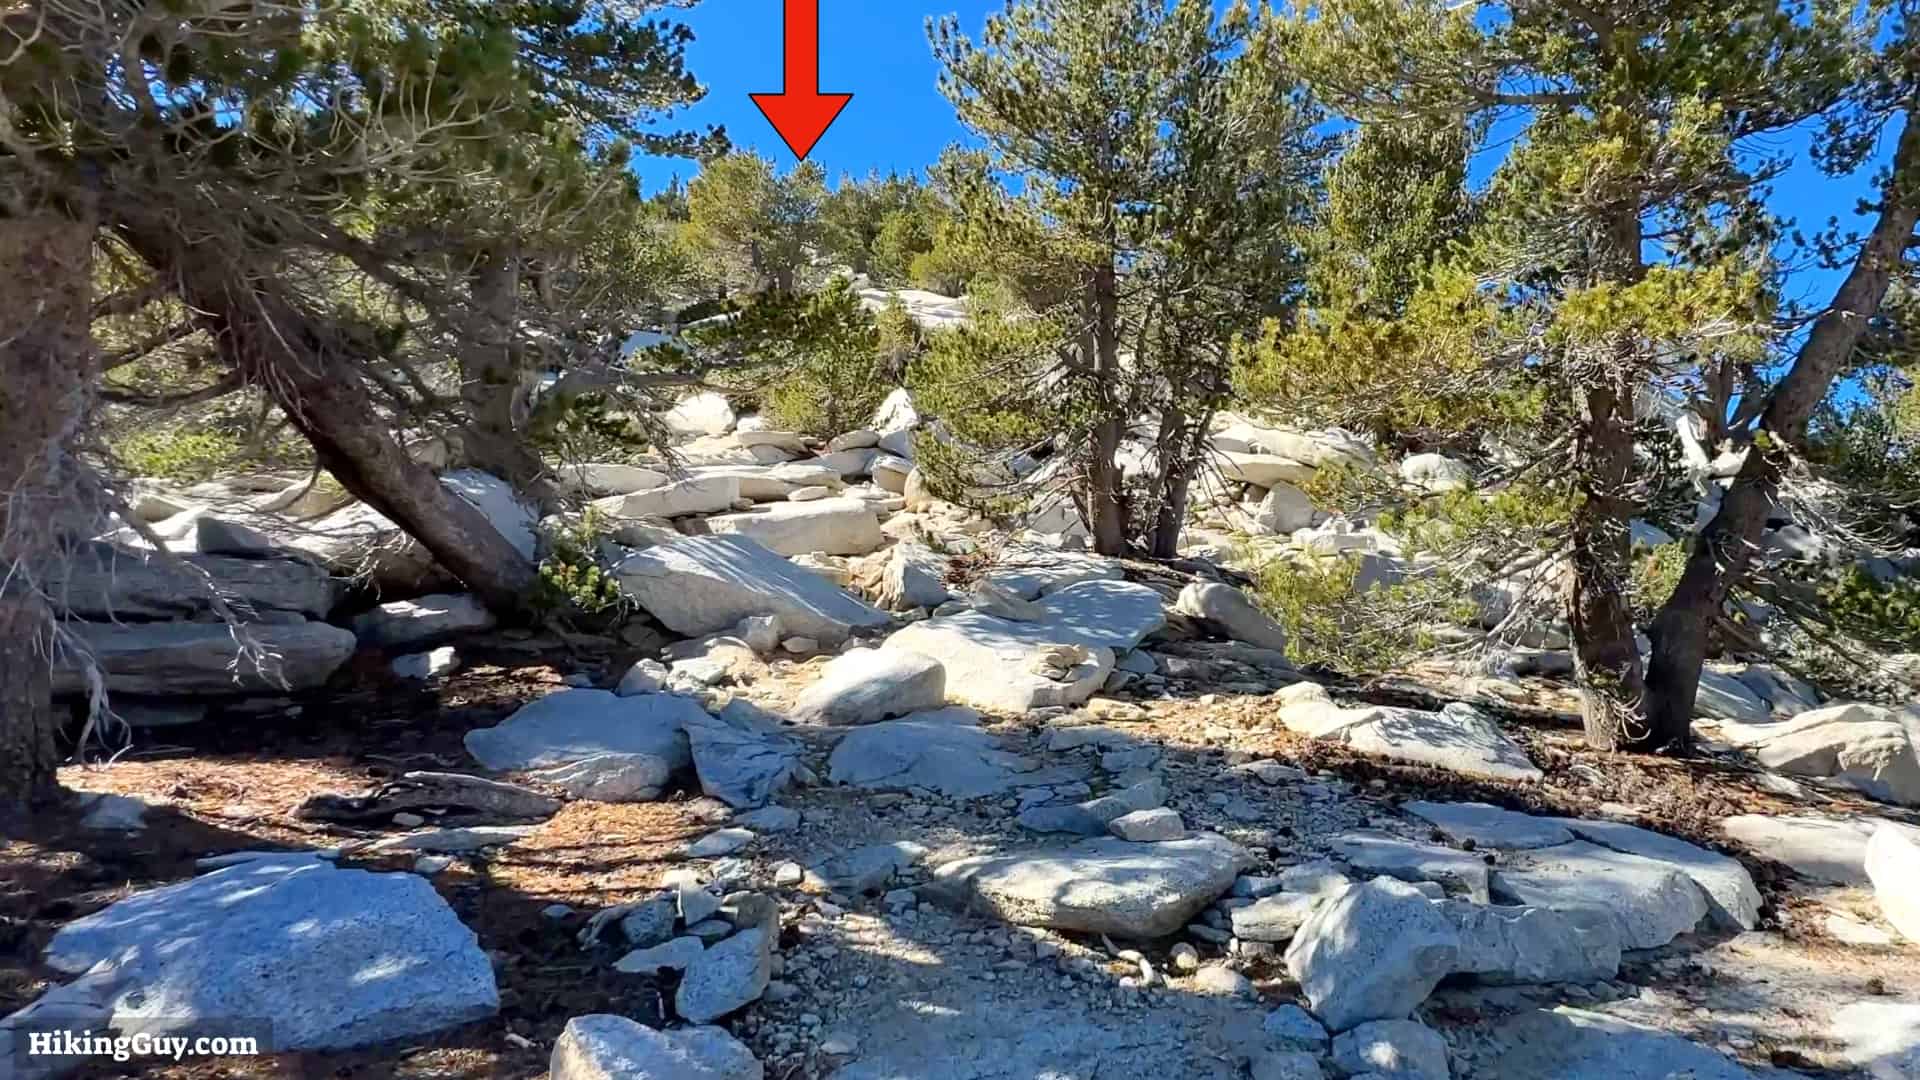
- If the trail starts to fizzle out and grow overgrown, you should head back and look for a turn or switchback that you may have missed. There are a few sections where the trail goes through shrubs, but it only occurs a few times.
- At some points, the Skyline Trail splits and comes back together later. Look at the map and know where these sections are. My GPX file generally follows the less steep option.
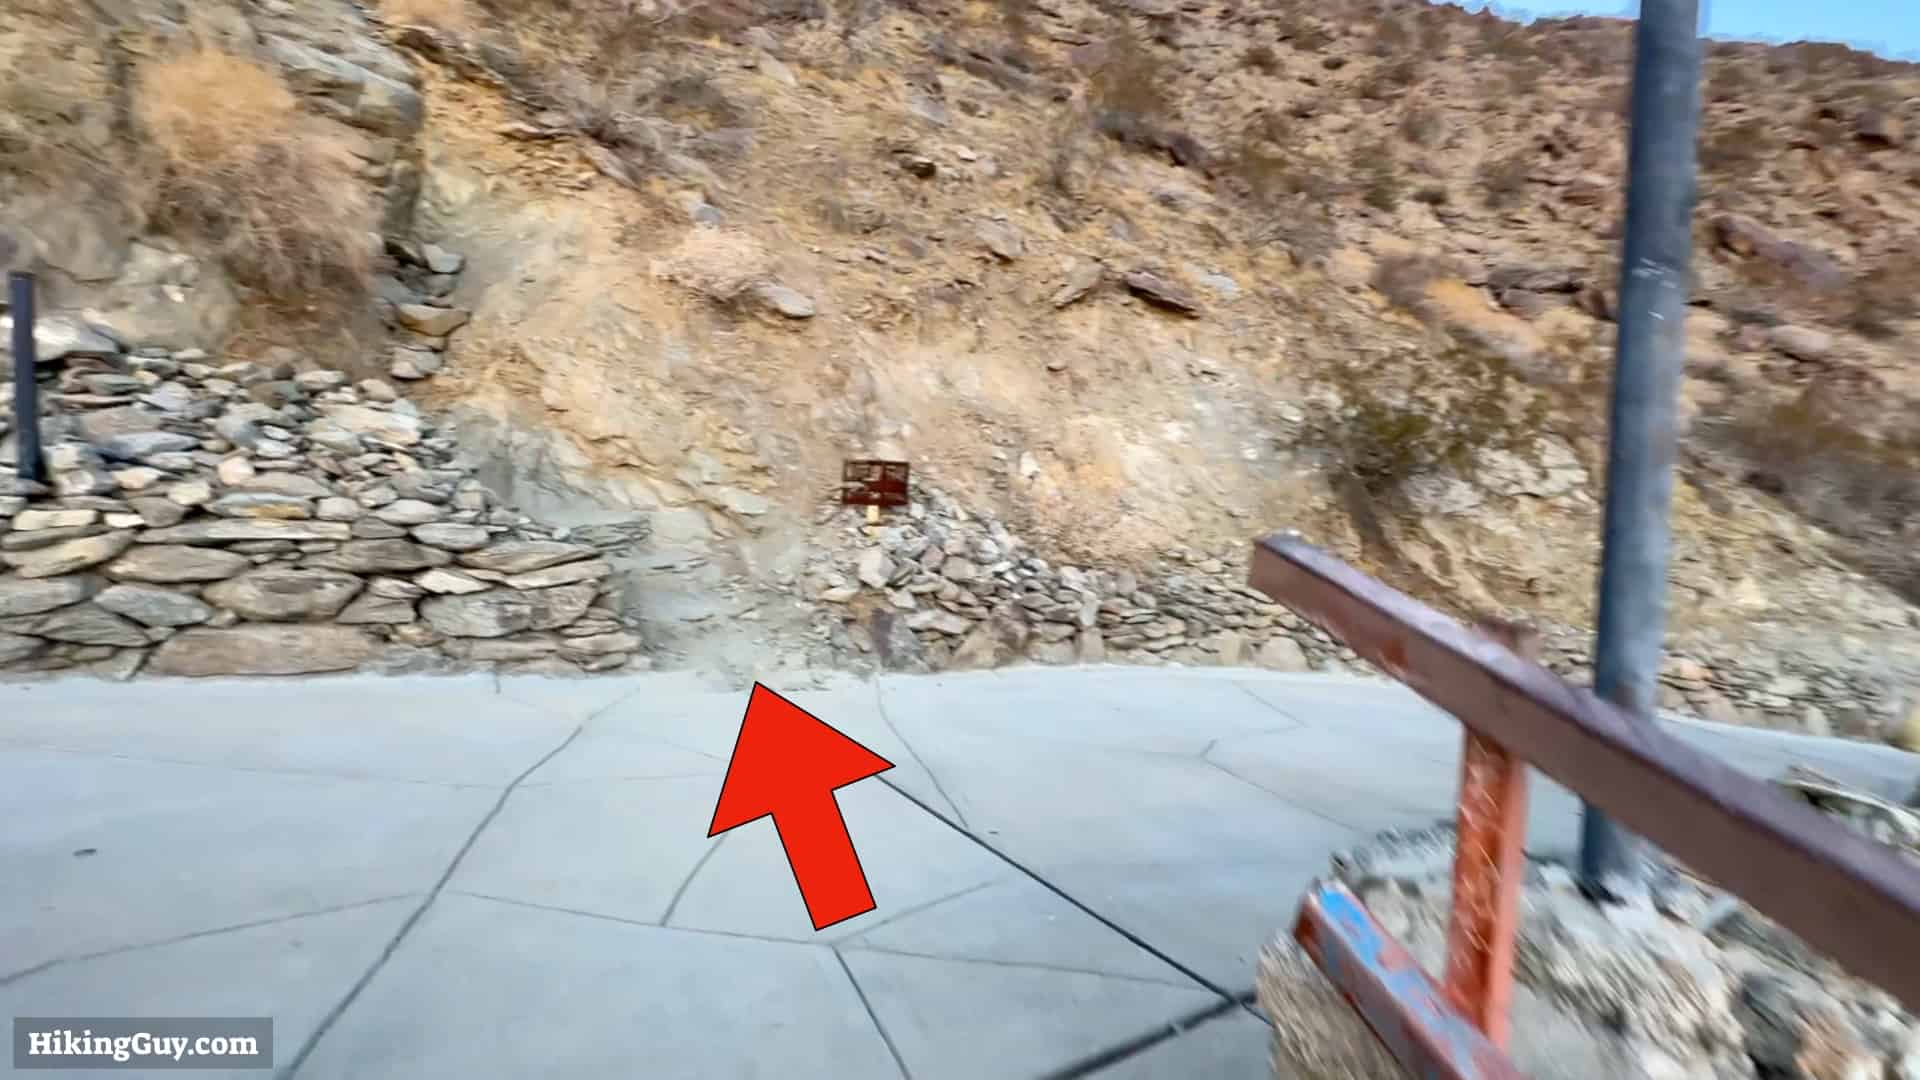
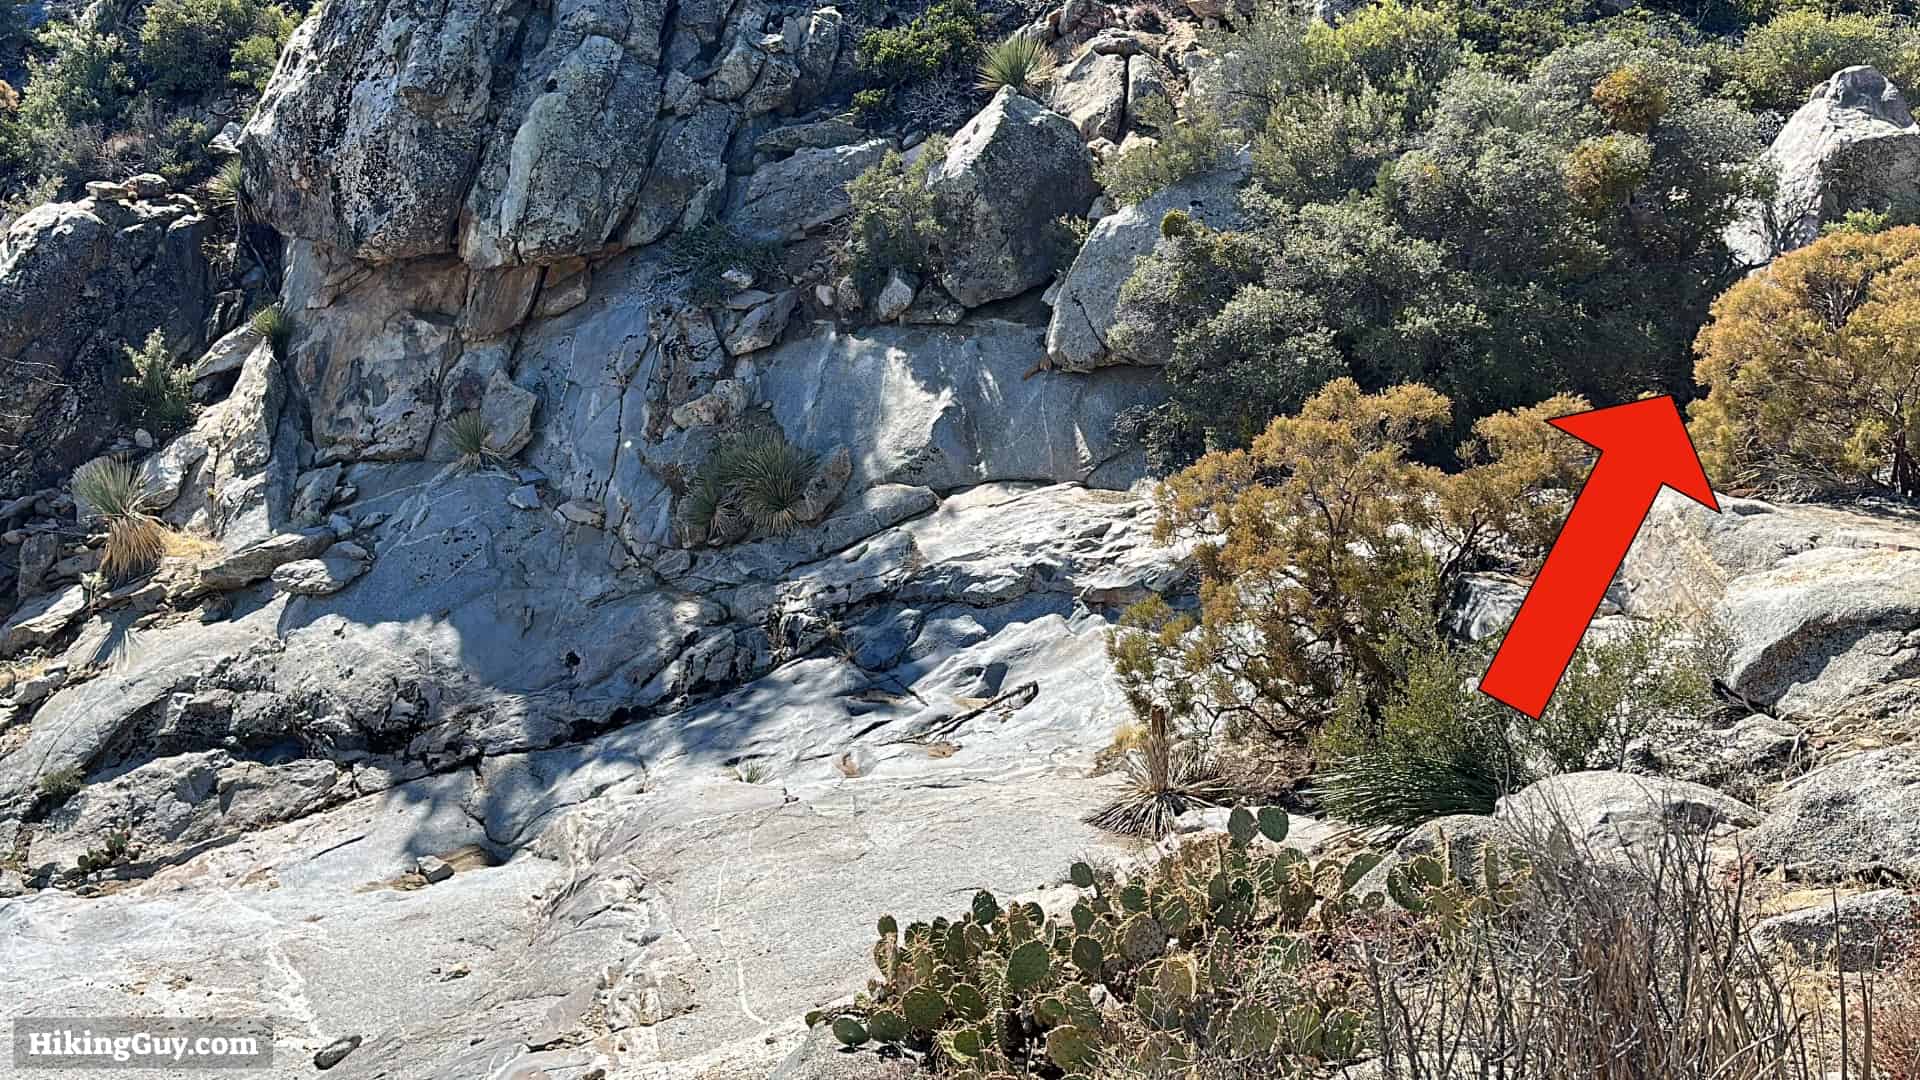
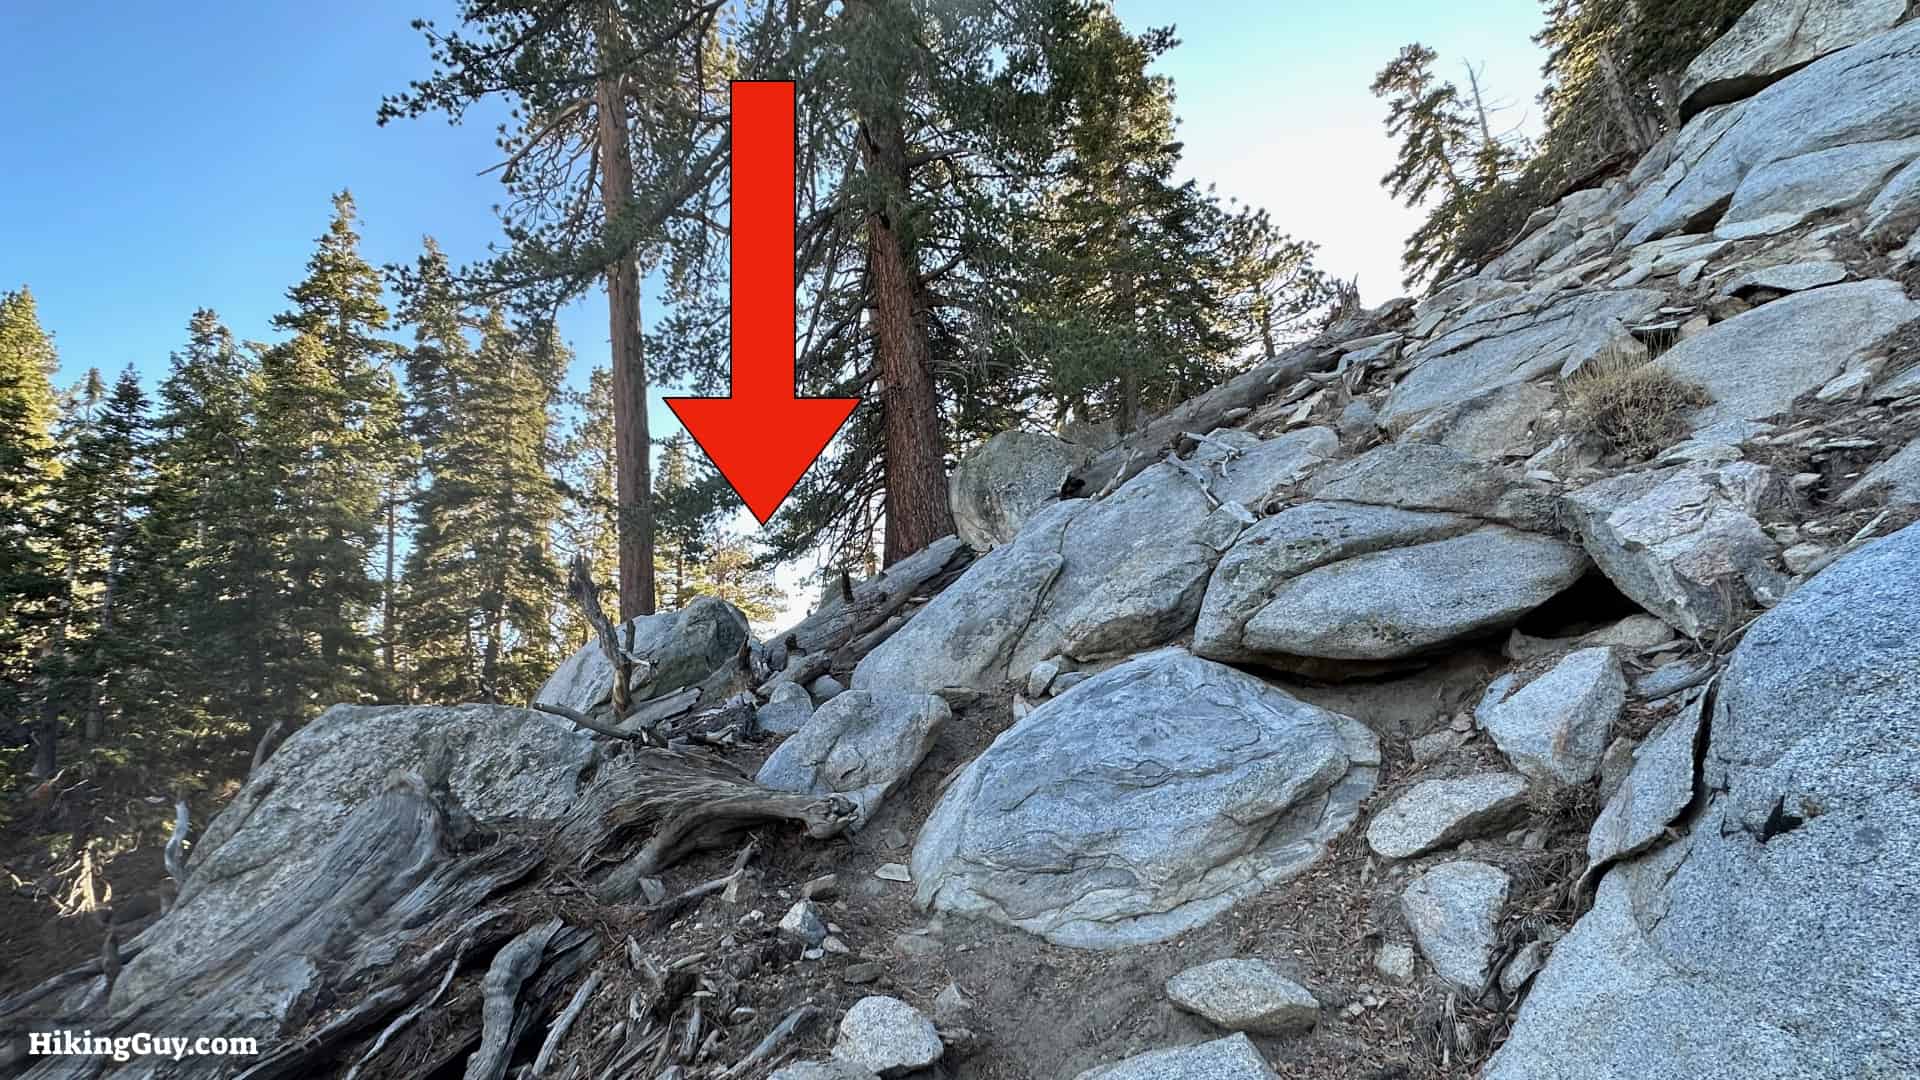
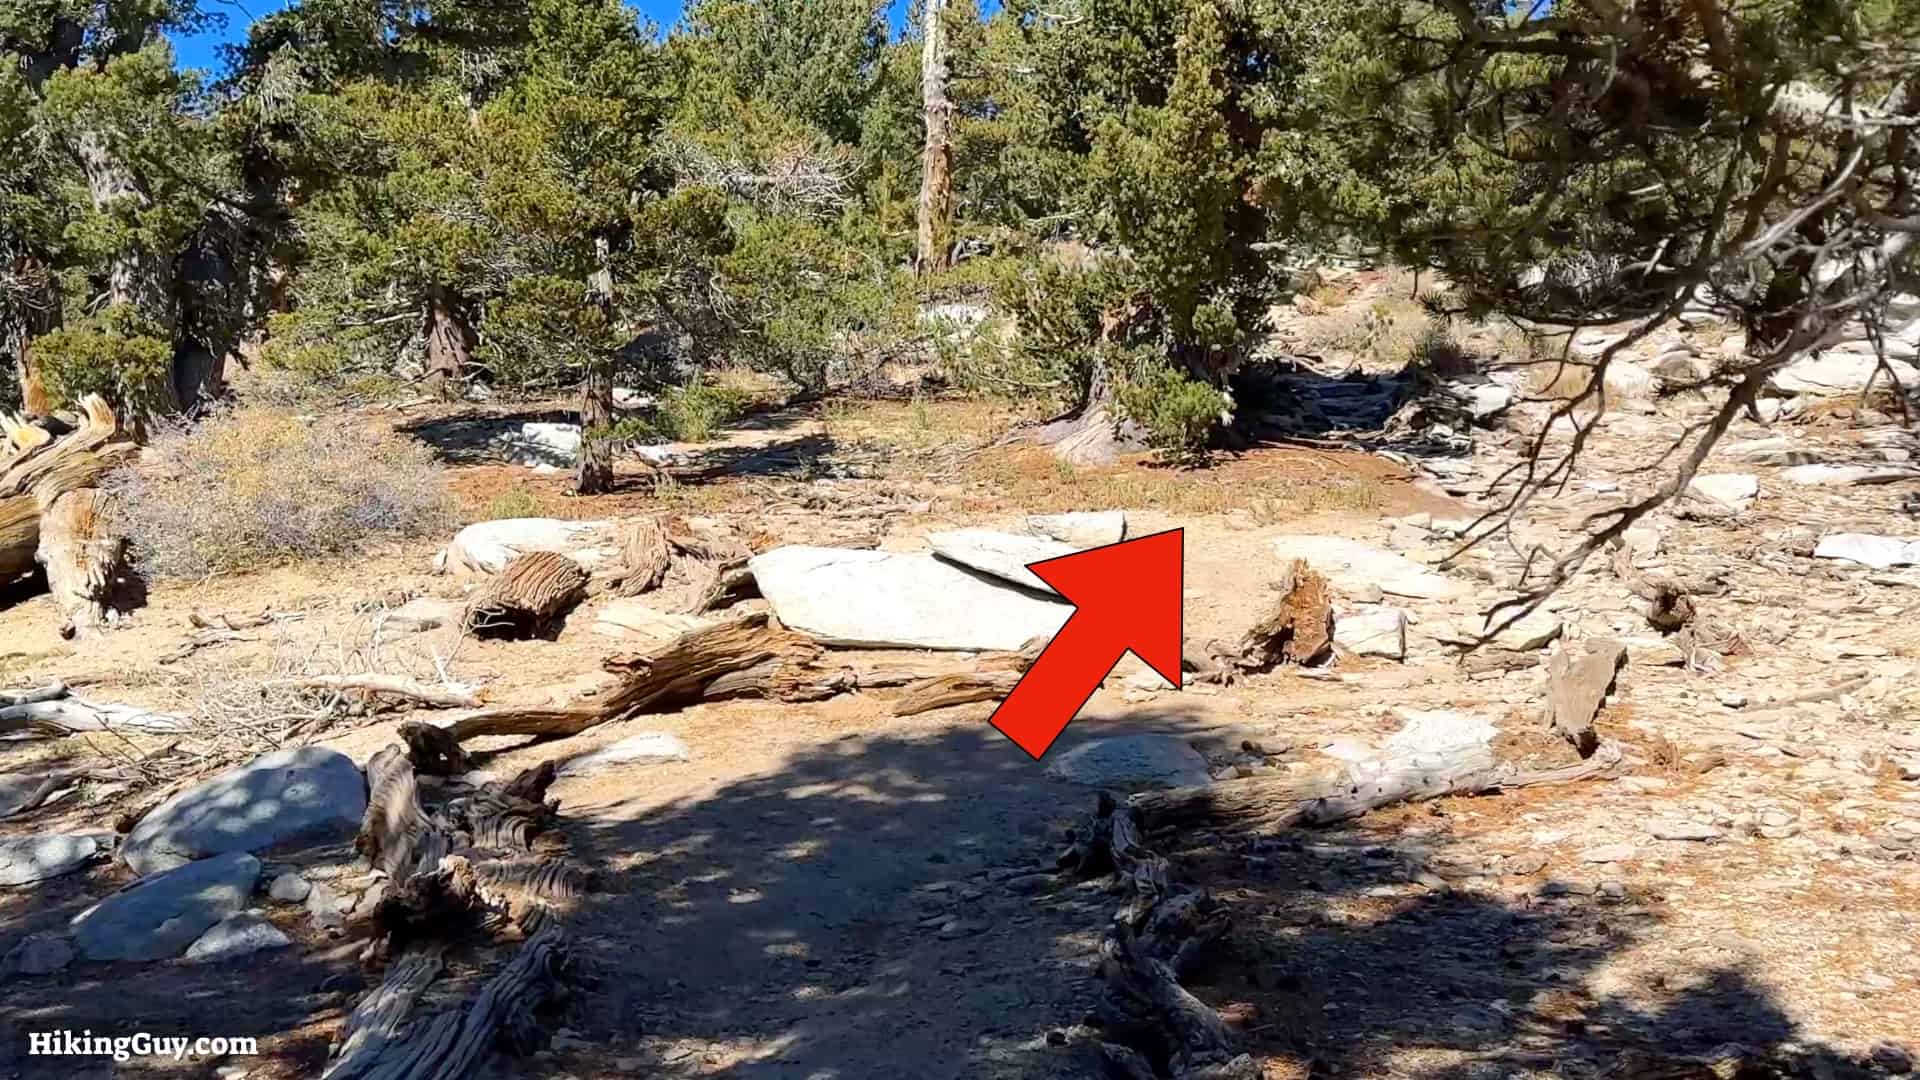
- Incorrect side trails are often blocked to help you stay on the main Skyline Trail.

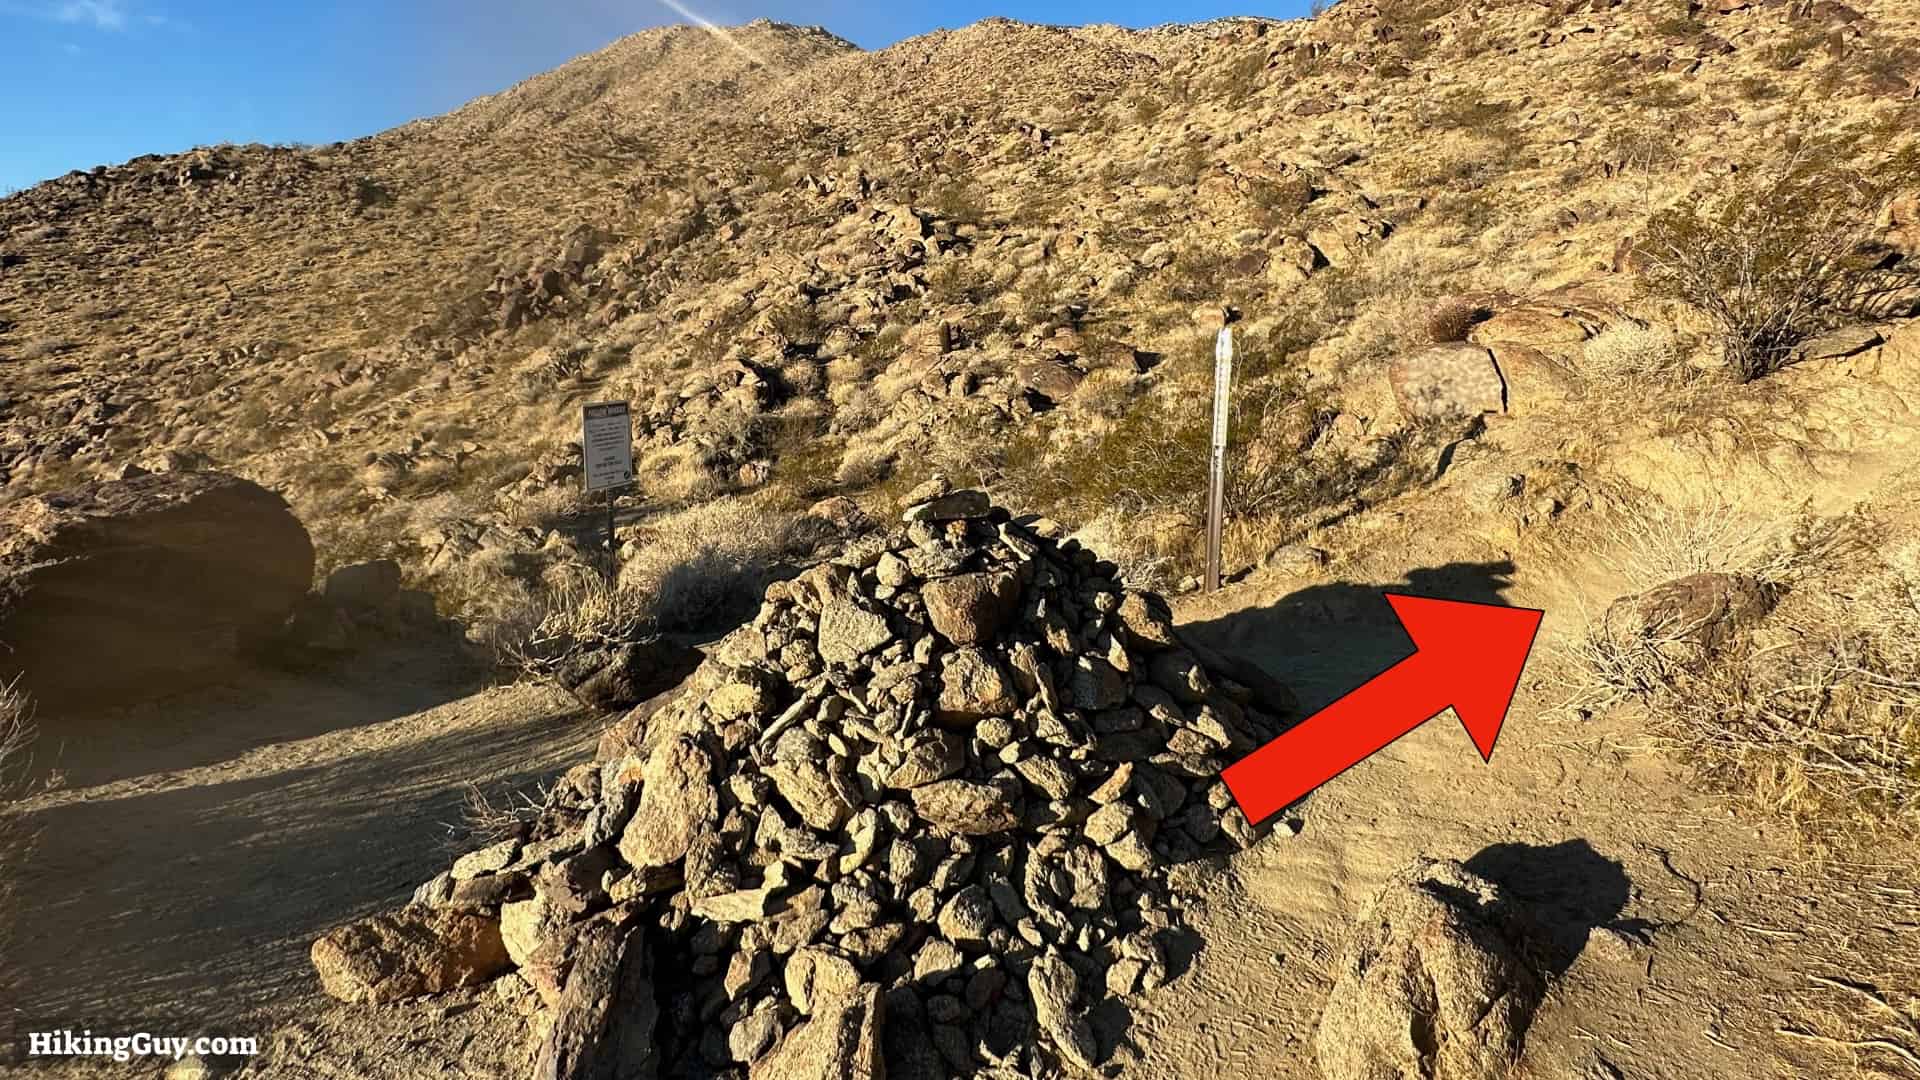
Branches and rocks block off a trail shortcut. - Similarly, some sections of the Skyline Trail are marked by a line of stones.
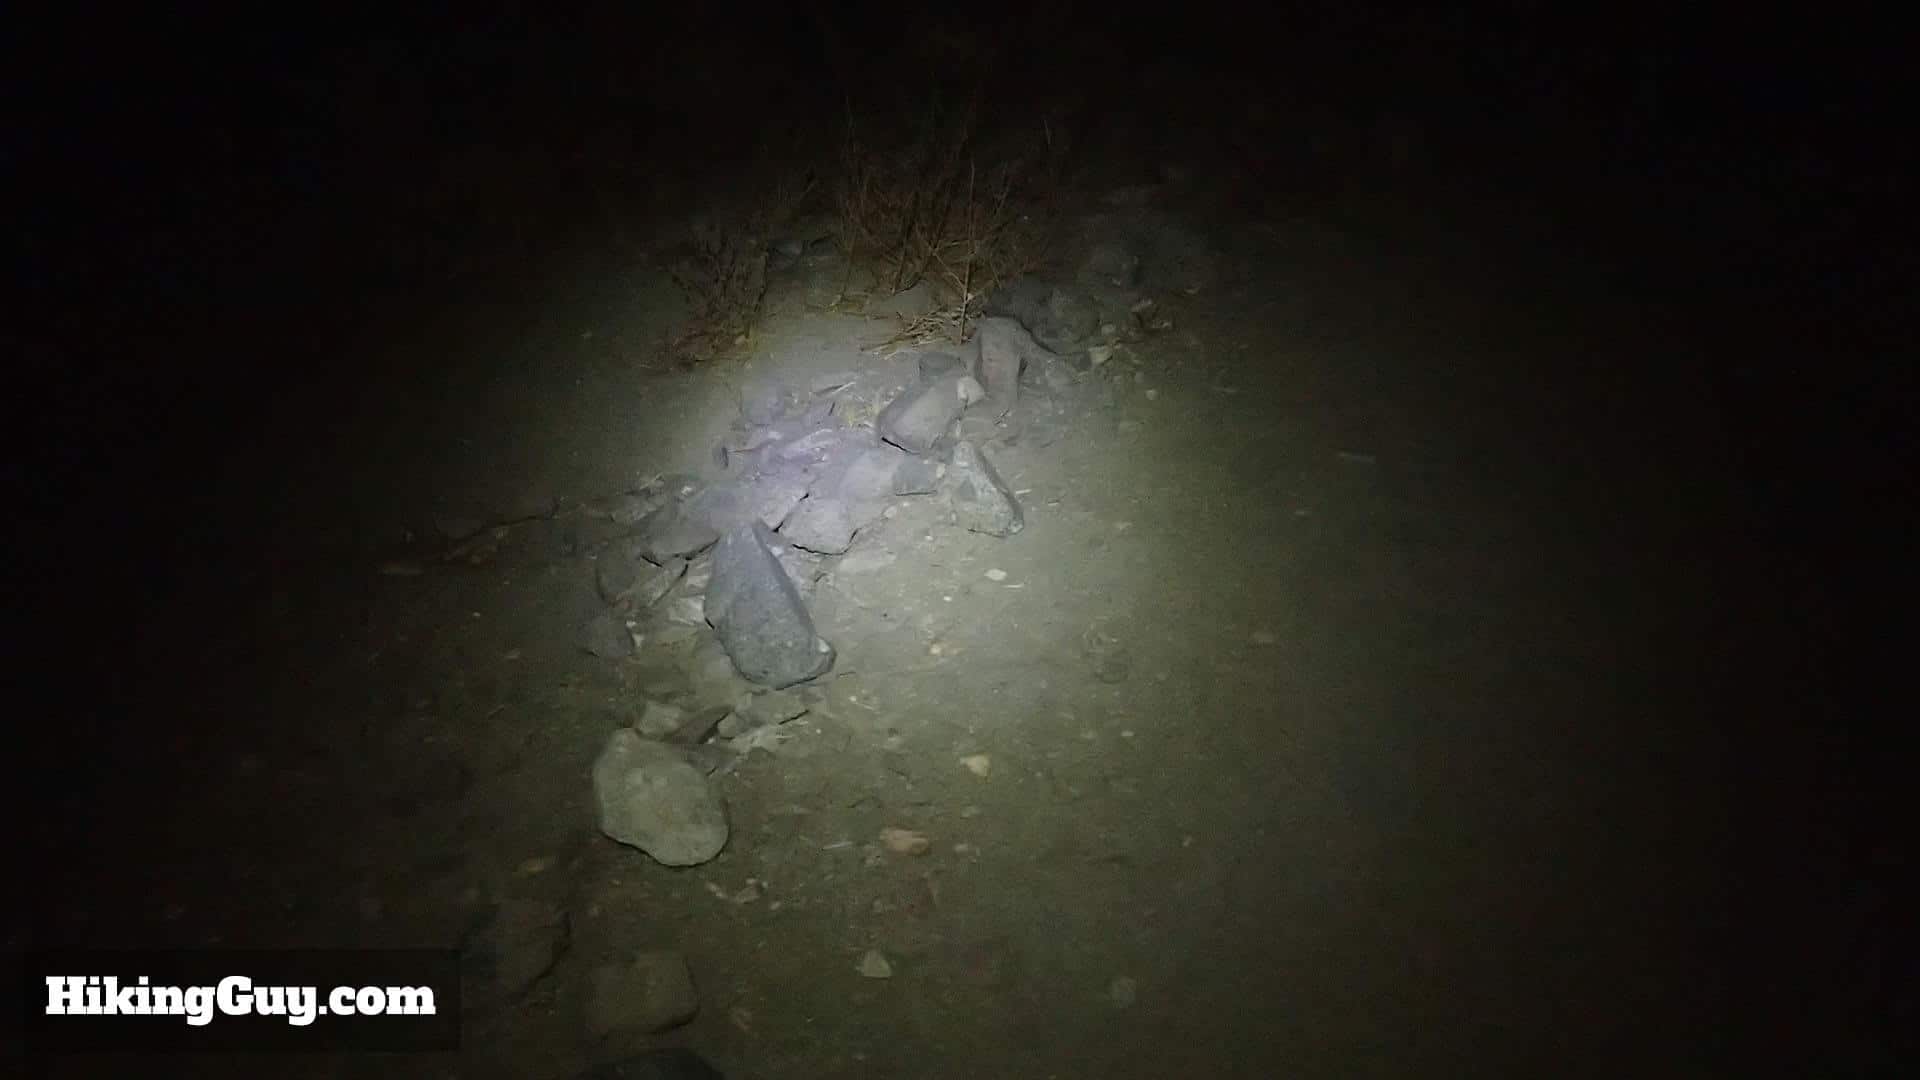
This line of stones helps, especially at night with a headlamp. - Use a GPS to check your position. It helps to have a GPS watch with the track loaded, but any device will do.
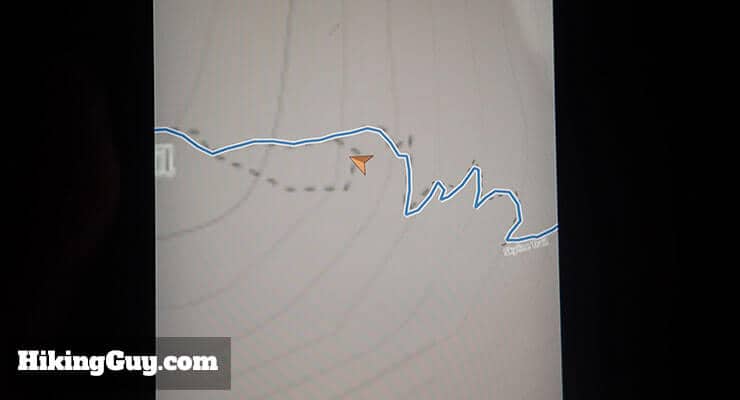
Here I am checking my GPS against a pre-loaded GPX file. It looks like I missed the split that I wanted to take. - If you have time in the evening before your hike, I'd recommend hiking the first mile to the picnic tables and back with sunlight to familiarize yourself with the trail. It will make the beginning of the hike in the early morning less intimidating.
Cactus to Clouds Hike Directions


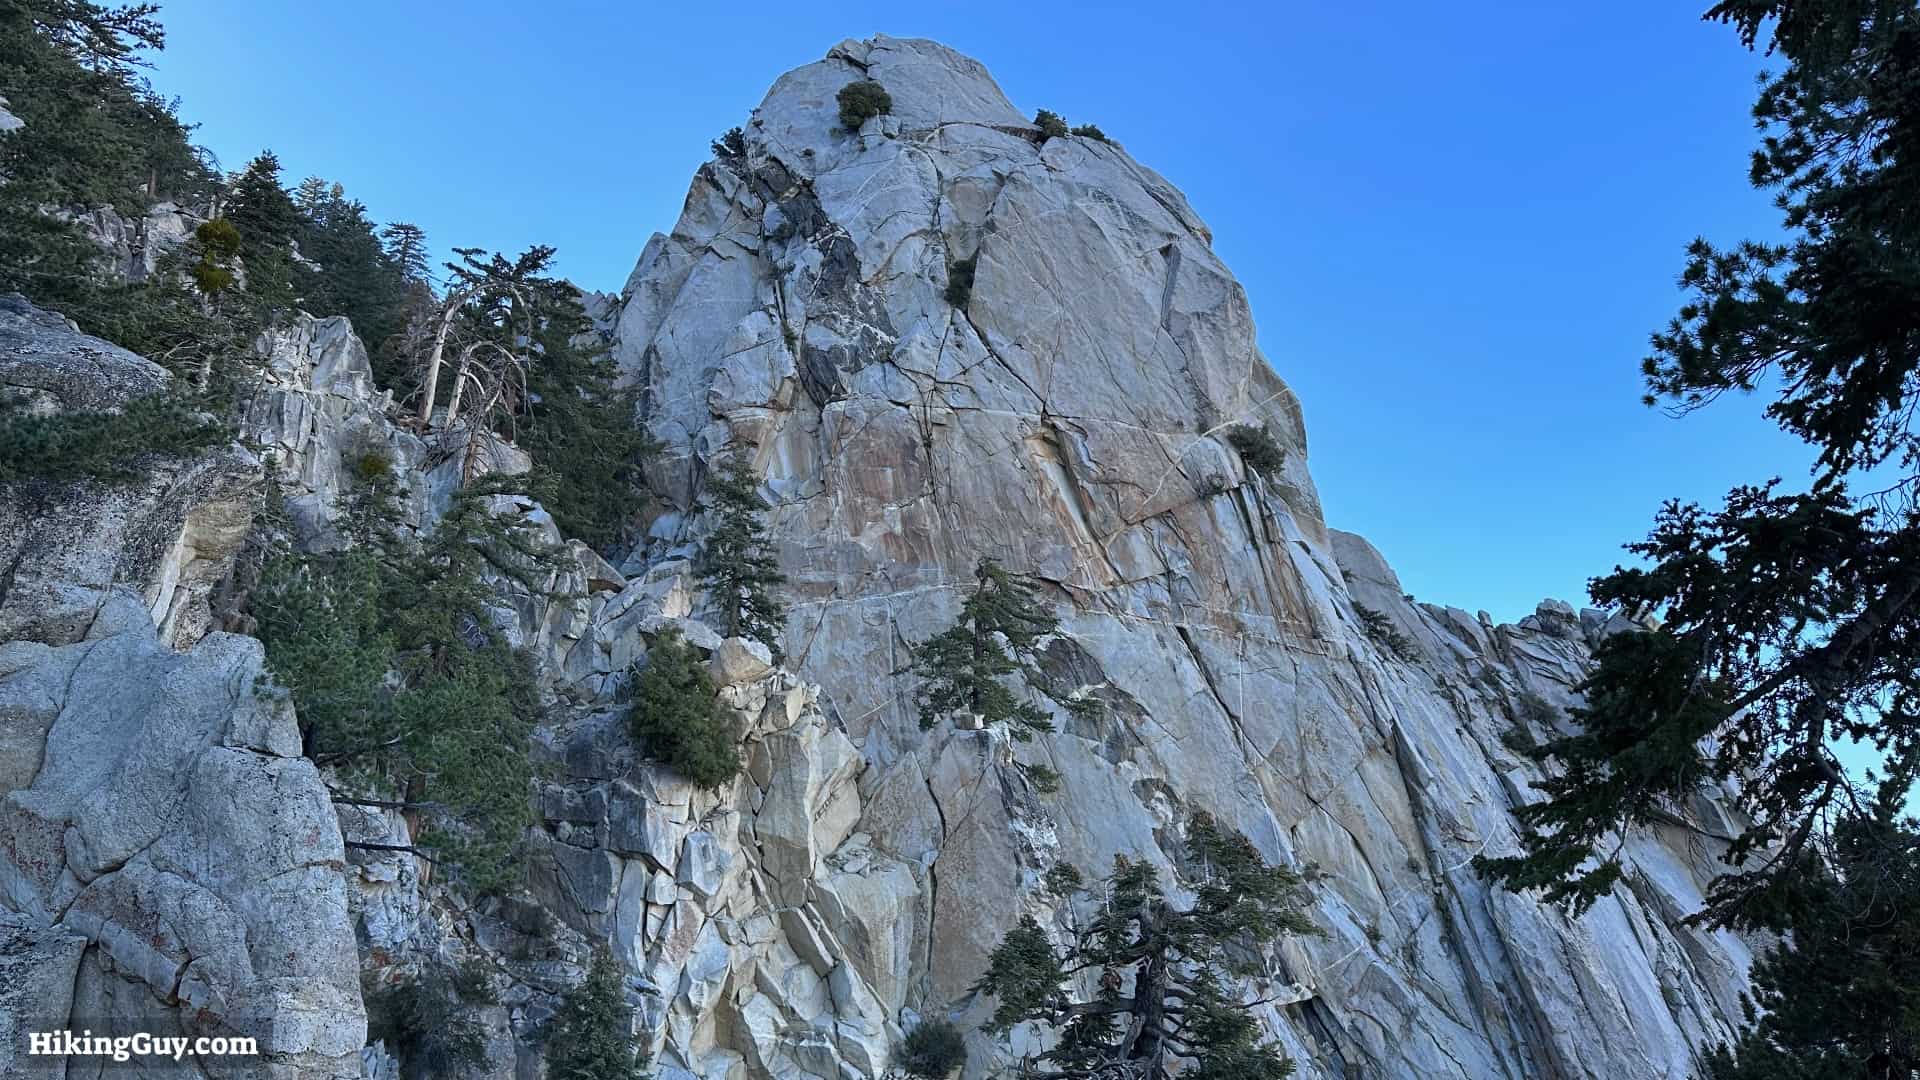
Owen Earl Coffman, who the crag is named after, was an early Palm Springs resident instrumental in the town's development. He was co-founder of the tram. He also managed the Ahwahnee Hotel in Yosemite. The guy got around.
VW Grubbs was a local resident instrumental in ensuring this area was developed for recreation, including getting the tram built (1963).
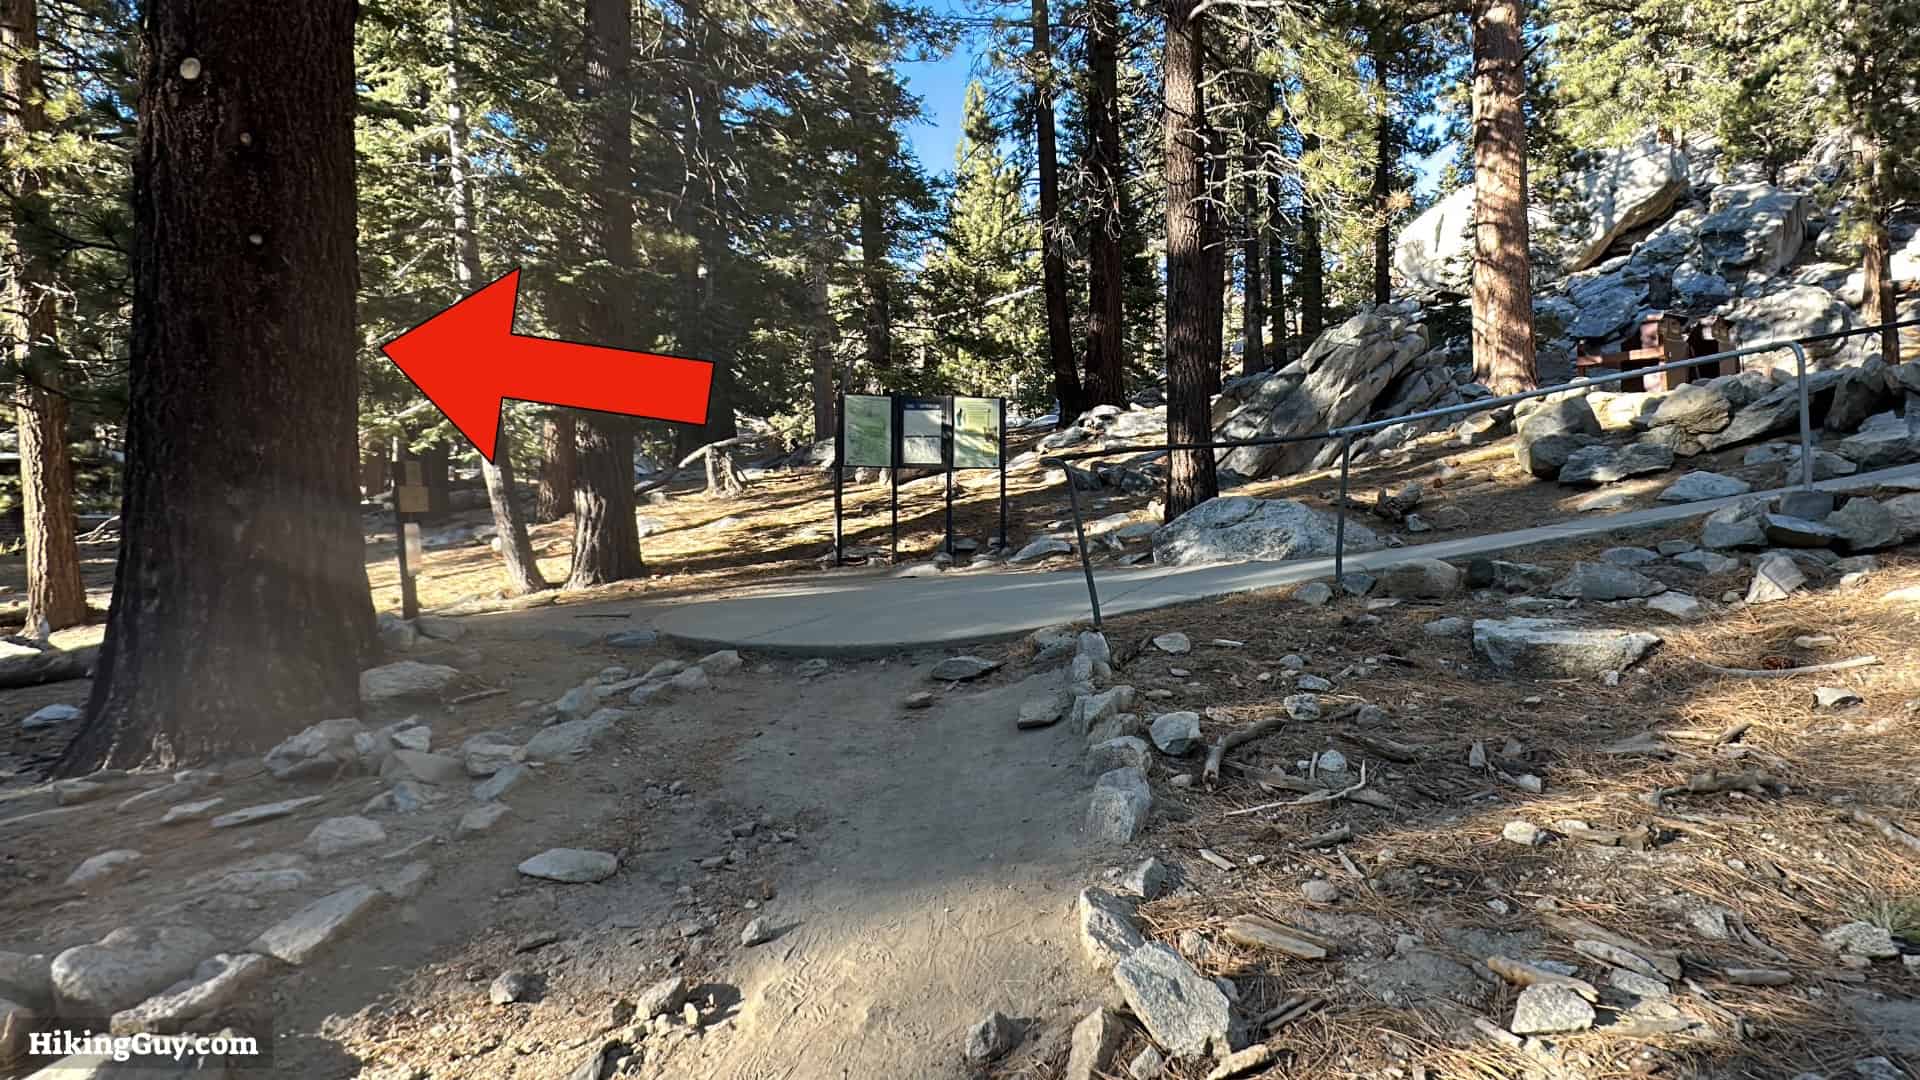
When you return from the summit, you'll climb the paved path to the right to finish the hike at the tram station.
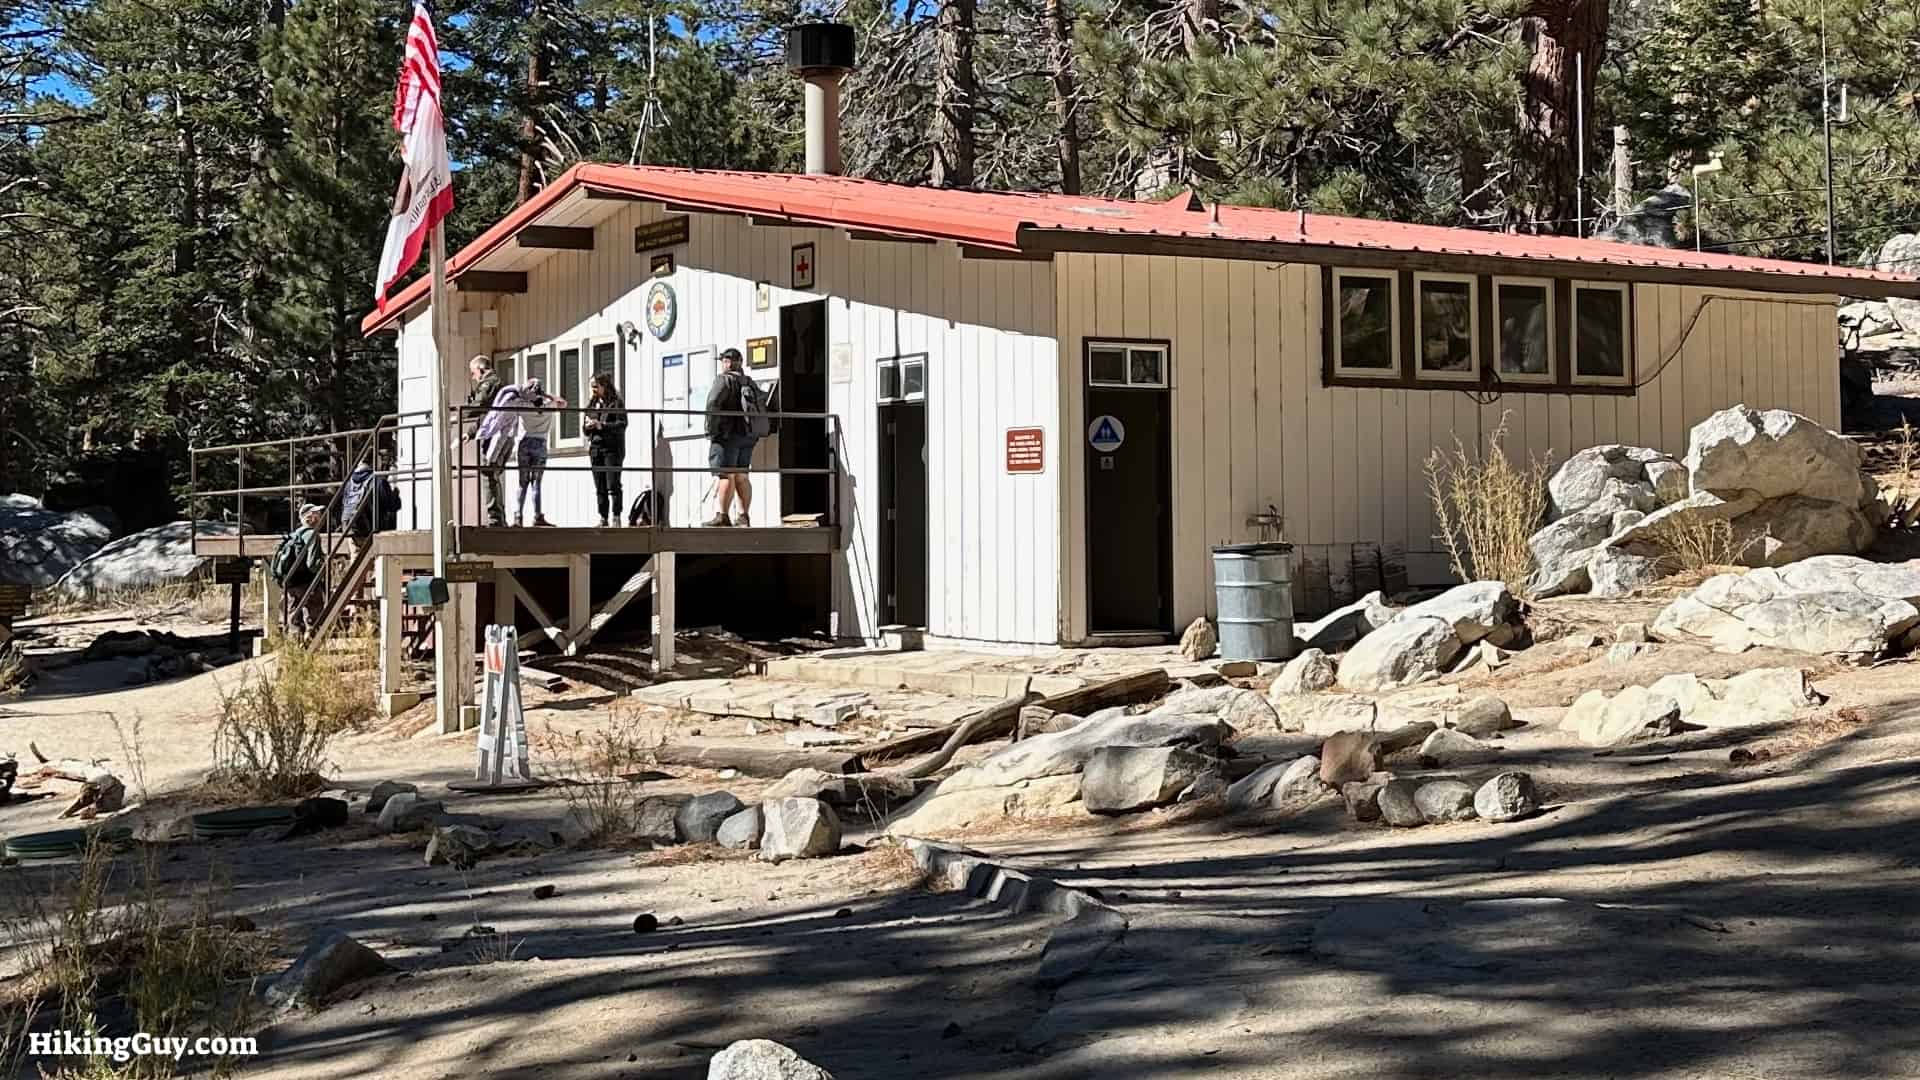
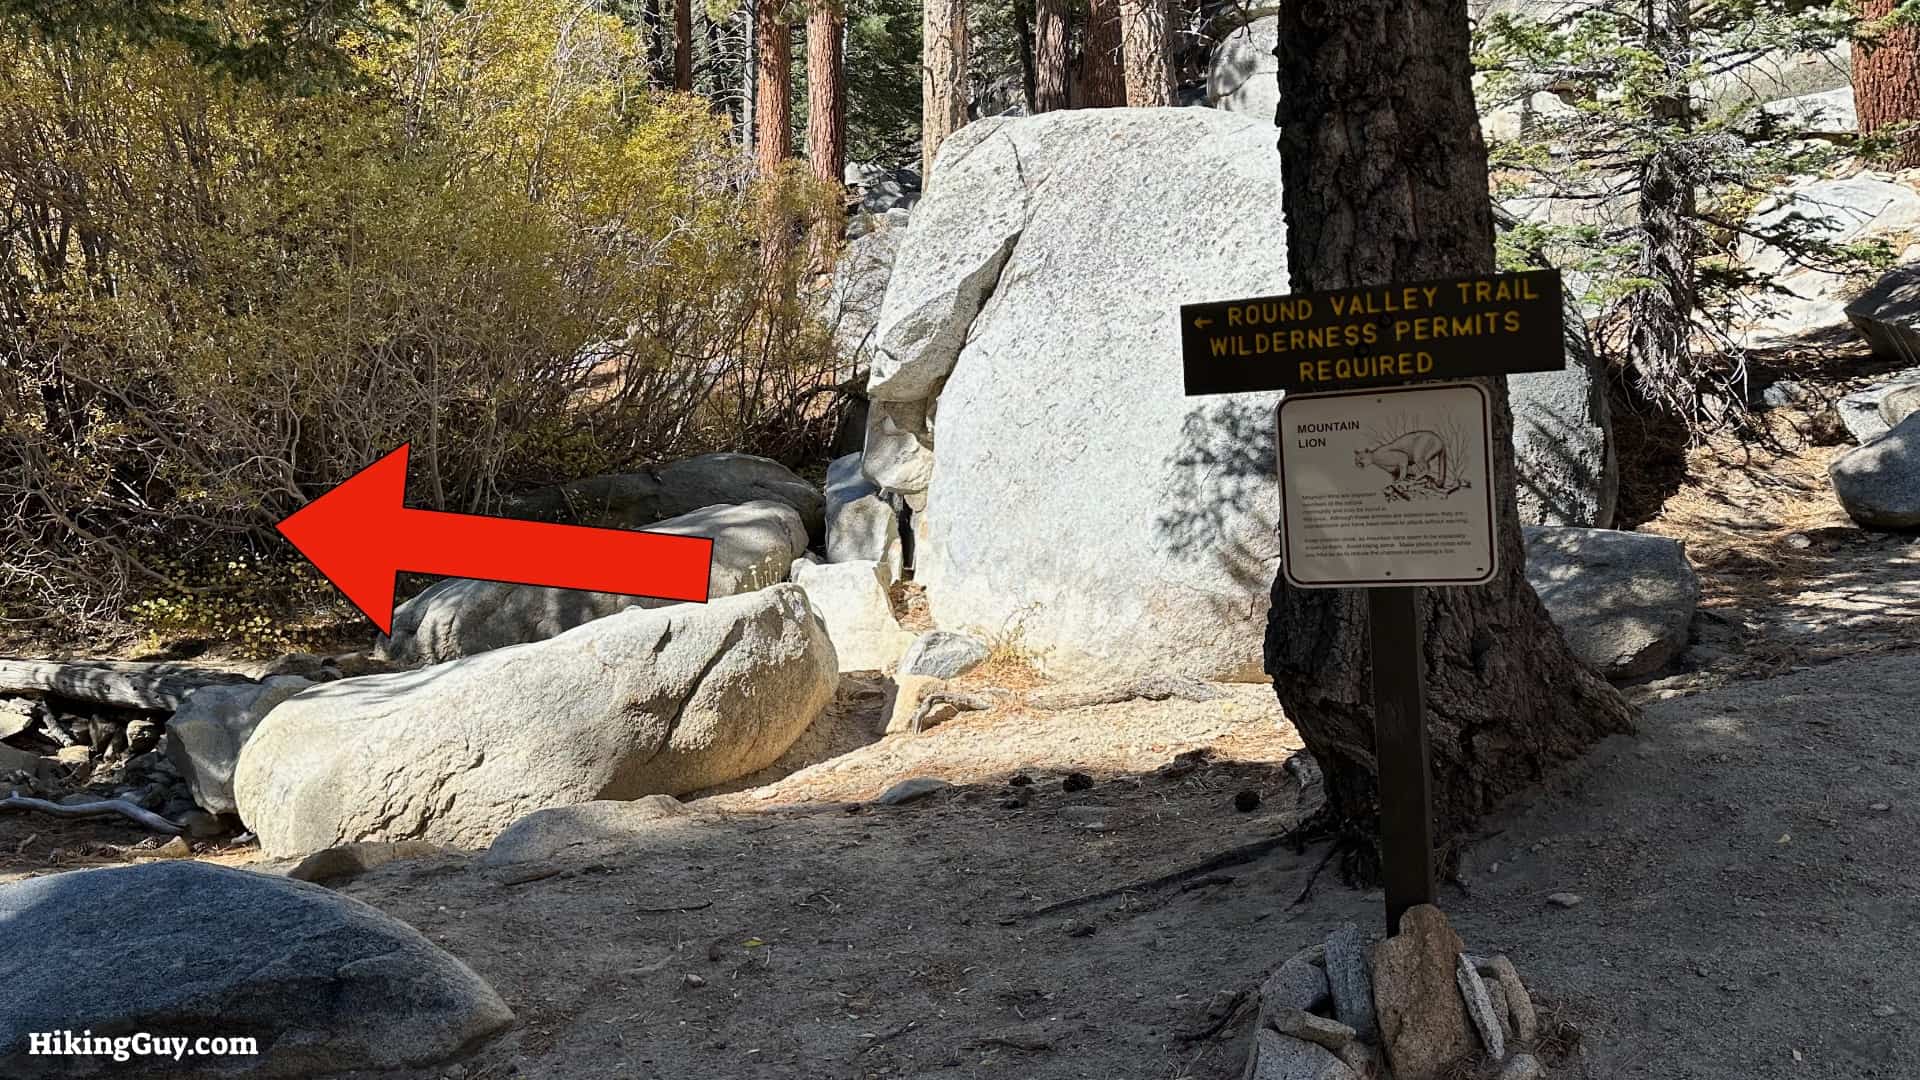
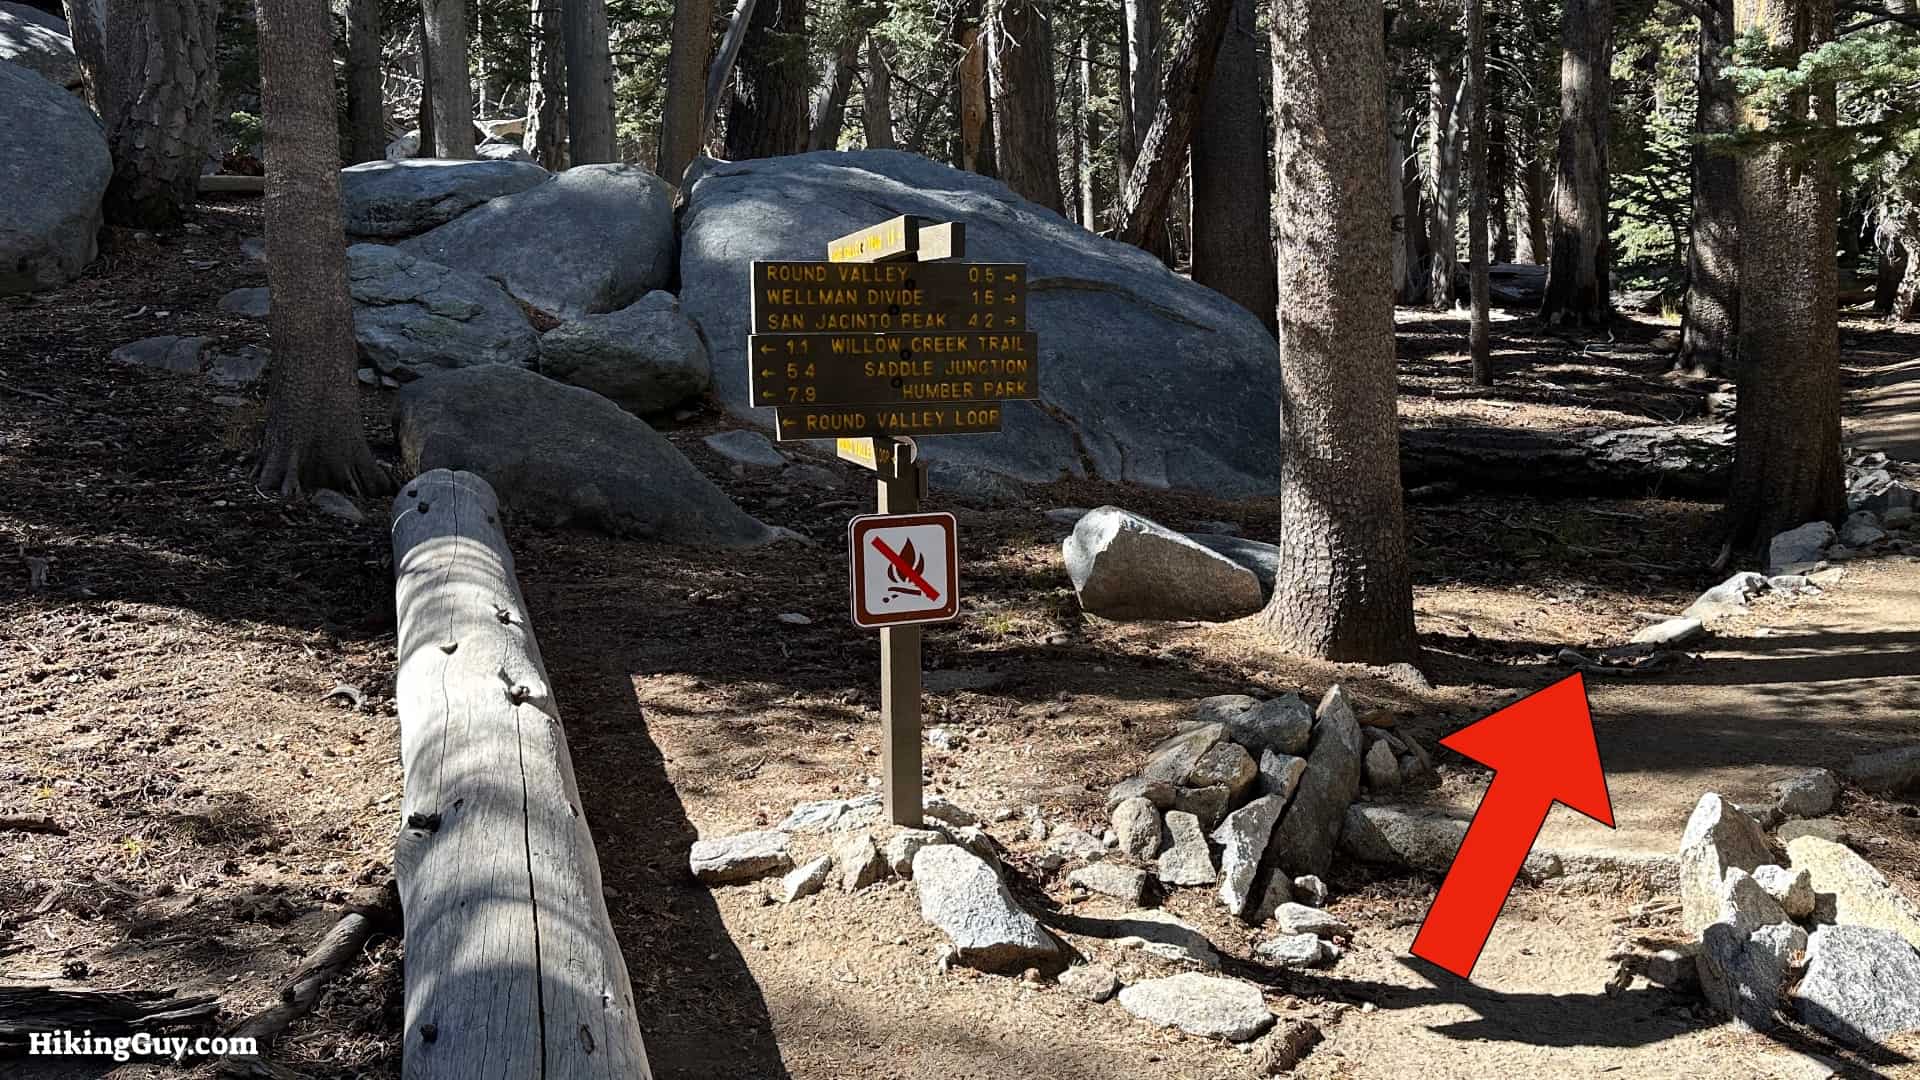
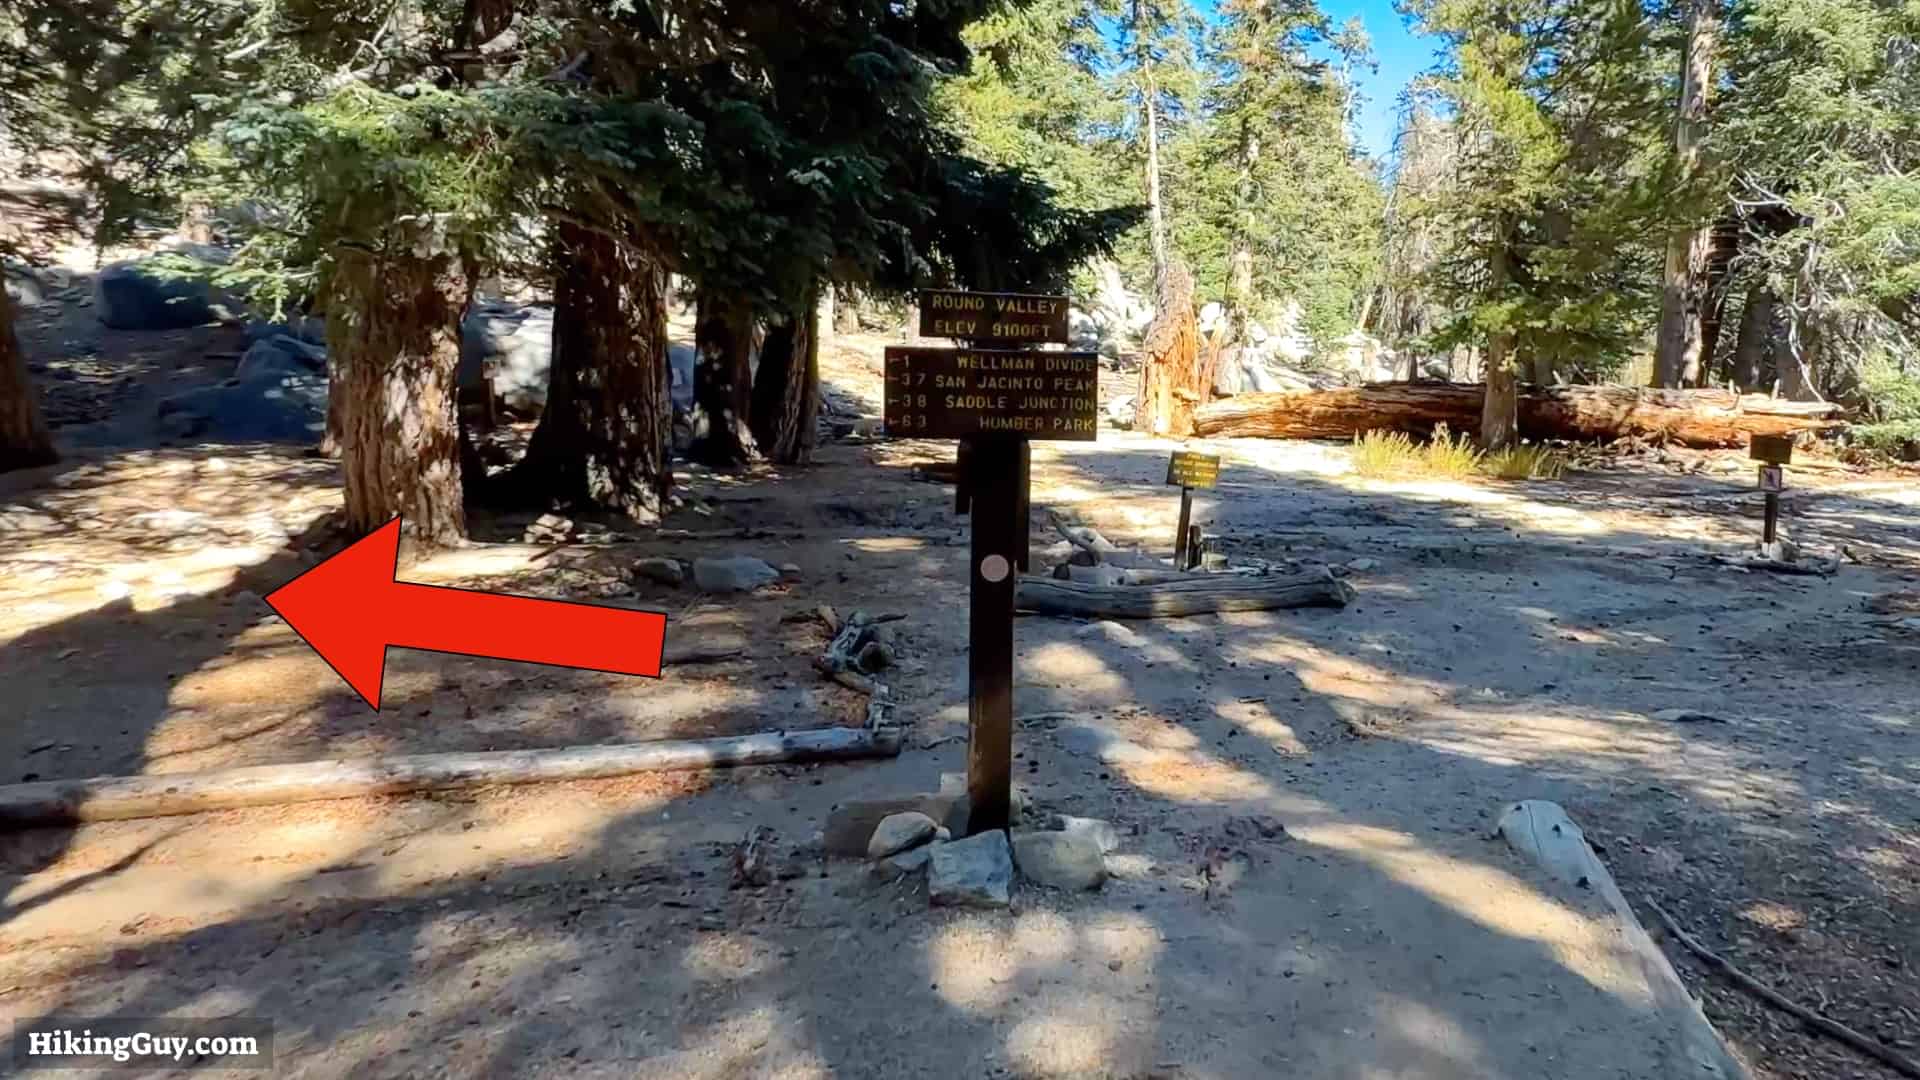
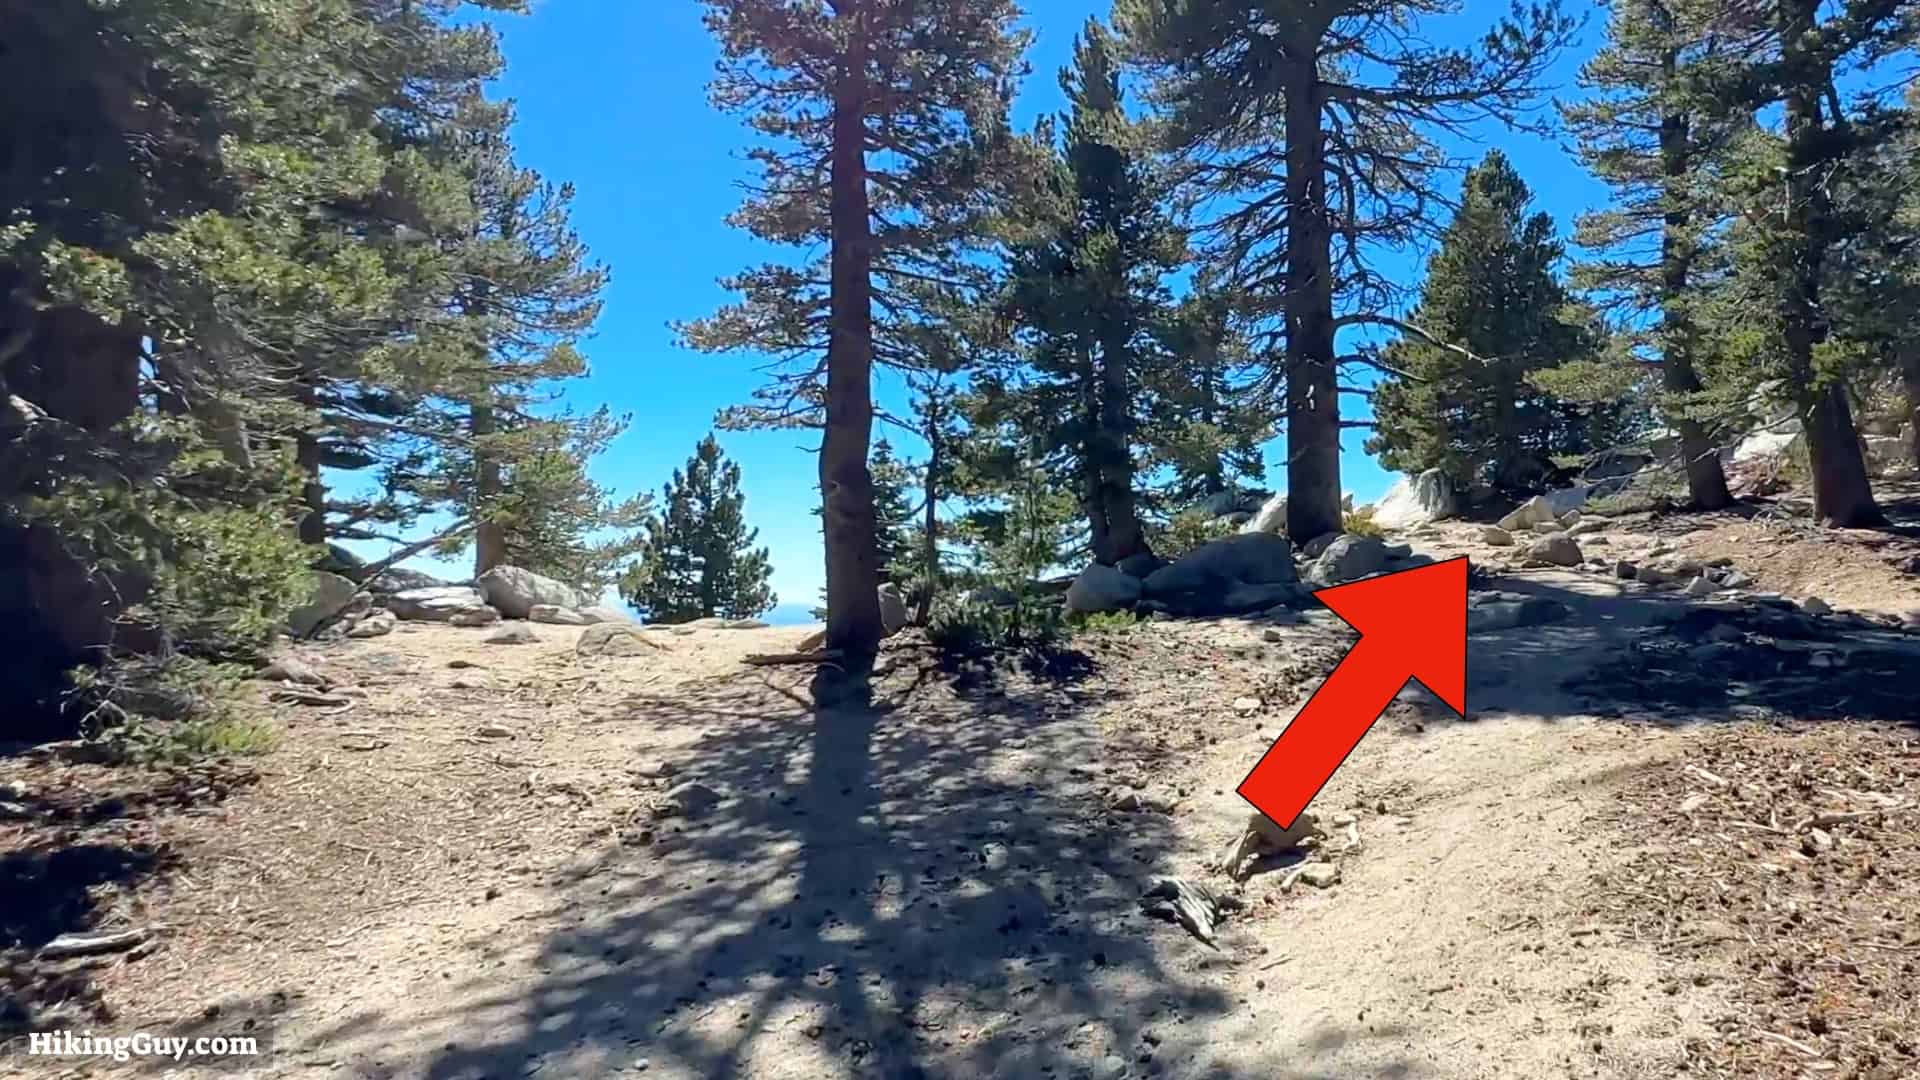
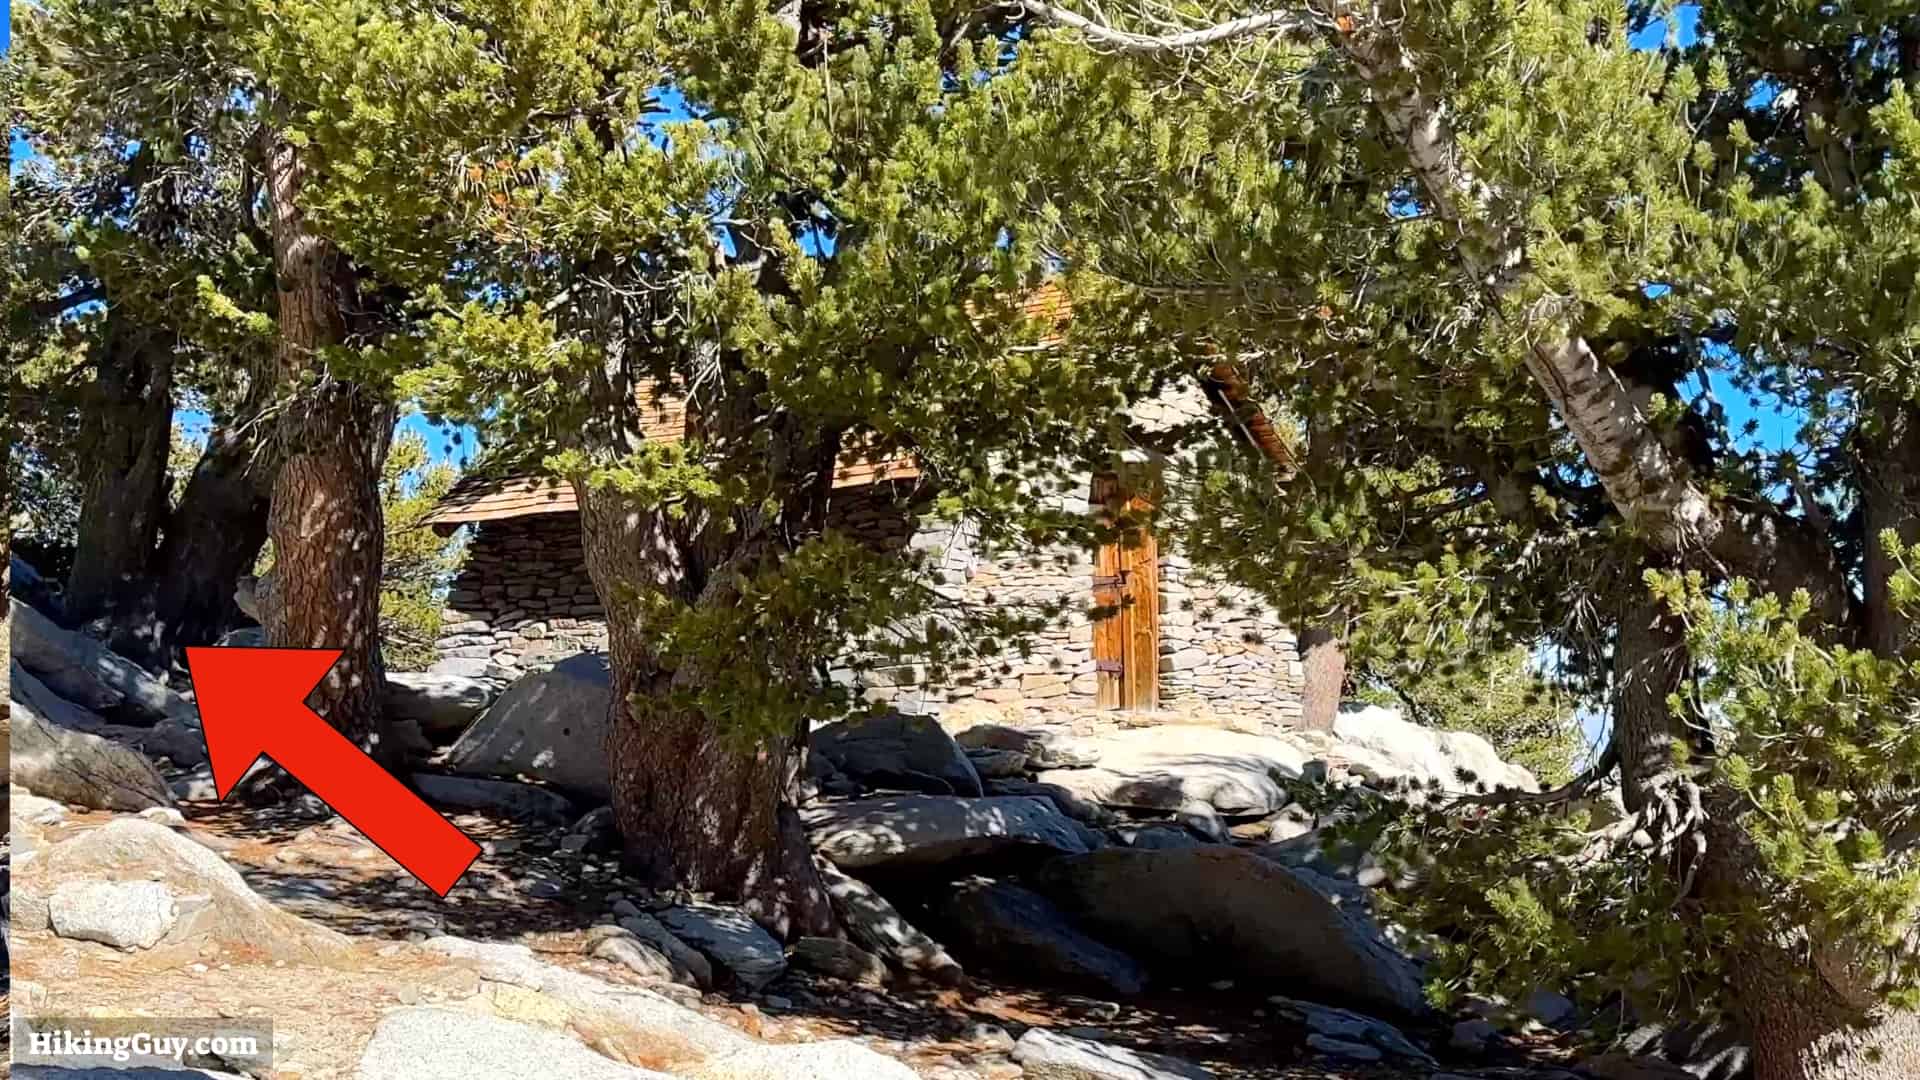
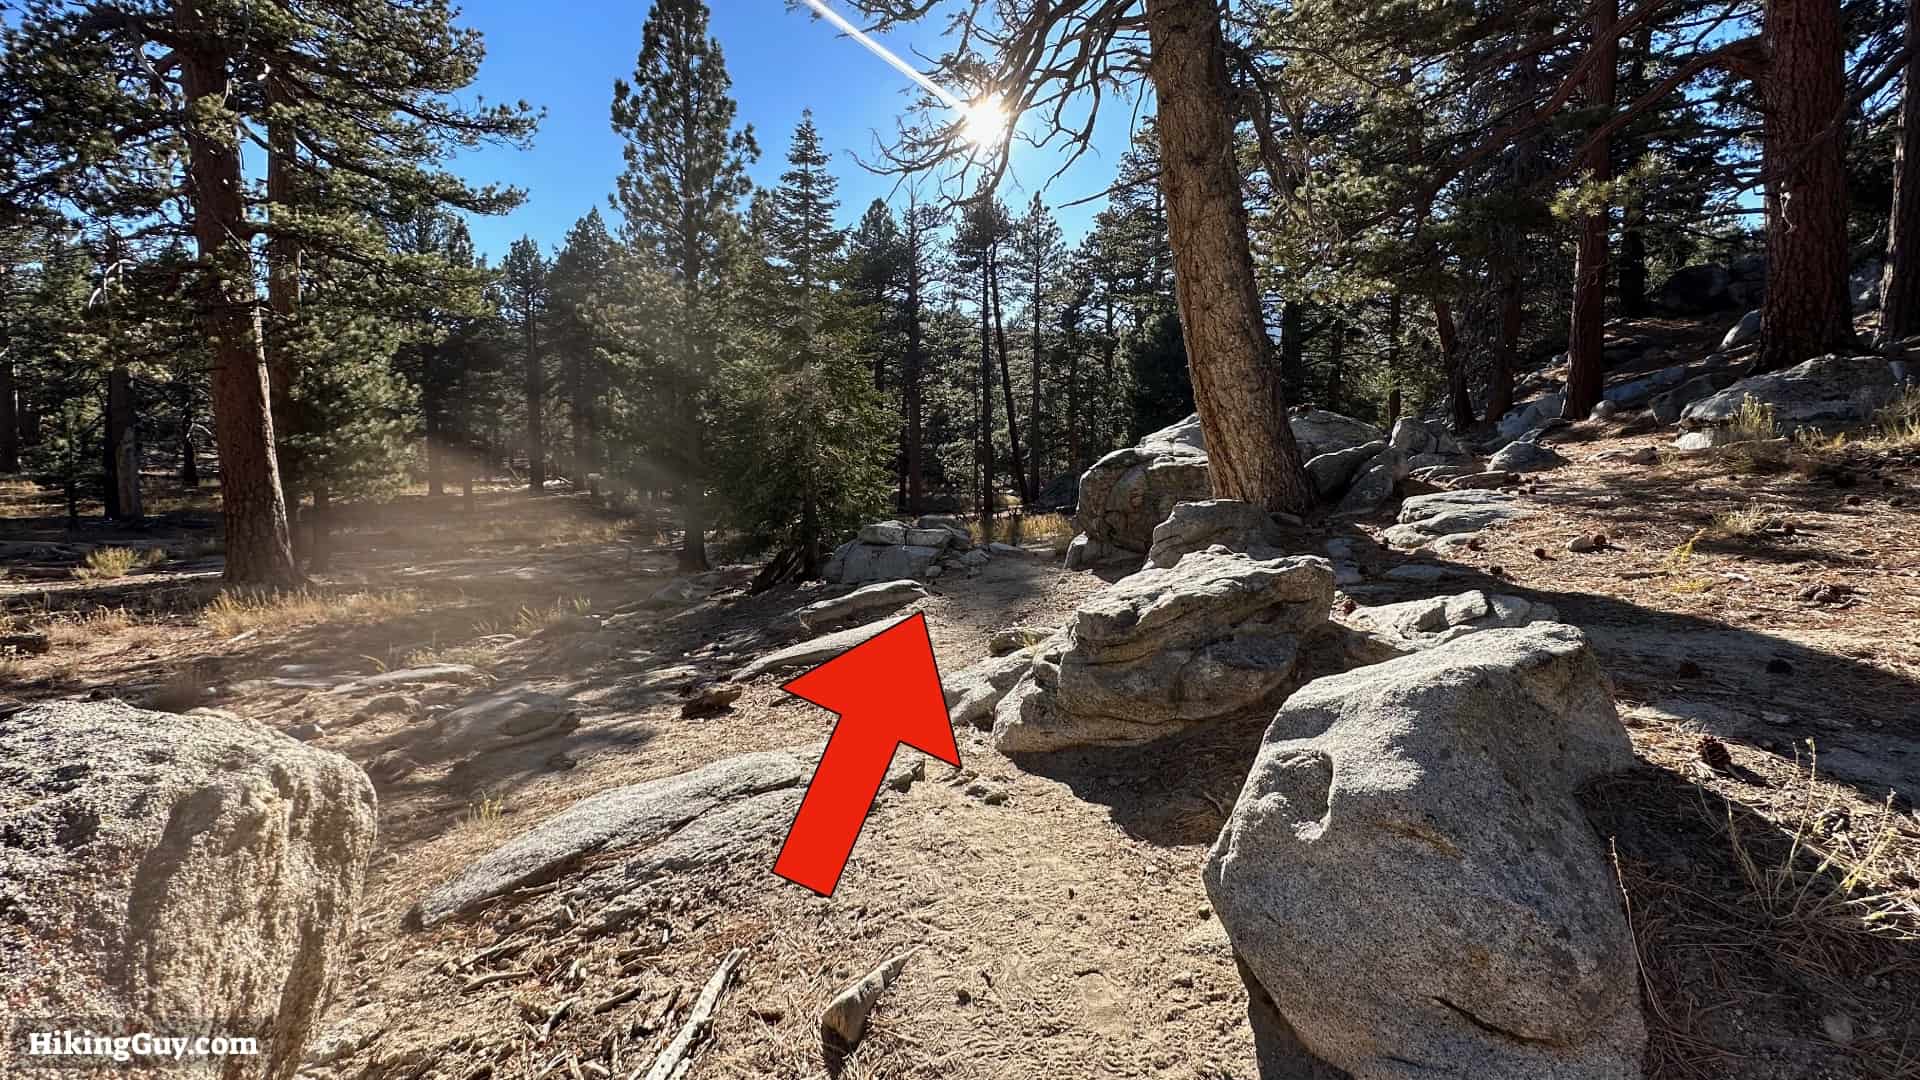
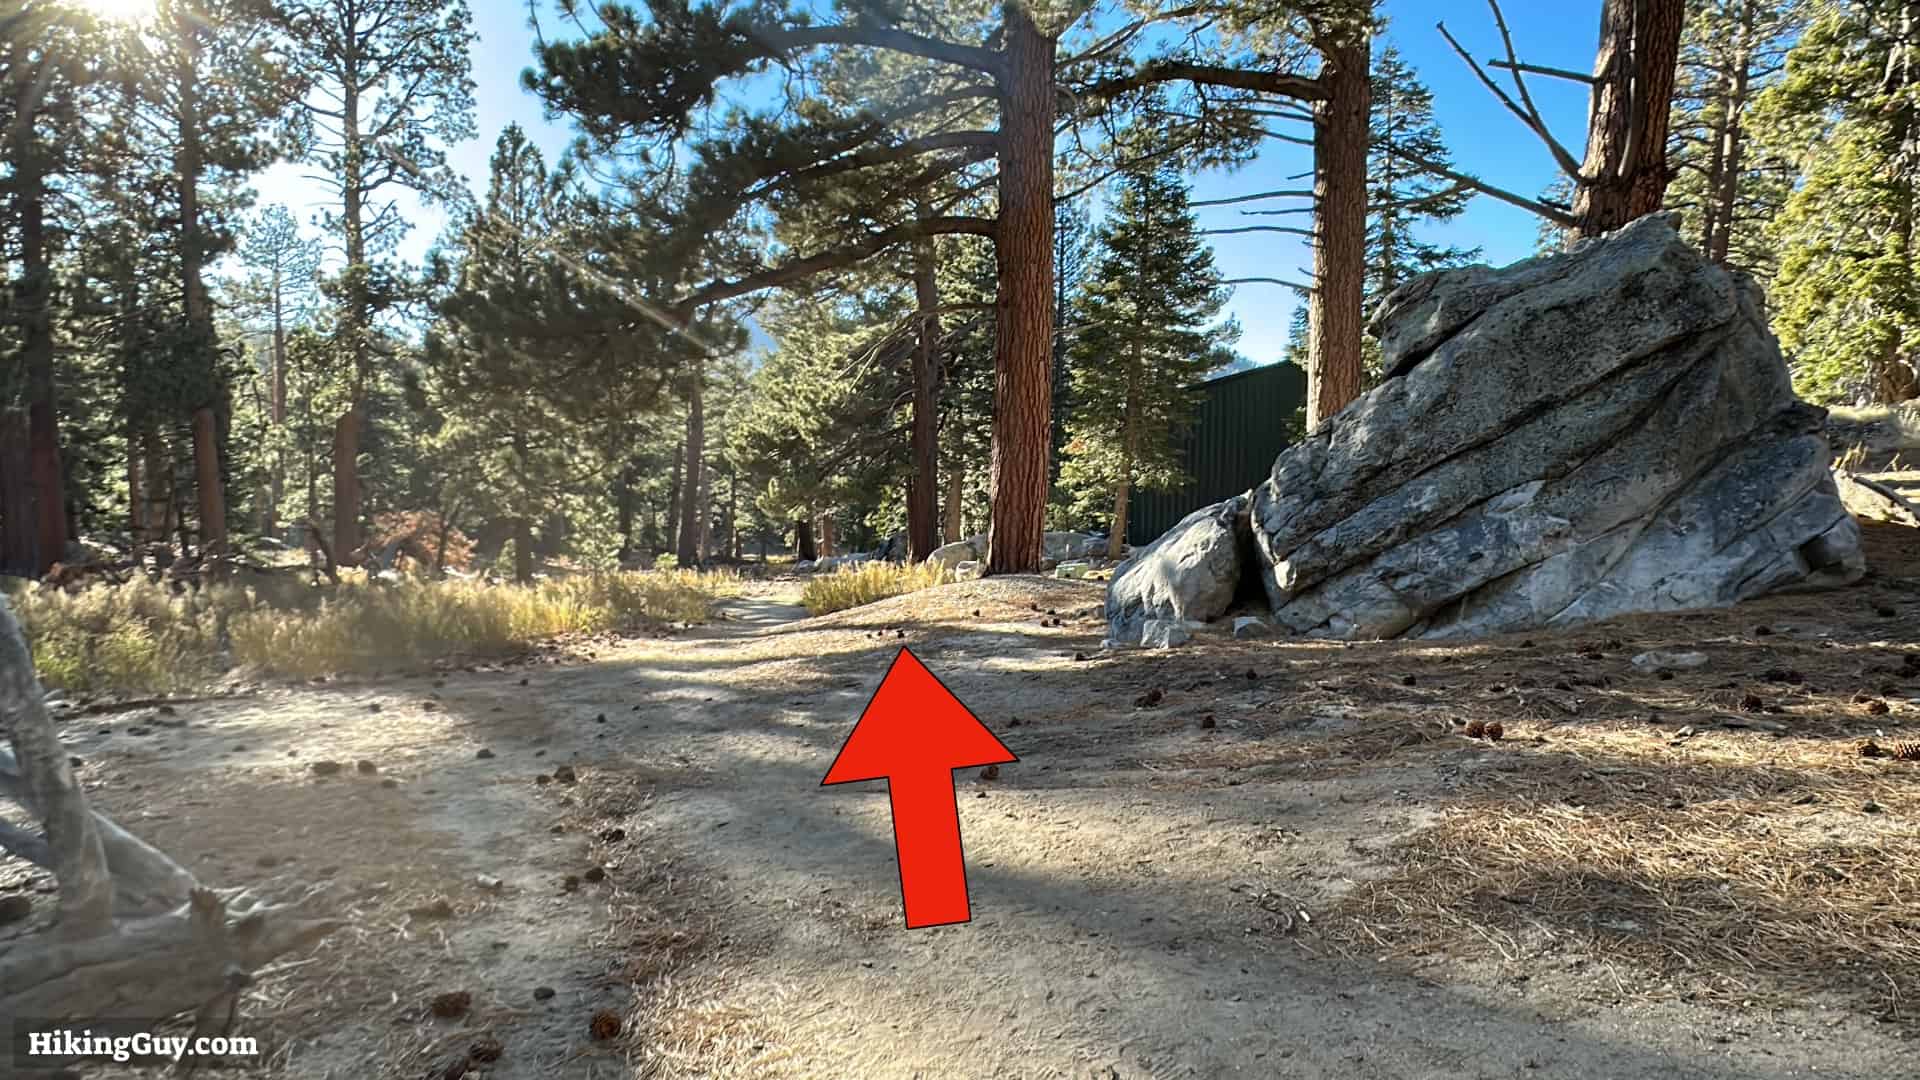
From here, just hike back down the way you came, taking the paved path just past the ranger station.
Wait, how high is San Jacinto? Well, there's lots of popular media that says 10834 feet. The last USGS map I could find (from 1996) says 10804 feet. The USGS map from 1955 lists 18301 feet. The Peakbagger.com website shows 10834 feet based on NAVD88. So we're going with that.
Originally published December 14, 2022