The 41.5 mile Timberline Trail, which circles Oregon's highest point, Mt Hood, dropping in and out of glacier-carved canyons, is a classic that should be on everyone's bucket list. There's a lot to love about the Timberline Trail: a well-worn path above and below the timberline (the altitude where trees stop growing), epic views of Mt Hood and the other peaks of the Cascades, glaciers, waterfalls, volcanic rock, alpine meadows, wildflowers, and rich history (it's also a National Historic Trail). Numerous tent sites along the trail and an easy permit system make tackling the Timberline in 2-4 days straightforward. In this guide I'll explain everything you need to know to plan your trip, and then do the hike.
In this Guide:
Itineraries for the Timberline Trail & Planning Your Trip
What to Expect On the Trail
Video and Turn-by-Turn Directions for the Timberline Trail
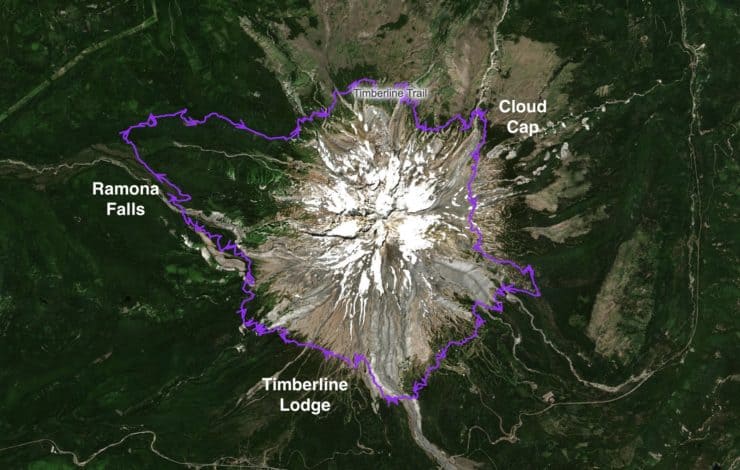
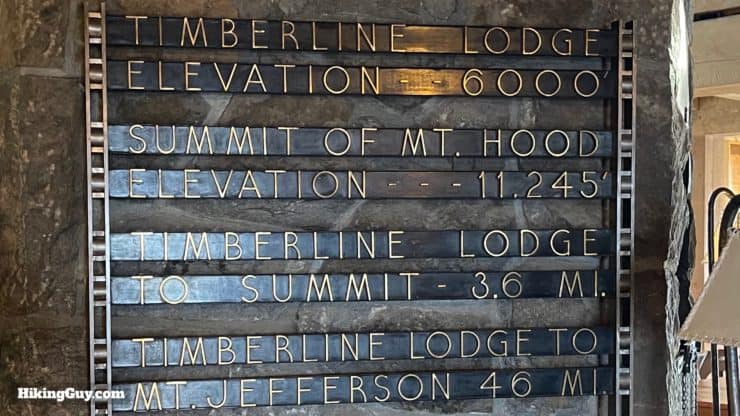
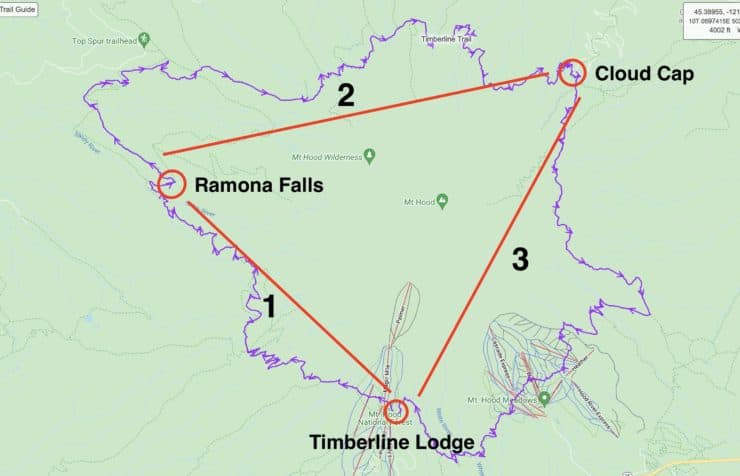
Here's a high-level overview of the Timberline Trail, 41.5 miles around Mt Hood (11,250 feet). Most first-timers take the trail on in a clockwise direction, taking 3 or 4 days to complete the loop. There are three major landmarks along the way: Timberline Lodge, Ramona Falls, and Cloud Cap. Most people start and end at the Timberline Lodge, although there are other options that I'll talk about below.
Although the Timberline Trail is always "open," it's generally attempted from mid-July to September, when the snow is gone and when the rivers are not raging. If this is your first time, do it in this date range. The sweet spot is the end of July to the end of August, when the wildflowers are in bloom and most of the snow is gone.
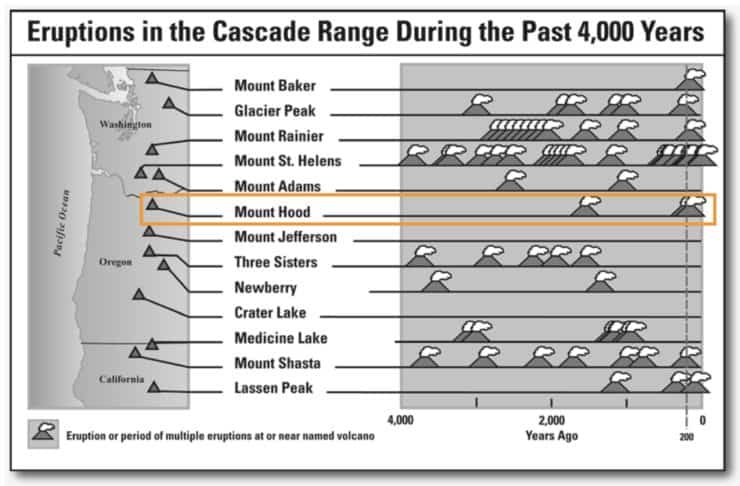
Mt Hood sits in the middle of the Cascade Range, a string of volcanos (and part of the Pacific Ocean's Ring of Fire) that are relatively young in geologic terms (younger than 500,000 years old). The Cascades are still active volcanos. Mt St Helens had a major eruption in 1980, and the last major eruption of Mt Hood was in 1781. The highest peak in the range is Mt Rainer at 14,411 feet, and is usually visible from downtown Seattle. Most of the Cascades high peaks are covered with glaciers all year and require mountaineering skills to summit. Chart USGS
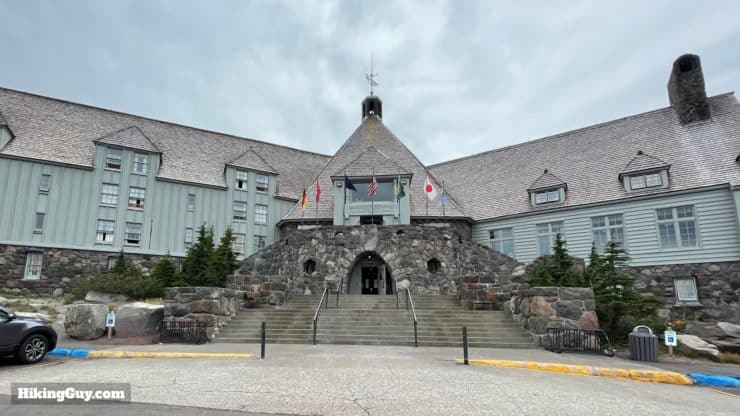
The centerpiece of the Timberline Trail is the Timberline Lodge, built from 1936-38 by the New Deal created Works Progress Administration. It's the informal gateway to Mt Hood, allowing access to the Timberline Trail, the PCT, and the USA's only all-year ski slopes. Today you can stay at the lodge, have a meal here, or just explore the interior, and I highly recommend a visit (more later). Photo UC Berkeley
Year
Event
Meanwhile...
500k BC
Volcanic Activity Starts at Mt Hood
Homo Erectus Evolves - Mastodons Roam the PNW
30k BC
Mt Hood's Cone Forms
Humans Start Crossing the Bering Straight From Asia to the Americas
10k BC
Humans Start Settling Around Mt Hood And Create Trails
End of the Ice Age
1781 AD
Mt Hood's Last Major Eruptive Period
Colonists Start Turning the Tide in the American Revolutionary War
1850s-1920s
An Informal Trail System Forms In the Area Around Mt Hood
Humans Start Looking For Escapes from Industrialization
The Civilian Conservation Corps Build the Timberline Trail
The USA Recovers From the Great Depression
1960s-70s
The Trail is Rerouted in Spots and Improved
The Volatile Landscape Around Mt Hood Forces Adaptations
2000+
Minor Adaptations and Reroutes
The Trail Regains Popularity From Social Media
William Langille is allegedly the first gringo to hike around Mt Hood in the late 1890s. He also built the Cloud Cap Inn, shared a cabin with The Call of the Wild author Jack London in the Klondike, and was instrumental in the early days of the Forest Service.
How to Hike the Timberline Trail
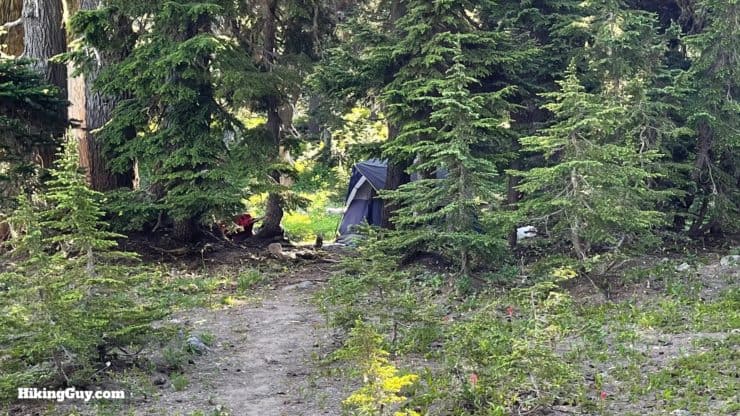
Most people do the Timberline Trail as a backpacking trip. There are plenty of secluded spots just off the trail to pitch a tent.
Okay, if you want to tackle the Timberline Trail, you first have to figure out how you will do it. I'm going to give my suggestions based on the clockwise routing that is most common. There are over a dozen access points to reach the Timberline Trail, tons of tent sites, and lots of ways to slice and dice this. These suggestions are great for first-timers.
All routes described go clockwise.
3 days / 2 nights Camping (for those in good hiking shape)
Start at Timberline Lodge
Hike 11 miles and camp in a creekside spot after Ramona Falls
Hike 16.5 miles and camp at Cloud Cap
Hike 14.5 miles and finish at Timberline Lodge
4 days / 3 nights Camping (for all levels)
Start at Timberline Lodge
Hike 11 miles and camp in a creekside spot after Ramona Falls
Hike 12 miles and camp at Elk Cove
Hike 10 miles and camp just past Lamberson Butte (or continue 2 miles down to Newton Creek for water)
Hike 9 miles back to Timberline Lodge
2 days / 1 night Slack-Packing (for the very fit)
This is a great option for those low on time who don't want to carry a full backpack. Just bring the essentials and a change of clothes.
Start at Top Spur Parking Lot
Hike 28 miles to Timberline Lodge
Hotel night at Timberline Lodge
Hike 14 miles back to Top Spur Parking Lot
2 days / 1 night Camping (for the very fit)
Start at Cloud Cap
Hike 22 miles and camp by Paradise Branch Overlooks
Hike 20 miles back to Cloud Cap
Can you hike the Timberline Trail in a day? Maybe not by hiking, but there are plenty of trail runners who do it in a day, usually taking between 8-12 hours.
Timberline Trail Permits
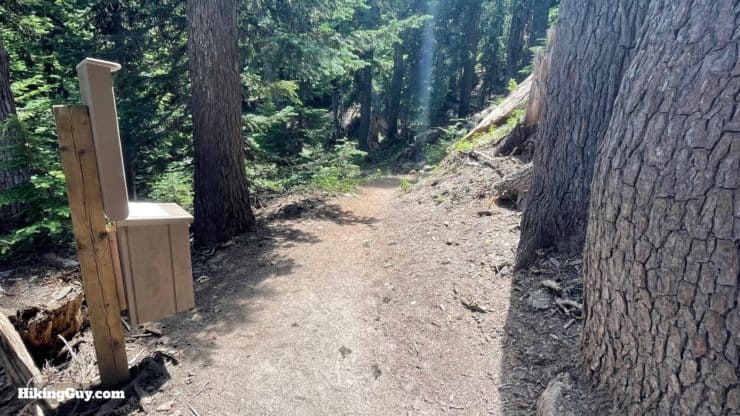
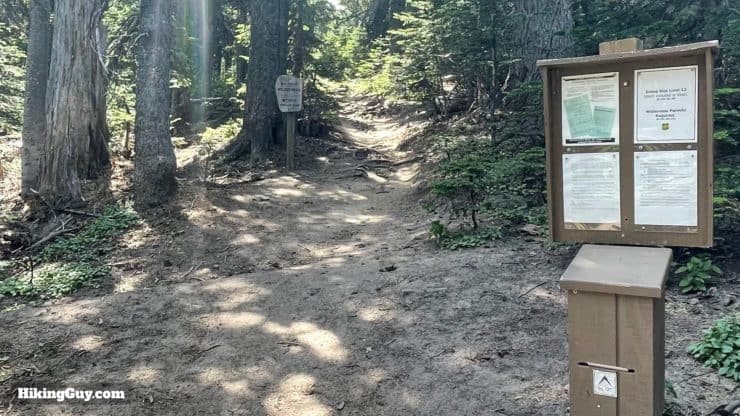
One of the great things about the Timberline Trail is that there is NOT a quota permit system. You need a permit, which you can get at the trailheads, but it's about awareness and following the rules within the Mt Hood Wilderness. And that's it. Just show up, sign your permit, understand what it says, and have fun.
Most Timberline Trail access points have a permit kiosk like this.Just open up the box, sign the permit, carry it with you, and you're good.
Where to Camp on the Timberline Trail
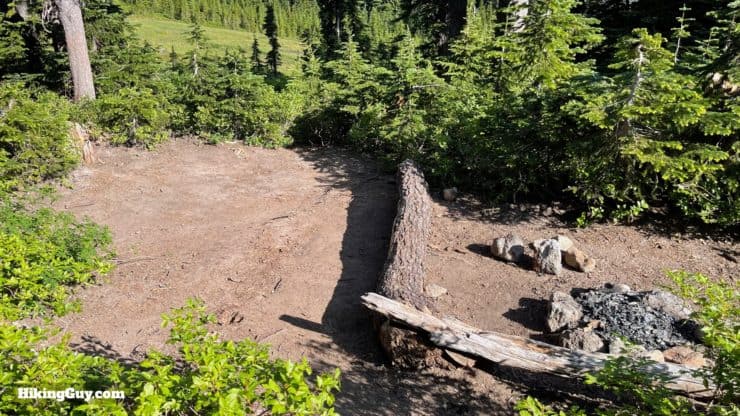
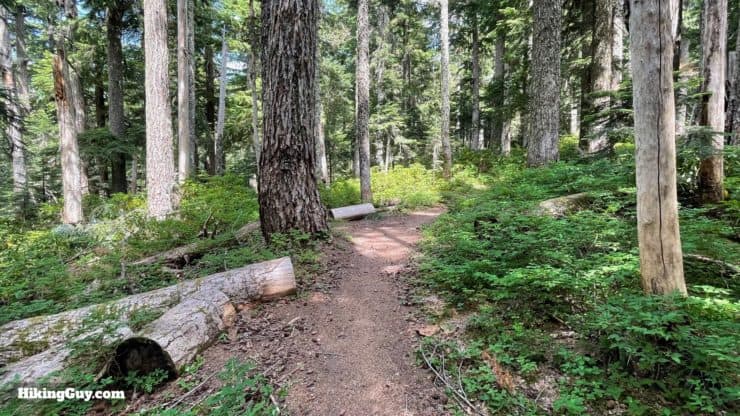
Here's a typical tent site on the Timberline Trail. Look for a flat area like this just off the trail. This one is on the larger side and also has a sitting log and fire pit. Many tent sites just have a flat spot to pitch a tent.
Another great aspect of the Timberline Trail is that there are (probably and unofficially) hundreds of pre-established tent sites where you can camp along the trail. Since it's in the Mt Hood Wilderness, there are no official campgrounds, no websites to book a spot on, and no facilities. Just find a nice spot that is not explicitly marked no camping (like some alpine meadows), pitch your tent, and enjoy. And please leave no trace by not creating your own new tent site, there are plenty out there already.
Look for hidden campsites just off the trail. Some maps also show markers for popular camping spots. You'd be hard-pressed to hike a mile and not see at least several tent sites. Either side of stream and river crossings are good bets to find spots close to water.
The larger / easier to find (and picturesque) areas to camp are (miles in clockwise direction):
11 miles - There are dispersed spots once past Ramona Falls along Ramona Creek, just off the trail.
19 miles - Eden Park (a mile detour off the trail) is like Elk Cove but more mellow.
22 miles - Elk Cove is probably the most popular spot.
28 miles - Cloud Cap has spots but you'll share with car campers (more below).
34 miles - Newton Creek has lots of spots over the creek to camp.
There are spots to camp above the tree line from Cloud Cap to Lamberson Butte, but they are exposed.
Aside from the last section I mentioned above the tree line, the rest of the trail is very hammock friendly if that's your bag.
Most campsites are close enough to some water source, but on the stretch between Cloud Cap and Newton Creek, you'll have a tougher time. You may need to melt snow.
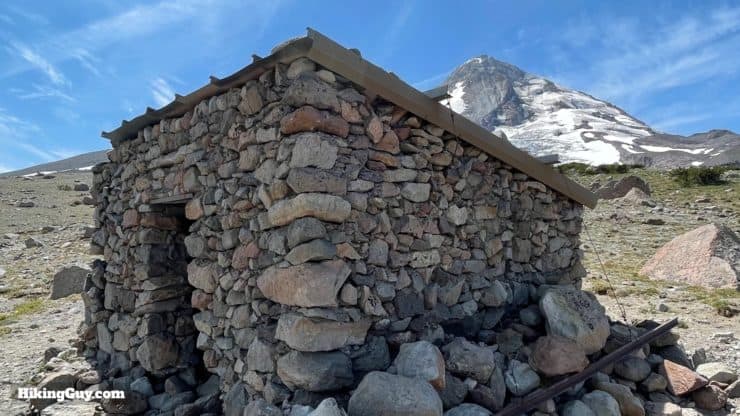
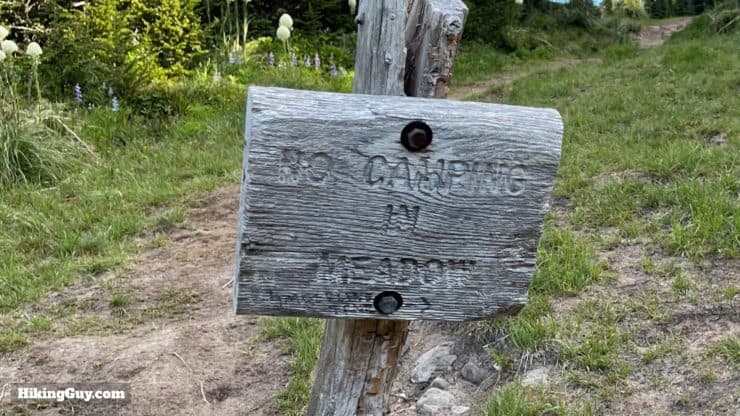
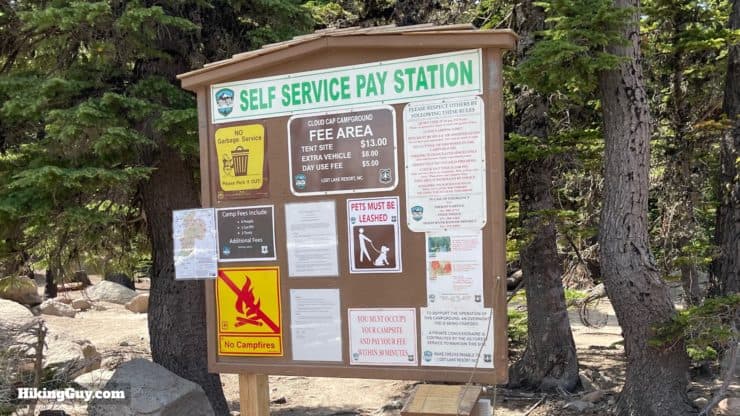
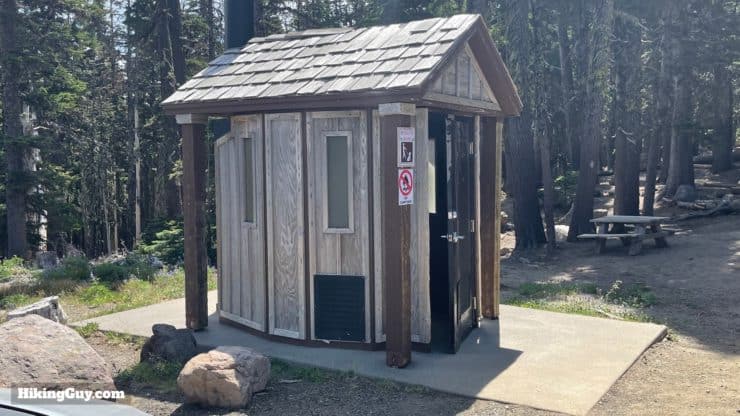
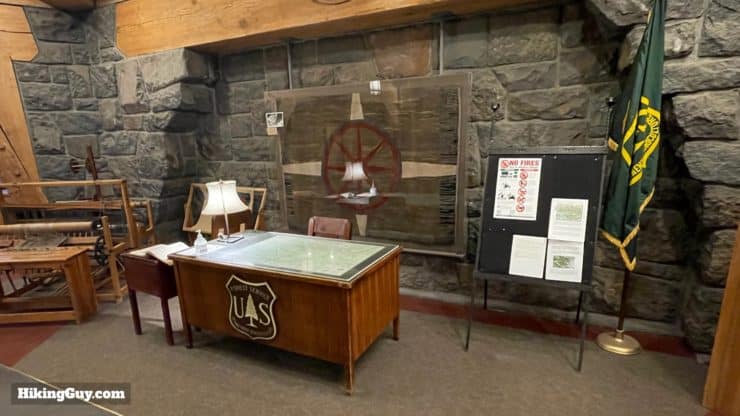
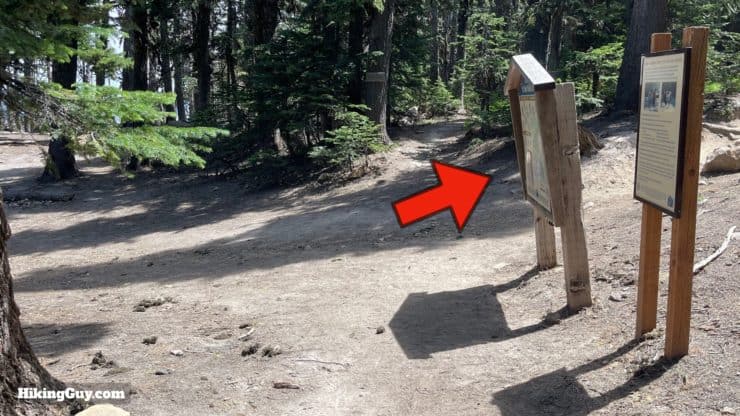
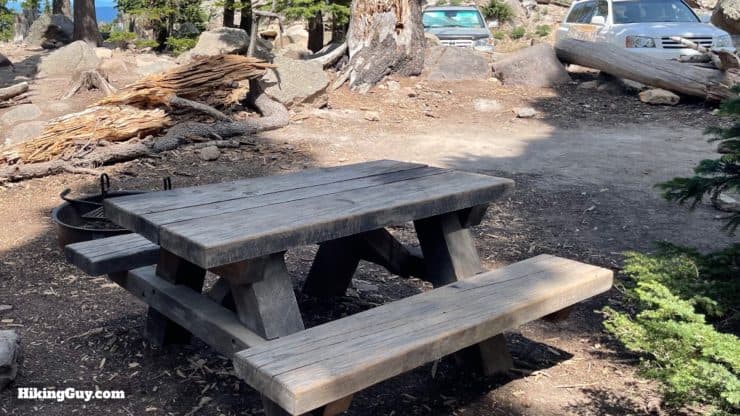
There are also a few shelters along the route, dating back to the original construction of the trail. They're probably great in a storm, but kind of dark and cool otherwise. Watch my video below to see what it looks like inside here, the Cooper Spur Shelter.Look for these simple signs that tell you where not to camp.The Cloud Cap Saddle Campground is not a typical camping spot as it is not officially in the Mt Hood Wilderness area. There are tent sites, picnic benches, a water spigot, and primitive toilet. There is a fee to camp here. Pay at the board by the parking lot.Here's the primitive toilet at the Cloud Cap campground.I'd also recommend working in a stay at Timberline Lodge, usually best done at the end of the hike and paired with celebratory dinner, drinks, and hot shower. And if you are staying overnight, there's a great breakfast buffet as well.Even if you're not staying at the Timberline Lodge, it's worth stopping in to check out the beautiful lobby and great room areas.The bathrooms on the lower floor has long-neck faucets to refill water bottles and hydration packs.There's also vending machines near the bathrooms if you want to buy some snacks. You can also get food at the lodge's restaurants, and casual food at the nearby Wy'East Café.The Timberline Lodge even has a Forest Service info desk (not always attended) to answer any questions that you might have.
Timberline Trail Starting Points
I'm not going to cover every access point to the Timberline; there are over a dozen trails that join up with the Timberline Trail Loop. Instead, I'll cover the most popular options, which are also the options listed in my suggested itineraries.
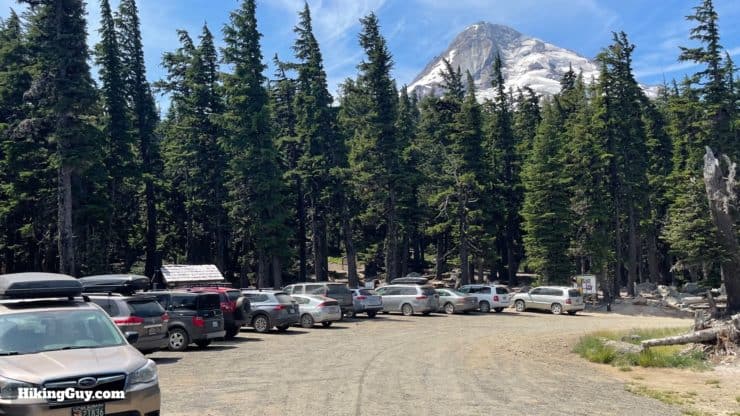
The traditional starting point for the hike is the Timberline Lodge, about 90 minutes away from Portland. It's a paved road all the way to the lodge, and is generally an easy drive. The lodge is directly on the route of the Timberline Trail.
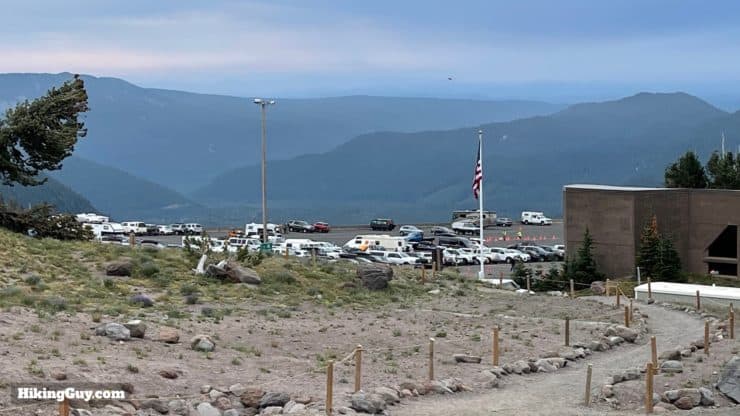
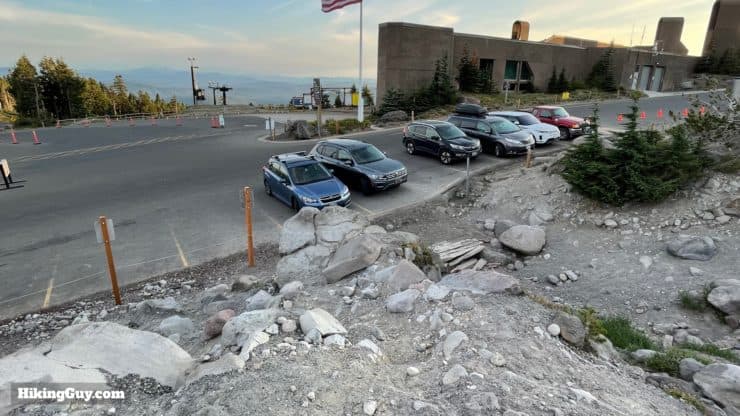
Make sure that you park at one of the massive lower lots that's clearly marked overnight for parking. There is no fee to park here, except for in the winter ski season.
If you start the hike on the upper part of the loop, Cloud Cap is a good option for parking, but the drive there has a steep and narrow dirt section at the end that can be rutted. I've seen low-clearance cars in the lot, so it's doable, just go slow. If you're driving from Portland, I recommend the northernmost route that goes through the Columbia River Gorge, which has jaw-dropping scenery. Don't park at the Cloud Cap Inn, park at the Cloud Cap campground area.
There's a decent sized parking lot at Cloud Cap, but it gets full, especially mid-day (with day hikers). The lot usually spills over onto the sides of the road. The parking area is basically right off the trail.
You need a National Parks Pass or Northwest Forest Pass to park at Cloud Cap.
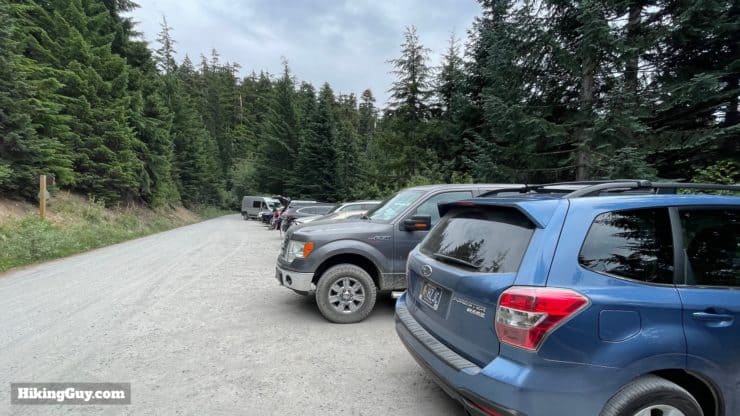
Top Spur is close (1:15) to Portland, and just has a half-mile hike to access the Timberline Trail. The last few miles of road are dirt and rutted, but can be done in a low-clearance vehicle slowly.
Top Spur has a large parking lot, and it fills up with day hikers during the day. Overflow parking is next to the lot on the side of the road. There is a porta-potty here most of the time.
You need a National Parks Pass or Northwest Forest Pass to park at Top Spur.
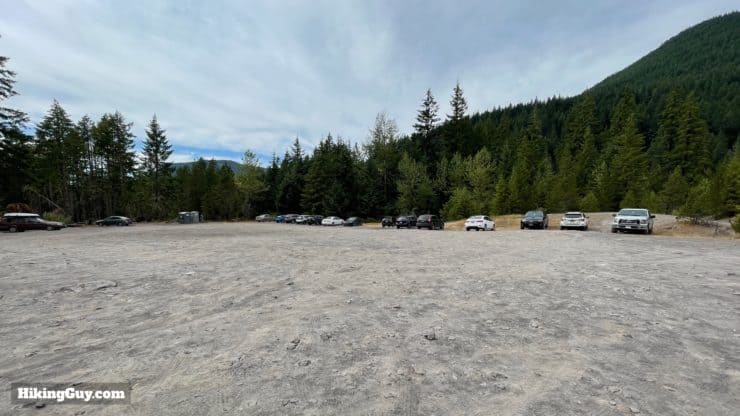
Just over an hour from Portland, and all paved (but with some major potholes at the end), the Ramona Falls trailhead parking lot is another option to easily access the trail. The parking lot is not on the Timberline, but it's an easy 1.5 mile hike to access it.
The parking lot at Ramona Falls is massive. You won't have trouble finding a spot here, even if there is a big day hiking crowd.
You need a National Parks Pass or Northwest Forest Pass to park at Ramona Falls.
Bailing Out
If you can't continue the trail for whatever reason, your best move is to use your map and hike out on one of the numerous access trails around the loop. Bailing out is more common than you'd think, and if you have to do it, don't feel bad. Most trailheads have other hikers who are sympathetic and can offer rides back to a gas station or wherever.
Gear For the Trail
In general you'd need all the gear that you would normally when backcountry camping. My advice is to go light. The trail is nothing but ups and downs with some river crossings thrown in there for fun, and having a heavy pack will take its toll. Here are some standout items that you need.
Trekking Poles are a must-have. I wouldn't recommend crossing the tougher streams without them. They're also great for stabilization when you face slippery slopes.
Some sections (like the PCT between the Muddy Fork and Bald Mountain) can have some intense insect activity. There's nothing worse than being devoured by mosquitoes while you're huffing and puffing up a climb. Bring insect repellant. You don't need a lot, most other sections are mosquito-free.
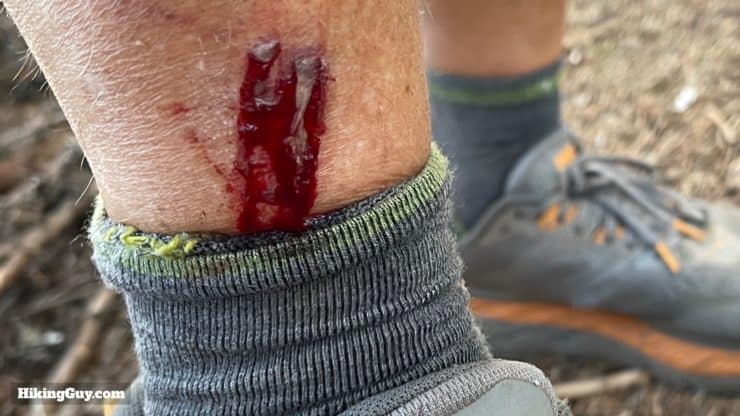
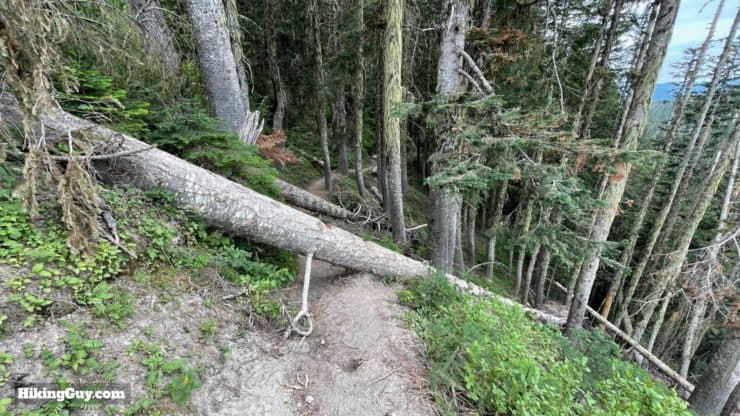
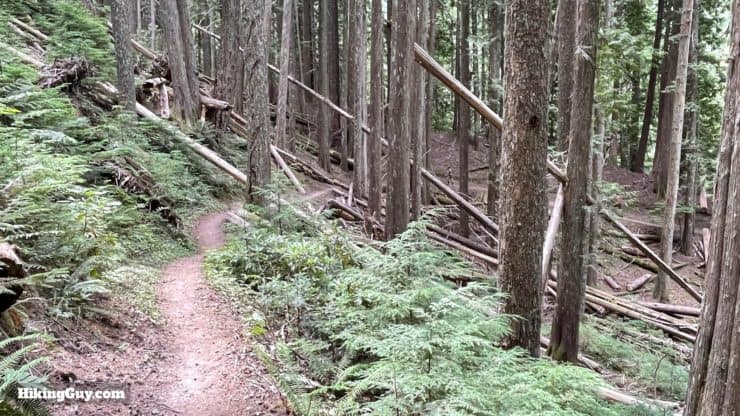
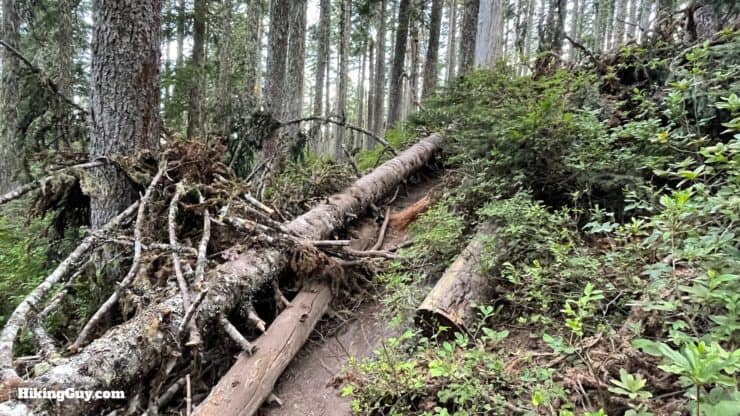
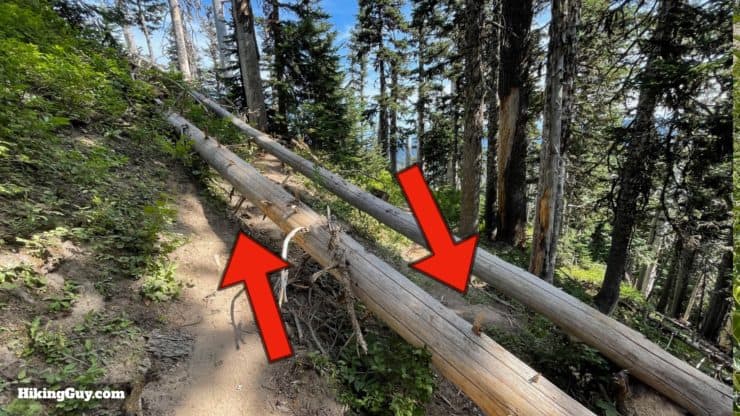
Along the same vein as the last point, don't wear cotton. Make sure you have clothing that will dry quickly. If you have a problem with brush against your legs, wear long pants. Long pants can also help prevent nasty scrapes like this from downed tree crossings, of which there will be many.
It can rain anytime, so be prepared for it. Even if the forecast looks good, it's smart to bring rain pants and a shell.
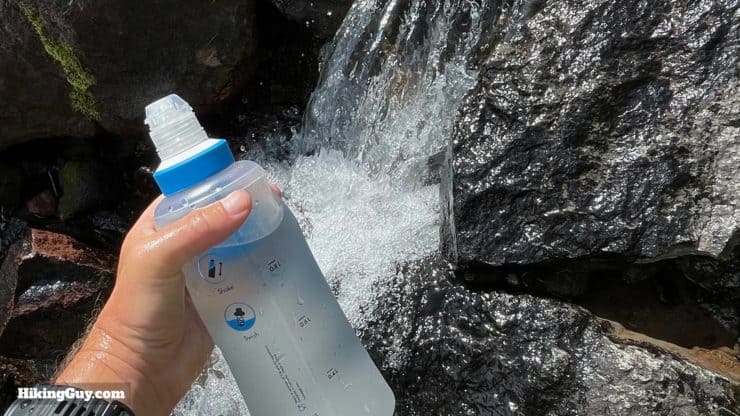
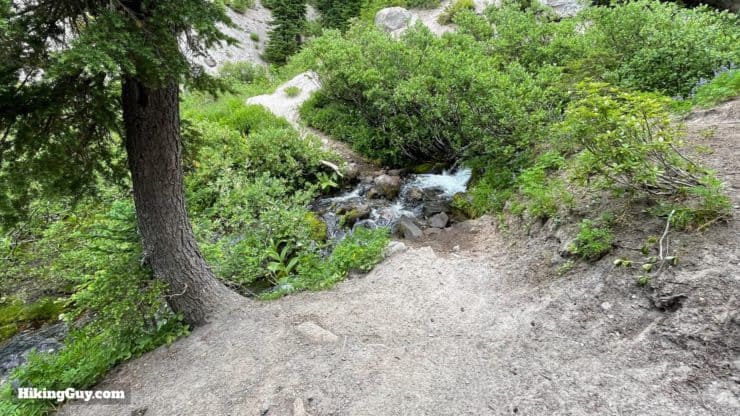
Luckily there's plenty of water along the route, but it needs to be filtered. The easiest thing to do is to carry a 1L Smartwater bottle or two with a screw-on water filter. The stretch between Cloud Cap and Newton Creek is the driest, and you'll probably want to have at least 2L of water between those two spots. If the water you are filtering is milky, it has a lot of silt in it, and your filter might struggle. You can still drink that water, but expect a reduced water flow. After you filter silted water, it's always best to do a quick back-flow clean afterwards. Having a bottle like this to filter water is also handy. Ideally you're going to be looking for water sources like this clear and cool creek.
I wouldn't worry much about animal attacks or bears looking for food. There are certainly bears in the Mt Hood Wilderness, but they generally keep to themselves and there's not a problem with them like in some major parks. Most people use a simple bear hang for their food, or just sleep with it in their tent (I've done this). Just keep the scents down by washing utensils and packaging. Your biggest threat is probably rodents, but again, I've never had a problem. If you are really paranoid, I'd bring an Ursack. A bear canister is overkill here.
For navigations, using the National Geographic Mt Hood map along with the GPX file (below) loaded into a free app with offline maps like Gaia GPS is the move. Don't count on cellular service. Having a satellite communicator is prudent.
A waterproof pack liner is the best move to protect from rain and any accidental dunking in the creeks.
Osprey Hikelite 26Lightweight, carries all your gear, and your back doesn't get sweaty. Oh yea, it's also one of the most inexpensive packs you can get.
Timberline Trail River Crossings & Other Challenges
That pretty much sums it up. The streams are tough, but lots of people do them. Follow the tips here and you should be fine. Always take care in crossing, no matter how easy it may look. Remember that hikers have died in these streams.
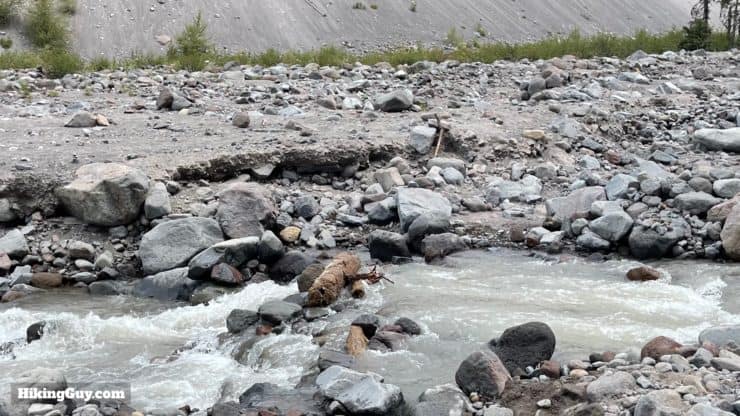
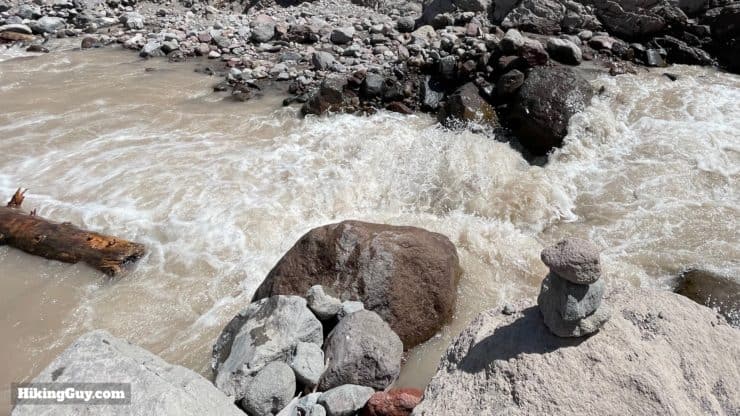
The Timberline Trail is famous (or infamous) for its river crossings. In the winter, new layers of snow on Mt Hood add to the glaciers and snowfields, which then melt in the spring and summer, creating raging rivers. In the spring, the rivers are generally too intense to cross. The intense flows and floods can wipe out whatever cairns, crossings, and other markers that were left the last year along the river washes. By mid-July most of the crossings are doable.
I've marked the tougher crossings in the GPX file and map. Here they are, in (my opinion) the order of most to least difficult: Eliot Creek, White River, Newton Creek, Sandy River, Ladd Creek and Coe Creek.
The Elliot River crossing has a tough reputation. It's not super wide, but the banks are steep and the current is swift.
Here's how I recommend tackling the crossings:
When planning your hike, give yourself 15-30 minutes per major crossing extra to account for the recon and crossing.
Know what your next big crossing is and ask hikers you pass heading in the opposite direction what the conditions were and if they found a good crossing. If you can hear a rushing torrent from far away, it's probably going to be a tougher one.
Watch for other hikers crossing for clues on where to cross. If you don't feel confident crossing, wait for other hikers to show up and engage them for a second opinion or help.
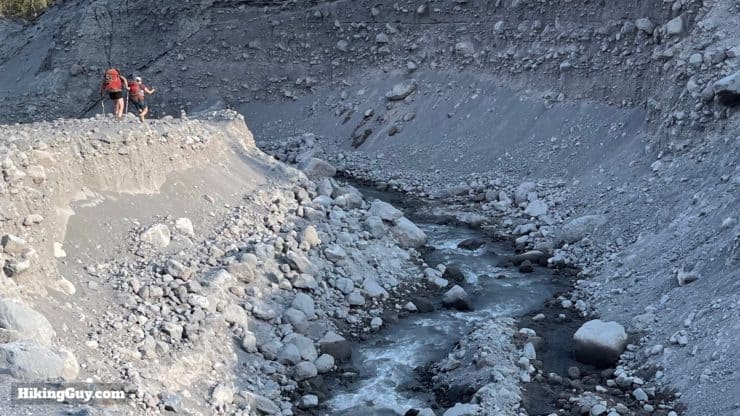
Be careful on the banks of loose sand, which can collapse and send you into the stream. A hiker died like this.
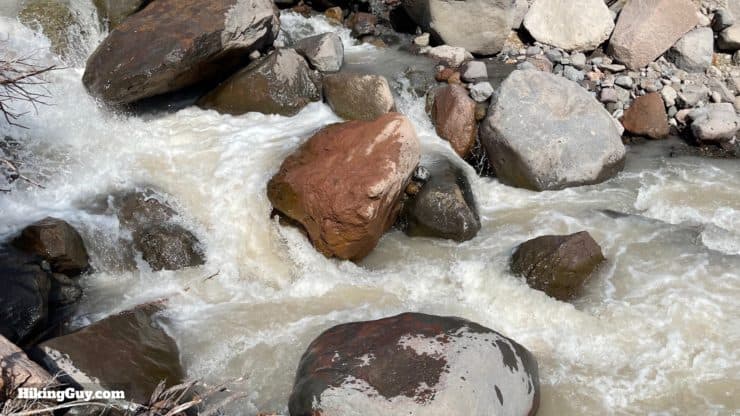
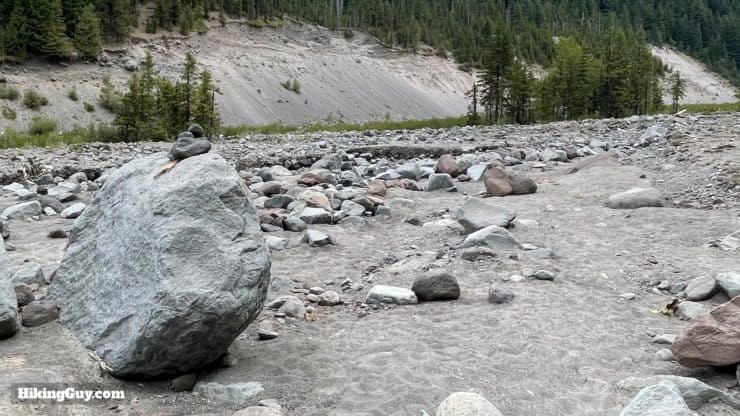
Look for cairns and sticks marking the most recent crossing. The crossing points can change day to day, so this is the best move for finding the latest and greatest. Don't just follow the line on your GPS. Generally the crossings are bit upstream or downstream from where the line of the trail crosses.
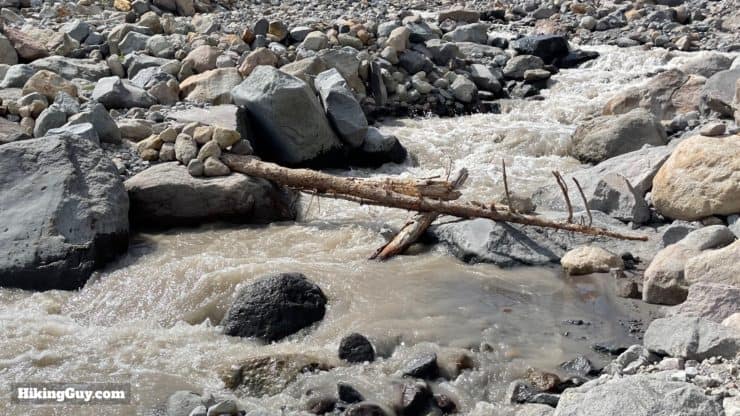
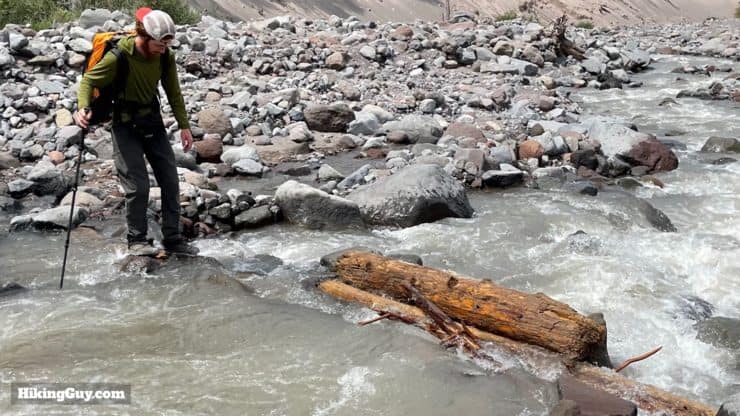
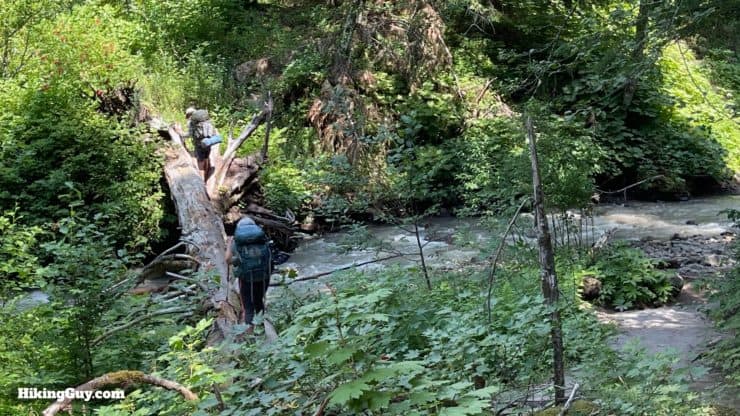
There are no bridges but sometimes you can find logs, snow bridges, or rock hops to get across. They can be slick, and hikers have drowned when falling off of them. If you don't feel 100% confident that you can safely cross that way, then you should walk through the water.
Look for areas that are wider and shallow if you can't find good markers. It's better to cross two shallower branches than one narrower deep one. Avoid crossing close to a waterfall or steep drop.
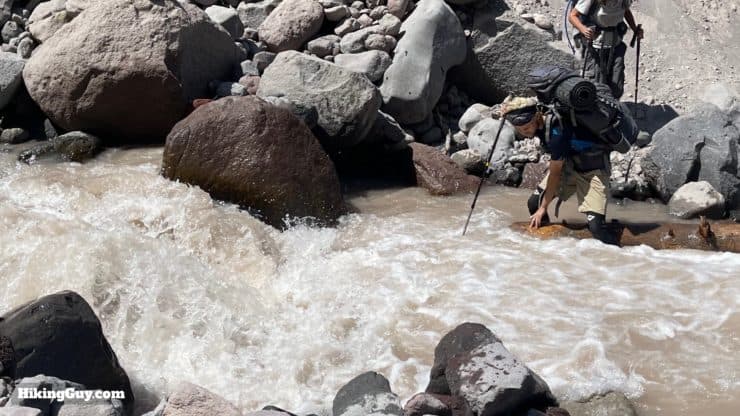
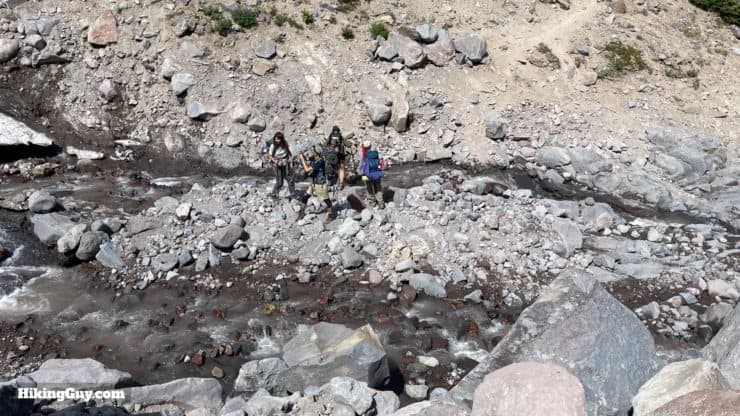
When you look at the pictures below, the crossings don't look like a big deal, but the water is fast and freezing, the rocks are slick, and if you get swept off your feet, you could have problems.
When walking through the water, I've found the best move is to face the current, put a trekking pole down where you want to step, get a good lock on that spot, then put your foot there. Then repeat with each limb. So the trekking pole becomes the "scout" for your foot. Some people do something similar by holding onto another hiker.
Unclip your backpack straps and hip belt. If you go down, slip out of your pack, otherwise it might pull you under. If you are committed to a crossing, it can be easier to just throw your pack across before you (make sure you can make throw without it falling in the creek).
As snow melts during the day, the crossings can get more intense. Likewise, if it's raining out, they can become impassable.
If you don't feel safe crossing after all of that, don't cross. People have died trying to cross. Set up camp and wait is out, or backtrack and bail out. No hike is worth giving your life for, this is supposed to be fun.
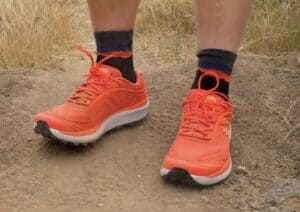
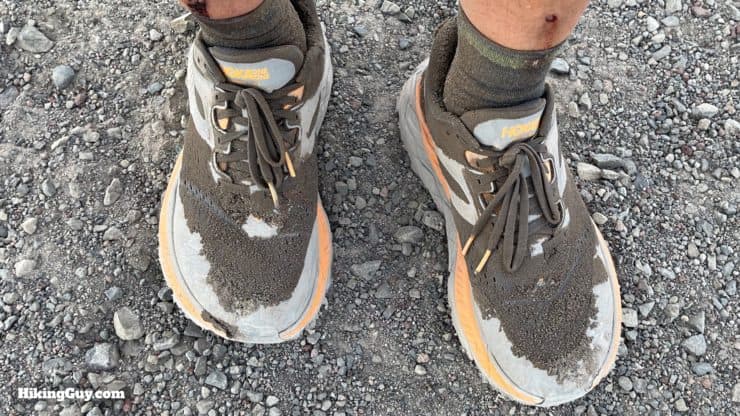
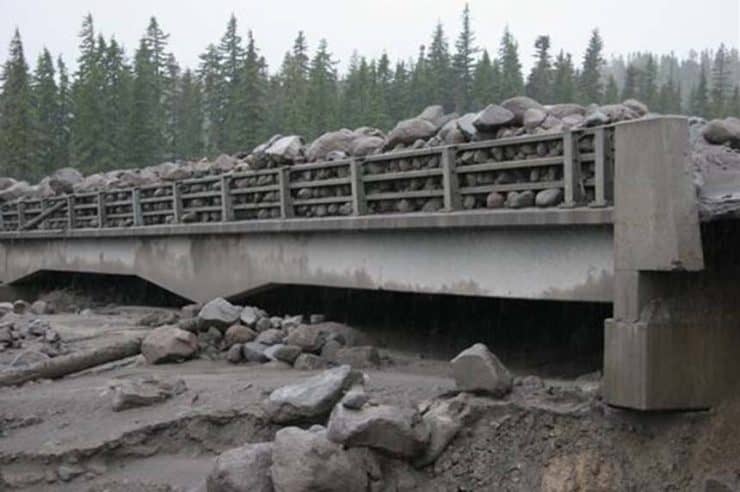
Look for cairns like this to guide you to a safe crossing.Some log crossings, rock hops, or snow bridges can be sketchy. If it doesn't look safe to you, move on to another option.If you do cross on a log or rocks, use your trekking poles to steady you across. Remember to check whether a rock or log is solid before putting your weight down on it.Even if a rock hop looks close, remember that the rocks are slick.Having breathable trail runners and wicking socks means that your feet will dry as you hike after the crossing. If your shoes get covered in sand, stomp them out or rinse the sediment off (while still on your feet) at one of the smaller crossings. Some people change shoes, wring their socks out, change socks, and a host of other hacks. I find that my feet will just dry as I hike on when I invest in quality footwear.And just to give you an idea of the force of the water and what can happen in big melts, check out this picture from 2006 of the White River Bridge at Rt 35, about 2 miles downstream from the Timberline Trail crossing. More incredible photos like this on this site.
Other Challenges
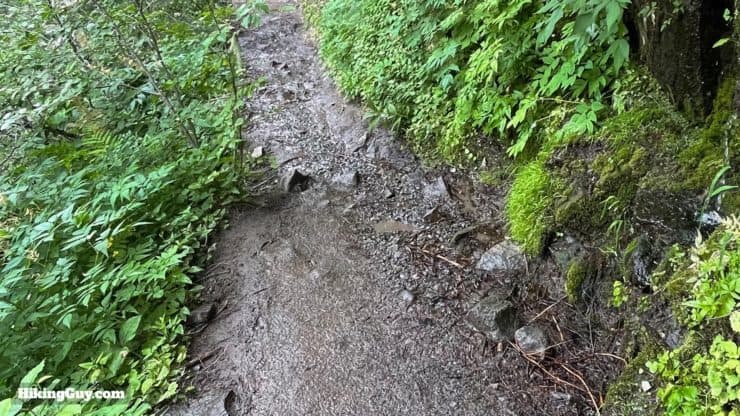
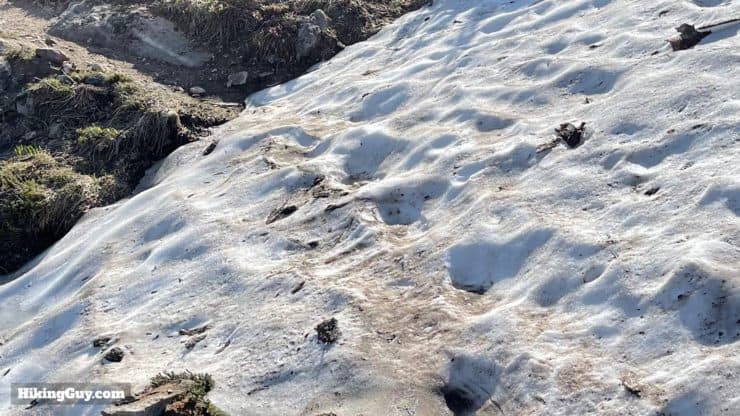
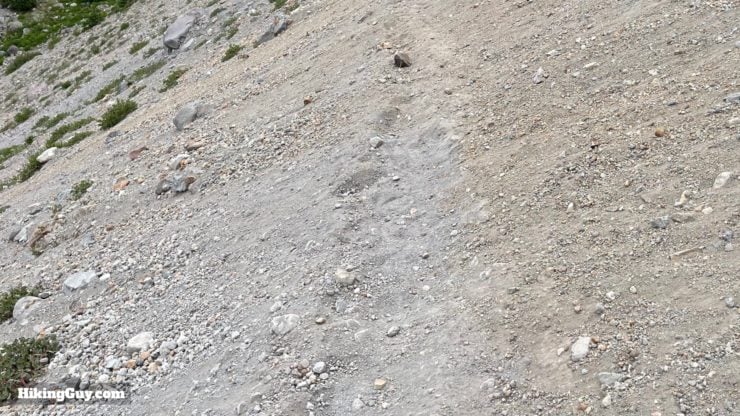
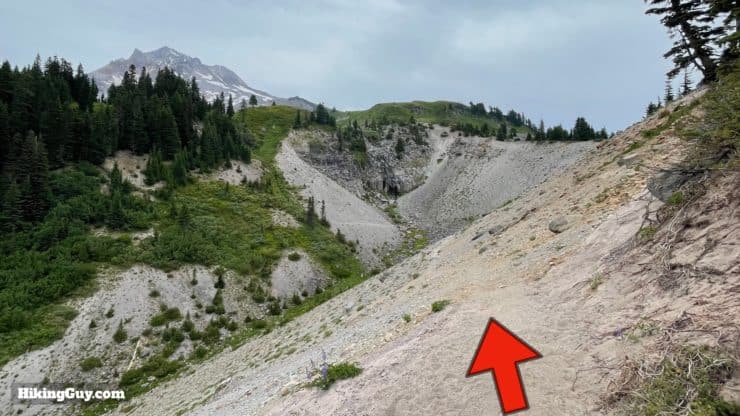
It's impossible to keep the entire trail clear, and you'll see dozens of downed trees across the trail. Some have detours around them, while others you'll have to go over or under. If you go under, it's easier to take your pack off.There's a lot of water, and some sections of trail can be muddy. Be careful of wet trails and mud on steep slopes. Use your trekking poles to navigate these areas safely.You might have snowfield crossings. Again, go slow, use your poles, and watch your footing.You'll have some crossings of soft and loose moraine. Most of these are fine, but some are very loose like this one.While not a hazard, the loose sand found on some sections is worth mentioning. Usually this is volcanic ash turned to sand, and it can be tough to hike through, especially on a climb. Just take your time.
Timberline Trail Maps
Right now a portion of the Timberline Trail between Ramona Falls and Top Spur is closed because of devastation from the Labor Day 2020 blowdown. So these directions follow the Ramona Falls Trail #797 + PCT detour. Don't attempt the closed portion. Hikers who do are regularly stuck and need search & rescue services.
In general, if going clockwise, trails to your left exit the Timberline, and trails to your right are excursions up the mountain.
Elevation Profile
The trail is a series of ups and downs, descending into a canyon, and then back out. The low point at 2,810 feet is the Muddy Creek crossing, just past Ramona Falls. Then after Cloud Cap you hike above the tree line to the high point at 7,335 feet. Overall it's about 10,800 feet of total ascent.
Landmarks on the Hike
Landmark
Distance
Elevation
Notes
Timberline Lodge
0
6000
Little Zigzag Canyon
1.1
5880
not a river crossing
Zigzag Overlook
2.4
5450
Paradise Branch Overlooks
6.9
5100
Paradise Branch of the Sandy River
Sandy River Crossing
10
3380
can be a tough crossing
Ramona Falls
10.5
3460
Muddy Creek Crossing
12.3
2810
usually easy here
Top Spur Junction
14.9
4300
Cairn Basin Shleter
19.2
5660
Ladd Creek Crossing
19.4
5660
small but can be tough
Elk Cove Camp
21.9
5460
sites just north of trail
Coe Crossing
22.7
5150
can be tough
Elliot Crossing
26.8
5520
tough crossing
Cloud Cap Campground
27.6
5860
toilets and potable water
Cooper Spur Shelter
29
6700
now above treeline
Timberline High Point
30.4
7335
Gnarl Ridge Viewpoint
31.3
6940
my favorite view
Newton Creek Crossing
34.2
5450
tough crossing
Mt Hood Meadows Ski Area
36.6
5850
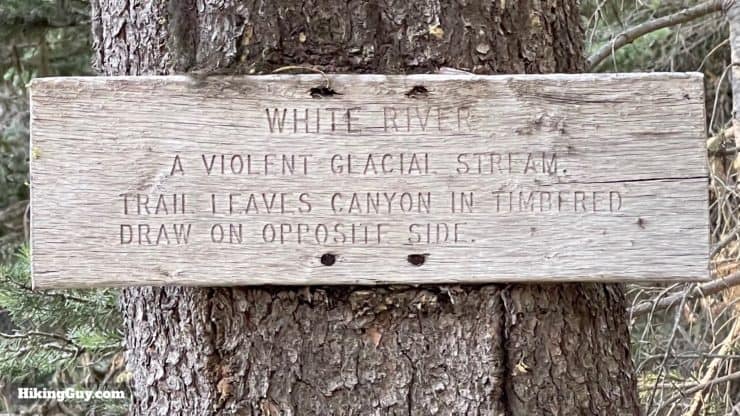
White River Crossing
39.9
4900
tough crossing
Timberline Lodge
42
6000
Timberline Trail Hike Directions
Because the Timberline Trail is so long, I'll break the directions down into sections, running clockwise from the Timberline Lodge at the bottom of the map to Ramona Falls, then Cloud Cap, and then back to Timberline Lodge.
1: Timberline Lodge to Ramona Falls
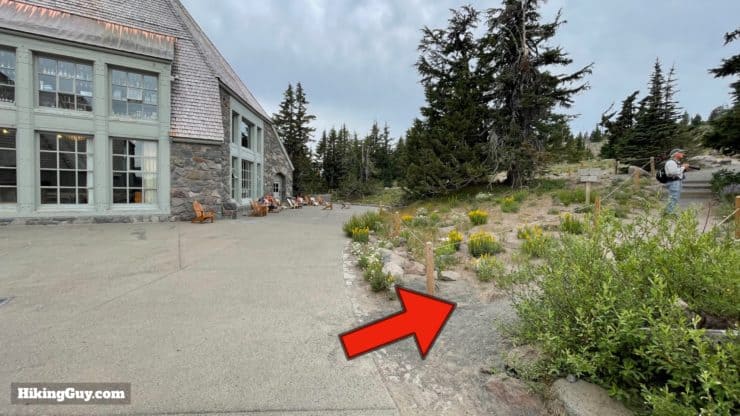
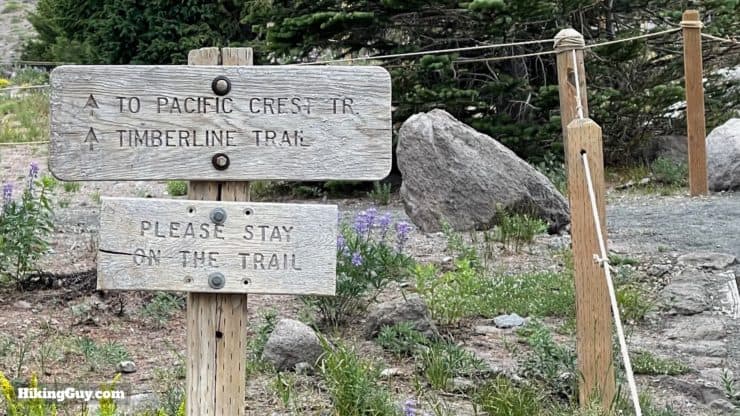
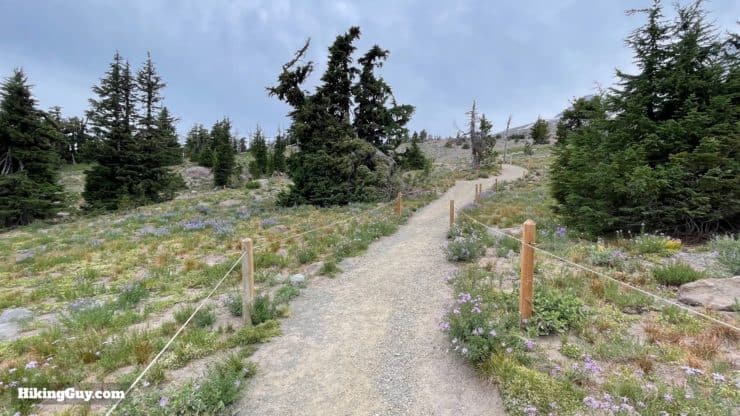
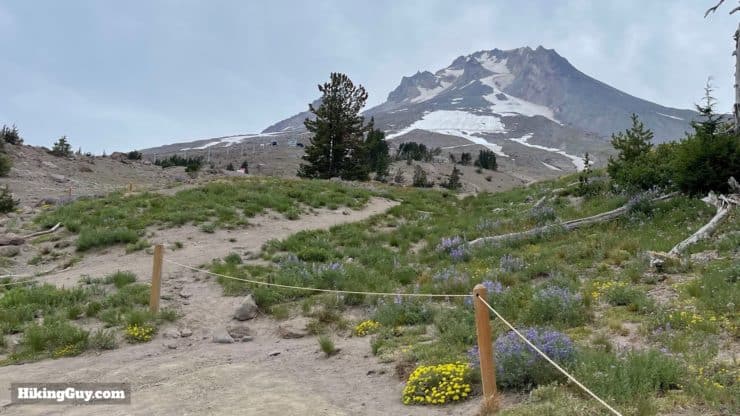
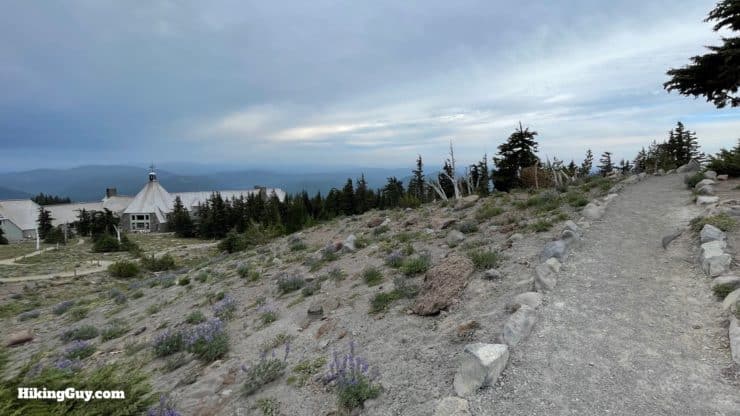
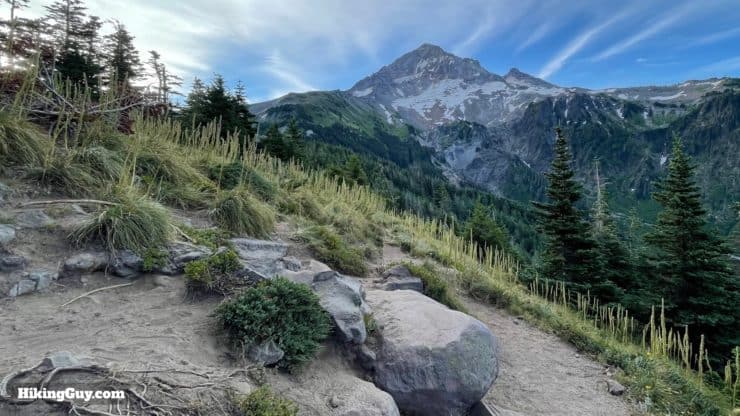
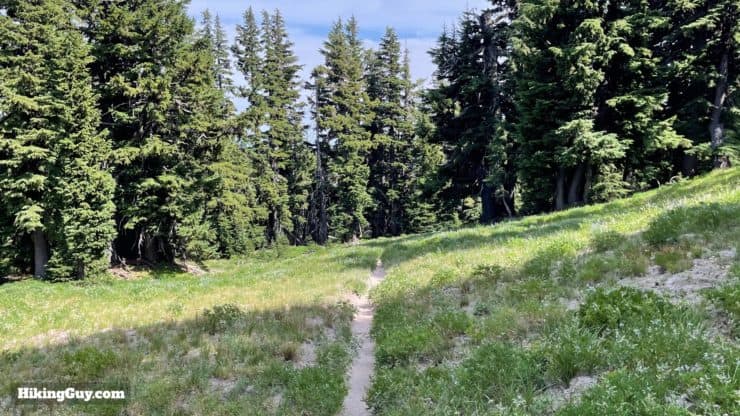
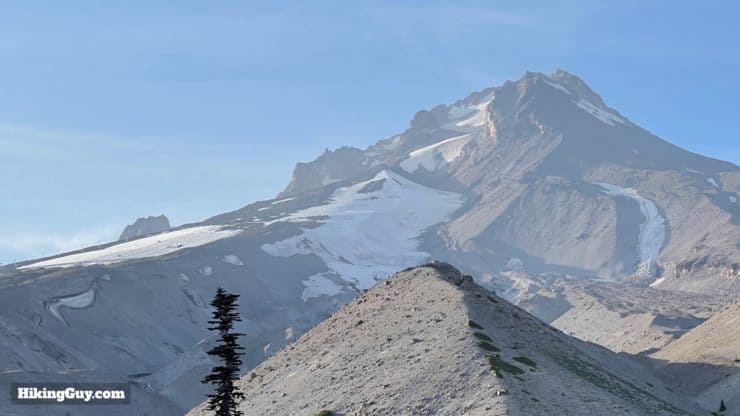
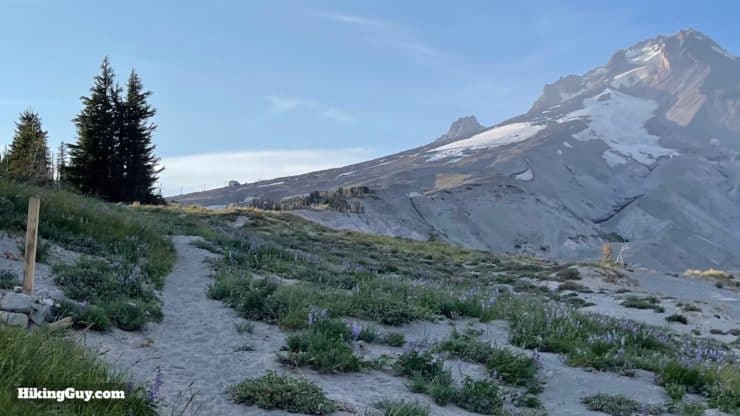
We'll start at the back of the Timberline Lodge. Hike up the trail directly behind the lodge.You'll see a sign telling you that you are heading toward the PCT and Timberline.It's a pleasant walk through the wildflowers to the start of the trail. Expect tourists from the lodge here.You'll also start to see Mt Hood in front of you. At 11,249 feet, it's the highest point in Oregon.
Mt Hood is named in 1792 after a British naval war hero, Samuel Hood, 1st Viscount Hood. When Lewis and Clark spotted it in 1805 they called it Falls Mountain, but I guess "Hood" sounded cooler and that's stuck.
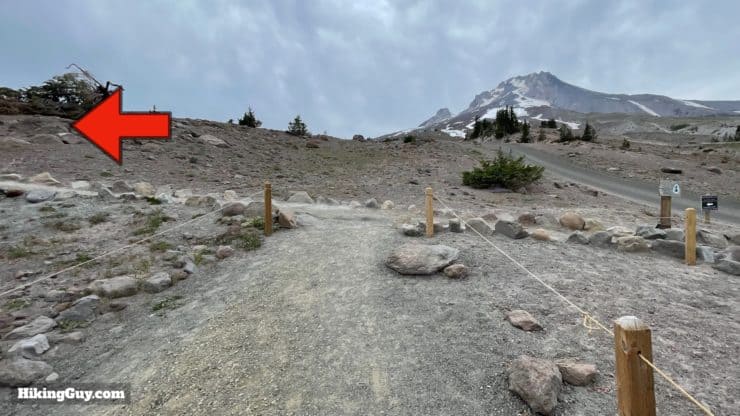
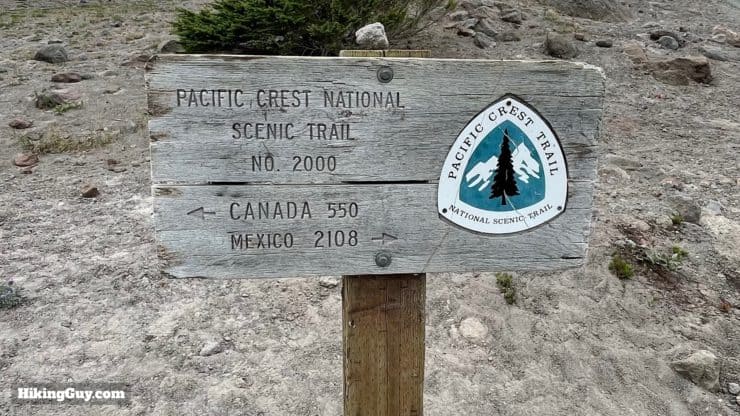
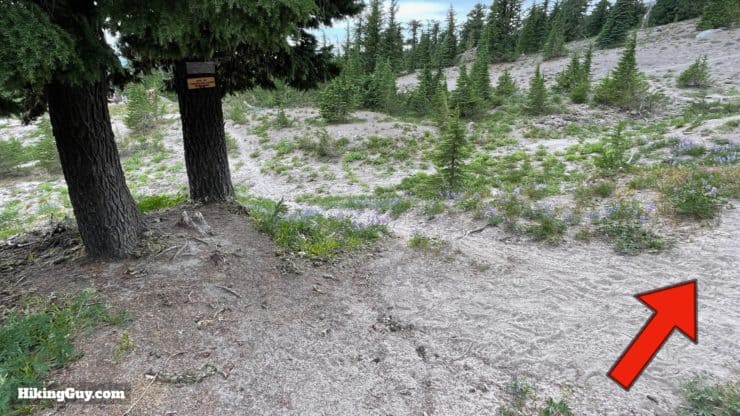
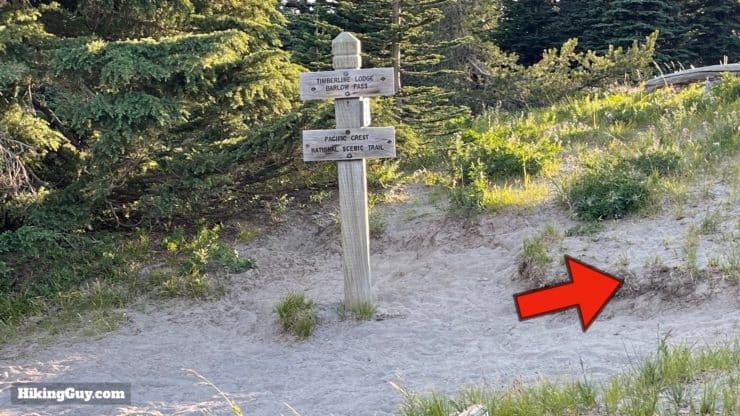
And then you come to a T-junction. The Timberline Trail goes to the left. Just on the right, there's a PCT sign.Here's the PCT sign at the junction.Alright, welcome to the Timberline Trail. The beginning goes behind the lodge and through the ski areas.
There are only two developed areas along the Timberline Trail, the Timberline Lodge and the Mt Hood Meadows Ski Area. Otherwise you're in the wilderness.
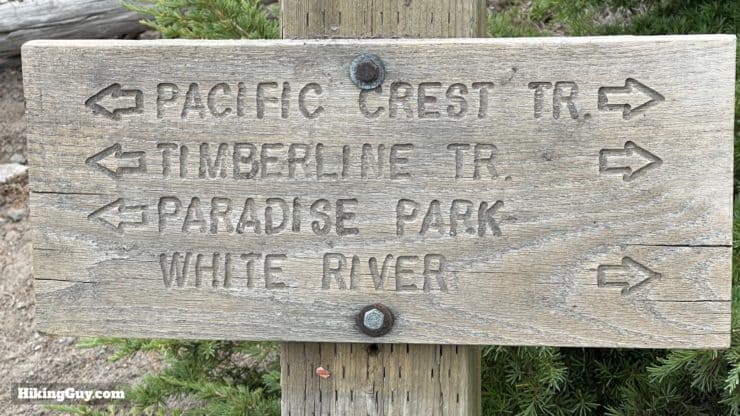
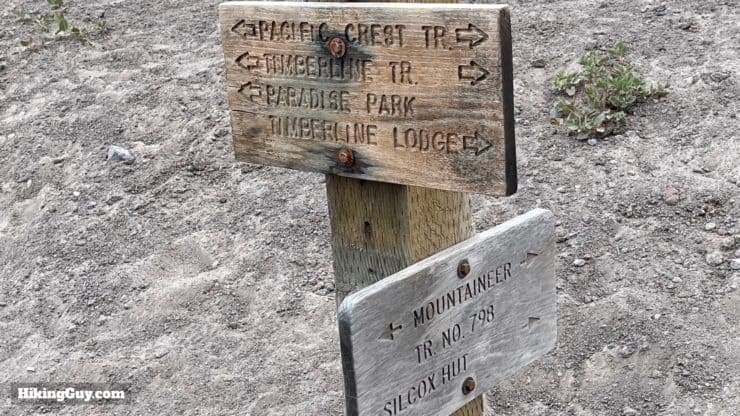
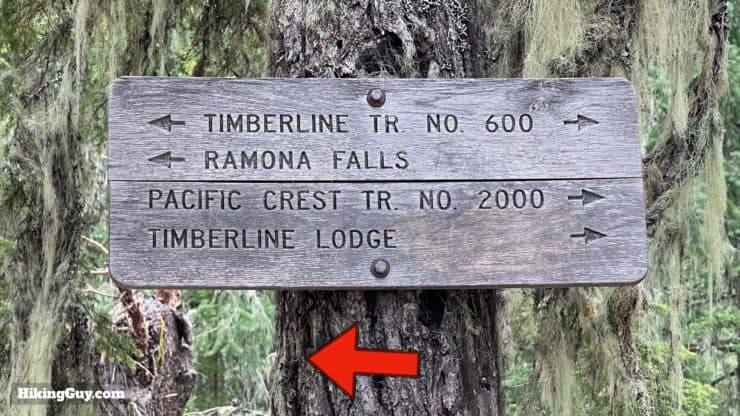
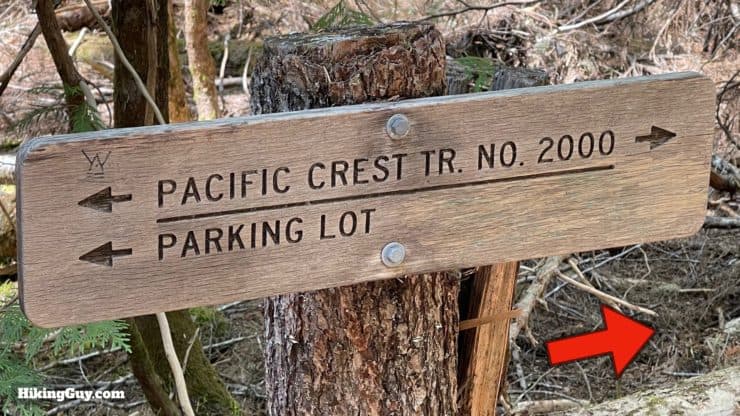
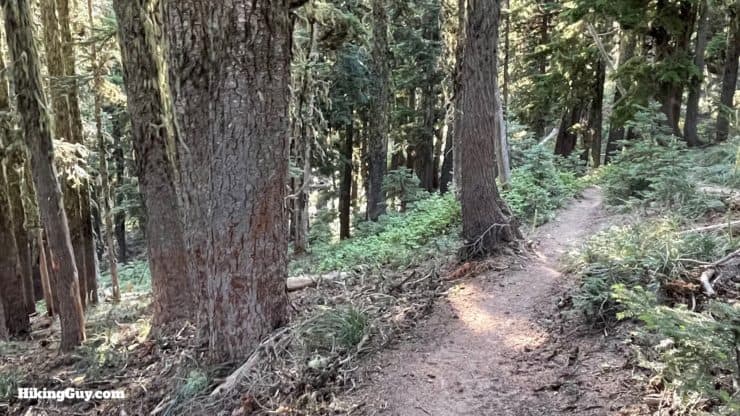
Go straight at the junction for the mini-trail down to the lodge.These are the signs that you'll see (and the one from the last sign). In general, you'll be looking for Timberline Trail #600 or Pacific Crest Trail #2000. The only part where we leave either is on the Ramona Falls detour, which I'll show you shortly.Keep hiking through all the ski lifts.Soon you'll head into the trees. Here's a tent site that you'll pass. There are dozens of these along the trail, and they are your best bet for setting up a tent and spending the night.You'll pass a sign marking the site of the Timberline Cabin (1916-1953).
Don't confuse Timberline Cabin with the Timberline Lodge. The cabin was built in 1916 by a Forest Service employee as a refuge and telephone relay point between the Summit Fire Lookout and Government Camp. Soon after that it became a popular bunkhouse stop for early skiers and adventurers heading toward the summit.
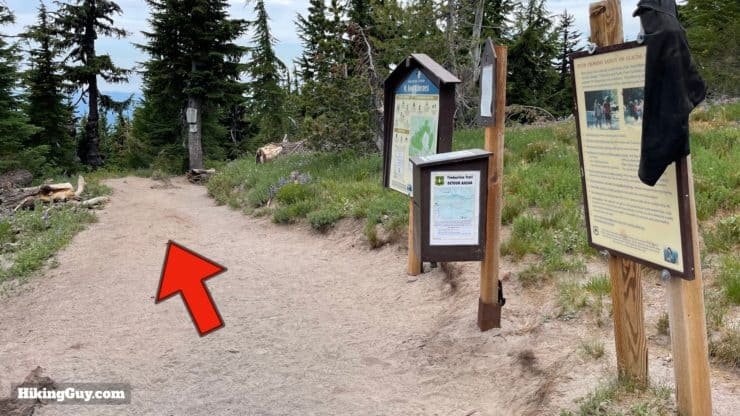
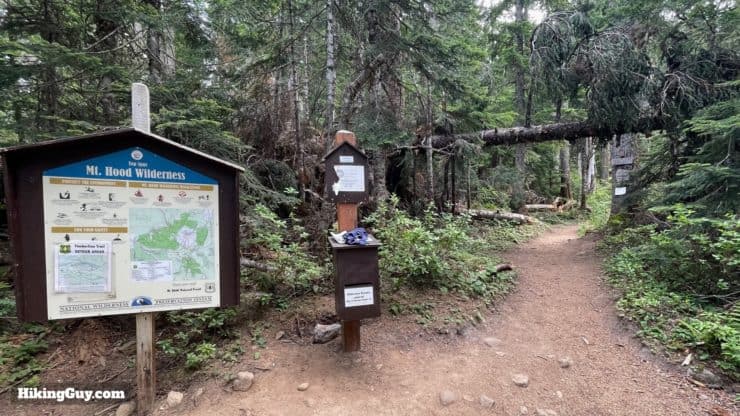
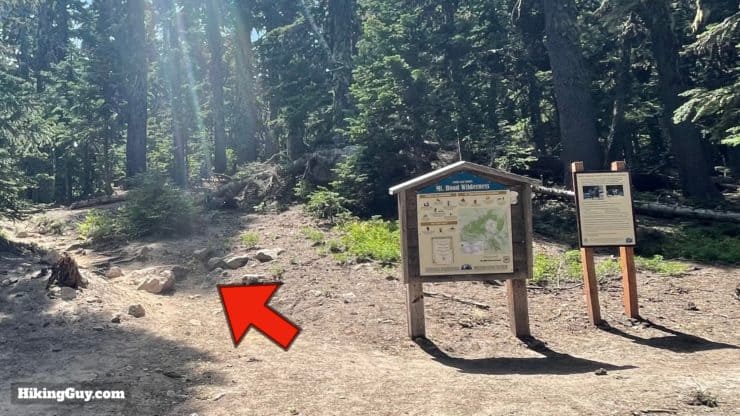
Stay on the Timberline Trail as it intersects the Mountaineer Trail #798.And then you'll see a permit sign-in station. Sign your permit and keep moving.And right after that you'll enter the Mt Hood Wilderness Area. The Mt Hood Wilderness is a protected area of about 65 thousand acres, including the summit of Mt Hood.
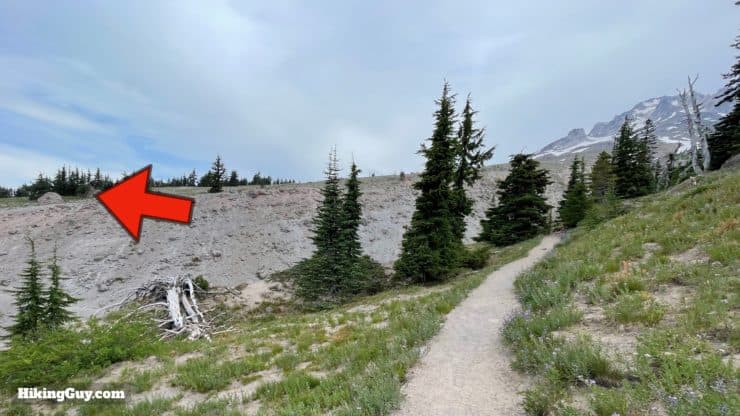
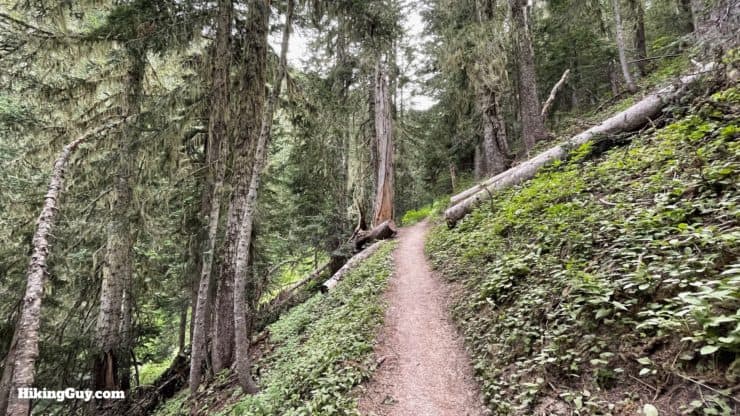
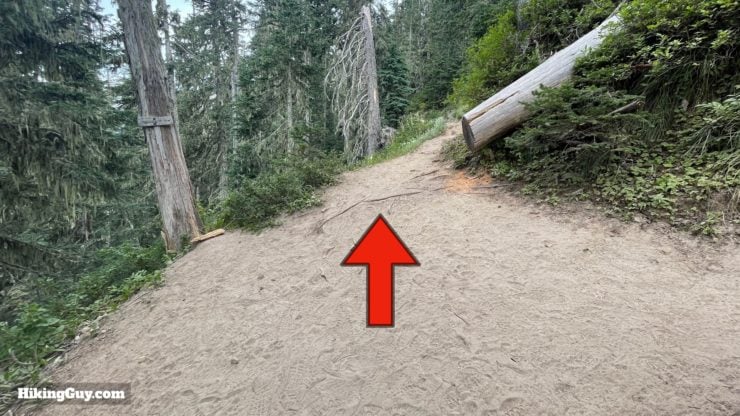
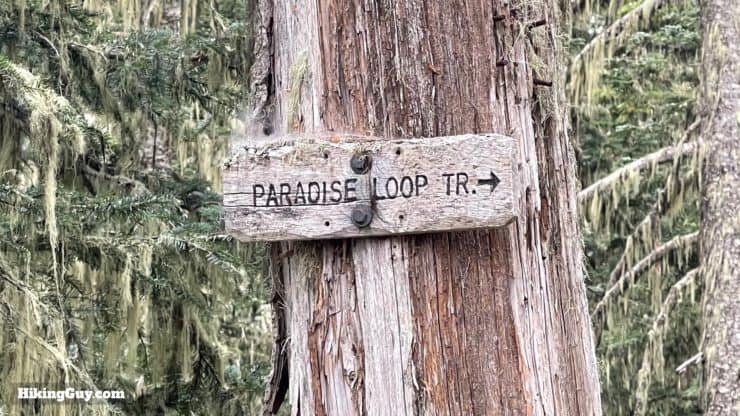
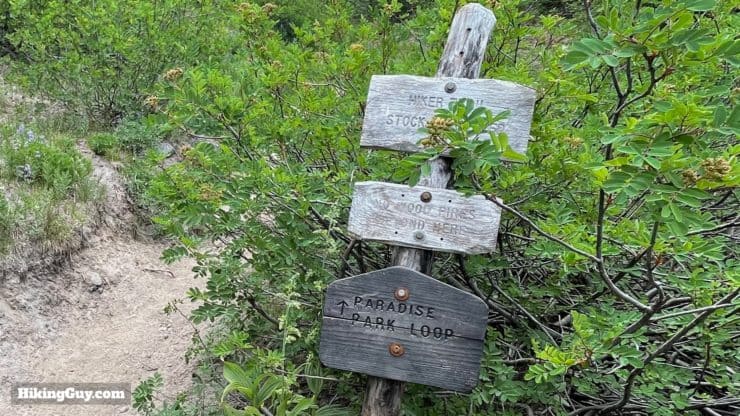
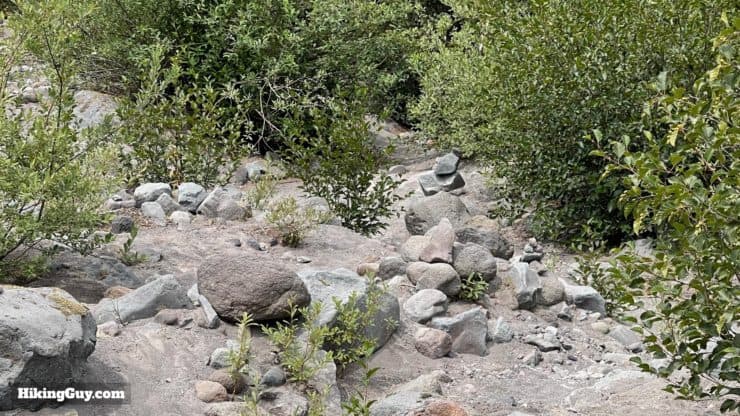
Soon you'll hike along the typical V-shaped gully or canyon crossing.. You'll be doing dozens of these along the route as the Timberline crosses all the drainages from Mt Hood. This is Little Zigzag Canyon.When you cross Little Zigzag Canyon, look for the trail to continue on the other side.Keep straight on the Timberline Trail as the Hidden Lake Trail #779 joins on the left.The trail enters the trees and gently rolls downhill.Cross the small "warm-up" gully before you reach the Zigzag Canyon overlook on the other side.When you get to the other side, the trail continues left, but go straight for an incredible view of Zigzag Canyon.Here's the viewpoint into Zigzag Canyon, named after the Zigzag Glacier above and the Zigzag River which flows through the canyon. To the far left is Paradise Park, an alpine meadow. The large mesa-like formation at the top of the canyon is called Mississippi Head.Head down the switchbacks into Zigzag Canyon. You might encounter your first downed trees here. They will be the first of many.When you get to the canyon floor, cross the Zigzag River and look for the trail up to the left. Remember this pattern, it's basically the same for every major crossing. The Zigzag River is generally an easy crossing that you can usually rock-hop over or just walk through. It's usually only a few inches deep unless there is heavy melt. If you look upstream you can spot Zigzag Falls.The second half of a canyon crossing is the climb out. Again, get used to this pattern, which happens many times.At the junction with the Paradise Loop Trail #757 (on the right), go straight.Here's the sign for the Paradise Loop Trail at the last junction. The original Timberline Trail went up that loop, but later when it needed to accommodate horses, was routed on the lower trail you are taking now.
If you have the time and the energy to do an extra 720 feet of steep climbing, you can take the Paradise Park Loop and then rejoin the Timberline Trail at the end of the loop. Paradise Park is a nice alpine meadow with great views. You'll see several "parks" along the hike, which refer to meadows.
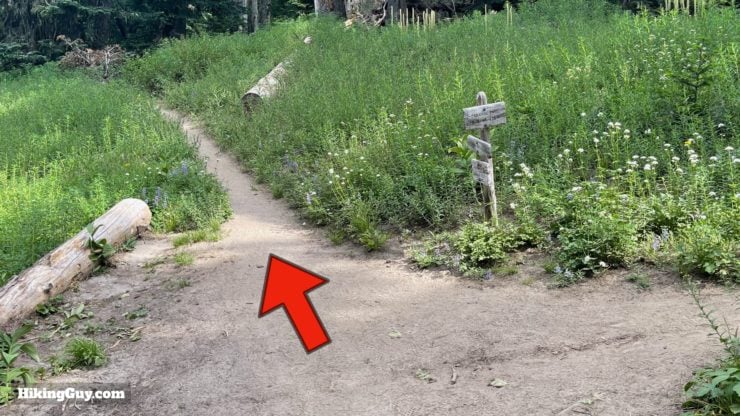
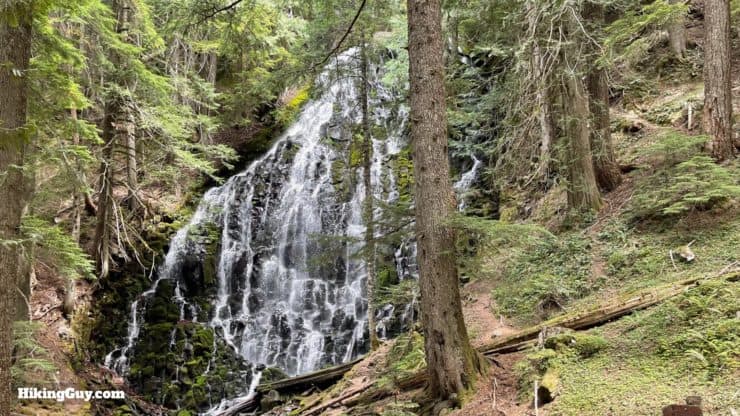
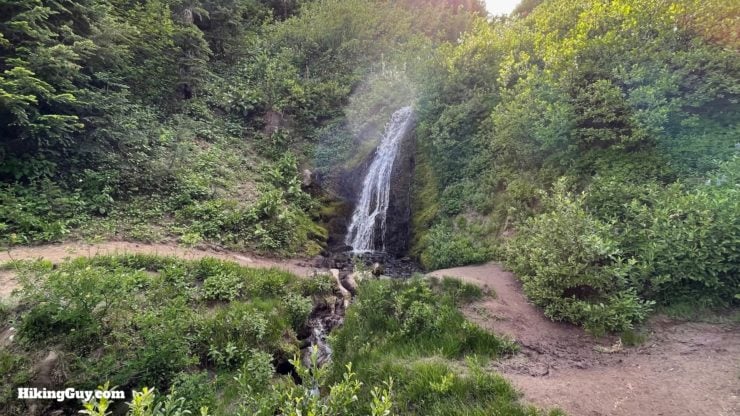
Soon after that last junction, go straight through the Paradise Park Trail #778.As you hike you'll get nice views of Mt Hood and Paradise Park above to your right.Continue on and cross Lost Creek.And after that, make the right to continue around Rushing Water Creek.Head down to the end of the gully at Rushing Water Creek, which actually starts below the trail.There's a nice fall at the end.Look out as you cross the canyon. At the end of this canyon is a 500 foot drop where Rushing Water Creek plunges down toward the Sandy River, our next big crossing.Soon after that you'll pass the junction with the other side of the Paradise Park Loop.When you come to this edge, check out the viewpoint and then continue downhill left on the trail.Here's the view from the overlook. That's the Middle Paradise Branch Falls in front of you, and behind it, Upper Paradise Branch Falls.And a few minutes down the trail after the last viewpoint, there's another one, this time with head-on views of (regular) Paradise Branch Falls.Then you have a nice long downhill to the Sandy River.The trail joins the banks of Rushing Water Creek, which we crossed earlier, and then joins the rocky wash of the Sandy River.Okay, this is our first big river crossing on the trail. The way it works is that you follow the trail markings, cairns, and sticks, to find the best place to cross. The location changes as the river floods, but unless there has a been a recent flood, the markings are usually accurate. There used to be footbridges (and then log bridges) installed by the Forest Service, but a few years ago they gave up, as the bridges were frequently washed away.Take care when crossing the Sandy River. In 2014 a hiker fell off a log bridge like this and died. Sometimes going through the water is smarter than crossing a slippery log.Look for the cairns to continue on the other side.And start the trail proper as it follows the Sandy River Downstream.When you reach the big intersection at the boulder, make the hard right to continue to Ramona Falls.Here's the sign at that junction. We're leaving the PCT on this stretch to Ramona Falls.The trail is much wider and well-worn; the Ramona Falls Loop is one of the most popular day hikes in the area.And soon you'll reach Ramona Falls, with water glissading 100 feet down the rock face. The falls were named by a Forest Service worker in 1933 when scouting a route for the PCT. He named it after a popular love song called Ramona, which was based on the 1884 novel Ramona, about a half-native, half-Scottish woman.When you're done taking in Ramona Falls, continue down the trail by crossing the bridge.
2: Ramona Falls to Cloud Cap
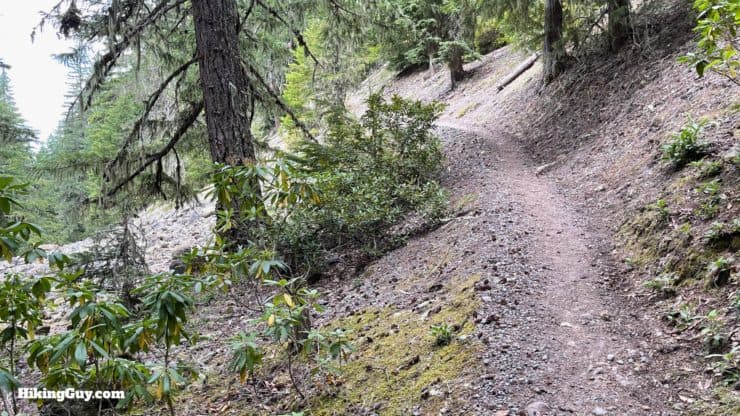
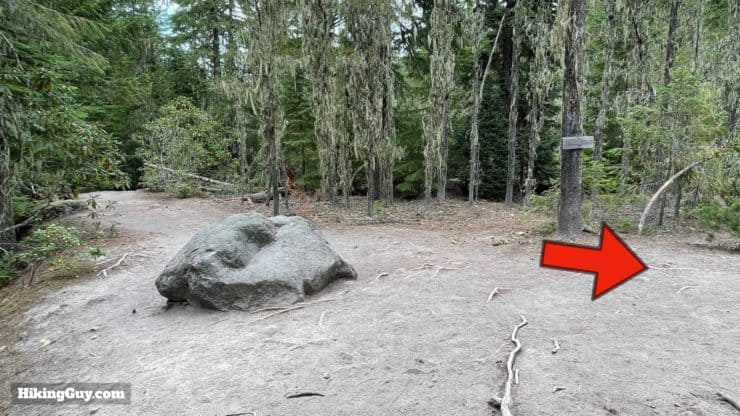
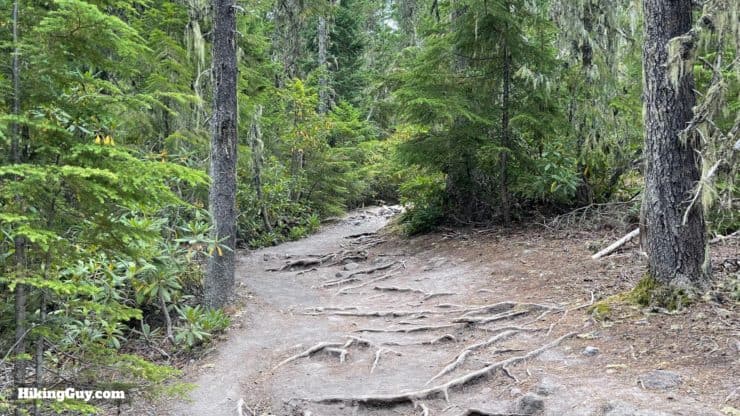
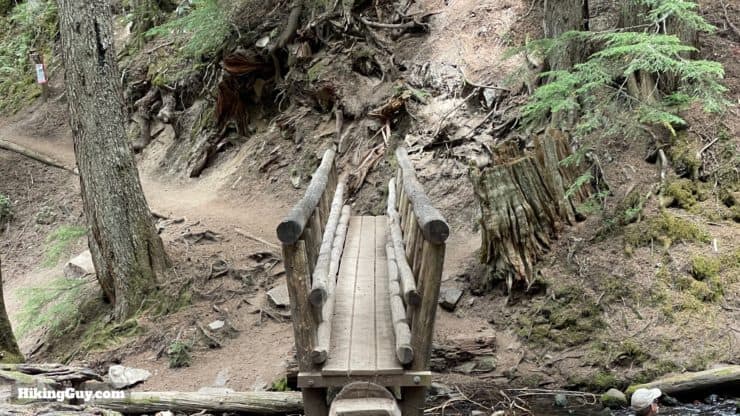
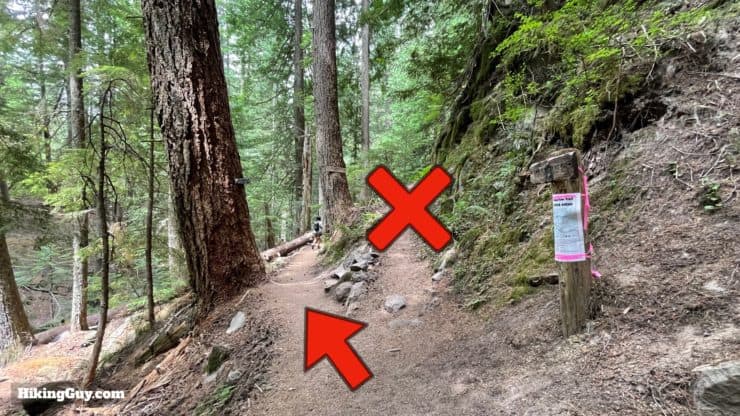
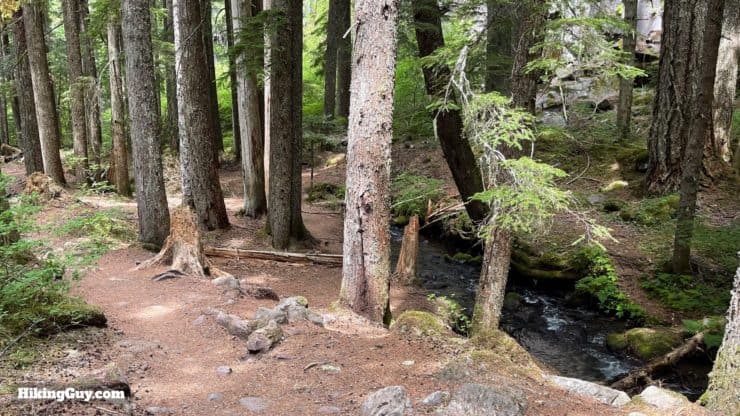
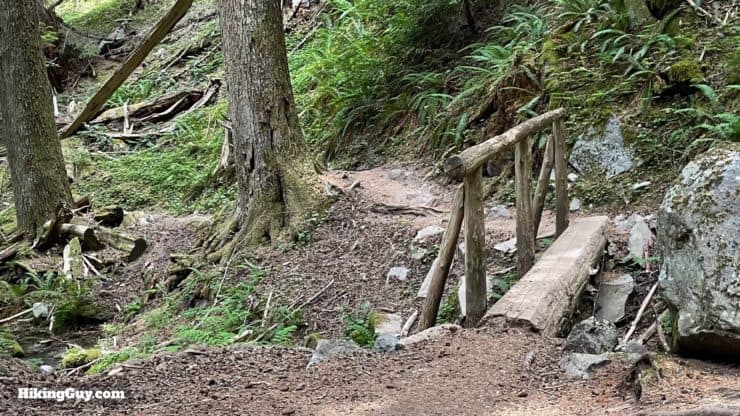
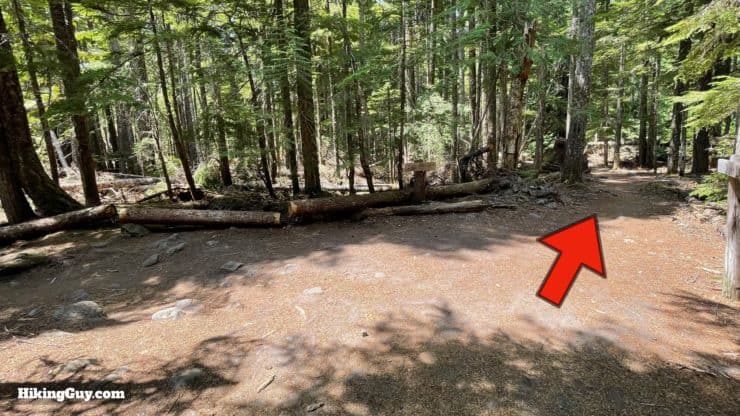
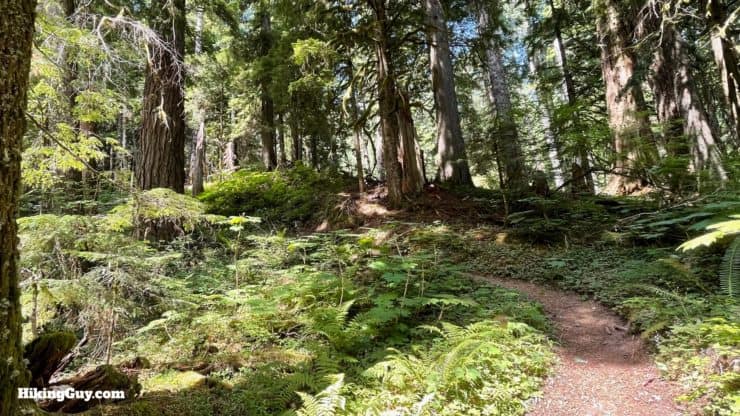
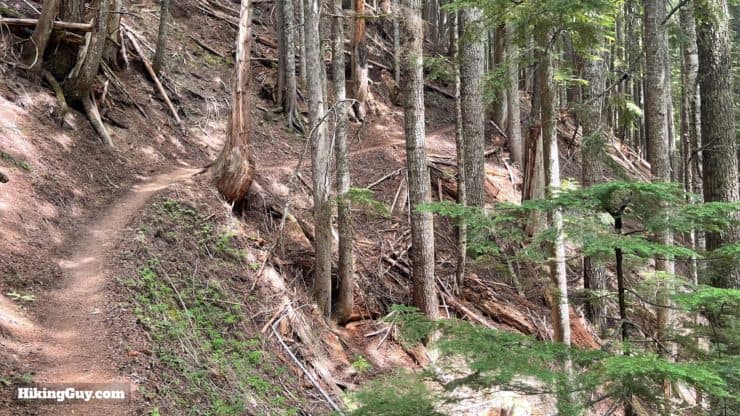
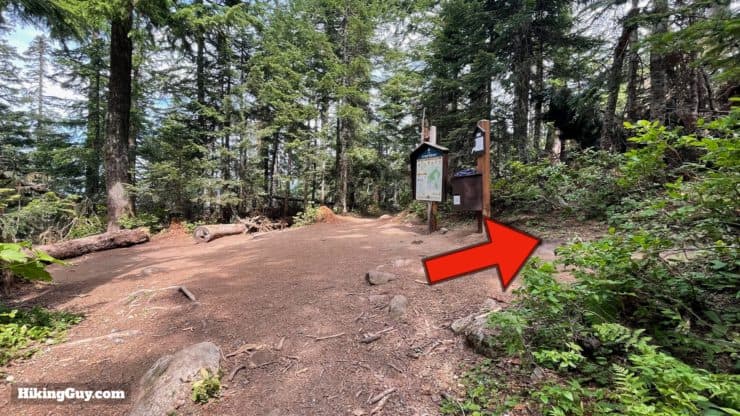
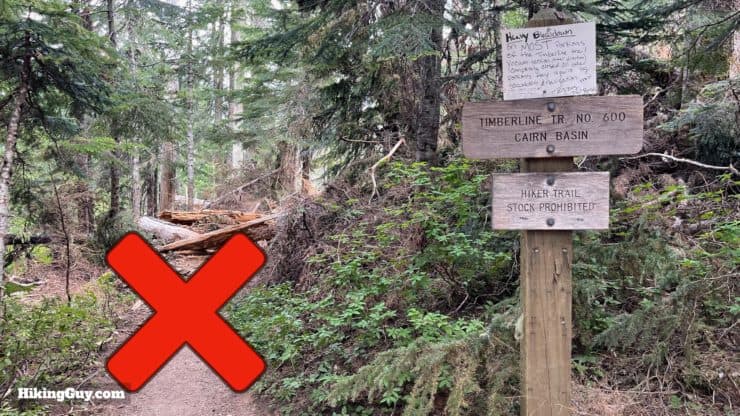
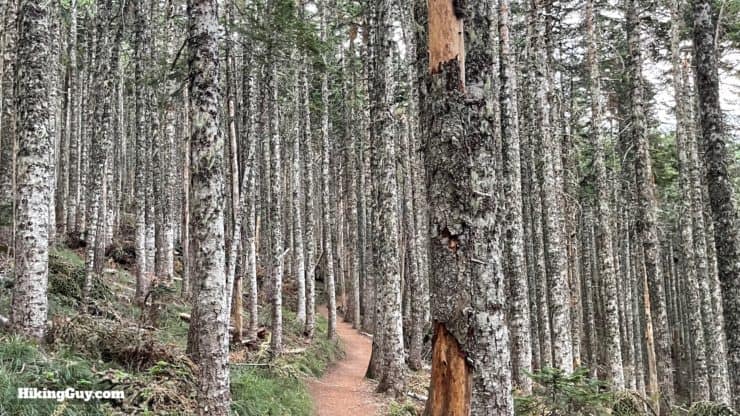
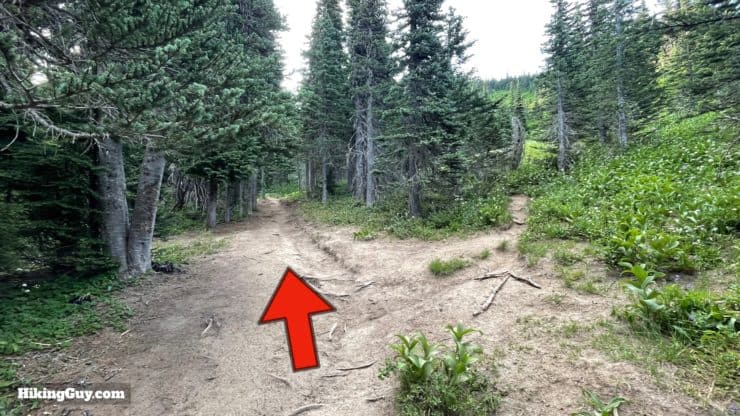
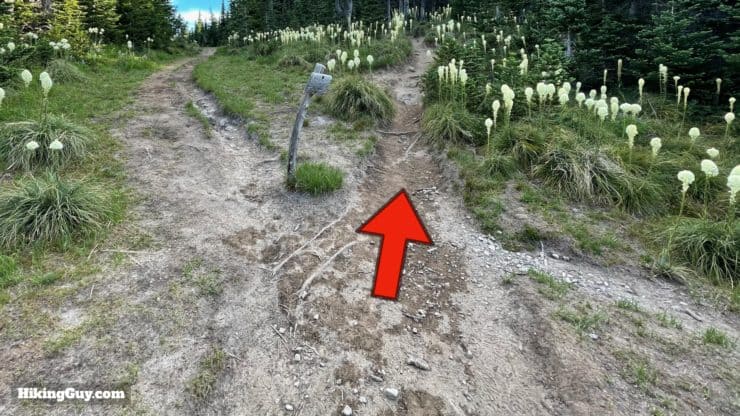
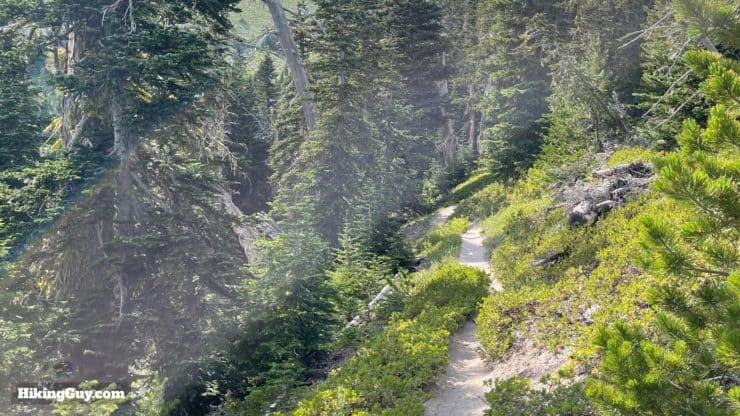
Right after the falls you'll come to a junction. On the right is the Timberline Trail, which is closed for the foreseeable future (maybe permanently?). This is the start of the Ramona Falls detour. Hike left and continue down the Ramona Falls Loop Trail.This part of the trail is very scenic as it makes its way down along Ramona Creek. There are a few dozen very scenic and peaceful (aside from passing day hikers) campsites here.When the trail crosses Ramona Creek, there's always a bridge.As you get towards the end of the Ramona Loop Trail and it wides out, look up to your right and spot Bald Mountain above. We're going to be hiking just below the summit up there, about 1500 feet of climbing from here.At the bottom of the Ramona Loop Trail, make the hard right.Here's the sign at that intersection. If you needed to bail out, making the left brings you to a busy Ramona Falls day hike parking lot where you can probably hitch back to civilization.Head down to the lowest point on the hike, the crossing of the Muddy Fork, at 2800 feet. There's a big and well-established log bridge to cross over.Now you start about 1500 of climbing. The good news is that it's shady.The climb seems to go on forever, especially if you are tired. To add onto the effort, every time I do this stretch, there are a ton of bugs and flies out. If you have insect repellant, this is the place to use it.After several long switchbacks and a mile or so of climbing, the gradient eases up as you gain the ridge.The Top Spur junction can be confusing. You're going to make the hard right at the sign.There is straight option at the Top Spur junction on the Timberline, but is full of downed trees, and doesn't offer views. Skip it.
Reader Alex T emailed me and said that straight is clear now, so you can choose whichever way you'd like. If you go straight, the directions below will rejoin after the cutoff trail ends.
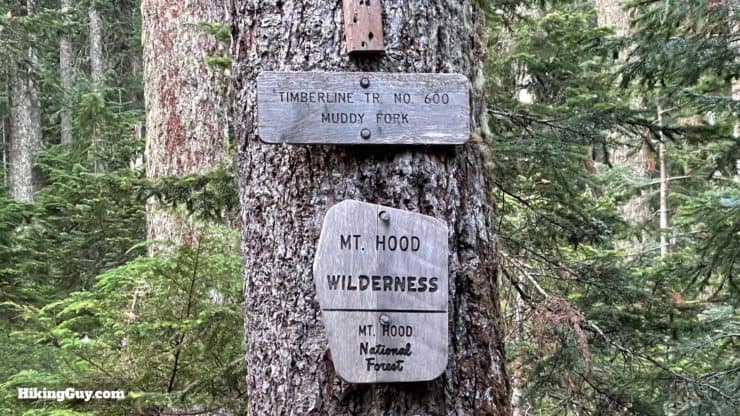
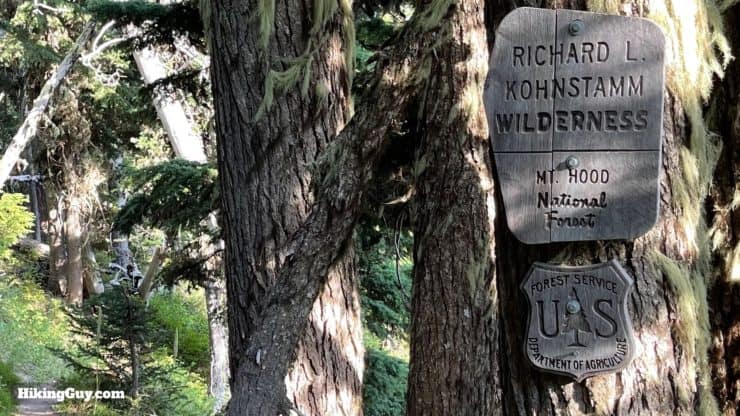
Instead make this hard right and head down the trail, leaving the PCT behind.Hike past the Mt Hood Wilderness sign.
What's the difference between the Mt Hood Wilderness and the Mount Hood National Forest? The wilderness is a protected area where no development is allowed. The National Forest, which surrounds the wilderness, is managed land that allows recreation and (planned) logging.
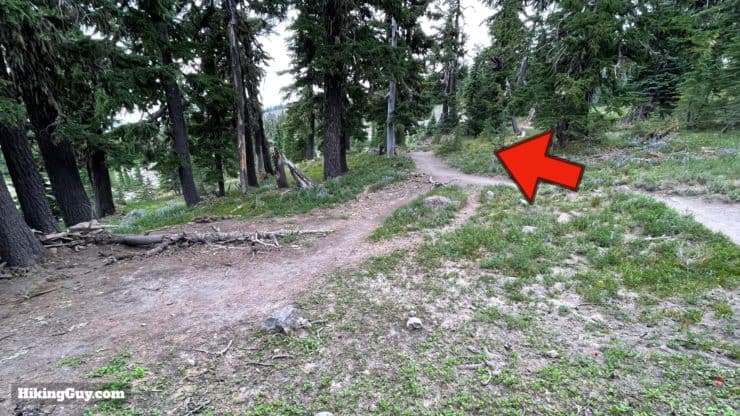
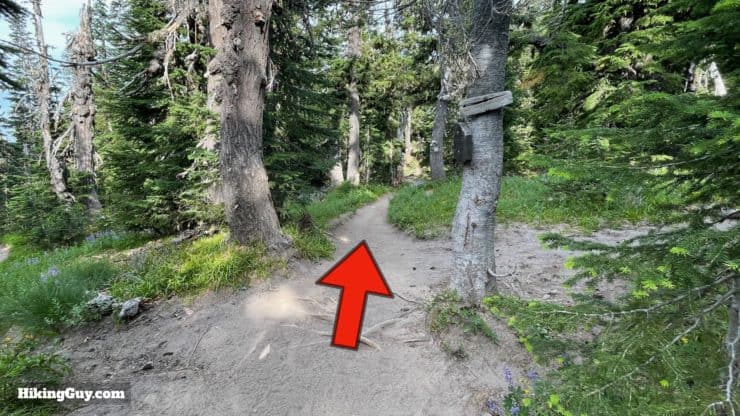
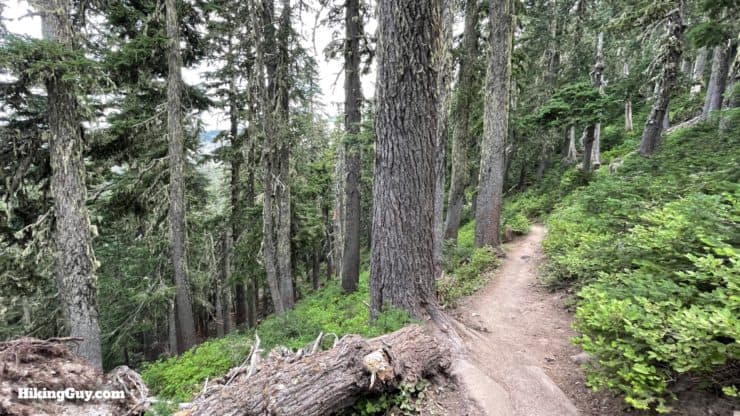
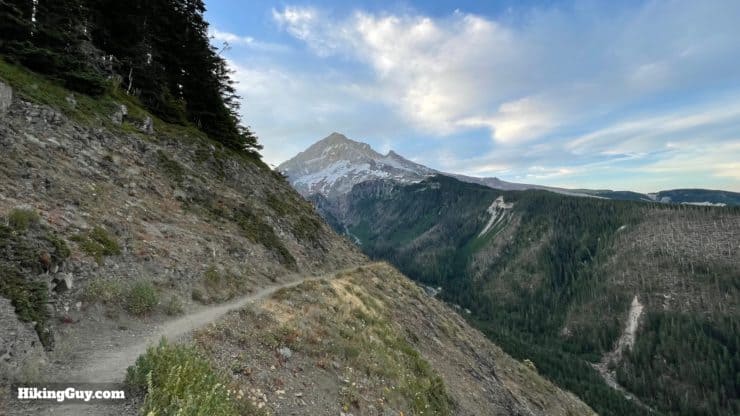
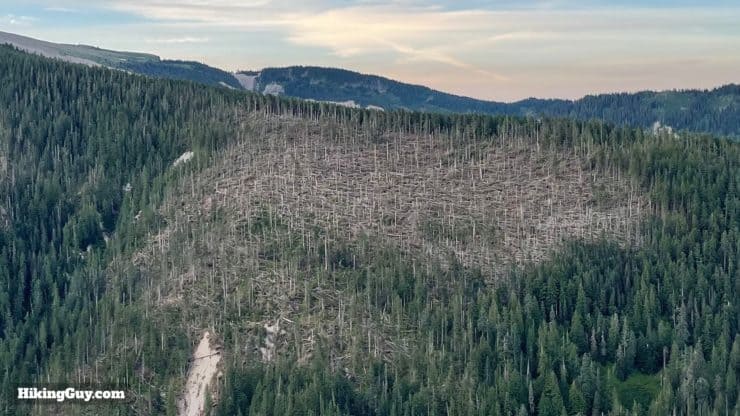
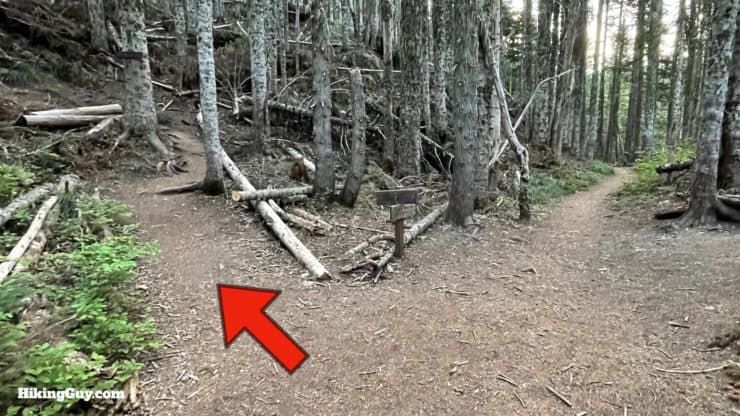
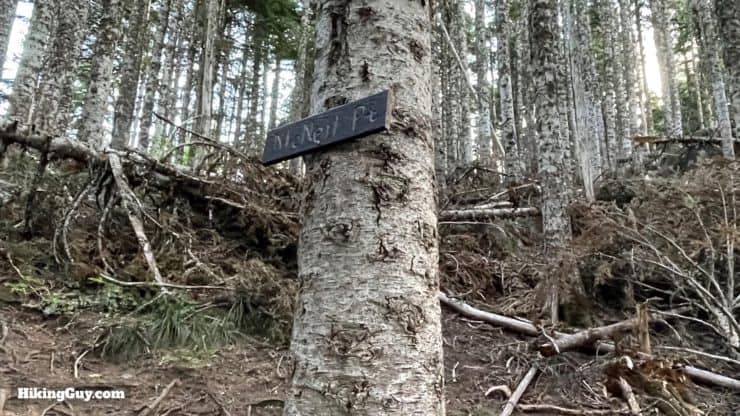
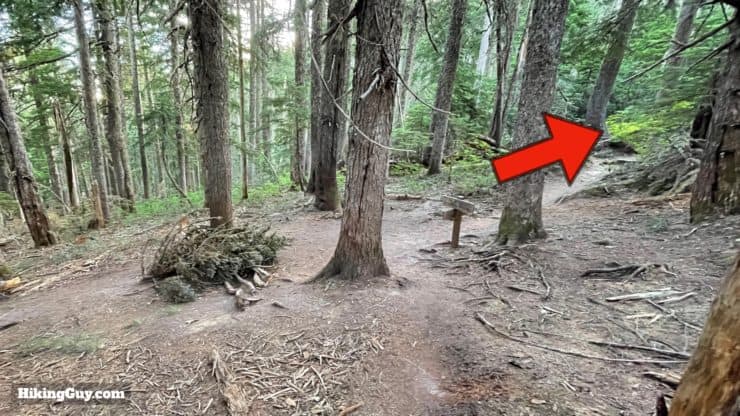
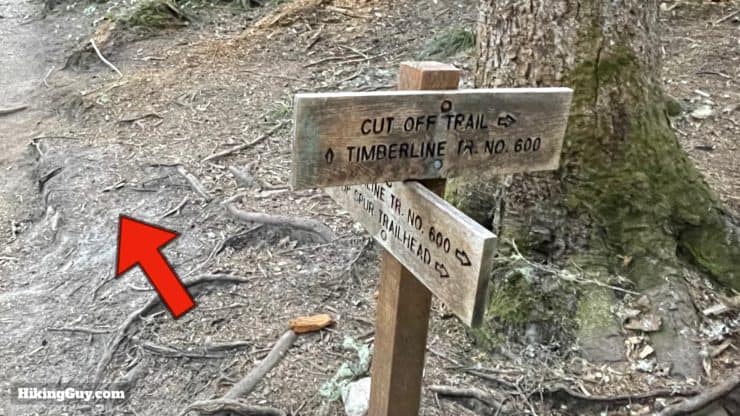
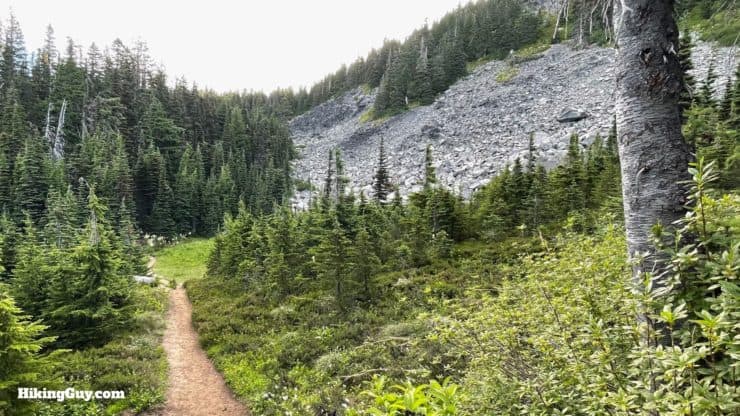
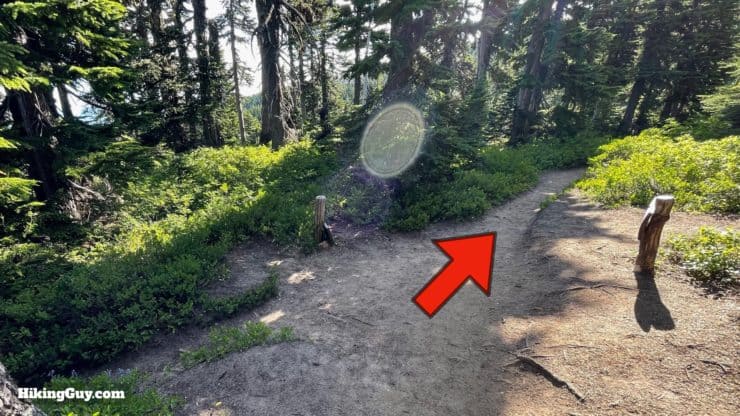
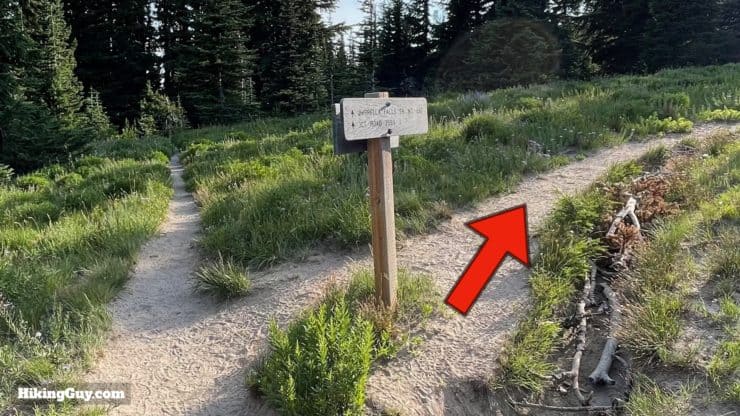
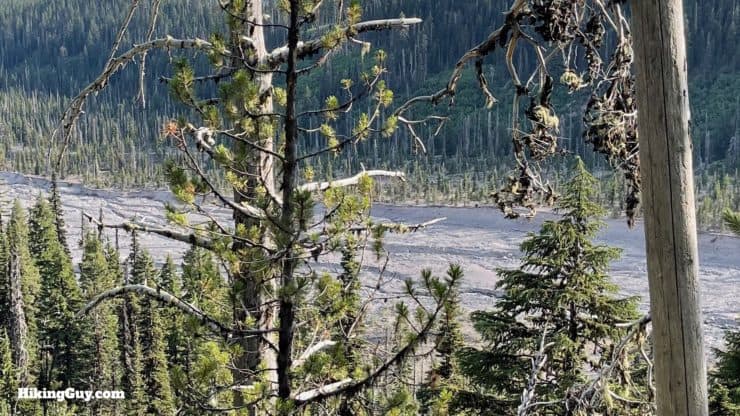
And then through the tall trees as the trail winds around Bald Mountain, a few hundred feet below the summit.And soon you'll be greeted with incredible views of the west side of Mt Hood.If you look across the valley to Yochum Ridge, you'll see the devastation from the Labor Day 2020 wind storms which closed that portion of the Timberline Trail and forced us onto the earlier detour.Okay, this junction is important. Make the hard left onto the cut-off trail. Otherwise you'll be heading down into the devastation I showed in the last picture.Here's a closeup of the sign at the junction.There's a sign for McNeil Point on the cut-off trail, It's a bit out of place; McNeil Point is up the trail a ways. Don't let it confuse you, you're not near it.At the end of the cut-off, make the hard right to continue on the Timberline.Here's the sign at that junction. We're on the Timberline Trail heading uphill.
Update: the following blowdowns have been cleared!
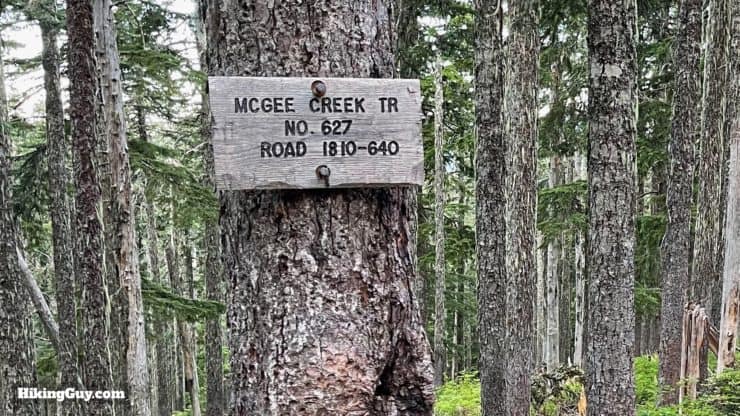
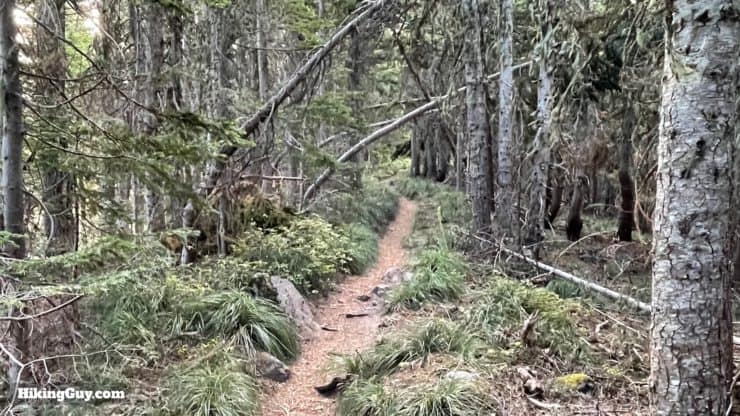
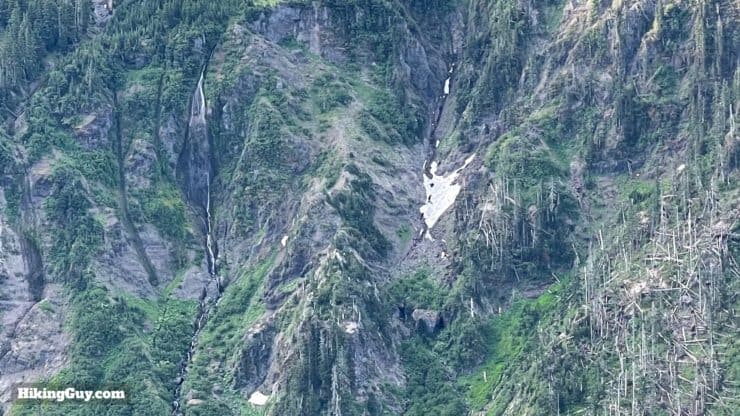
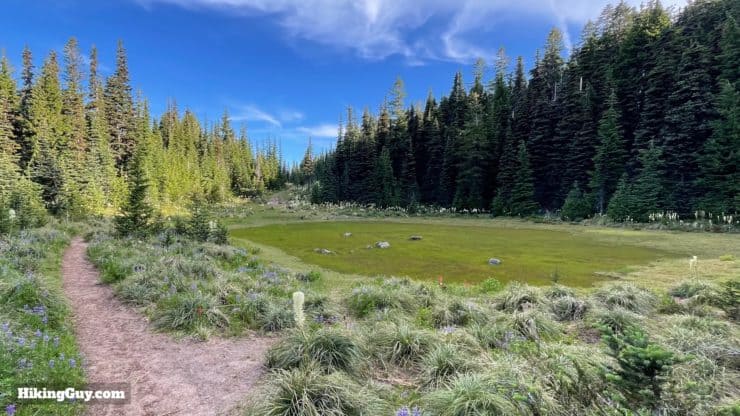
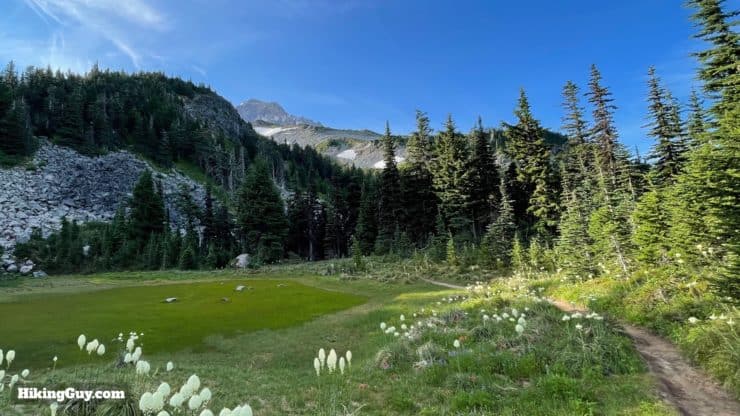
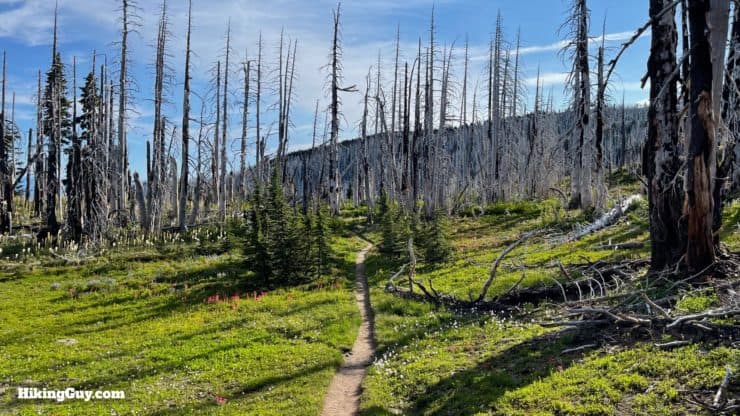
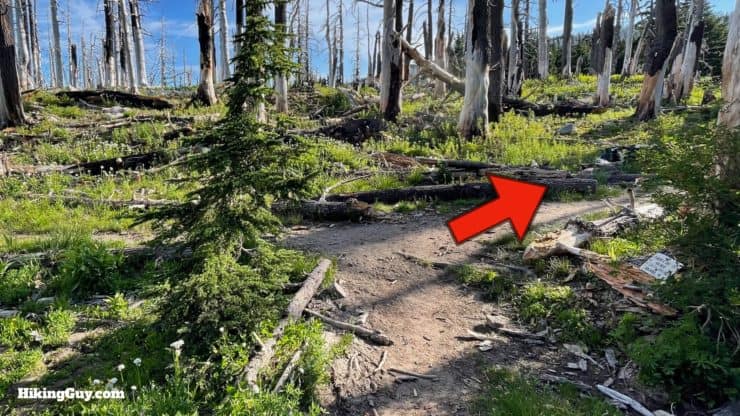
This section has a lot of blowdowns but they all have detours around or over.As you climb you'll pass the McGee Creek Trail on your right.Keep your eyes open to the left as you climb and the ridge narrows. You'll be able to see Mount Adams, the second-highest point and the largest active volcano in Washington State.The climb starts to level off and the ridge narrows even more.And then you emerge to great views of Mt Hood. The hill up ahead is McNeil Point. This is a great spot for a break.Look across the valley for the 800 foot Yochum Ridge Falls, which tumbles down to the Muddy Fork in the middle of the valley.And from here you'll really be able to see Sandy Glacier, which feeds the Muddy Fork River that you crossed earlier. The glacier has halved in size over the last 100 years. It's also home to the Sandy Glacier Caves, the largest glacier caves in the lower 48.Go straight past the unofficial cut-off trail to McNeil Point on the right.The trail goes past a hillside of volcanic Andesite rock, then through some nice meadow areas with hidden tent sites.Then you pass what is informally know as "McNeil Ponds," a pair of photo-worthy glacial tarns.Keep straight on the Timberline Trail as it passes through some small trails to tent sites and through the meadow.You'll cross a big alpine meadow.And then pass the junction with the Mazama Trail #625 on the left.
The Mazamas are a mountaineering club founded at the summit of Mt Hood in 1894, and are still active today.
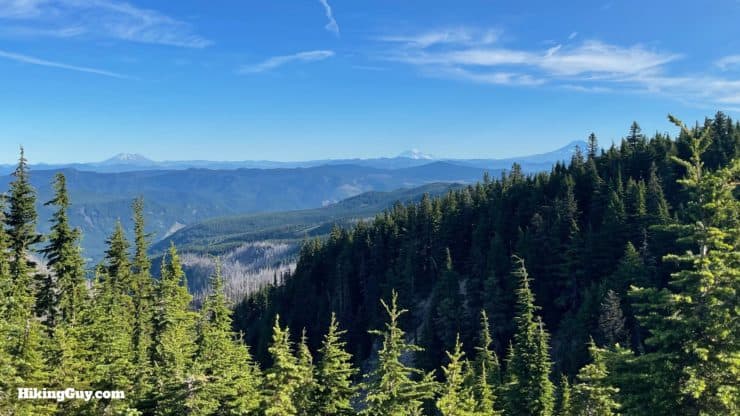
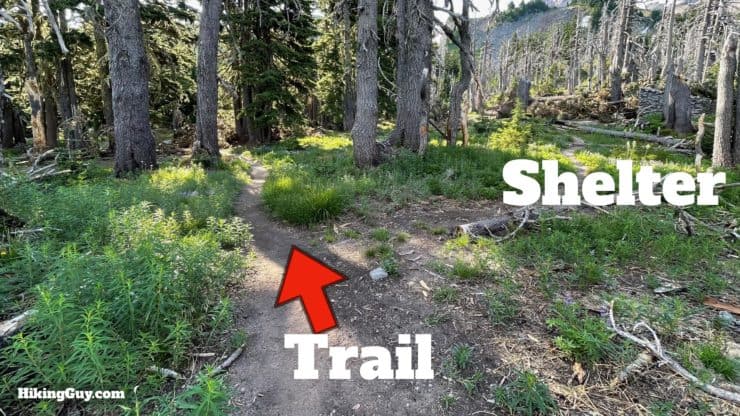
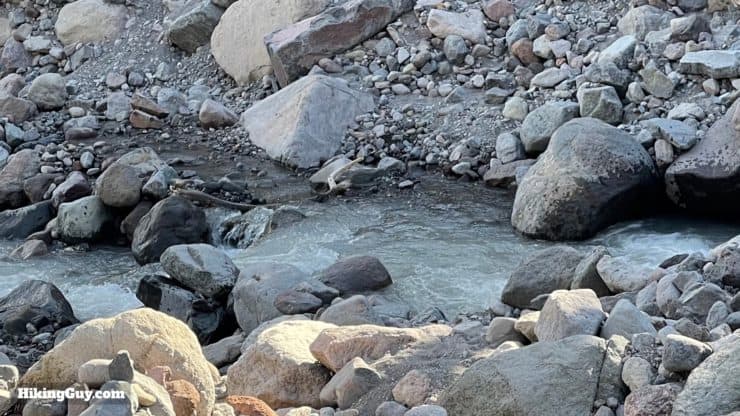
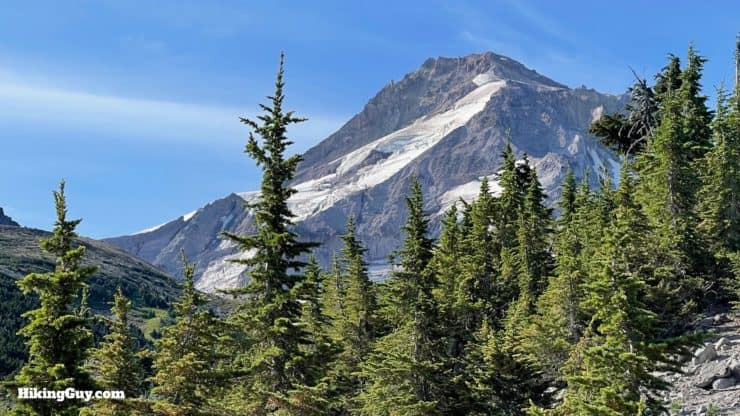
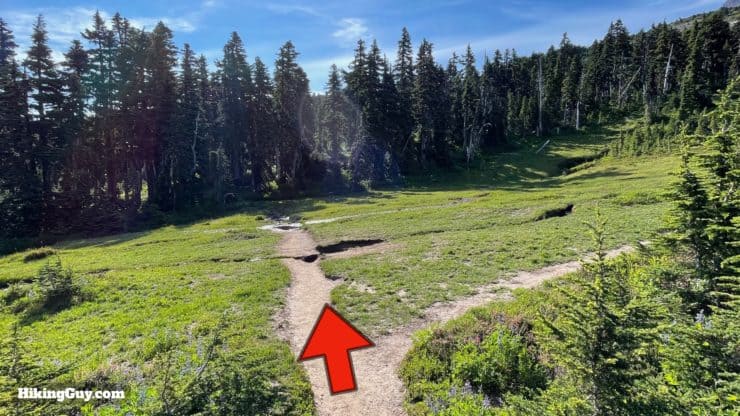
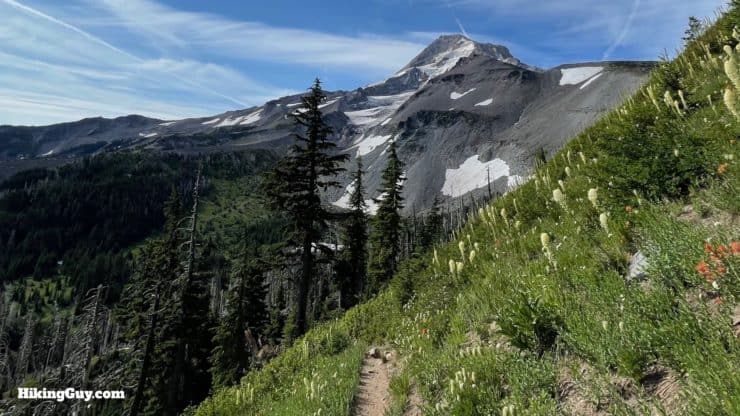
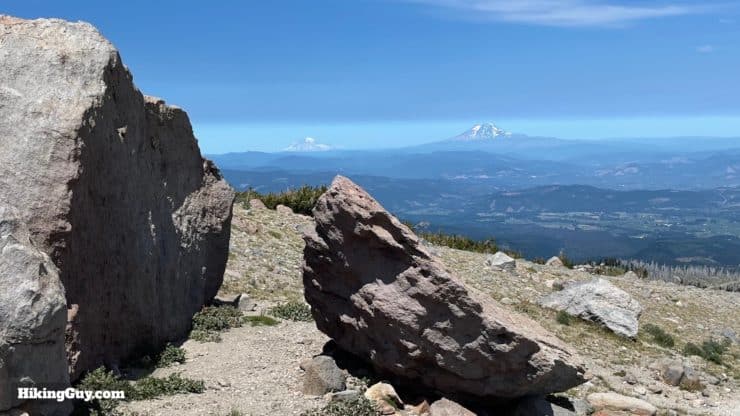
Look left as you hike for the trifecta of Cascades high peaks. From left to right: Mount St Helens (which had a major eruption in 1980), Mount Rainer (the highest point in Washington), and Mount Adams.Keep straight past the (official) McNeil Point Trail on the right.Then you'll have a crossing of a stream coming from the Glisan Glacier. It's not usually mentioned in guides but can be challenging when it's moving.The trail passes through an area destroyed by the 2011 Dollar Lake Fire.Pass the Eden Park Trail, which leads to an alpine meadow, on the left, and continue right on the Timberline Trail.Shortly after the last junction, look for the unmarked turn-off to the right, which leads to Carin Basin and the old shelter.The shelter is close to the trail and worth checking out. It's one of the original six stone shelters built as a refuge for hikers in 1934.Shortly after that you'll descend to the Ladd Creek crossing.This is another crossing that isn't mentioned often but can be challenging. The stream is deep and fast.After Ladd Creek you'll start a long descent with new views of Mt Hood. You're about 2.5 miles away from the summit here. At one point later, on the other side of the mountain when you are above the timberline, you'll be about a mile closer.At the junction with the Vista Ridge Trail #626, stay straight on the Timberline Trail. And yes, that's an orb photobombing me.Hike straight through a meadow called the Wy'East Basin.
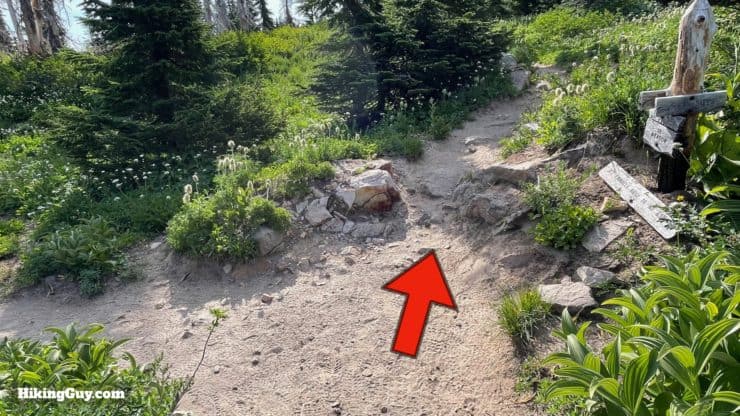
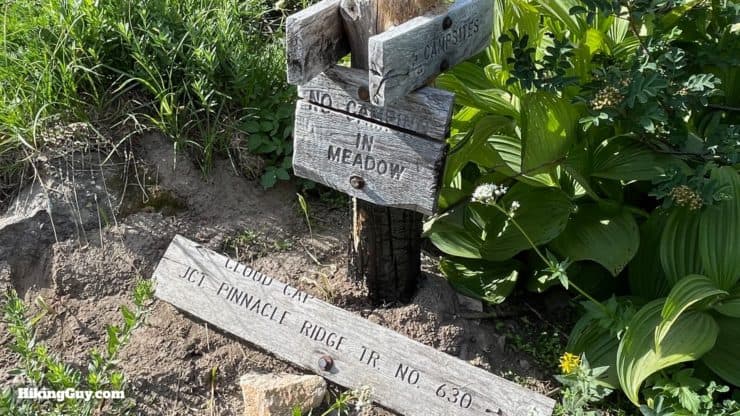
Go straight past the Pinnacle Ridge Trail #630 on the left.You'll get more great views of Mt Hood and the north Coe Glacier as you descend.And then you'll come to the junction with nearby Elk Cove (to the left).Here's the sign at that junction. The meadows at Elk Cove make it a popular camping spot. Stay on the established tent sites around the meadow.
There are elk in Oregon, although I've never seen any on the Timberline Trail.
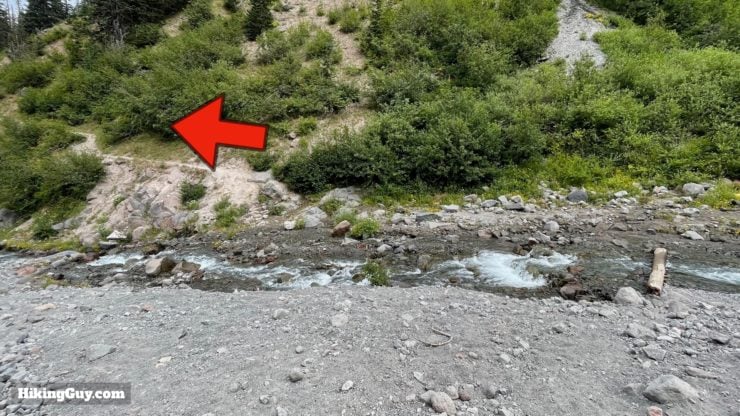
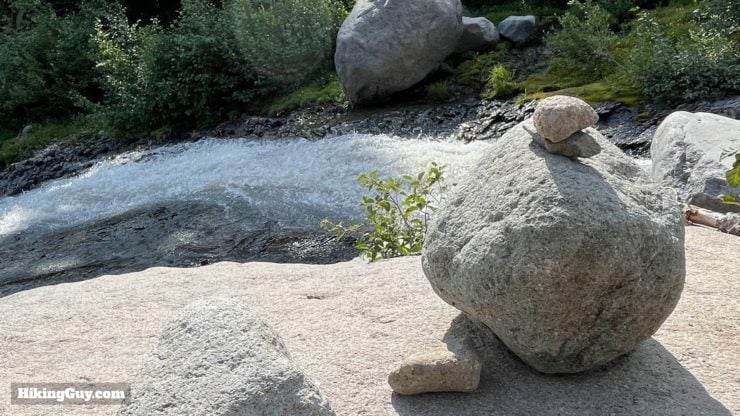
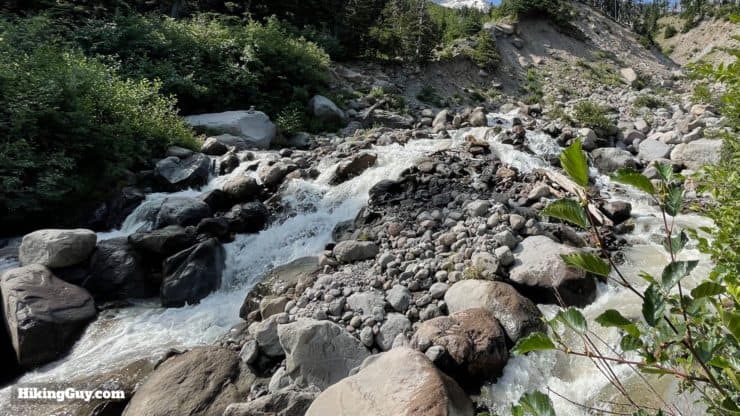
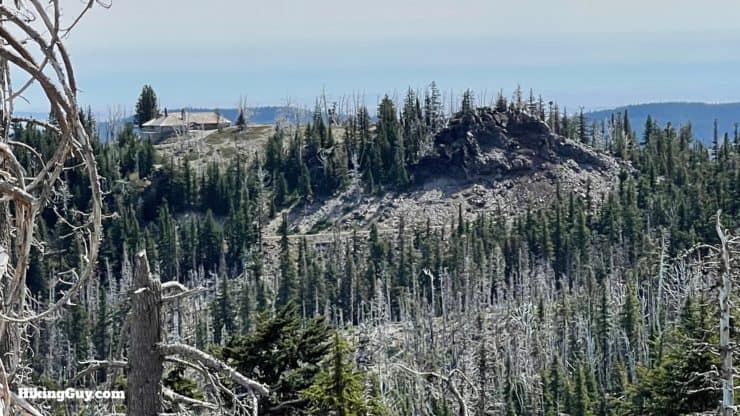
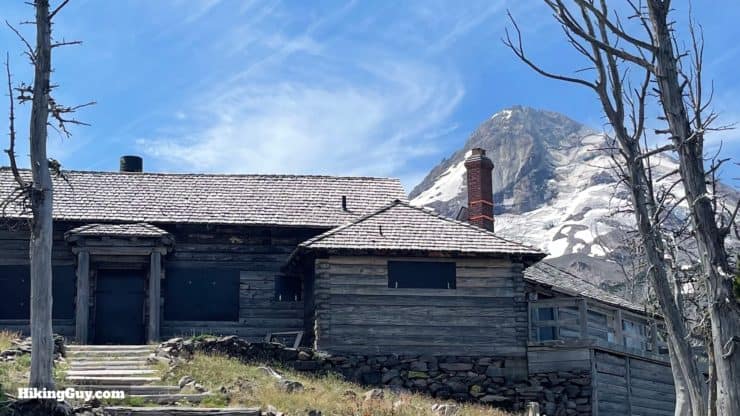
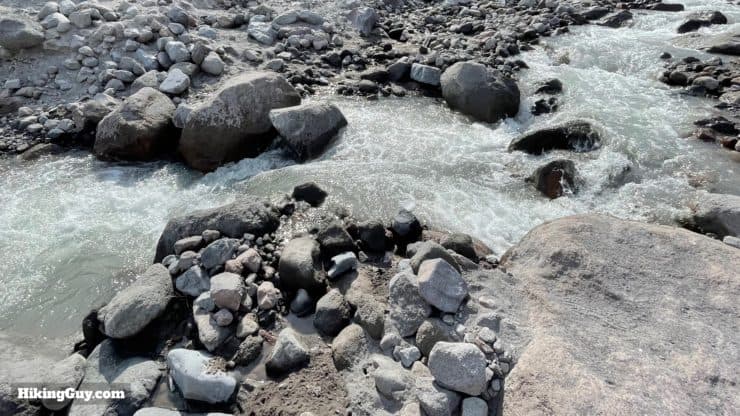
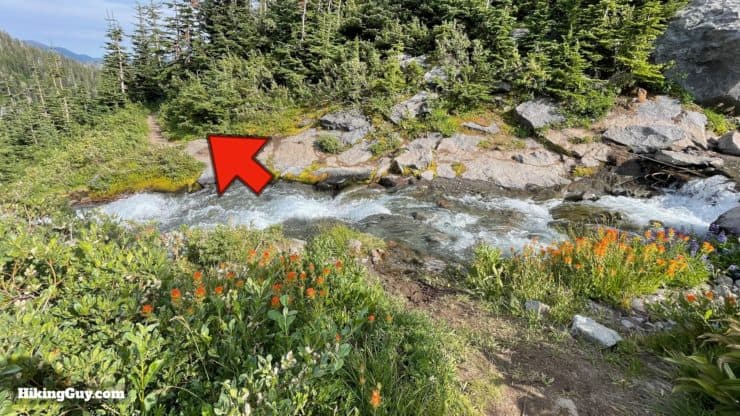
Shortly after Elk Cove you'll have to cross the Coe Branch. Look for the cairns for a good place to cross.The Coe Creek, although not wide, can be tough to cross. It's deep and fast.Here's what it looks like once crossing.Then you have a nice climb up from Coe Creek. Keep your eyes open for switchbacks that can be blocked by blowdowns.As you crest the ridge, you'll see the Cloud Cap Inn on the next ridge over.And then you descend the switchbacks to the infamous Elliot Branch. The trail you are on now is a reroute of the original trail, which was washed out in 2006. The detour trail was opened in 2017.Make your way across the Elliot Branch, which many hikers consider the toughest crossing on the whole Timberline Trail. Make sure you read my earlier crossing tips, take your time, and you'll be fine.Once the Elliot Branch is behind you, start climbing up to Cloud Cap. You'll pass another permit box.And then arrive at the Cloud Cap Trailhead. The Timberline Trail continues as a hard right here, but I encourage you to take a break at Cloud Cap, which is off to the left.There are picnic benches and tent sites around the area.There's also water (by the parking area) that you don't need to filter.It's a short walk over to the Cloud Cap Inn historic site.
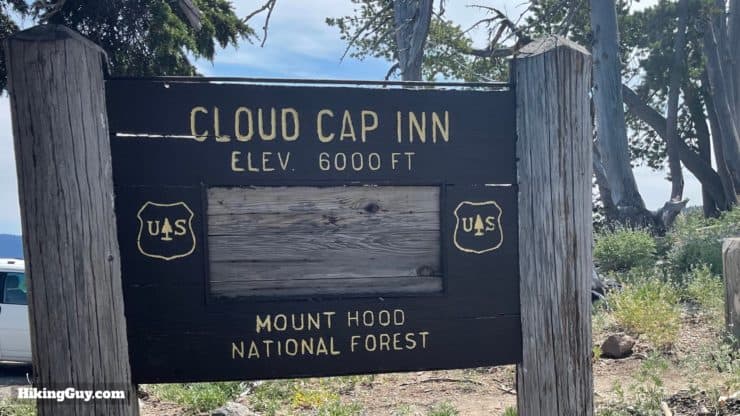
The Cloud Cap Inn, built by Chinese laborers for $50,000 in 1889, is Mt Hood's first resort. It had a tough go of it, and in 1946 closed for good as a resort, with the Timberline Lodge effectively putting it out of business. Oregon's PBS has a cool (and short) documentary on the Cloud Cap Inn that's worth watching. Today, America's oldest search and rescue organization, the Crag Rats, is restoring it while using it as a base for operations.
Explore the Cloud Cap Inn and then return to the trailhead.
3: Cloud Cap to Timberline
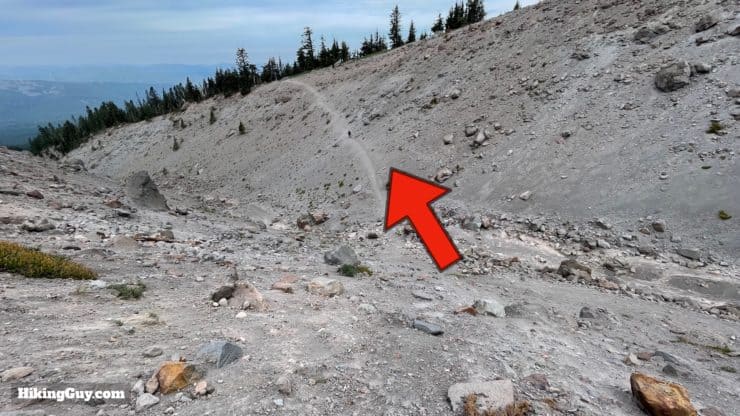
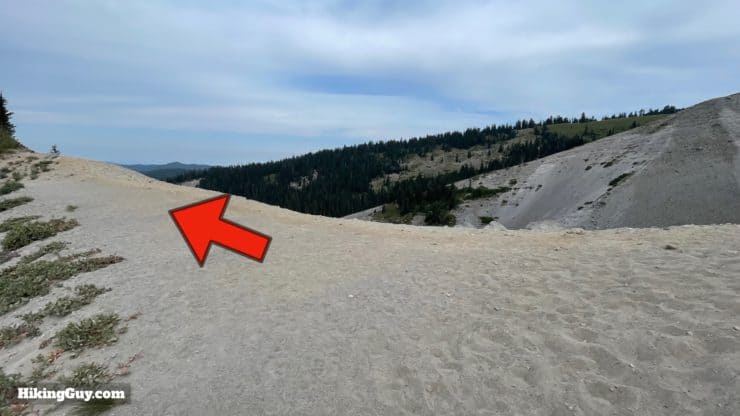
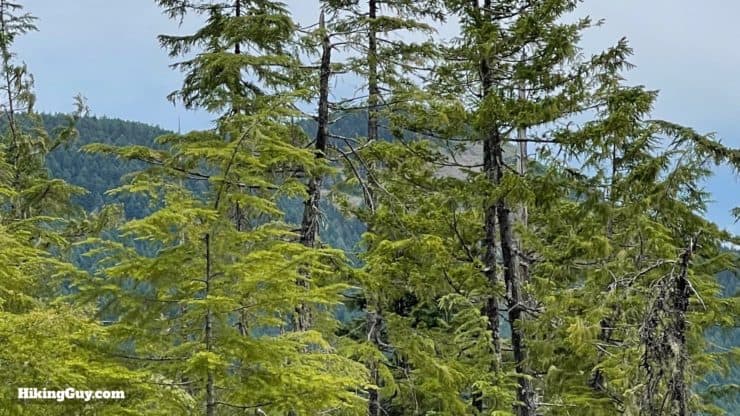
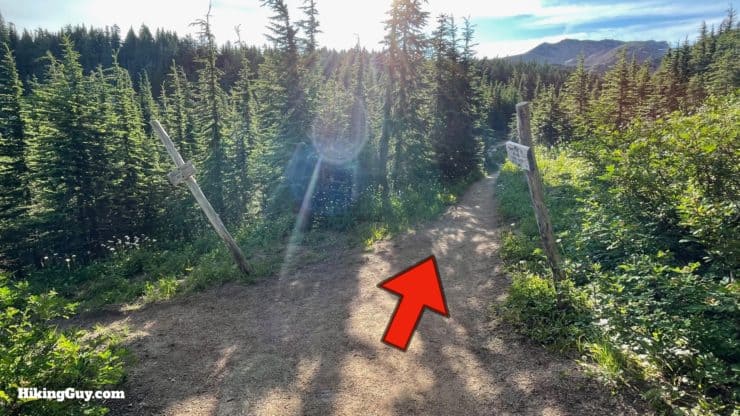
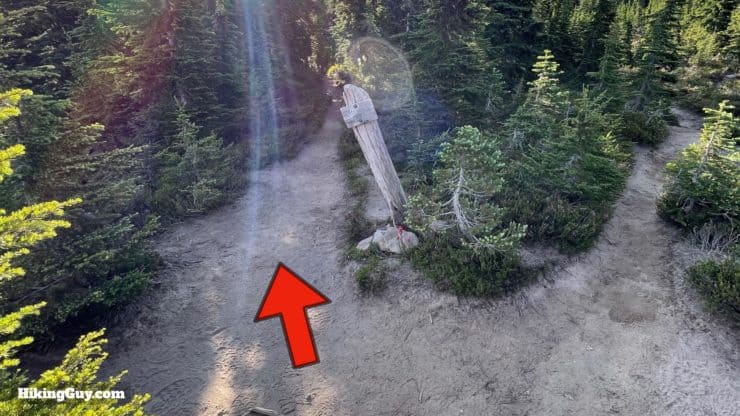
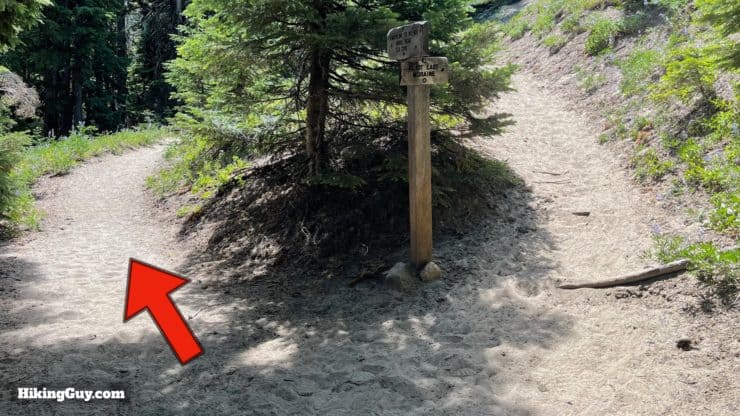
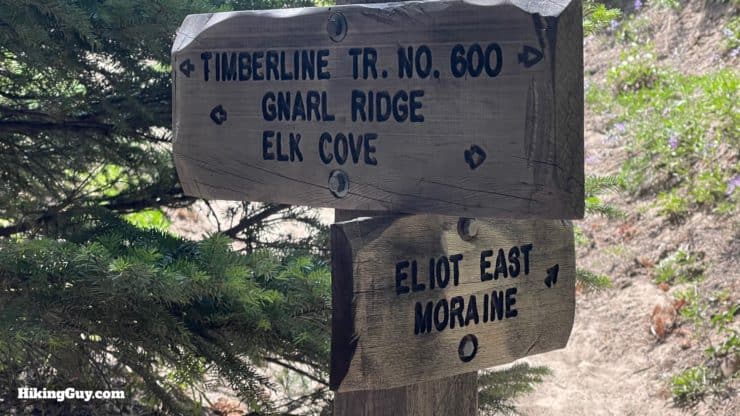
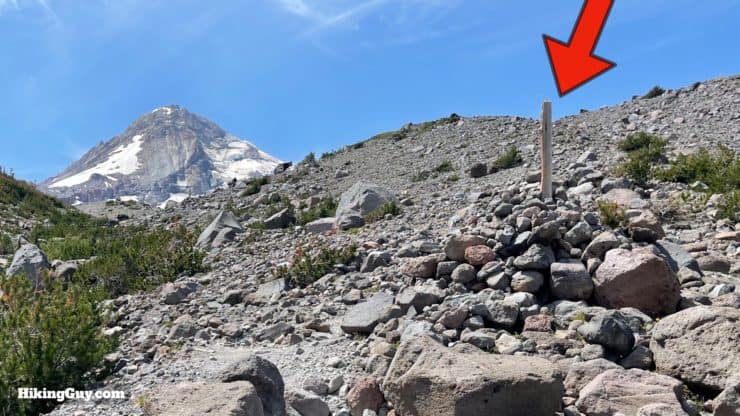
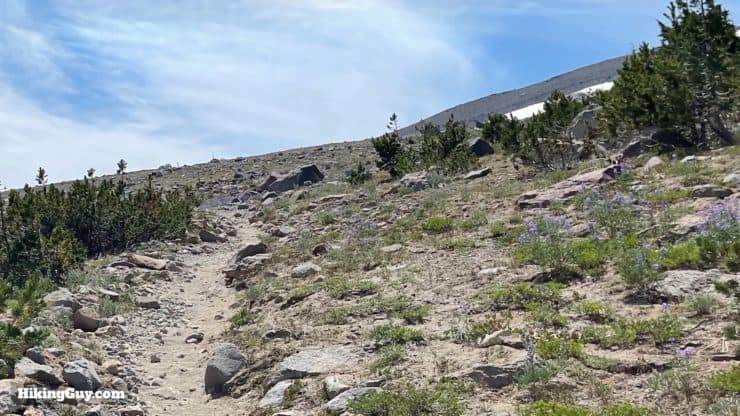
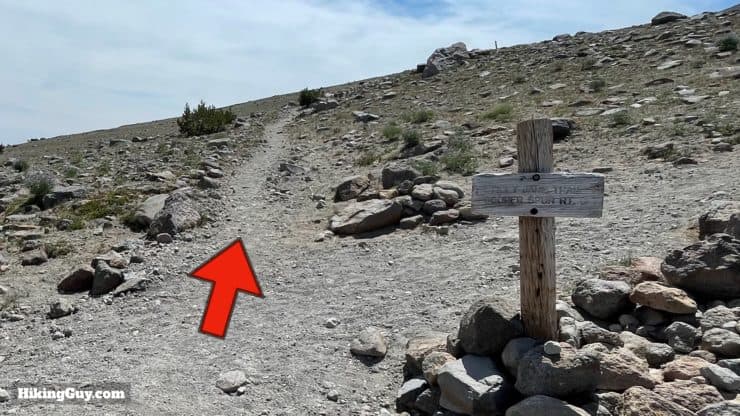
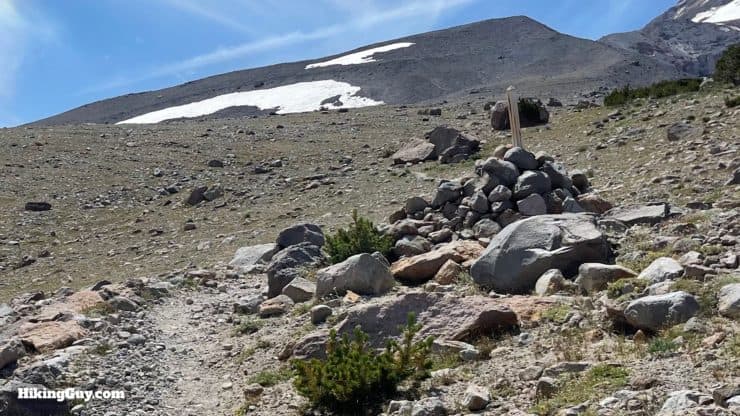
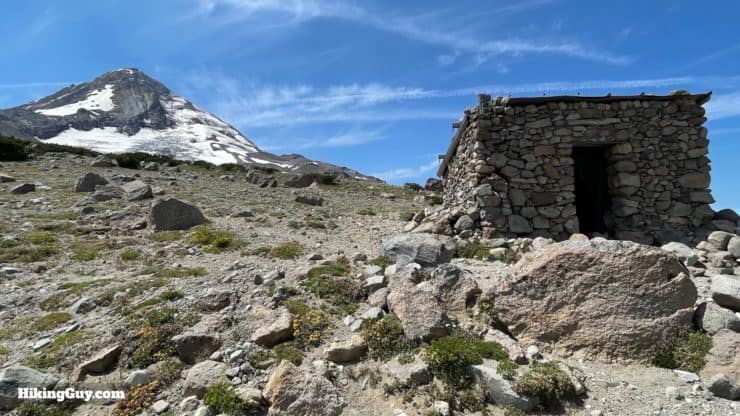
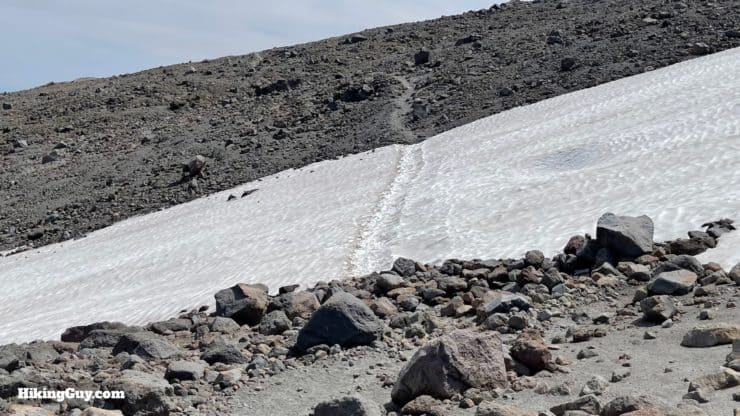
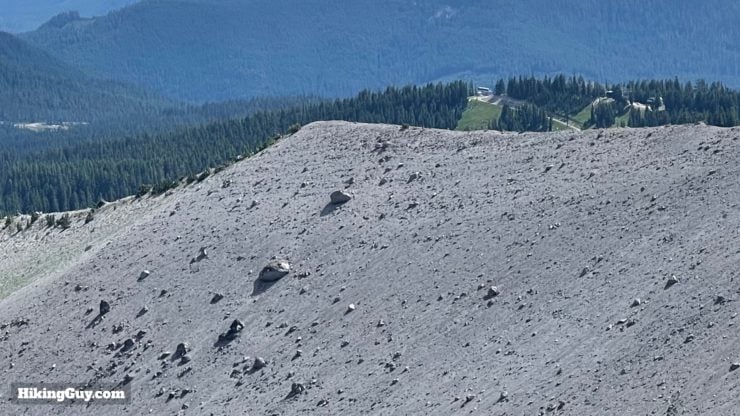
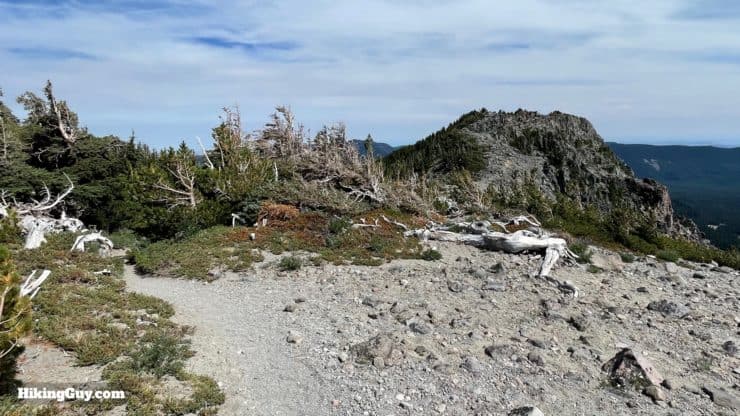
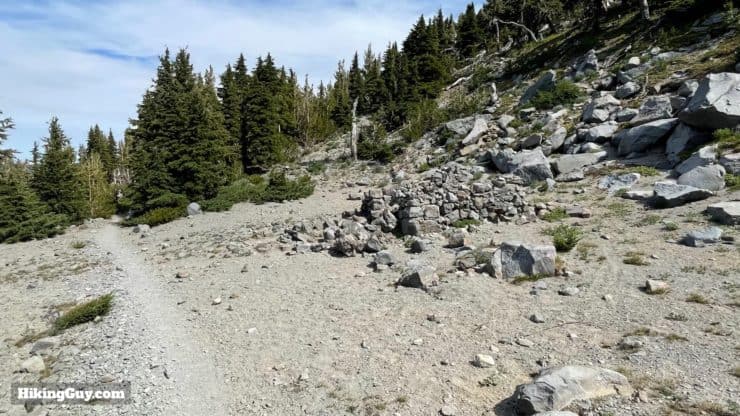
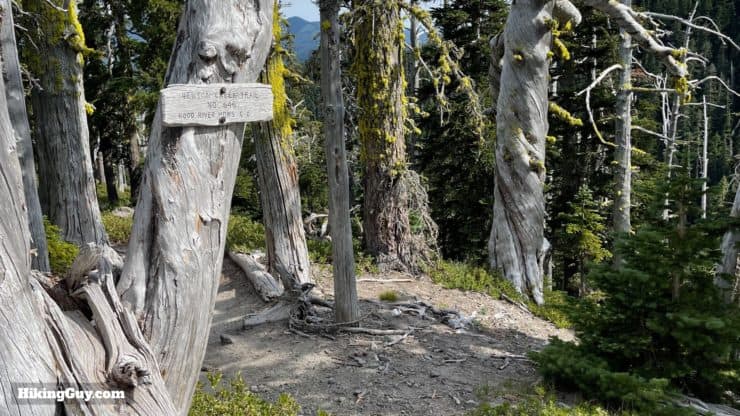
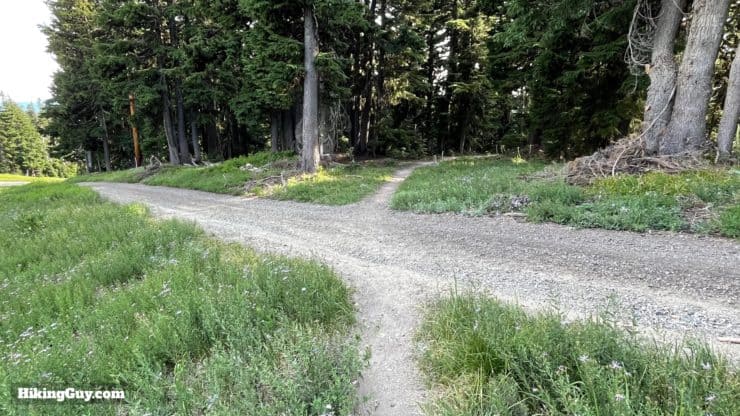
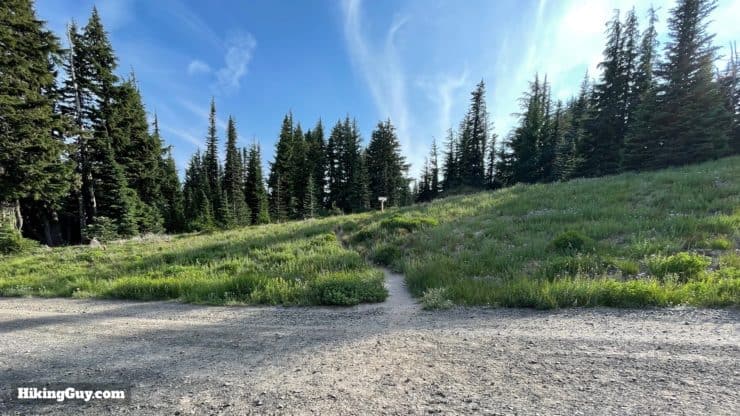
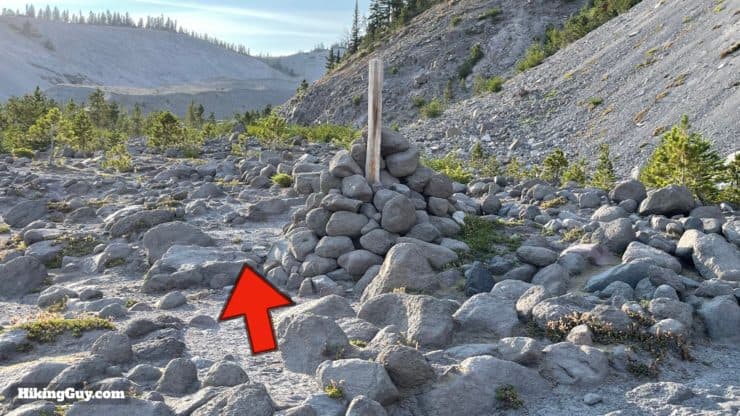
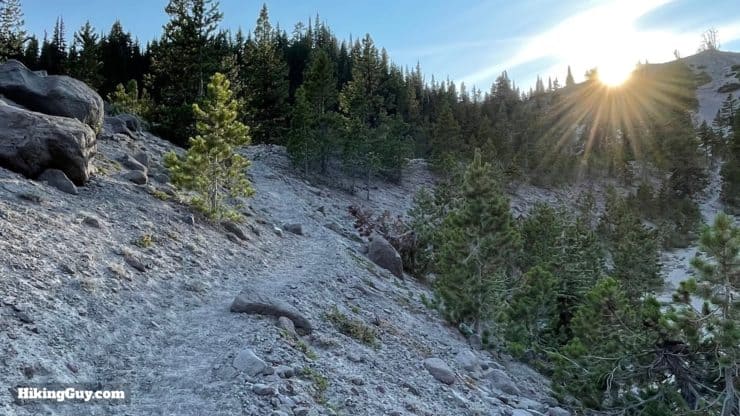
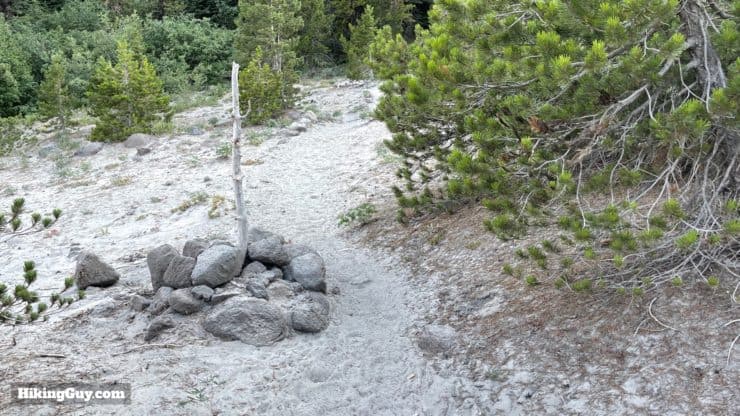
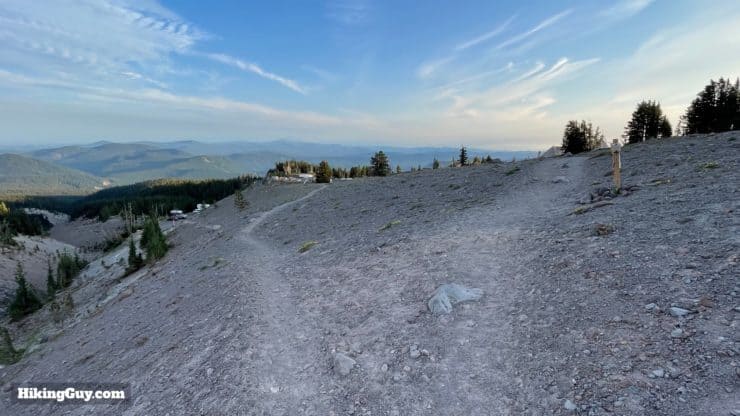
Okay, head back to the trailhead and hike straight, avoiding the Tilly Jane Trail on the left.Soon you'll pass a permit box and a Mt Hood Wilderness sign.A spur trail to the Eliot Glacier Moraine is off to the right, stay left on the Timberline.Here's the sign at that last junction. We're heading to Gnarl Ridge, named for the gnarled (and endangered species of) whitebark pines found at the edge of the tree line ahead.As you climb away from Cloud Cap through Tilly Jane Canyon, the trees thin out and you climb through the rock. Look for these cairns, cedar poles mounted in big rock piles, which are the original style trail markers from 1934. Above the tree line, these are the primary trail markers.The trail winds away from Tilly Jane Canyon and climbs along the lower slopes of Cooper Spur. The trees give way to boulders and rocks.Keep going straight at the Cooper Spur Route junction.You'll see the distinctive rock and pole cairns unfolding in front of you as you gently climb towards the Timberline Trail's high point.Off to the left there are epic views of Bluegrass Ridge, nearly 5 miles long at an elevation of over 5000 feet.And if you look back, you still get views of our friends, Mt Adams, Mt Rainer, and Mt St Helens.When you arrive at the unmarked intersection just past the boulder, the Timberline continues straight, but I suggest taking a 2 minute detour up one of the use trails to the right and visiting the shelter.Here's Cooper Spur Shelter, one of the original stone shelters built in 1934. It's got a steel roof and small fireplace and chimney. I wouldn't stay in it unless there was a storm, but if you do want to camp in this scenic spot, there are a lot of tent sites around (but no water). The glacier directly above you is the Elliot Glacier, which feeds the swift Elliot Branch that we crossed earlier.Head back on the Timberline and continue hiking uphill through the desolate lave fields. You'll likely cross a few snowfields as you approach the high point of the hike.
What's the difference between a snowfield and glacier? A snowfield is a large amount of snow that stays around all year, usually in a cooler or shady spot. A glacier is a larger body of snow that has recrystallized into ice and now moves like a slow river because of its mass.
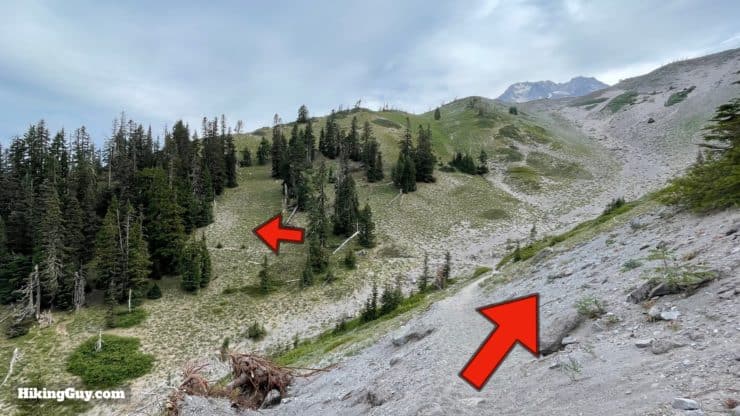
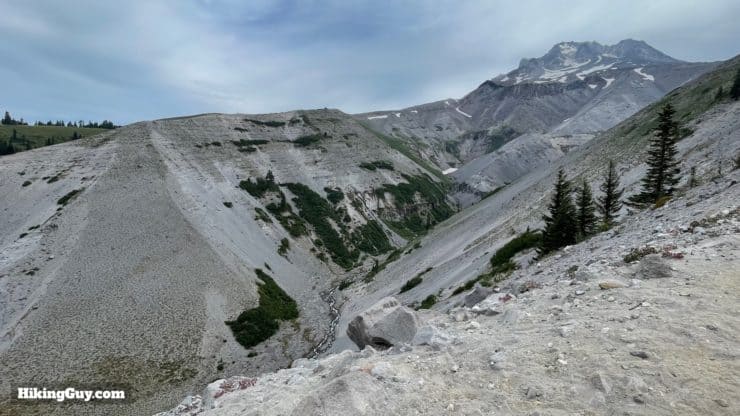
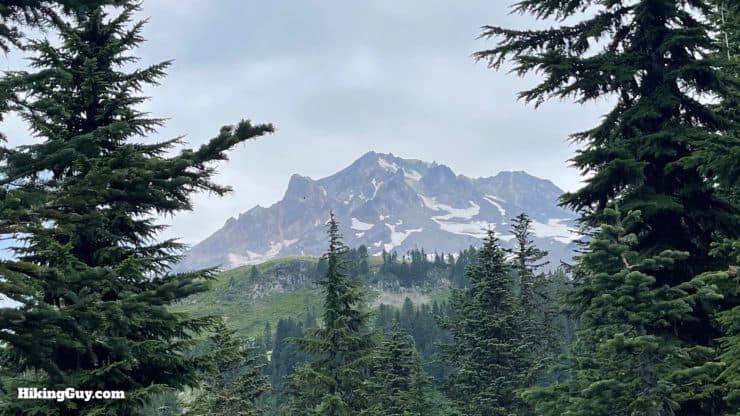
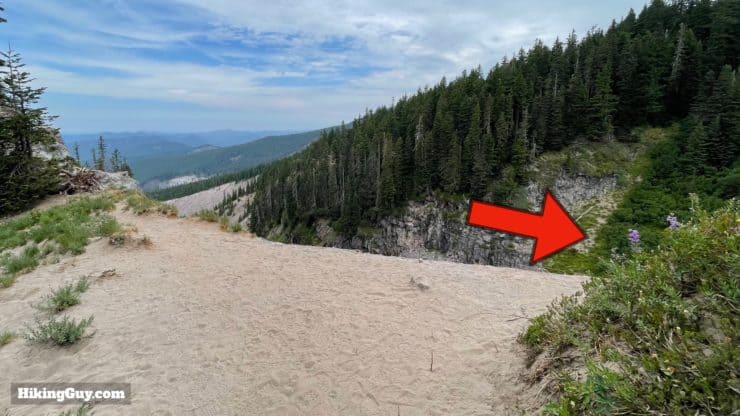
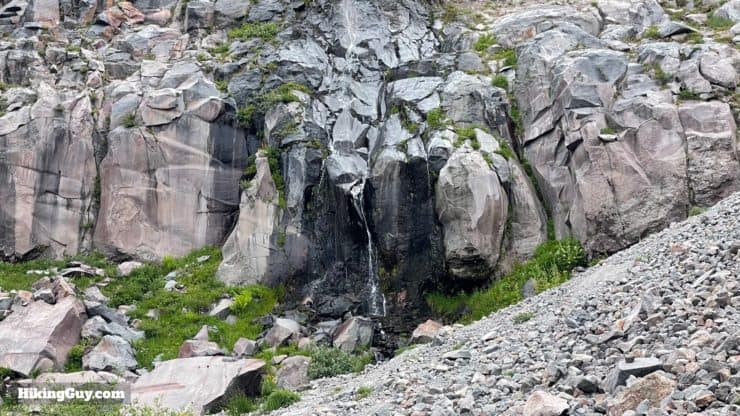
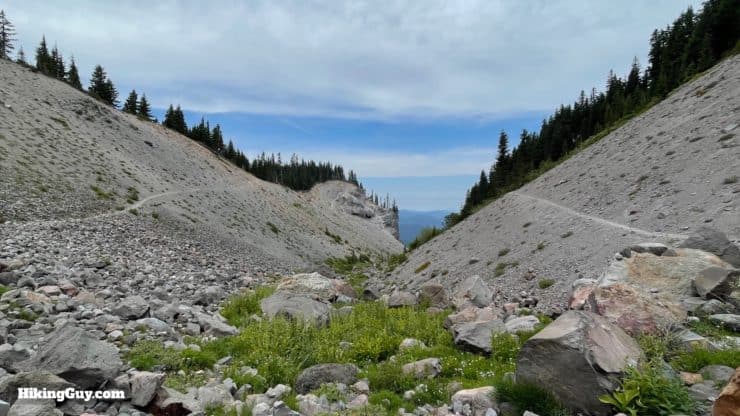
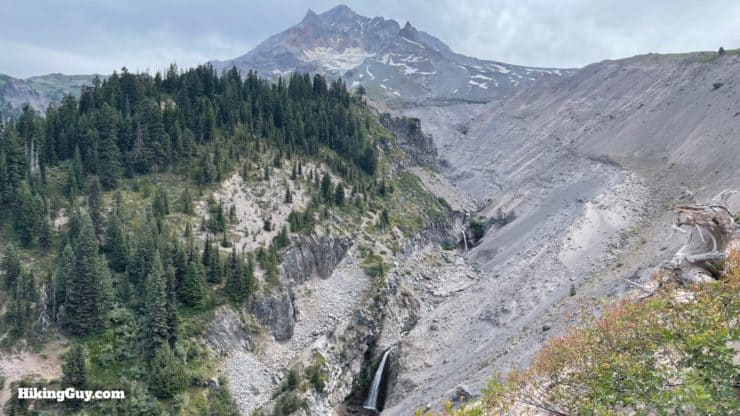
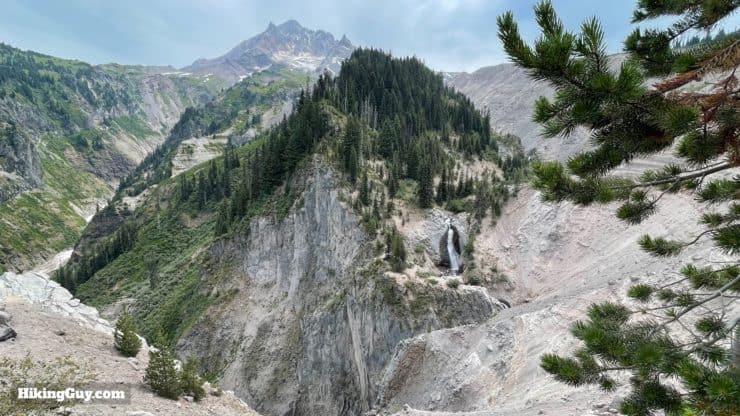
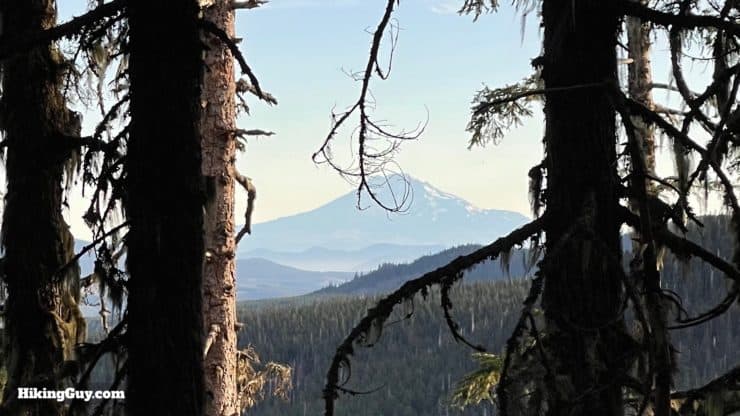
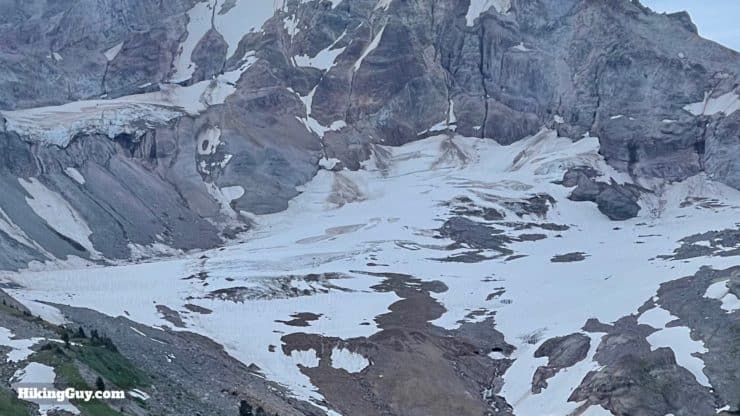
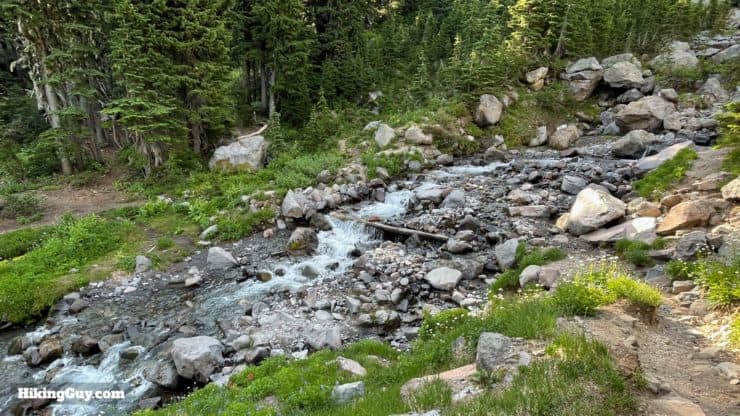
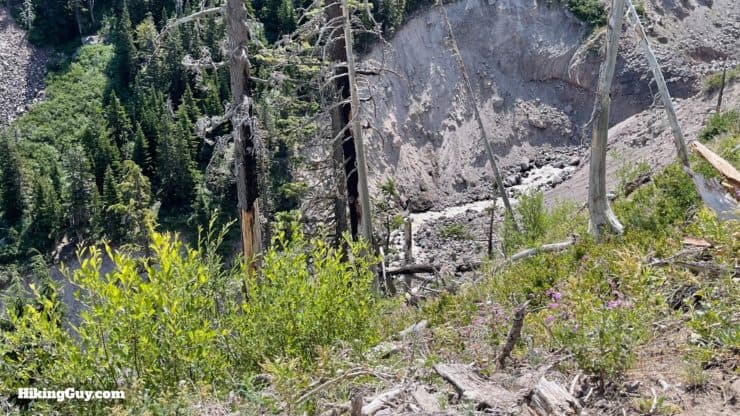
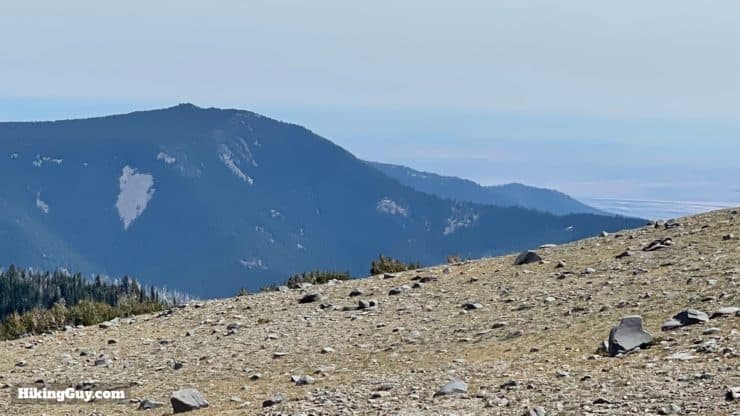
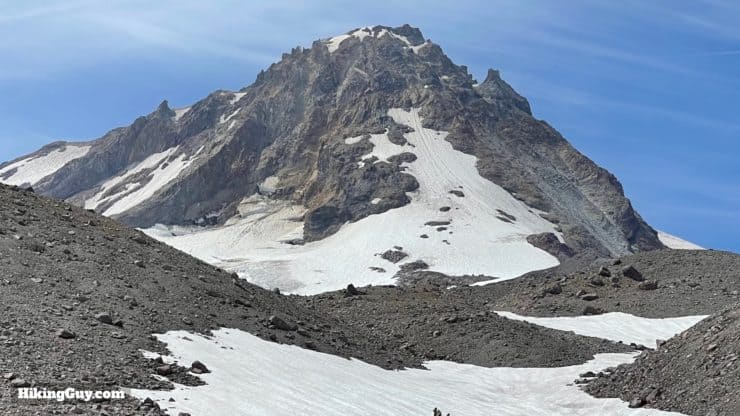
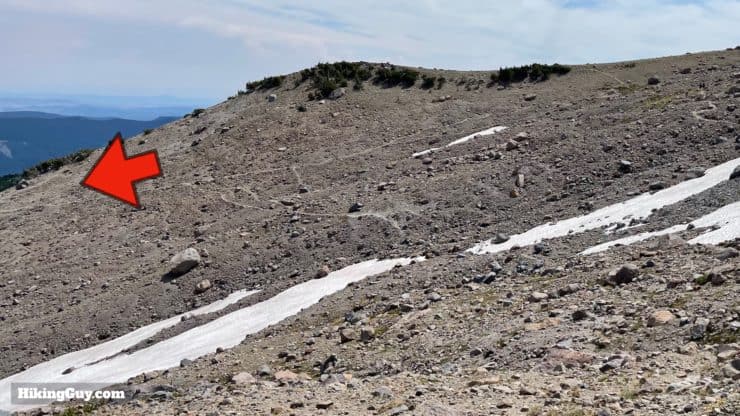
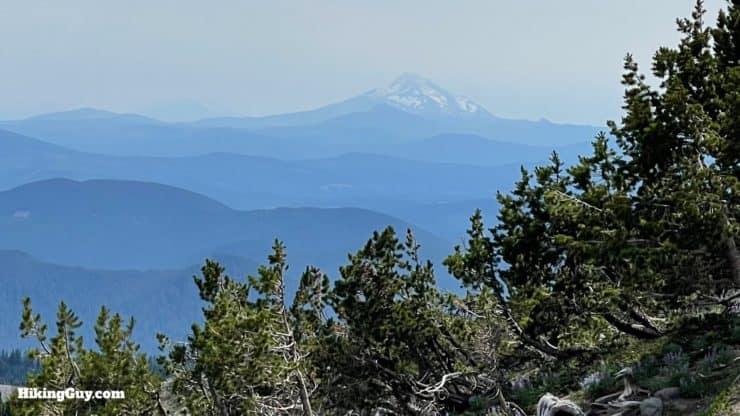
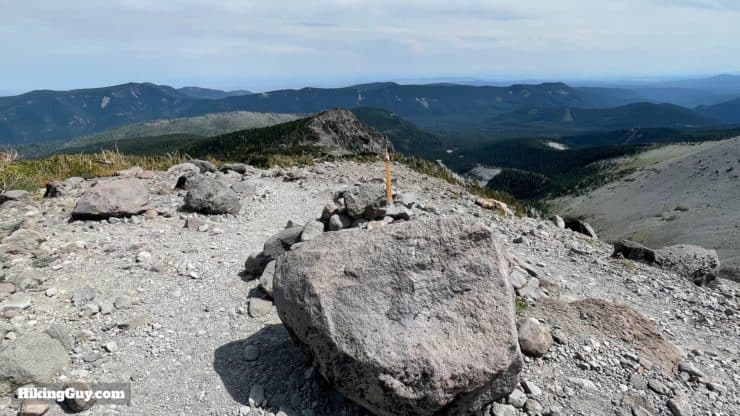
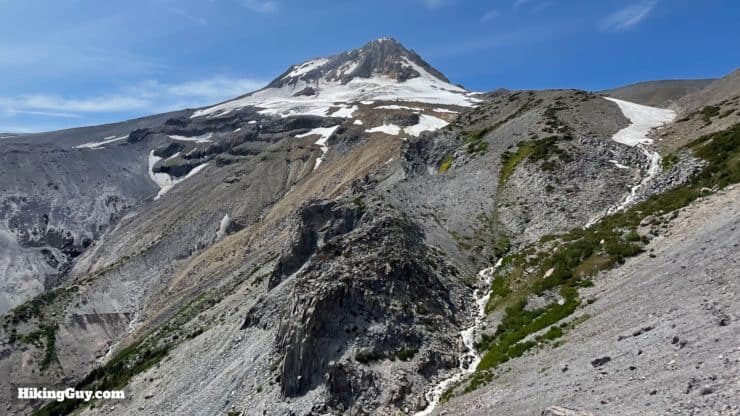
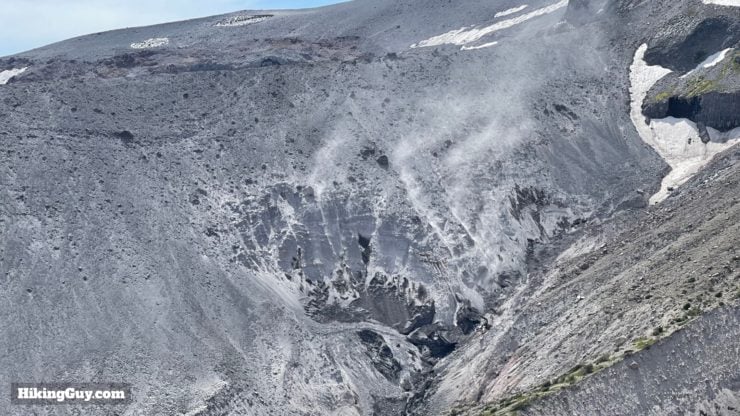
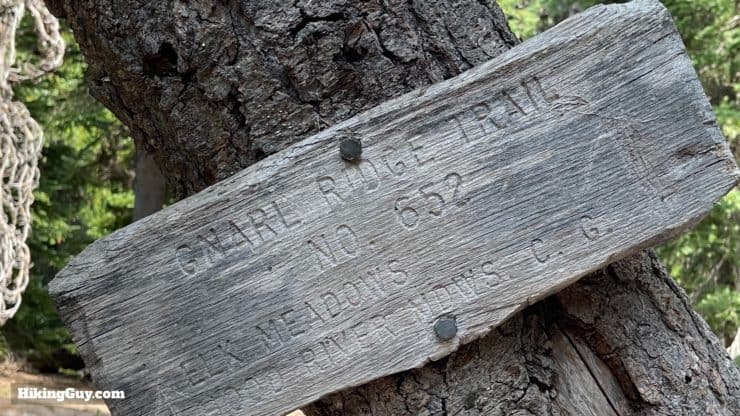
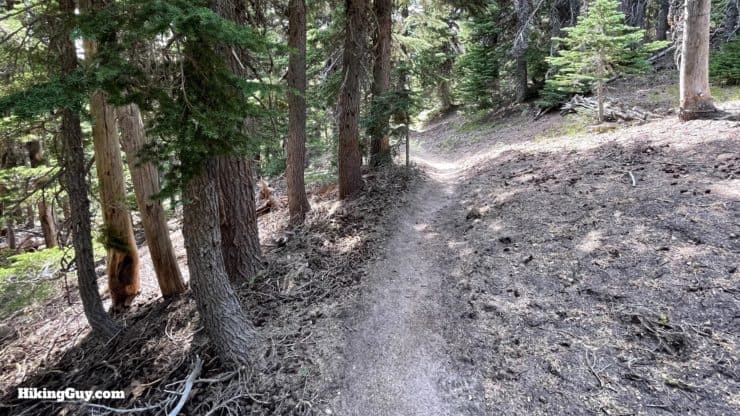
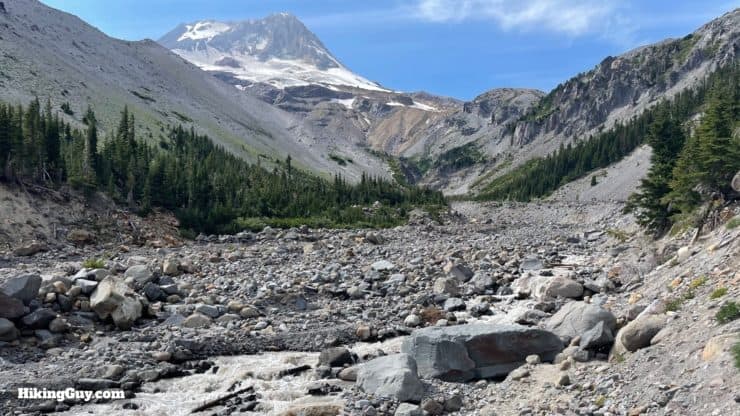
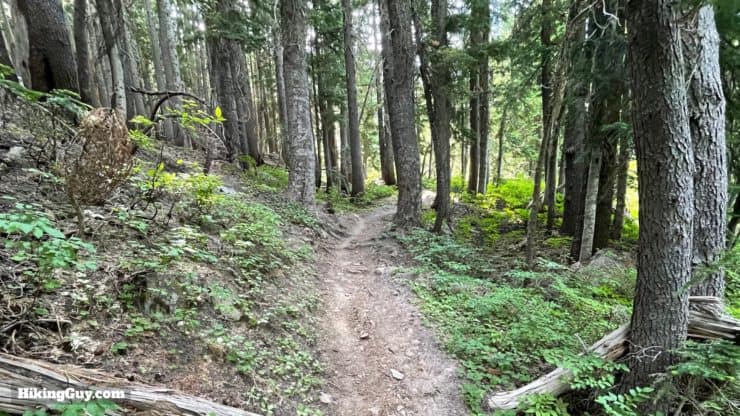
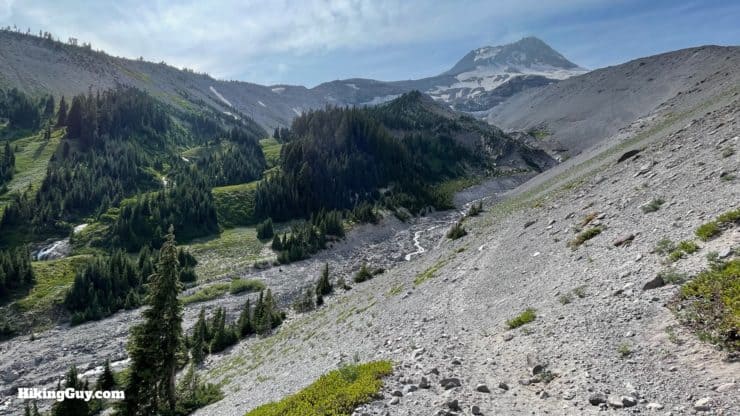
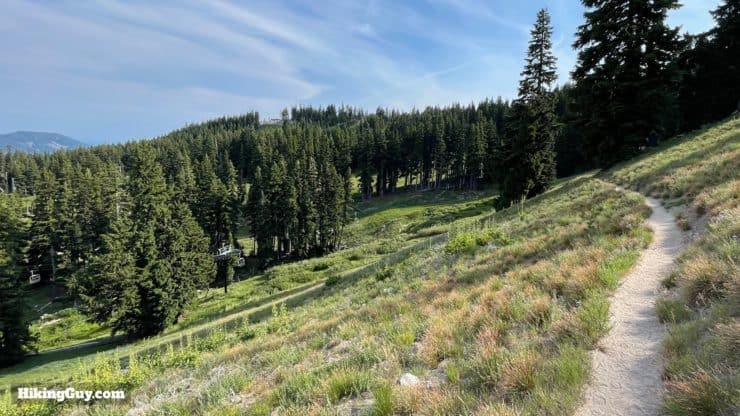
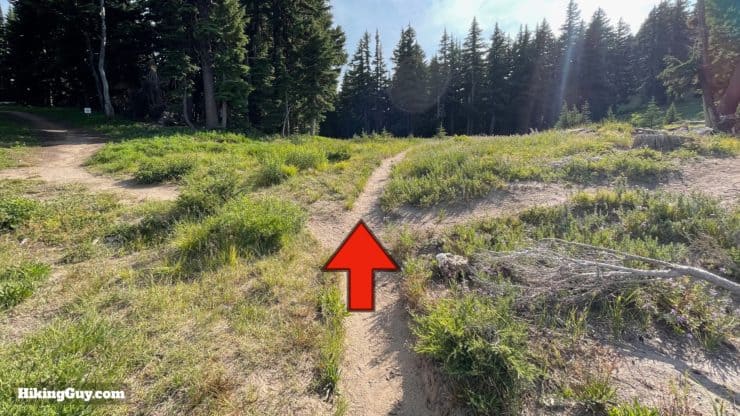
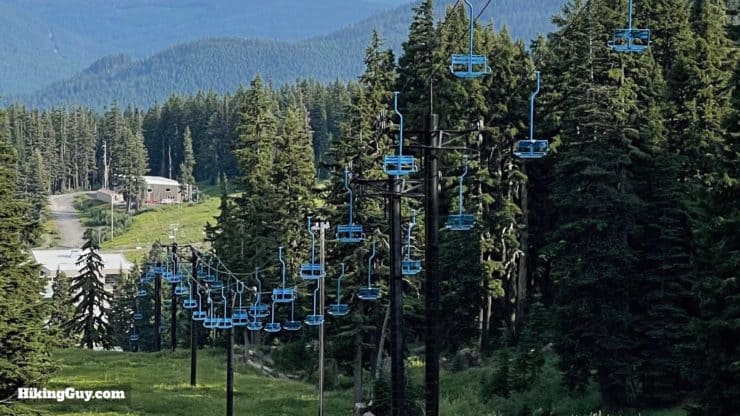
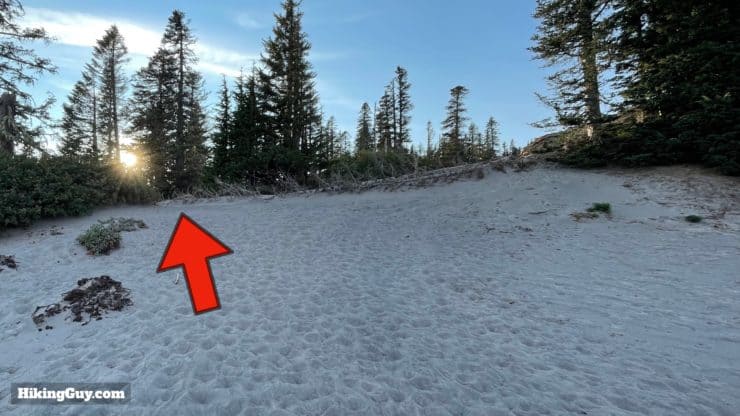
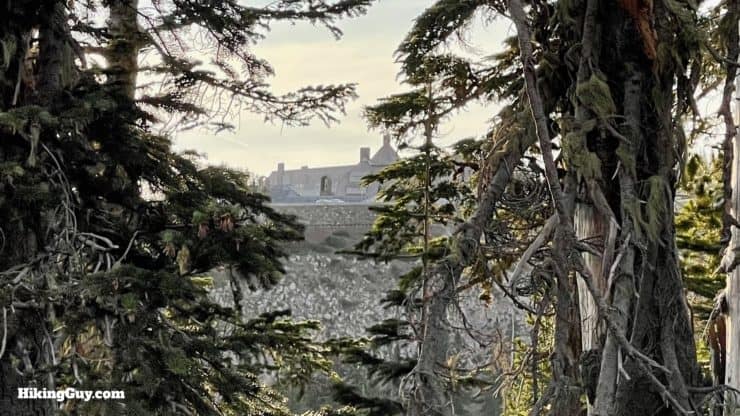
And here you are, the Timberline High Point at 7335 feet. There's a little plateau where you could camp, but it's fairly exposed.The views of Mt Hood from here are impressive. This is the closest that you'll be to the summit, just over 1.6 miles away. The glacier is called the Newton Clark Glacier, and is an anomaly because it's based (on a surveyor's) full name, not just the last name as is the rule for modern place names.Now we've got a long cruising downhill for the next 4 miles or so. There are a lot of use trails around the snow fields, but in general look down to the left for the continuation of the trail.As you wind south you'll start to get some great views of Mt Jefferson, about 50 miles away and the second highest point in Oregon after Mt Hood.As you descend, there's a little climb to a cairn. This is the crest of Gnarl Ridge, which opens up to my favorite viewpoint on the Timberline Trail. Turn around and you see...The massive expanse of Newton Clark Canyon and the east face of Mt Hood lies in front of you. Waterfalls cascade down hundreds of feet of canyon walls. Being here feels as if you've stepped into a postcard. Soak it all in.Look across the canyon at the steep and massive wall of loose rock called Newton Clark Moraine. Unlike most moraine on Mt Hood, which are terminal or lateral, this is more rare medial moraine, formed as the two glaciers on either side of the canyon ground the rock down on this ridge in between them. This type of moraine is more common in Alaska than it is here.Start heading downhill from the Gnarl Ridge viewpoint. In the distance to the right you'll see Mt Hood Meadows ski area, which we'll be hiking through in about 5 miles.The trail follows Gnarl Ridge downhill.Just before Lamberson Butte directly ahead, you'll make a left and descend into the pines. Lamberson Butte is the highest point on Gnarl Ridge and has a very sketchy scramble trail that is visible as you descend the ridge.Shortly after that turn you'll see the ruins of the old Gnarl Ridge shelter.And then the Timberline dips back below the timberline as you descend through pines and alpine meadows.At the junction with the Gnarl Ridge Trail #652, stay right on the Timberline Trail. The next destination listed on the Timberline Trail signs is Timberline Lodge; we have about 10 miles to go.Here's a closeup of the sign at the Gnarl Ridge Trail.Keep descending toward your next landmark, the Newton Creek crossing.Okay, it's the same drill at the Newton Creek crossing. Look for the cairns and markers to find the best way to cross.Newton Creek can be one of the more difficult crossings. If you don't feel safe or confident in your ability to cross on logs or rocks (like this sketchy log), then play it safe and go through the water.After miles of descending, now you start to climb again away from Newton Creek.Hike past the Newton Creek Trail #646, which joins on the left.Now we have another descent down toward Clark Creek.Clark Creek can look a little tricky as you approach by crossing the moraine. You have a crossing of Clark Creek upstream, and then you'll climb up to cross another creek above.Clark Creek is usually swift but has opportunities to hop across.Once you cross Clark Creek, you'll climb and pass a picture-perfect mini-waterfall.And then you'll have a bigger crossing at the top of a waterfall. It's easy to miss the other side of the trail, which continues along the top of the waterfall.Now you're entering civilization again as you cross over the numerous slopes and under the numerous lifts at Mt Hood Meadows ski area.Keep straight on the Timberline, avoiding the unmarked use trails around the ski area.And likewise, hike straight through the roads.It takes a while to cross the mile or so of trail through the ski area, which was built between the 1960s-90s.Okay, when you get to the last road, look for a junction just after the crossing.At the junction with the Umbrella Falls Trail #667, bear right to stay on the Timberline Trail.Leave the ski area behind and head back into the forest.As you descend you'll see the White River, the last major crossing before the end of the trail.On the way down to the White River you'll enter a narrow sliver of land called the Richard L. Kohnstamm Wilderness, which runs along the White River. Kohnstamm is responsible for saving the Timberline Lodge after it shut down in 1955, and creating what you see there today. He's also considered a champion of the National Forest Service ideal of creating a balanced mix of developed and wild areas on federal lands.Okay, now you're down at the White River wash. The White River generally has two branches to cross, is the widest river on the Timberline Trail, and can sometimes flood very high. Follow the markers and cairns to find the best crossings.Here is the crossing of the second branch. You can see how high the banks are by how small the hikers (on the left) are.When you cross, there are several use trails with camping areas. Head upstream to find the Timberline.There are cairns to help you find the trail and start the sandy climb back up to the Timberline Lodge.As you climb away from the White River, you'll be able to spot the chairlifts above the Timberline Lodge.The Timberline Trail joins the PCT. Make the right to continue climbing to the lodge.The trail is sandy and can be tough, especially if it's the end of the day for you.At the big patchy area of sand, it can be confusing. Follow the footprints. The trail is toward the left side of the wide area. On the right are views of the mountain.As you climb, you catch a glimpse of the Timberline Lodge.One last canyon to hike around (of the Salmon River), and then you'll see the Timberline Lodge in front of you. There are a bunch of splits in the trail. Left will lead you to the parking lots, right will lead you to the lodge and the trails behind it where you started.And here you are, back at the start! That was the Timberline Trail.


 Using the Apple Watch for Hiking
 Garmin Fenix 7 & Epix Review For Hikers
 How To Read a Topographic Map
 Garmin GPSMAP 67i Review
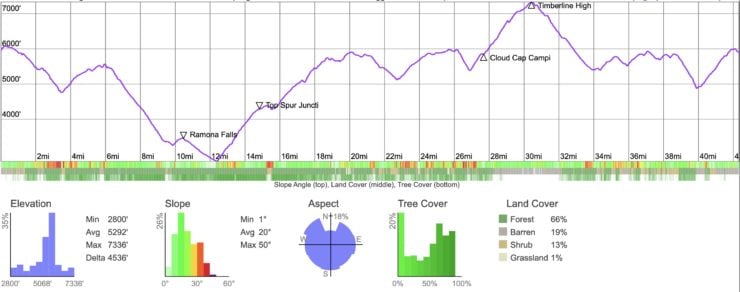


 Hoh River Trail to Blue Glacier Hike Guide
 Eagle Creek Trail Guide
 How to Hike the Lost Coast Trail
 Peter Skene Ogden Trail Guide
 Pacfiic Northwest Hikes
 Backpacking Trips
 Best Hikes in the World
 Best Hiking Gear 2024
 Hiking Boots or Shoes: Do I Really Need Hiking Boots?
 When to Hit SOS on inReach