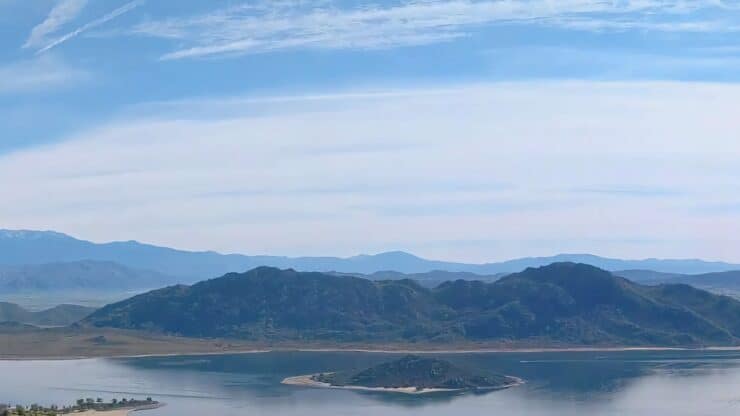

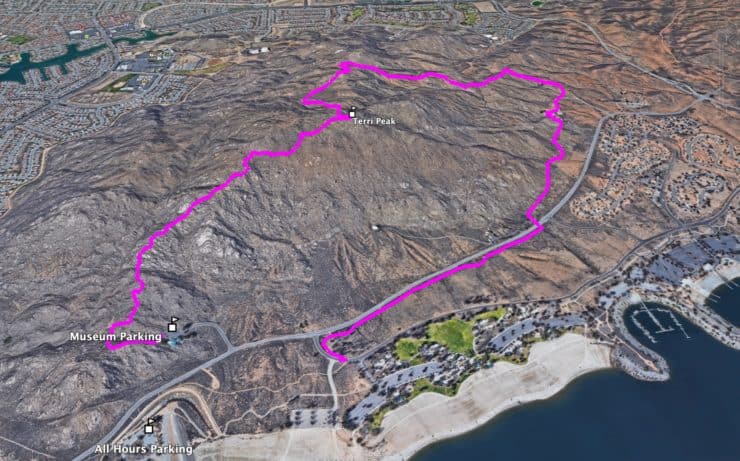
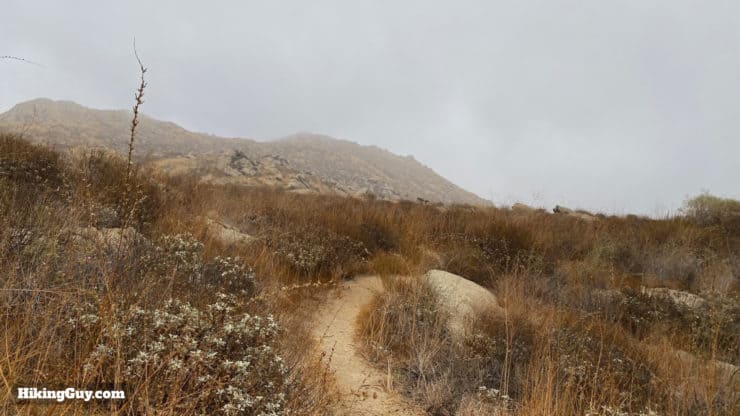
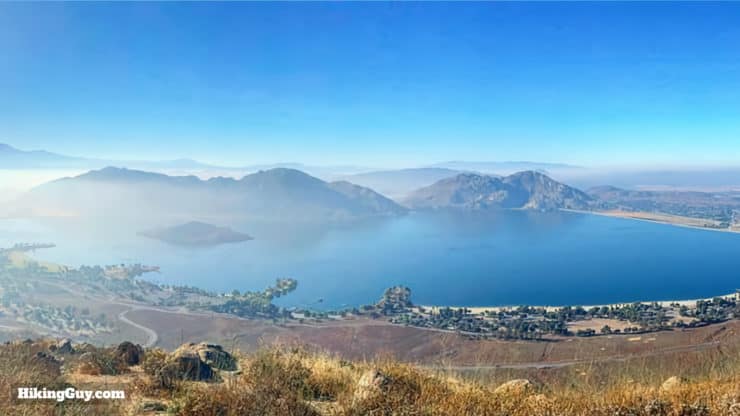
The hike to Terri Peak, which towers over Lake Perris and offers panoramic views, is a hidden gem. It's located in Lake Perris State Recreation Area, a park noted more for water sports than hiking. The trail to Terri Peak climbs through boulders and offers plenty of gradual sections to catch your breath and take in the views. You can either hike to the top and back, or you can do the full loop for even more views.
- Video & Turn by Turn Directions For the Terri Peak Loop Hike
- Trailhead Directions at Lake Perris State Recreation Area
- Insider Tips for the Hike
Getting to the Terri Peak Trailhead
There are a few ways to hike to Terri Peak, and this guide will show you the loop hike which I find the most beautiful. You'll do most of the hike between the lake and the mountain, which offers great views going up and down.
There is an entry fee for the park unless you have a California State Parks Pass.
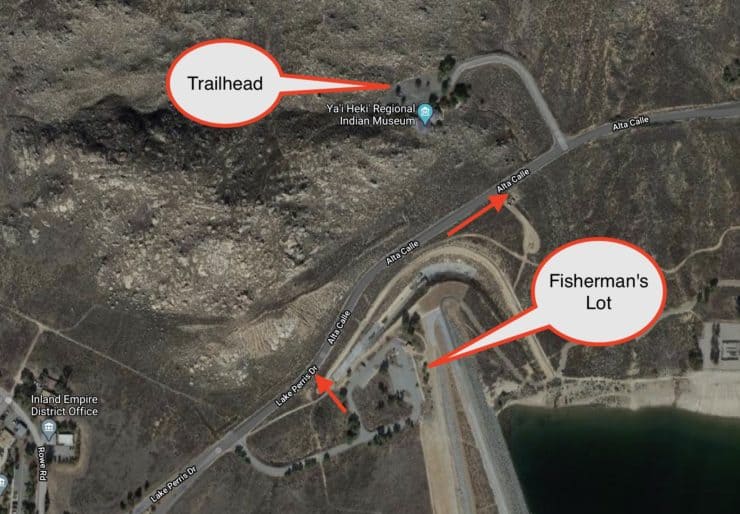
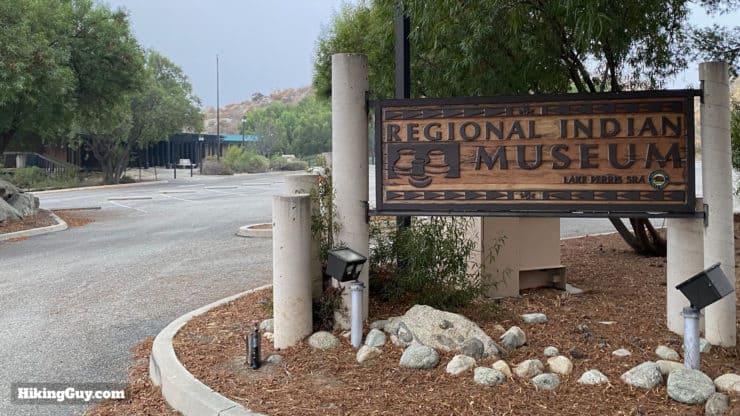
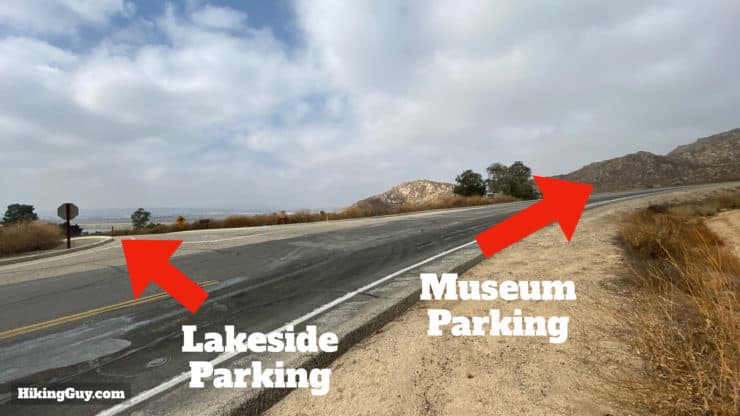
The trailhead is next to the Ya'i Heki' Regional Indian Museum (pronounced ya-hee eh-key and meaning "home of the wind" in Cahuilla). You can use this trailhead address:
17801 Lake Perris Dr, Perris, CA 92571
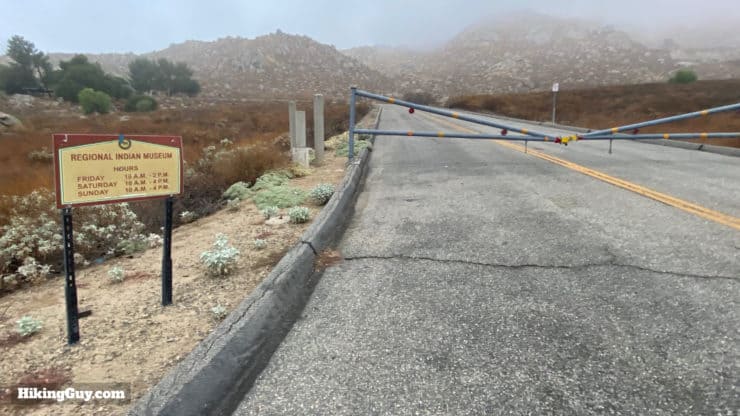
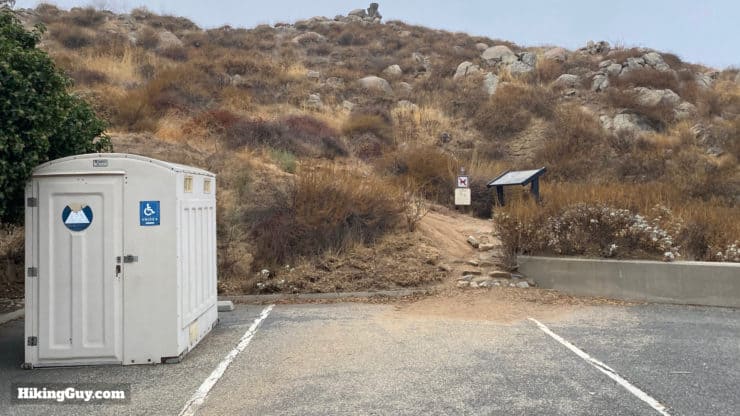
If the parking lot at the museum is closed, you can park nearby at the Fisherman's Lot.
There are bathrooms at both parking lots.
Gear for the Hike
This entire hike is exposed, so when the sun is out, it can be brutal. Bring sun protection and lots of water (at least 1.5L). I hike this with light hiking gear, but you can certainly get away with fitness clothes.
Gear That I Love Right Now
Nothing is sponsored or promoted, just the actual gear that I use.


Terri Peak Loop Trail Maps
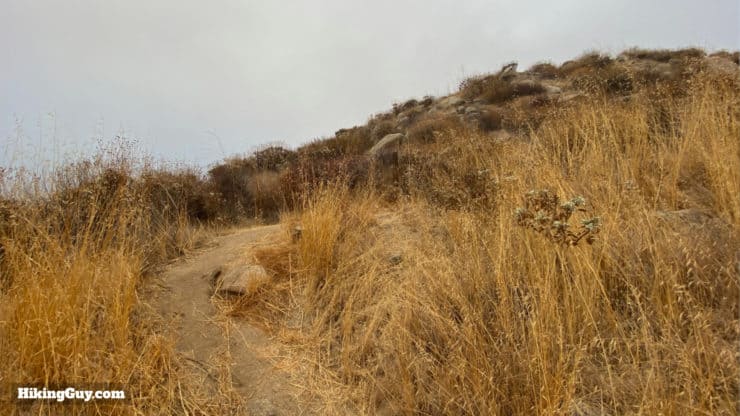
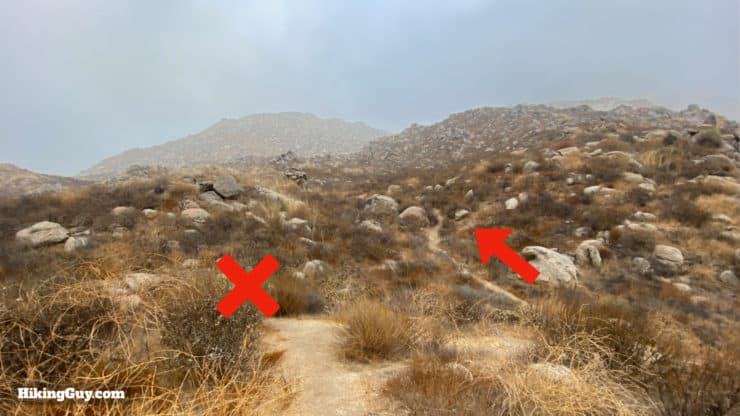
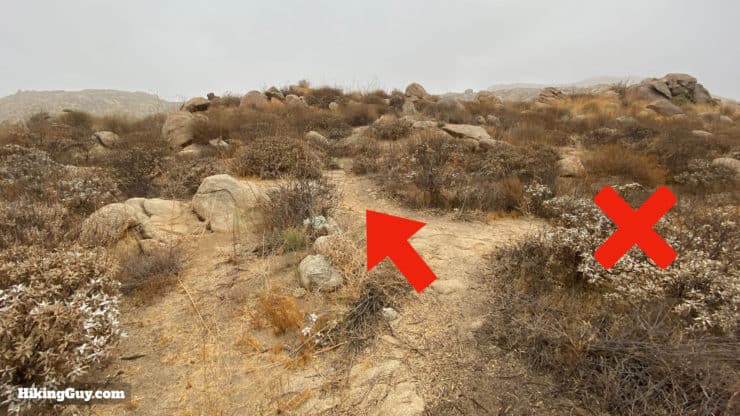
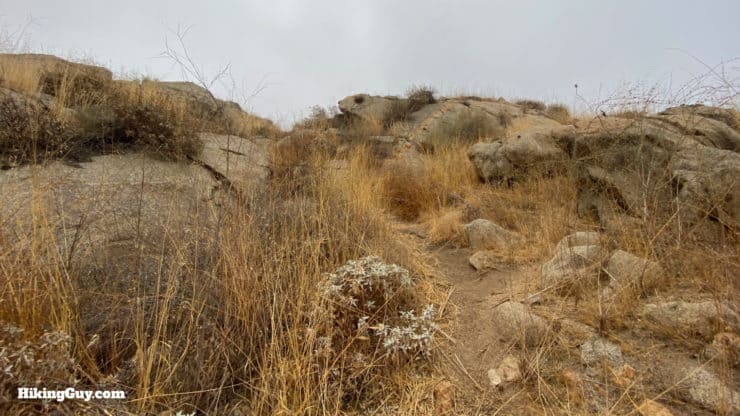
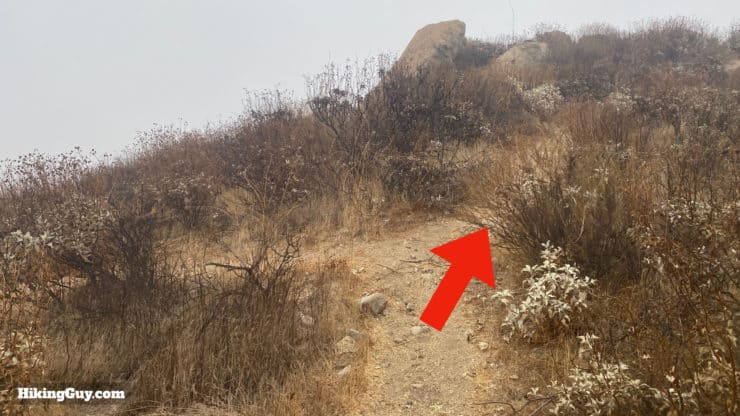
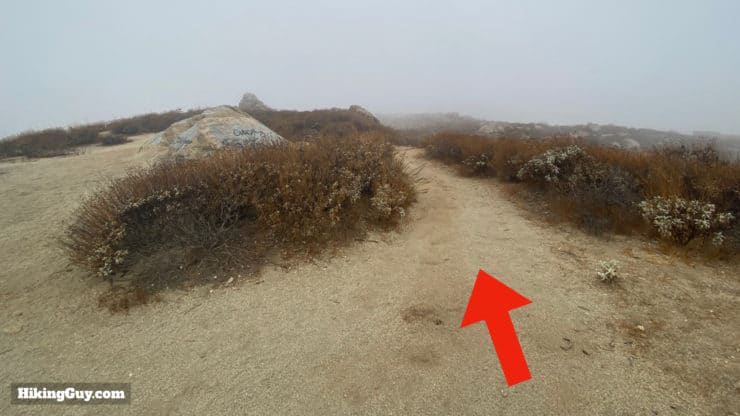
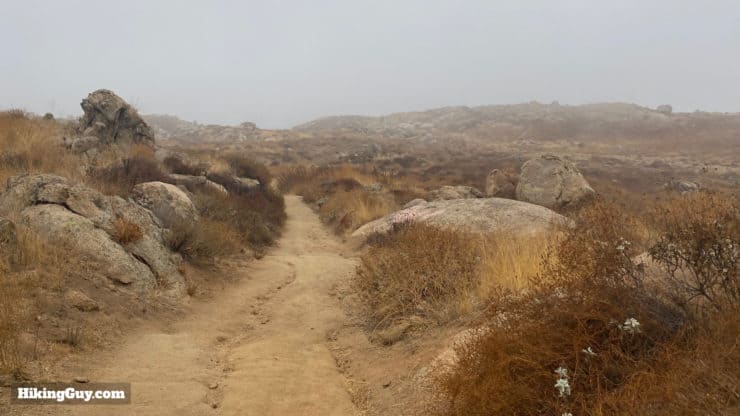
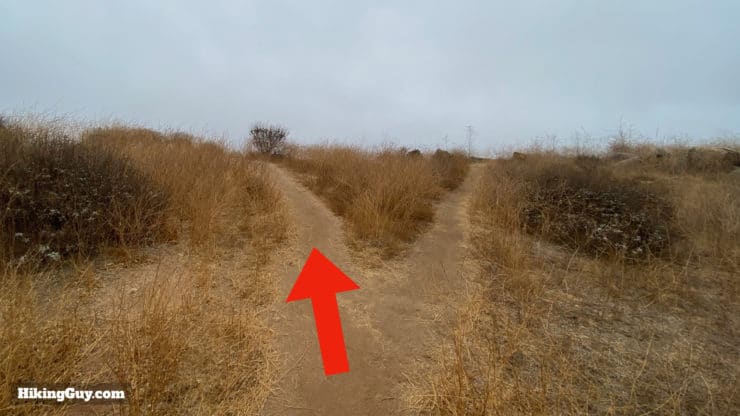
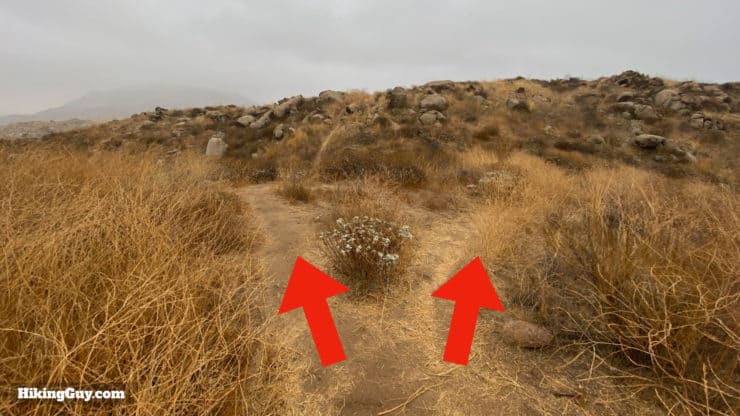
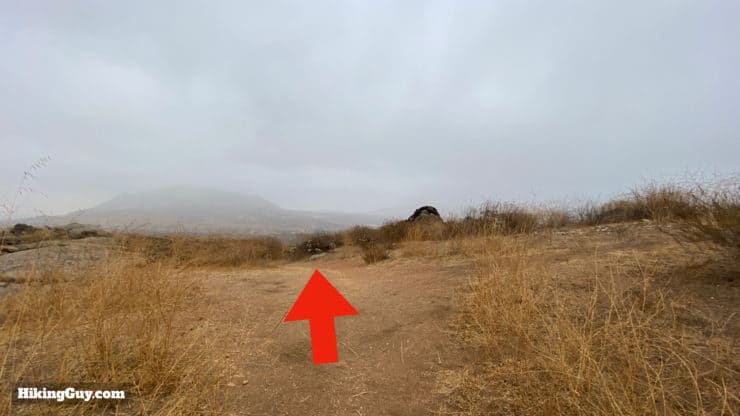
The first part of the hike is on small trails that, for the most part, are easy to follow. There are small, unmarked use-trails that branch off at points, but I've noted most of them in the directions below. After the peak you'll descend on larger trails that are shared by mountain bikes. The last part of of the loop ends at a road. If you've parked at the museum, there's a 5 minute walk in the dirt along the side of the road. If you parked at the Fisherman's Lot, you walk on the paved pedestrian path to the start.
How Will You Navigate?
 Using the Apple Watch for Hiking
 Garmin Fenix 7 & Epix Review For Hikers
 How To Read a Topographic Map
 Garmin GPSMAP 67i Review
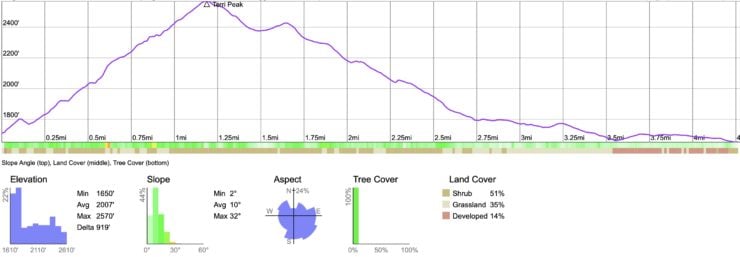
Elevation Profile
3d Map
Hike Brief

- At the beginning of the hike there's an interpretive display warning you about mountain lions. Don't be scared. According to the rangers they get about a dozen reports of a mountain lion sighting each year, most of which are probably a bobcat (harmless to humans) that lives around Terri Peak. Expect to see rabbits, squirrels, lizards, and hawks.
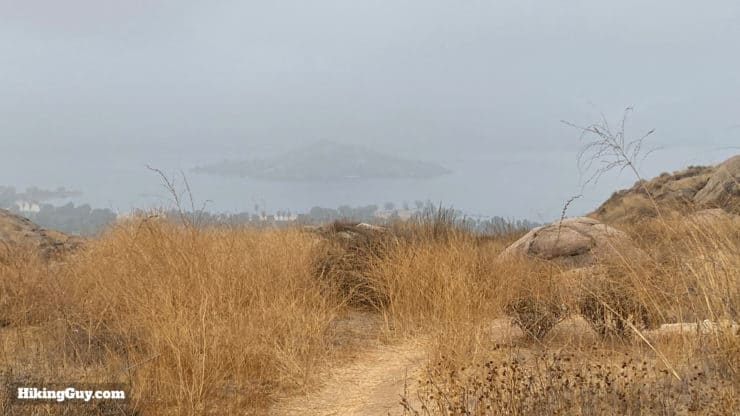
- Lake Perris is a humanmade lake, finished in 1973, and part of the California State Water Project. It's a popular spot for waterskiing and fishing, and even has an artifactual tire reef habitat. Scientists determined that anything over a 7.5 magnitude earthquake (big) will break the 2-mile long dam.
- Don't drink the water from the lake, even if filtered. It has high mercury and toxin levels.
- Terri Peak (at 2569 ft) is not the highest point in the park, but it is the highest point with a trail to it. The highest point is nearby Mt Russell at 2704 ft.
- In the winter this hike is lush and green. In the summer and fall it's dry and yellow. The late winter and early spring is a good time to see wildflowers and California Poppies.
- The Ya'i Heki' Regional Indian Museum is essentially the visitor's center for the Lake Perris State Recreation Area, and is worth a visit if open. From the big glass windows inside you can see the lake and Mt San Jacinto.
- If you want to make a day of it, do the hike first thing in the morning, then take a bike ride around the lake (9 miles and flat), and then have a picnic lunch.
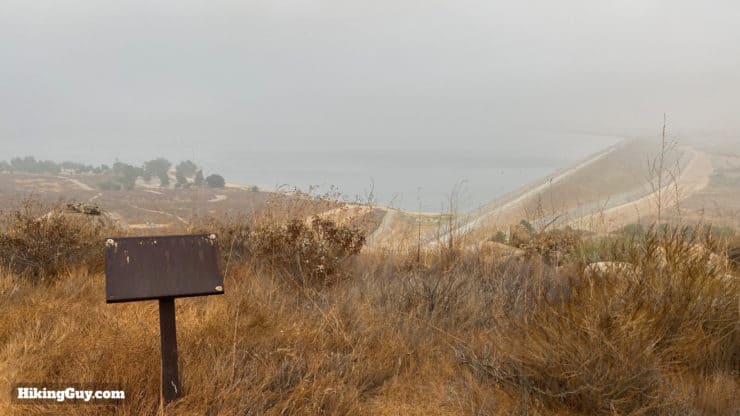
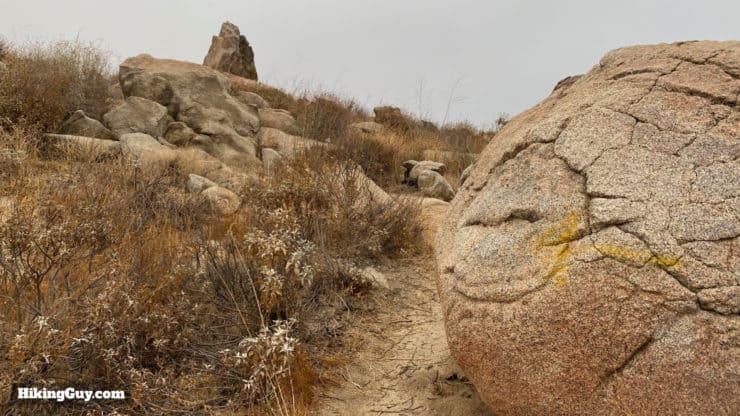
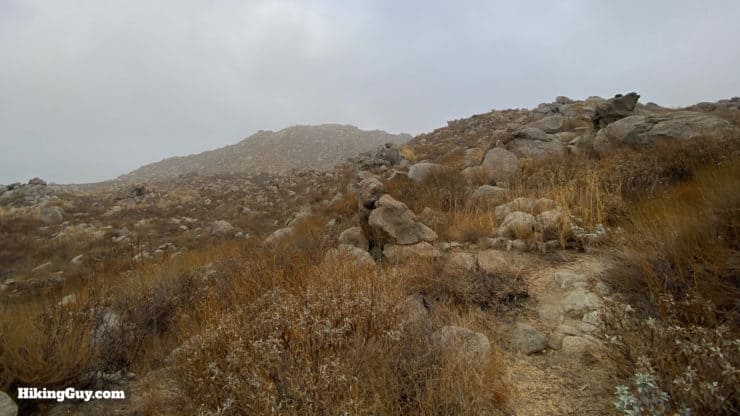
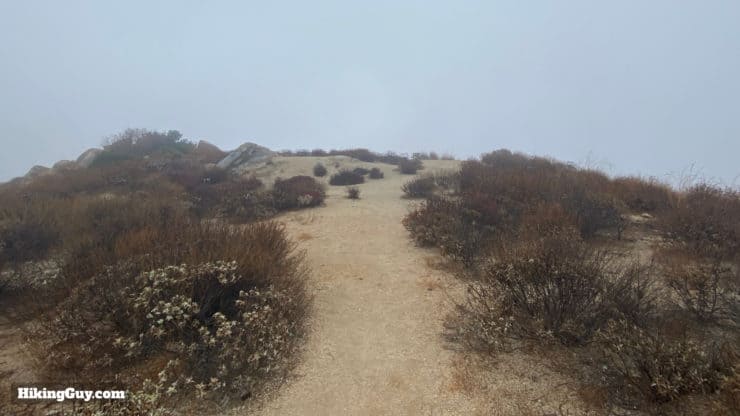
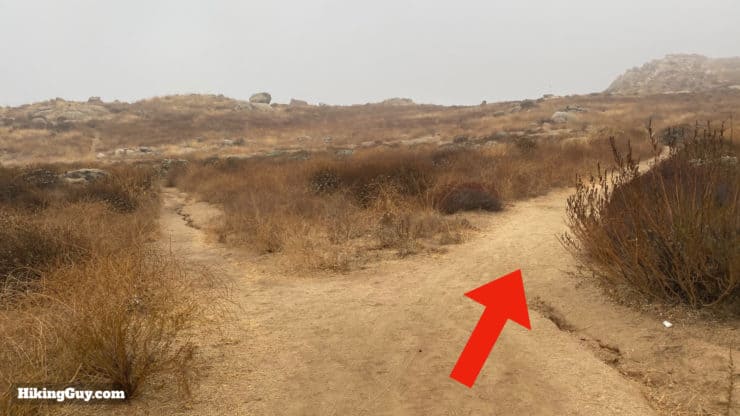
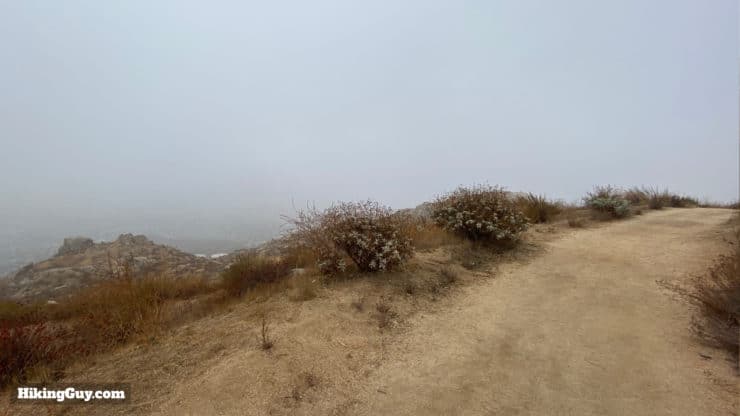
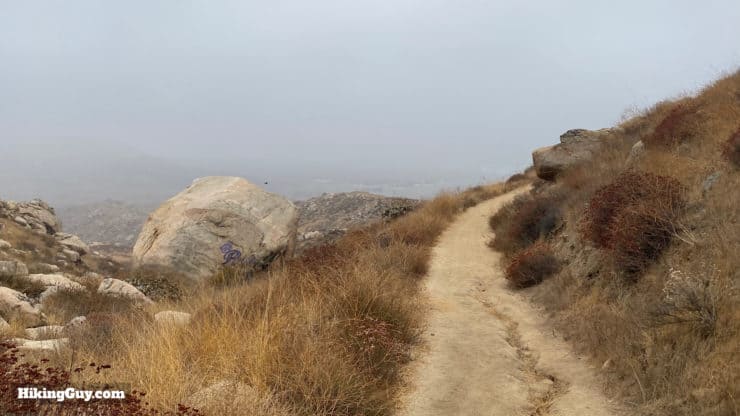
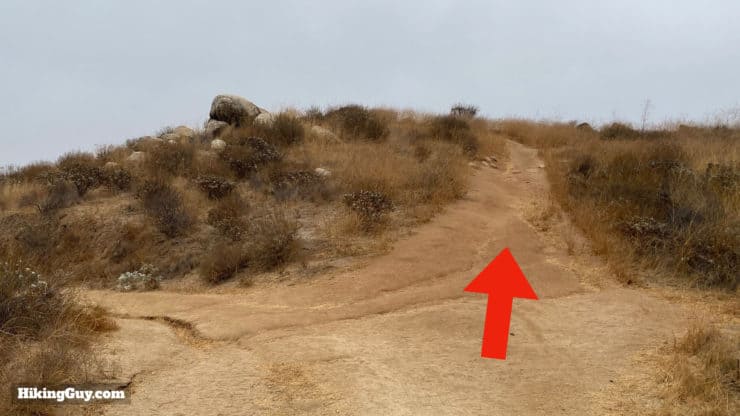
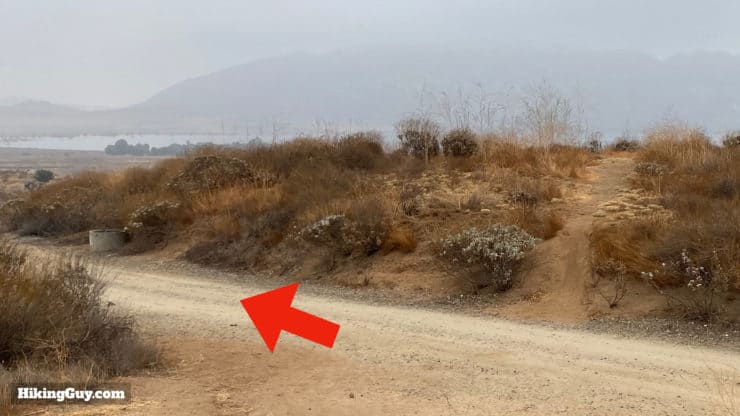
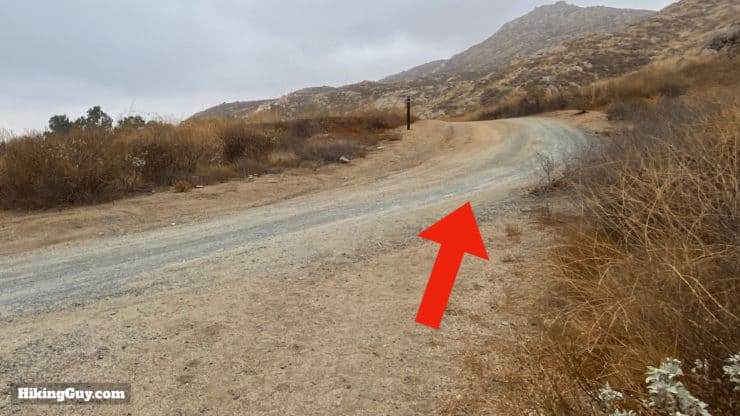
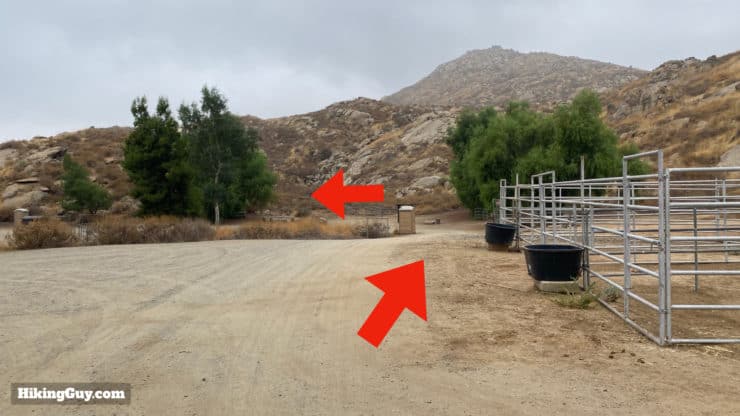
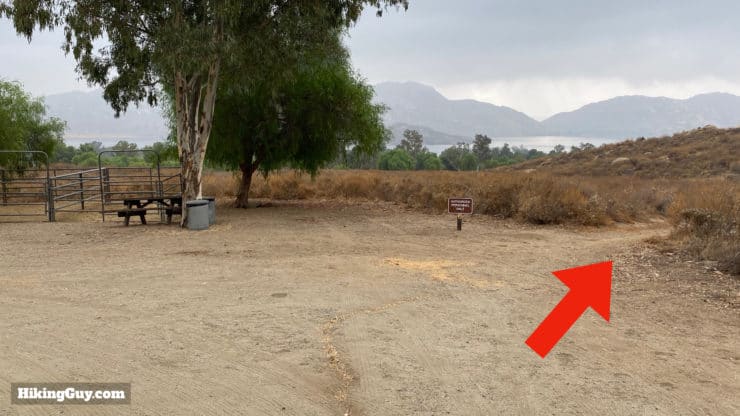
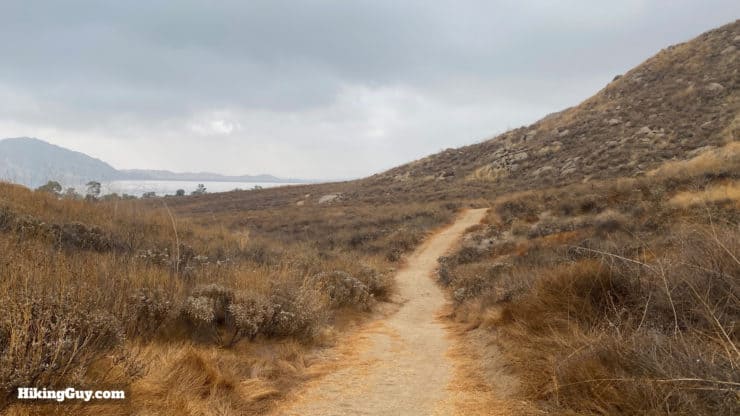
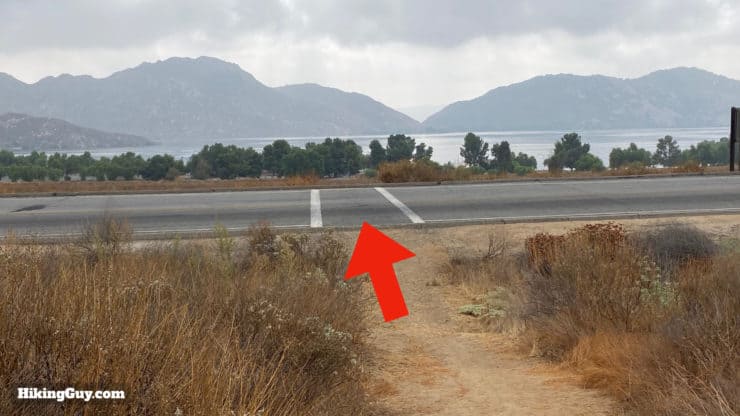
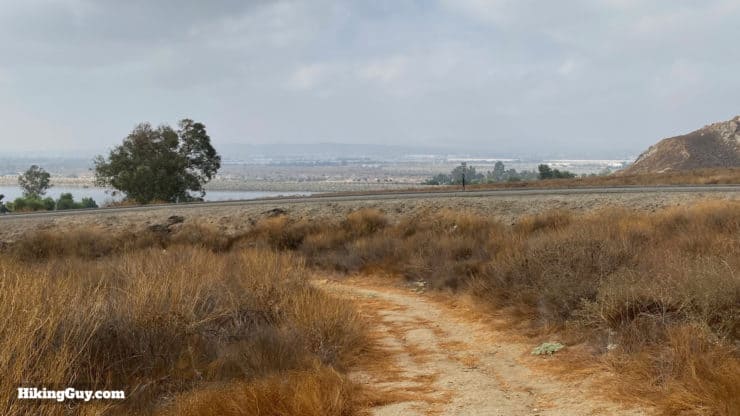
Terri Peak Loop Hike Directions


Need More Info?
- Have a question about the guide or want to see what other people are saying/asking? View the Youtube comments for this video. Leave a comment and I will do my best to respond.
- When planning, always check the park website and social media to make sure the trails are open. Similarly, check the weather and road conditions.
Related Guides
 Hike the Pumpkin Rock Trail
 Hike the Mt Rubidoux Trail (Riverside)
 Los Angeles Hikes
 Hikes In and Around Riverside County
Popular Guides
 Best Hiking Gear 2024
 Hiking Boots or Shoes: Do I Really Need Hiking Boots?
 When to Hit SOS on inReach
This Guide Was Written by Cris Hazzard

Hi, I'm Cris Hazzard, aka Hiking Guy, a professional outdoors guide, hiking expert, and author based in Southern California. I created this website to share all the great hikes I do with everyone else out there. This site is different because it gives detailed directions that even the beginning hiker can follow. I also share what hiking gear works and doesn't so you don't waste money. I don't do sponsored or promoted content; I share only the gear recommendations, hikes, and tips that I would with my family and friends. If you like the website and YouTube channel, please support these free guides (I couldn't do it without folks like you!). You can stay up to date with my new guides by following me on YouTube, Instagram, or by subscribing to my monthly newsletter.