
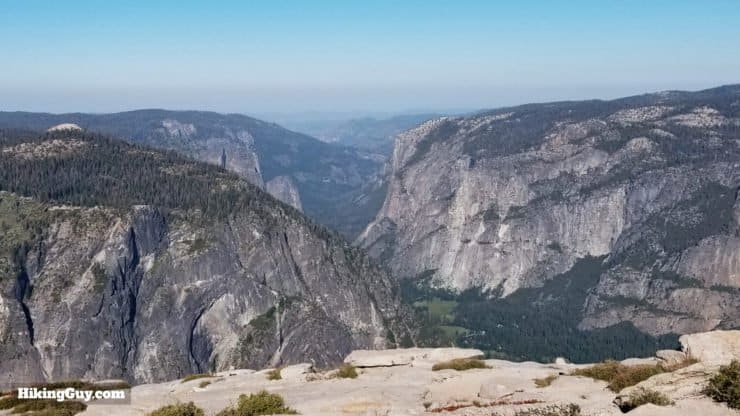
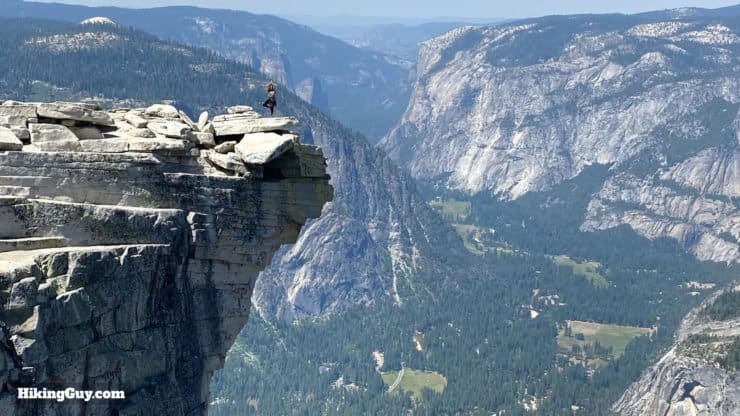
The hike up to Half Dome, towering over the Yosemite Valley at 8846 feet, is one of the great bucket list hikes. You'll pass iconic waterfalls, hike through majestic sequoias, and then pull yourself up steel cables to stand at the summit. There's a lot to know before you start; this isn't just a hike where you show up at the trailhead and go. There's a decent amount of anxiety about the cables section of the hike for a lot of folks. In this guide, I will cover everything you need to know in a simple and step-by-step way. I'll help you prepare, conquer your fears, bag the summit, and have a great time in the process.
- How to Get a Half Dome Permit
- Planning and Training For the Hike
- How to Conquer the Cables
- Gear Recommendations & Tips
- Printable Directions & Maps
Park Pass - Cables Lanyard & Harness - Permits - Park Website - Weather Forecast - My Jul 2024 Gear
Quick What To Expect
- How long is the Half Dome hike? The most popular route to Half Dome and back is 17 miles, and typically takes between 9 and 12 hours. Most people do the hike in a day, but you can also camp and break it up.
- How hard is the Half Dome hike? Yosemite National Park calls it "maybe the most strenuous day hike in any park," but it's doable by most people with the right preparation. I've seen people in their 70s and I've seen 12-year-olds (not recommended).
- Is climbing Half Dome dangerous? It can be, and people have died doing it. In this guide I'll tell you how to overcome your fears and show you gear that you can use to ascend safely.
- When does Half Dome open? Technically it's open all year, but the cables section (that help hikers ascend the granite face) is generally up from the Friday before Memorial Day through the Tuesday after Columbus Day.
- Can you hike Half Dome when cables are not up? Yes, but it's only something that should be attempted by those with lots of experience who are very familiar with the ascent. There are a disproportionate number of deaths on the cables when they are down.
- Do I need a permit to hike Half Dome? You need a permit when the cables are up, which is when you should be doing the hike. I'll show you four different ways to get a permit in this guide.
- What is your best advice? Leave early (like 5am), be fit enough to hike 17 miles, bring water and food, and use grippy gloves and shoes on the cables section.
Consider Doing a Different Hike
How To Get a Half Dome Hike Permit
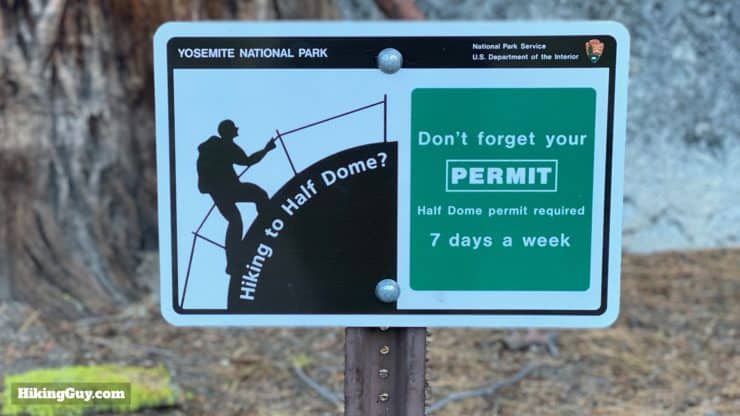
Before you even think about hiking Half Dome, you need to get a permit. There are a few ways to nab one:
- Win the pre-season permit lottery.
- Win the daily permit lottery 2 days before your hike.
- Hike to the Sub Dome and use another hiker's empty permit slot.
- Add Half Dome onto a (overnight backpacking) wilderness permit.
Before the permit system, up to 1200 hikers a day would scale Half Dome. Today 300 daily permits are allocated.
Pre-Season Permit Lottery
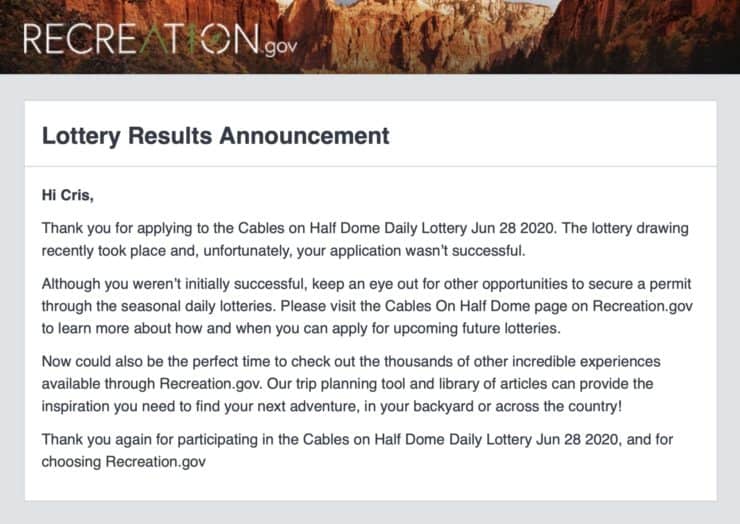
Most hikers will want to plan their hike in advance, and the best move here is to apply for the pre-season permit lottery, which you do online at Recreation.gov. Since you'll probably want to book accommodation at Yosemite in conjunction with your permit, it can be a bit of a chicken and egg situation. I recommend booking your accommodation first, especially if you want to stay in the park. I've found that accommodation is much harder to get than a permit. If you don't win the pre-season permit lottery, there are other ways to secure a permit to hike Half Dome once you arrive. And there are many other great non-permit hikes to experience at Yosemite as well.
- The lottery is generally open for all of March.
- You don't have to apply at midnight, it's not first-come, first-serve.
- You can apply for up to 7 different dates.
- You can have up to 6 people in your group.
- You are only allowed to apply once per person, per season.
- In mid-April you will get an email letting you know if you got your permit.
How hard is it to win a permit?
- 300 permits are awarded for each day, 225 for day hikers and 75 for backpackers (more later)
- About 29% of people are awarded permits.
- You have a better chance of winning a weekday slot than a weekend.
- Half of all applications are for Friday to Sunday. You have your best chances on Tuesday through Thursday.
You can only book a permit online at Recreation.gov - you can't walk up to the Visitor's Center and get a day hike permit.
Permit Availablity
Can't get a permit for your date? Try OutdoorStatus.com and get a text message as soon as a cancelled permit opens up!.
Daily Permit Lottery
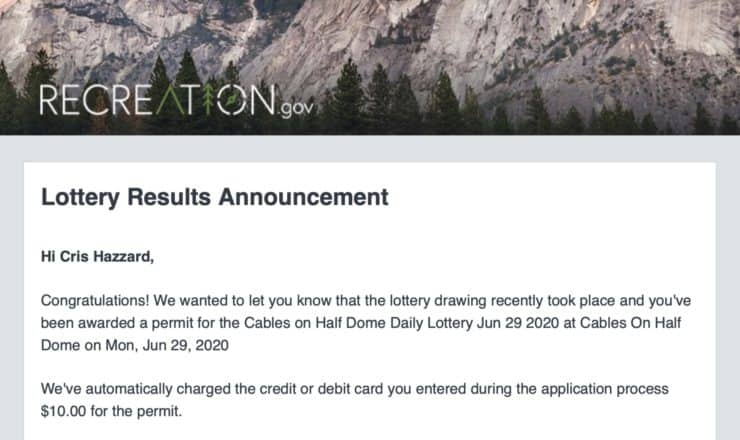
The Parks Service also releases about 50 permits in a daily lottery. Here's how it works.
- You apply on the Recreation.gov website.
- Apply two days in advance. So if you want to hike on Wednesday, apply on Monday morning.
- You don't have to apply at midnight, it's not first-come, first-serve.
- The lottery generally closes around midday and you are notified later in the afternoon. So if you applied Monday morning, you'd find out if you won on Monday afternoon. Then you hike on Wednesday.
Permit Jumping
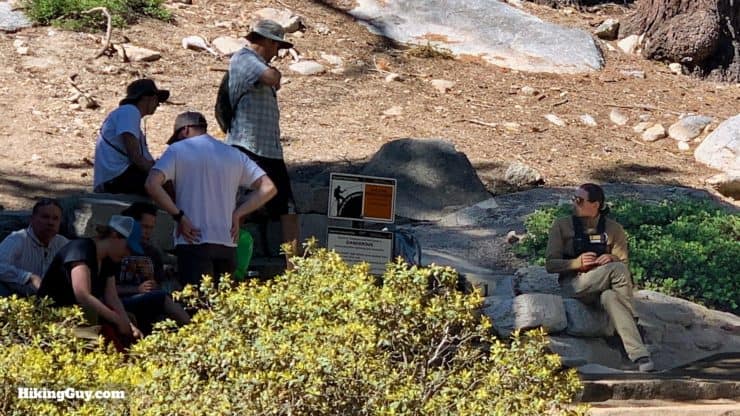
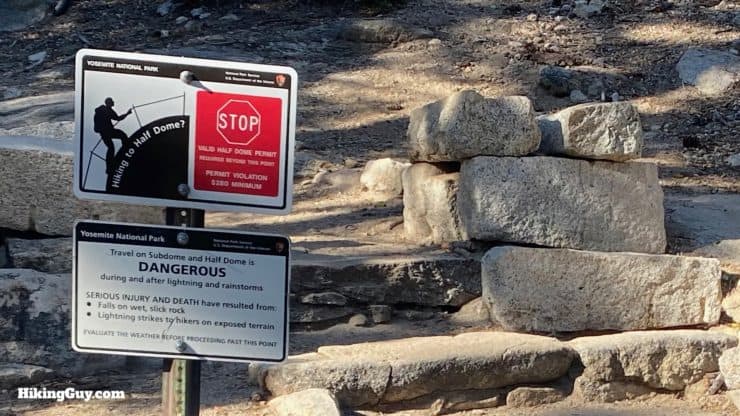
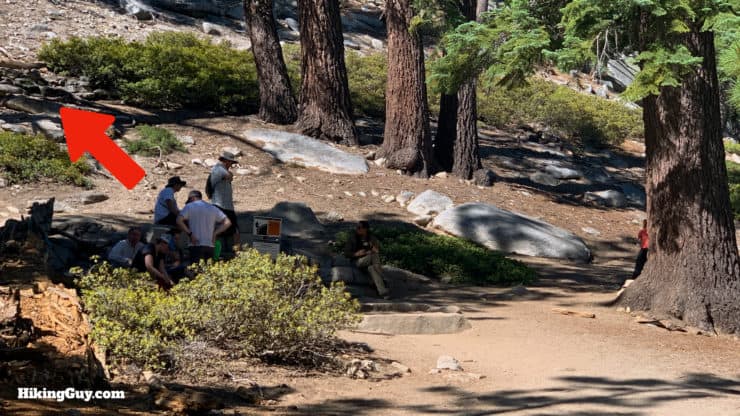
If you haven't gotten a permit, you still have a chance. You are allowed to hike all the way to the Sub Dome, about 0.5 mile before the summit, without a permit. Generally the ranger will be sitting there, checking people's permits. Simply go up to the ranger and ask him if there are any empty permit slots open. Often times people will have a group permit with some no-shows. If there are slots open, you can go. If there are no slots open, hang out close to the ranger and ask folks that are arriving if they have any open slots.
I've used this method successfully. You might have to wait for a while if you get here early. The big rush of hikers generally arrives between 9am-noon, so waiting until then will get you the most traffic.
Half Dome With a Wilderness Permit
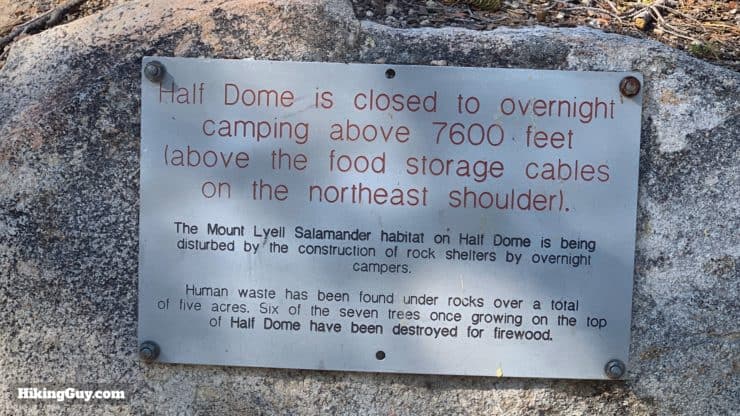
Another option is applying for a wilderness permit, camping, and adding Half Dome to your reservation. You simply ask for the add-on when you pick your permit up at the ranger station. It's only available for overnight permits close to Half Dome, so you can't get an easy wilderness permit for somewhere else in the park and then day hike Half Dome without camping.
Planning a camping trip to Half Dome is not something I'm going to cover in this guide, but if you do want to give it a try. a popular option is to camp in the Little Yosemite Valley.
Using Your Permit

Your permit is good from 12:00 AM on the date it was issued for, so you can leave as early as you want. Having a permit also allows you to park at the hiker trailhead parking lot. You don't need to display anything on your car.
When you get to the Sub Dome area, a ranger (or two) will be there checking permit confirmation emails. The best move is to print it out, but rangers will also allow you to show the email on your phone (no service here though). You'll also need an ID (like a driver's license) that matches the name on the permit. Only the group leader (the name on the permit) needs an ID. When you apply for your permit can specify an alternate permit holder as well.
No Permit Hiking
Generally there is no ranger on duty during the night, and you could ascend the cables then. I once saw someone who did this get busted in the morning on the way down, so be prepared to pay a fine if you try it (not recommended). I also know of people who have done this successfully. For some people the fine might be worth it.
And you don't need a permit when the cables are down. But again, this isn't something for someone without experience to try. People die when the cables are down. If you need to read this guide, you should not be climbing with the cables down.
Alternatives For When You Can't Get a Permit
If you can't get a permit, there are some other great hikes in Yosemite that are similar to Half Dome, but don't require any permit.
- Clouds Rest - This is considered the best hike in Yosemite by many. You'll climb up to the summit and tower above Half Dome.
- North Dome - A moderate hike to nearby North Dome, with a similar summit to Half Dome and views into the Yosemite Valley.
- Sentinel Dome - If you don't to do a long hike, this short and easy summit is the move. You'll get what is probably the best panoramic views of the Yosemite Valley for about 2 miles of hiking.
Did you know that the North Face's logo graphic is Half Dome?
How to Train For Half Dome
The National Parks Service describes Half Dome as the most strenuous day hike in Yosemite, and probably the toughest (recommended) day hike in any National Park. So while you can certainly just show up and give the hike a go, you'll enjoy it more if your fitness level is up to snuff. Training doesn't have to be complicated and a lot will depend on the trails you have available where you live.
- Work your way up to a 15 mile hike by adding 1-2 miles onto your longest hike every week.
- Feel comfortable climbing at least 4,000 feet in one day.
- Do some pulling exercises like seated rows for a few weeks before the hike.
- Try to spend some time at altitude before you hike Half Dome. Arrive at the Yosemite Valley a few days before your hike and do hikes at higher elevations off of Tioga Road to prepare. While altitude sickness is not a major problem, you will still likely feel the thinner air if you came up from sea level. I recommend reading the section on altitude sickness in my Mt Whitney guide so you can recognize and address any symptoms.
Gear You Need For Half Dome
This is a proper backcountry hike and I recommend proper hiking gear. If you don't have hiking gear, go with fitness clothes and comfortable, grippy footwear. At a minimum you should bring:
- 3-4L of water (or less if you have a water filter - you can refill in the Little Yosemite Valley)
- Plenty of snacks like energy bars
- A headlamp or flashlight if you get caught out after dark
- An extra layer and light shell
- A trowel and toilet paper in case of an emergency. There are no toilets past Little Yosemite Valley.
- If you've used them already and are comfortable with them, bring your trekking poles.
Gear That I Love Right Now
Nothing is sponsored or promoted, just the actual gear that I use.


Check out the complete list here. ( Updated July 2024)
Specific Gear For the Cables
The cables section presents a unique challenge that you don't get on most hikes. You'll climb up a steep 45-degree granite slope, using a steel cable to keep you steady and occasionally pull on. Here's what I recommend:
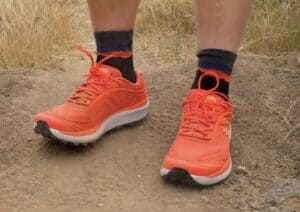
- Footwear with a good grip; most hiking shoes and traik running footwear work well.
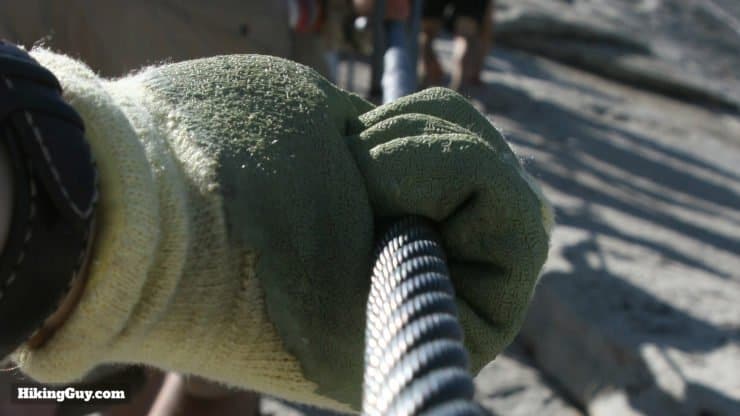
- Nitrile work gloves are the best gloves for the cables, and they're cheap. You don't need anything expensive or fancy. These gloves are lightweight and very grippy.
- Maybe a "via ferrata" climbing lanyard and harness. I'll talk more about that later in the cables section of this guide. Most folks climb the cables without one.
Gear Notes
- You are not allowed to leave gear (like your backpack) at the base of the cables before climbing. People do leave their trekking poles there, and I think that's a safer move than lashing them onto your pack (and potentially hitting the person behind you with them).
- Watch out for rodents at the base of the cables and summit; they will try to pilfer your snacks when you put your backpack down.
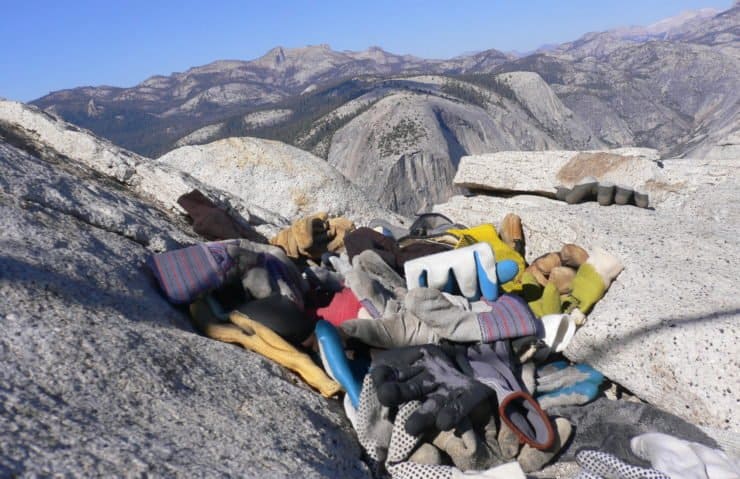
- Don't leave your gloves for other hikers, they usually end up as trash blown into the wilderness.
- Bring a zip-loc bag to pack all your trash out.
- The last reliable water source to refill at (with a filter) is the Merced River in Little Yosemite Valley.
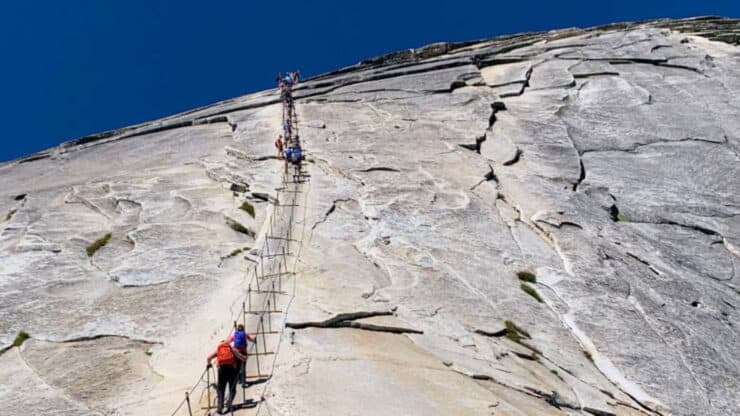
The Half Dome Cables
I just climbed the cables for the first time and I was blown away by how freaking insane the whole thing is. I mean, you slip, you die (probably). I can't believe it's even a thing open to the public since it's so dangerous. I'm terrified of heights and it was a mental challenge for me, for sure. I can't imagine what it's like in wet or bad conditions. Glad I did it though! Reddit Hike Report
Another report from the same day:
The cables weren't as daunting as I expected. The cables need to be respected for the danger they are, no doubt. But I didnt find that part to be difficult. Reddit Hike Report
The majority of people who reach the cables at Half Dome ascend it without a problem. I've seen almost every type of person ascend the cables: 70-year-olds, a 12-year-old (not recommended), people wearing cheap tennis shoes, and those obviously not prepared. I've also seen experienced hikers reach the base of cables and say "I'll pass." Fear and anxiety are personal and relative, and it's hard to say how you will process the experience until you get there. In this section I'll explain exactly what the cables are like, and then give you some insider tips on making the experience as safe as possible.
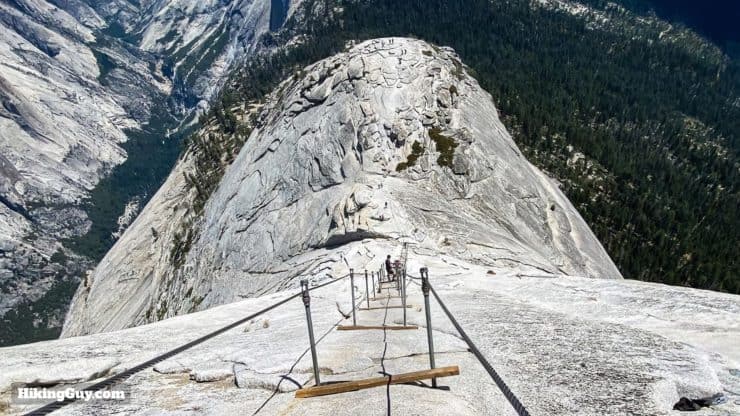
What the Cables Are
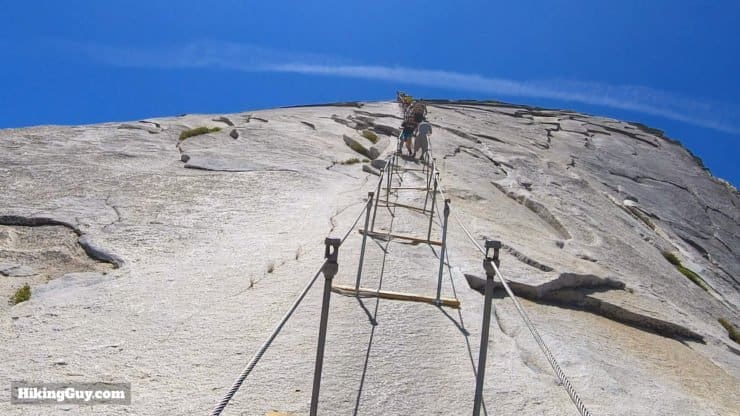
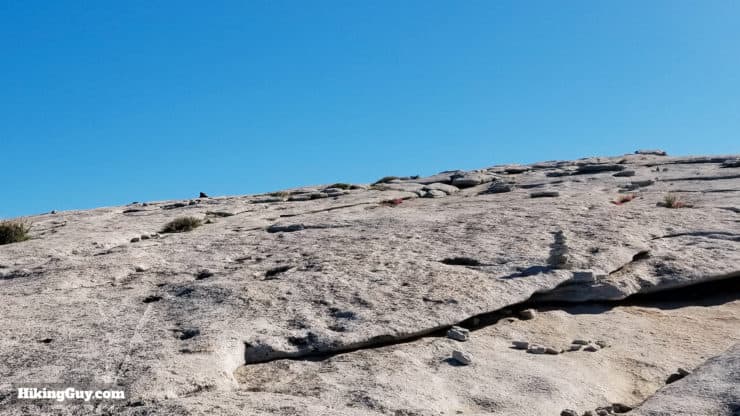
- "The cables" is the last section of the Half Dome hike that climbs the bare granite to the summit. Hikers use the cables to help them climb the steep 45-degree slope, which is a little steeper than a set of house stairs, but without the stairs.
- Hikers climb about 400 vertical feet between the base of the cables to the summit.
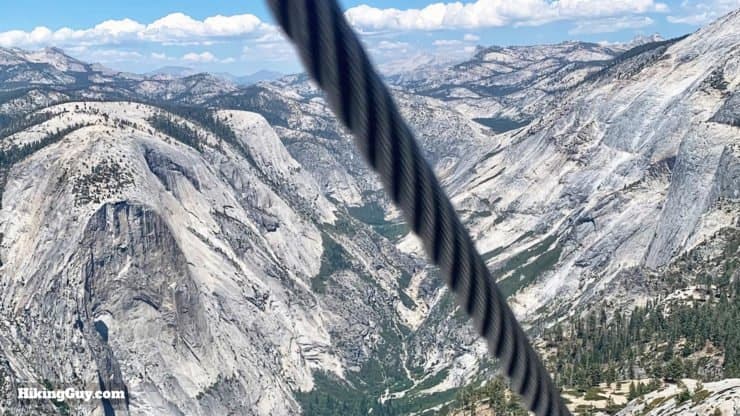
- There are multiple sections of 16mm cable between the bottom and top that overlap.
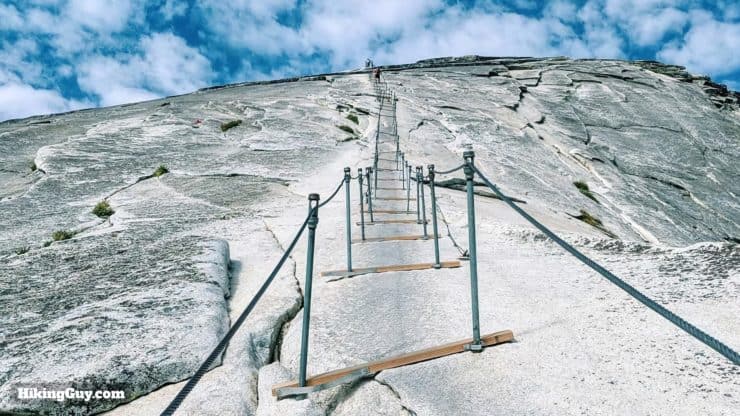
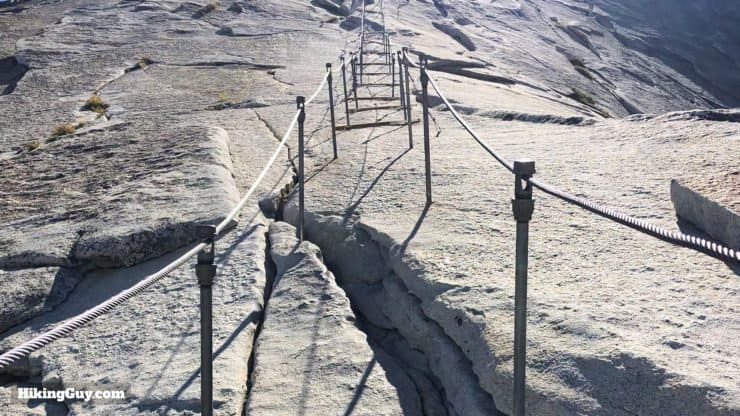
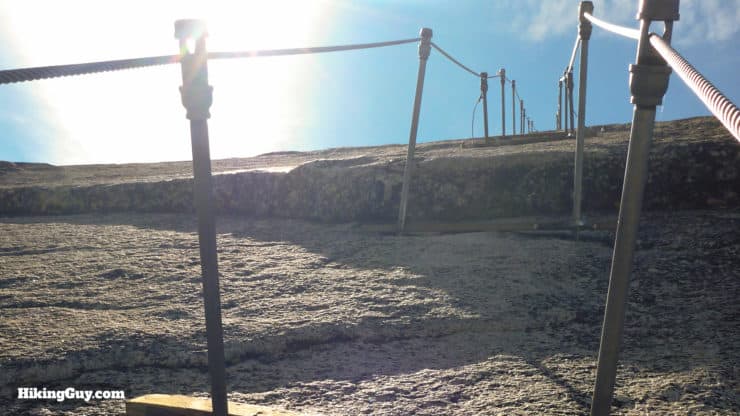
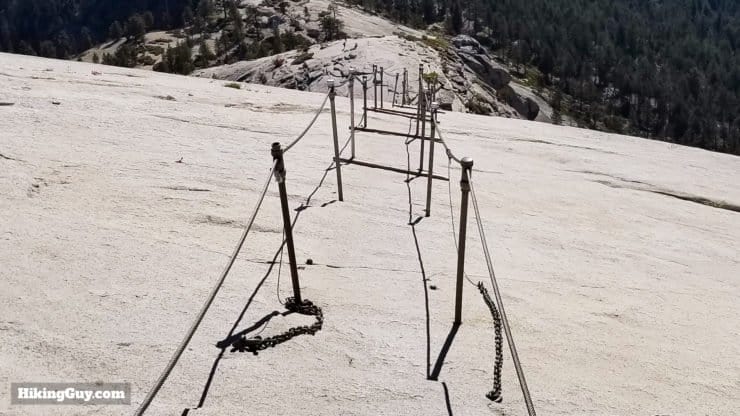
The cables are anchored into the granite. - About every 10 feet is a set of poles (stanchions) that hold the cables up, creating a version of a handrail. The poles are placed in holes drilled into the granite. You can (and people do) pull out the poles as you climb. There are about 60 sets of poles along the way.
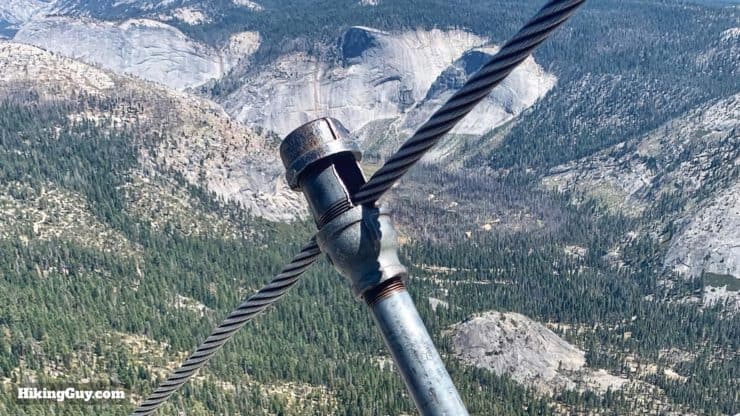
The cables run through the poles, which hold up the cable like a handrail. - In between each set of poles is a plain old 2x4 board. The board is not secured to the granite, but rather is attached to the poles with a small metal bracket. Because the path is steep and slick (from so many years of being worn), you end up resting on the boards at each pole. The boards don't lie flush against the rock and can wobble.
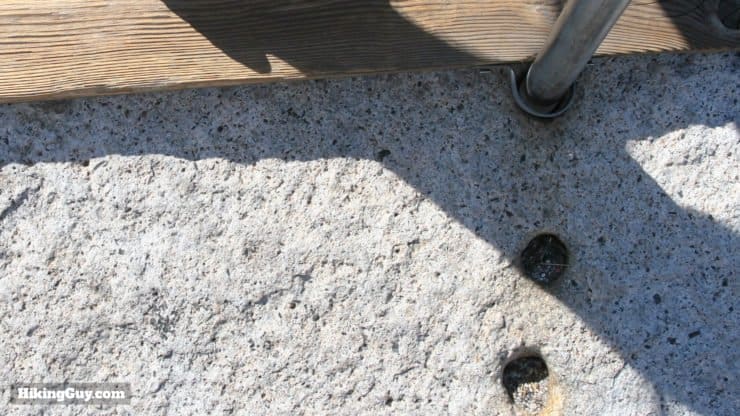
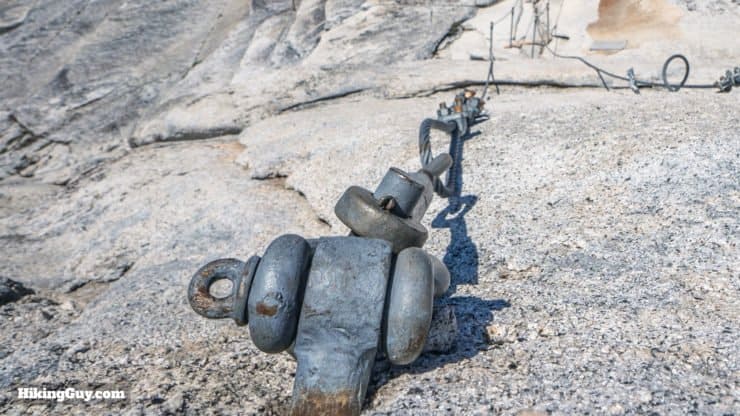
Here's the typical anatomy of a pole section. The board rests between, secured by basic hardware. The pole goes into a hole drilled into the granite. Notice the older (not used) holes. 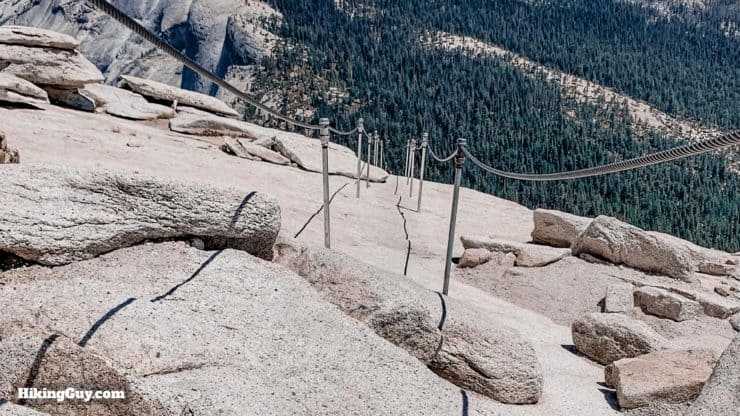
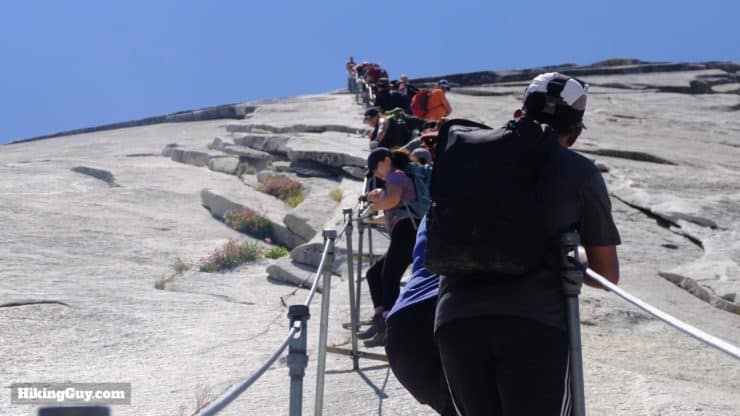
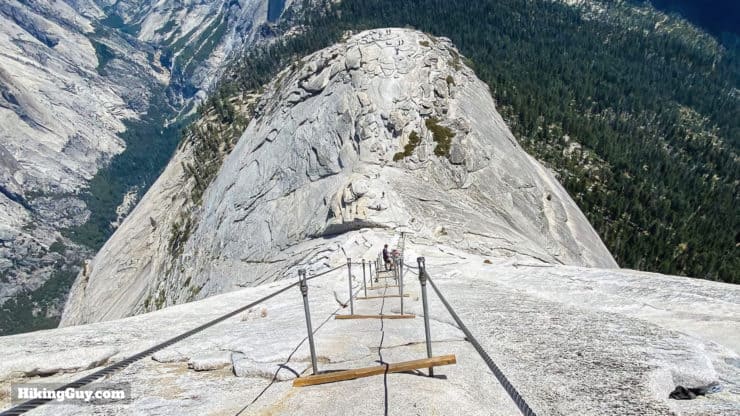
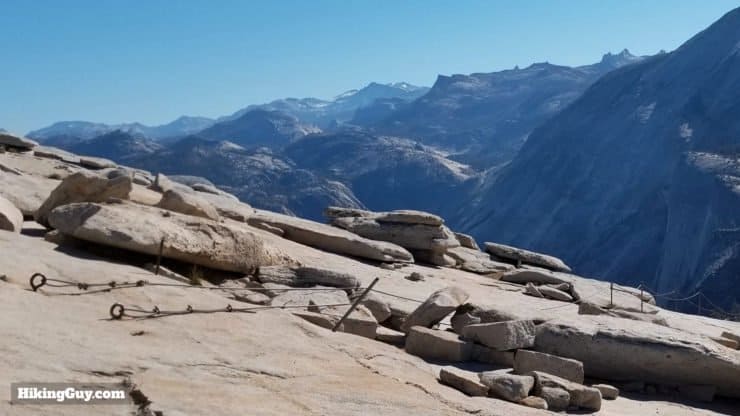
Less steep sections of the cables don't have boards in between them. - You ascend by holding onto the cable and walking up the granite to the next set of poles, resting on the board, and then moving up to the next one. You can also pull on the cable to help yourself up, and you will need to this on the steeper sections.
- Hikers generally stay to the right as you would when driving, with people going up on one side and down on the other.
- There is no ranger at the cables managing the hikers and there are no official rules, only the norms that I cover here.
When "the cables are up," which is generally from the Friday before Memorial Day through the Tuesday after Columbus Day,.it means the poles and boards are in. The cables are actually there all year. A disproportionate amount of deaths occur here during the off season when "the cables are down". If you need to read this guide, doing the cables when they're down is not something for you.
The cables were initially installed by the Sierra Club in 1919 and have been replaced by the CCC in the years since. Today the cables would never go up; Half Dome is protected under the Wilderness Act that forbids alternations of the landscape by man.
Traffic On the Cables
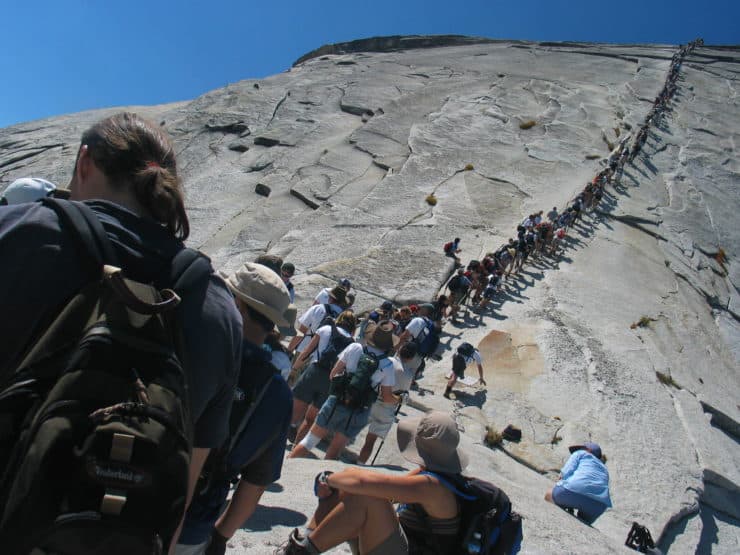
- If you can get to the cables by 8 am, the average amount of people climbing is 10.
- If you ascend the cables between the peak hours of 11am-2pm, the average is 50-60 people, and can be higher.
- You may have to wait in line just to start the cables. If there is a wait, it's usually between 10-15 minutes long.
- When there are no crowds, it usually takes 20-30 minutes to ascend and 15 minutes to descend.
- When there are crowds it's between 30-60 minutes to ascend and 20-30 to descend.
- Some people will try to pass the line of climbers by weaving through the traffic lanes or going on the outside of the cables.
- Occasionally people will have panic attacks and freeze, halting the ascent. Generally they move to the other side and descend.
The Parks Service did a study on Half Dome traffic when they were deciding on what type of permitting system to implement, and it's full of traffic info, if that's your thing.
The Scary Parts of the Cables
Here are the factors that cause the most anxiety about the cables.
- Outside of the cables are sheer drops with nothing to stop a fall.
- Crowds on the cables with different fitness and experience levels can jeopardize your safety.
- The fact that the poles and boards are not secured and often move can be unnerving.
- The long hike and effects of altitude can make the effort much harder than you expected.
Tips To Tackle the Cables
- Arrive as early as possible to avoid the crowds. Arriving at the cables between sunrise and 9am usually means only a handful of other hiker on the cables. I've climbed the cables all by myself at 8am on a July weekend.
- Go to the bathroom before the Sub Dome. There's nowhere to hide after that.
- Eat and drink before climbing the cables.
- Secure all your gear inside of your pack, including whatever is in your pockets. Be prepared to dodge falling water bottles, etc. from other hikers. Don't try to grab anything that is falling; a hiker died doing this.
- Leave your trekking poles at the base of the cables. You're supposed to carry everything with you, but swinging a pole attached to your pack at the person behind you is no bueno.
- Don't look up, don't look down, and don't look out to the sides. Focus on one set of poles at a time.
- DO NOT GO OUTSIDE OF THE CABLES.
- Don't put your weight on a pole until you know it's securely in the hole. Don't pull up on a pole, it can come out of the hole.
- If someone wants to pass you, let them pass, but DO NOT move to the outside of the cables to give them room. Let them deal with it.
- If you are stuck behind slower hikers, just suck it up and wait. Passing can cause anxiety to others who might be in a tough mental situation. Be kind and patient, 10-20 minutes extra is not a big deal.
- If you panic, just stop, hold on, look at your feet, and collect yourself. If you feel too much anxiety, turn around and go back down calmly and backward. Stay in control and take it one step at a time.
Descending the Cables
There are two schools of thought when you go down, climb down forward or backward. I find that I'm able to control my descent and balance my weight better when going down backward, so I do that on the steeper sections. On the less steep sections I just carefully walk forward. Whichever way you do it, make sure you are going as slow and as controlled as you are when you ascended. You'll find some people getting impatient when there are crowds and going on the outside of the cables. Not smart.
Don't forget your gloves on the way down. The cables can get hot and sweaty hands slip easily on the cables.
It's Okay To Turn Around
Just making it to the base of the cables is an achievement. If you don't feel comfortable going up them, don't do it. I'd say about 10-20% of hikers that I've seen reach the base end up not going up the cables. And while plenty of people get to the summit, fear is personal and relative. This should be an experience that is fun, not terrifying.
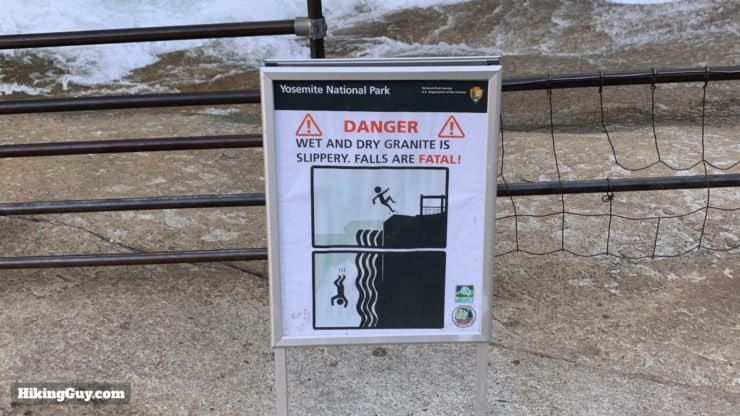
The Cables When It Rains

The common thread when it comes to deaths on the cables is rain. When the granite gets wet, it gets slick. And the 45-degree slope becomes impossible to grip onto. Add to that lightning, which can easily strike the exposed high point of Half Dome. Even a charge in the air can energize and electrify the metal cables.
If there is rain in the forecast, hike it up to the Sub Dome and then check on conditions with the ranger. If you are on the cables or summit and clouds start building or drizzle starts, get down immediately. If it starts raining hard and there is no lightning, it might make sense to stay put on the summit and call for help or use your InReach. If you see thunderstorms or lightning, get down immediately. If there is already lightning striking around you, the park recommends hunkering down at a low point on the summit. I recommend reading this harrowing tale of lightning and slick conditions.
Although storms can pop up at anytime, they generally happen in the afternoon. Plan on getting up and down before noon to play it safe.
Death on the Cables
Statistically the amount of people who die on the cables given the number of people who do it is miniscule. In the 100 years that the cables have been up, nine hikers have died on the cables. Most of those deaths occurred when the cables were down or conditions were wet. You might get scared, but the odds are in your favor to make it out alive. Be smart and safe and you'll be okay.
Where the Most Problems Occur
According to Yosemite National Park, here's where most problems occur for Half Dome hikers and where you should be vigilant.
- Sprained ankles and twisted knees, especially on the Mist Trail section.
- Dehydration leading to exhaustion.
- Slips and falls from exhaustion; hikers pushing themselves past their limits.
- Hikers getting stuck out after dark without illumination.
Training and doing your homework will go a long way to ensuring you have a magical time instead of a miserable one.
Do You Need a Climbing Harness for Half Dome Cables?
Most hikers ascend the cables without any special gear other than gloves, but for those with acute fear of heights, a climbing harness can be helpful. And before I dive in here, let me preface this by stating that there's some strong opinions for and against using a harness. I've done the cables with and without a harness, and the guidelines here are based on my experience, as well as ranger input.
First off, you don't want to just tie a rope with a carabiner or two between your pack or belt and the cables. The attachment points are not made to withstand the force of a fall. For instance, the typical backpack strap adjuster (a ladder lock) breaks at around 53lbs. I'm guessing a belt strap on hiking pants is much less than that. There is also no give in the system, creating a very high impact force when stopping (similar to hitting the ground).
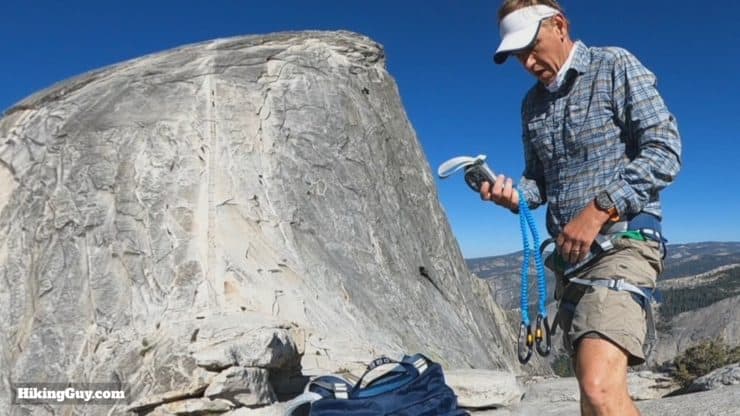
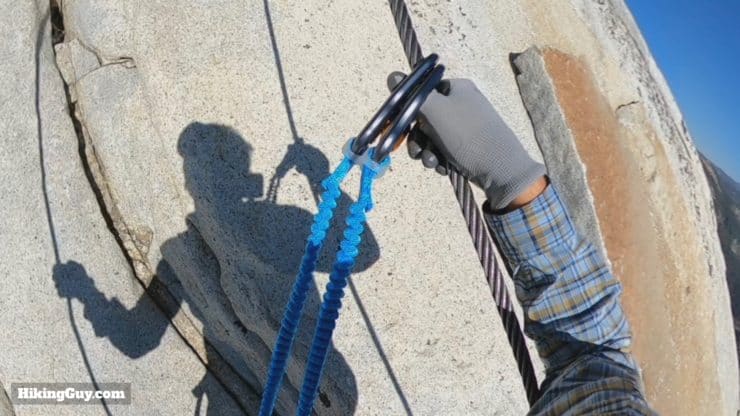
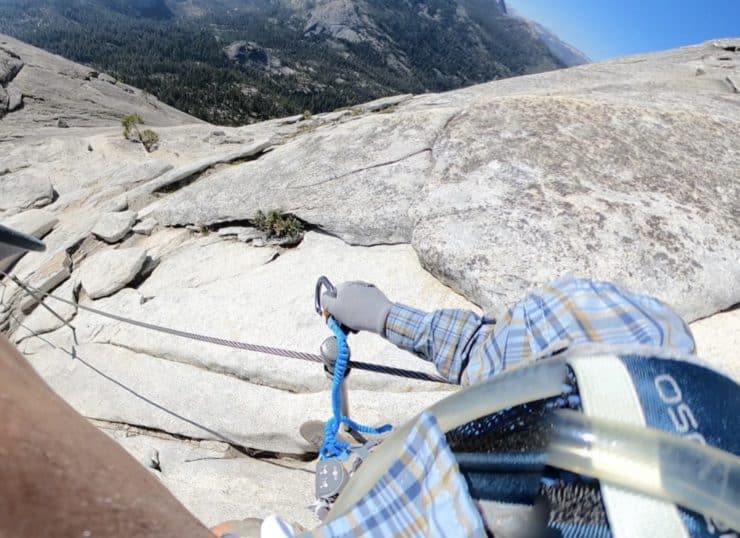
Instead, what you need is something called a "via ferrata" system, which is a climbing harness with two shock-absorbing cords and a spring attached to it. The idea is that you are always clipped into the cables as you climb. If you fall, the shock-absorbing lanyard attached to the climbing harness will absorb the force of the fall and stop you.
The Via Ferrata System
If you have a pack with a hip belt, you make have to adjust the straps so that it sits higher than the climbing harness. Otherwise the two belts rub against each other. Try them out at home first.
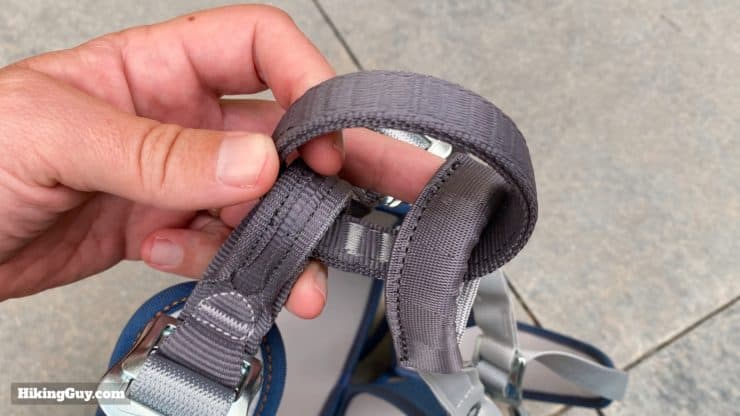

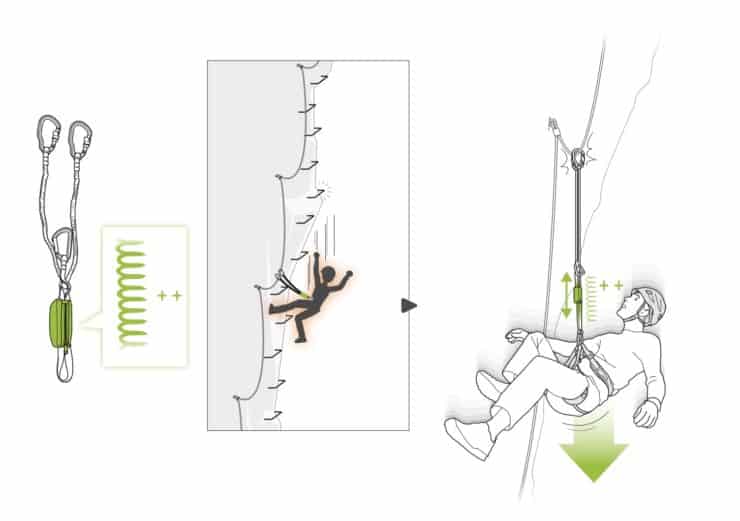
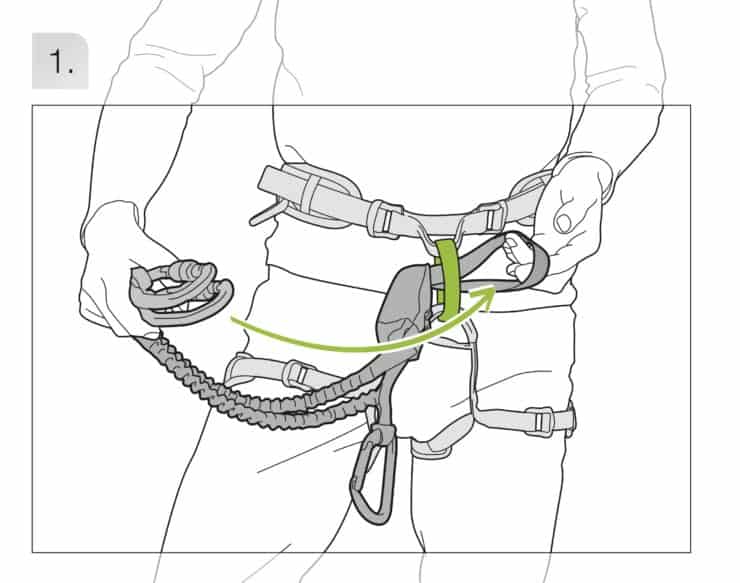
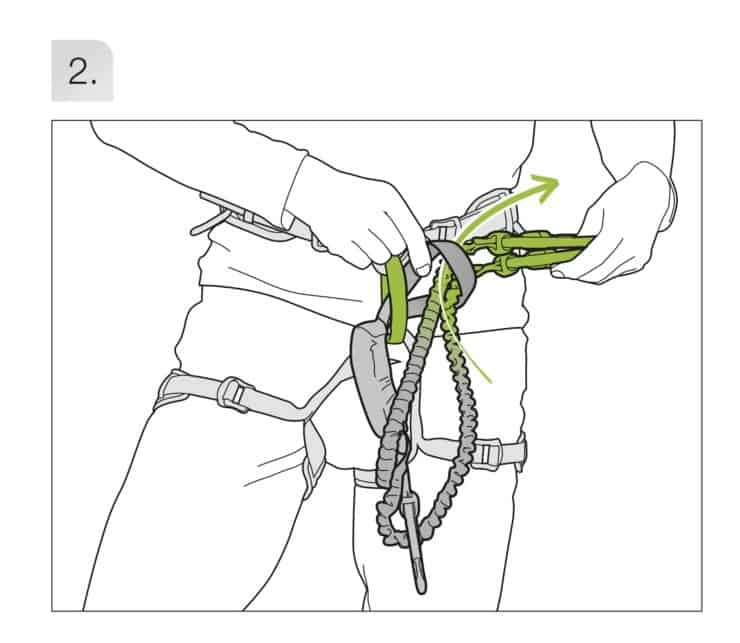
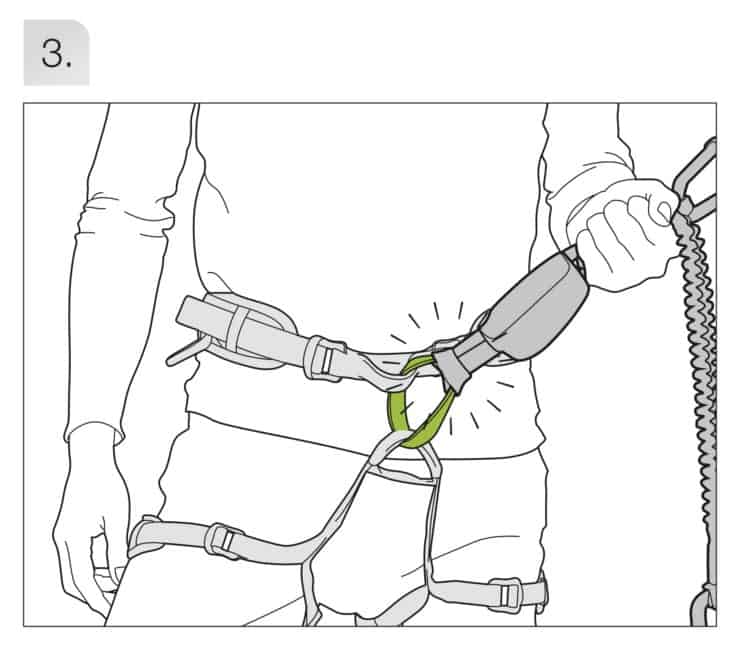
Here's how you attach the lanyard to the harness (from Petzl, a maker of the system). You loop the lanyard through the harness; there is no carabiner or attachment piece.
The third, short carabiner you see is not necessary for the Half Dome cables. It's called a resting point attachment and is something you would clip in if you were close to the cable and not moving.
And here's a great a video that shows you how to clip in and use your via ferrata system.
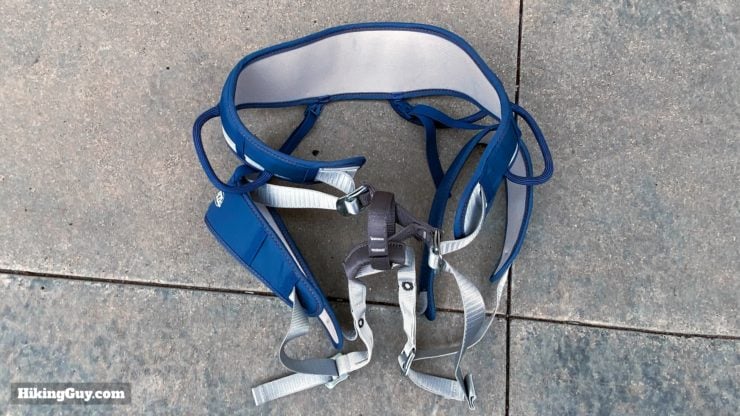
You can purchase the via ferrata gear as a kit, which usually comes with a helmet. You don't need a helmet, so just buy the harness and lanyard by themselves and save a few bucks. Unfortunately you can't rent a via ferrata kit in the Yosemite Valley.
Bought this for the cable route on Yosemite’s Half Dome hike for my teenage daughter. She ended up not needing it to go up. But on the way down she said the Via Ferrata was indispensable. It’s 45-degree grade and the granite slope has been worked smooth over the years. So her hiking boots were just sliding her downhill. The Via Ferrata gave her a lot of peace of mind. This combined with gloves and the Petzl harness was the perfect setup for Half Dome. Via Ferrata Harness Review
Disadvantages of a Via Ferrata
So the via ferrata sounds like a great system, right? Well, there are some major disadvantages that you should consider.
- Your pace will be very slow. Having to stop at every stanchion and clip over takes time.
- If you are scared of heights, when you clip and unclip, you will have to take at least one hand off the cables. It means you are not focused on your stance and holding, but instead on the clips.
- You are forced to go up on one side. If it's crowded, this will be the case anyway. If it's open, it's easier to go up the middle and hold onto both sides.
- The cables are not a true via ferrata system, the poles can come out. In a traditional via ferrata system, the anchor points are affixed to the rock.
Via Ferrata Recommendations
Here's my recommendation on whether you need a harness or not.
- If you have an acute fear of heights and still really want to do this hike, use a harness.
- If you are scared of getting knocked off or down by another hiker, get a harness.
- When you get to the cables, only use the harness if it's crowded.
- If you get to the cables and it's pretty empty, put the harness on, clip your lanyard off to the harness, and try climbing without clipping on the cables. If you get scared, you can always start clipping onto the cables.
- If you want to go faster, just clip in with one lanyard. There will be a few seconds where you are not clipped in at all, but for most of the way up, you'll be attached.
How many people use a harness? Not many. I'd guess about 5%, but it's variable. I climbed the cables a month after a hiker fell to their death (in 2019) and about half the people had a via ferrata. I've also had people tell me they wish they had a harness after seeing mine.
ESSENTIAL for the Half Dome cables. If you want to clip yourself In, which I recommend you do, this is the only way to do it right. Attaching climbing rope to carabiners is only going to give you a false sense of security. I am extremely pleased with my purchase, it helped give me the confidence to climb Half Dome! Even if you trust your own skills, anything can happen on the cables. A pole could get pulled out of the rock (I saw it happen). A water bottle or phone could fall and someone inadvertently reaches for it, etc... the peace of mind this gear offers is worth its weight in gold. Amazon Via Ferrata Review
And again, the majority of people just do fine with gloves and good shoes. It's all based on your comfort level. But if you are in doubt, carrying a via ferrata up to the start of the cables is a smart move, given all the planning, expense, and luck that probably went into your Yosemite visit and Half Dome permit.
Via Ferrata Double Lanyard Prices Lightweight Harness Prices
If you get a harness, practice at home with it before you go. An easy move is to tie a rope along a stairway banister. Don't unpack your via ferrata kit for the first time at the base of the cables.
A Personal Cables Story
There was one time that I did not make it up the cables. I was about a 150 feet up, and it was very crowded. A hiker about 5 people up from me had a panic attack and suddenly started to head back down quickly. They slipped and knocked down some other hikers, which had a chain effect, and I lost my balance, but remained upright. It definitely shook me up and I ended up turning around and calling it a day.
I bought a via ferrata and used it on my next trip up the cables. The via ferrata wasn't perfect, but it helped when I got stuck in crowds. Now I wear the via ferrata, but only use it when I'm going slow in a crowd. Otherwise I wear it with the lanyards clipped into the harness, and just go up as normal. If I need to use it, it's there.
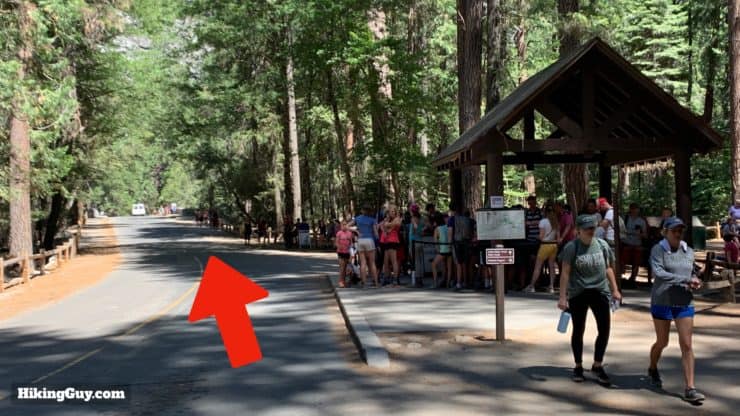
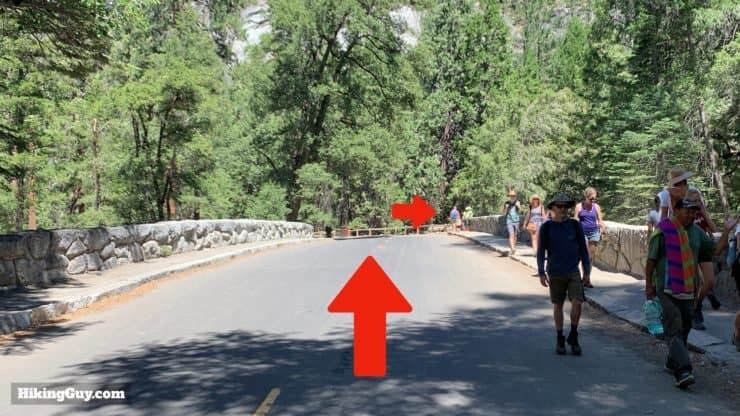
Where Does the Half Dome Hike Start?

If you've looked at other guides or even the Yosemite NP website, you may have noticed different distances for the Half Dome hike. There are multiple routes to Half Dome, and some guides start the hike mileage from the Mist Trail Trailhead, which is a good ways away from any parking or transportation.
This guide starts from the Happy Isles Shuttle Stop, which is the closest that you can get with a vehicle. It's the traditional starting point for this most popular route to the top. However the shuttle bus only starts running at 7am, so if you want to leave early, you should
- Drive to the Yosemite Valley Trailhead Parking Lot and walk to the start (10 min)
- Get dropped of at the Happy Isles shuttle stop by friends or family
- Stay or park at Curry Village and walk from there (15 min)
If you are driving and parking, use this trailhead address:
Yosemite Valley Trailhead Parking, Happy Isle Loop Rd, Yosemite Valley, CA 95389
Most people start between 5am-9am. I recommend 430am-5am to beat the crowds and potential afternoon thunderstorms.
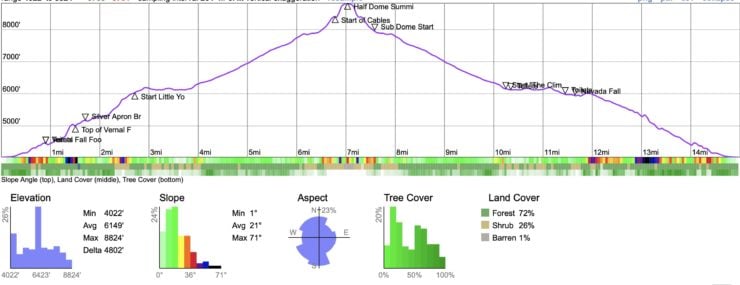
Half Dome Hike Trail Maps
As you may imagine, there are multiple ways to hike to Half Dome. This guide covers the most popular day hike route from Happy Isles in the Yosemite Valley. If this is your first time doing the Half Dome day hike, this is your best move.
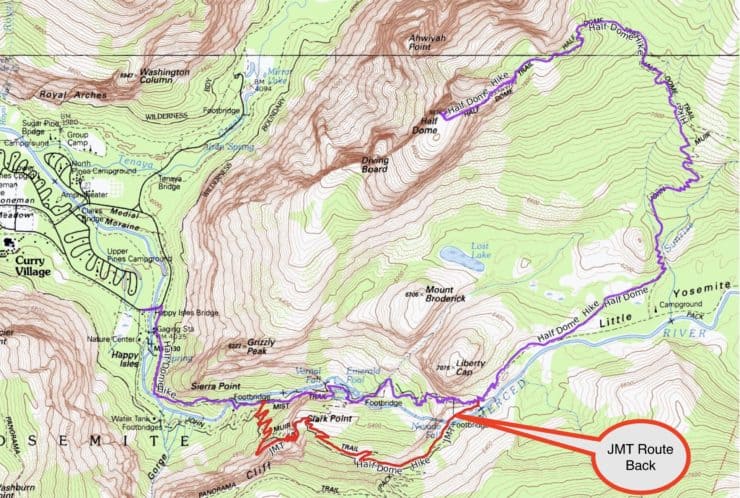
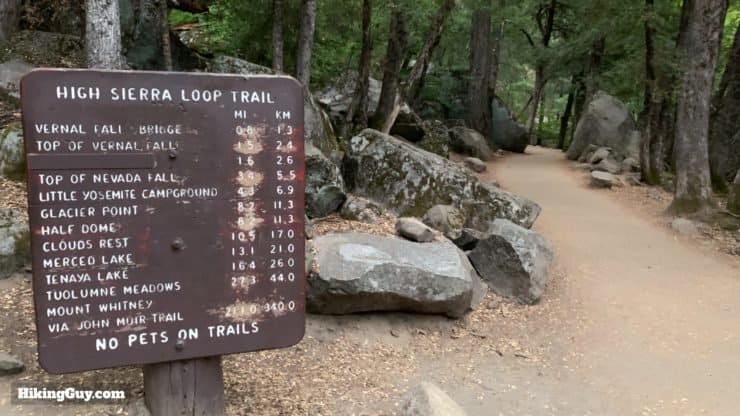
The route to Half Dome covered here (from the Happy Isles shuttle stop) is about 17 miles round trip, and comes back down on the John Muir Trail (JMT) instead of descending the Mist Trail. This is the preferred way to come back; it's a little bit longer than taking the Mist Trail, but more gradual and easier on the knees. Descending the wet, steep steps of the Mist Trail after hiking 14 miles is not fun.
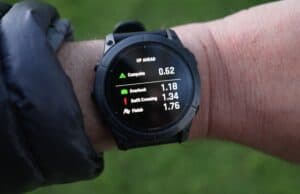
Chunking the Hike
Let's start with the distance. The easy way to finsih a 17 mile day is by breaking it down into chunks and tackling them one by one. Just focus on each section. At the end of each, take a break, sip some water, maybe refuel, and move on.
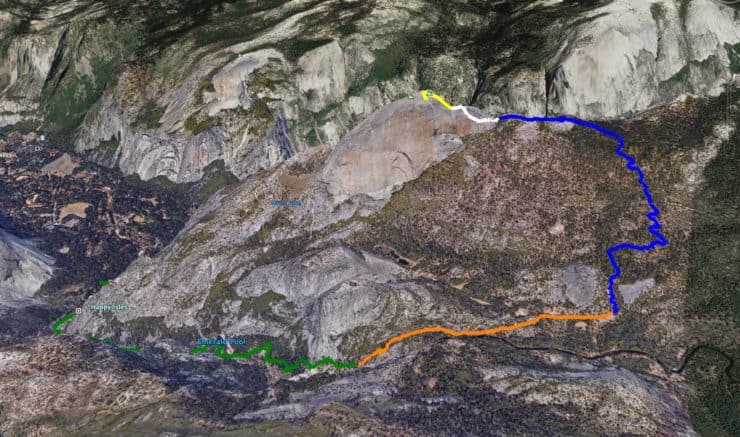
| Segment | Color | Distance | Climb | Notes |
|---|---|---|---|---|
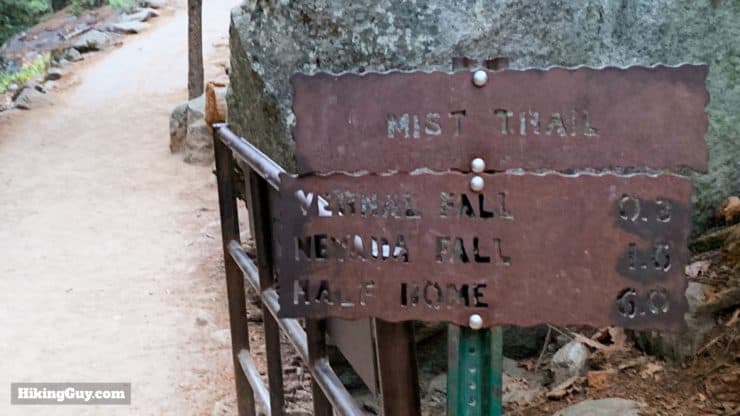
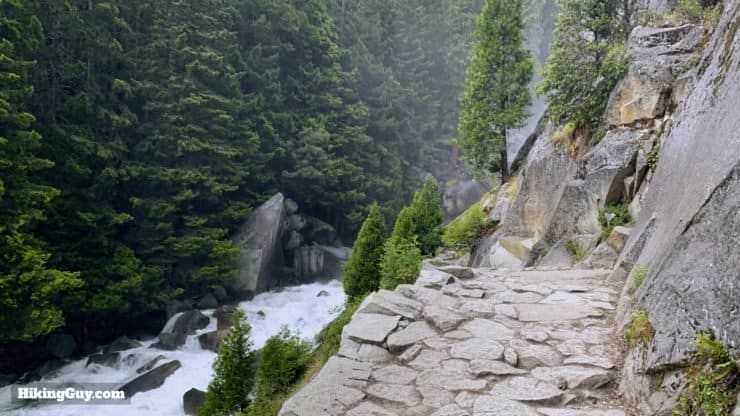
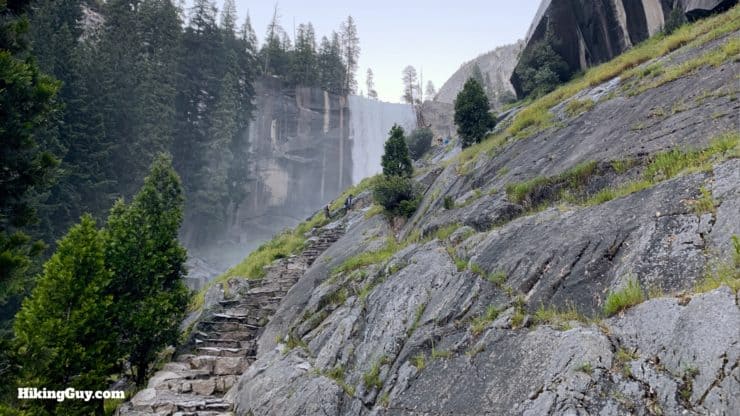
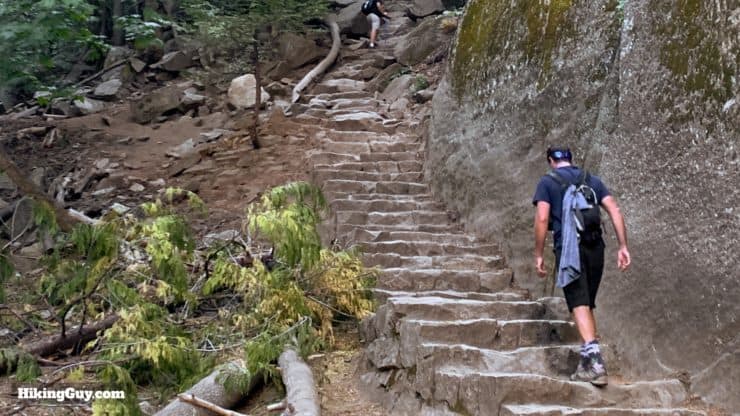
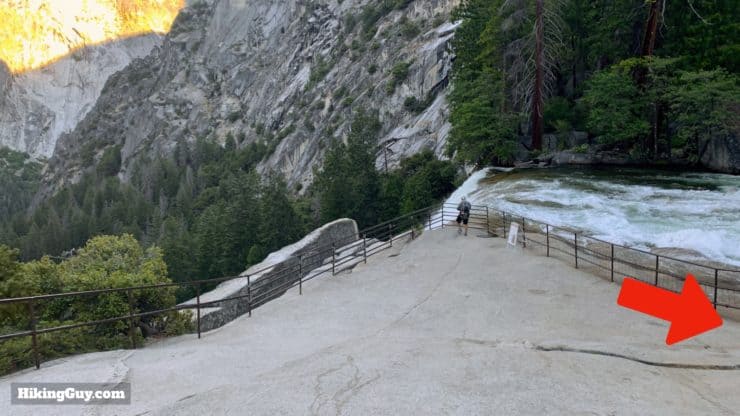
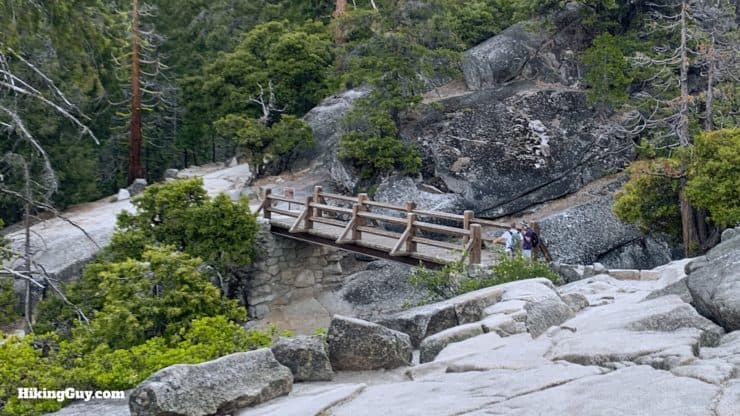
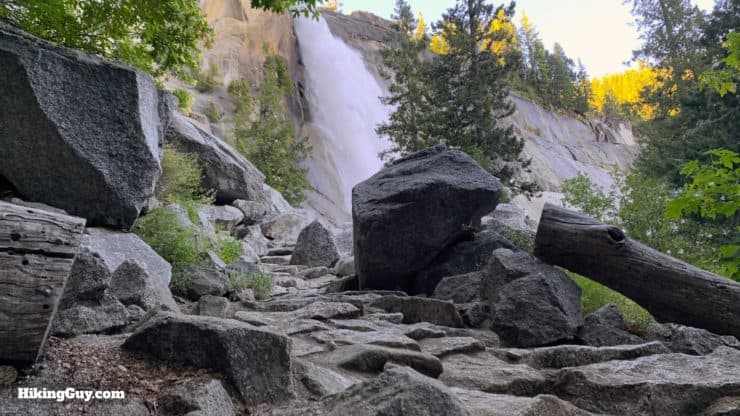
| Mist Trail | Green | 3 | 2500 | The first three miles are the steepest. You'll pass Vernal and Nevada Fall as you tackle the steepest sections before the dome. |
| Little Yosemite Valley | Orange | 1 | 200 | Catch your breath on this largely flat section along the Merced River. |
| The Climb | Blue | 2.5 | 1800 | A long but steady and gradual climb up the back of Half Dome |
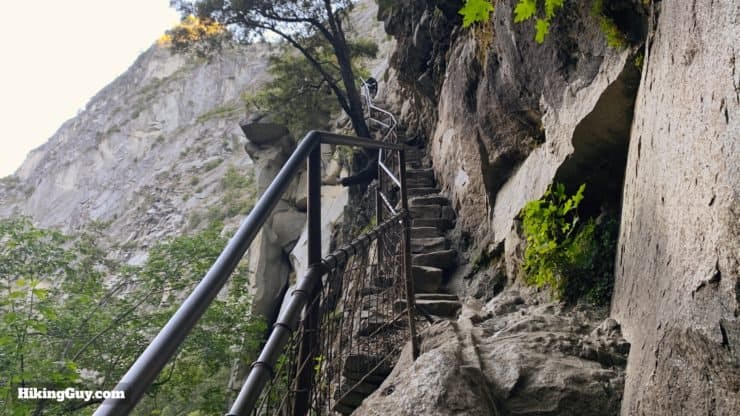
| Sub Dome | White | 0.5 | 400 | Permits only past this point. You'll make your way up steep rock steps to the base of the cables. |
| The Cables | Yellow | 0.3 | 400 | Make your way up the steep slopes on the cables section to the summit. |
Interactive Map
How Will You Navigate?
 Using the Apple Watch for Hiking
 Garmin Fenix 7 & Epix Review For Hikers
 How To Read a Topographic Map
 Garmin GPSMAP 67i Review
Elevation Profile
Half Dome Hike Directions
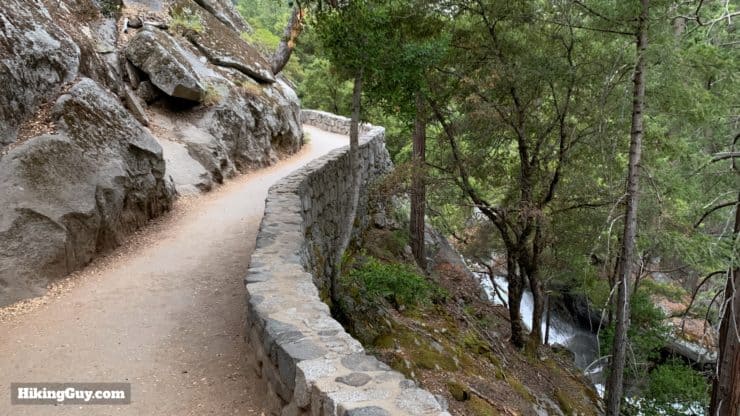
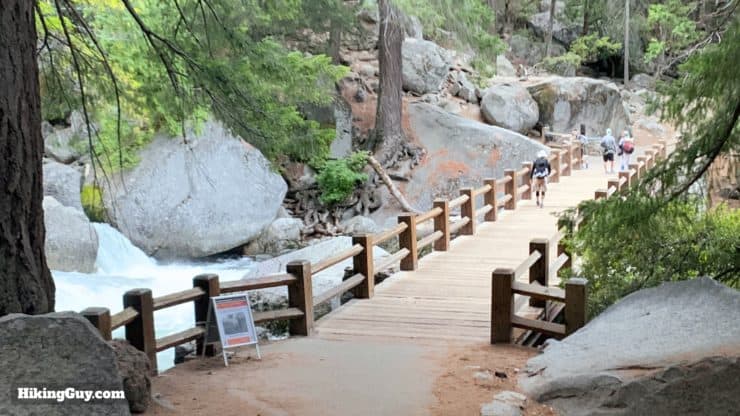
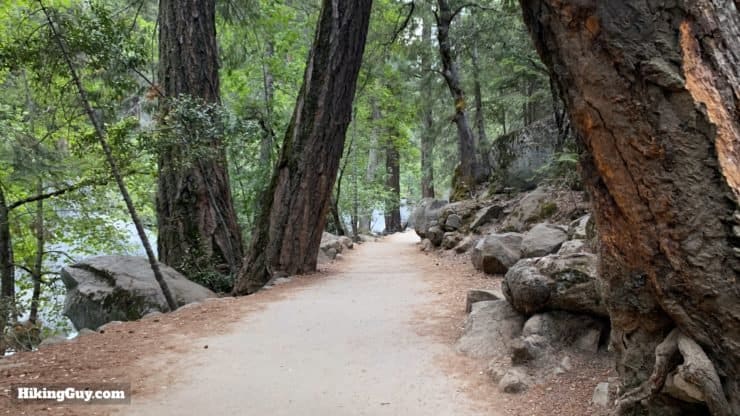
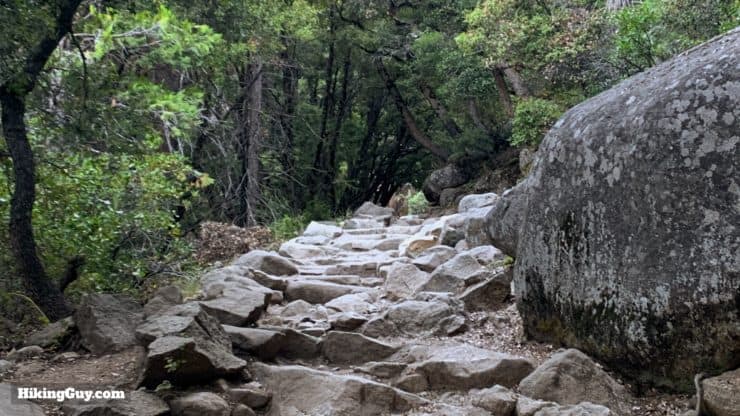
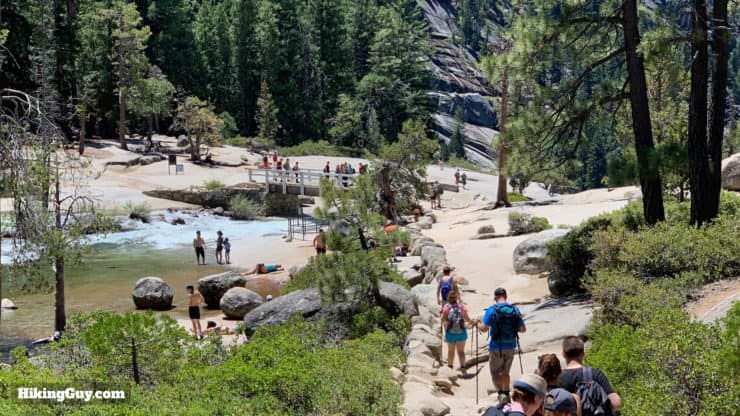
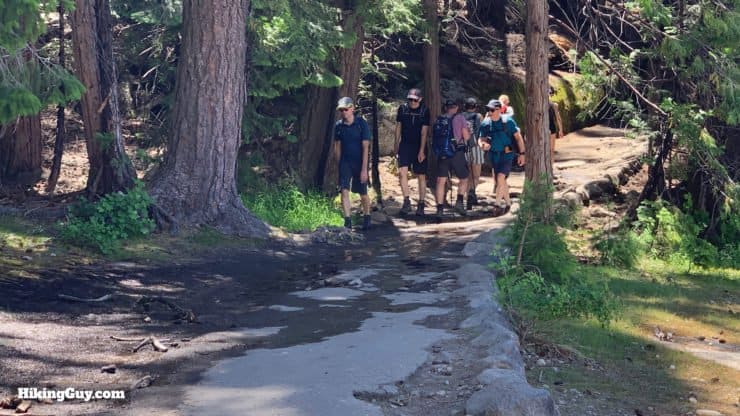
Section 1: Mist Trail
The first part of the hike might be the toughest, but you will probably have the most energy at the start, so it's usually not a big deal. Just make sure to pace yourself and know that you have a long day ahead.
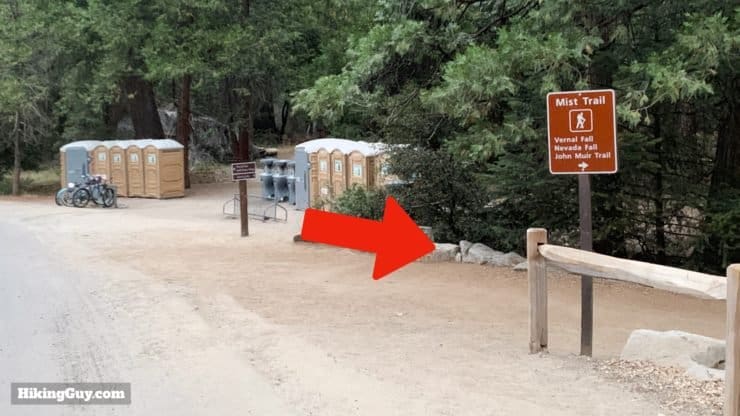
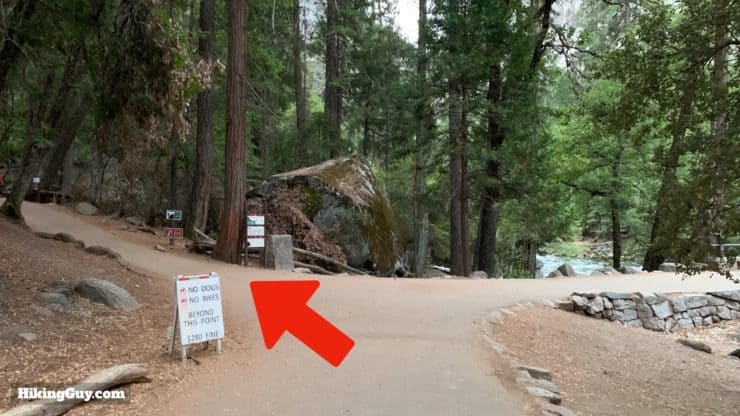
The bathrooms here offer the last flushing toilets, but there are primitive toilets further along. This is also the last place to fill up on water that you don't have to filter (from the outside sink).
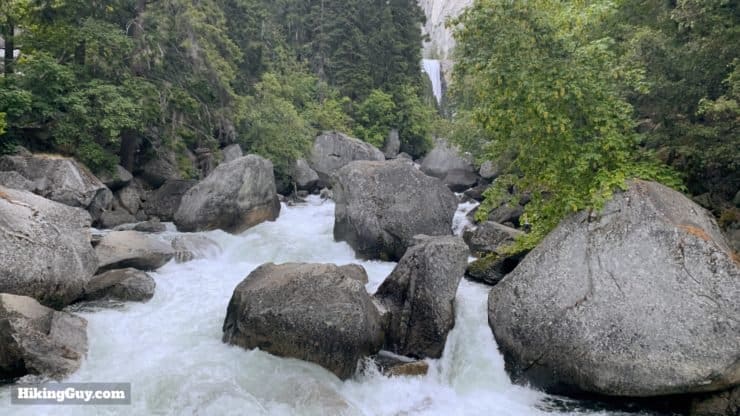
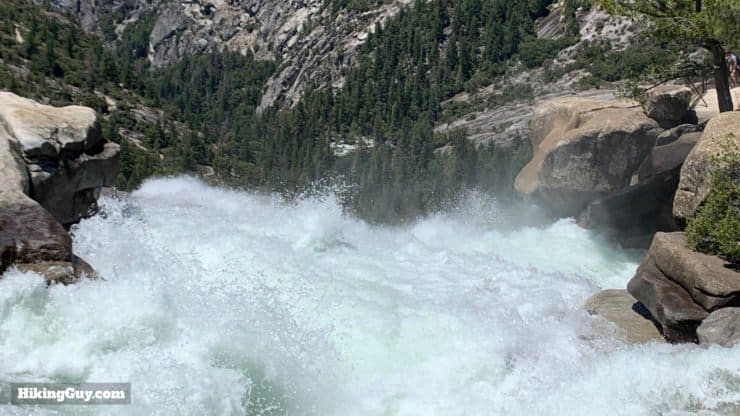
Fall or Falls? If a waterfall drops unimpeded it is a FALL. If it cascades, it is FALLS.
If it's chilly and you have a light rain shell, it's good to wear on this section. Otherwise you'll dry off as you climb later.
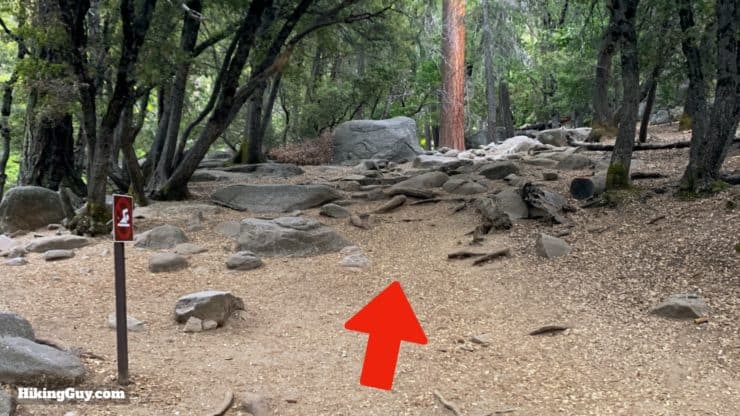

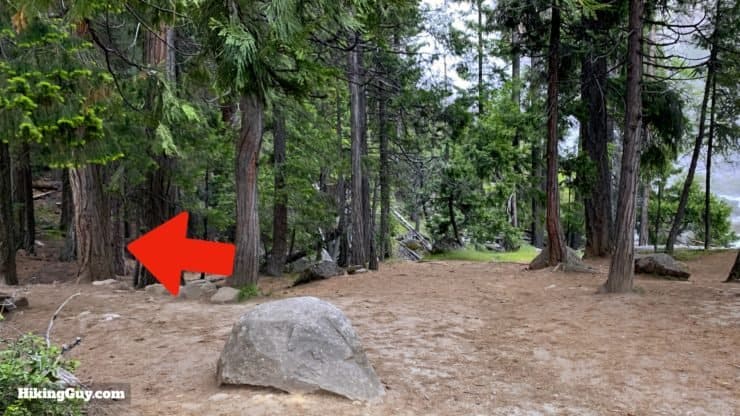

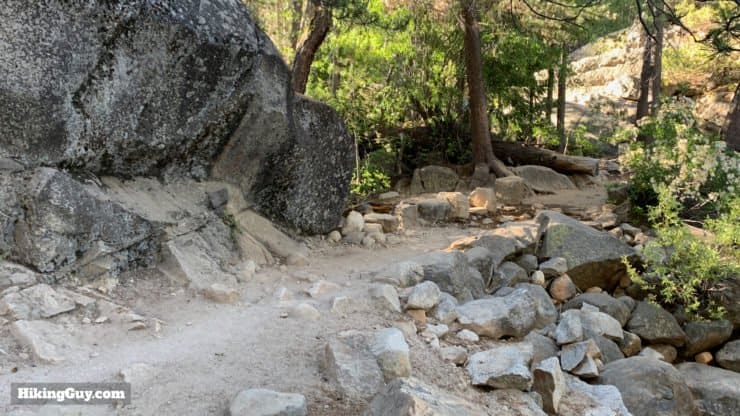
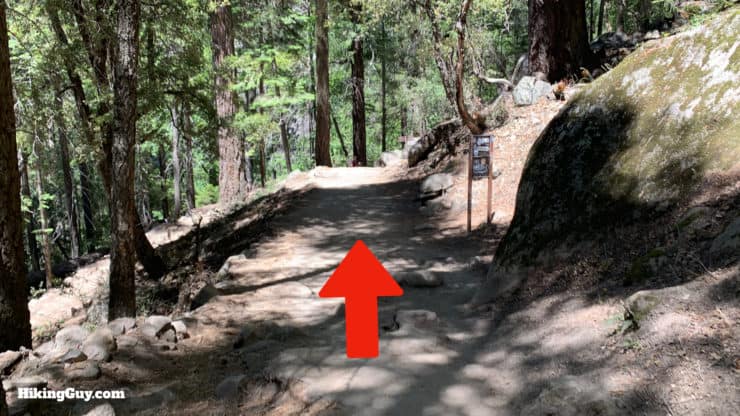
Section 2: Little Yosemite Valley
This is a good section to catch your breath before you start climbing again. After your tough ascent on the Mist Trail, this section will feel like a cakewalk.
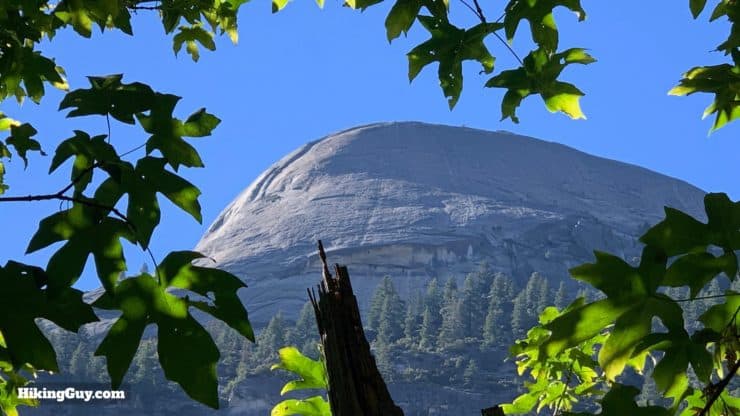
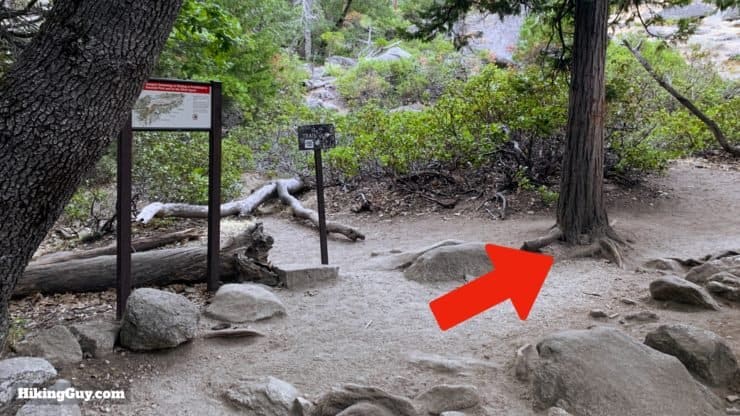
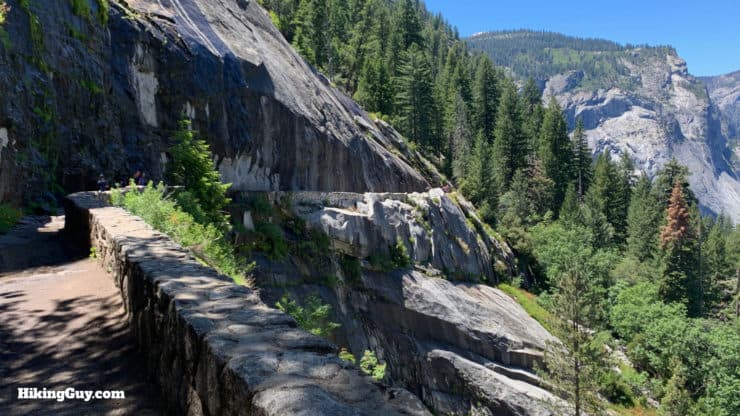
Section 3: The Climb
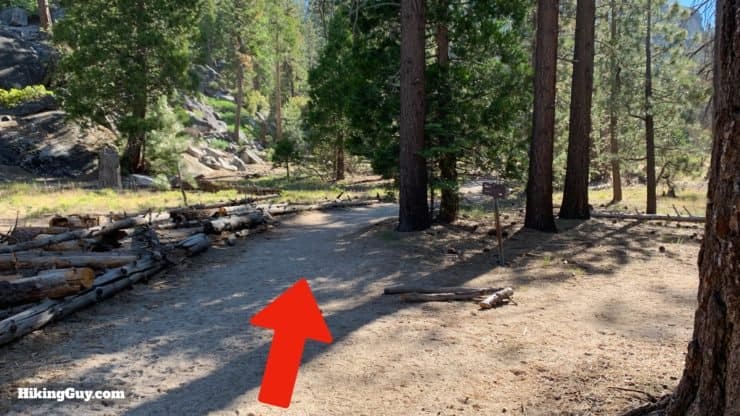
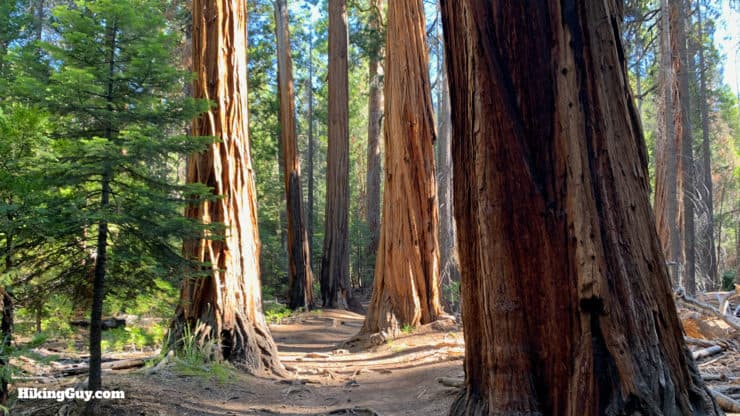
The next section, which climbs about 1800 feet, is tough on some folks. For the most part you're in the forest, and you'll conquer the climb by hiking up many switchbacks. My advice is to settle into a rhythm, enjoy the forest, and forget about how far you have to go.
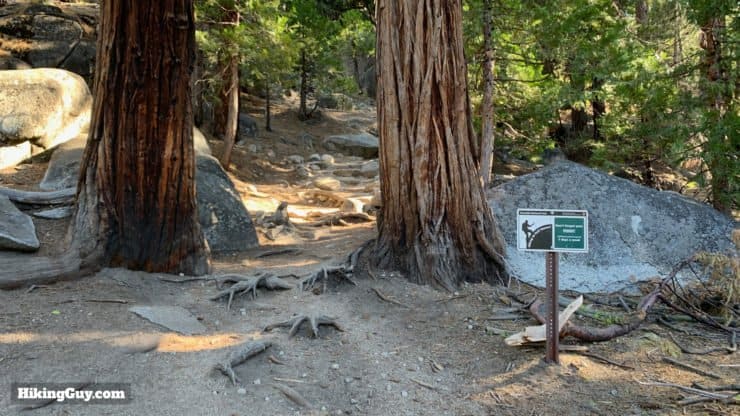
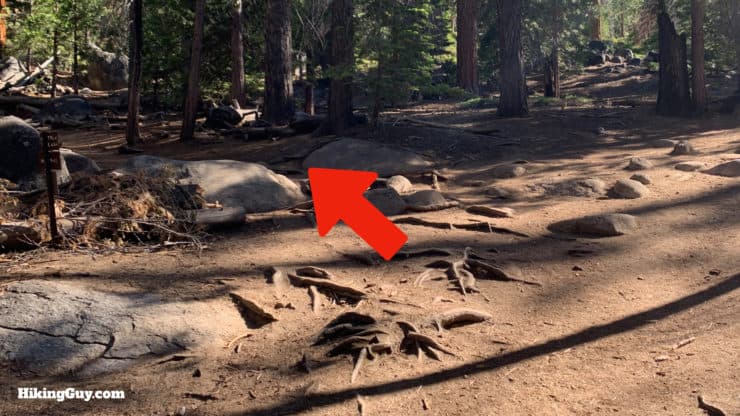
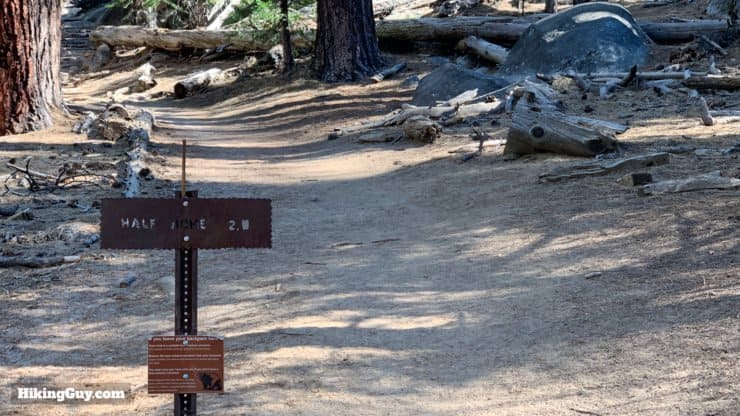
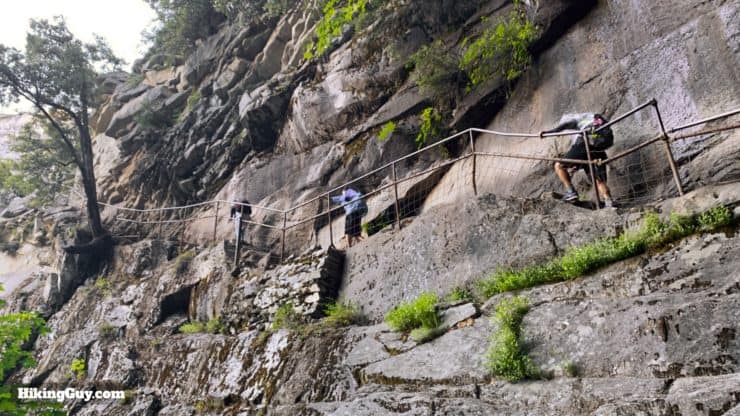
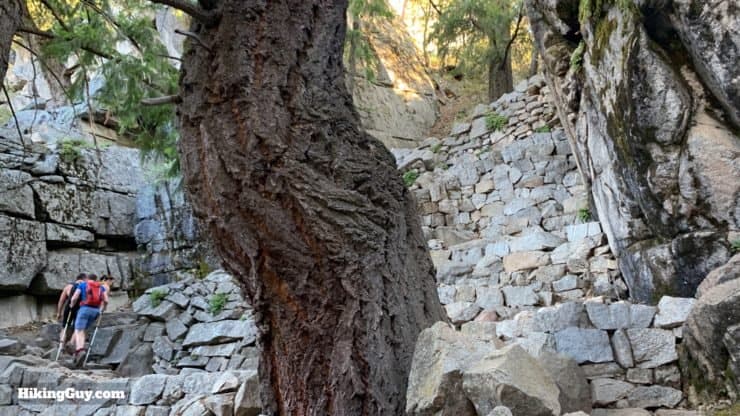
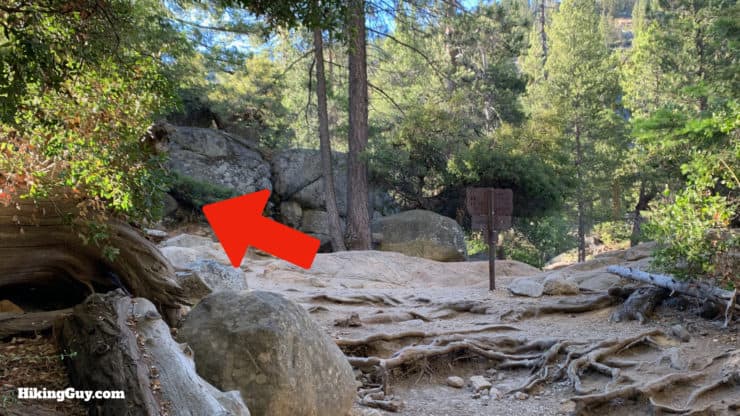
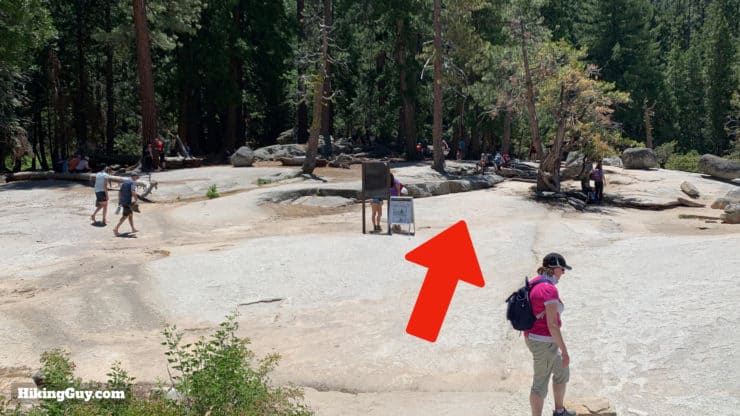
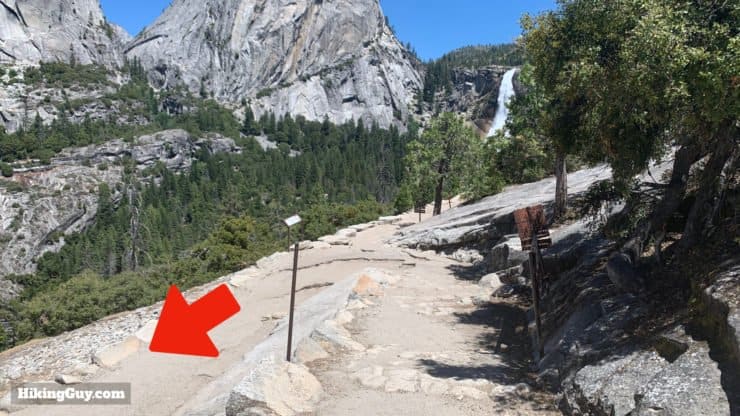
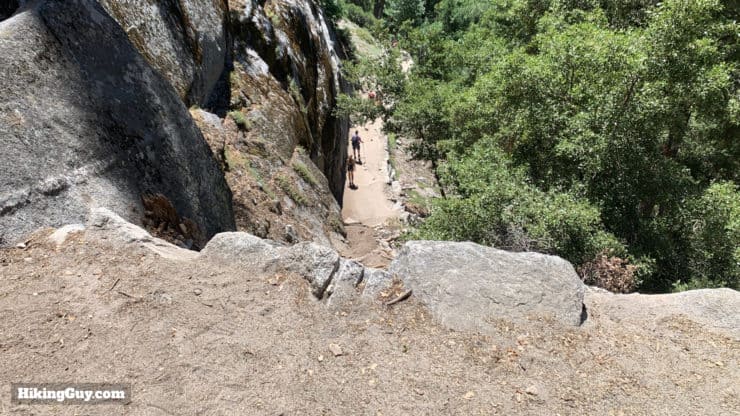
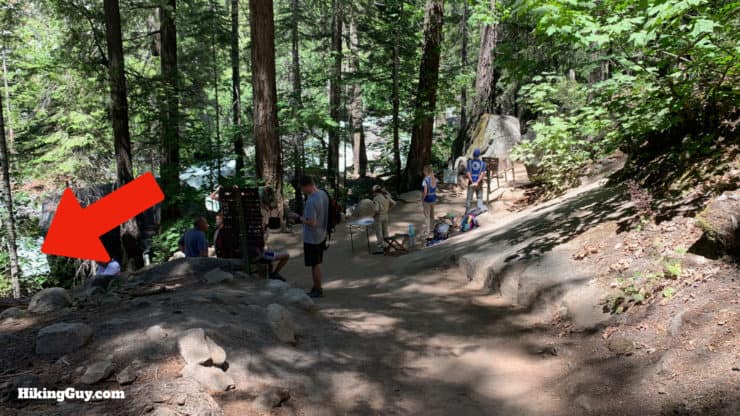
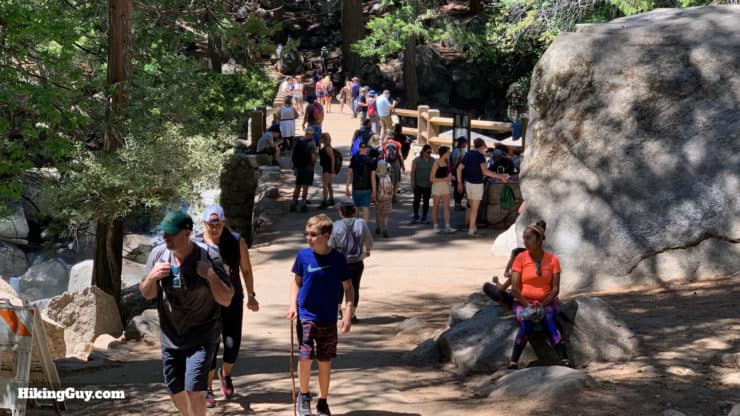
Section 4: Sub Dome
Usually the ranger will be at the base of Sub Dome checking permits. Sometimes they'll be somewhere else, in which case just keep hiking and show your permit later. You can hike all the way up to this point without a permit, and if you want to permit jump, this is where you wait and ask other hikers if they have an empty slot.
Don't forget to stow your ID deep in your pack after showing it to the ranger. It's easy to drop it in your pocket and then lose it on the cables.
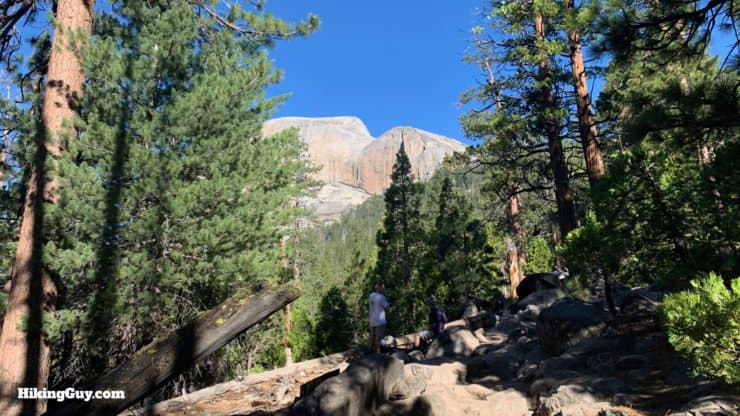
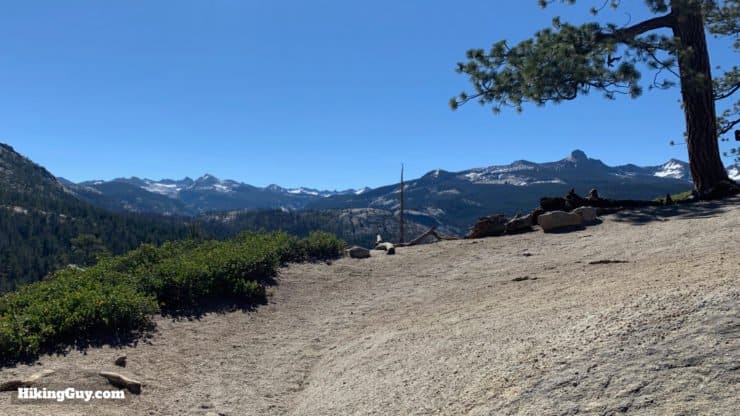
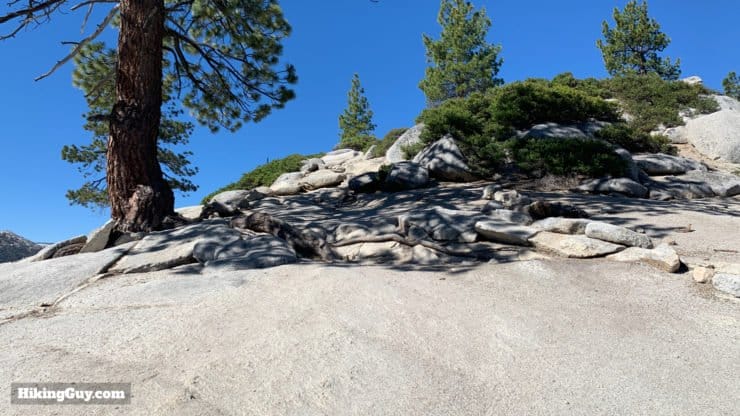
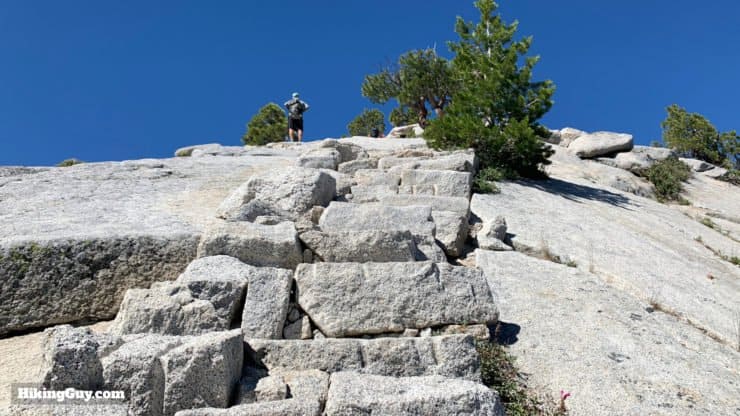
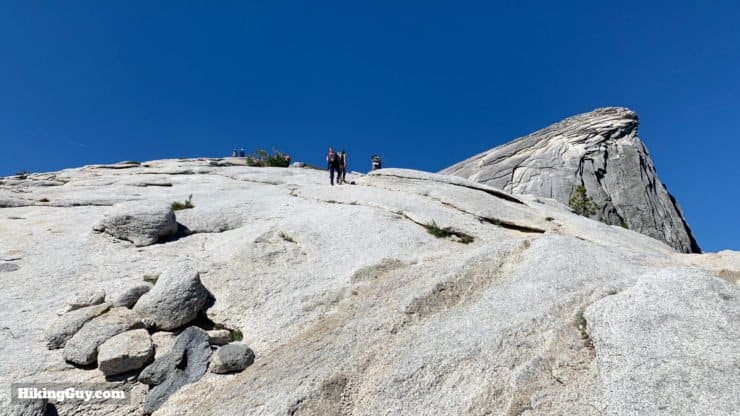
From here on out you'll be above the tree line. Some folks have a problem with this section and think it's harder than the cables, but I don't agree. It's steep and narrow, but doesn't require any climbing or scrambling. Take your time, allow others to pass in safe spots, and you'll be fine.


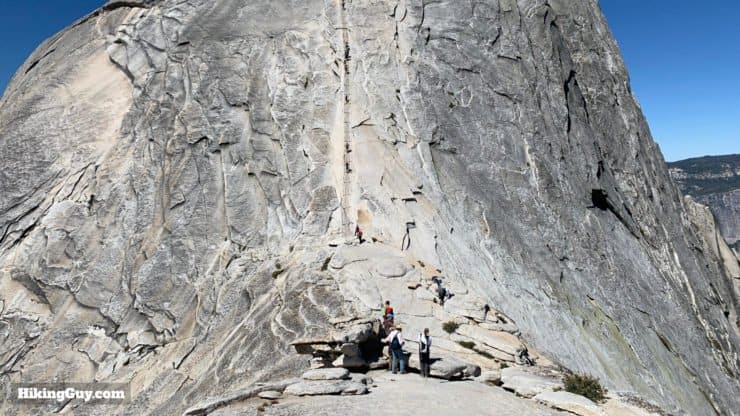
Section 5: The Cables and Summit
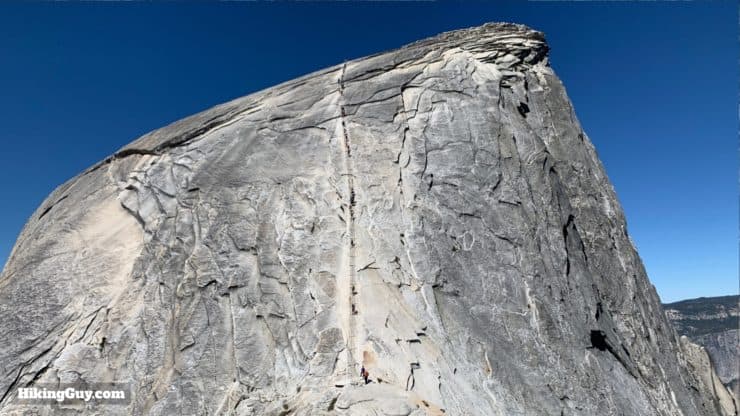
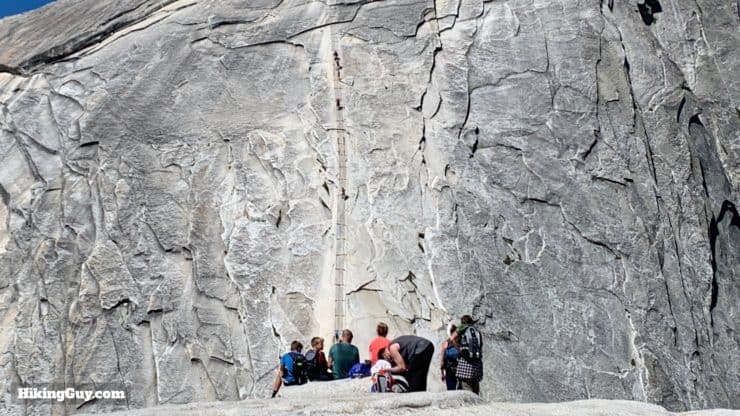
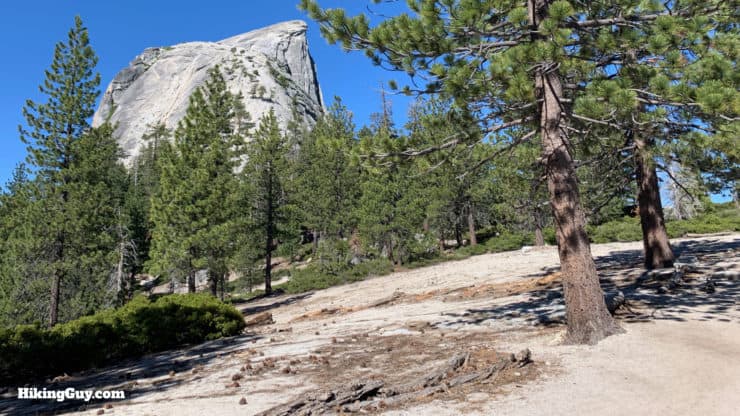
Here we are, at the section of the hike that all the training, permits, and sweat have lead up to. It's common to take a break at the base of the cables, eat, drink, get your gear prepped, and then go for it. Or maybe not. It's up to you. I can say that the first time you get to the base of the cables, it is awe-inspiring (aka "holy sh@t!"). Because you are looking at the cables head-on, it looks like it climbs straight up. But when you actually get closer to the cables, you'll see the slope is steep yet doable.
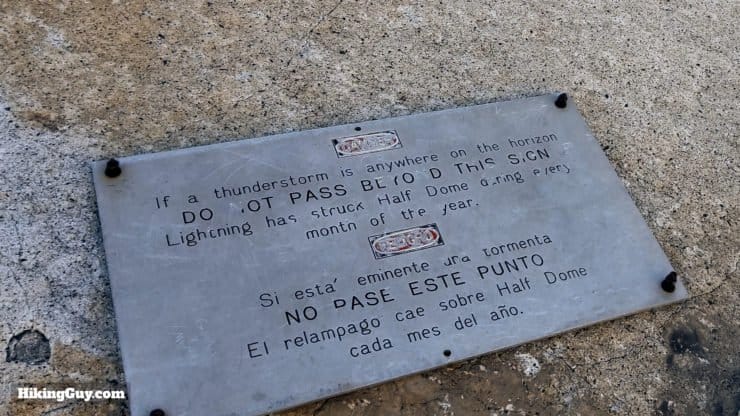
Do a weather check here. If you see building clouds, hear thunder, or "smell" rain, don't risk it. Remember that lightning can travel 10 miles and it strikes Half Dome every month of the year.
When Josiah Whitney (who Mt Whitney is named after) looked at this view in 1870, he said "Half Dome is perfectly inaccessible, being probably the only one of all the prominent points of Yosemite which has never been, and never will be, trodden upon." Little did he know that about 150 years later there would be a permit lottery...
That's it, you bagged Half Dome! After enjoying the summit, head back down the cables.
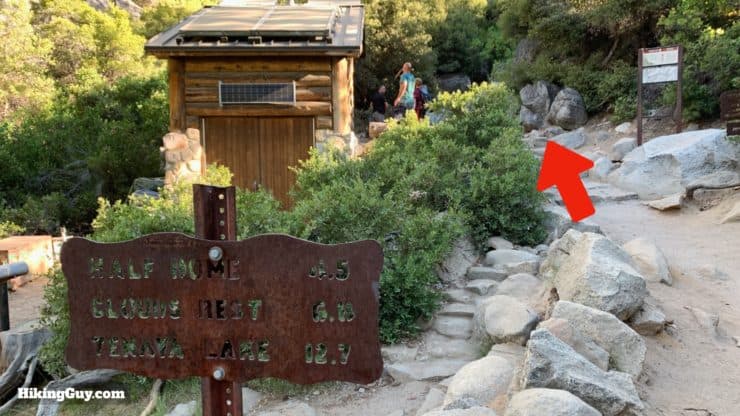
Once you get back to the Sub Dome, hike back down the climb and through the Little Yosemite Valley, back to the junction of the Mist Trail.
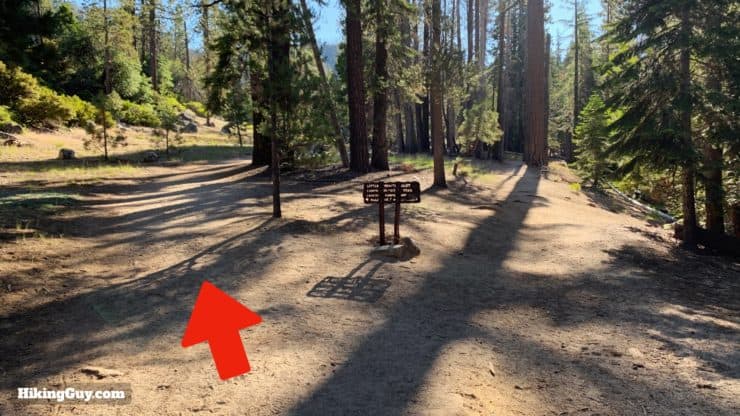
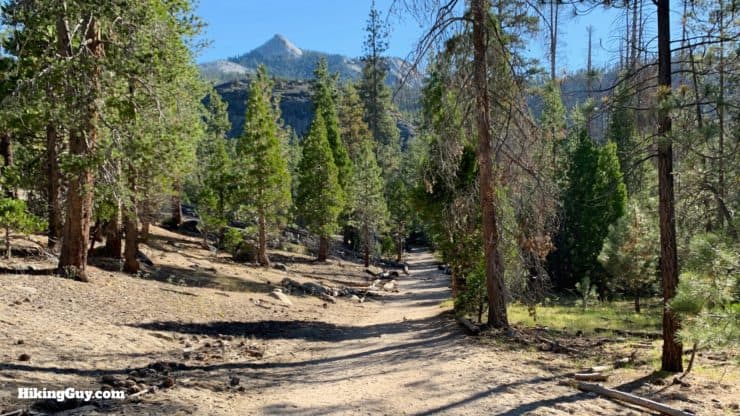
JMT Return Route
You can certainly descend the way you came up on the Mist Trail, but I've found that taking the JMT is much nicer. The Mist Trail is shorter but steeper and often wet from the mist. After hiking 14 miles or so, it can be hard to muster the focus to safely descend the hundreds of steps and steep sections. Take the JMT, enjoy the spectacular views, and play it safe.


What's next on your hiking bucket list? Mt Whitney?
Need More Info?
- Have a question about the guide? Join my Patreon and ask me a question.
- When planning, always check the park website and social media to make sure the trails are open. Similarly, check the weather and road conditions.
- Do you have an update to this guide? View the Youtube comments for this video. Leave a comment and I will do my best to update the guide.
Related Guides
 Clouds Rest Hike Guide
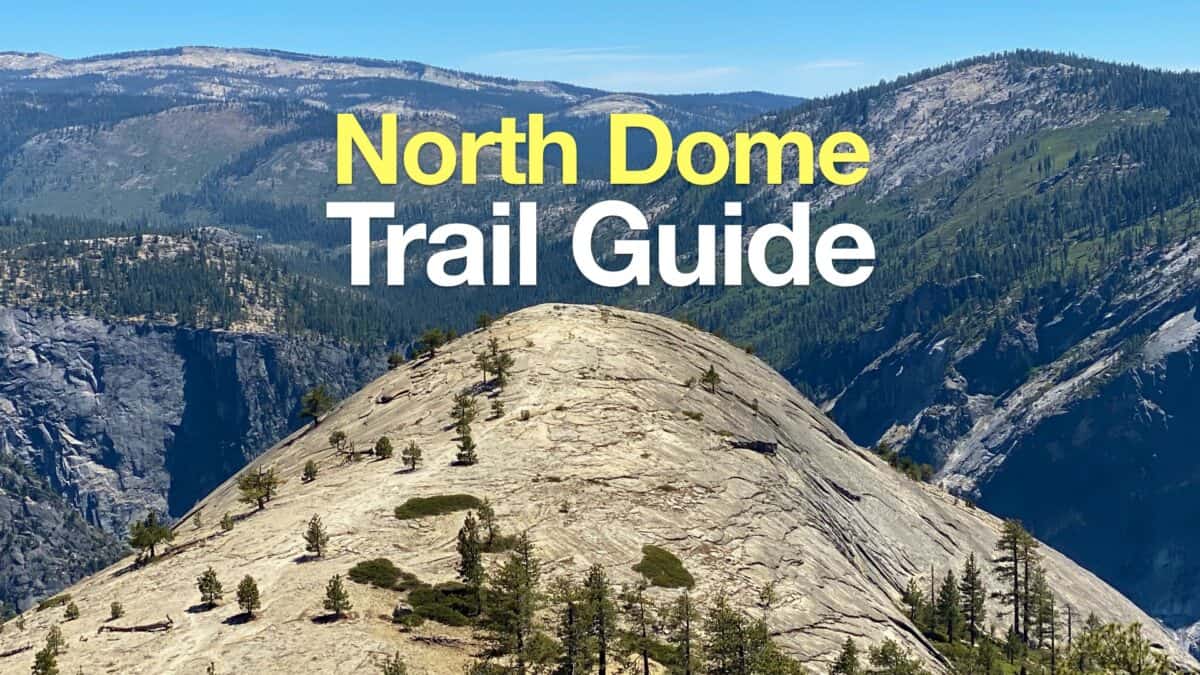 North Dome Hike
 Sentinel Dome Hike
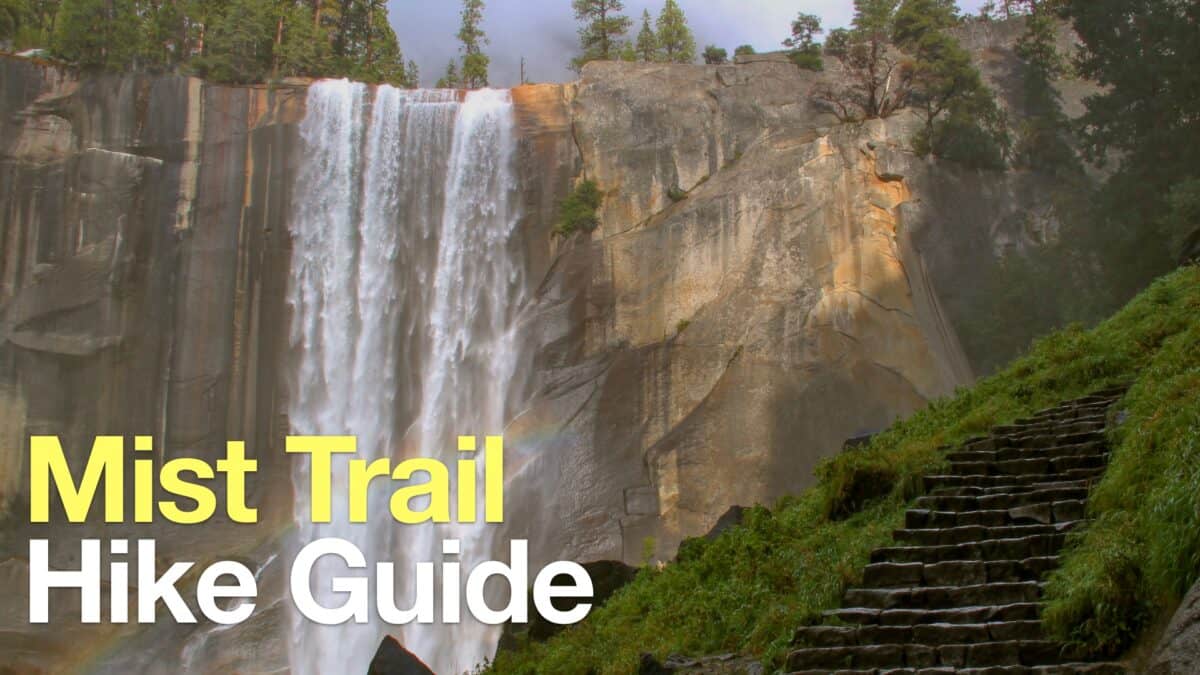 Mist Trail to Vernal and Nevada Falls
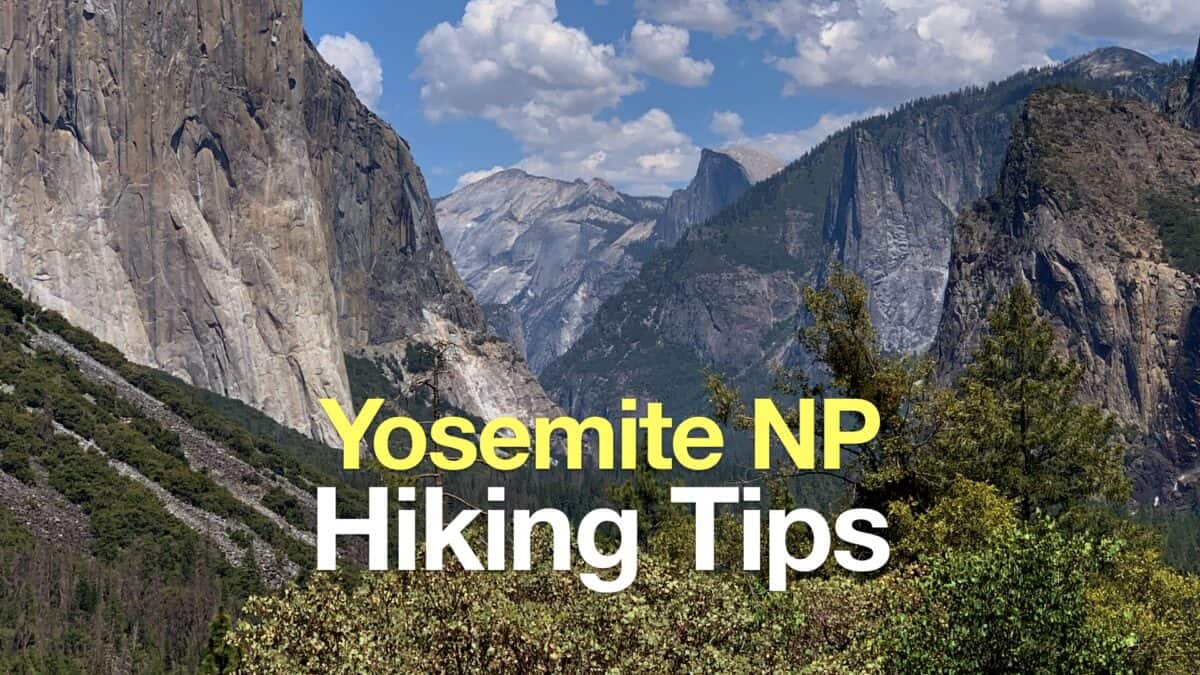 Yosemite Hiking Tips
 Yosemite Hikes
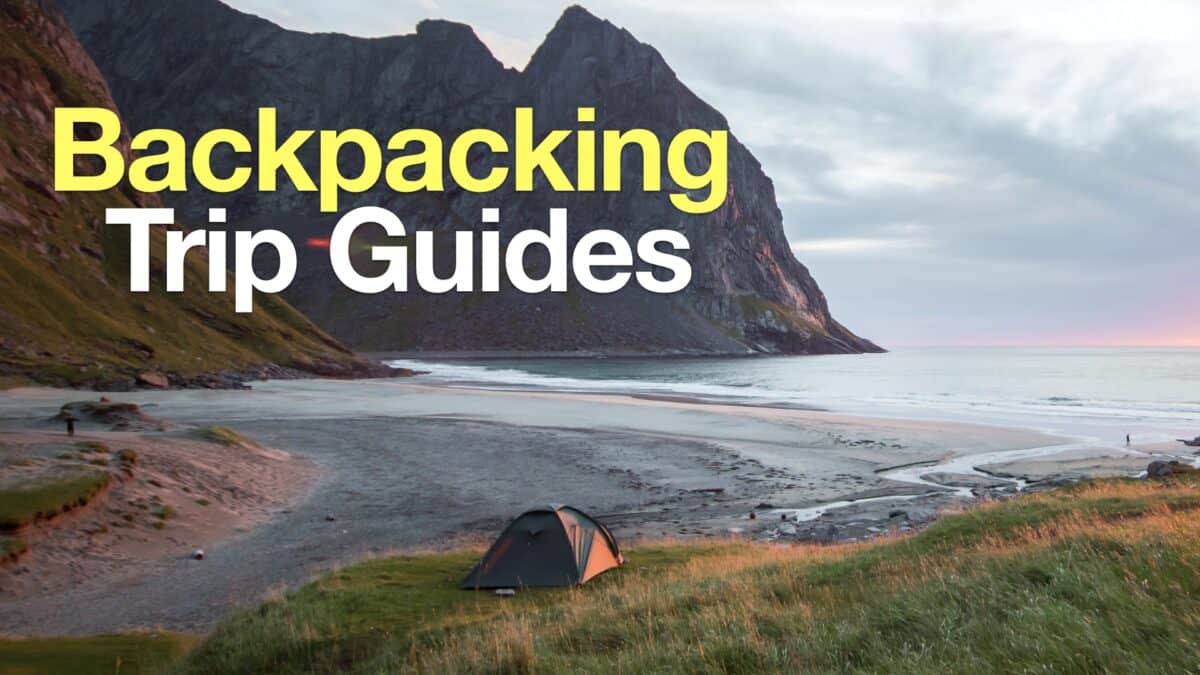 Backpacking Trips
 Best Hikes in the World
Popular Guides
 Best Hiking Gear 2024
 Hiking Boots or Shoes: Do I Really Need Hiking Boots?
 When to Hit SOS on inReach
This Guide Was Written by Cris Hazzard

Hi, I'm Cris Hazzard, aka Hiking Guy, a professional outdoors guide, hiking expert, and author based in Southern California. I created this website to share all the great hikes I do with everyone else out there. This site is different because it gives detailed directions that even the beginning hiker can follow. I also share what hiking gear works and doesn't so you don't waste money. I don't do sponsored or promoted content; I share only the gear recommendations, hikes, and tips that I would with my family and friends. If you like the website and YouTube channel, please support these free guides (I couldn't do it without folks like you!). You can stay up to date with my new guides by following me on YouTube, Instagram, or by subscribing to my monthly newsletter.