
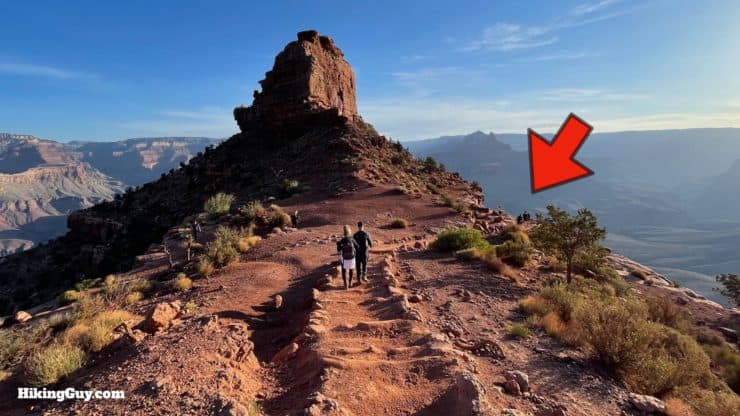
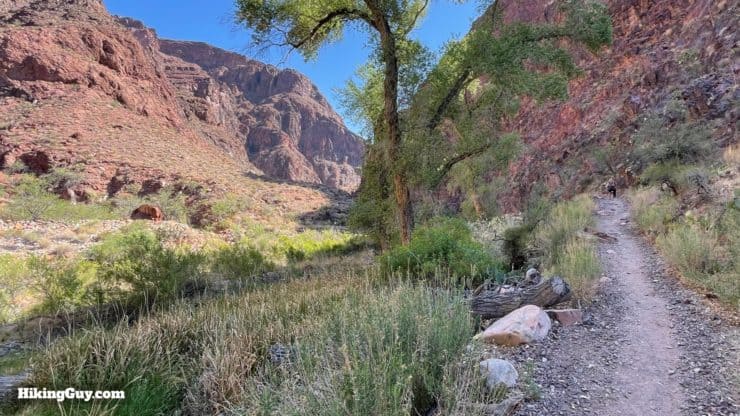
The rim-to-rim hike in the Grand Canyon is iconic, spectacular, and challenging. Over my years of hiking the rim-to-rim, I've seen people of all shapes and sizes hike across the Grand Canyon, and in this guide, I'm going to give you all the information you need to know so that you can hike it too. Your journey will start months before stepping foot on the trail, as planning is critical for this popular bucket list hike. And then, armed with the correct information and preparation, you'll know what to expect as you leave 99.9% of the other Grand Canyon visitors behind and hit the trail to cross one of the seven wonders of the world. And in case you're wondering, although you'll be exhausted at the end, the sense of accomplishment you'll feel at the end is unparalleled.
- How to Plan Your Rim-to-Rim Hike
- Training & Mental Preparation
- Video & Turn-by-Turn Directions
- South-to-North and North-to-South Directions
Want to experience a hike into the Grand Canyon without doing something as strenuous as the rim-to-rim? Check out my Grand Canyon hikes page for options into the Canyon as short as 1.8 miles.
What is the Grand Canyon Rim to Rim?
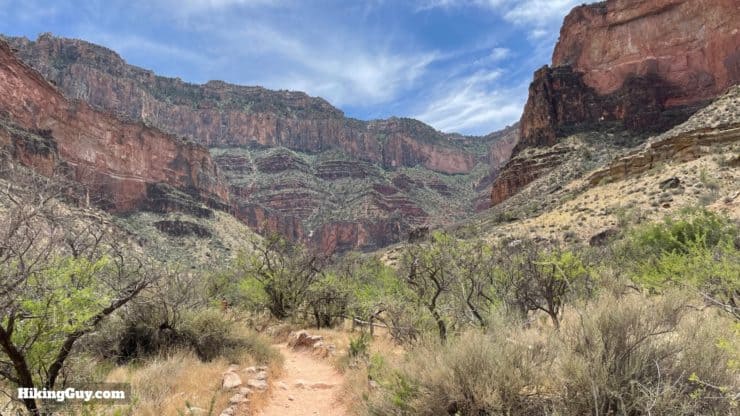
Although there are many ways to hike from rim-to-rim in the Grand Canyon, a "rim-to-rim" hike generally means hiking from the south to north rim, or the north to south rim. The hike can be done in a day, or spread over a few days that include camping or lodging. Often it's done one-way, with hikers taking a pre-booked shuttle bus back to the side where they started.
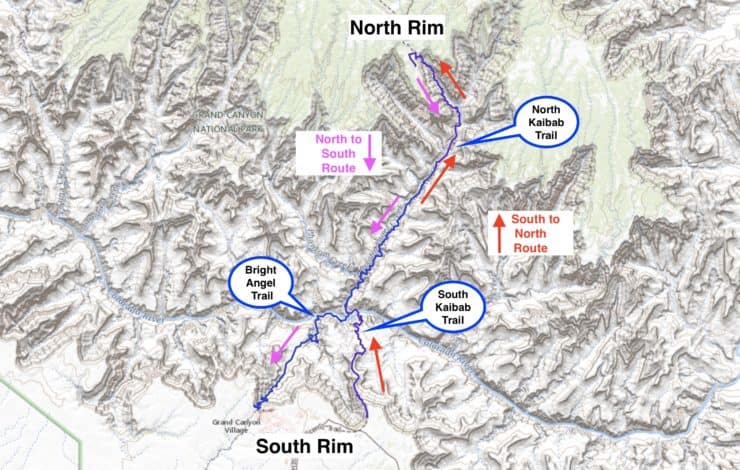
Map locations: South Kaibab Trailhead - North Kaibab Trailhead - Bright Angel Trailhead
Rim-to-Rim Route Comparison
| South to North | North to South |
|---|---|
| 21 miles | 24 miles |
| 6400 feet total ascent | 5150 feet total ascent |
| 8-12 hours | 9-14 hours |
| South Kaibab to North Kaibab Trails | North Kaibab to Bright Angel Trails |
| Limited lodging at end | Many lodging options at end |
| Less Crowds | More Crowds (at end) |
| Limited facilities at end | Many facilities at end |
| No water first 7 miles | Water on whole route |
Grand Canyon North and South Rim Comparison
The South and North Rims are only 10 miles apart in a straight line, but to drive between them is 4 hours.
| South Rim | North Rim |
|---|---|
| Main tourist attraction | More remote destination |
| Very crowded | Not crowded |
| Lots of faciliites and lodging | Limited facilities and lodging |
| Open year round | Open May-October |
| Occasional snow | Snowed in for winter |
| Elevation of 6800 feet | Elevation of 8297 feet |
| Closest airport is Flagstaff - 1.5 hours | Closest airport is St George - 3 hours |
Recommended First Time Rim-to-Rim Route
Whether you're backpacking or doing the rim-to-rim as a day hike, I highly recommend doing your first rim-to-rim from south to north on the South Kaibab to North Kaibab trails. Here's why:
- This route is 3 miles shorter than the other. When you're doing a long day like this, having a shorter route means less miles on your feet.
- Although there is more climbing on this routing, it's spread out over a longer distance, making the climb out feel a little easier. When you get to the last few miles on either side, it will be tough no matter what.
- It's only about 7 miles to the bottom of the Canyon. If you leave early (more later) you can generally clear the hottest part of the hike before the hottest part of the day. People die from heat related conditions every year, and you need to take this point seriously whichever way you route your hike.
- Arriving at the North Rim is a much more peaceful experience. You'll have left the desert-feeling South Rim and arrive at a higher altitude pine forest on the North Rim. It feels like you've really hiked to someplace different. Contrast that with arriving at the South Rim, where you're faced with tourists and tour buses. It can be a bit jarring after 10+ hour immersed in the natural beauty of the Canyon.
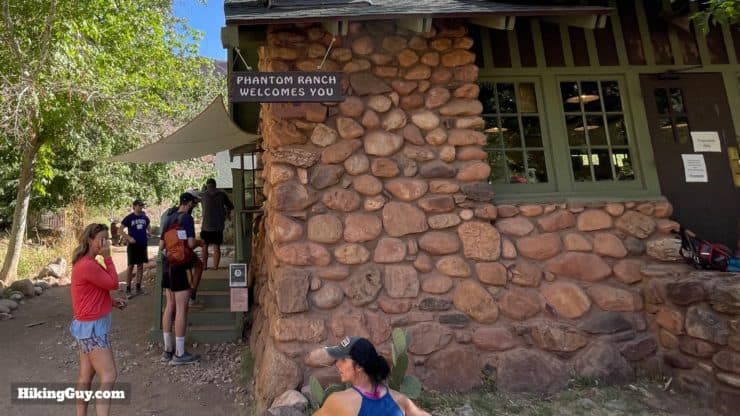
- I'd also recommend doing this as a one-way day hike, or with an overnight at the Phantom Ranch Lodge. Hiking up the wall of the Grand Canyon with a day pack is a much more pleasant experience than doing it with a full backpack of camping gear. I'll talk more about the lodging options shortly.
Why not Bright Angel to North Kaibab? You can certainly do the South to North hike this way, and plenty of people do. It's nice because you can park at the trailhead and start your hike. However the South Kaibab option is definitely more popular because of its beauty and shorter distance.
Grand Canyon Rim to Rim Itineraries
There are multiple ways that you can plan out your rim-to-rim hike, and the main question you need to ask is whether you want to do it as a multi-day trip, or as a day hike. While you might have thought the toughest thing about this hike is the distance and climbing, it's not. It's actually booking your accommodation. There are limited spaces in the campgrounds and lodges along the route, and the demand is massive. Let's take a look at the popular itinerary options.
Rim to Rim In One Day
This is a popular option, and is doable by almost everyone with the right training and preparation. In my years of doing the rim-to-rim, I've seen people of all shapes, sizes, and ages hiking it in one day, and you can too, even though the distance can see daunting if you are not a regular hiker. If you can walk at a 2mph average (probably faster on downhills and slower on uphills), it's just 10.5 hours of walking. Assume you have 12 hours of daylight, and will take 1.5 hours for breaks and snacks, and you will probably hike somewhere from dawn to dusk.
Generally a one-way rim-to-rim hike is coupled with an overnight stay at the rim you've arrived at, and then a shuttle bus ride to bring you back to the rim where you started. The shuttle bus is generally easy to book. Here are the two options, assuming that you are starting on the popular South Rim.
A new shuttle service based on the North Rim offers trailhead and rim-to-rim shuttles. They also offer affordable accommodation and lodging, which is a welcomed development given how tough it can be to stay at the North Rim.
You do not need a permit to day hike the rim-to-rim!
South to North in One Day
- Hike from South to North Rim
- Stay at North Rim
- Shuttle bus back to South Rim
North to South in One Day
- Shuttle bus to North Rim
- Stay at North Rim
- Hike from North to South Rim
Rim to Rim and Back in Two Days
If you're a fit hiker or runner, you also have the option of hiking one-way, staying overnight at the rim, and then hiking back the next day, for a total of 45 miles in 2 days. If you're new to hiking or just a casual hiker, this may seem crazy. But for those who are strong enough, it's a nice option that lets you experience all of the corridor trails.
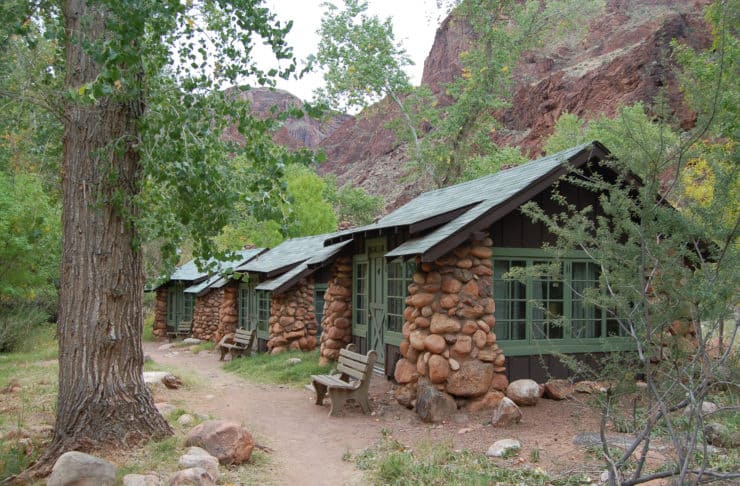
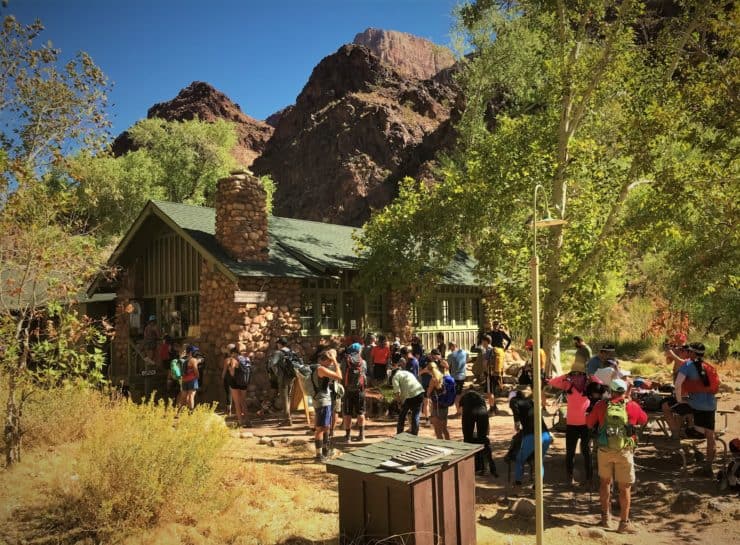
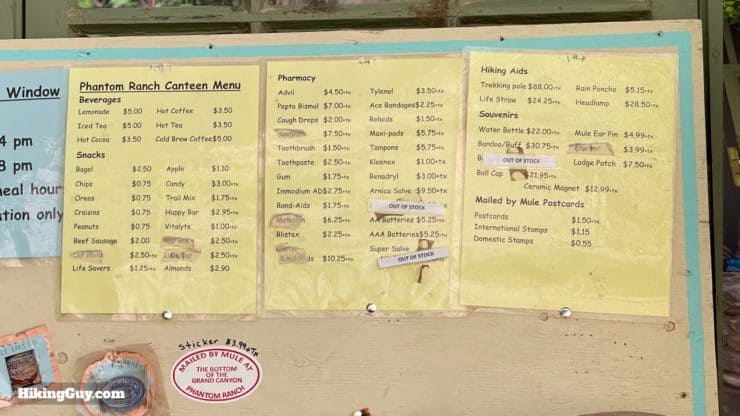
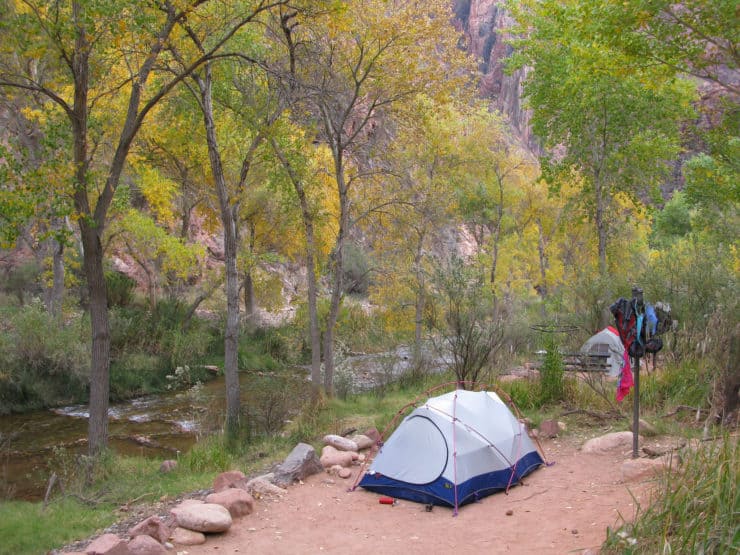
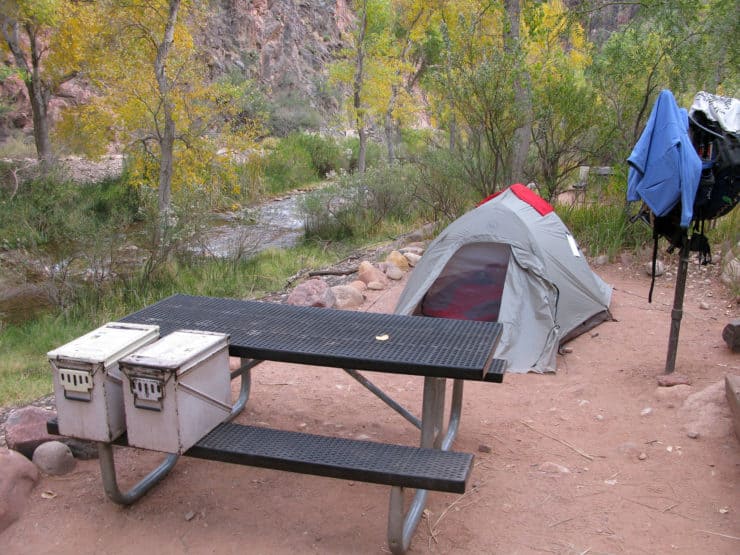
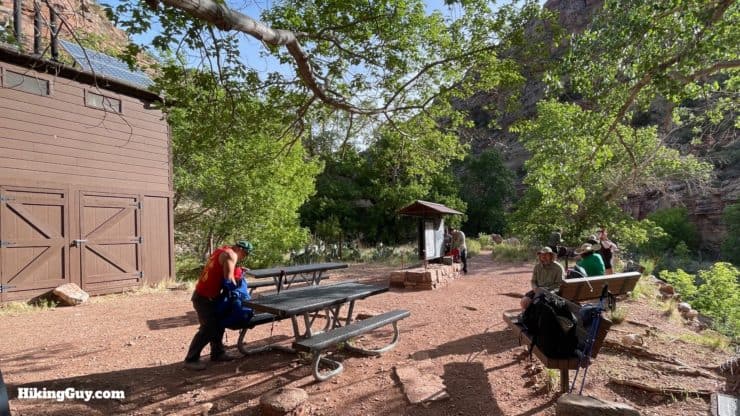
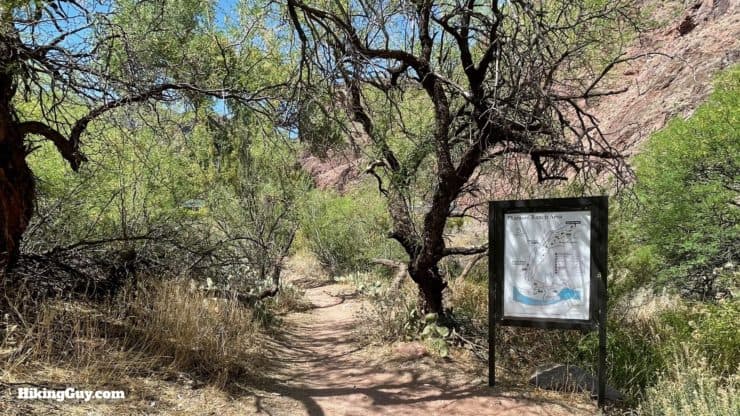
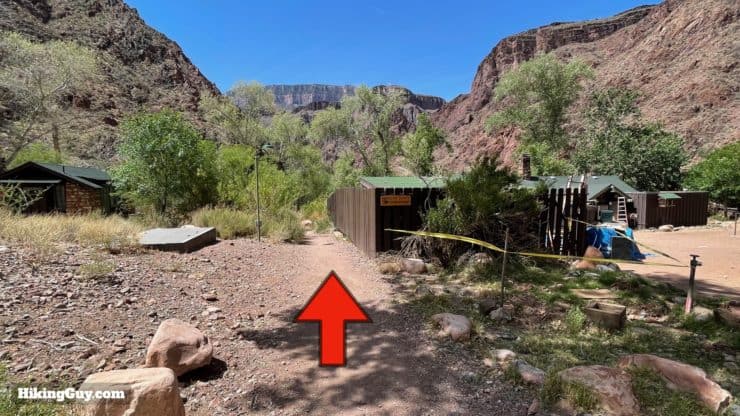
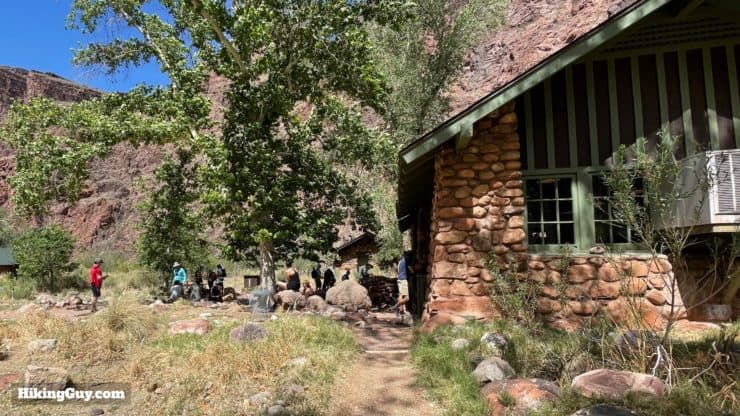
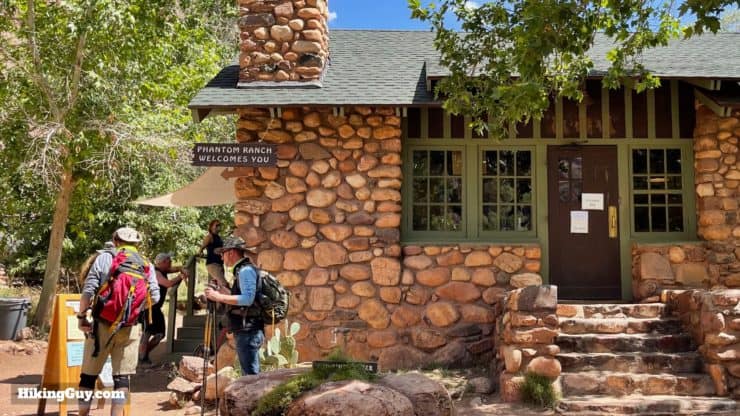
Overnight at Phantom Ranch
The best of both worlds is to book a room at Phantom Ranch Lodge, located at the bottom of the Grand Canyon, close to the Colorado River. As you would imagine, the lodge is basic but provides everything you need to stay comfortably overnight. The lodge is booked by a lottery one year in advance. I have a friend who has entered the lottery for 20 years straight and has never got a bed. It's a tough one to score. If you are able to book a night at Phantom Ranch, then your rim-to-rim can be a more leisurely experience with the 21 miles (South to North) or 24 miles (North to South) broken up into two days, without having to carry camping gear.
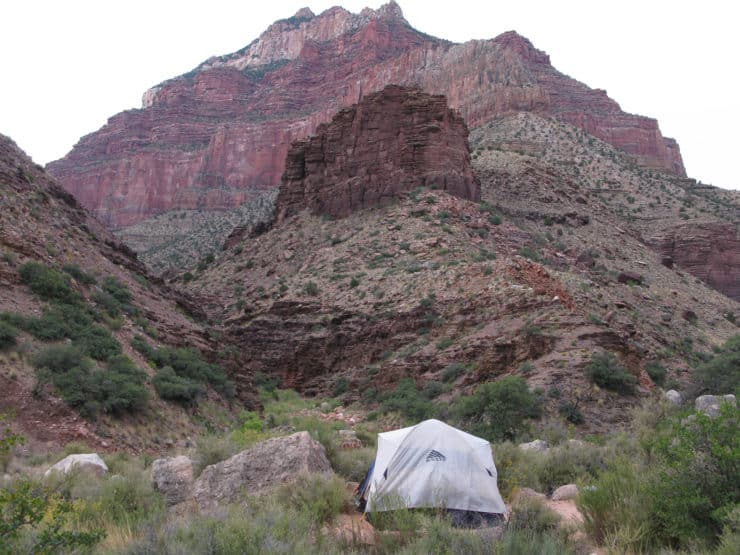
Rim to Rim Camping
While I love camping in the Grand Canyon, it does have its downsides.
- You can only camp at designated campsites along the rim-to-rim corridor trails.
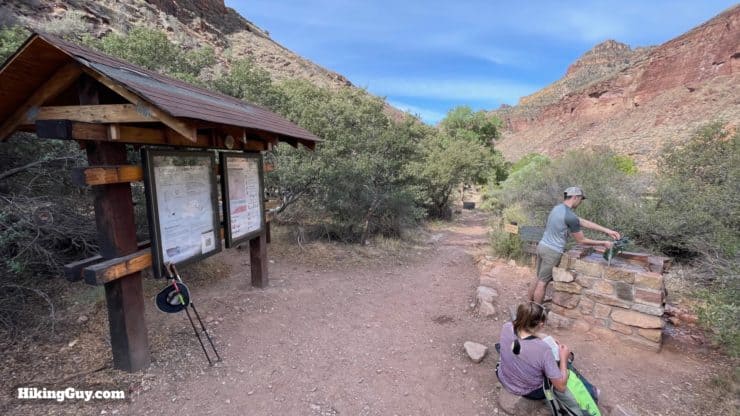
- It can be hard to secure that limited campsite space. You're not only competing against other rim-to-rim campers, but also people who are hiking other routes that intersect the corridor trails. The campsites along the rim-to-rim route are popular because they all have clean water, while other backcountry campsites generally do not.
- You have to carry all your camping gear out of the Canyon.
That said, if you have your heart set on camping, go for it. I've stayed overnight in the Canyon several times and it's awesome. But if you're just focused on making it across from rim-to-rim, a day hike might be a better option.
Booking Rim-to-Rim Campsites
Unlike other National Parks with an online permit system, you have to go through the Backcountry Office for camping in the Grand Canyon, and the system is old-school. Check out the Backcountry Permit page for the latest links and info, but in a nutshell this is the process.
- Check the availability of spaces on a paper chart that's updated a few times a month.
- Pick your campsites and itinerary.
- Fax or mail in a printed form requesting the dates four months before your start date.
- Wait three weeks for a response.
You can also show up at the Backcountry Office (in person) and request a last-minute permit. If you don't get a spot, you get put on a waitlist with better odds every day you are on it.
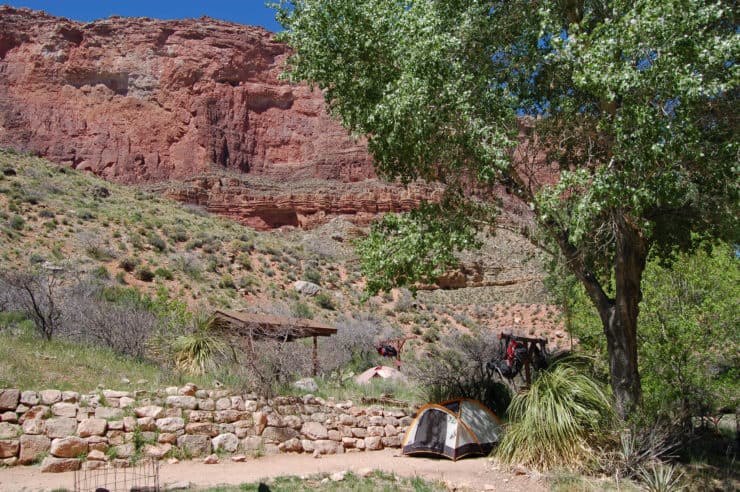
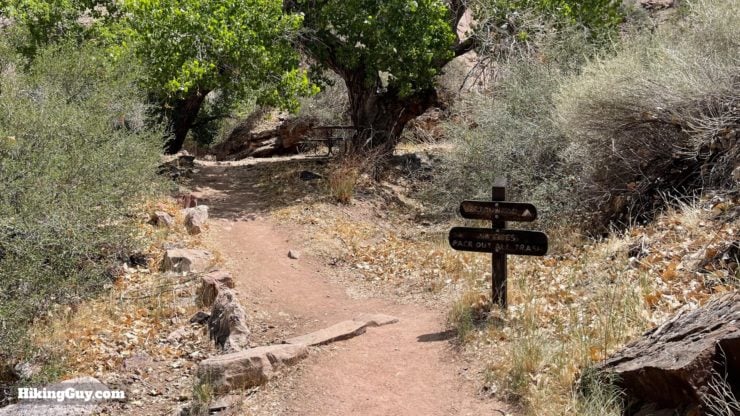
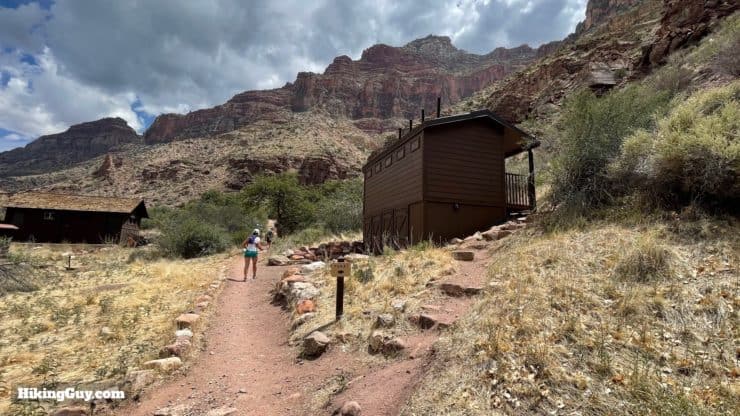
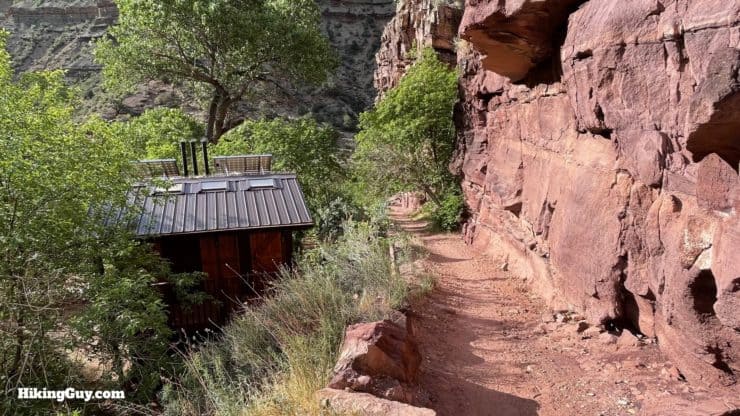
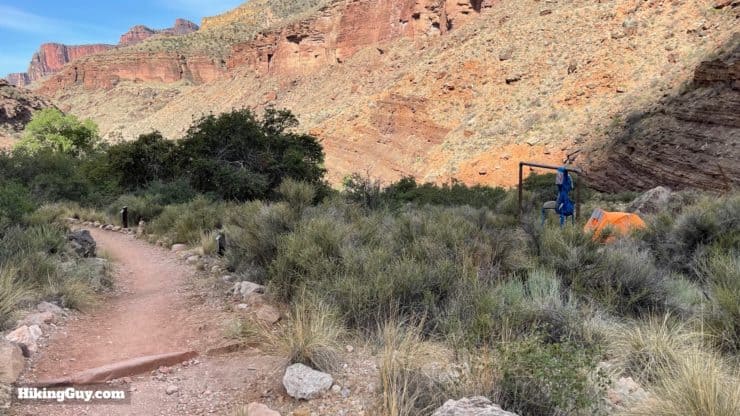
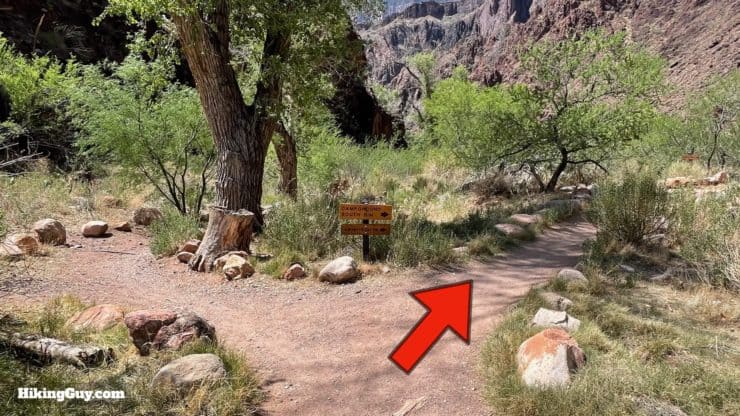
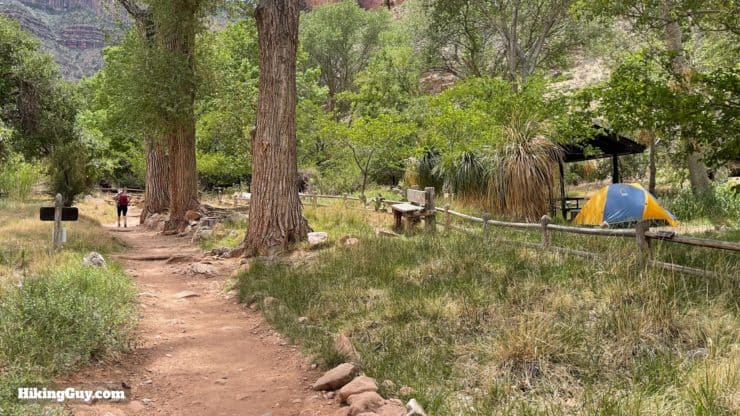
The Rim-To-Rim Campsites
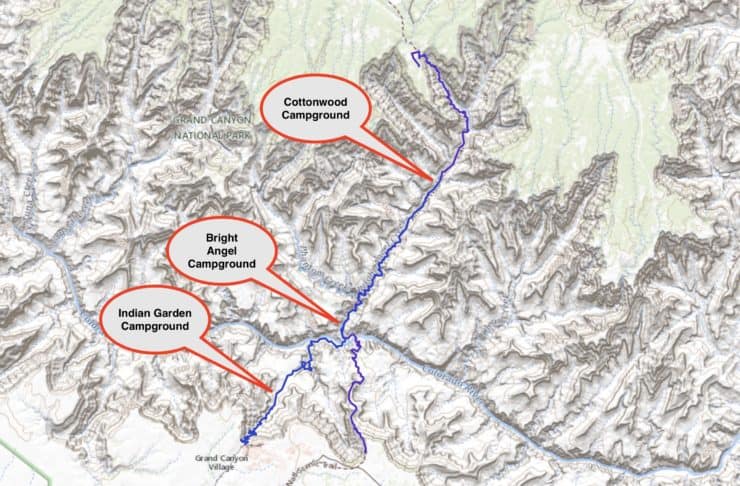
All of these campsites have toilets and running water.
Permit Availablity
Can't get a permit for your date? Try OutdoorStatus.com and get a text message as soon as a cancelled permit opens up!.
Rim Lodging
Generally doing a rim-to-rim involves staying in a lodge, hotel, or campground on either side of the rim. Here are the options for staying on the rims at either end of your hike.
| Rim | Option | Notes |
|---|---|---|
| South | Bright Angel Lodge - Yavapai Lodge - Thunderbird Lodge - Maswick Lodge - El Tovar Hotel - Kachina Lodge | Cool Spots - Hard to book - Expensive - Walking Distance to Trailhead and Hiker Shuttle |
| South | Mather Campground | Can be Loud - Have to Walk to Shuttle and Trailheads - Inexpensive |
| South | Hotels in Tusayan | Tons of Options - Short Drive From South Rim - Can Be Booked at Short Notice |
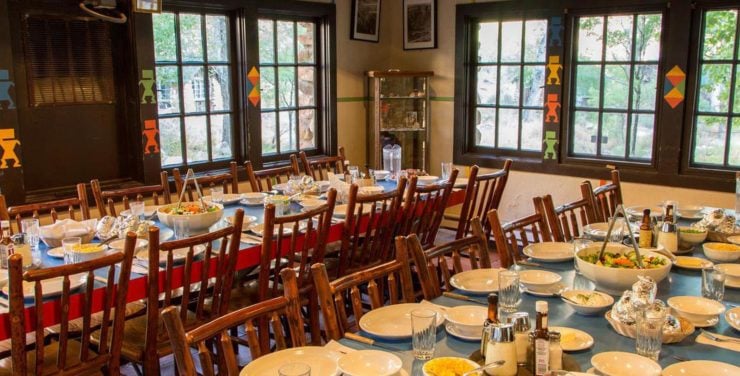
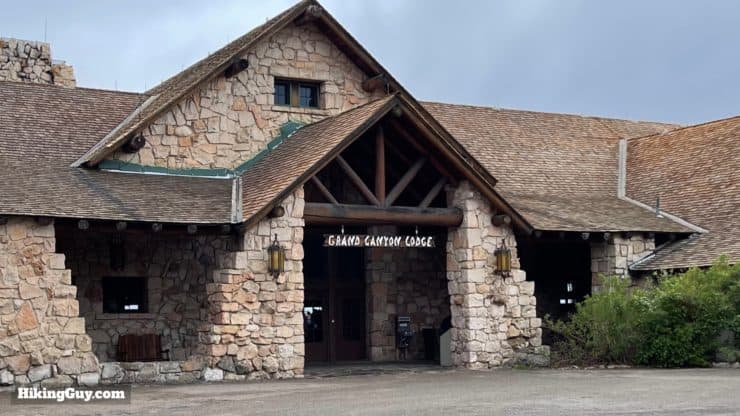
| North | North Rim Lodge | Only Hotel on North Rim - Iconic Dining Room - Hard to Book - 30 min Walk to Trailhead |
| North | North Rim Campground | Close to Trailhead - Scenic - Affordable |
| North | Kaibab Lodge | Affordable Cabins - Buffet - Shuttle Needed |
Rim to Rim Guided Tours
Another option that's probably not for most of you, but worth mentioning in case you can't book lodging or permits, is a guided hiking tour. Generally these take 3-5 days to do a one-way rim-to-rim, and cost a couple thousand dollars. The nice thing about them is that they handle the logistics. Several guided outfitters are working in the Grand Canyon, and a Google search will reveal all the options. While they're not cheap, they can often include gear, food, lodging, fun guides, and sometimes even a porter to carry your gear.
Dates For Hiking Rim to Rim
To add some more complexity to the lodging situation, let's talk about the small window when hiking across the Grand Canyon is possible. You want to go when the North Rim facilities are open (May 15-Oct 15) and when the heat isn't too extreme at the bottom of the Canyon. What that practically equates to is doing the hike between May 15-31st, or between October 1-15th.
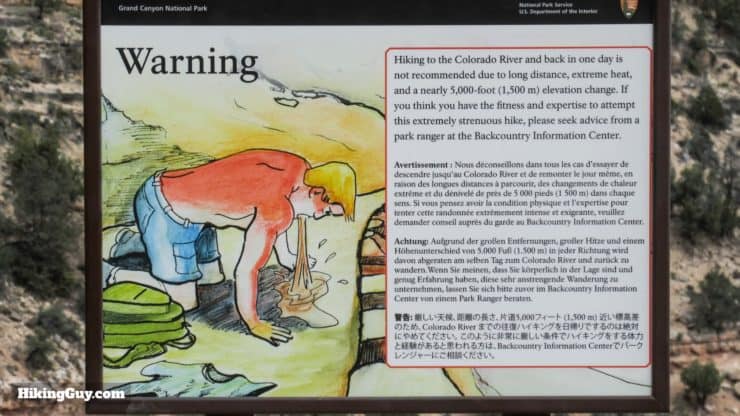
Hikers have died from the heat in the Grand Canyon. You need to take the heat seriously.
You can still do the hike outside of these dates, but you're going to have to plan on resting somewhere cool during the hotter parts of the day. So that could mean laying in a shaded tent in a campground, resting under a tree next to the Bright Angel Creek, or whatever gets you out of the sun and into the cool.
Timing Your Hike
Ideally you should start your hike at sunrise and plan on hiking until sometime before sunset. This way you have daylight and can enjoy all the beauty that the Grand Canyon offers as you hike. Generally if you can get a day in the late May window, you'll have over 14 hours of daylight to do your hike.
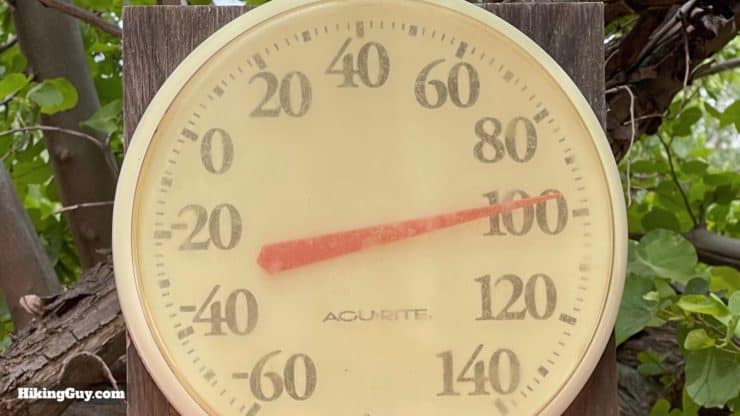
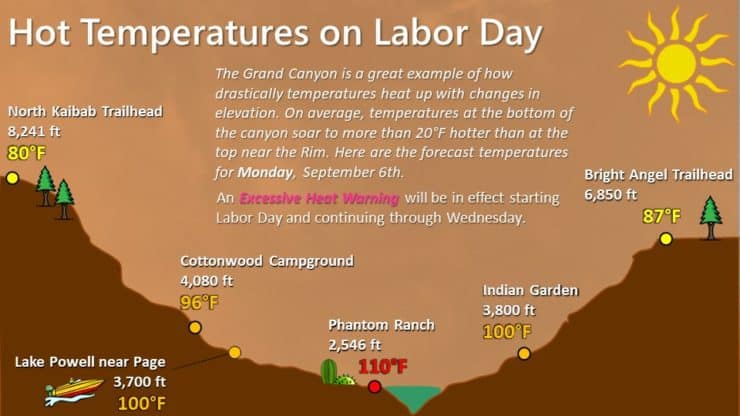
Even when you manage to get the ideal dates, the heat can still be extraordinary at the bottom of the Canyon. Temperatures rise about 5.5F for every 1000 feet that you descend into the Canyon. The bottom of the canyon is often 20-30F hotter than the South Rim. Microclimates in the 0% humidity area, among the slot canyons of hot black rock, can get even warmer. You don't want to be hiking at the bottom of the Canyon when it's above 90F.
The move is to keep your eyes on the forecast at Phantom Ranch. Plan on leaving early enough to clear the lower parts of the Canyon before it gets too hot. If it's extraordinarily hot, then you may have to put a headlamp on and leave before sunrise. It's not ideal but it's prudent. It's why I recommend going South to North. If you leave at 5am, you can usually get to Phantom Ranch by 9am and then start up the semi-shaded middle section toward the North Rim.
Doing It In Winter
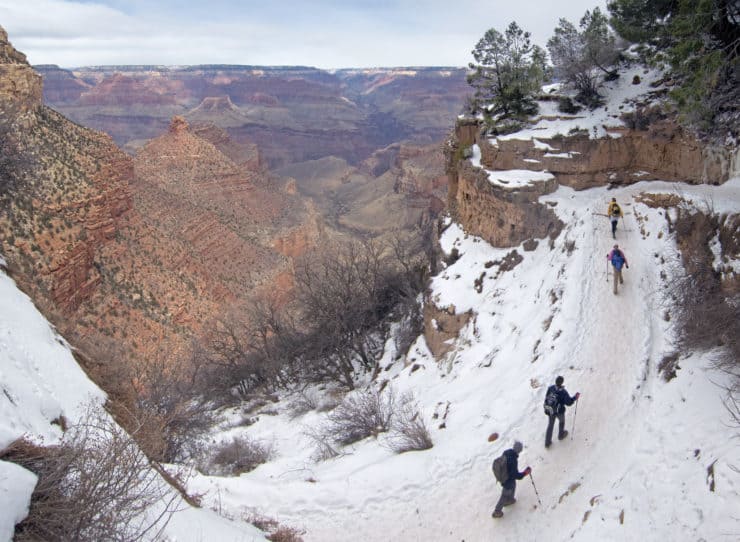
Doing this hike in the cooler months of winter may seem like a good option, but it's not ideal for beginners. Generally the North Kaibab Trail is covered in snow and ice during the winter. It's usually well-trodden and easy to follow, but you need proper winter hiking equipment. If you're asking yourself what that is, you probably don't have enough winter hiking experience to do it.
And the big thing is that the North Rim facilities are closed. People will hike to and overnight at Cottonwood Campground, the last camp before the North Rim. The next day they'll hike up to the North Rim and back down to the camp. And then on the third day hike back out to the South Rim.
Workflow For Booking and Planning the Rim-to-Rim
Okay, to wrap up the planning part, here's how I'd recommend tackling it.
- Pick the dates that you'd like to go.
- Book your rim lodging. Generally you can (and should) book these a year in advance.
- Book your travel to the Grand Canyon.
- Book your shuttle.
- If you are camping, apply for your backcountry permit as early as you can. If you can't get the permit you are looking for, try for a walk-up permit. If that doesn't work, consider doing it as a day hike.
- Show up and do the rim-to-rim!
Training for the Grand Canyon Rim to Rim
The trickiest thing about training for the rim-to-rim is the "reverse" nature of the climbing. It's pretty easy to find lots of hikes of up to 20 miles with a big climb of 5000 feet. The problem is that you climb up, then descend. Whereas in the Grand Canyon, you descend, and then the toughest part of the hike, the steep climb out, is at the end. So unless you live on top of a 5000 foot mountain that you can walk down and then back up, it's tough. Here are some recommendations.
- Gradually build up to a hike of 20 miles and 5000 feet of climbing. If you're starting from scratch, increase your mileage by about 2 miles (roughly 1 hour) a week. Do it with the same pack and weight that you'll be using in the Grand Canyon.
- Hike up mountains that climb about 800 feet per mile. This will give you an idea of what the steepest parts of the trail are like.
- If you don't have big climbs in the area where you live, I'd recommend adding running to your training. Running gets your heart rate up to where it could be when you're doing the climb. Even though it will be a shorter time than the actual hike, doing a 10 mile hike and then running for 10 miles will be a good way to prep your body.
- If you are lucky enough to live in an area with automotive access to a mountain peak, do a hike in reverse. For example, in Southern California, you can drive to the top of Mt Wilson. From there, you can do something like the Mt Wilson Trail in reverse (maybe adding on a couple of miles of street walking at the bottom if you'd like).
- Do some hikes in the heat. Pay attention to the effect of heat on your pace and stamina.
Mental Training
Don't underestimate the power of your mentality and outlook when doing this hike. If you mentally give up and tell yourself that you don't have any more left in you, you won't. If you say goodbye to negative thoughts and follow them up with positive thoughts, you will make it. Here are some tips to win the mental game.
- Break the trail up into smaller sections and just focus on one section at a time.
- Tell yourself that people of all ages, shapes, and sizes do this hike, and you can too.
- Take the steep sections one step at a time. If you are getting winded and tired when it gets steep, set yourself a mini-goal, something like "20 steps and then 1 minute of rest" or "hike 4 minutes and rest for 1 minute."
- Don't stop for too long. It can be hard to get going again, especially if your muscles have stiffened up.
- Pick a mantra like "one step a time" and use it to drown out any negative thoughts you might have.
- Prepare correctly and then hike your hike. Be wary of well-intentioned strangers who might give you tips or info for the hike. I often see people in the lodge bars handing out information about what type of pace you need to be doing, etc. and most of the time it's fairly inflated by machismo. Prepare, know your plan, and follow through.
Gear For the Hike

The key to gear in the Grand Canyon is to carry the minimum that you need. Reducing the weight that you are hauling on your back will save you energy and help you climb back out of the Canyon. You don't really need much gear to do this hike safely. Here's what I recommend.
- Bring the essentials that you would on any hike.
- Trekking poles are great for the steep descent and climb.
- The weather can change, especially if you are going to the North Rim. I wear lightweight hiking clothes for the bottom, and then take a good top layer, a beanie hat, and a rain shell, which I put on when the temps go down.
- Sun protection is key here. You're going to want to keep your body cool. A good hat that shades your head and soaks up sweat is smart. Soak your hat as you pass water stations to stay cool. And sunglasses will help protect your eyes from photokeratitis
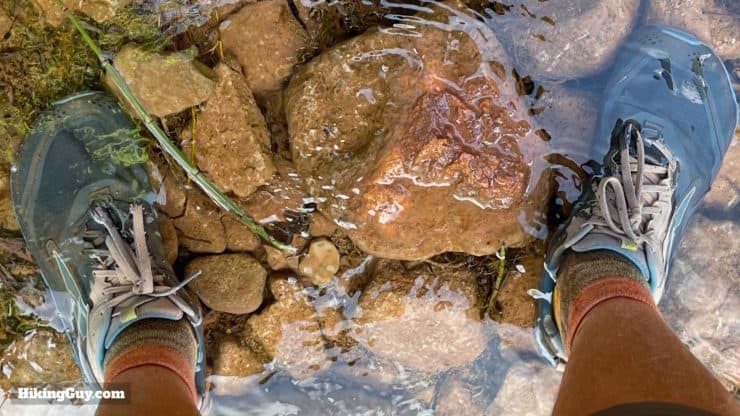
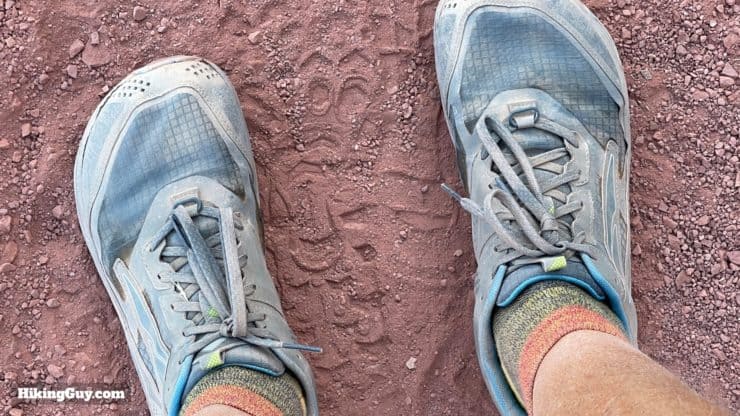
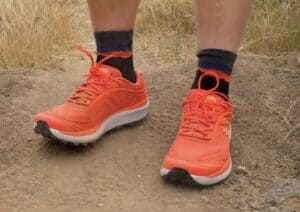
- Leave your heavy boots at home and wear light vented trail runners. You can dip them in any stream crossings to cool off, and you save weight over the thousands of steps that you'll be making.
Comfortable and lightweight trail runners like these will grip the trail well and are your best best for the well-groomed trails on the rim-to-rim hike. - I like using a hydration bladder to carry my water, and you can also use two Smartwater bottles (or similar).
- Bring food that's easy to eat and that has some salt in it, which most energy bars do (look for sodium). And bring some energy gels for the climb out. It can be hard to get food down in the heat and with the exhaustion, and energy gels are easy to squirt down your gullet.
- Don't forget a headlamp in case you get stuck out after dark.
- A simple change of clothes (shirt, socks, underwear) for the destination rim / end of the hike.
- I'd print out the hotel confirmation for the end of the hike as well.
Gear That I Love Right Now
Nothing is sponsored or promoted, just the actual gear that I use.


Check out the complete list here. ( Updated July 2024)
Camping Gear
If you are overnighting at a campground, I'd recommend taking the minimum: tent, sleeping bag and pad, camp shoes, and small stove. Check the low temperatures for your stay. The hot extremes are often followed by very cold nights. You can see the latest camping setup that I'm using on my gear page here.
Water
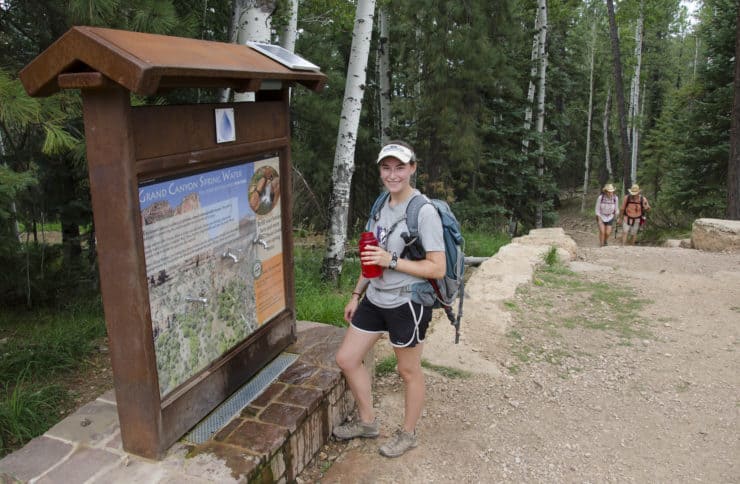
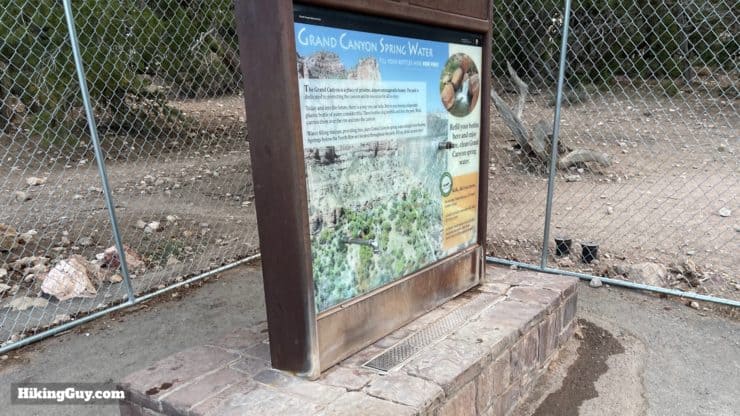
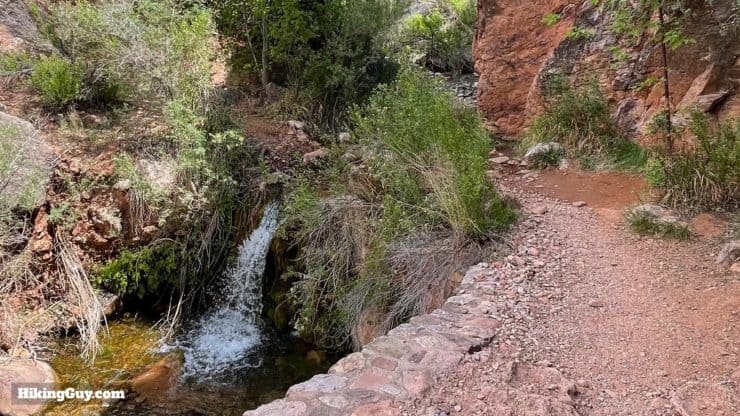
The great thing is that, aside from the (short) South Kaibab Trail, regular water sources are all along the rim-to-rim route. That means that you don't have to haul 20+ miles worth of water with you (water weighs about 8.3 pound per gallon). The key is to know where the water is turned on, which you can find on the Grand Canyon NPS website backcountry updates page.
Generally these are good refill strategies.
- South to North: Bring 2L of water to descend from South Kaibab to Phantom Ranch (no water on this stretch), refill 3L at Phantom Ranch, and then refill at Manzanita.
- North to South: Refill 3L at Cottonwood, at Phantom Ranch drink a lot and then bring a full 3L of water to get you to Indian Garden. From Indian Garden fill up 1-1.5L and refill as you climb at 3 and 1.5 mile resthouses.
It's important to have some salt in your system, since you will sweat a lot of it out. If you don't have enough salt, you can die from over-hydration (hyponatremia or EAH), and people have died from this at the Grand Canyon. Eating a small page of salted nuts at the midpoint of the hike is a good strategy.
The Best Rim to Rim Map
The rim-to-rim hike is easy to navigate. There are signs along the way, the trail gets an immense amount of traffic, and there are generally people hiking by every few minutes. Don't let that stop you from getting a good map though. I think the best option is the "Trails Illustrated Grand Canyon National Park Trail Map - Bright Angel Canyon/North and South Rims" by National Geographic. It's easy to read, lists facilities such as water fills, highlights landmarks, and has the distances between trail landmarks. I use the distances between points as my mental mileposts when hiking the trail. Breaking the trail into these little chunks helps me tackle the 20+ miles of the hike.
You can get the paper version of the map, or if you get a GaiaGPS premium subscription (discount on my gear page), you can also reference them on your phone, along with your GPS position on the map. I generally use both. The paper map is nice to look over at home as you prepare, and the phone version is great for when you are on the trail. And if my battery dies, I have the paper version with me as a backup.
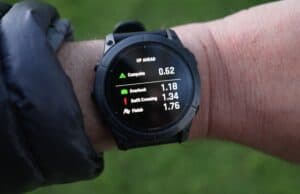
GPS in the Grand Canyon
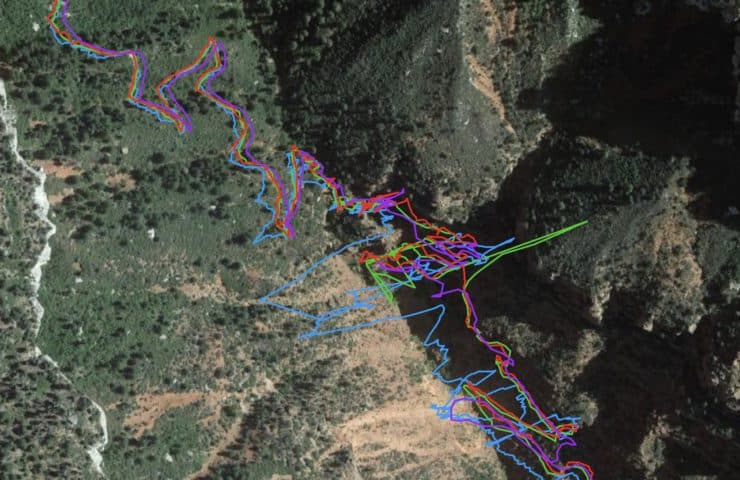
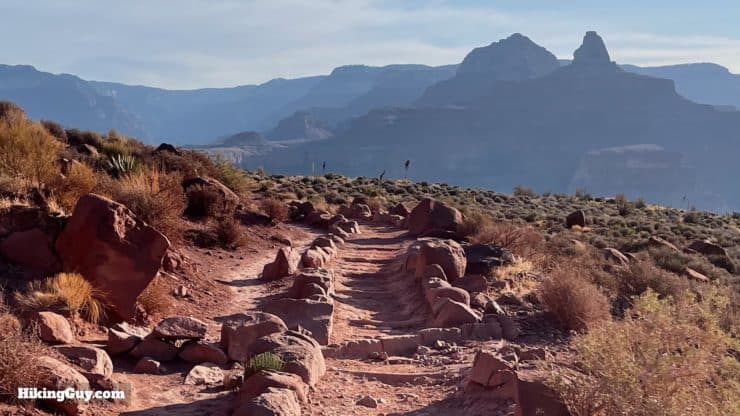
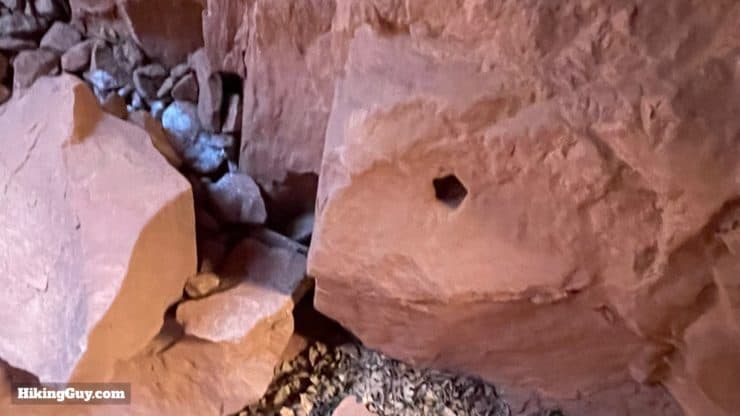
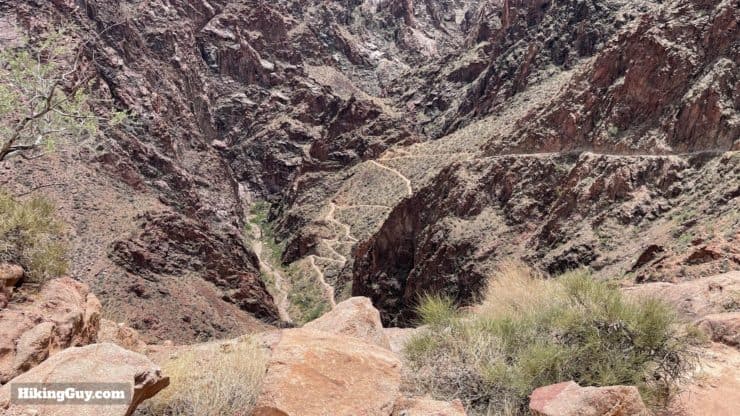
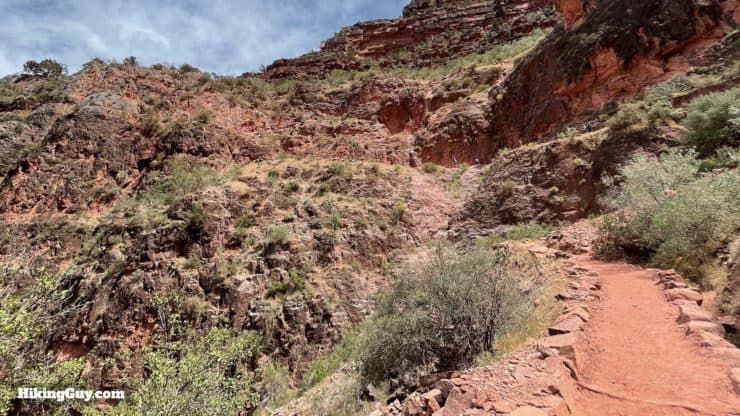
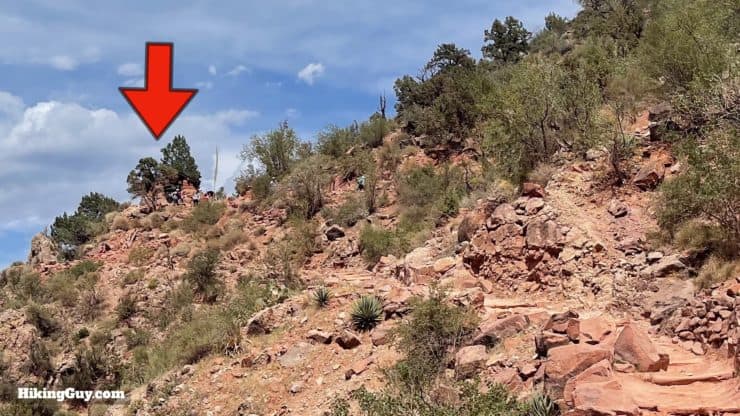
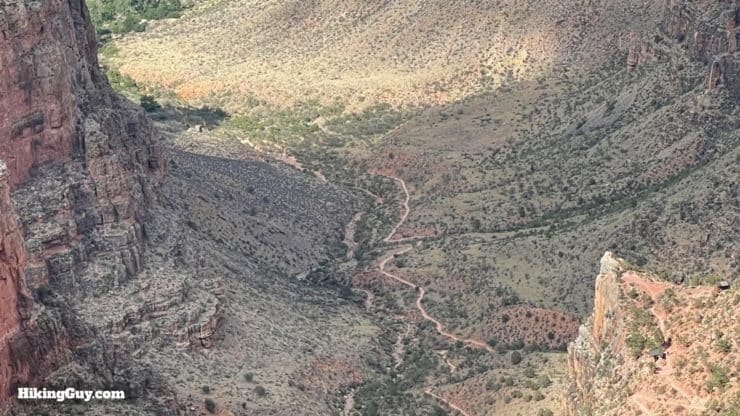
Expect the mileage on your GPS units to be off. It generally won't match the official distances listed on the maps and given by the Parks Service. That's because you'll get extra distance added onto your track when the GPS loses reception and starts jumping around, as you can see in the photo above. If you have a GPS, use it as a general guide, but otherwise use the official trail markers to gauge how far you've traveled.
Practice Good Trail Karma
Unfortunately every time that I hike rim-to-rim, I'm always picking up some pieces of trash. Maybe it's an old gel pack, maybe a water bottle lid, whatever. Bring a zip-lock bag and pick up any little trash you see. And certainly don't leave any.
Other small acts of kindness go a long way. Say hello. Move to the side and let people pass. Offer help if you see people lost. Don't feed the animals. You know all this stuff.
Rim to Rim Safety
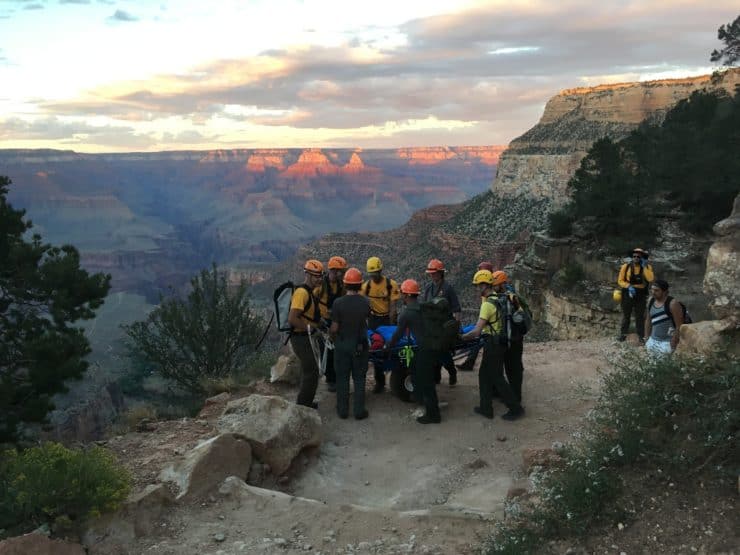
Thousands of people do this hike all the time, the experience is safe if you hike responsibly. But there are some areas that I'd like to address to allay any fears or gaps in your knowledge. In the summer park rangers perform about half a dozen evacuations every day. Don't be one of those guys.
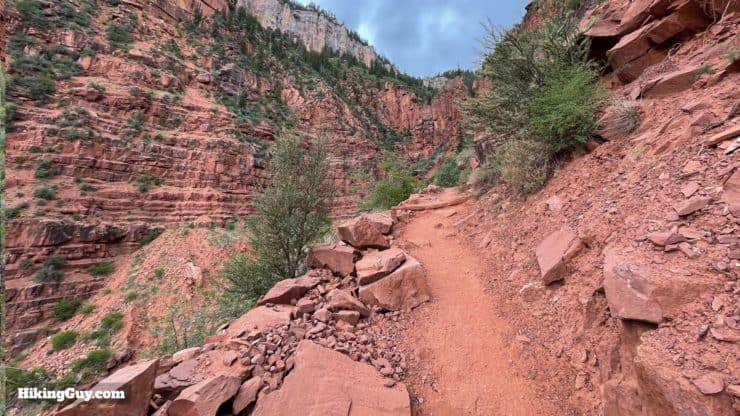
- The number one issue in the Grand Canyon is the heat. Make sure you time your hike properly and avoid the hot parts of the Canyon during the hot parts of the day. The hottest parts of the hike are:
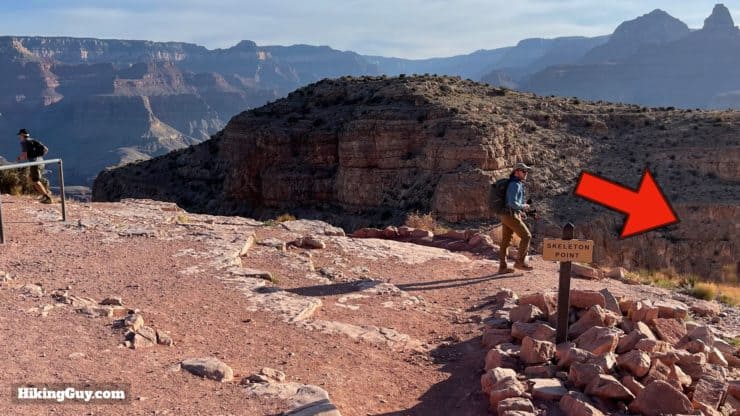
- South Kaibab between Skeleton Point and Phantom Ranch
- North Kaibab between Phantom Ranch and Ribbon Falls
- Bright Angel Between Phantom Ranch and Indian Garden
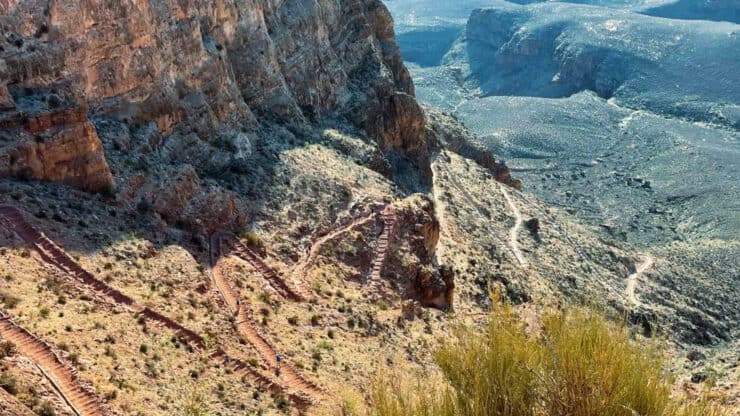
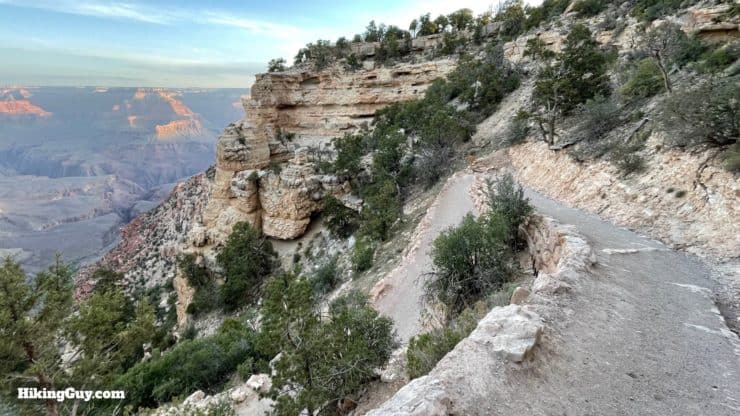
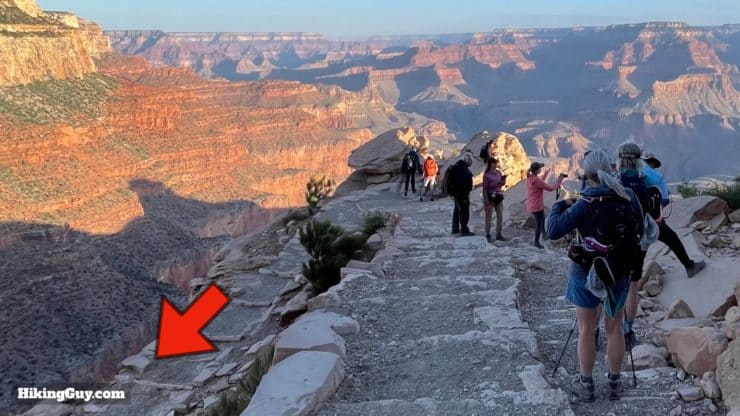
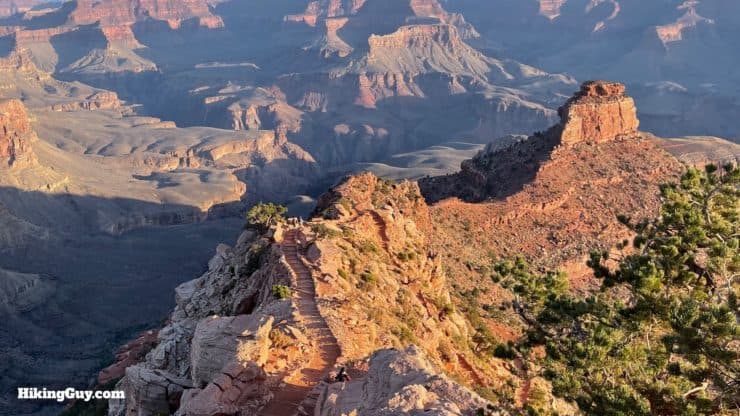
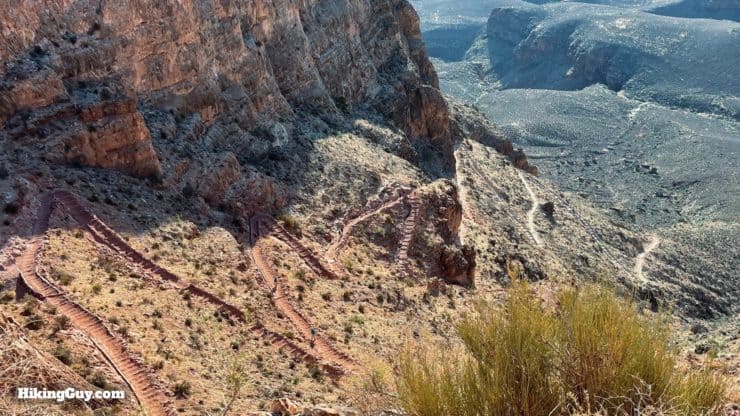
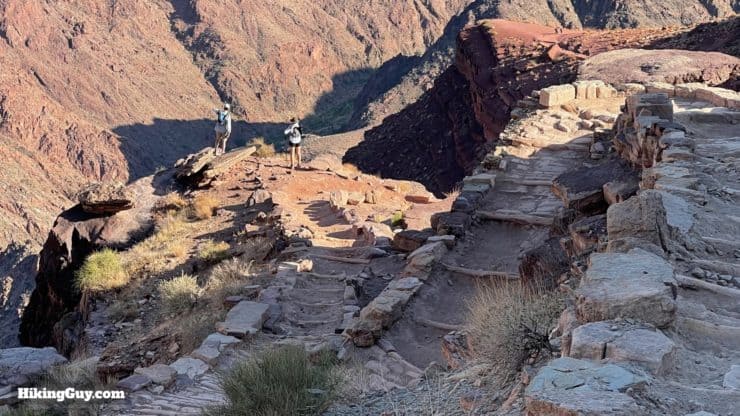
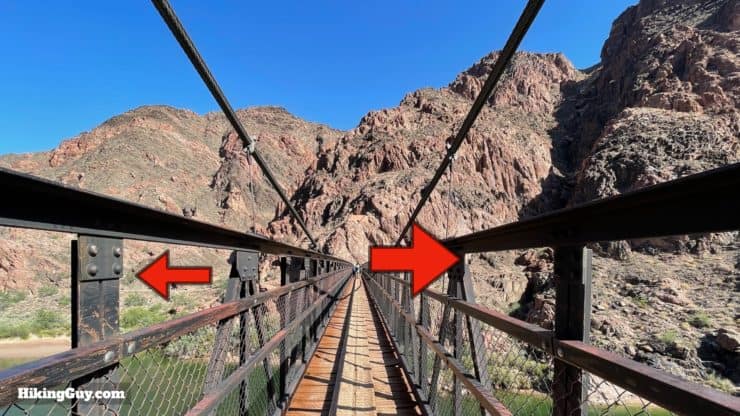
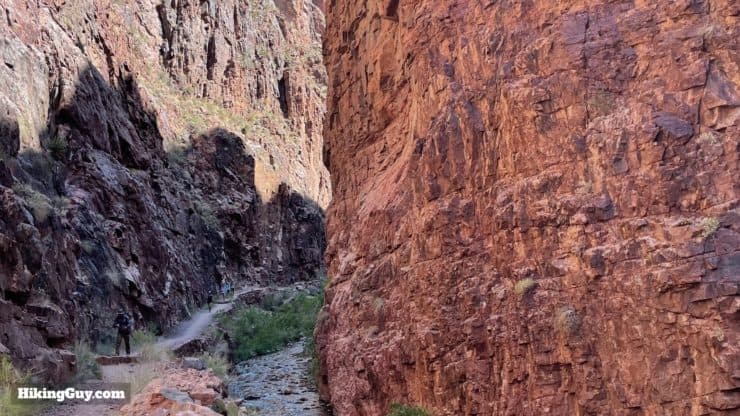
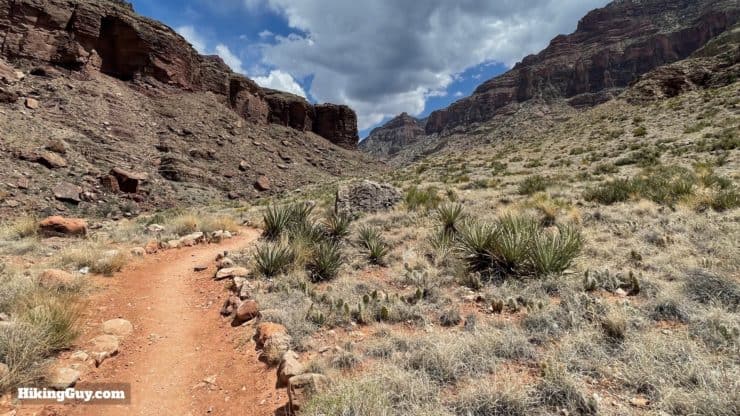
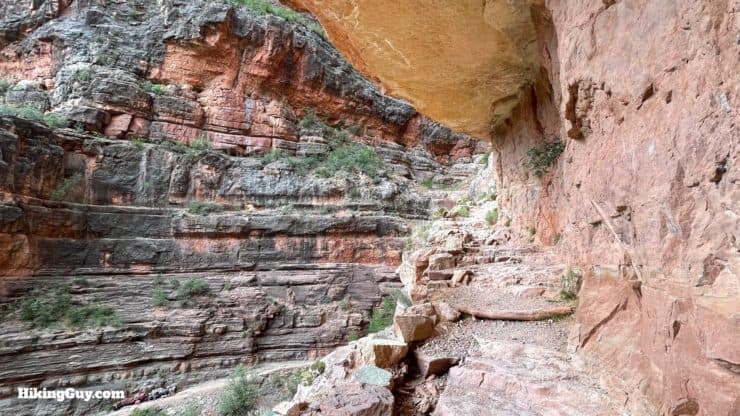
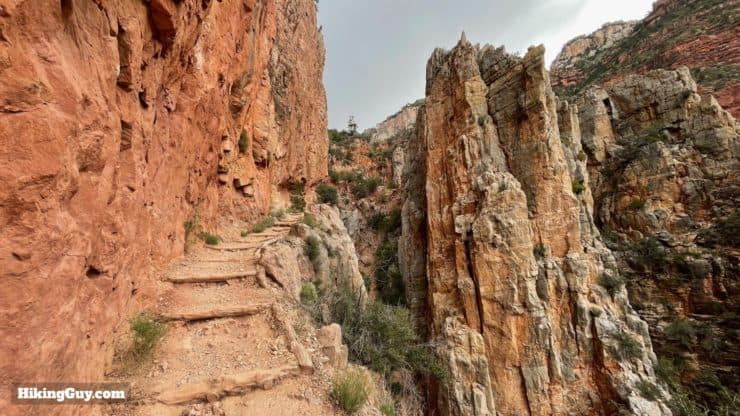
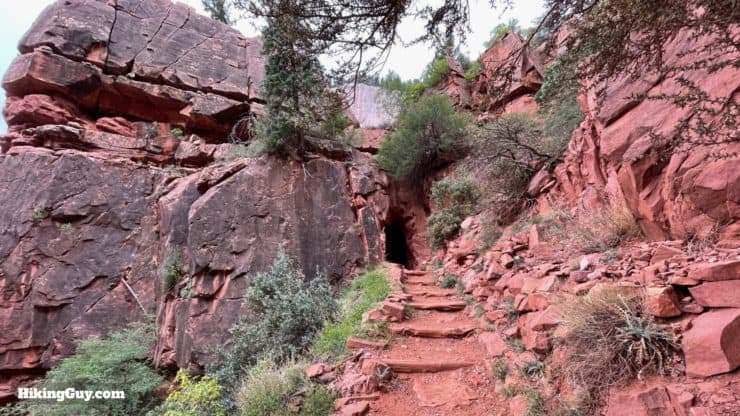
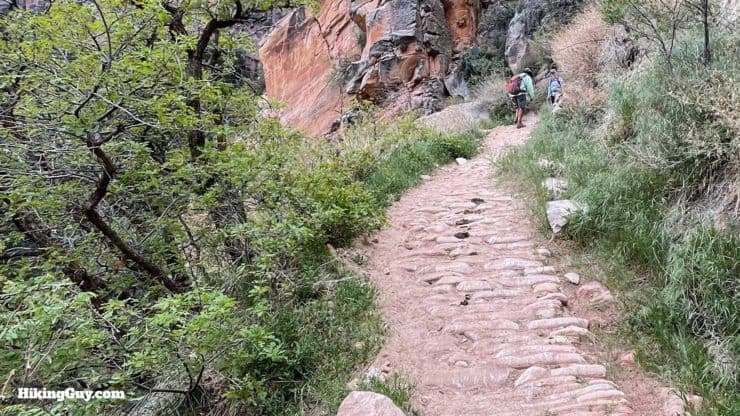
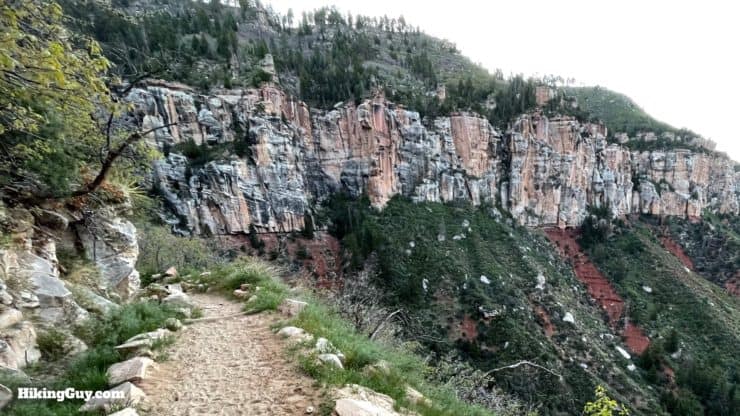
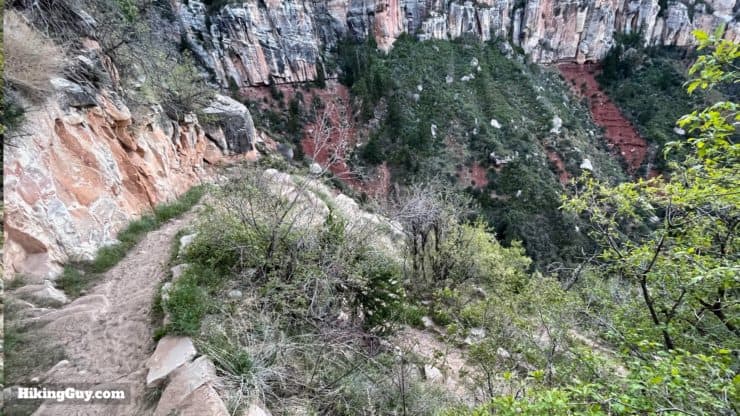
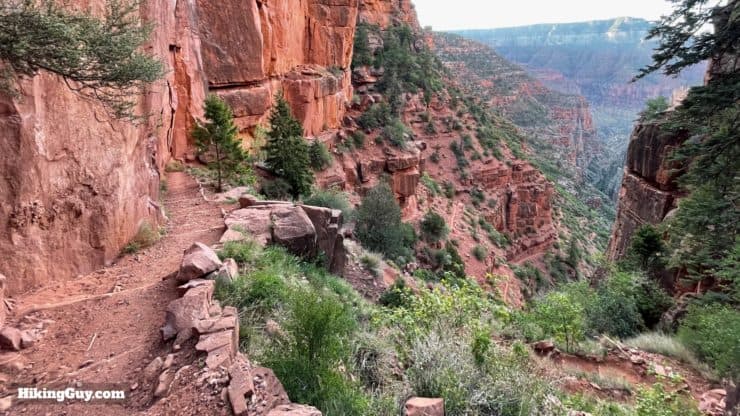
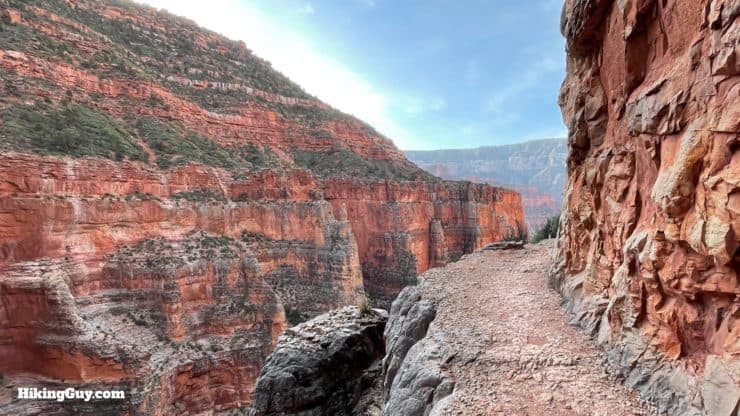
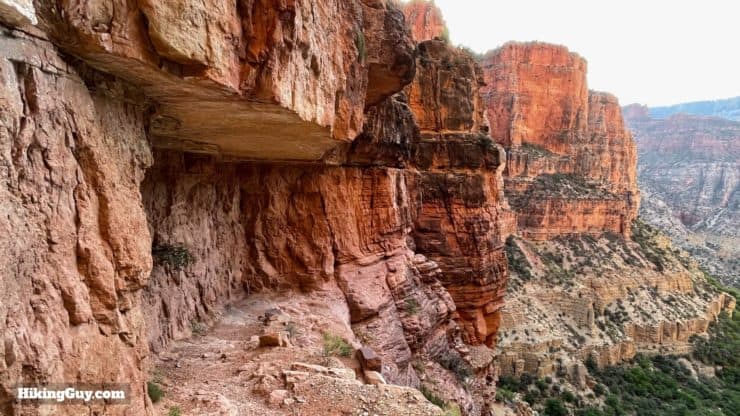
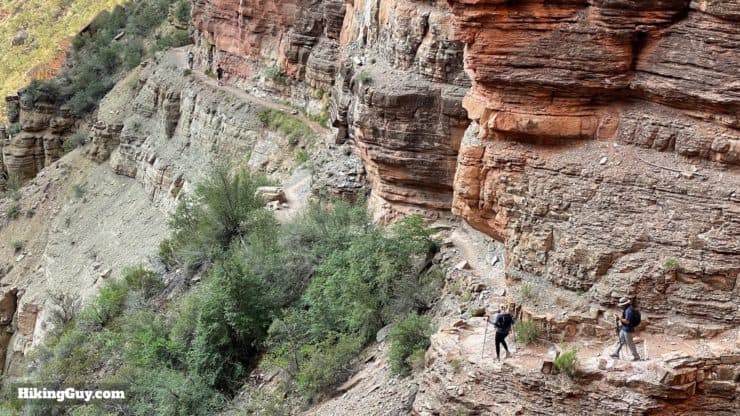
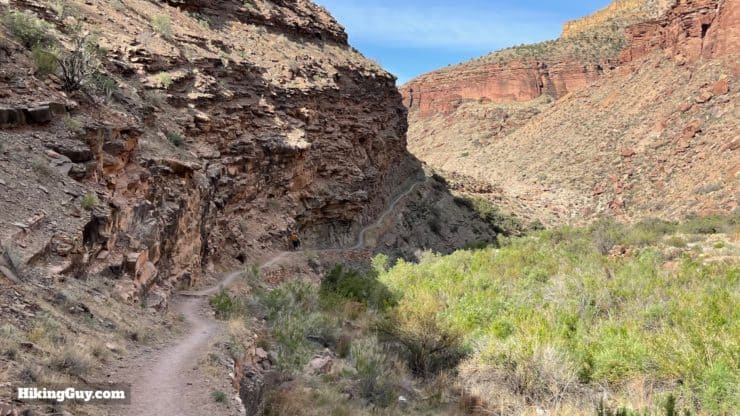
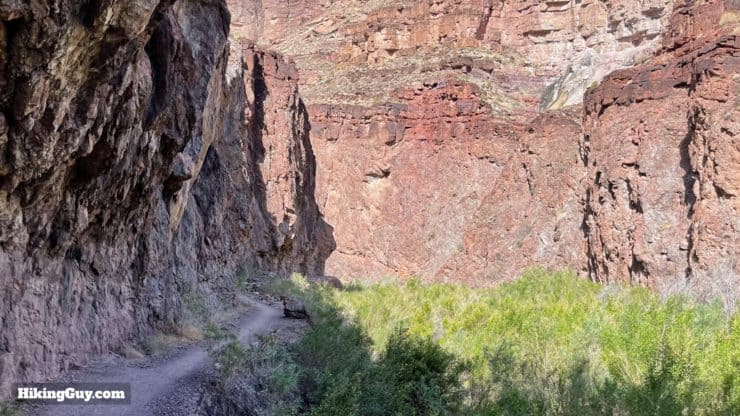
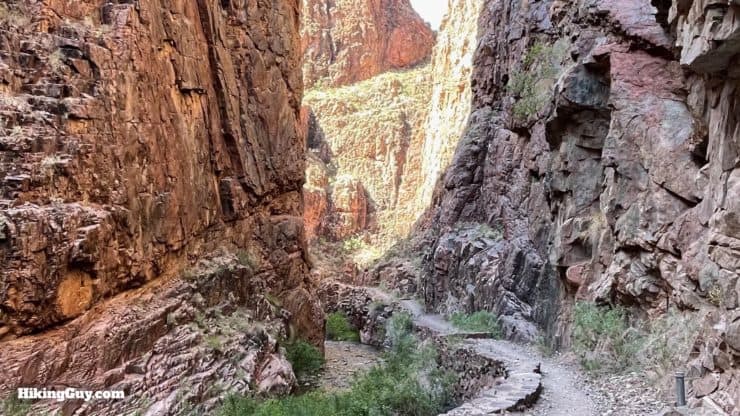
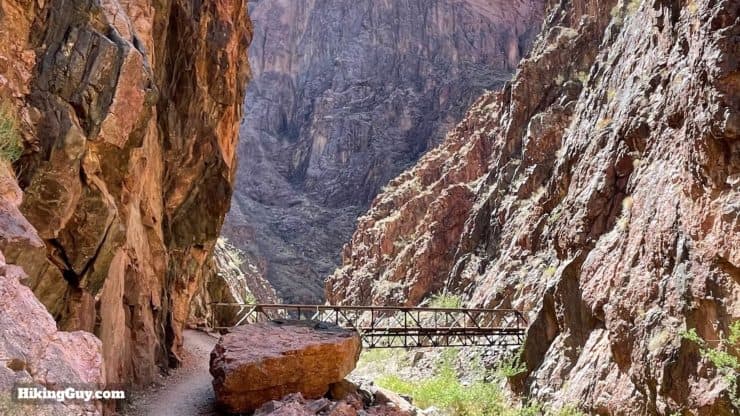
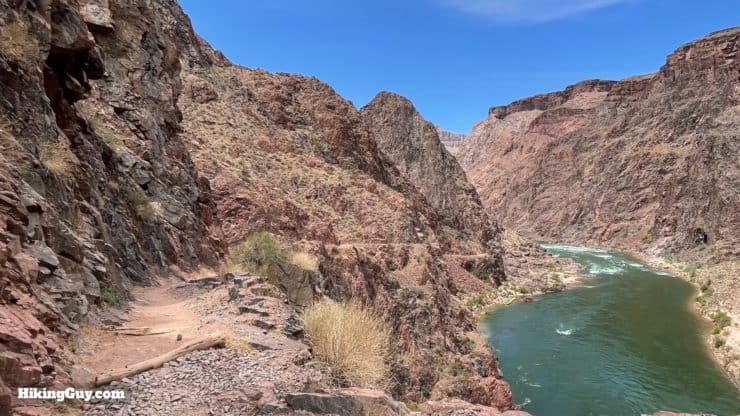
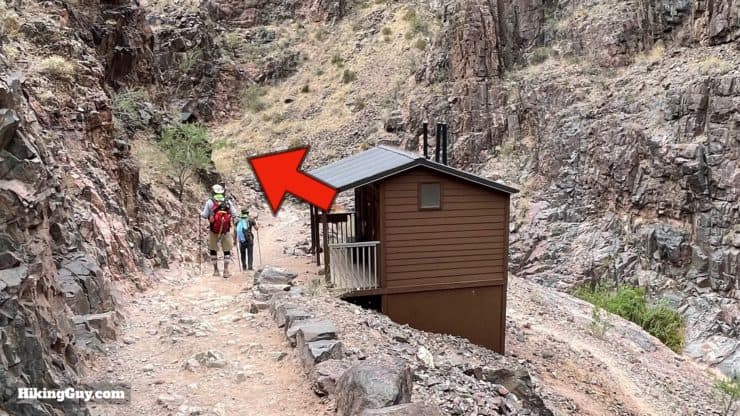
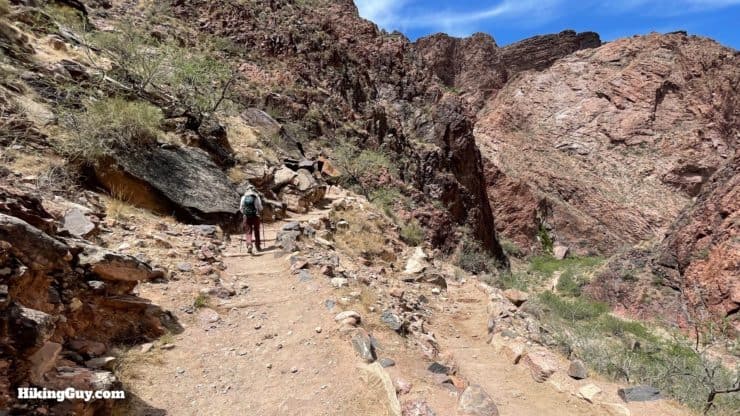
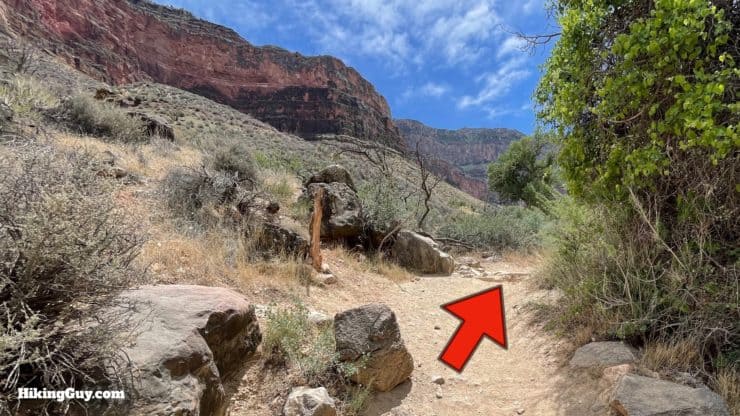
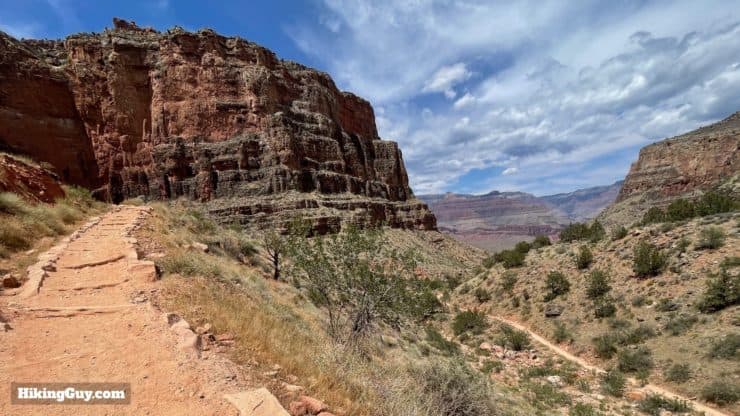
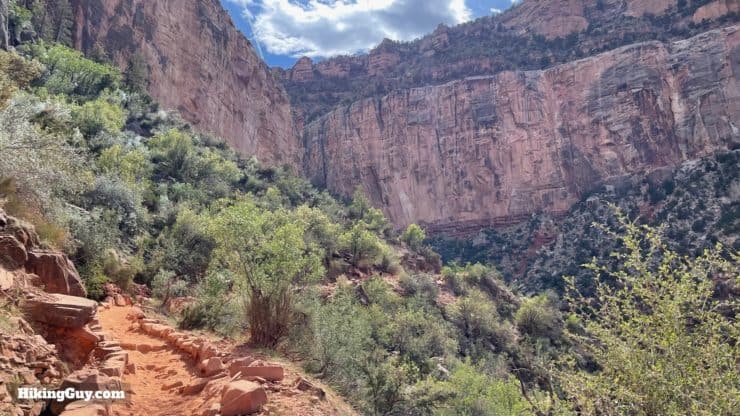
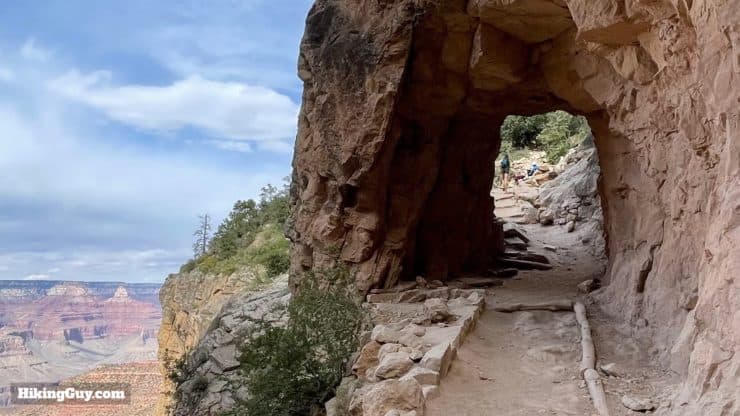
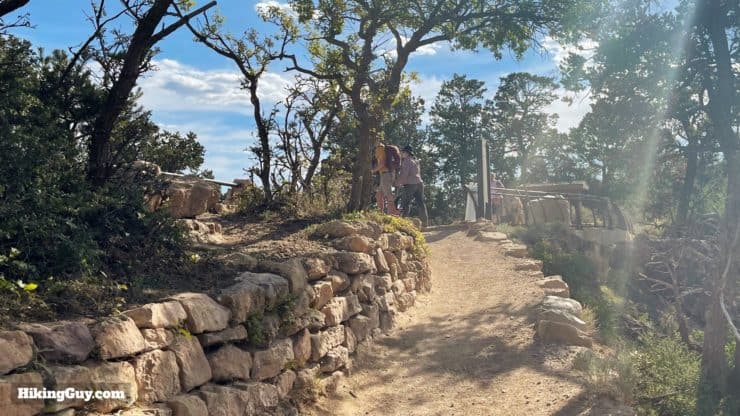
- If you are scared of heights, know that there are no sections of the rim-to-rim where you have to precariously inch your way along a ledge. There are some very short sections where a sheer drop would mean bad news, but the trails are built with a minimum width of 4 feet, and you can always walk away from the edge and avoid the view down. Most of the hike is simply along winding switchbacks or on the banks of the Bright Angel Creek, and doesn't have any anxiety-causing implications. When people fall off the cliffside, it's almost always from getting to close for a picture or view. Stay on the trail and you'll be good.
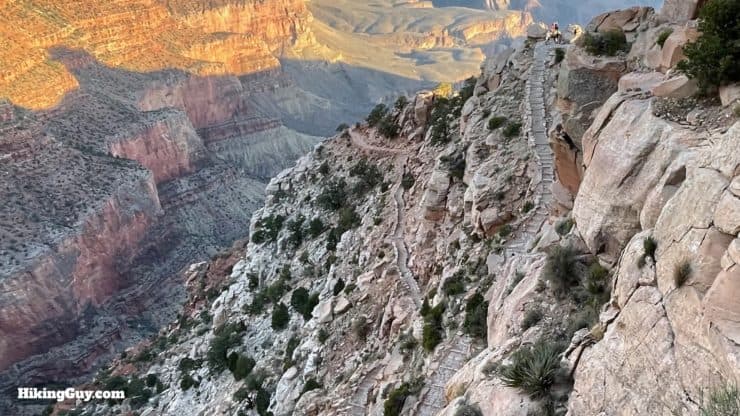
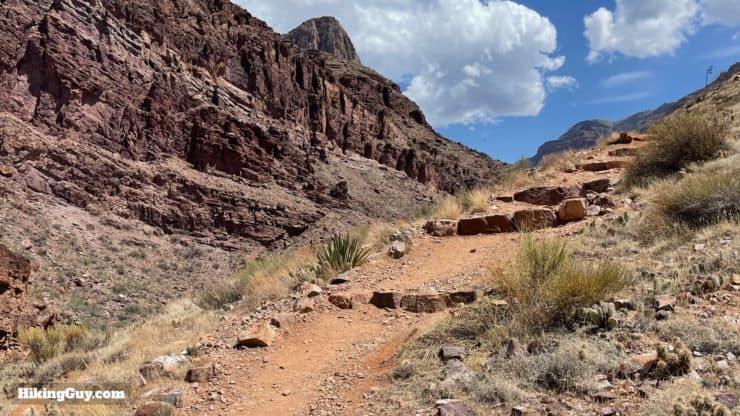
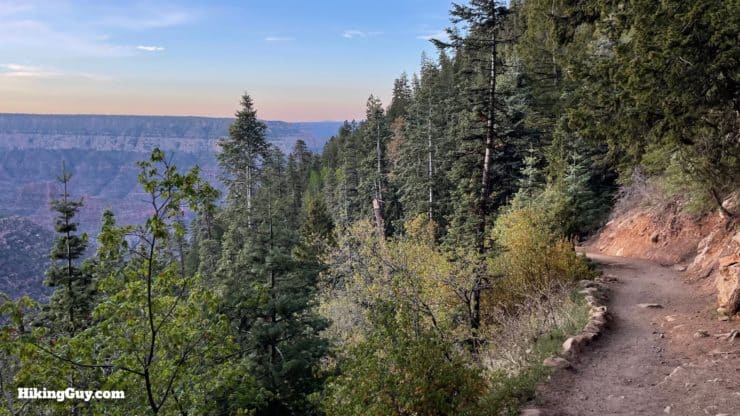
Most of the steep sections of trail look like this. There's a series of steep switchbacks, a wide trail, but no sheer drop off a cliff. 
On the sections that do have an edge, the trail is wide enough to safely hike on. If you feel unsafe when passing, just hug the inside and wait for someone to pass. - That said, occasionally you might have to pass a mule train. The front of the train always has a handler, and they will give you instructions on what to do. Generally you will stand on the inside of the trail, against the wall, and let the mules pass. The mules are used to people and the tight fit, and they do not kick.
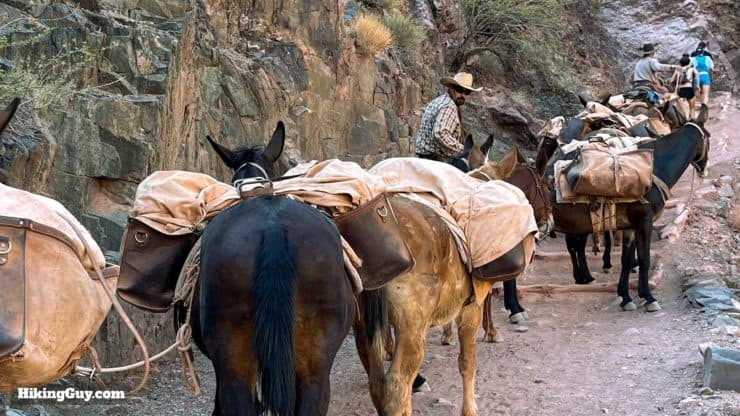
The worse case with a mule train is that you get stuck behind it. Generally they will go faster than hikers though. The mule trains will stop to let trail runners and fast hikers pass. Just wait behind. When the handler sees you, they will address you. - The smell of mule excrement can be intense, especially when it's hot outside. If you have a problem with smells and nausea, you might want to bring some Vicks VapoRub for under your nose.
- This is a desert environment with desert creatures, including rattlesnakes and scorpions. Just watch your footing and you'll be fine. None of these animals will actively seek out humans to attack; they attack if they feel threatened. And given the amount of traffic on the rim-to-rim trails, wildlife usually stays away. If you're camping, watch your feet if in flip-flops and make sure you put everything in your bag hang. Shake your footwear out before you put them back on.
- One of the biggest risks is rolling an ankle on steep descents. I'd say it would be quite a feat if you didn't manage to slip or roll an ankle at all. Take your time on the descents, don't hike and gaze at the same time, and go slow enough so that you're always in control.
- Don't cut off switchbacks. Going off-trail can knock rocks and boulders down onto other hikers.s
Understanding the Land
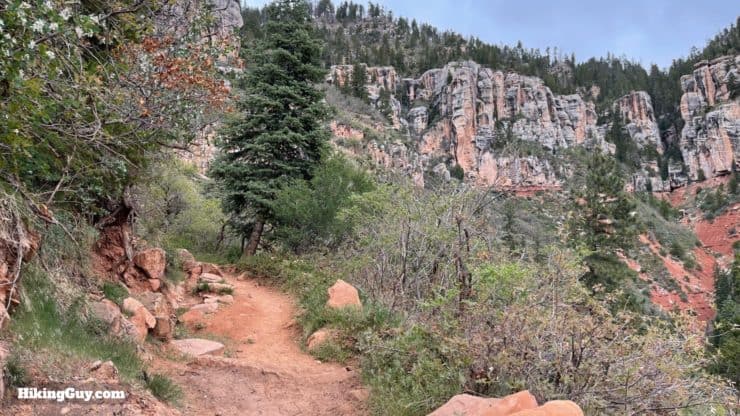
I'm not going to attempt to give you an exhaustive description of the natural history and ecology of the Grand Canyon. Instead, I want to point out some over-arching concepts to help you understand and enjoy your hike more.
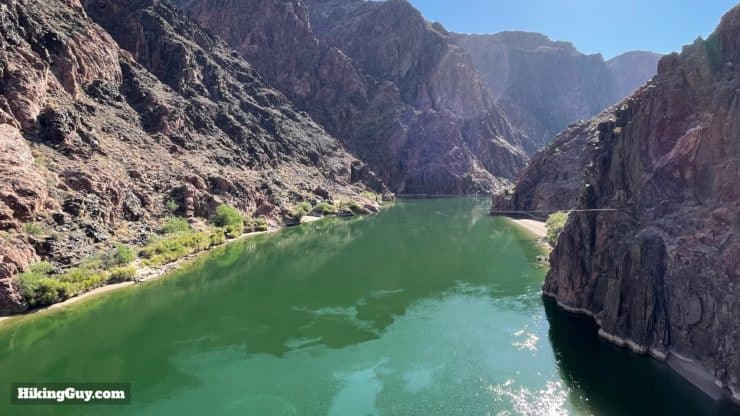
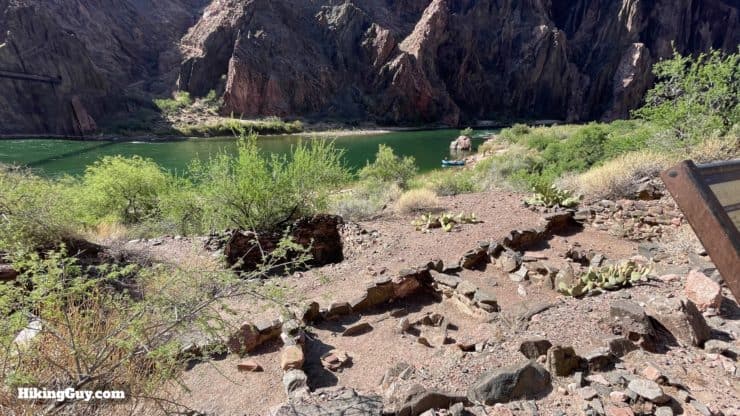
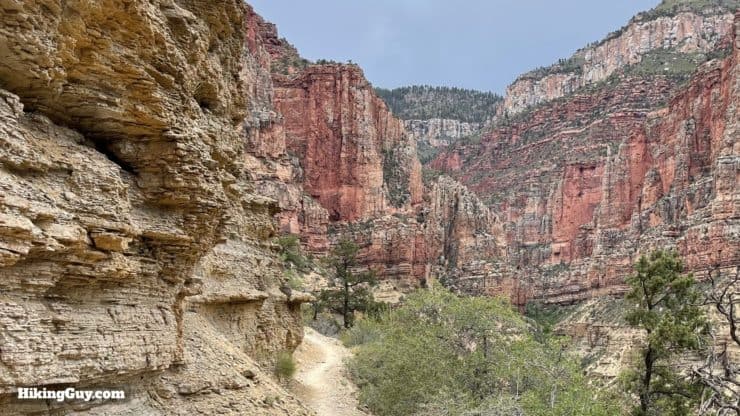
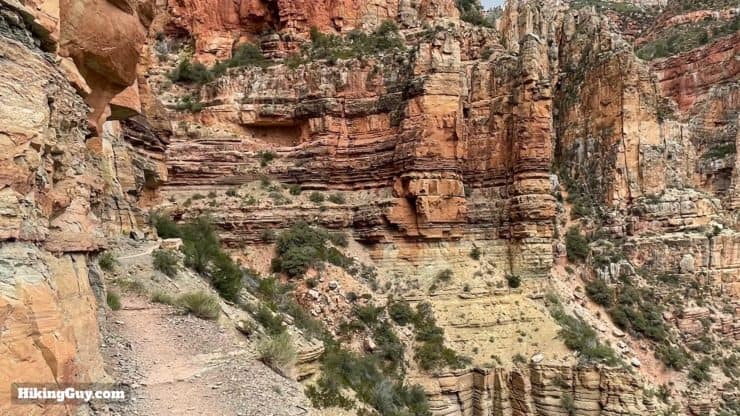
- About 6 million years ago the Colorado River wore through the weak points in the soil, carving out the Grand Canyon.
- The river carved just over 1 mile down, all the way down to the dark-colored “basement” rocks, which you hike through. These rocks are almost 2 billion years old.
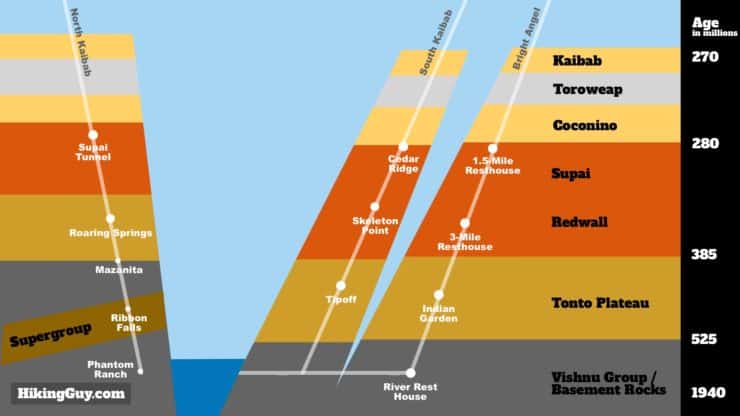
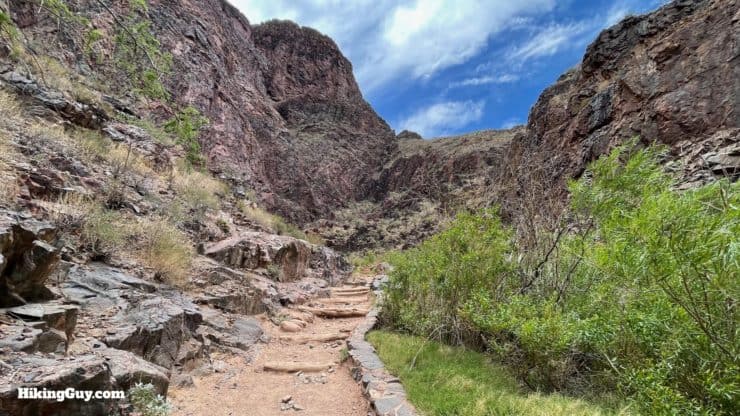
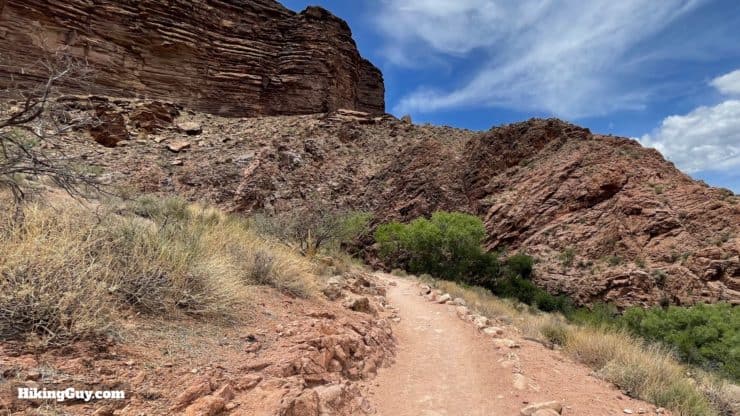
Here's a very simplified version of the main rock layers on the hike. As you hike down and up the Canyon, note the changes in the color of the rock that tell you that you've moved onto another layer. 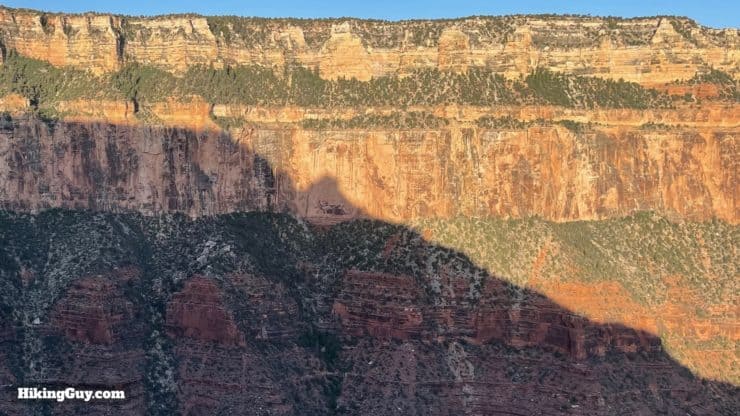
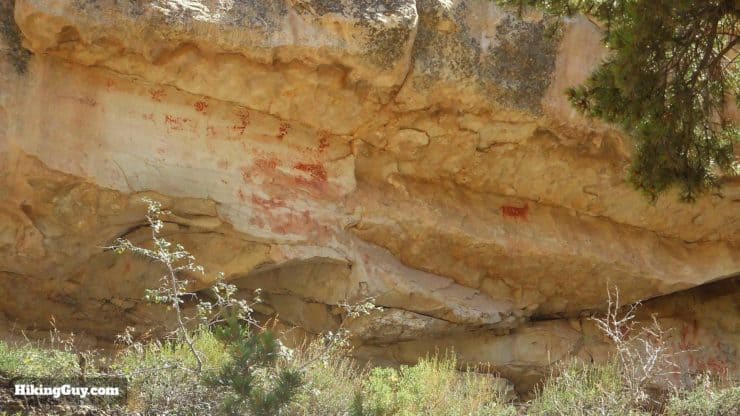
Look for the layers as you hike through the canyon. You'll also notice the dirt on the trail changes color as you tackle each stratum. - Native Americans started settling in the Canyon around 12,000 years ago. Their descendants were displaced when the Parks System took over in 1919 and evicted them all. You'll pass remnants of their presence on the hikes in both directions. I'll point them out in the directions below.
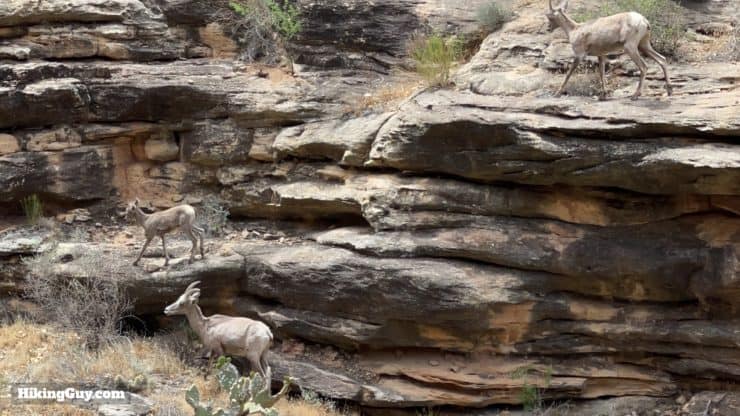
Keep your eyes out for wildlife, like these Big Horn Sheep. Fairly common are big horn, mule deer, hawks, lizards, and rodents. Don't feed the squirrels, they are carriers of bubonic plague.
Getting to the Rim to Rim Trailheads
Getting to the trailhead for each routing requires a bit of planning, but it's not too hard. Just know your plan in advance. Also note that you can't grab a ride-share or taxi at either one of these spots. You're either on a shuttle, hitchhiking, or walking.
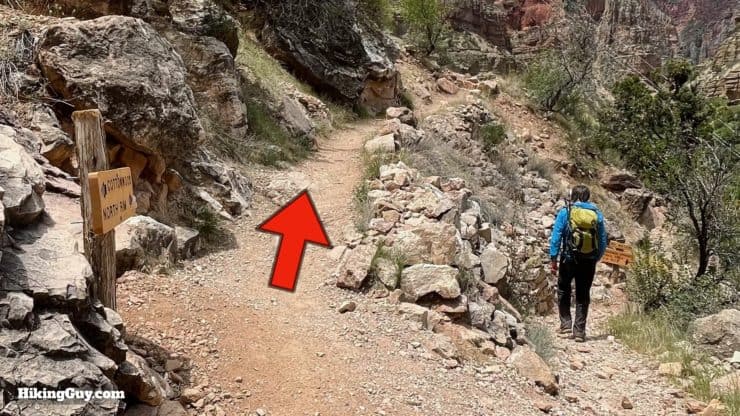
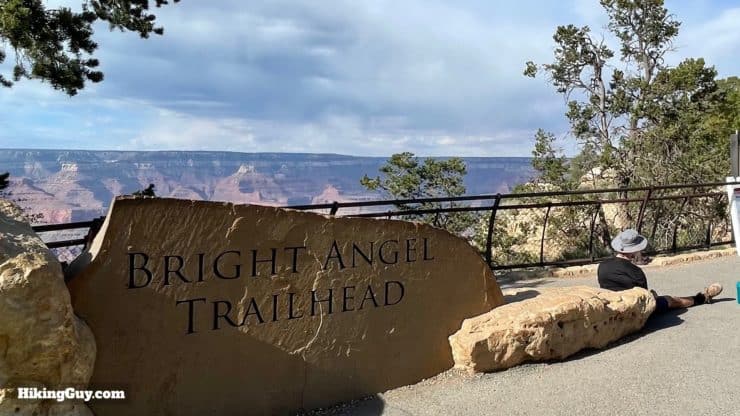
South to North Starting Point
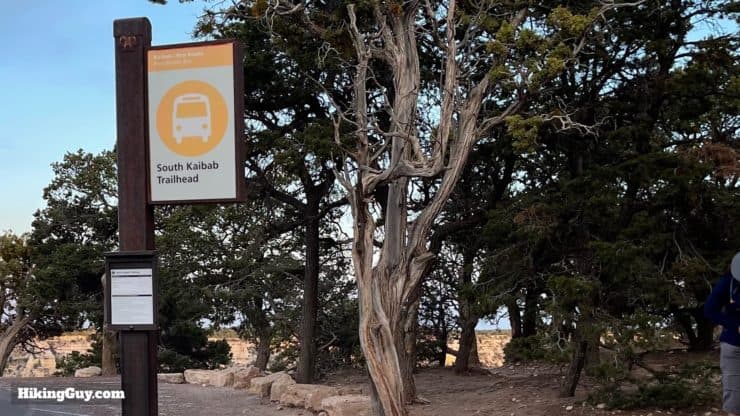
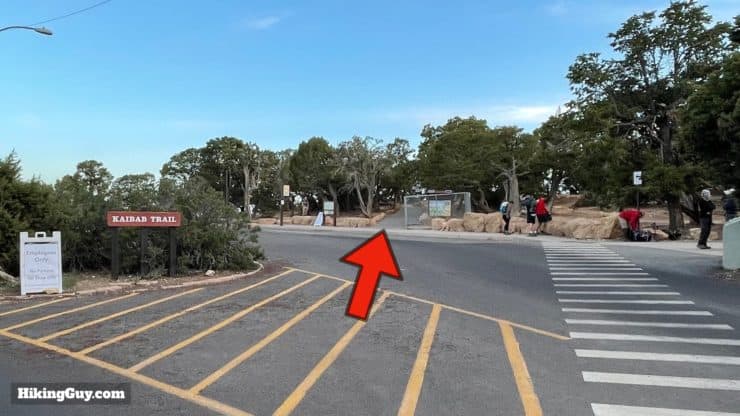
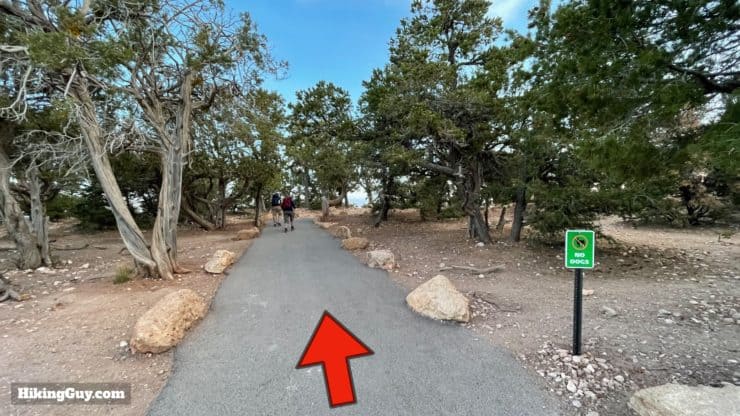
This route starts at the South Kaibab Trailhead near Yaki Point.
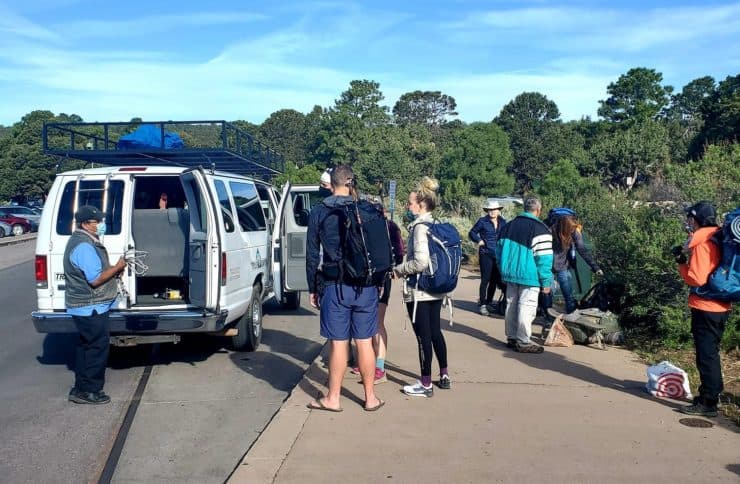
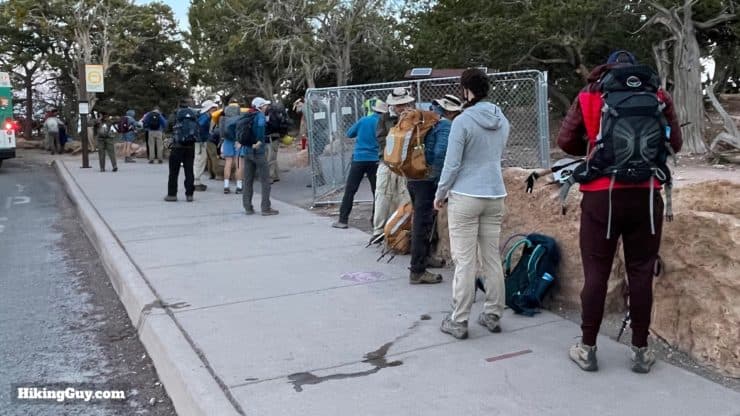
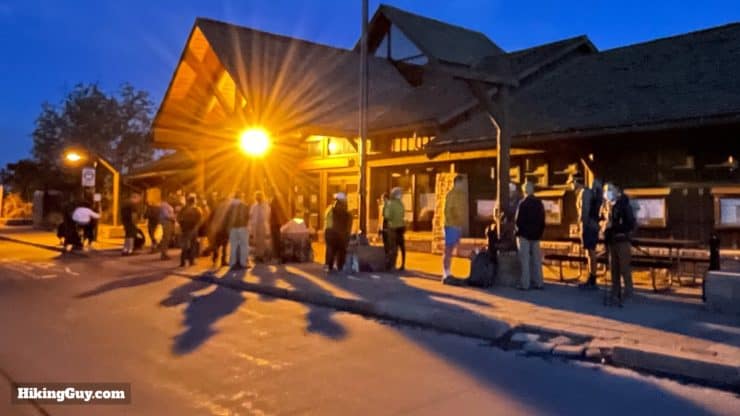
There are no private cars allowed on the road to the trailhead, so most people take a shuttle bus. Otherwise it's about a 4 mile walk to the lodges on the South Rim. There are two shuttles that you can take, the regular Orange Route to points east of the Visitor's Center, and the Hikers Express, which only leaves early in the morning and goes directly to the trailhead. The times and details can change based on the season, so check out the Park's shuttle bus page here.
You can also take a taxi to the trailhead. Call Xanterra Taxi Service (24 hours) 928-638-2631
North to South Starting Point
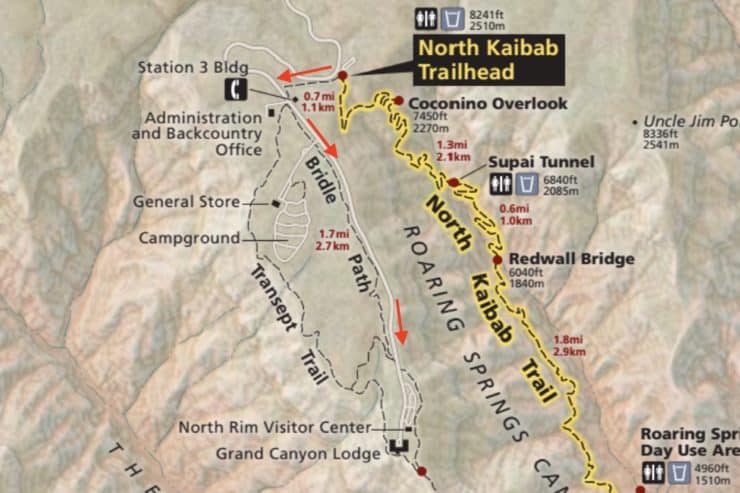
This route starts at the North Kaibab Trailhead, which is not really close to anything.
If you are staying at the North Rim Lodge, there is a shuttle bus (van) that you can book when you check in, but it doesn't always run. Also note that there is no pickup service from the trailhead if you are ending your hike here. You'll have to walk to wherever you are staying (the lodge or campground). Some folks also have luck hitchhiking.
Checklist For Right Before The Hike
Here's what I recommend for the day before your hike (in addition to the normal things like setting an alarm, packing, etc.)
- Check the weather at the South Rim, North Rim, and Phantom Ranch. Check the Park's weather page and analysis. Make sure there are no extremes. If there are, consider leaving earlier or modifying your plan to avoid the extremes.
- Check the backcountry updates and make sure all the trails are open. Also confirm that the water sources where you plan to refill are operational (sometimes they close for repairs).
- Confirm the schedule of the shuttle buses if you are using one.
I Hope this Guide Has Been Helpful
Rim to Rim - South to North Hike Directions
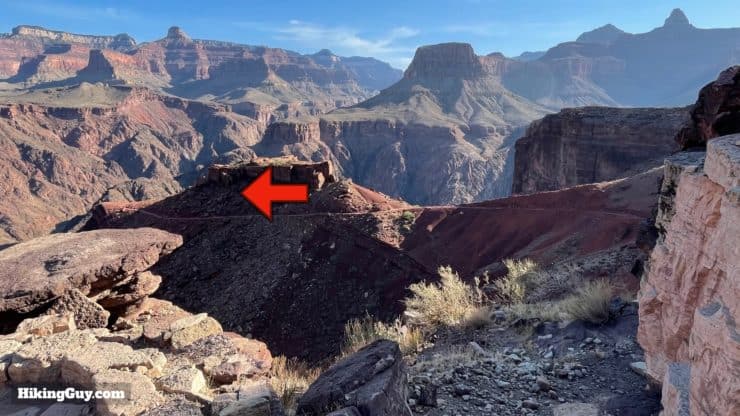
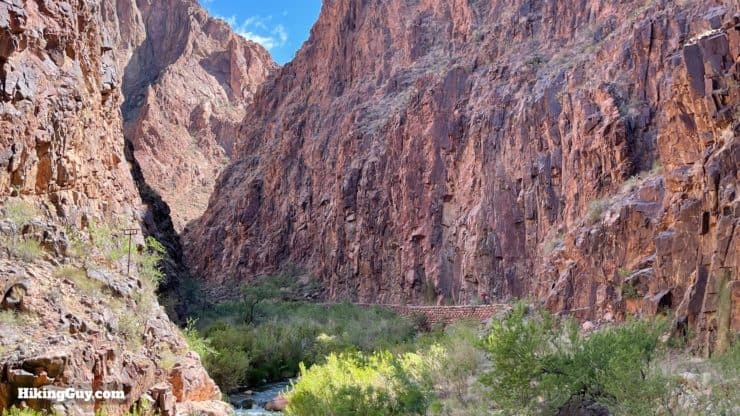
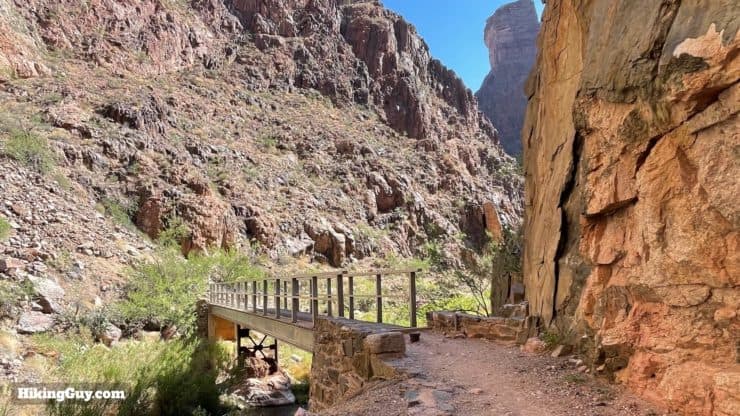
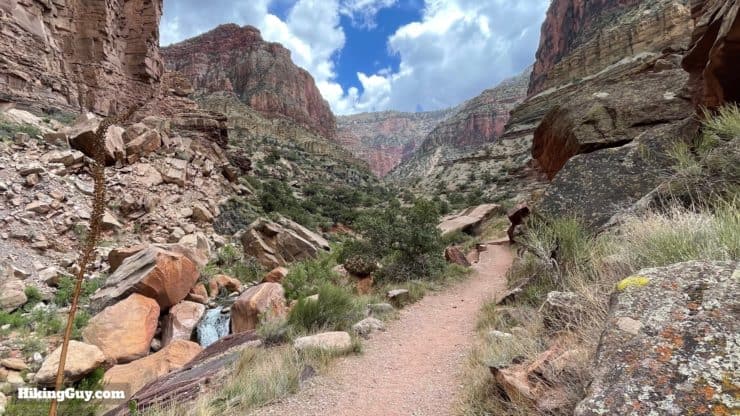
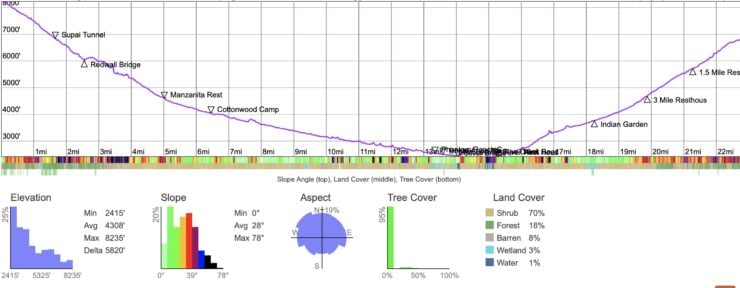
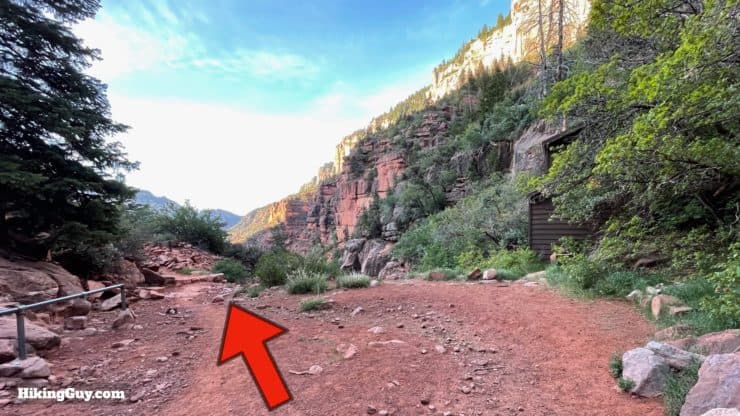
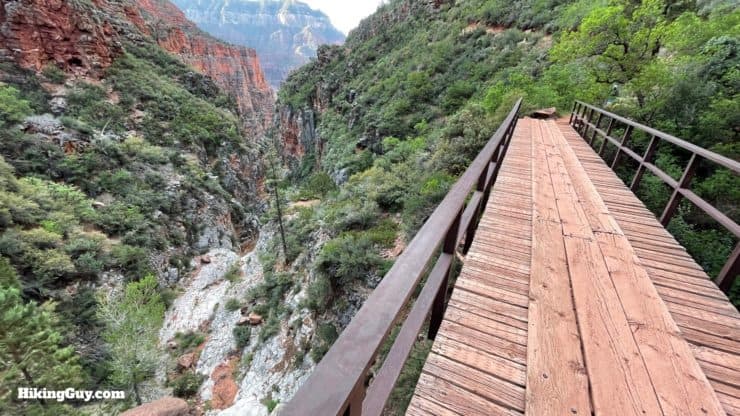
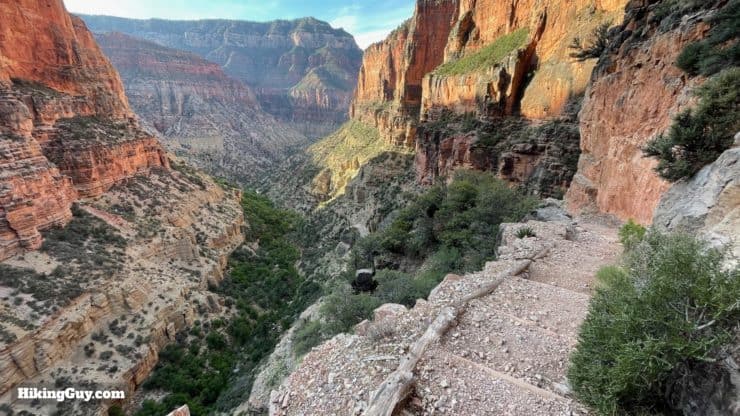
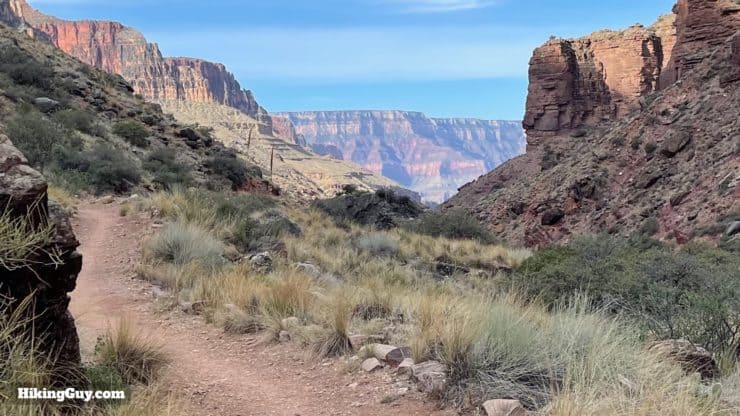
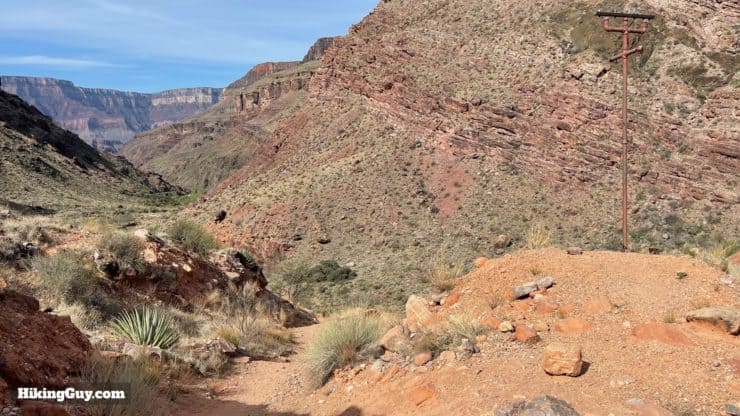
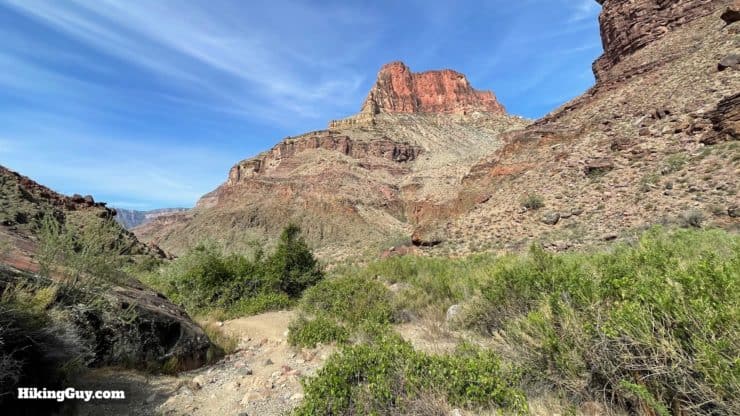
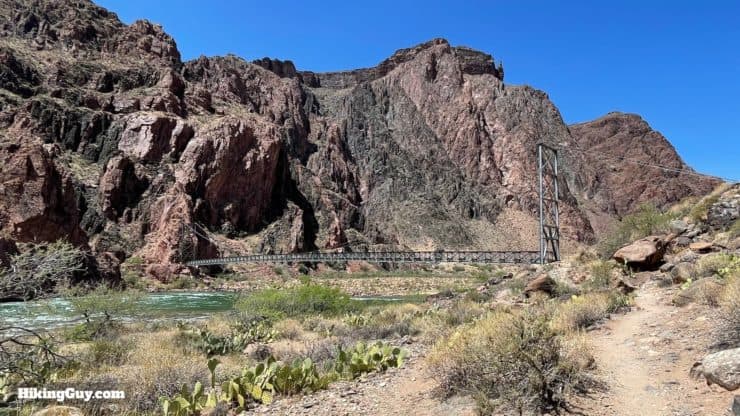
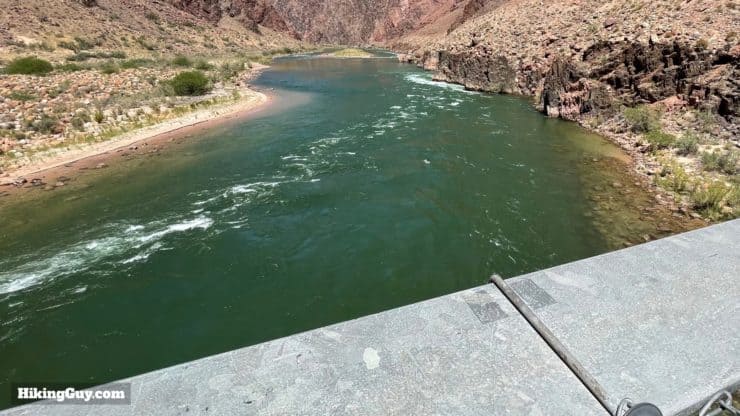
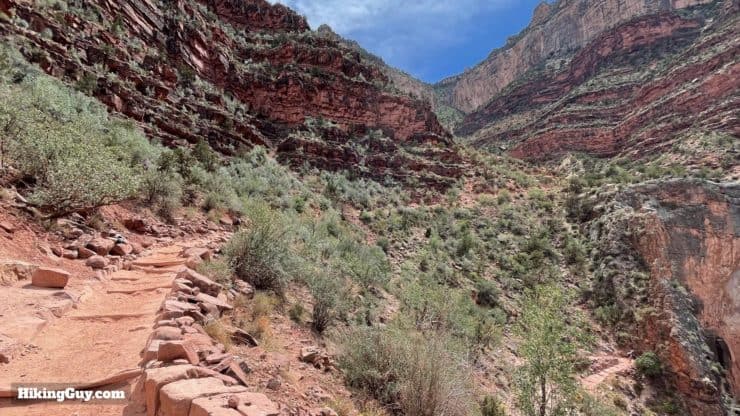
This popular routing follows the South Kaibab Trail from the South Rim to the Colorado River, and then takes the North Kaibab Trail from the river back up to the North Rim.
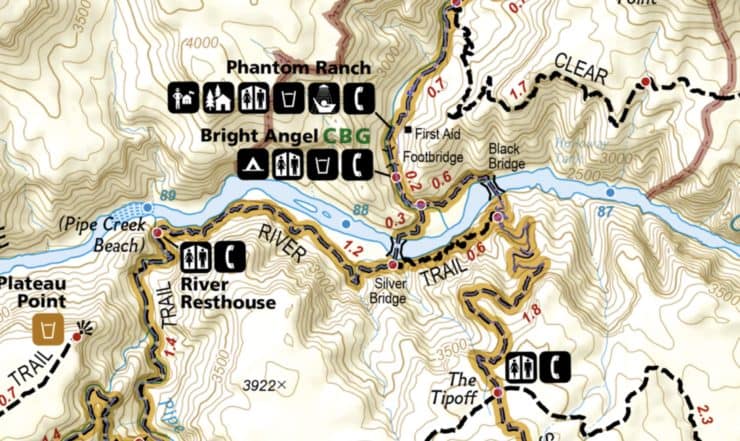
| Landmark | Distance (miles) | Gradient |
|---|---|---|
| South Kaibab Trailhead | 0 | - |
| Cedar Ridge | 1.5 | Steep Downhill |
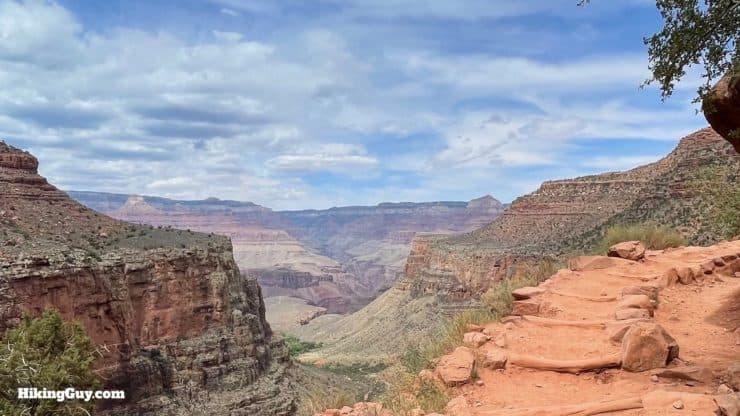
| Skeleton Point | 3 | Downhill |
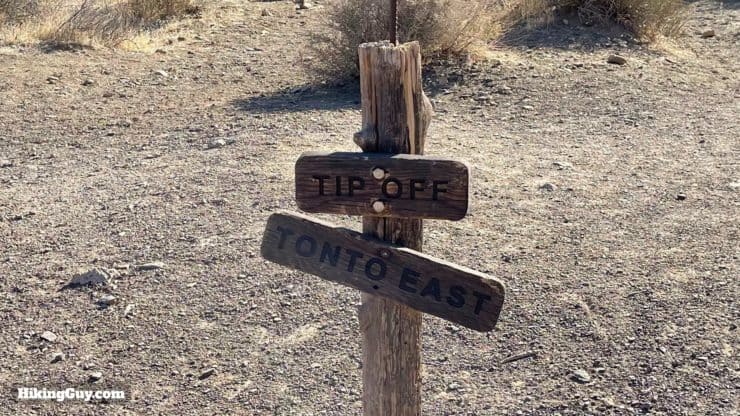
| Tip Off | 4.4 | Downhill |
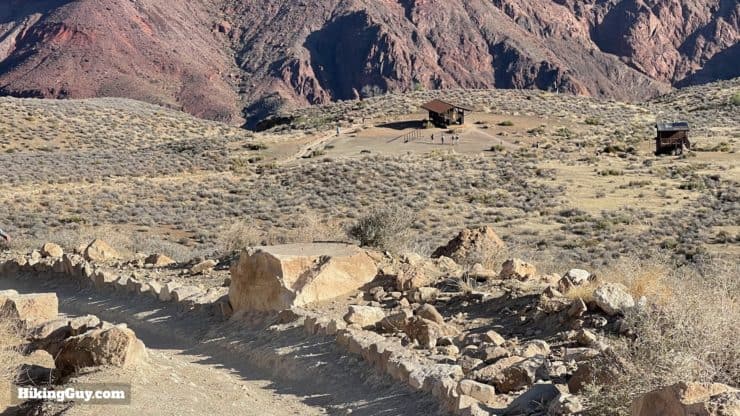
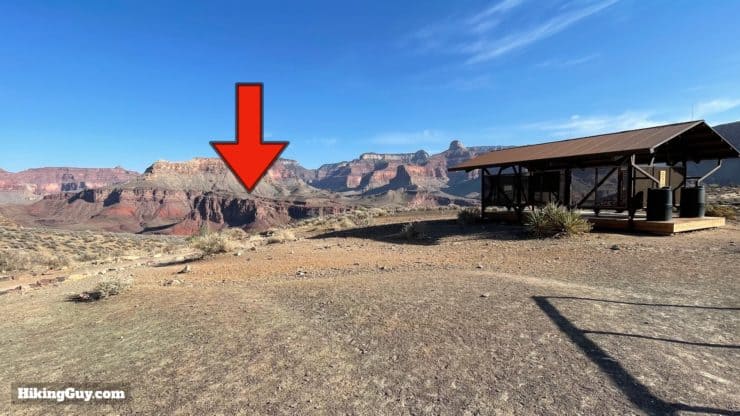
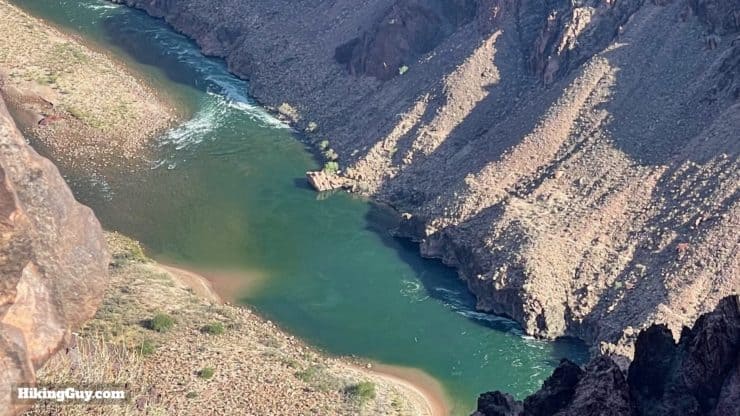
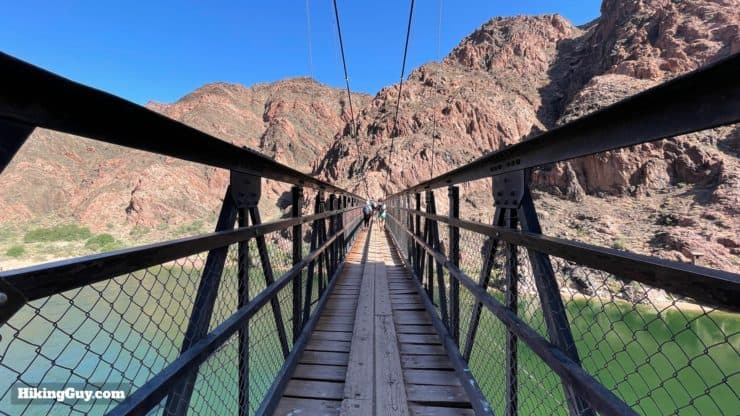
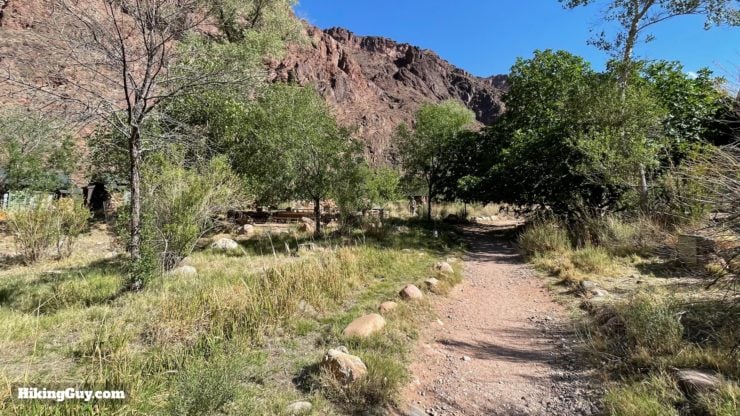
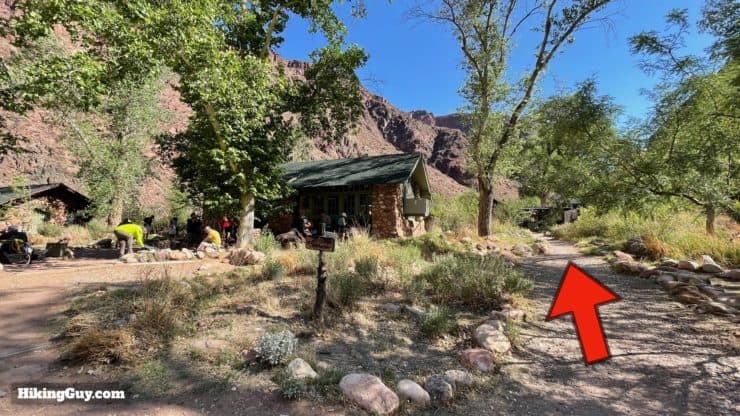
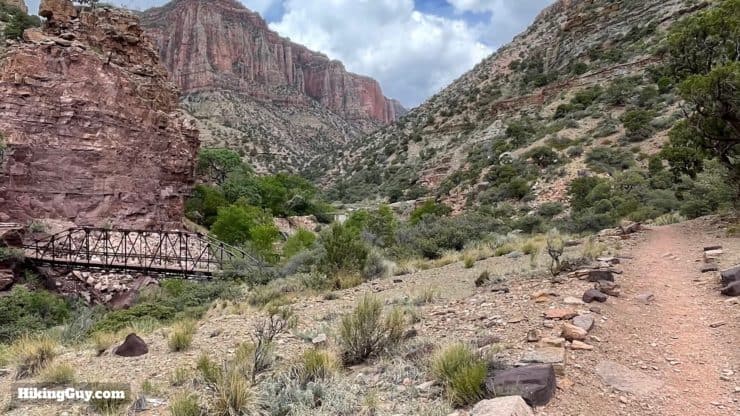
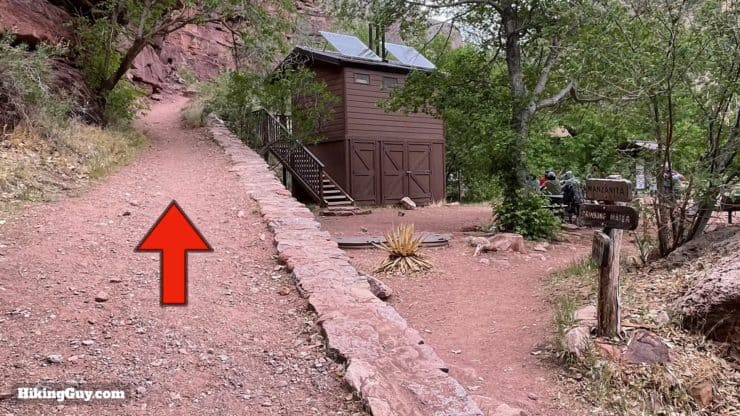
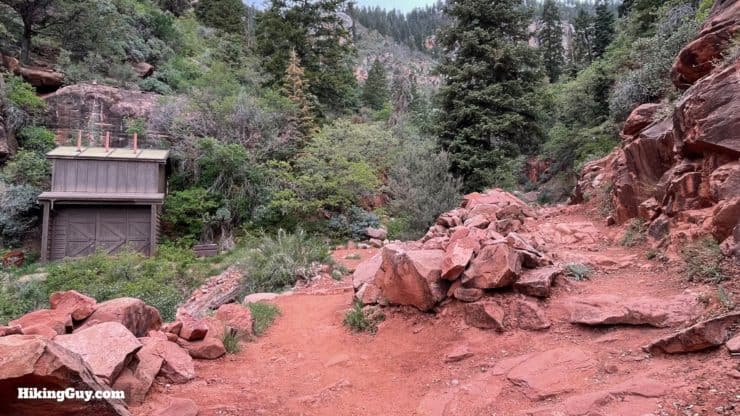
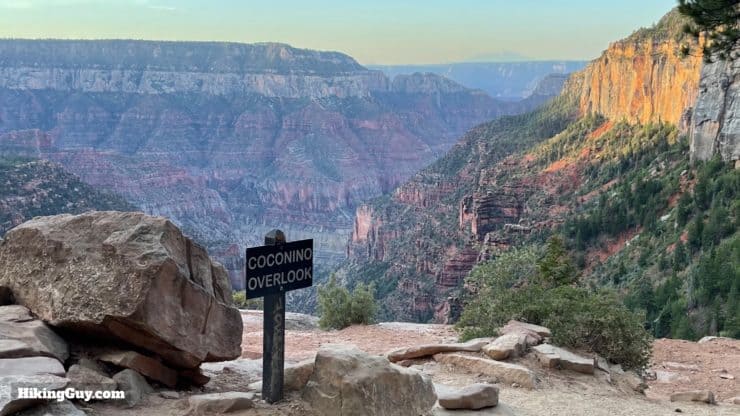
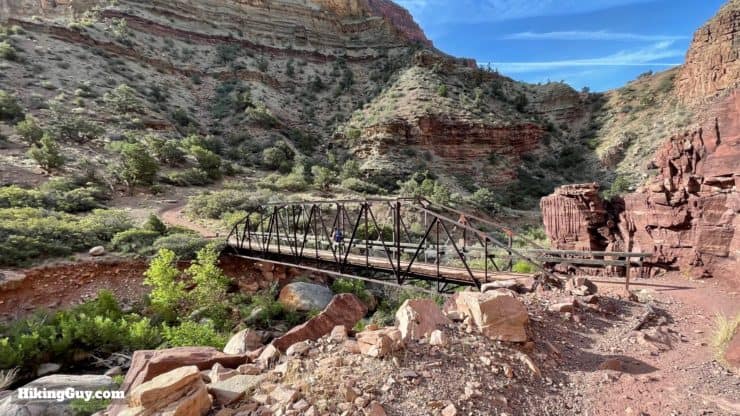
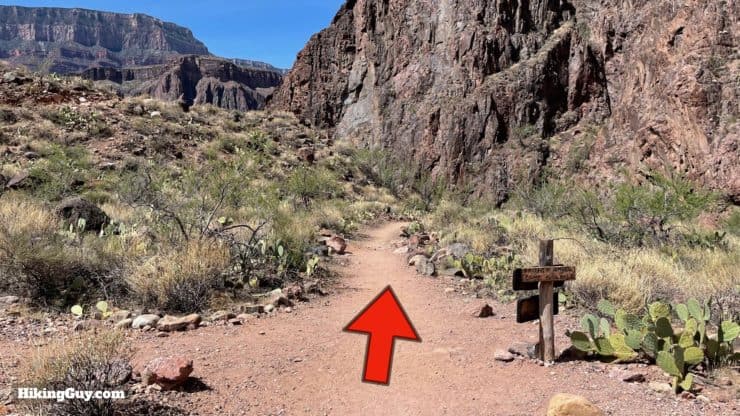
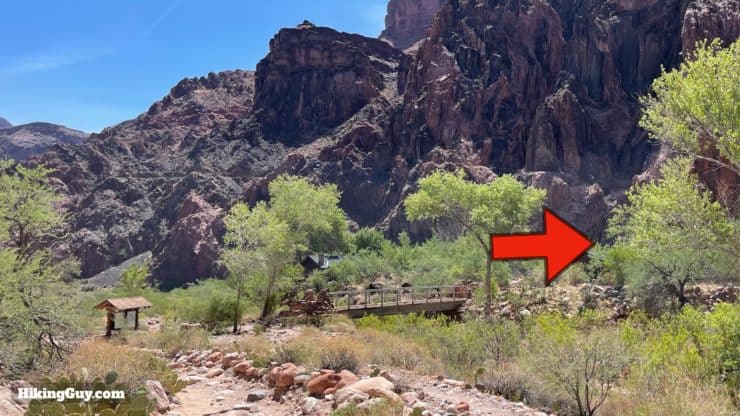
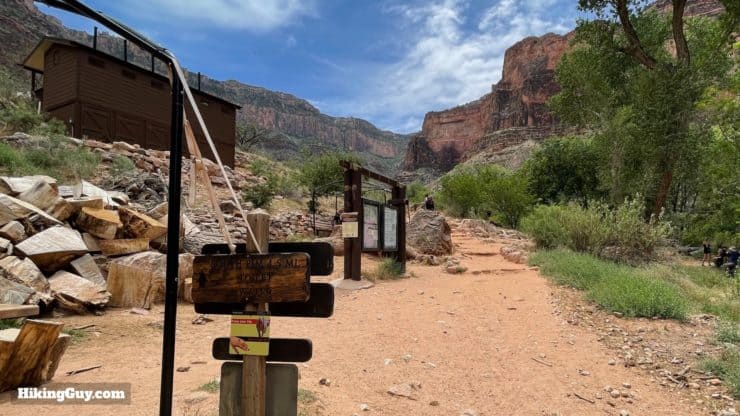
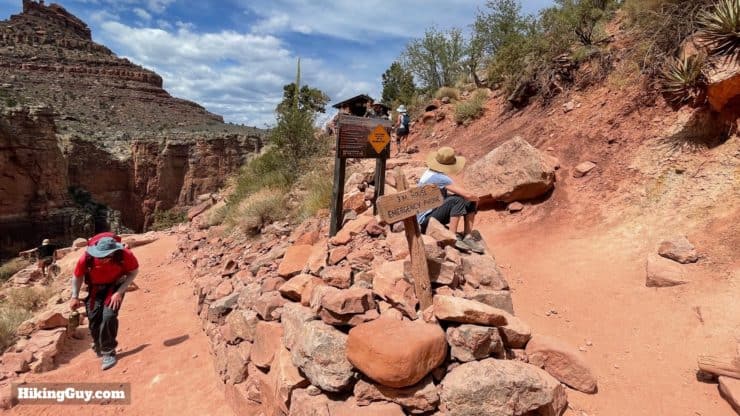
| Phantom Ranch | 7.4 | Downhill |
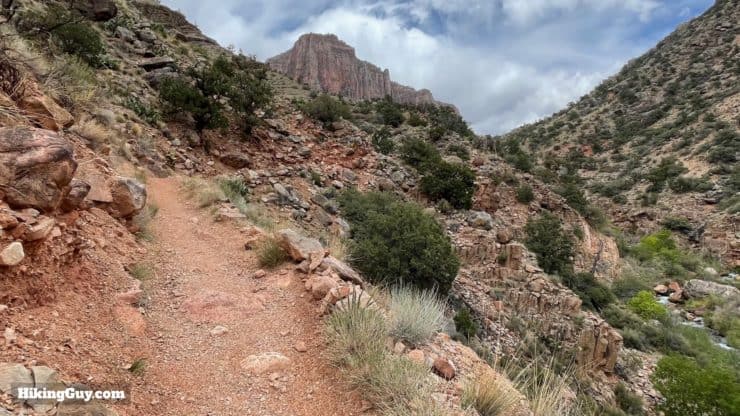
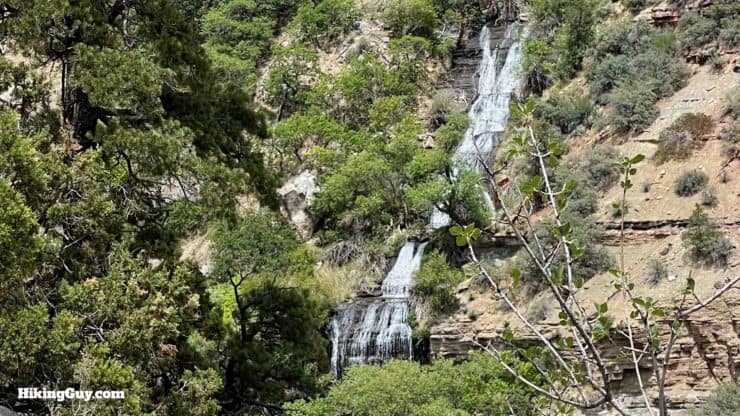
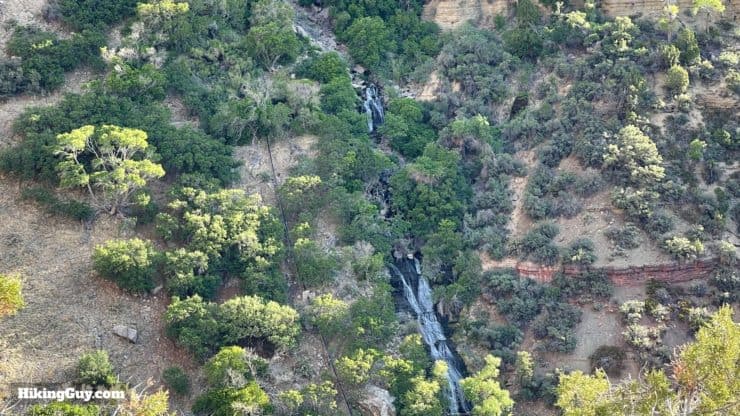
| Ribbon Falls | 12.6 | Slightly Uphill |
| Cottonwood Campground | 14.2 | Slightly Uphill |
| Manzanita Rest Area | 15.6 | Uphill |
| Roaring Springs | 16.4 | Uphill |
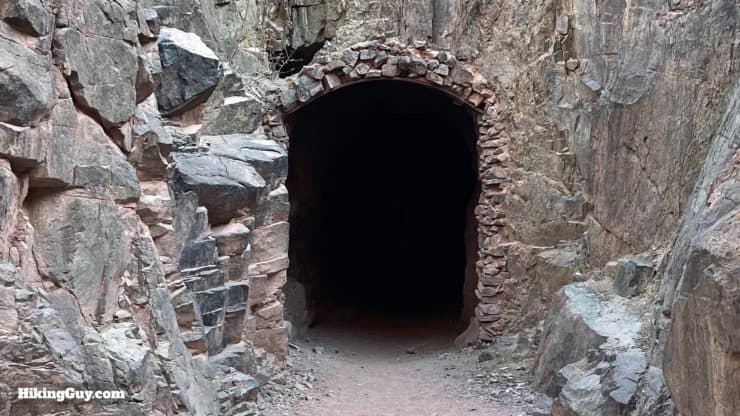
| Supai Tunnel | 19.4 | Steep Uphill |
| North Kaibab Trailhead | 21.1 | Steep Uphill |
How Will You Navigate?
 Using the Apple Watch for Hiking
 Garmin Fenix 7 & Epix Review For Hikers
 How To Read a Topographic Map
 Garmin GPSMAP 67i Review
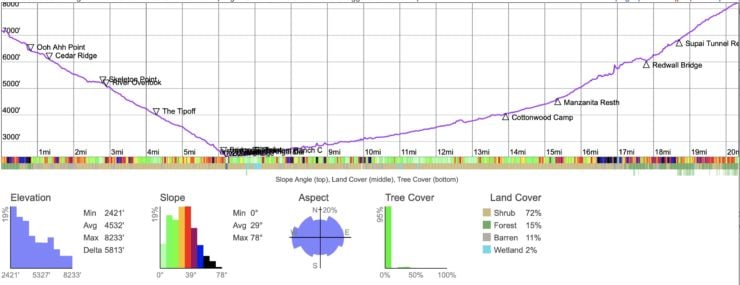
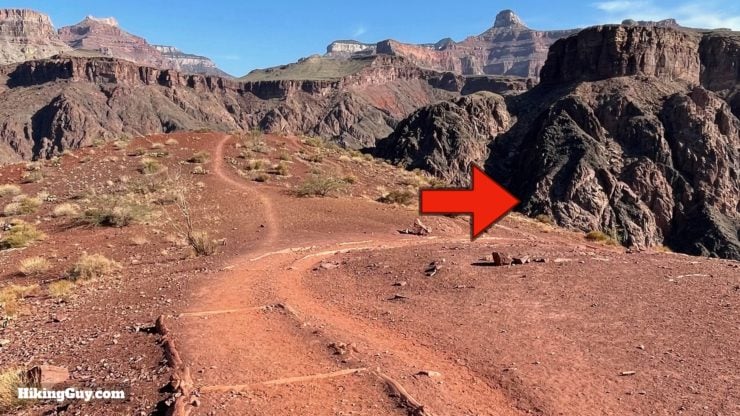
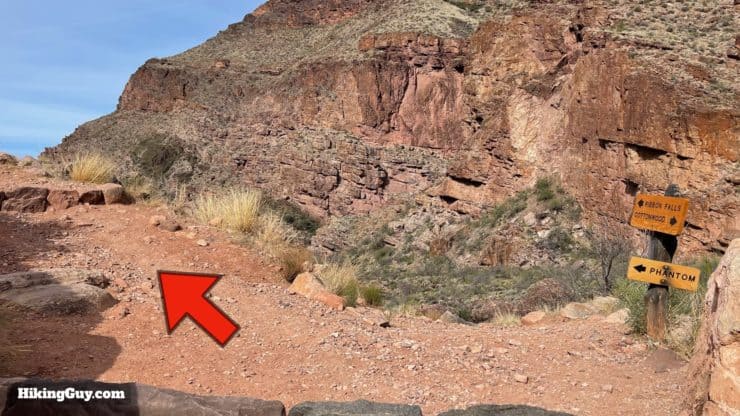
South to North Turn by Turn Directions
I also have a 360 video of the South to North hike turn-by-turns. You can drag around the video and look around as I show you the hike.
If you want to read a little history and background on the South Kaibab Trail, check out my day hike trail guide.

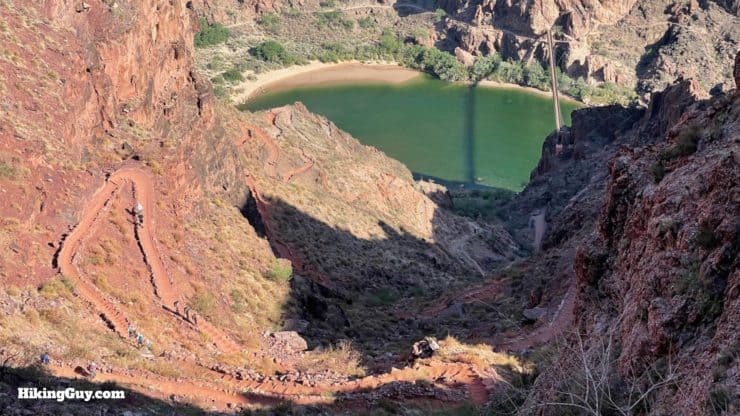
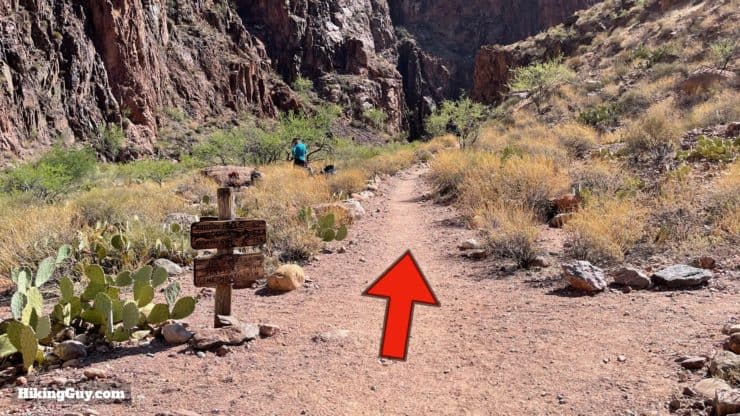


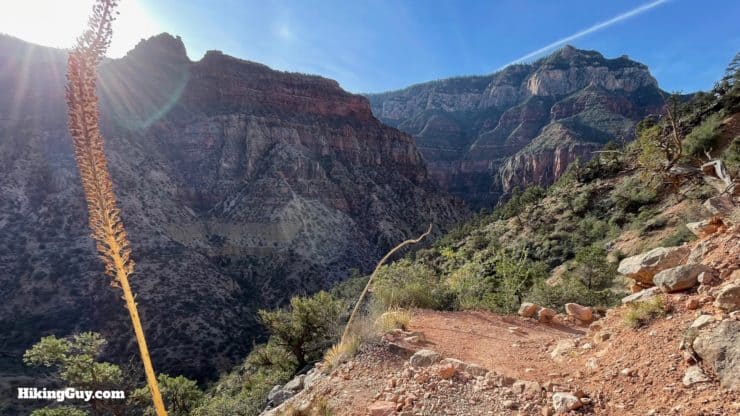
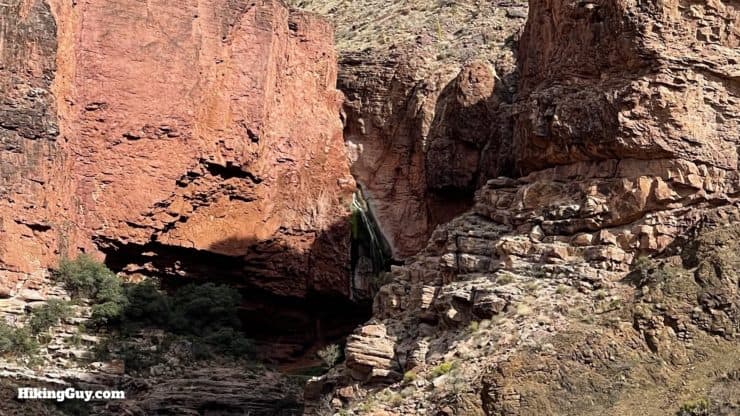
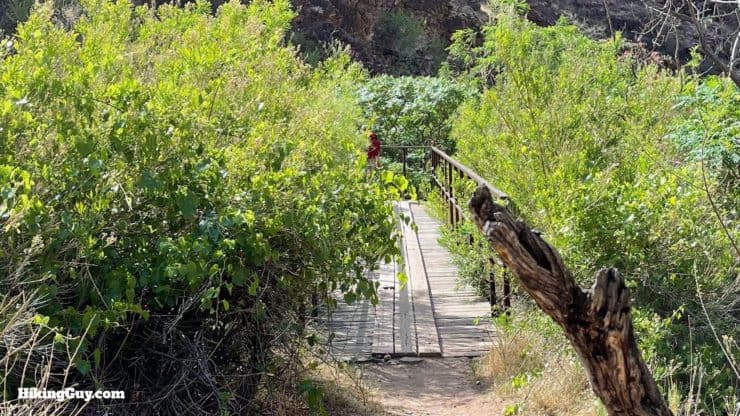
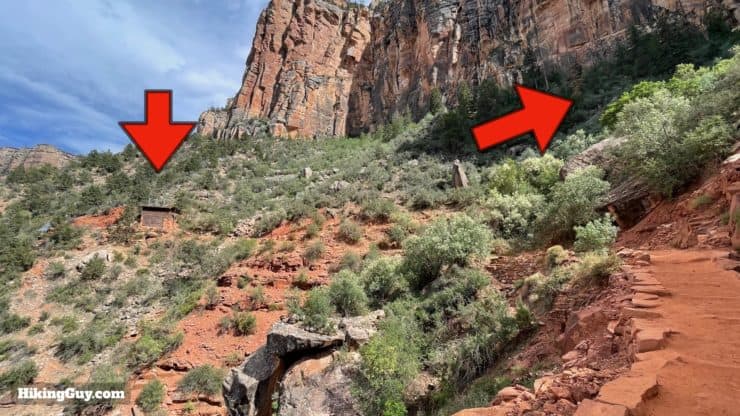
If you are doing the rim-to-rim as a day hike, I'd recommend giving Ribbon Falls a skip and just focusing on getting to the end. If you are doing this over a couple of days, visit the falls. There used to be a bridge to them, but now you have to walk through the creek. When you get to the falls you can go behind them.


Rim to Rim - North to South Hike Directions
The start of the North to South Rim to Rim is on the North Kaibab Trail. After a long descent to the Colorado River, you turn right and hike up the Bright Angel Trail to the South Rim.
| Landmark | Distance (miles) | Gradient |
|---|---|---|
| North Kaibab Trail | 0 | - |
| Supai Tunnel | 1.7 | Steep Downhill |
| Roaring Springs | 4.7 | Steep Downhill |
| Manzanita Rest Area | 5.4 | Steep Downhill |
| Cottonwood Campground | 6.8 | Downhill |
| Ribbon Falls | 8.4 | Downhill |
| Phantom Ranch | 13.6 | Gradual Downhill |
| River Resthouse | 15.5 | Gradual Uphill |
| Indian Garden | 18.7 | Mixed Uphill |
| Three-Mile Resthouse | 20.4 | Steep Uphill |
| Mile-and-a-Half Resthouse | 21.9 | Steep Uphill |
| Bright Angel Trailhead | 23.5 | Steep Uphill |
View on CalTopo Download GPX Download PDF
North to South Turn by Turn Directions
I also have a 360 video of the North to South hike turn-by-turns. You can drag around the video and look around as I show you the hike.


If you want to learn more about the history of the Bright Angel Trail, read my guide on the day hike to Plateau Point.


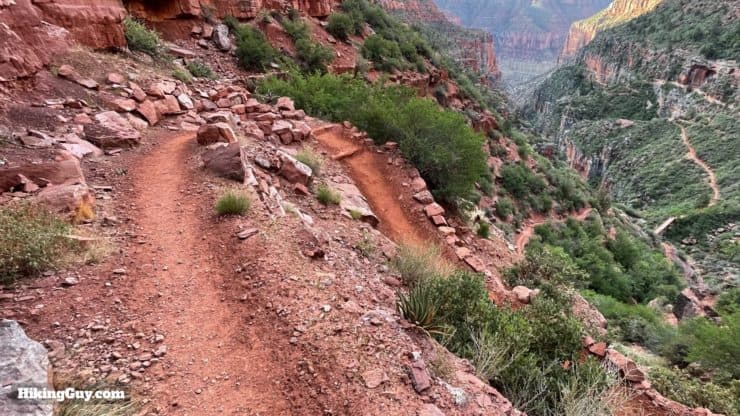
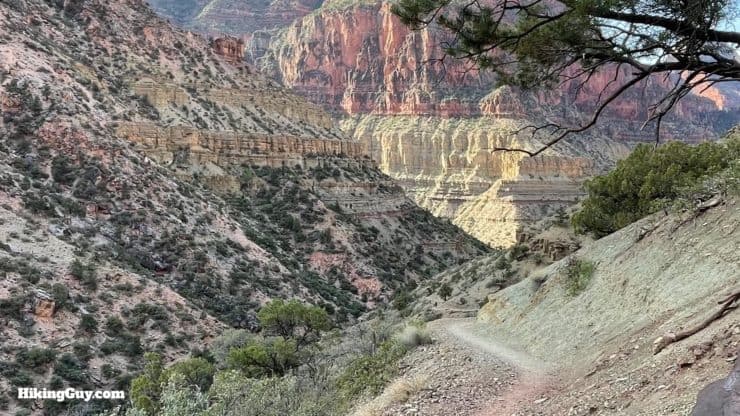
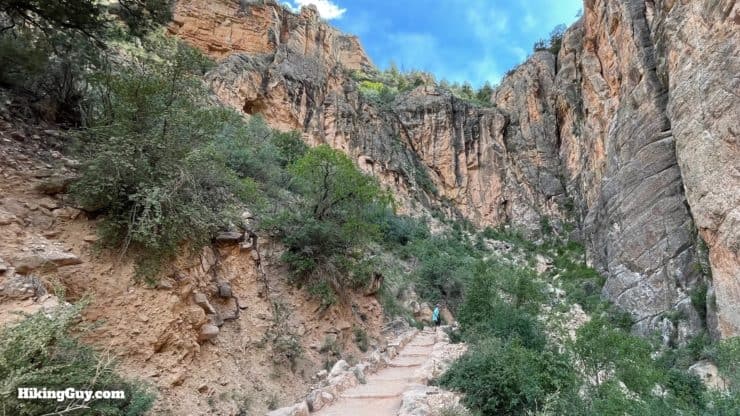
Remember what this view up the cliff wall looks like. Whenever I hike climbs in other places, I think back to when I scaled thousands of feet of sheer wall like this, and mentally other climbs become much more doable.

Looking for another challenge? Maybe the Timberline Trail should be next on your list...
Need More Info?
- Have a question about the guide? Join my Patreon and ask me a question.
- When planning, always check the park website and social media to make sure the trails are open. Similarly, check the weather and road conditions.
- Do you have an update to this guide? View the Youtube comments for this video. Leave a comment and I will do my best to update the guide.
Related Guides
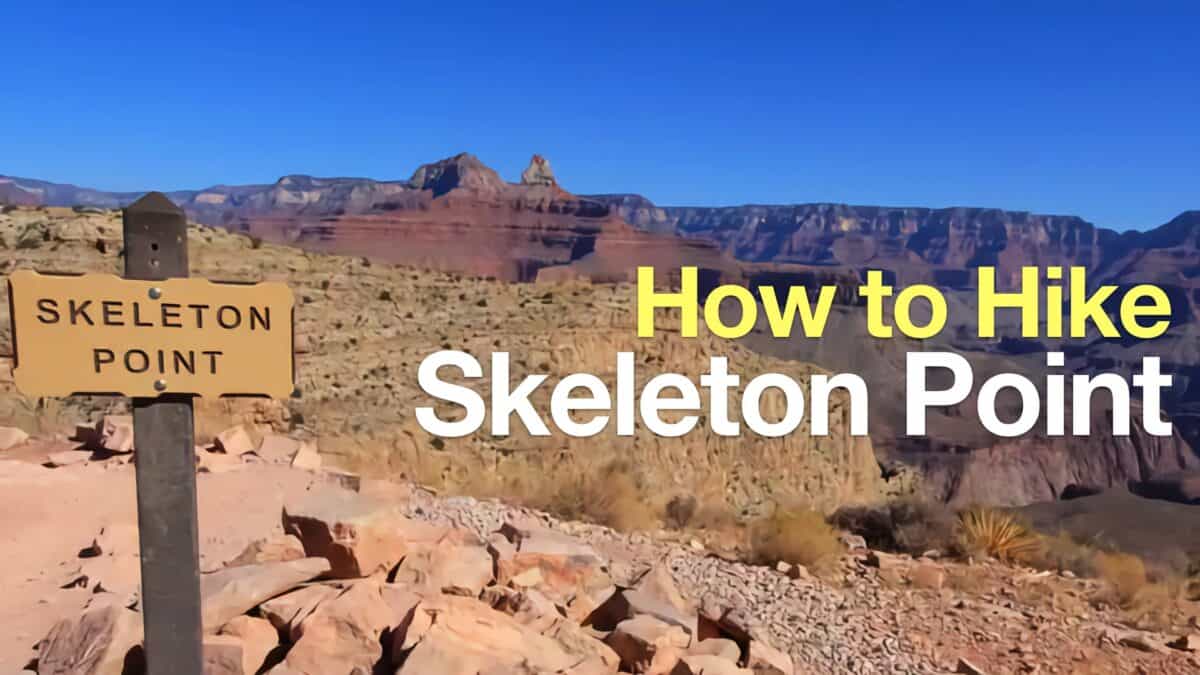 Hike Skeleton Point
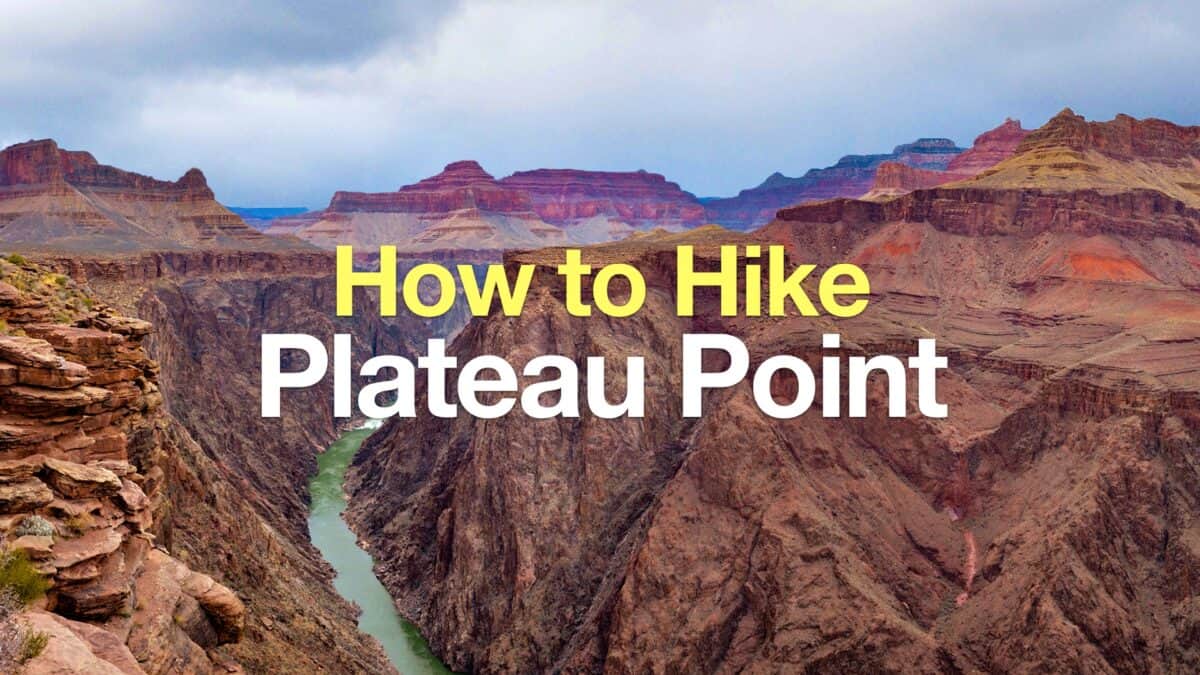 Bright Angel Trail to Plateau Point Hike
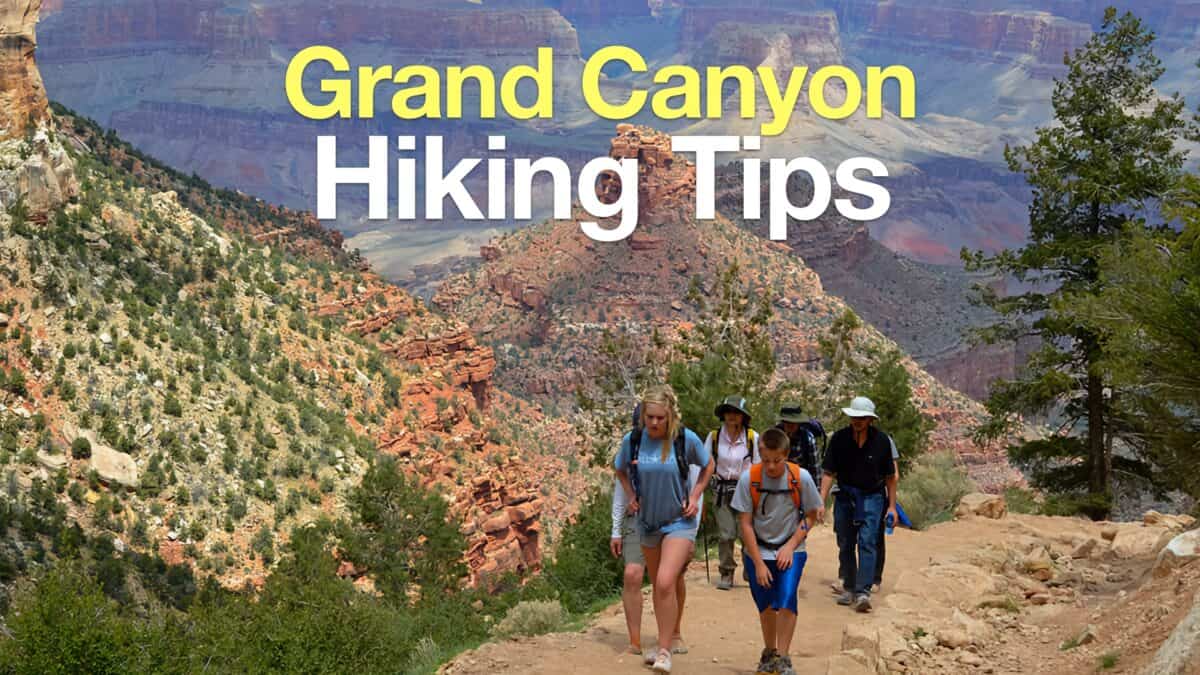 Grand Canyon Hiking Tips
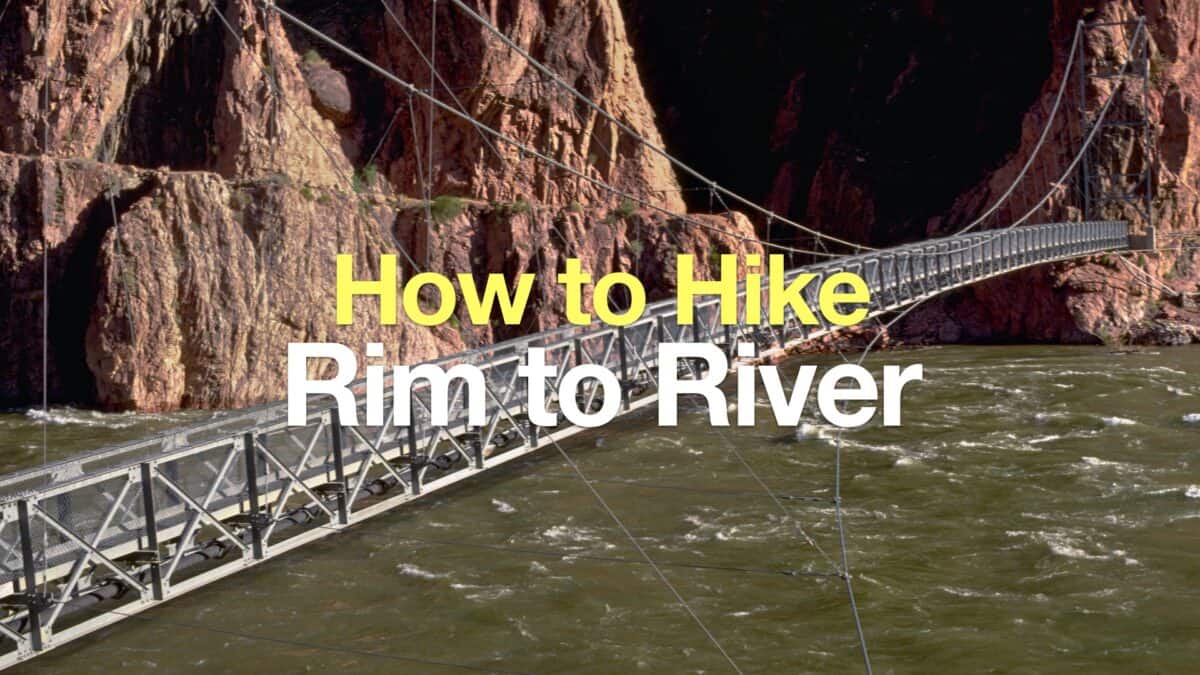 Grand Canyon Rim to River Hike Guide
 Grand Canyon Hikes
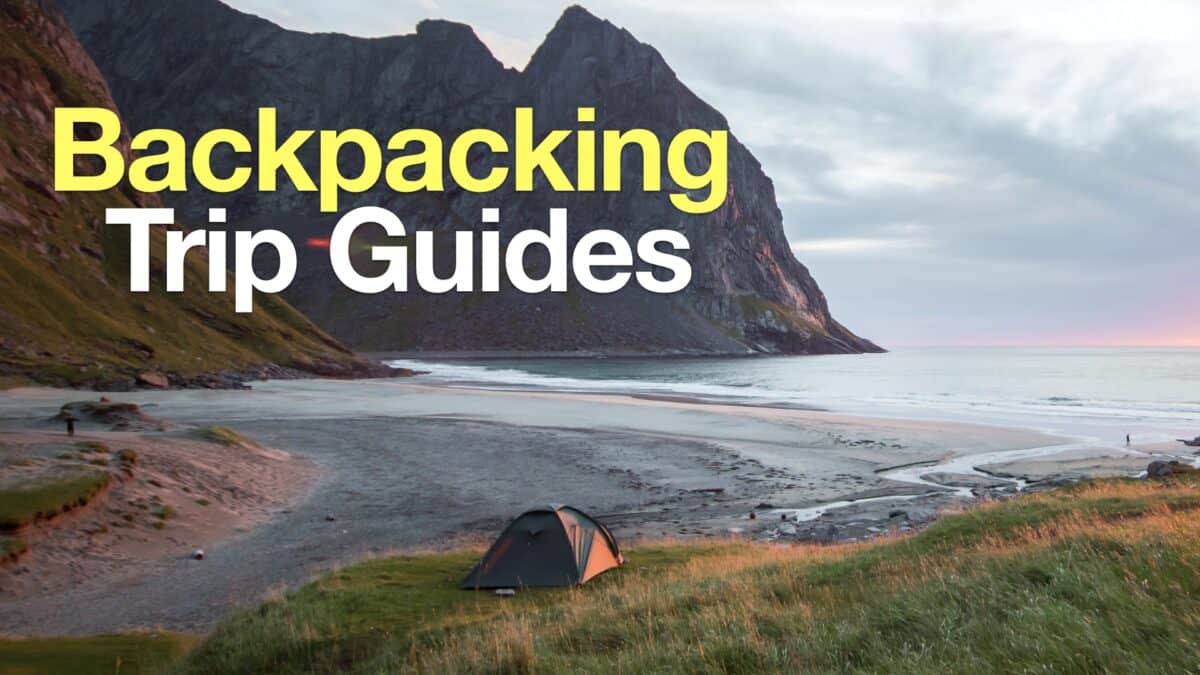 Backpacking Trips
 Best Hikes in the World
Popular Guides
 Best Hiking Gear 2024
 Hiking Boots or Shoes: Do I Really Need Hiking Boots?
 When to Hit SOS on inReach
This Guide Was Written by Cris Hazzard

Hi, I'm Cris Hazzard, aka Hiking Guy, a professional outdoors guide, hiking expert, and author based in Southern California. I created this website to share all the great hikes I do with everyone else out there. This site is different because it gives detailed directions that even the beginning hiker can follow. I also share what hiking gear works and doesn't so you don't waste money. I don't do sponsored or promoted content; I share only the gear recommendations, hikes, and tips that I would with my family and friends. If you like the website and YouTube channel, please support these free guides (I couldn't do it without folks like you!). You can stay up to date with my new guides by following me on YouTube, Instagram, or by subscribing to my monthly newsletter.